There are lots of reasons why homeowners look into how to paint countertops – but for most people, it’s because they are looking for a cost-effective and quick way to give their existing kitchen a really impactful refresh.
The great news is that all kinds of countertops can be painted – from timber and stone to laminate, meaning that no matter what kind of surface you are working with, this will be an option for you.
If you’re desperate to tie your kitchen countertops in with the rest of your kitchen color ideas, then you’ll be pleased to learn that painting your kitchen countertops is pretty easy to DIY. Ready to get started? Our step-by-step guide will take you through everything you need to get the job done from start to finish.
How to paint countertops like a pro
Sometimes all you need is a few small kitchen upgrades to smarten up your cooking space. In this simple step-by-step guide, our trusted experts will take you through all the steps needed to take your tired countertops to stylish surfaces you can be proud of. We’ve also included a list of the tools you’ll need to get the job done.
The equipment you’ll need to paint countertops
Before you pop the lid on that paint tin, arm yourself with the following:
- An all-purpose degreaser (Mrs Myers Clean Day Multi-Surface Cleaner Spray, available from Amazon, was one of the best eco-friendly cleaning products in our round-up)
- Lint cloth
- Sanding block or, to remove some of the elbow grease and depending on the state of your countertops, a power sander
- Painter’s tape
- Protective sheets or drop cloths (Bates Plastic Drop Cloth from Amazon offers good value for money)
- Standard roller, mini roller, and small paintbrush
- Primer and paint designed for your countertop material or a complete countertop refinishing kit (such as the Giani Granite Countertop Paint Kit from Amazon )
- Epoxy or glaze (not always necessary so check the manufacturer's instructions)
- Sealer or topcoat
Step 1: Clean countertops thoroughly
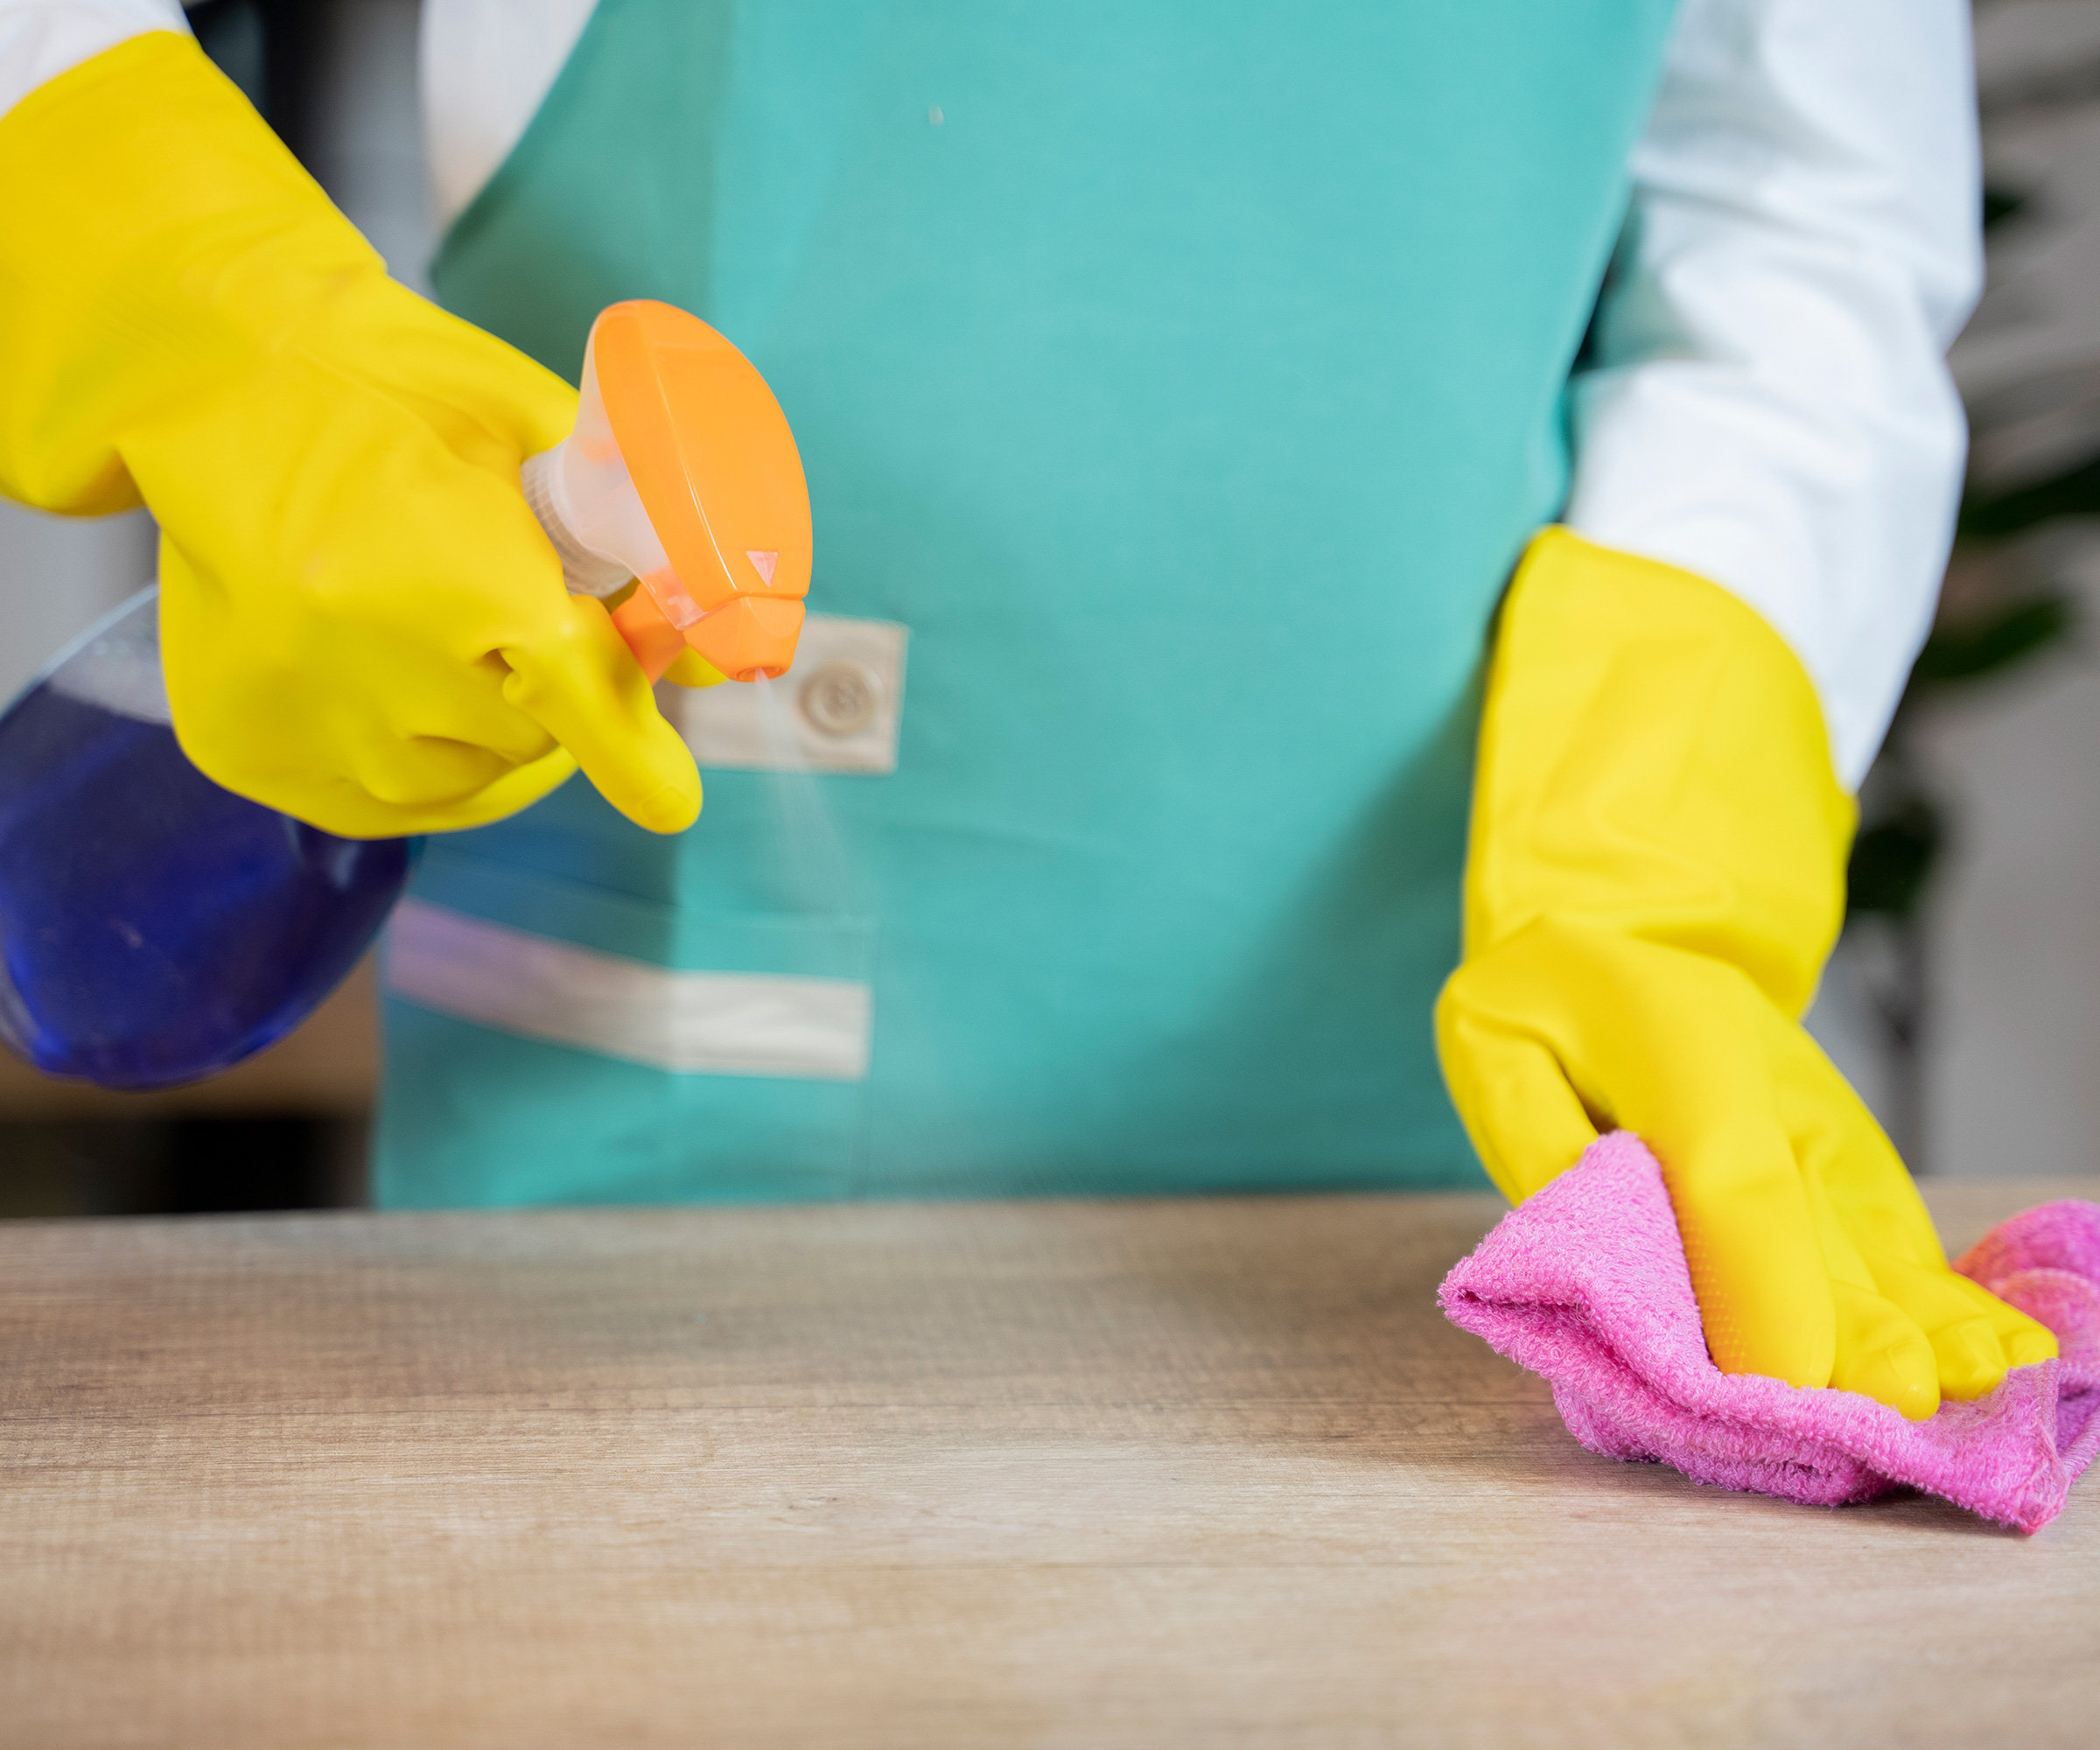
No matter what material your countertops are made from, they need to be sparkling clean before you move on to the next step. Using your all-purpose cleaning spray, make sure you remove all traces of dirt, food, grease, and dust. If you skip this step, the paint just won’t stick properly.
Once you clean the countertops, dry the surfaces with a lint-free cloth. This is also a good time to repair any areas of damage to get the countertops in as good a condition as possible before painting.
Step 2: Sand your countertops
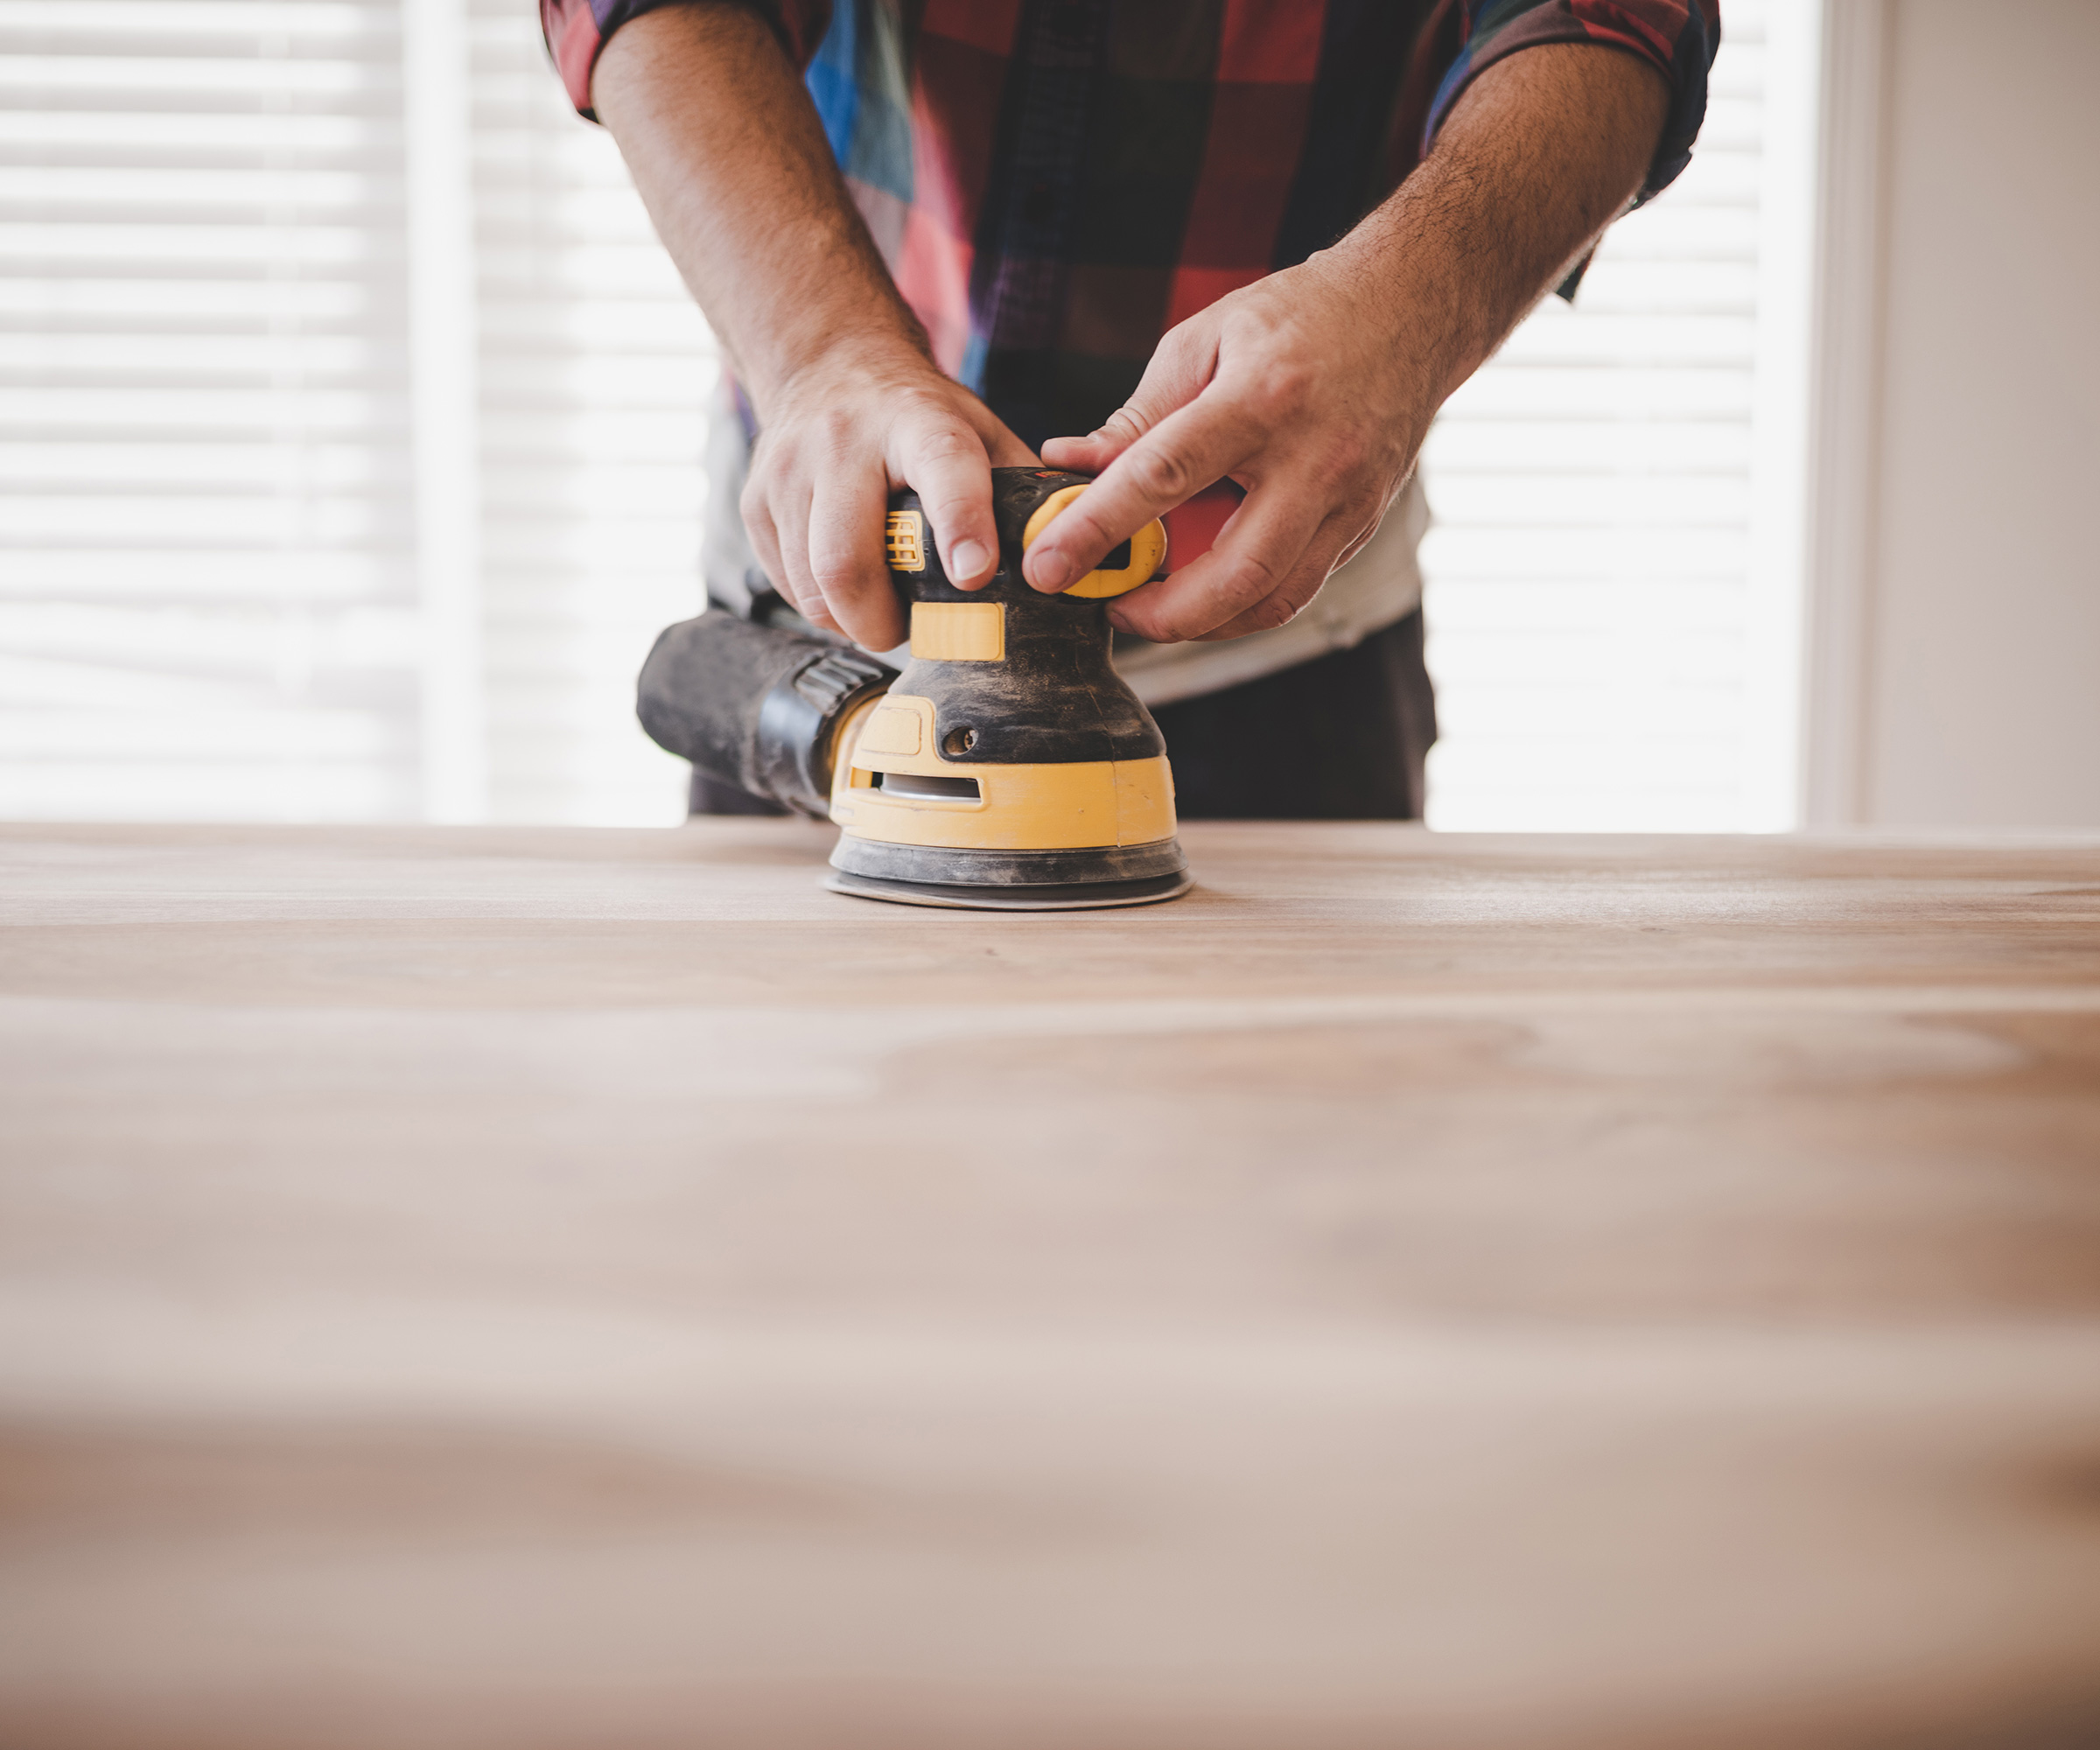
If you are working with timber countertops you'll definitely need to give them a light sand, but even sanding laminate, tile, and stone will help the primer and paint you are about to apply adhere better. In many cases, an inexpensive sanding block will do the job just fine and the Amazon Basics Rubber Sanding Block is a great budget option. If you want to cut back on labor a little and have a list of other DIY jobs on your to-do list, then you might want to look at investing in a power sander for larger areas. Once done, be sure to wipe or vacuum the surface down.
“For timber, you will need to sand the wood to give the paint a surface to stick to – but you need to make sure the dust is gone before you prime the wood” advises Drew Mansur co-founder and director at TileCloud. “This brings us to priming, which you will need to do to make sure the finish will be smooth and to ensure the paint sticks better.”
Step 3: Protect your kitchen cabinets, walls and floors
You don’t want to end up with splatters of paint ruining your beautiful kitchen flooring ideas or running down the doors of your cabinets, so it is well worth taking a little time to cover them over.
Use painter's tape between the countertops and walls, as well as around your stove, sink and so on. Dust covers and plastic sheeting draped over the floors and cabinets will protect them while you work.
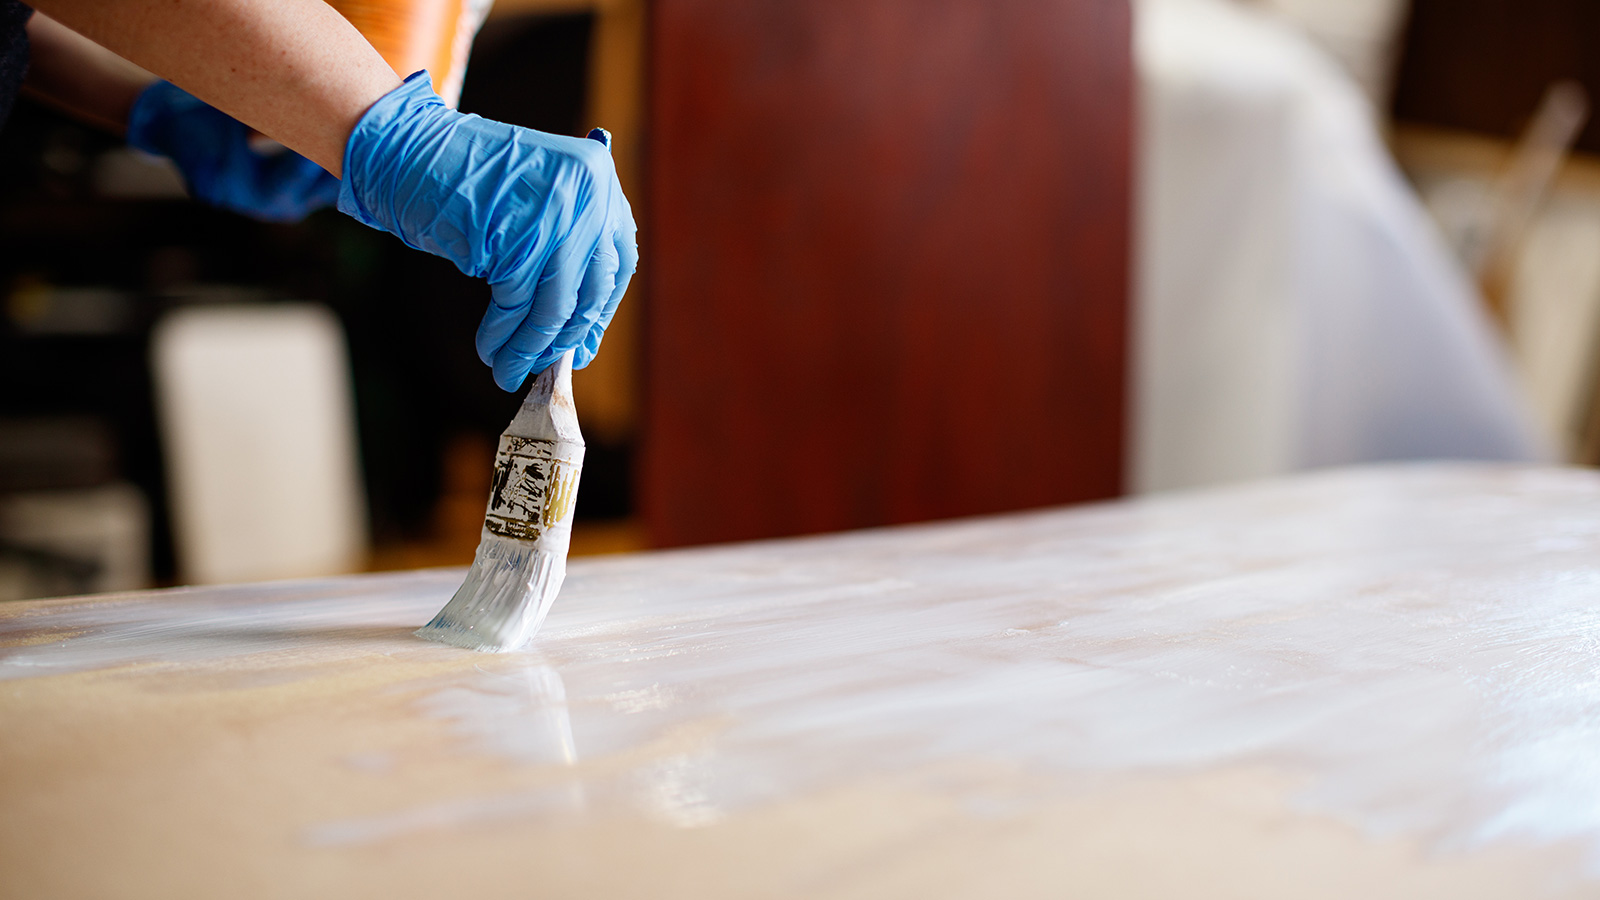
Step 4: Apply primer to the countertops
If you have purchased a complete countertop refinishing kit you might not need a separate primer, or it may have come with one included. However, many surface materials will benefit from a primer if you want a durable finish that will last.
"One of the biggest mistakes to make on any surface is to not use a primer," warns Brandon Walker, superintendent at ASAP Restoration LLC. "People think of primer as an unnecessary step that simply costs more without providing any benefit. In reality, primer is one of the most critical steps to ensure that the paint job lasts for years to come."
Using a roller or brush, apply a thin coat of primer and, if you are painting a backsplash too, bring out your mini roller to use on those. The Mister Rui Mini Paint Roller Kit from Amazon would work well. Your small paintbrush will help you to prime awkward corners and around faucets etc. In order to avoid messy brush marks showing up under your paint finish, aim to overlap each stroke a little with the next.
"One of the biggest mistakes you see when painting anything is not giving the primer enough time to fully cure before you start painting," warns Drew Mansur. "I say you should wait three hours before you start painting, but it really depends on the primer you’ve used and the conditions you’re painting in."
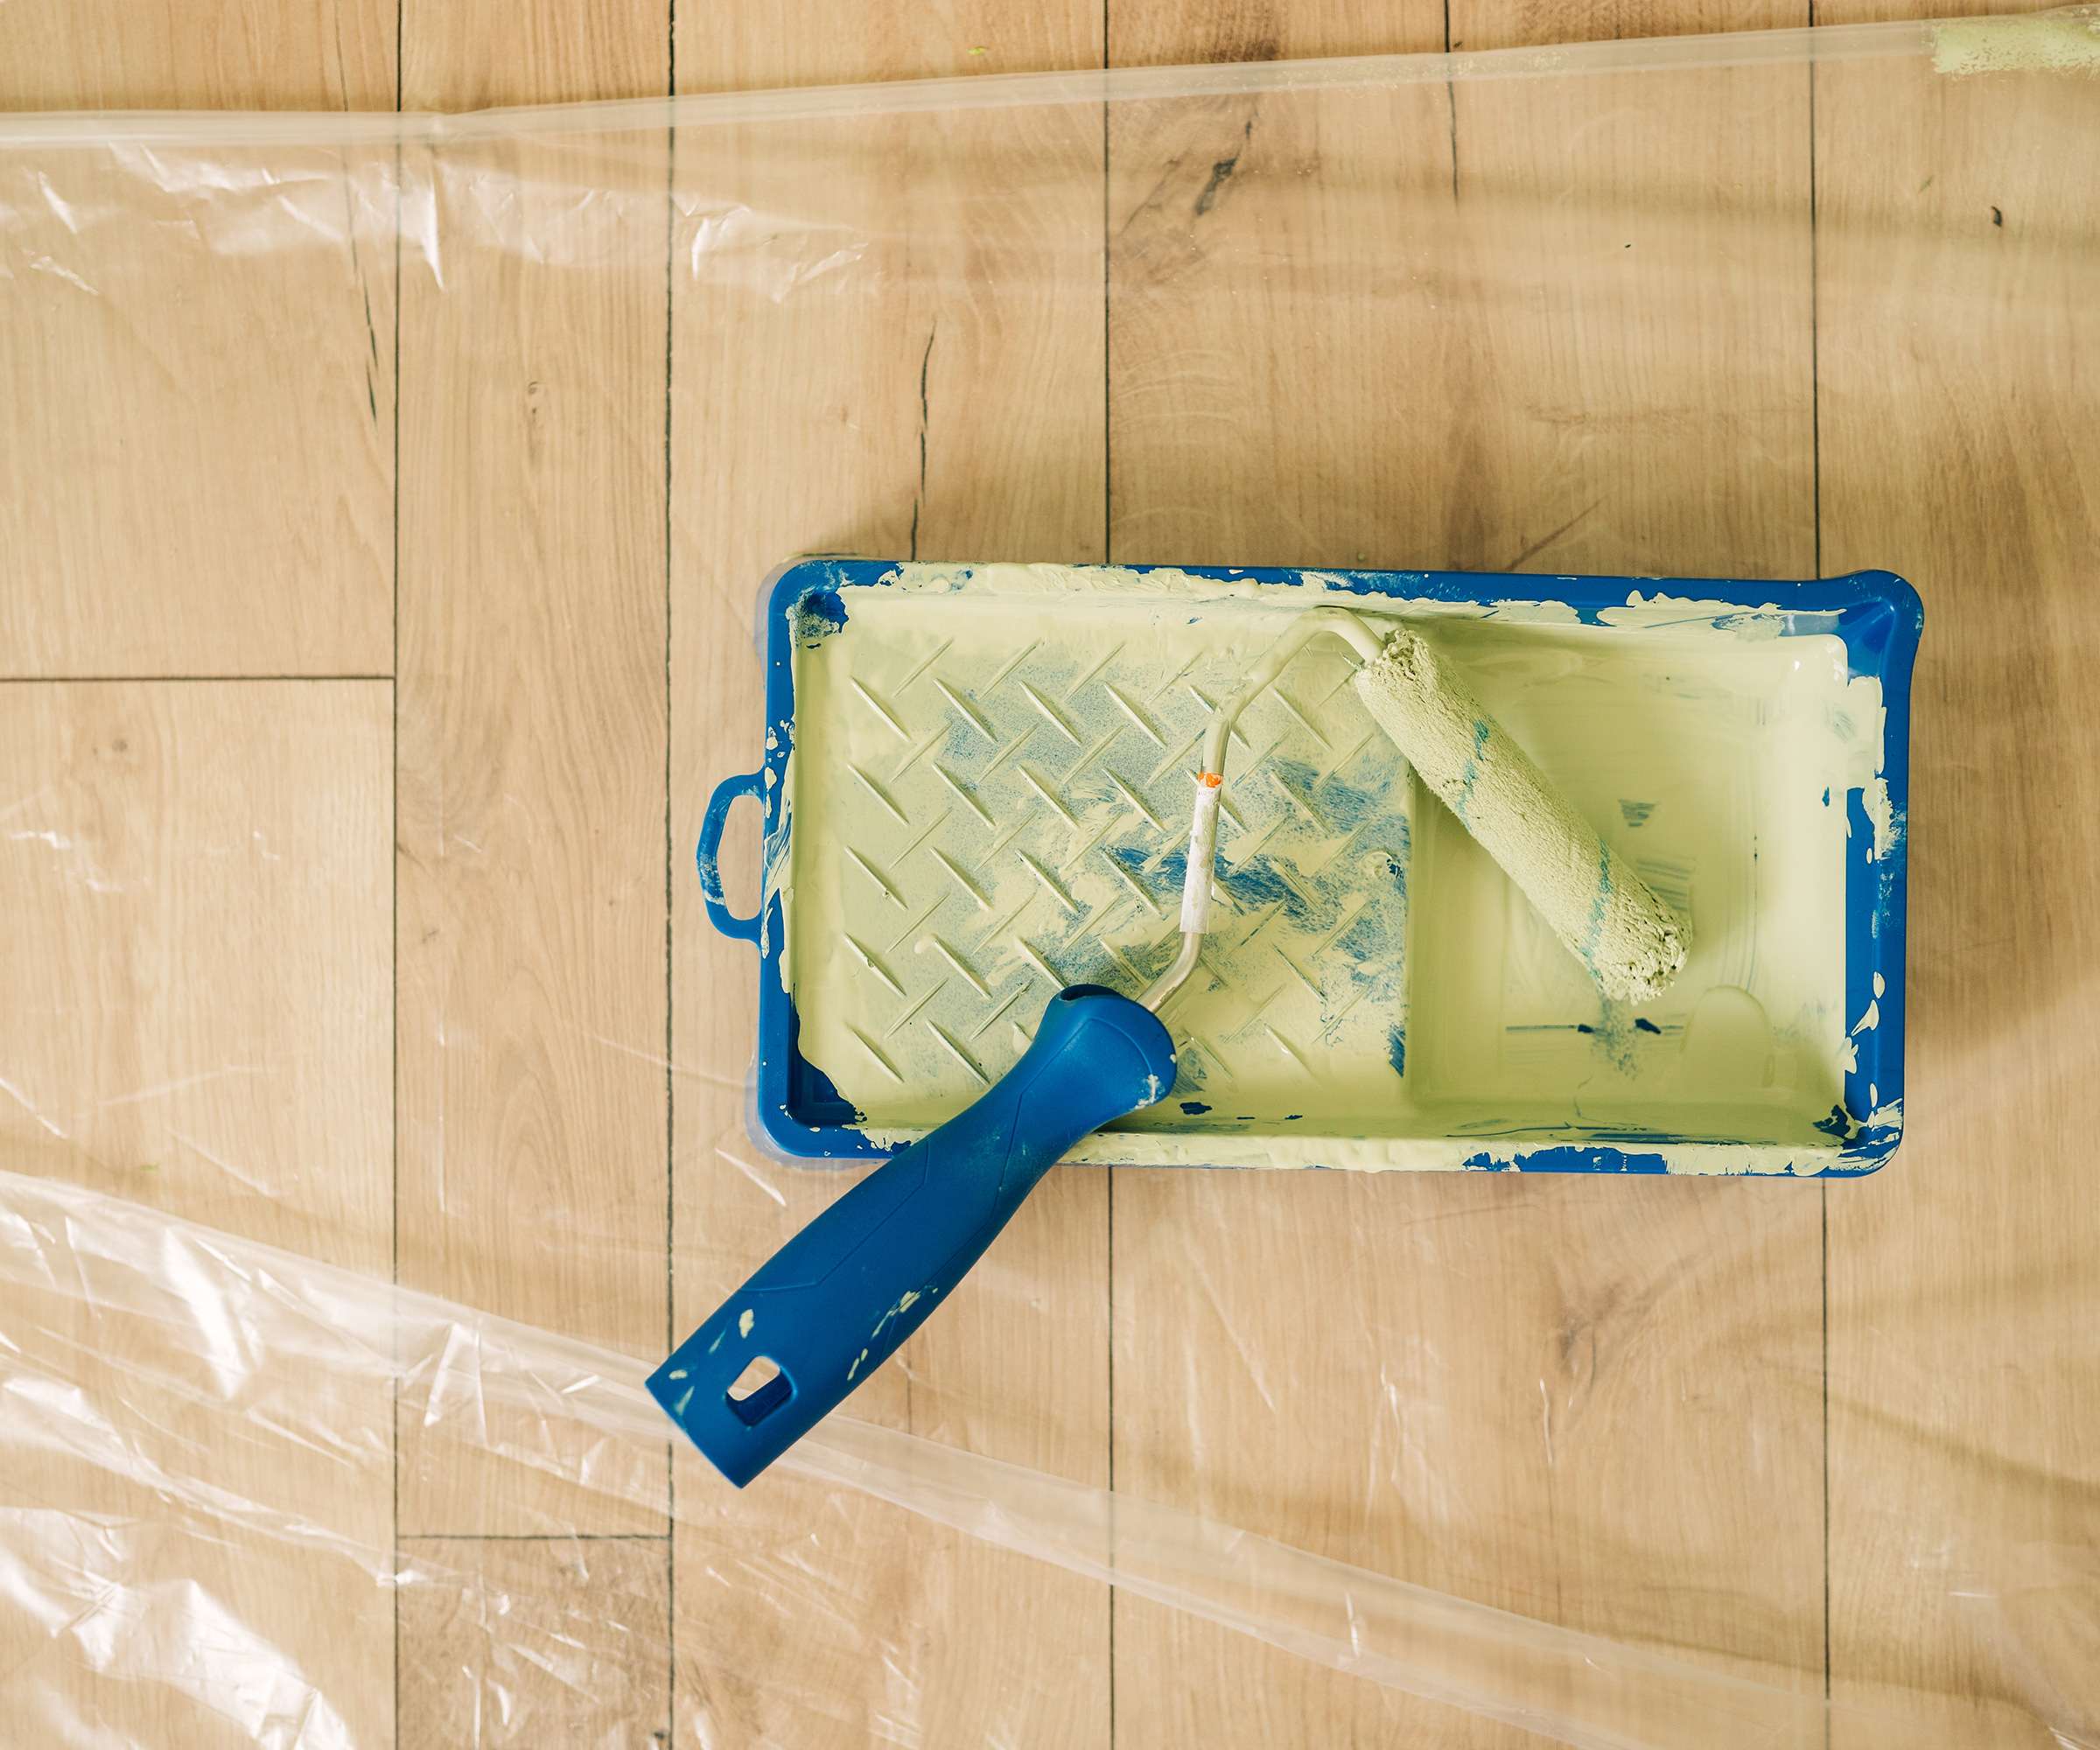
Step 5: Apply your first coat of paint
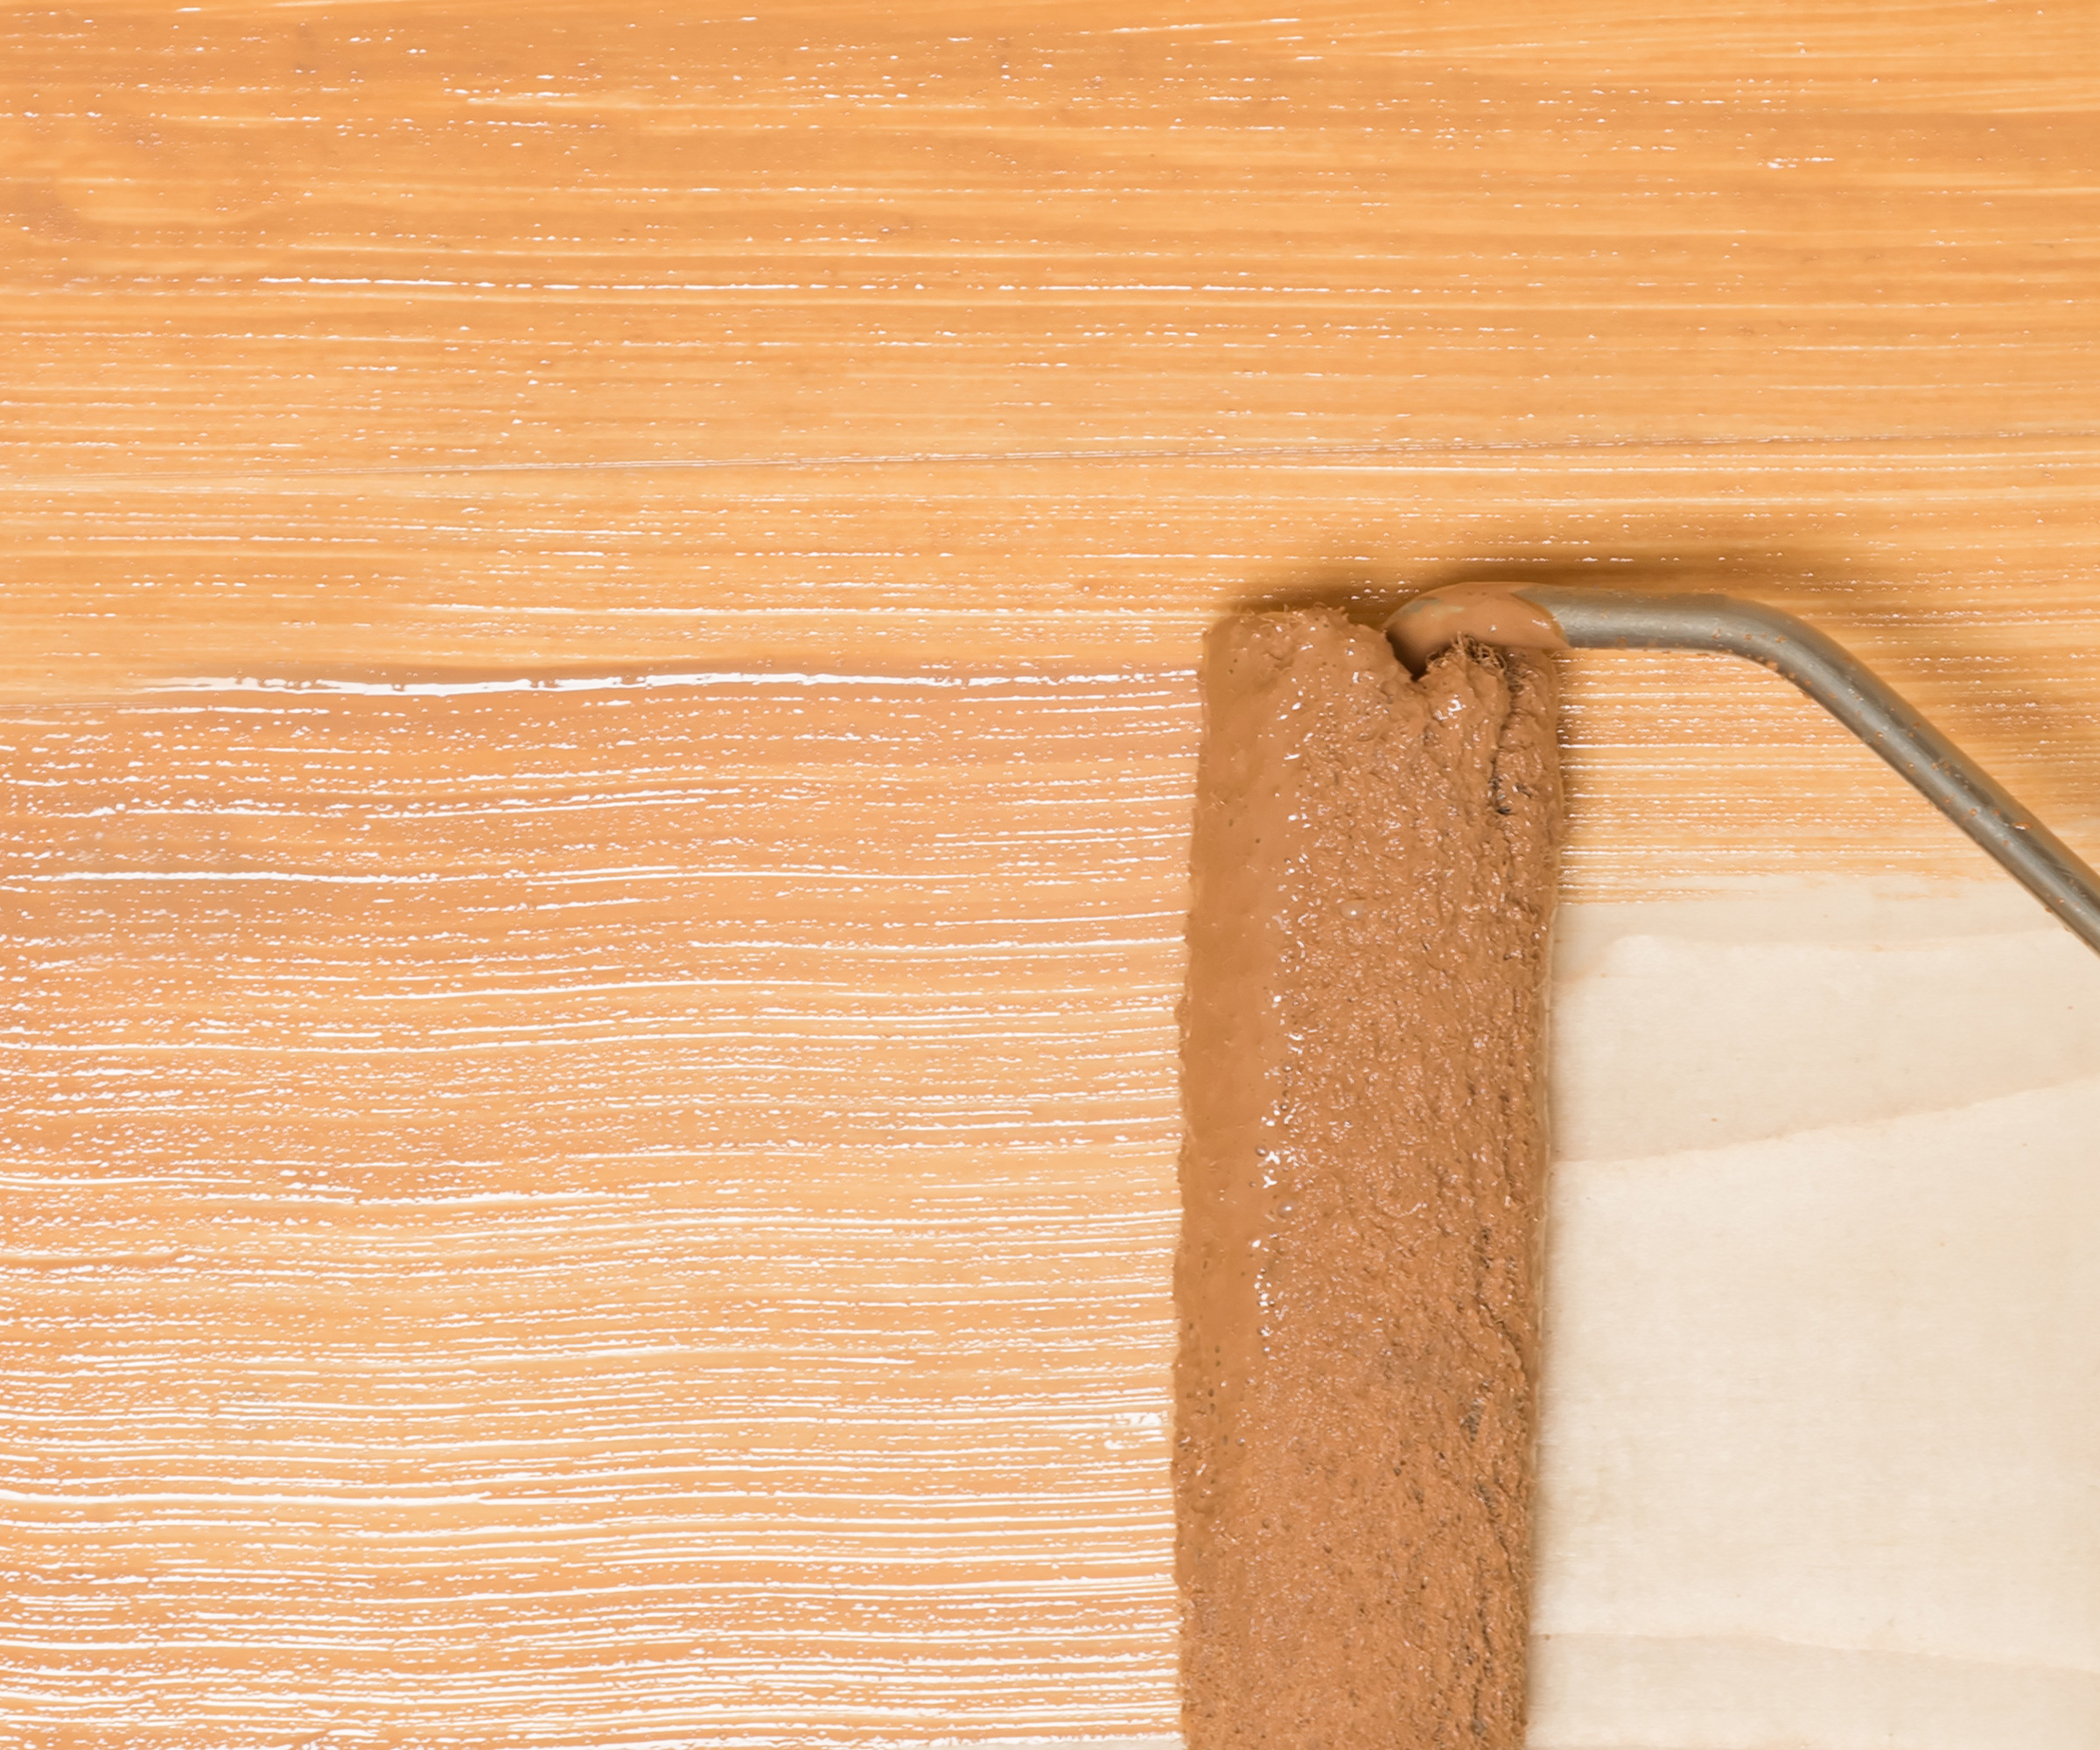
Make sure you have thoroughly stirred your paint or resurfacing coat to get rid of any lumps. Using your rollers and brush and working in the same way as when you applied your primer, coat all areas of your countertop and backsplash. Let it fully dry, according to the instructions.
Step 6: Apply a second coat of paint
In just the same way as you applied the first coat of paint, apply a second, being careful to keep a wet edge on each pass and dealing with any brush marks, just as you would be advised to do when looking at how to paint kitchen cabinets.
If you are using a refinishing kit, it may come with decorative finishes such as sparkling flecks or imitation veins to replicate the look of stone, such as marble. In most cases, these are applied after this second coat although some need to be applied while the paint is still wet so check the instructions carefully. Allow to dry.
Step 7: Apply your epoxy or glaze if using
While this step won't always be needed, if your paint or kit requires an application of epoxy or glaze, now’s the time to do it. Most can be rolled or brushed on and then need to be left for 24 hours or so to cure.
You may then need to sand (wet or dry according to instructions) the countertops until smooth. Before the final step, you will need to wipe the tops off by vacuuming and using a lint-free cloth such as the HOMEXCEL Microfiber Cleaning Cloth from Amazon. If they are wet, let them dry.
Step 8: Roll and brush on your topcoat or sealer
You’re almost done. A sealer or topcoat can now be rolled and brushed onto the countertops and will protect your newly painted surfaces meaning you can enjoy them for longer. Let dry and check if another coat is required.
Step 9: Clean up
Once everything is completely dry, carefully remove the painter’s tape – a sharp utility knife is handy here as it will ensure you don’t just pull off your new paint finish at the same time as the tape.
Clean up your brushes (if you are unsure how to do this then look into how to clean paint brushes first), stand back, and admire your transformed kitchen.
Your shopping basket essentials
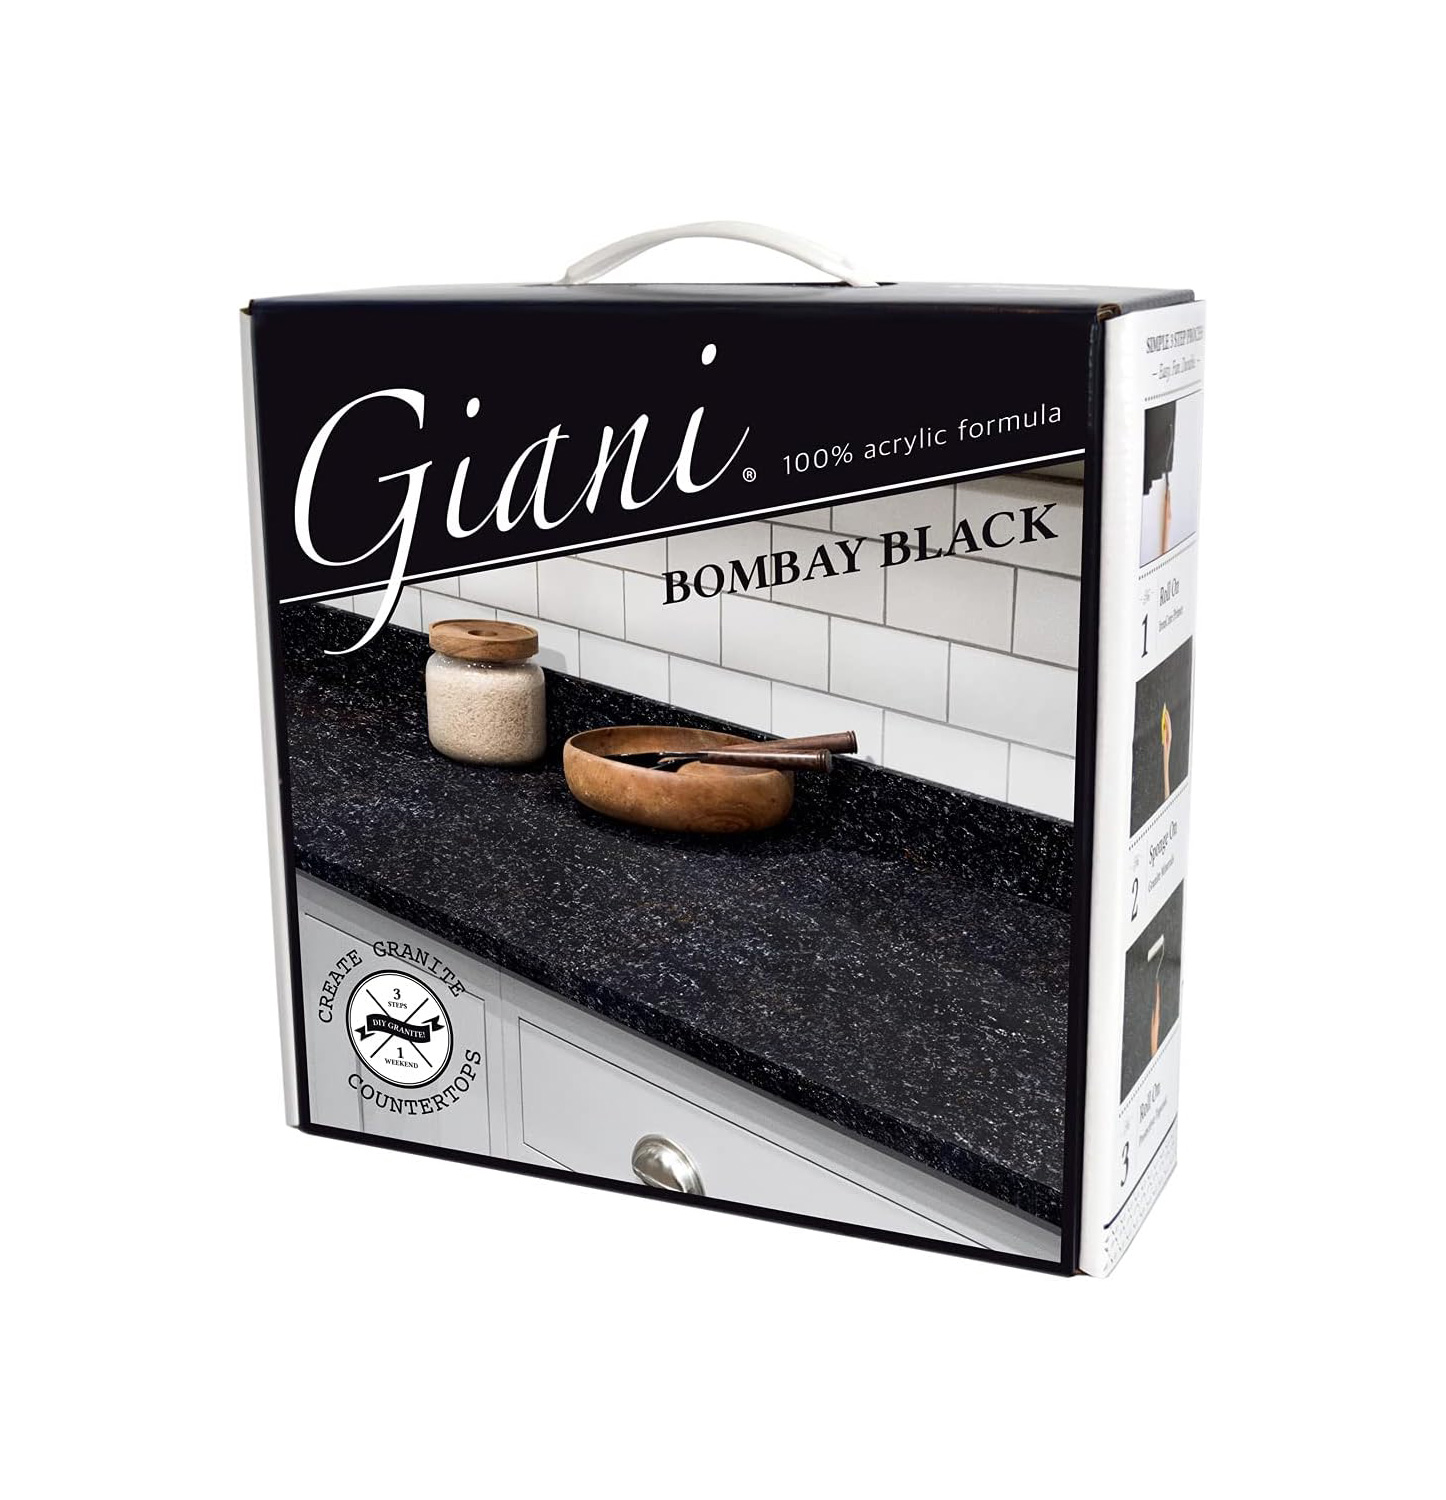
Price: $99.95
This all-in-one kit comes complete with everything you need to paint your kitchen countertops from start to finish, including rollers and brushes. It can be used on Formica, laminate, Corian, ceramic tile, butcher block, cultured marble, and even granite. Aimed to give surfaces a granite-like finish, it comes in a choice of three colors.
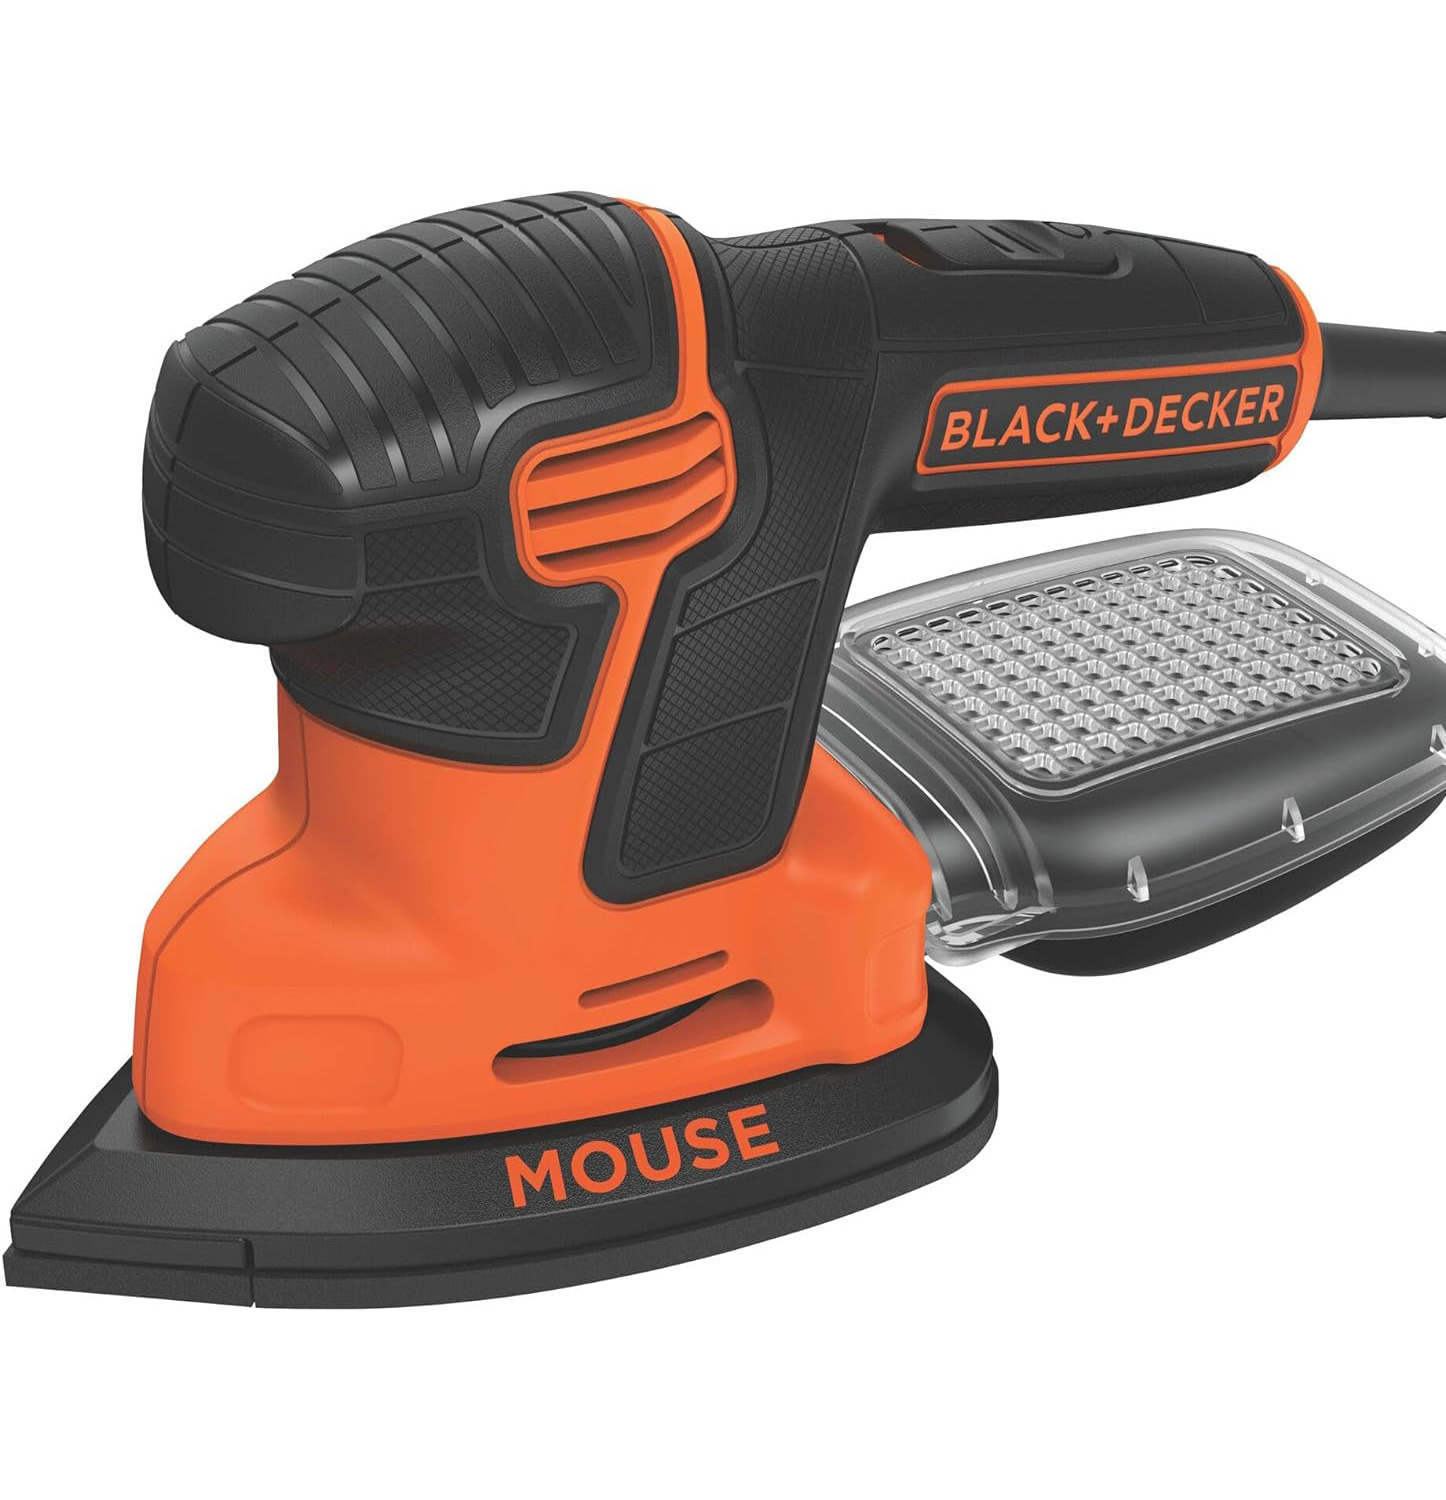
Price: $32.99
The perfect tool for sanding countertops quickly and efficiently. What is particularly good about this mouse sander from Black & Decker is that it comes with a detailed finger attachment to give easy access to hard-to-reach areas, such as corners. The dust collection canister is another bonus that means clean-up time will be minimized.
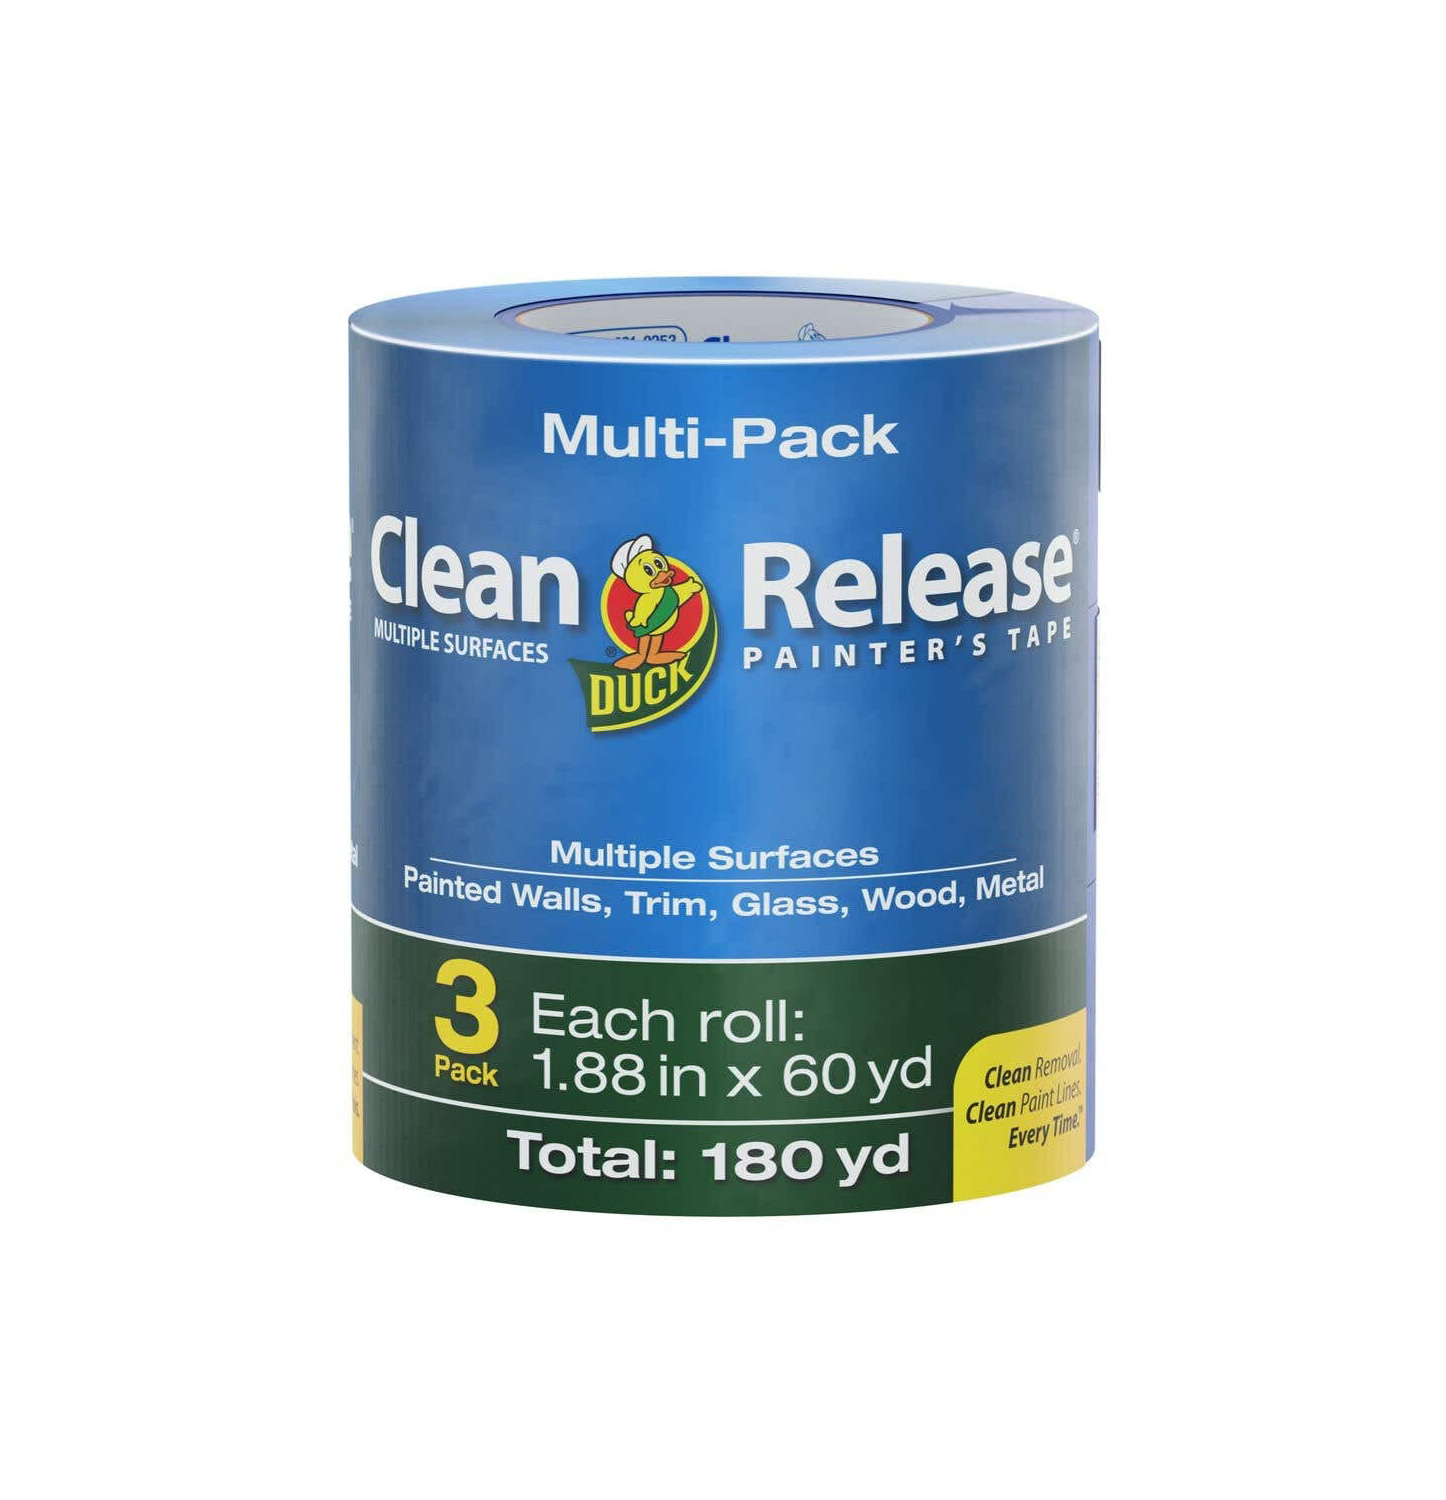
Price: $19.04
Painter's tape is a great way to ensure you are left with clean lines between countertops and walls, as well as around items such as sinks and hobs. This one has medium adhesion that means it can be removed easily without causing damage or leaving any sticky residue. It is also thick enough to prevent paint from seeping through.
FAQs
What is the best paint for countertops?
This very much depends on the type of countertop you are painting.
“To paint your timber countertops, you’ll need a paint that is durable and wood adhesive,” says Drew Mansur. “I would suggest going for acrylic paint followed by a polyurethane topcoat to give you durability and water resistance.
"For your stone and composite worktops, epoxy paint will be your best option," continues Drew. "This is because it is really durable and will also be resistant to your normal kitchen wear and tear.
"You can paint laminate worktops, but you’ll need a specialized countertop paint or a hard-wearing enamel paint," adds Drew. "This is because laminate is hard for normal paint to adhere to, and these special paints will adhere better and withstand more wear and tear."
"If you want to use an eco-friendly, all-natural paint, linseed oil paint is a good option for painting countertops," suggests Corinne Segura, owner and consultant at My Chemical-free House. "This paint is solvent-free and uses natural linseed oil as the binder. The benefit of this type of paint is that it sticks to any countertop material without a need for a primer. You can use it on wood, plastics (like melamine/laminate), stone, or any other type of countertop. It's also a very durable paint.
"The only downside is that because it contains manganese it’s not safe for direct food contact, so be sure to use cutting boards and serving boards for your food."
If you are working with a compact space, be sure to check out the best paint colors for small kitchens when choosing a shade for your countertops too.
Should you use food-safe paint for countertops?
"When you’re painting kitchen countertops, make sure you look for paints and sealants that are food safe," advises Drew Mansur. "Usually the manufacturing specs will tell you if they are safe for cooking surfaces. It’s important to know though that you need to let the paint cure completely before using it for one of your cooking surfaces."
"The FDA has created a litmus test for this very conundrum and there are paints that have been specifically approved by the FDA for use in food-related applications," says Brandon Walker. "These are non-toxic formulations that are safe for human consumption should the paint end up in food inadvertently.
"Another factor to consider is the chance of the paint being heated to the point of denaturing," continues Brandon. "If you are planning to paint a surface that may experience extreme heat, then it is important to choose a paint that is formulated to resist degradation when heated.
"Washability is another important consideration when choosing paints that might come into contact with food," further advises Brandon. "If the paint isn’t washable, it might not be the right choice for some surfaces, and, similarly, if it is washable, but not considered safe for food contact, then another option will be best."
How long will painted countertops last?
While painting countertops is a great way give your kitchen a makeover on a budget, there are a few downsides to note.
"It is important to know though that a painted surface might not survive as long as an original material or replacement might," points out Drew Mansur.
The key to making sure your painted countertops stand the test of time lies in good preparation, using the right paints for the job and following manufacturer instructions for drying and curing times.
You can also care for your countertops by using cutting boards and hot pads shields. Be sure to brush up on how to clean countertops too and avoid any harsh chemical-based cleaning products.
Painting kitchen countertops is a great way to refresh your kitchen on a budget and is definitely a job to add to your list of kitchen makeover ideas.
Other tasks you might like to consider include painting your cabinets, changing up the wall colors or even hanging wallpaper. Simple things like hanging pictures and introducing houseplants will also make a huge difference.