One of the latest trends in the world of 3D printing involves painting with your filament to create beautiful works of art – more commonly known as a HueForge 3D print. If you've been wondering how to make a HueForge print, then you've come to the right place. The results can be astonishing, ranging from textured 3D Star Wars posters to printed comic book covers, two-tone blueprints, and even realistic portraits.
No matter which of the best 3D printers you own, I'm going to show you exactly how to create a HueForge print from start to finish with this guide. But be warned, HueForging can be a tricky (and very lengthy) process. If you're new to 3D printing, then this could get overwhelming, but give it your best shot.
This article won’t be as simple as our traditional how-to guides, as I had to bring in some experts to really get my head around HueForge. But the good news is that I've made a ton of mistakes during this process, so you don't have to (you're welcome).
Tip: jump to my troubleshooting section if you're looking for a quick fix to any recurring issues, or check out my guide to the 6 essential tools for finishing 3D prints.
When I first started this challenge, I thought creating a HueForge would be a breeze. But my printer had other plans. It turns out that my single-extrusion Anycubic Kobra 2 printer isn't very practical for colour changing, and the specific G-code designed to program it for this exact purpose was less than useless (if you have a more advanced multicolour 3D printer, then you won't need to worry about G-code at all).
Thankfully, I spoke with the creator of HueForge (Steve Lavedas) and pro printer Esther Yam (also known as Cyanide Sugar) to help me along the process. Esther has created some exceptional HueForge artworks with a unique blend of 3D printed models incorporated into them, and Steve is taking HueForge to new levels with exciting updates (he's even made HueForge his full-time job now!).
Keep on reading to learn all about HueForge, how you can make one for yourself, and discover top advice from Steve and Esther on all things filament, the accidental Millennium Falcon, and things to look out for when making your first HueForge print.
What is HueForge?
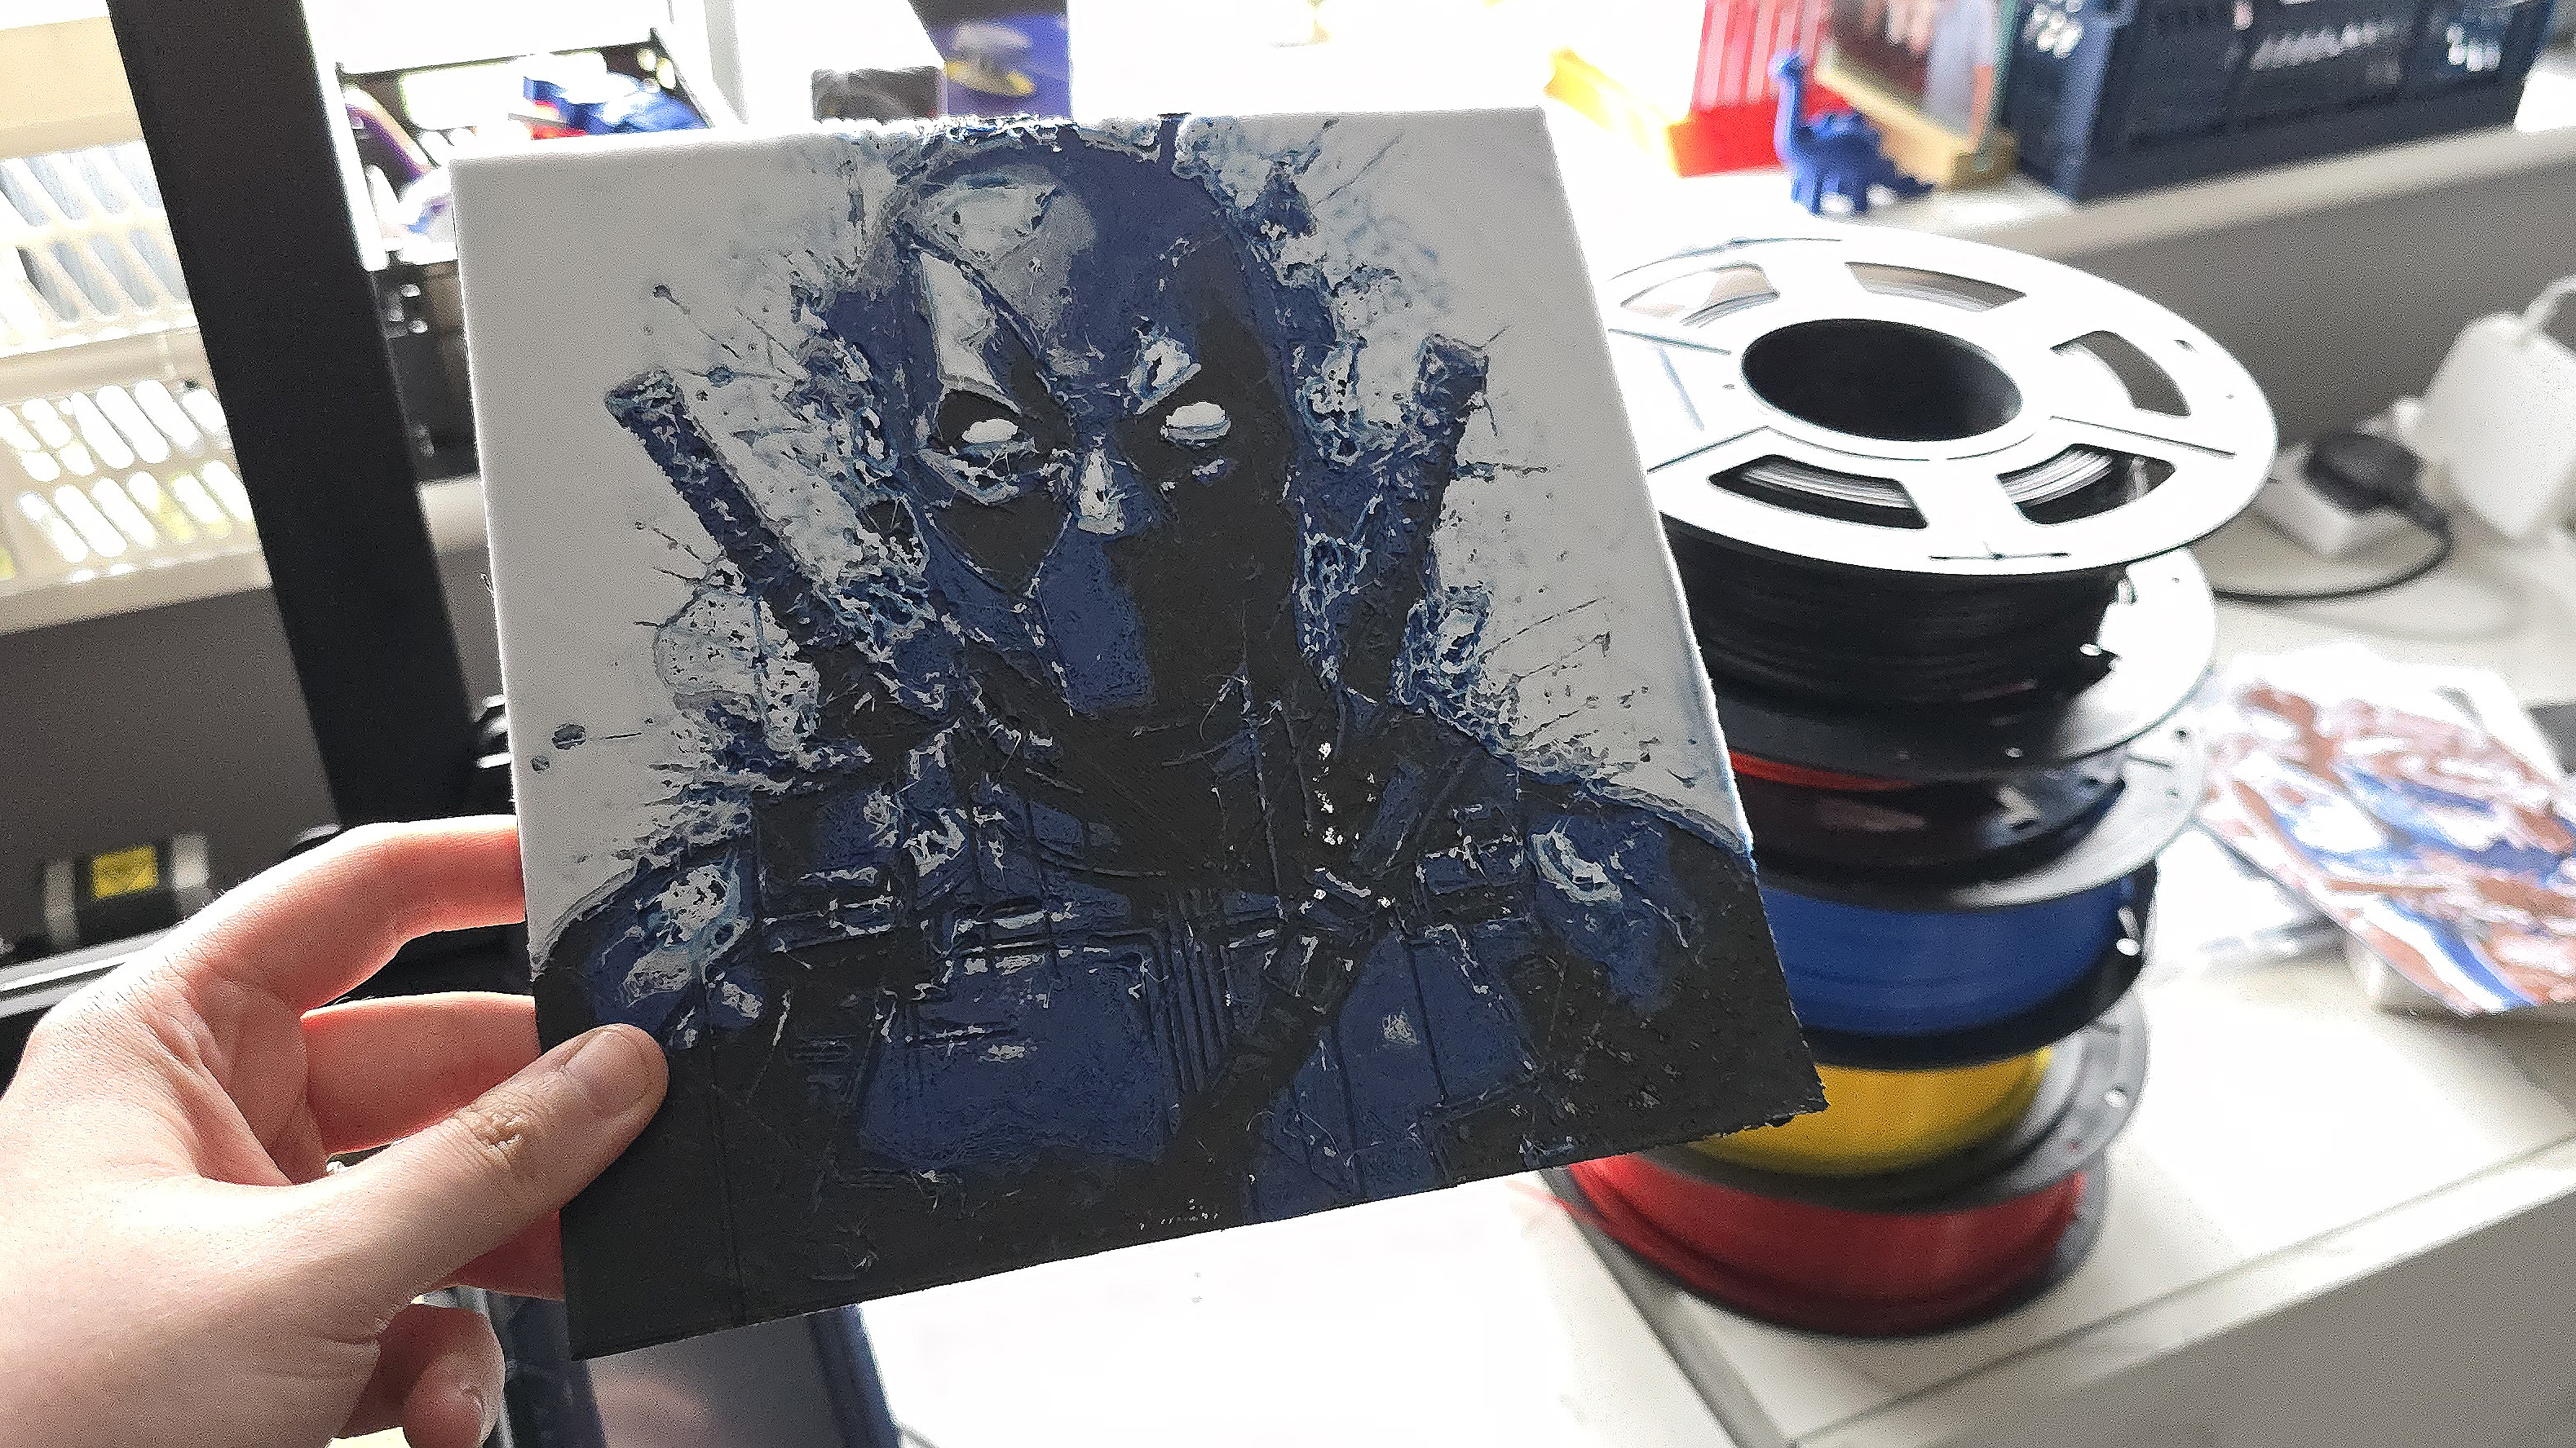
The result is a flat-ish 3D print of your image, only a few millimetres thick, created by combining multiple layers of filament stacked on top until you get a blend of hues and colours. If you haven't come across HueForge printing yet, you might be more familiar with the concept of backlit lithophanes instead.
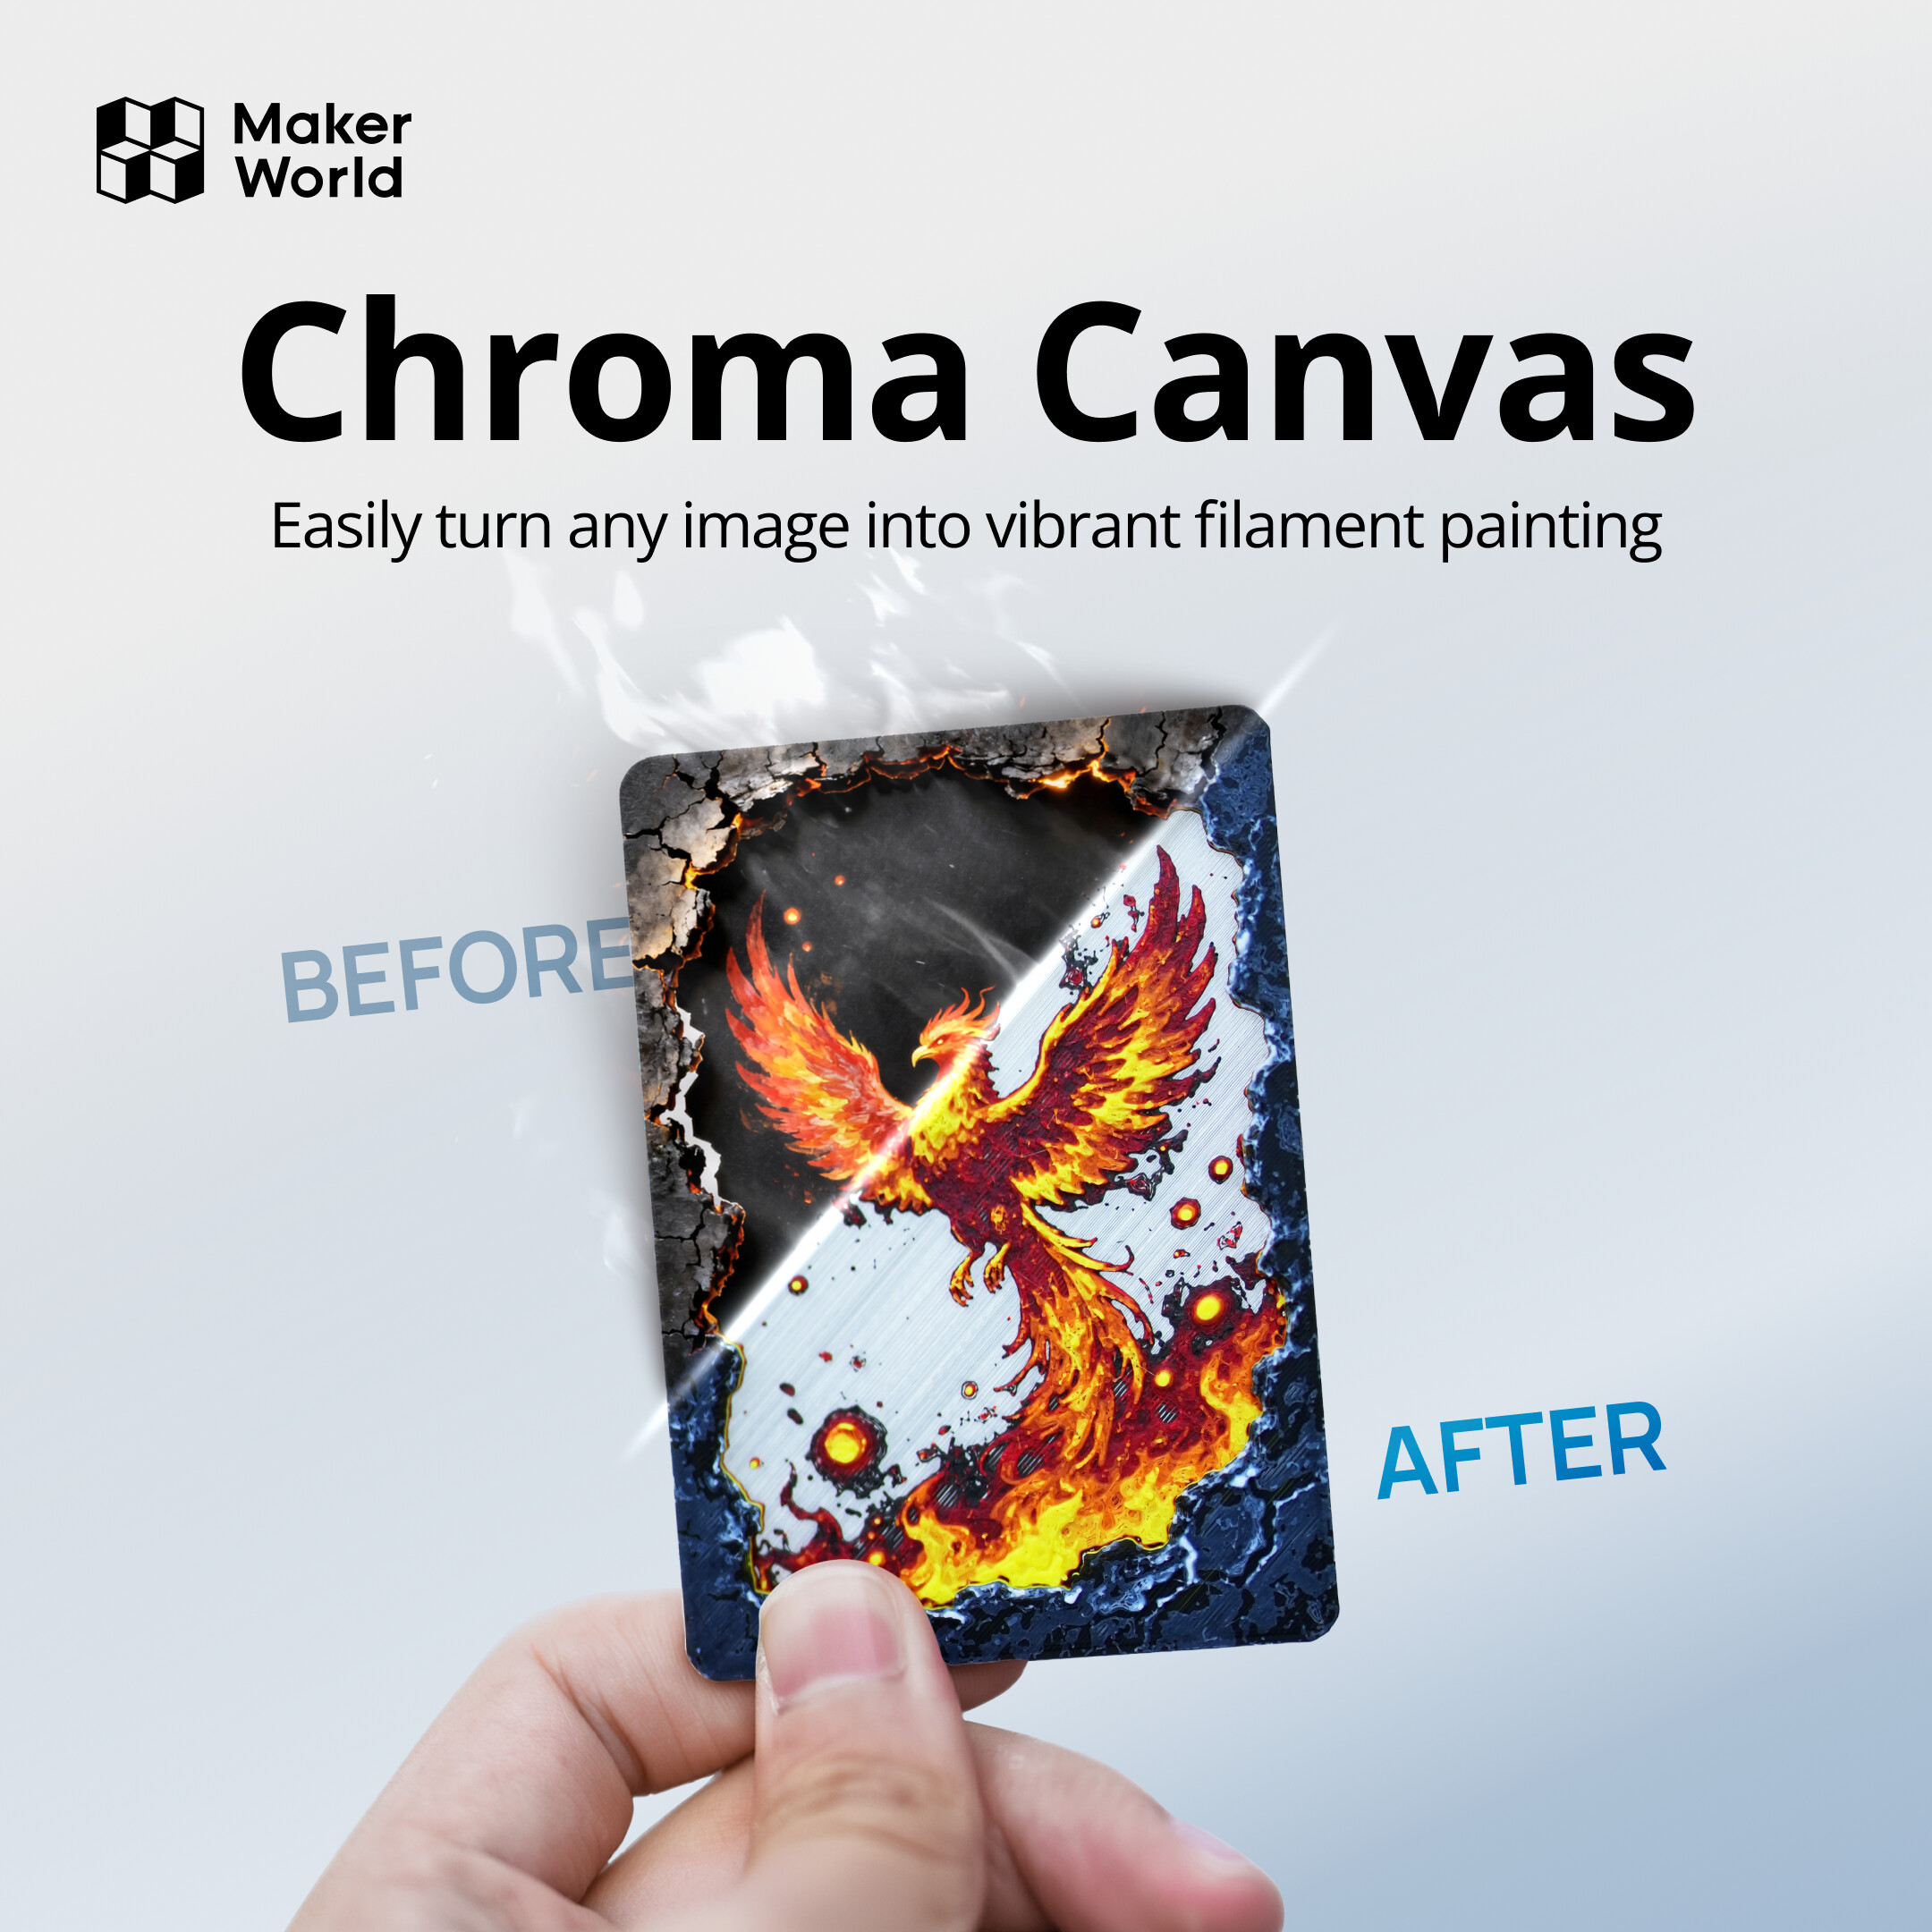
For Bambu Lab users – There's now a direct alternative to HueForge called Chroma Canvas, a free tool integrated into the MakerWorld Maker Lab online software with the ability to generate 2.5D filament paintings, optimised for easy slicing in Bambu Studio.
HueForge is a software program created by Stephen Lavedas, a software developer and 3D printing enthusiast, with help from creator Ian Smalley. It can convert pretty much any JPEG or PNG image into a 3D print using a combination of coloured filaments and your choice of 3D printer.
Lithophanes are black-and-white images that need light to pass through them for the image to be visible, and then colour lithophanes were developed next. HueForge prints are a little different, with a basis on front-lit printing. No light source is required, only merged layers of coloured filament to create the image.
A HueForge print can take anywhere from 2 hours to 30 hours, depending on the scale and detail of your image. Essentially, Lithophanes had to walk so that HueForge could run.
What do I need?
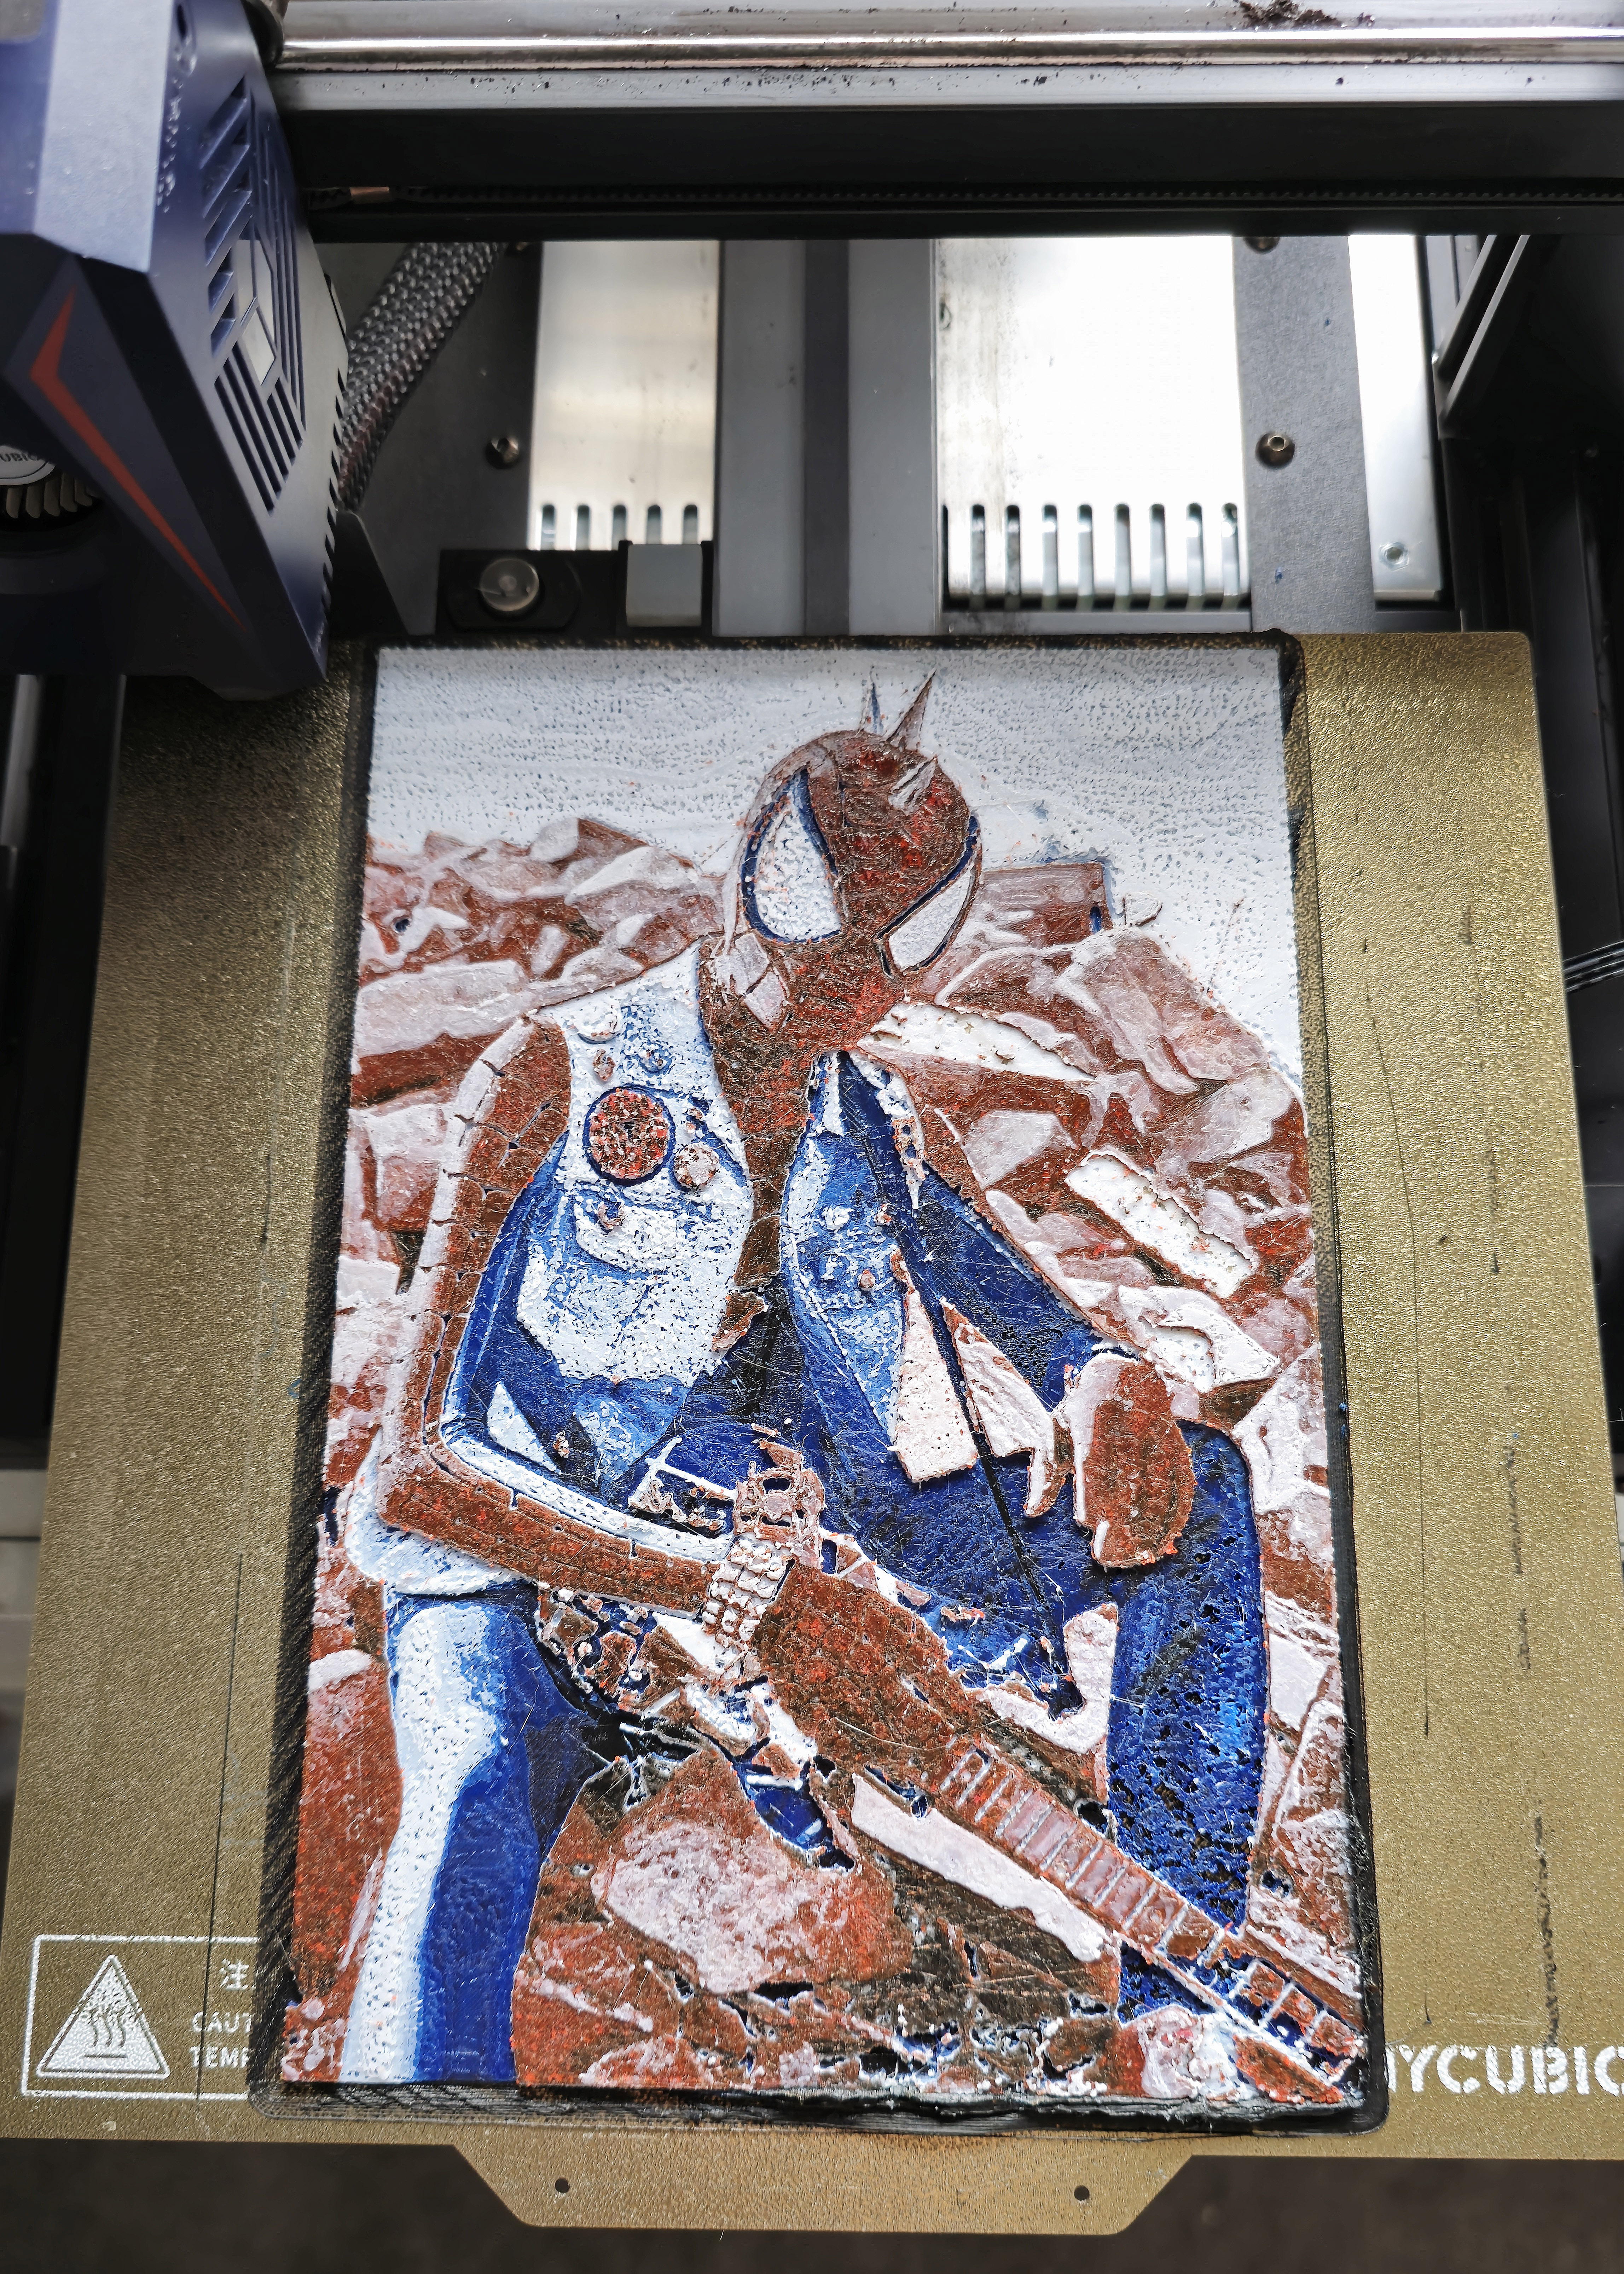
The number one thing you need when creating a HueForge is patience. I set out on a mission to transform my Spider-Punk cosplay image from my photography portfolio into a 3D print – and after blood, sweat, tears, 8 manual colour changes, and 27 hours of printing later – I managed to do it.
I'm still relatively new to 3D printing, and my first 3 weeks with a 3D printer taught me a lot. Now four months into learning this craft I feel pretty confident, and not to brag but I also managed to 3D print a hexagon shelf (it was really easy). Despite my eagerness to learn, I was seriously underprepared for creating a Hueforge print.

All you really need is a 3D printer and some filament, but It's also important to have an understanding of Transmission Distance (TD), which is a measurement of how far light can travel through your filament in mm before it gets dim. This can greatly affect your prints. You'll also need a decent slicer program to make adjustments to your STL file from HueForge, and convert it into Gcode which your 3D printer can read.
Next, you need to ensure that your printer is capable of filament changes, either automatically using an Automated Material System (AMS) like you might find on Bambu printers, or manually by pressing pause on your display.
Video Tutorial
If you can't see the video above, please refresh the page.
Step 1. Download HueForge
Before you can begin creating a HueForge, you'll need to own the software. You can purchase HueForge for a one-off price of $18 (approximately £15) from the official website for a personal use license. If you decide that you want to start getting commercial with it, there's a license for this too.
It's a good idea to have a general understanding of how to use HueForge before you buy it, and there are plenty of YouTube tutorials out there that can teach you the basics. You can also download free STL files from sites like MakerWorld and Printables without needing to download HueForge, which can be a great way to practice with it first.
Step 2. Import your image
Now you've got HueForge up and running, it's time to choose your image. Esther suggests that you start with a basic image, "I always tell people who are starting out with HueForge to start with either black and white prints or monochrome prints so you understand how it works. And then progress once you get how it works and how to layer the colours from dark to light or light to dark or blend the colours".
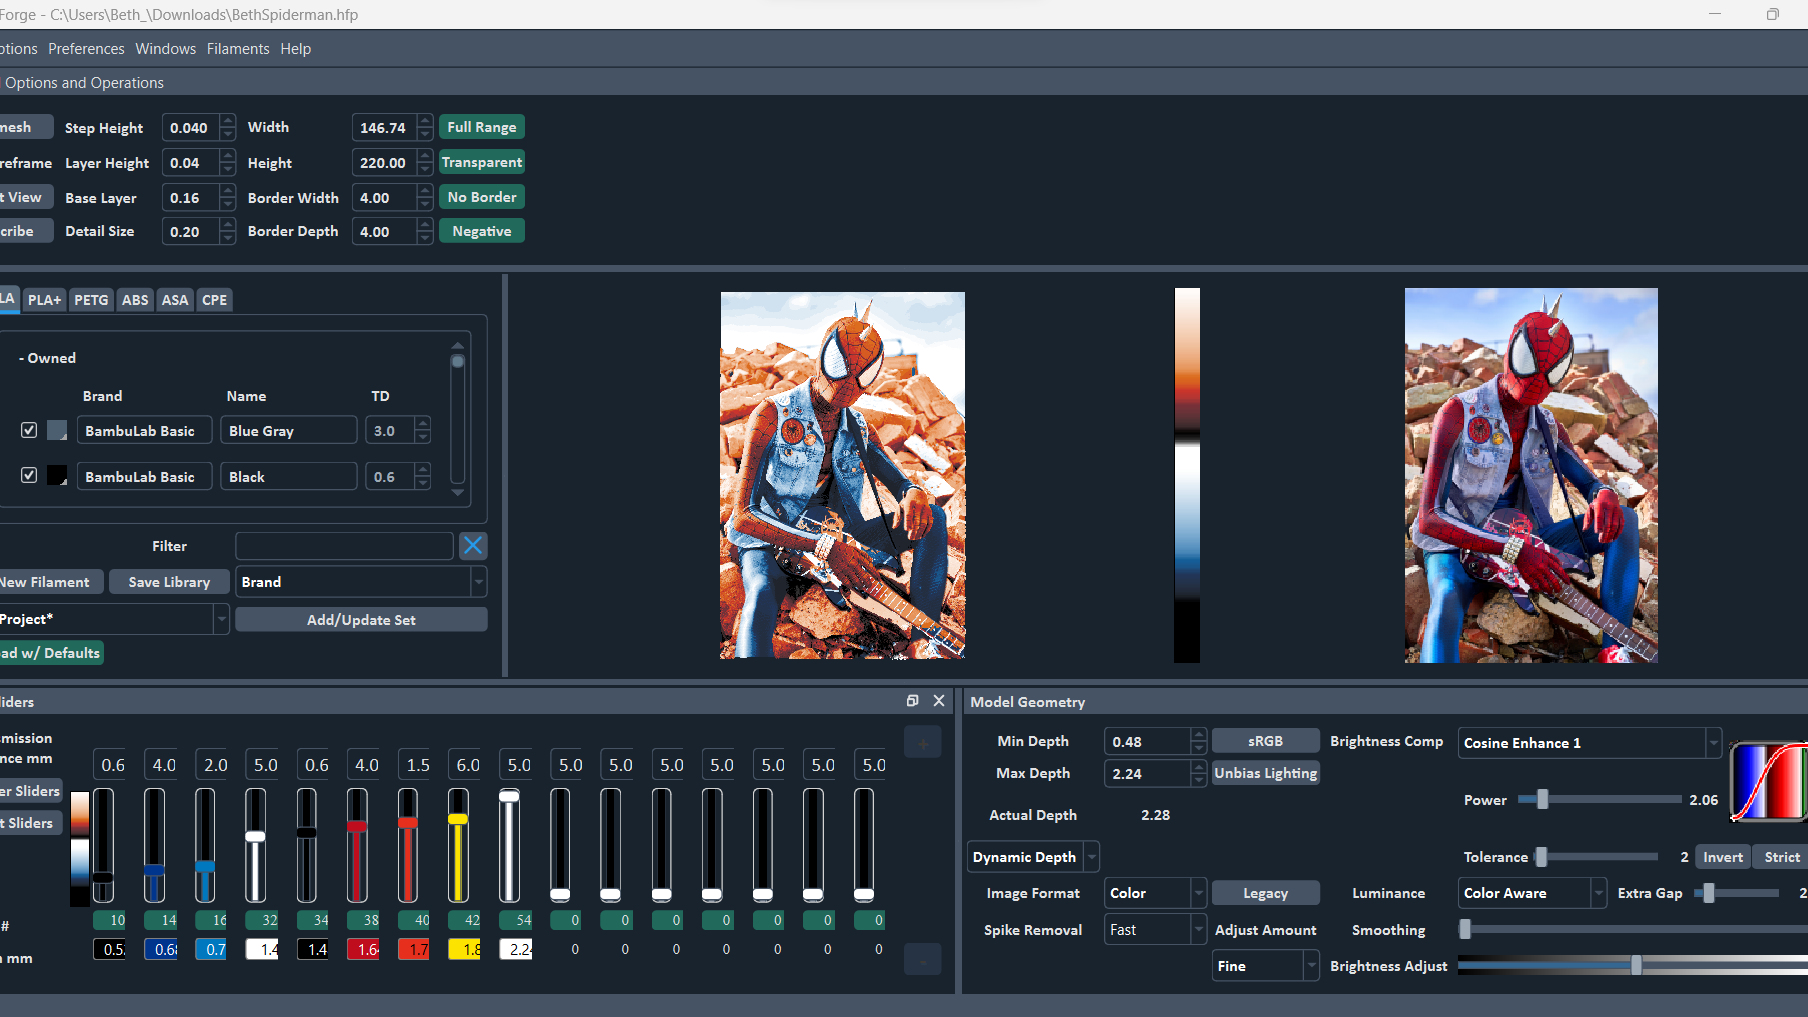
If you do decide to dive into colour, you can always edit the image in Photoshop first to make the colours pop and easier for HueForge to detect. As Steve suggests, "The biggest thing to think about with Hueforge is where vertically in your mesh is that colour? The sliders are stacking, which a lot of people don't understand, and will have their sliders down at the same height".
You need to drag the filament colours down into the sliders at the bottom and play around with each setting and the model geometry to find what works best. You can then export your project as an STL file and open it in your slicer.
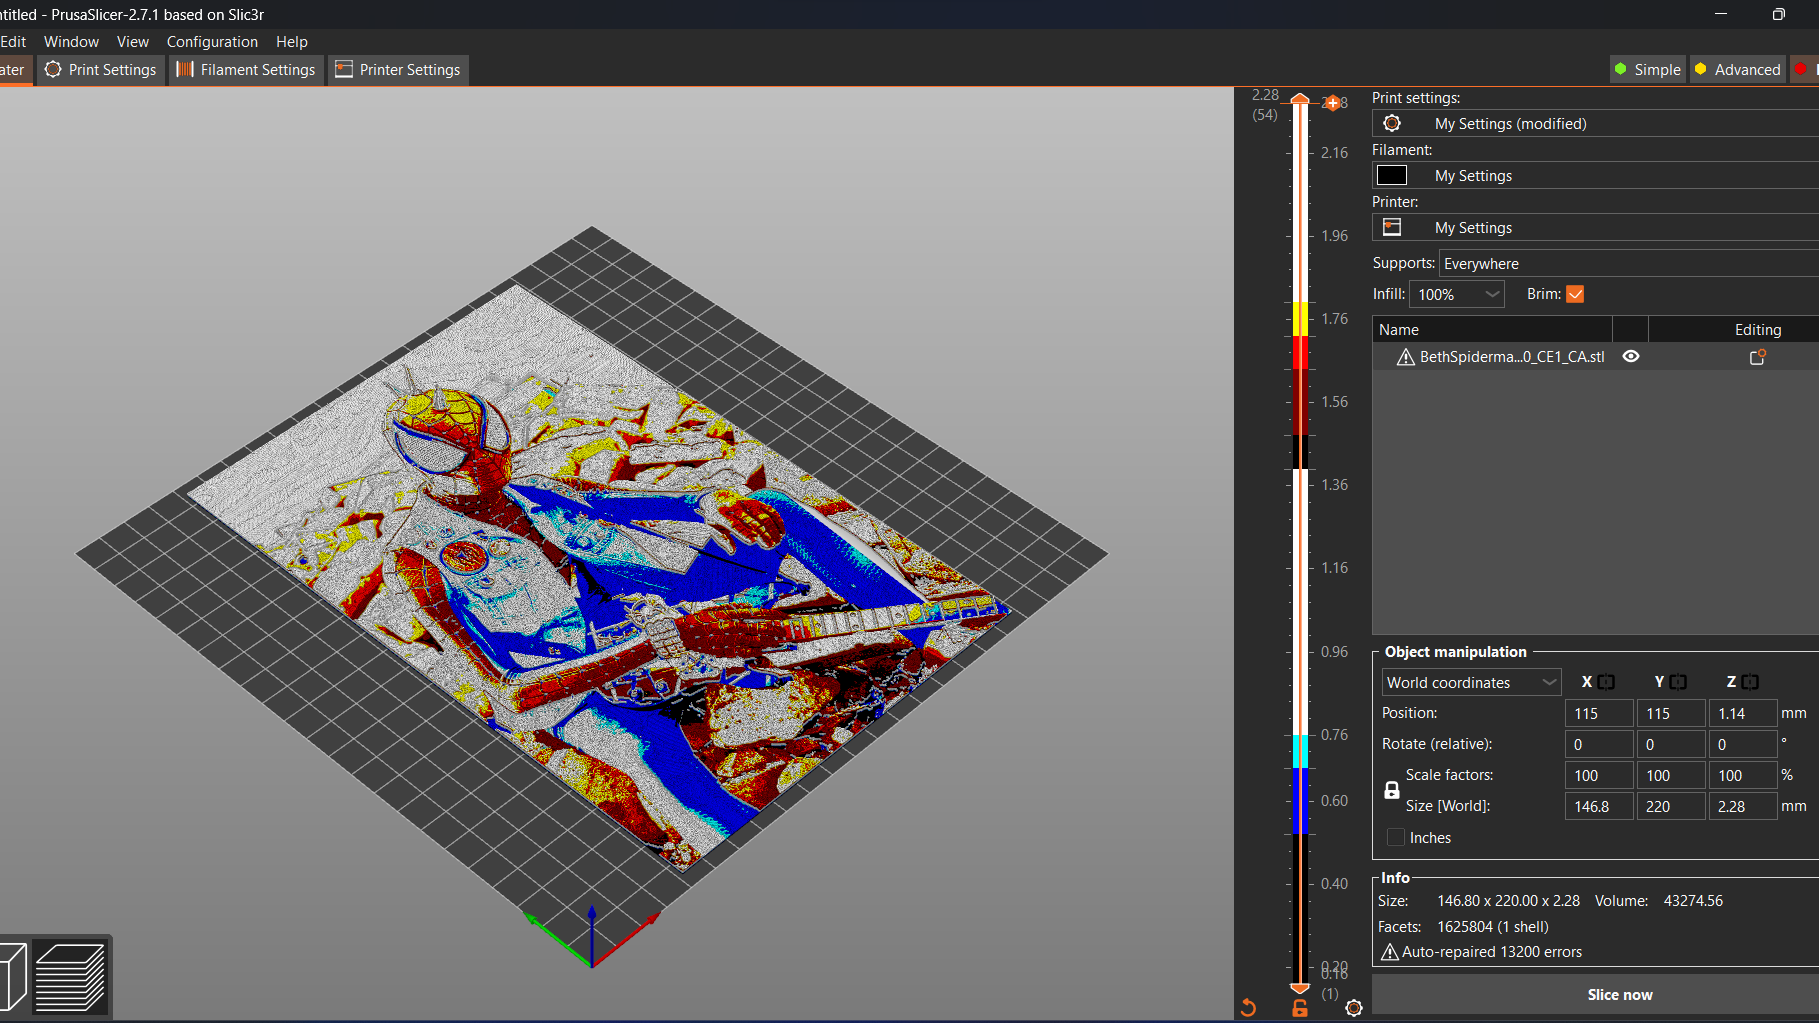
Step 3. Tinker with your Slicer
Based on the instructions you get from HueForge, you'll most likely need to set your layer height to around 0.08mm and your base layer height to 0.16mm, with an infill setting of 100%. Your layer height should never be higher than 0.08mm, but you can consider printing at 0.04 or 0.05mm for smoother blending.
Your base layer height needs to be a multiple of your layer height, so for 0.08mm you can have 0.16mm or 0.24mm and so on.
Step 4. Configure your GCode
You may need to add some additional code to your G-code file to instruct your printer to stop at certain heights and layers. If you have an advanced multicolour 3D printer with an AMS (automated material system) unit, then a lot of these colour changes should be handled for you, and so you don't need to worry about any G-Code tinkering.
For those of you with single-colour machines, the M600 Marlin code should work just fine for pausing at specific layers – although this would not work on my Anycubic printer, so I had to get creative and use an M300 sequence to play a tune on my printer instead, to alert me when to change filament. Head to the FAQ section if you want to learn how I did this.
I also set several timers on my phone and my Alexa speaker based on the provisional layer timings that Prusa Slicer suggested, just in case I missed the tune. Not ideal, but it definitely worked.
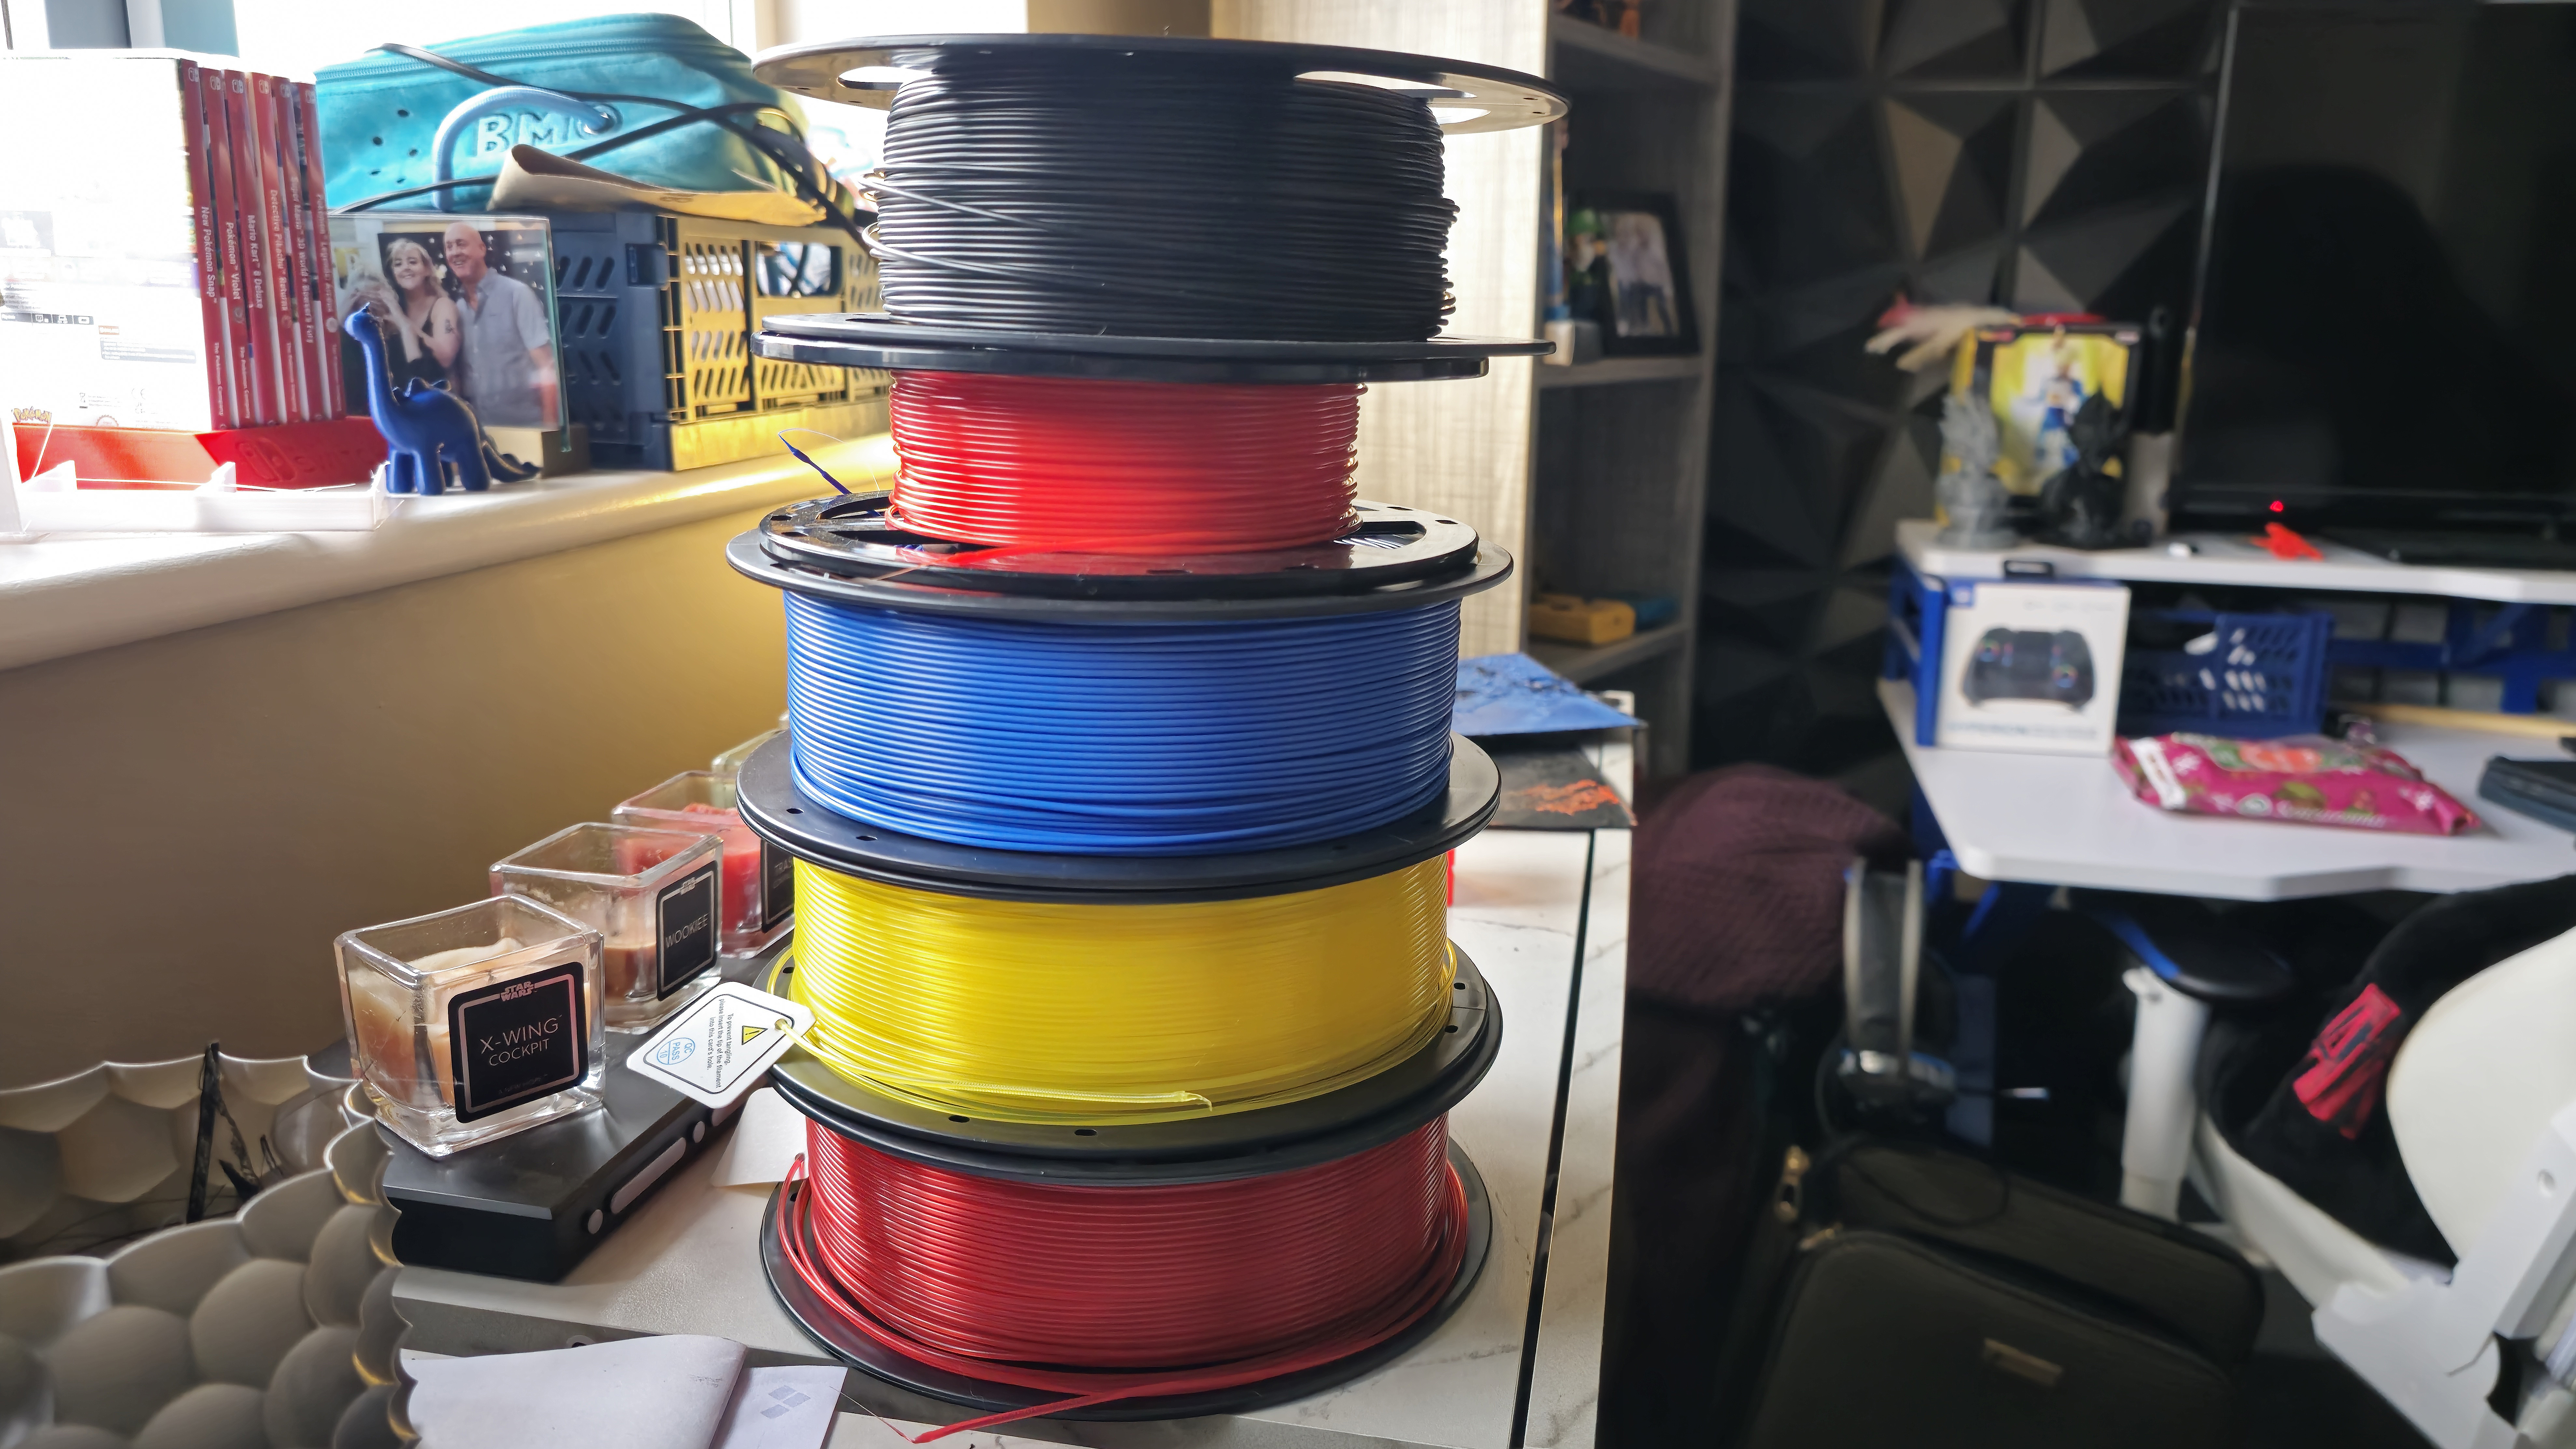
Step 5. Prep your filament
HueForge has a filament library equipped with the correct TD levels for specific brands like Bambu, Polymaker, and SUNLU to name a few. If you know the TD for your filament you can import this into HueForge. Steve ensures me that understanding the TD of your filament is super important for a successful print.
"It's really important because if you don't know the TD of your filament, then this prediction is not going to be right. A lot of times these days I stack two layers of colour, one with a higher TD and one with a lower TD to get the saturation that I want, but also the blending from the black into the colour."
Step 6. Start the print
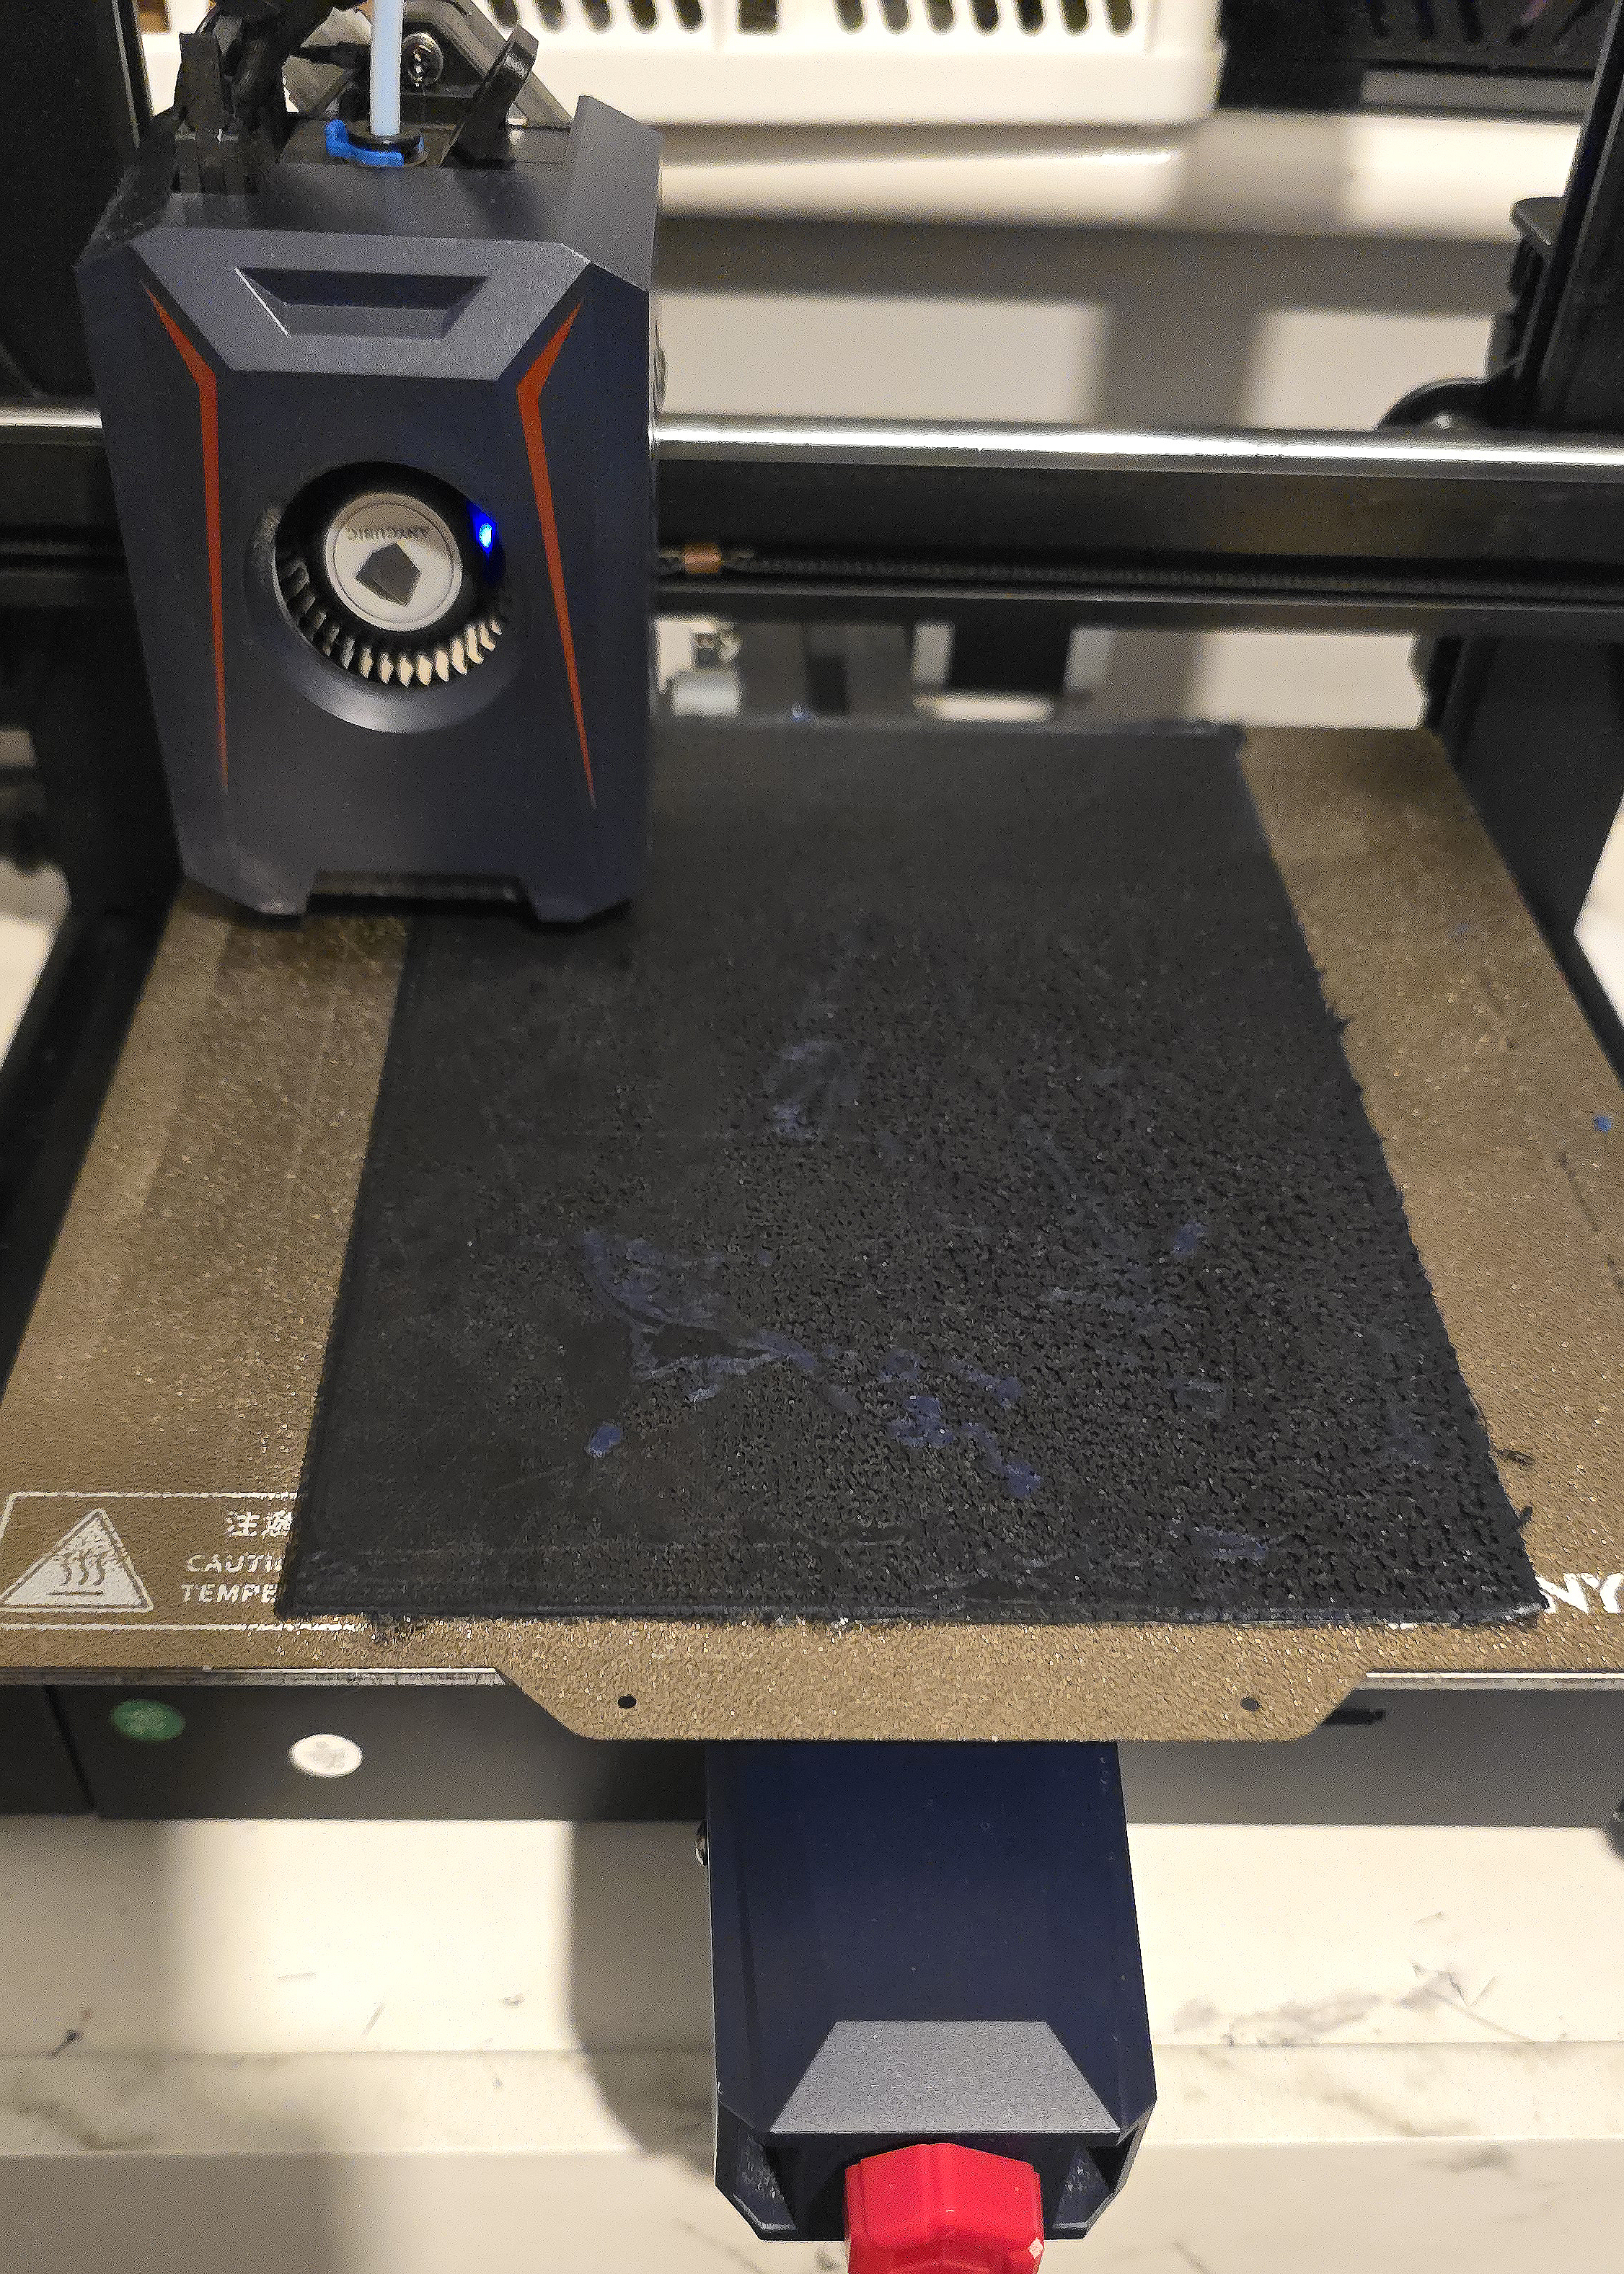
Anyone with a 3D printer will tell you that the first layer is make or break, so you really need to monitor your print once it starts. If you don't have the correct Z offset or bed adhesion then your whole print is in danger going forward. As Esther informed me:
"With HueForge, because you have such little room for error at 0.08mm height, if you over-extrude even a little bit over that height threshold, then the next time the nozzle passes, it's going to bump it and it's gonna tear it and dig into the print. So those math classes are really important to take note of."
7. You did it!
If all goes according to plan at this point, you should have a HueForge print that's in one piece and stitched together nicely with a blend of vibrant colours. Great job!
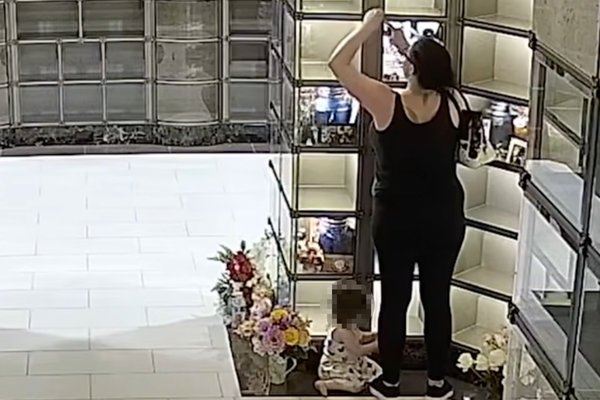
If you're feeling confident about HueForging now, you should attempt one of Esther's models, like her hugely popular Millennium Falcon sticking out of a portal. This was actually a happy accident, as she tells me:
"I looked up the Falcon and then I printed it. And because it printed vertically for some reason, it didn't finish properly and was messed up halfway. I was like 'Damn it. What am I gonna do with this half of a Millennium Falcon?' My sister was like 'Your Millennium Falcon went through a portal, and the portal closed, and it cut it in half'. She's totally not into anything sci-fi and was just being funny. But I thought, wait a second, we can sell this! I couldn't make it to hyperspace. That's what happens in Star Wars, so then I found this background that was perfect for HueForge."
Looking for that extra finish? Try printing a HueForge frame or picture stand to go with your new masterpiece.
Troubleshooting
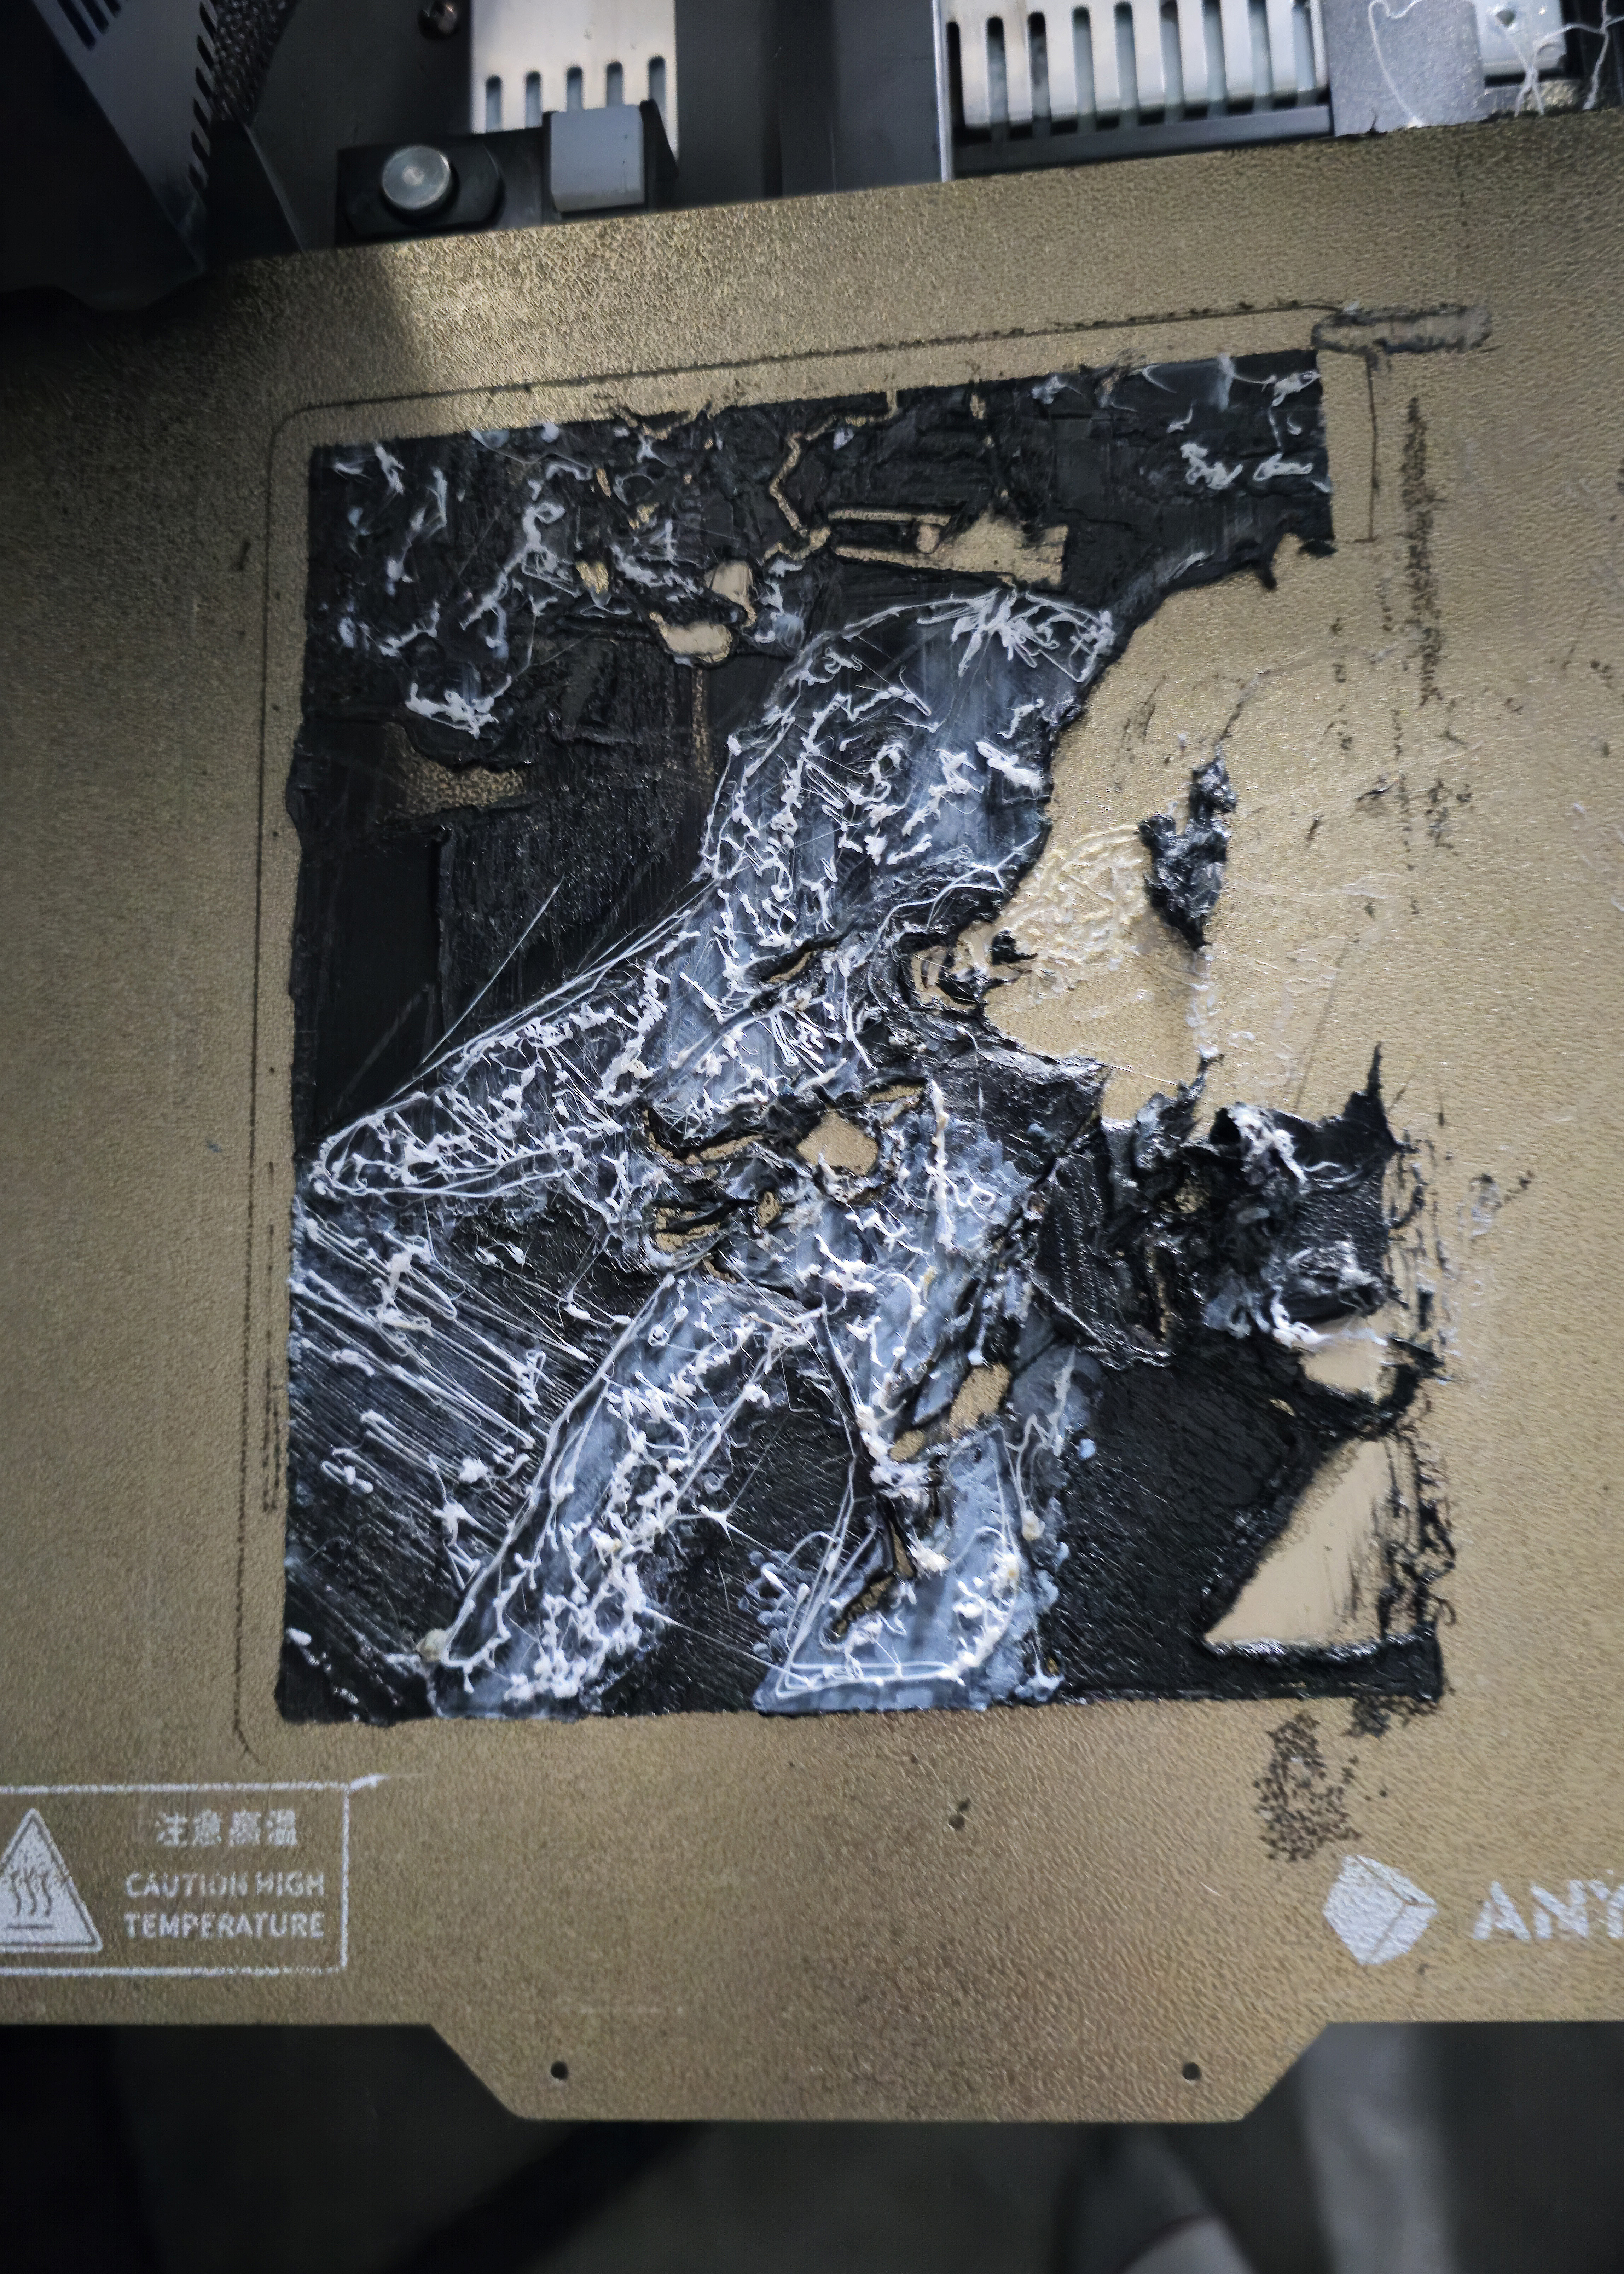
Other than not being able to initiate the colour change Marlin M600 command, additional setbacks I faced when making a HueForge were stringing, lack of bed adhesion, strange waves in the first layer of the print despite adjusting my Z offset, and what I think may have been a wet filament issue. Here are the fixes I found.
Stringing: The best way I found of fixing stringing was to simply reduce the temperature I was printing at from around 220c to 180c. As Steve helped me to understand, "When printing at very low layer heights, like 0.08mm or 0.04mm, you don't need as high of a temperature. You may need to be down in the 200-195 range where you might normally print at say 210. The stringing is almost certainly caused by it being too hot, because the filament is just sitting in the nozzle waiting to be melted. It's all melted and doesn't need to be that hot, so wispy stringing occurs".
Bed adhesion: The best solution I found to this was hairspray. Yes really. Using a small amount of hairspray on your print bed can really help get that first layer to stick, but be careful that you don't get any residue on other parts of your printer. You can also use a purple glue stick for this instead of hairspray, and try raising your bed temperature a little (to around 70c) and see if this helps too.
Wavy layers and ripples: I still don't have the exact solution to this, even after re-levelling my print bed with a spanner and raising the Z offset multiple times. My print is perfect in one corner and complete spaghetti in another. Steve suggested that I look into my extrusion multiplier and flow rate settings for a fix:
"One of the things that people don't get about first layer offset is that the first layer offset is created and corrected for the current flow rate out of your nozzle. So, distance and flow matter when you're doing that first layer offset. If your flow rate is too high, you can always make a perfect first layer by just backing off the first layer a little bit, right? But then when you start laying more layers on top of it, they're too close because you still have too much flow rate and it's moving up the exact increments. And so the solution is to drop this back."
"With 0.04mm layer heights, the extrusion gets messed up when you're going pretty fast. You have to slow everything down, or else. I think it's a math instability problem in slicing. But for this, generally ripples indicate that you have too much filament at that location, so I think what's happening is your flow rates are too high and you also see like nozzle scrapes and stuff in your print. A little bit of nozzle scrape is almost impossible to get rid of. It's hard without Z hopping, it's pretty much impossible to get rid of nozzle scraping entirely. Right. But yeah, I'm almost certain that the flow rate is the issue".
FAQS
How do I pause my printer to change filament?
There are several ways that this can be done, and it all depends on what type of 3D printer you have and the software it runs. A popular method of initiating a filament change is with the M600 GCode command. This tells the printer to stop at a certain layer, unload your filament, and then remain paused until you tell it to continue, and can be embedded into your Gcode using a notepad app or through your slicer.
Another code that can be used to get the job done is M0 S60, which works by telling your printer to pause for 60 seconds at a certain layer, and then the M108 command can be used to continue the print if you don't have a resume button on your LCD display (or it refuses to work). See this list of Marlin GCodes for more options.
Being able to pause your print is crucial because HueForge prints can take hours, and you can't sit around all day waiting for the exact layer to manually pause your print and change to a different colour, and if you miss this timeframe without any pauses in your Gcode then your HueForge will continue to print as a single-colour block.
You could also consider using OctoPrint if you own a Raspberry Pi, which works almost as a remote control that intercepts your commands to a 3D printer. "It runs the printer for you, and gives you a web interface for the printer," explains Steve.
How do I make my printer play a tune?
You'll need to carry out a few filament changes at specific layer heights when making a HueFforge, which your slicer along with HueForge can help you to determine. This can usually be done pretty easily, but the number one problem I had was not being able to use the colour change Marlin M600 command on my printer, as it would pause the print and unload my filament, but then there would be no option to restart the print on my digital display as it still said 'pause'.
When I pressed pause on the screen it would then freeze with 'waiting for cache command to complete' on the display, and I couldn't do anything other than turn the printer off at the switch and lose all my progress. Super frustrating!
The fix I found for this was to manually edit my Gcode with a notepad app on my desktop, and at specific layer heights as dictated by my slicer, input the code:
M300 S880 P300
M300 S440 P200
M300 S660 P250
M300 S880 P300
When inserted just before the layer changes, this code will tell your printer to play a sound to let you know that it's almost time. I used this as well as setting timers on my smart home devices and my phone to let me know when I needed to change colours. Not ideal, at all, but it worked!
Which slicer should I use for HueForging?
The slicer software that you use for preparing your HueForge is pretty important, as you need to be familiar with it and able to make adjustments such as the layer height and infill amount, tweak settings like your retraction distance, and adjust your flow rate or extrusion multiplier settings. I use a combination of Anycubic's slicer and Prusa slicer with my printer, but I've been told that Orca slicer and Cura are other excellent options.
Steve emphasised the importance of getting your flow rate right. "Lower layer heights are much more sensitive. So the lower your layer height is, the more your flow rate matters. And so you may very well need to tune your flow rate down or extrusion multiplier in slicer. I used Prusa slicer pretty much exclusively up until now. Up until I got my Bambus. I will say that Orca Slicer has some built in flow calibration that might be useful to you."