
Of all the production tropes that we associate with '90s-era rave, the most recognisable is the rave piano stab, a staccato piano sound layered into chords that can be heard in tracks like Baby D's Let Me Be Your Fantasy and Congress' 40 Miles.
Let's find out how you can recreate the '90s rave piano in your DAW.
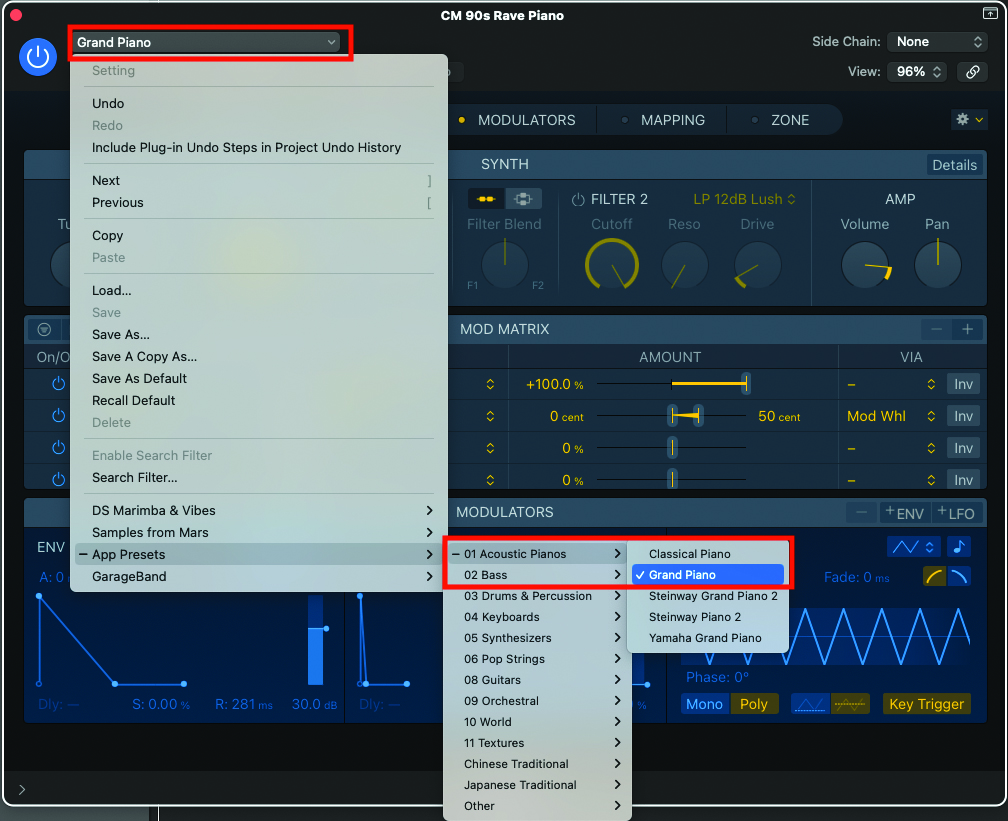
We’ll begin by choosing the most basic acoustic piano sound you have at your disposal. The original rave piano sound, made popular throughout the ’90s, was produced by the Korg M1. There were no round-robin samples available then, so using a basic one-shot sample would be an ideal starting point.

The EQ that you may apply will vary according to your initial piano sound. A good starting point will be to place a dip in the EQ, entered in the mid-range, at around 500Hz. This will take some of the mid-weight body from the piano sample.
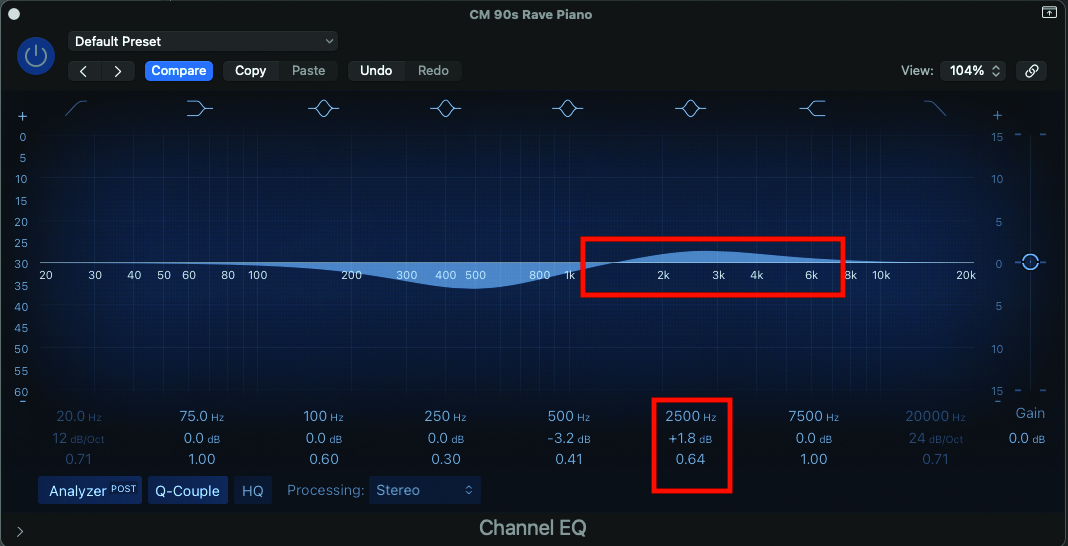
To aid mixing and add upper-band presence to your sound, try adding a little boost to the EQ, centred around 2500Hz. This will give the less high frequency register a needed lift, that will allow the piano to cut in the mix while also producing a slightly synthetic tone.
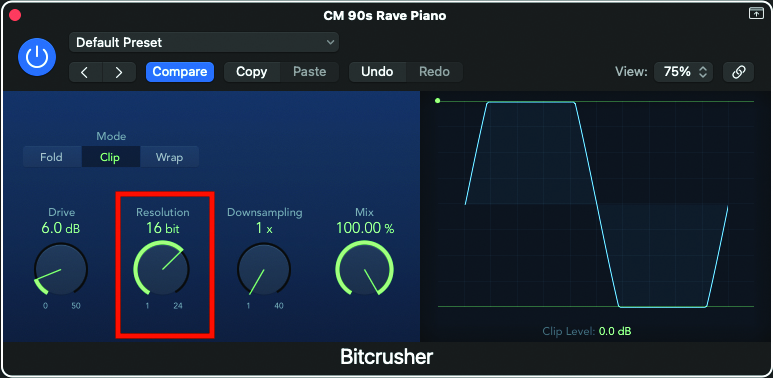
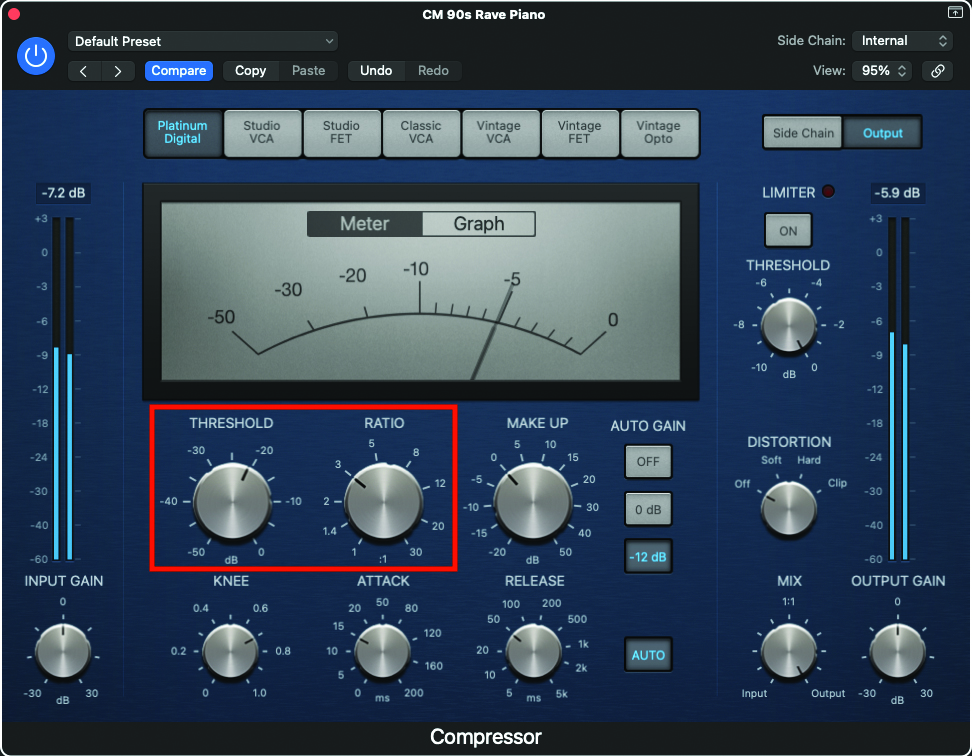
Many of the samples that we use today are far better than those from the ’90s. Applying a small amount of bit-crush distortion will reduce the quality of the sample, making the architecture more reminiscent of the original sound. Using your DAW’s onboard bit-crusher, reduce the bit rate resolution to 16, which was the bit-rate depth of CD.
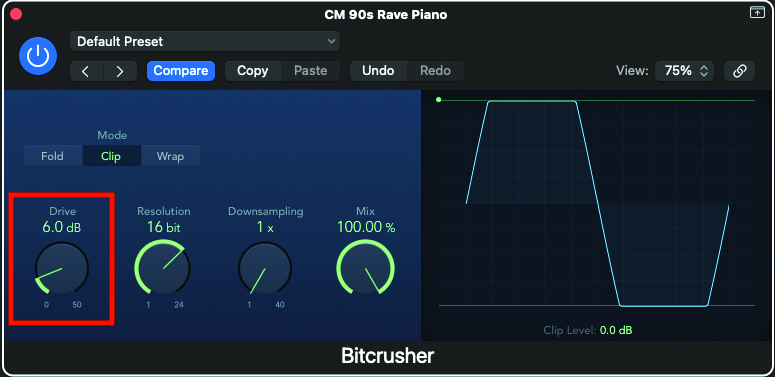
As bit-crushing tends to fall into the category of distortion, play around with the drive control, as it will also introduce frequency content, which will add to the general melée of the sound. Always be sure to play your sound while adjusting, until you hit the sweet spot.
As bit-crushing tends to fall into the category of distortion, play around with the drive control, as it will also introduce frequency content, which will add to the general melée of the sound. Always be sure to play your sound while adjusting, until you hit the sweet spot.
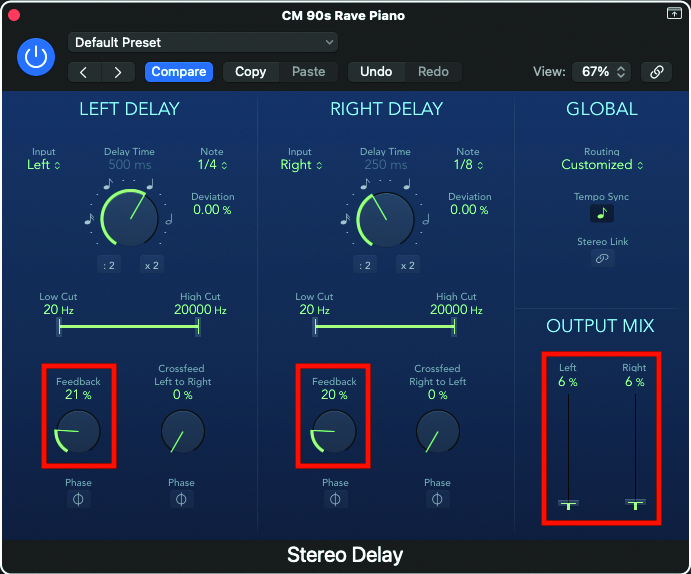
Applying a small amount of delay at this stage will really help engage the piano sound within a track. This should not be excessive, with a very low feedback setting, as well as a low wetness setting. Try different delays; a stereo delay could be particularly effective in this context.
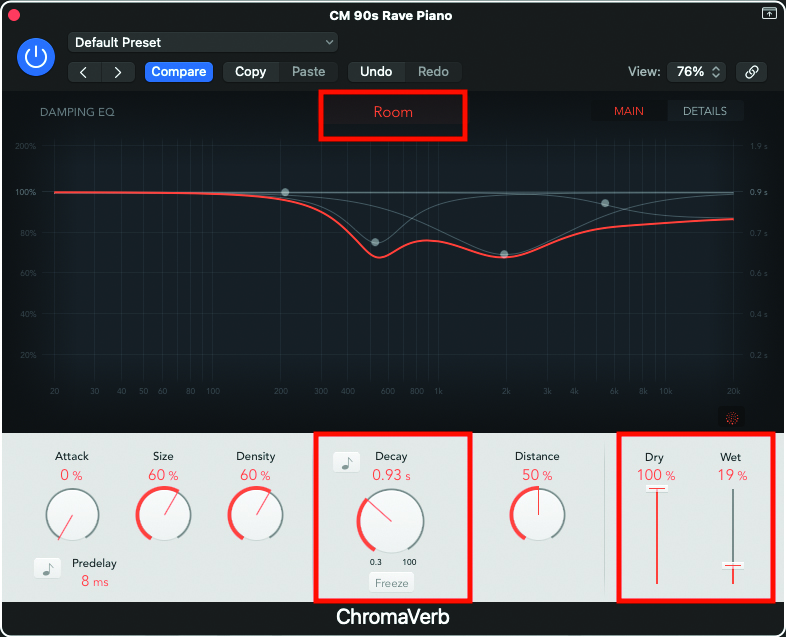
A small amount of reverb will also bring presence to the piano, and help it sit within the mix. We like the sound of a room reverb with a decay under one second, but with wetness set to under 20% versus the full dry signal.
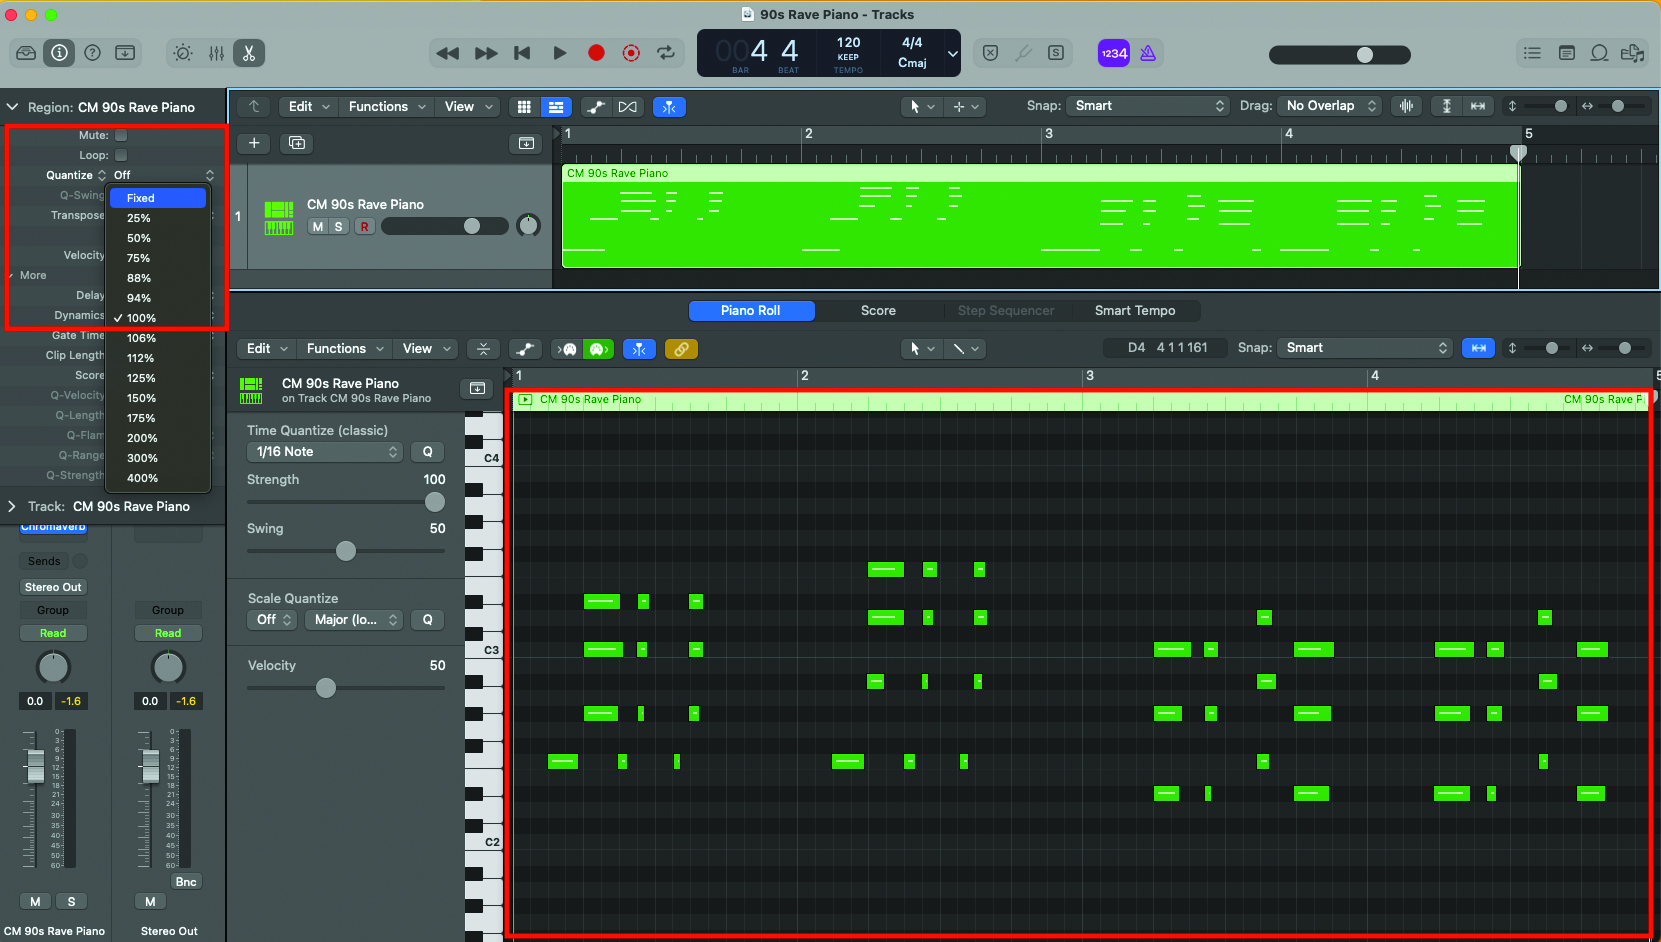
Now your sound is in place, you can begin to play and record your piano part. Another element which will add to the authenticity will be to fix the velocity of each note that you play. Most DAWs can apply this across a track object, so look at your settings for the easy option.