Congratulations: you’ve chosen to learn about the most powerful, free, desktop video editing software. Why is DaVinci Resolve free? Because it’s subsidised by all the hardware sales Blackmagic Design make - similar to what Apple do with Final Cut Pro, except you still have to pay for Final Cut Pro (even if it’s a one-time fee).
With DaVinci Resolve, you have in your hands a full featured application, with extensive tools to edit video, manipulate sound, apply effects, add titles, perform colour correction, and so much more. But where do you start?
How about a general overview, easing you into the basics, while familiarising yourself with the interface? If you haven’t got it already, head on over to Blackdesign Design and download version 19 for your system (Mac, Windows or Linux). Don’t get version 20 just yet: it’s still in beta. And follow along...
1. Start a new project
Launch Resolve, and you’ll be graced with a navigation page from which you can access projects on your computer, on your local network, or through Blackmagic Cloud (an online service which isn’t free). Click on ‘New Project’, lower right of the interface, give it a name, click on ‘Create’, and let’s get started.
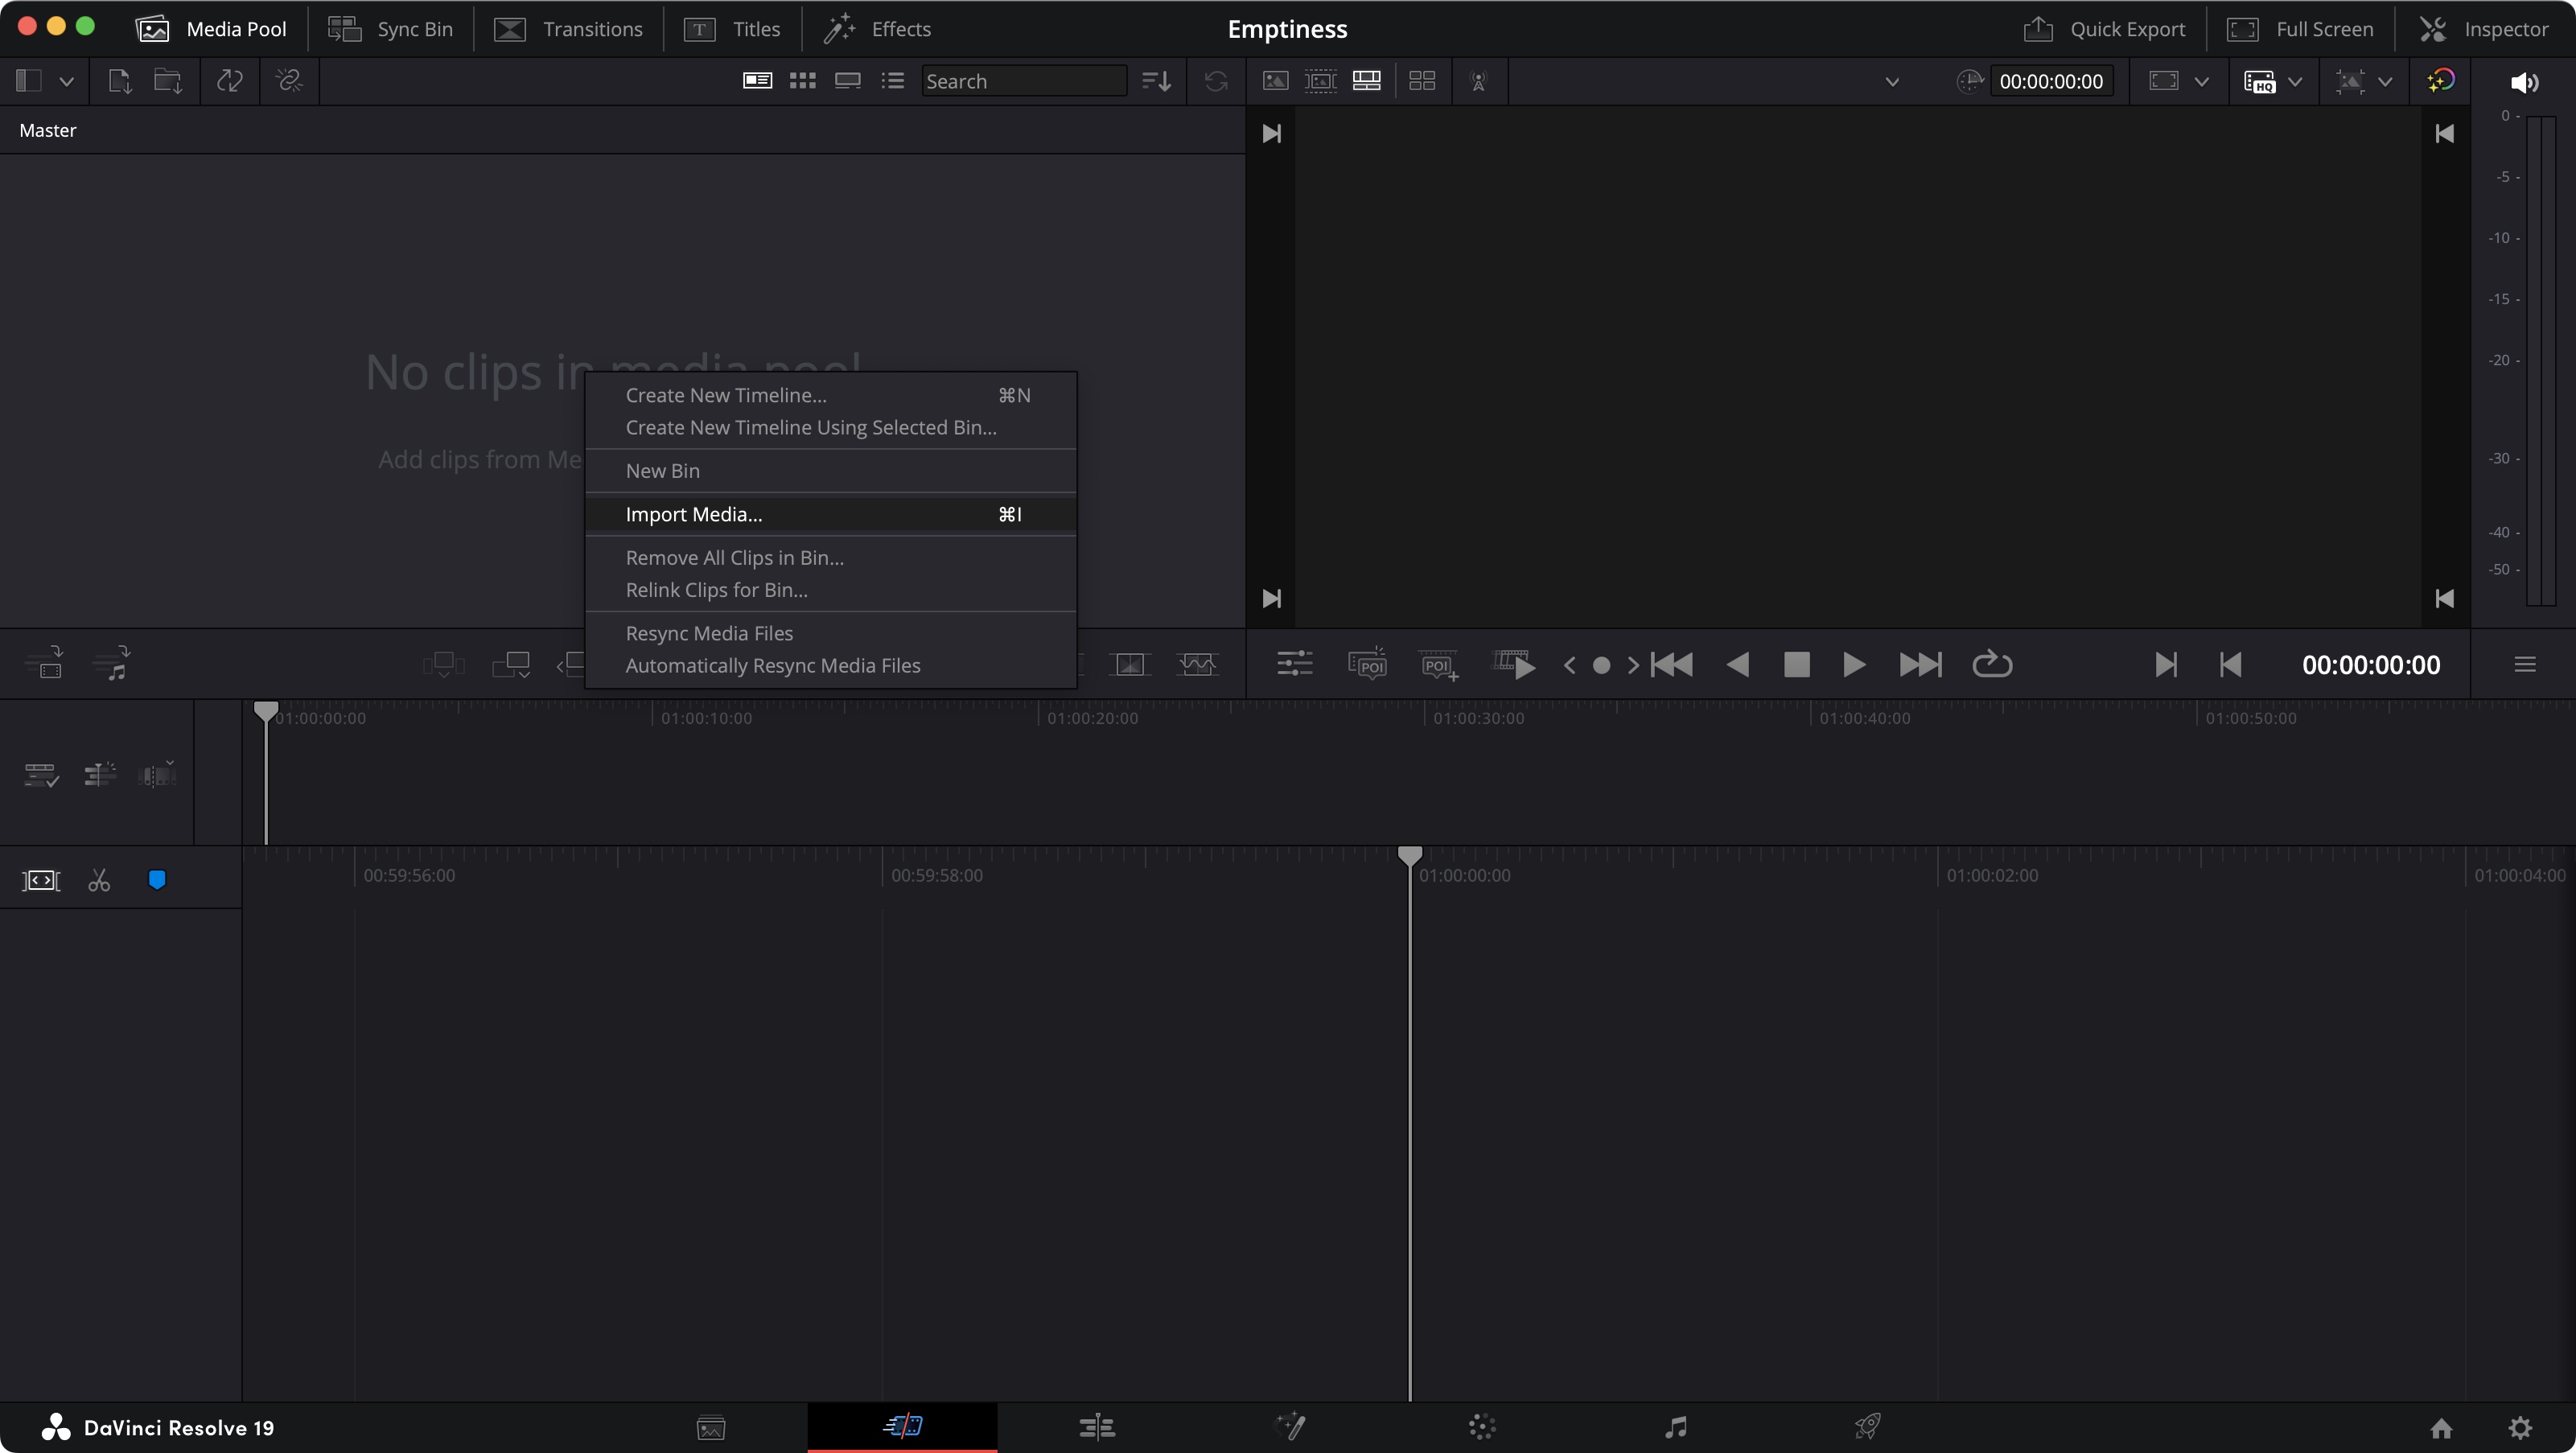
The next step is importing footage - can’t do anything without it. You can do this in various ways. For instance, right-click on the ‘No Clip in Media Pool’ section, select ‘Import Media’ from the menu, navigate through you file system and choose the ones you wish to use. Another way is to just drag those clips from your file system onto that section of the interface.
Depending on your clips’ settings, Resolve may ask you if you’d like to alter your sequence to match them, or keep the default dimensions. For the purposes of this exercise, if this happens, select ‘Change’.
2. First cut
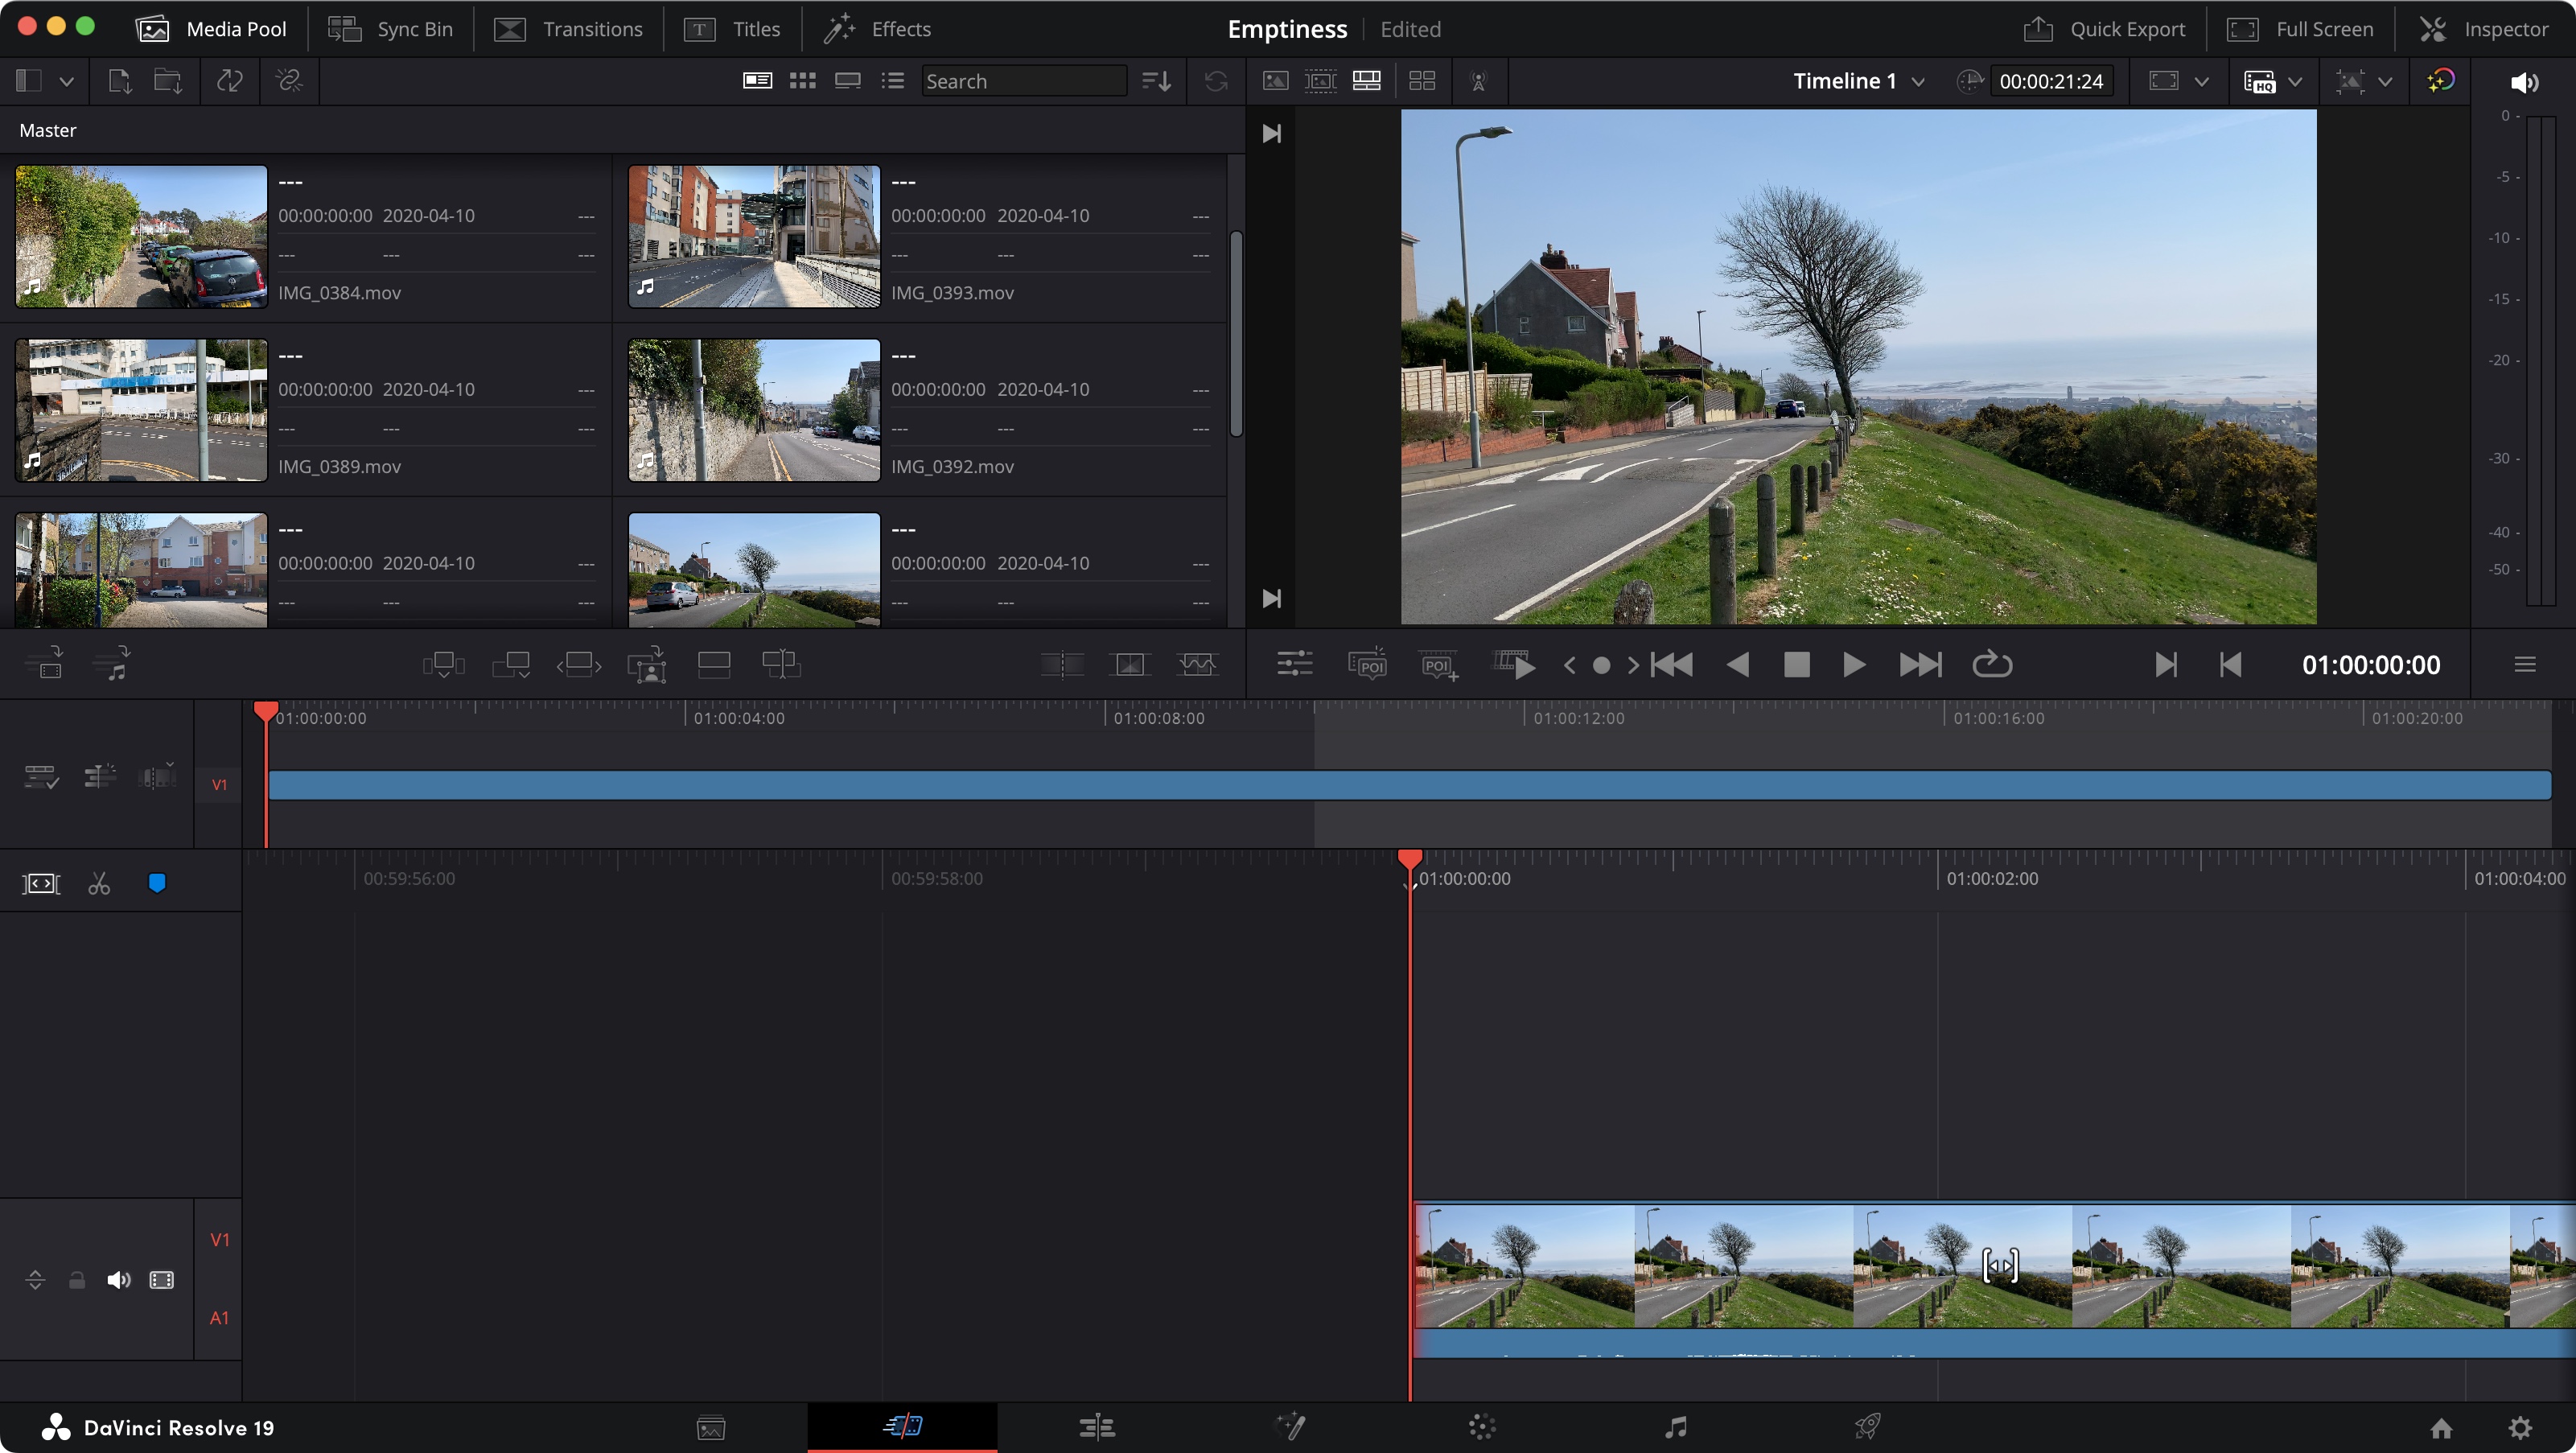
With your footage imported, you need to build your edit. Mouse over any of your clips’ thumbnails and move the cursor left and right. This skims through your footage through the thumbnail, and can help you find the right one section need quickly
Once you’ve found it, double click on the thumbnail, and that clip will appear in the Viewer section, top right of the interface. You’ll see an audio track beneath the visuals, representing the clip’s entire length, with a handle at either end. Drag those inwards. This selects the In and Out points for your clip, telling Resolve you only wish to use that portion of the clip. Once you’re happy, drag that clip either from the Media Pool, or from the Viewer, onto your Sequence (the bottom half of the interface).
3. Pages
Resolve has many workspaces, knows as Pages. Up to now you’ve been working in the ‘Cut’ Page, but although easy to work with, it has limitations. At the very bottom of the interface, is a row of icons. The second one from the left is highlighted - that’s the ‘Cut’ Page. Click on the icon to its right to move to the ‘Edit’ Page.
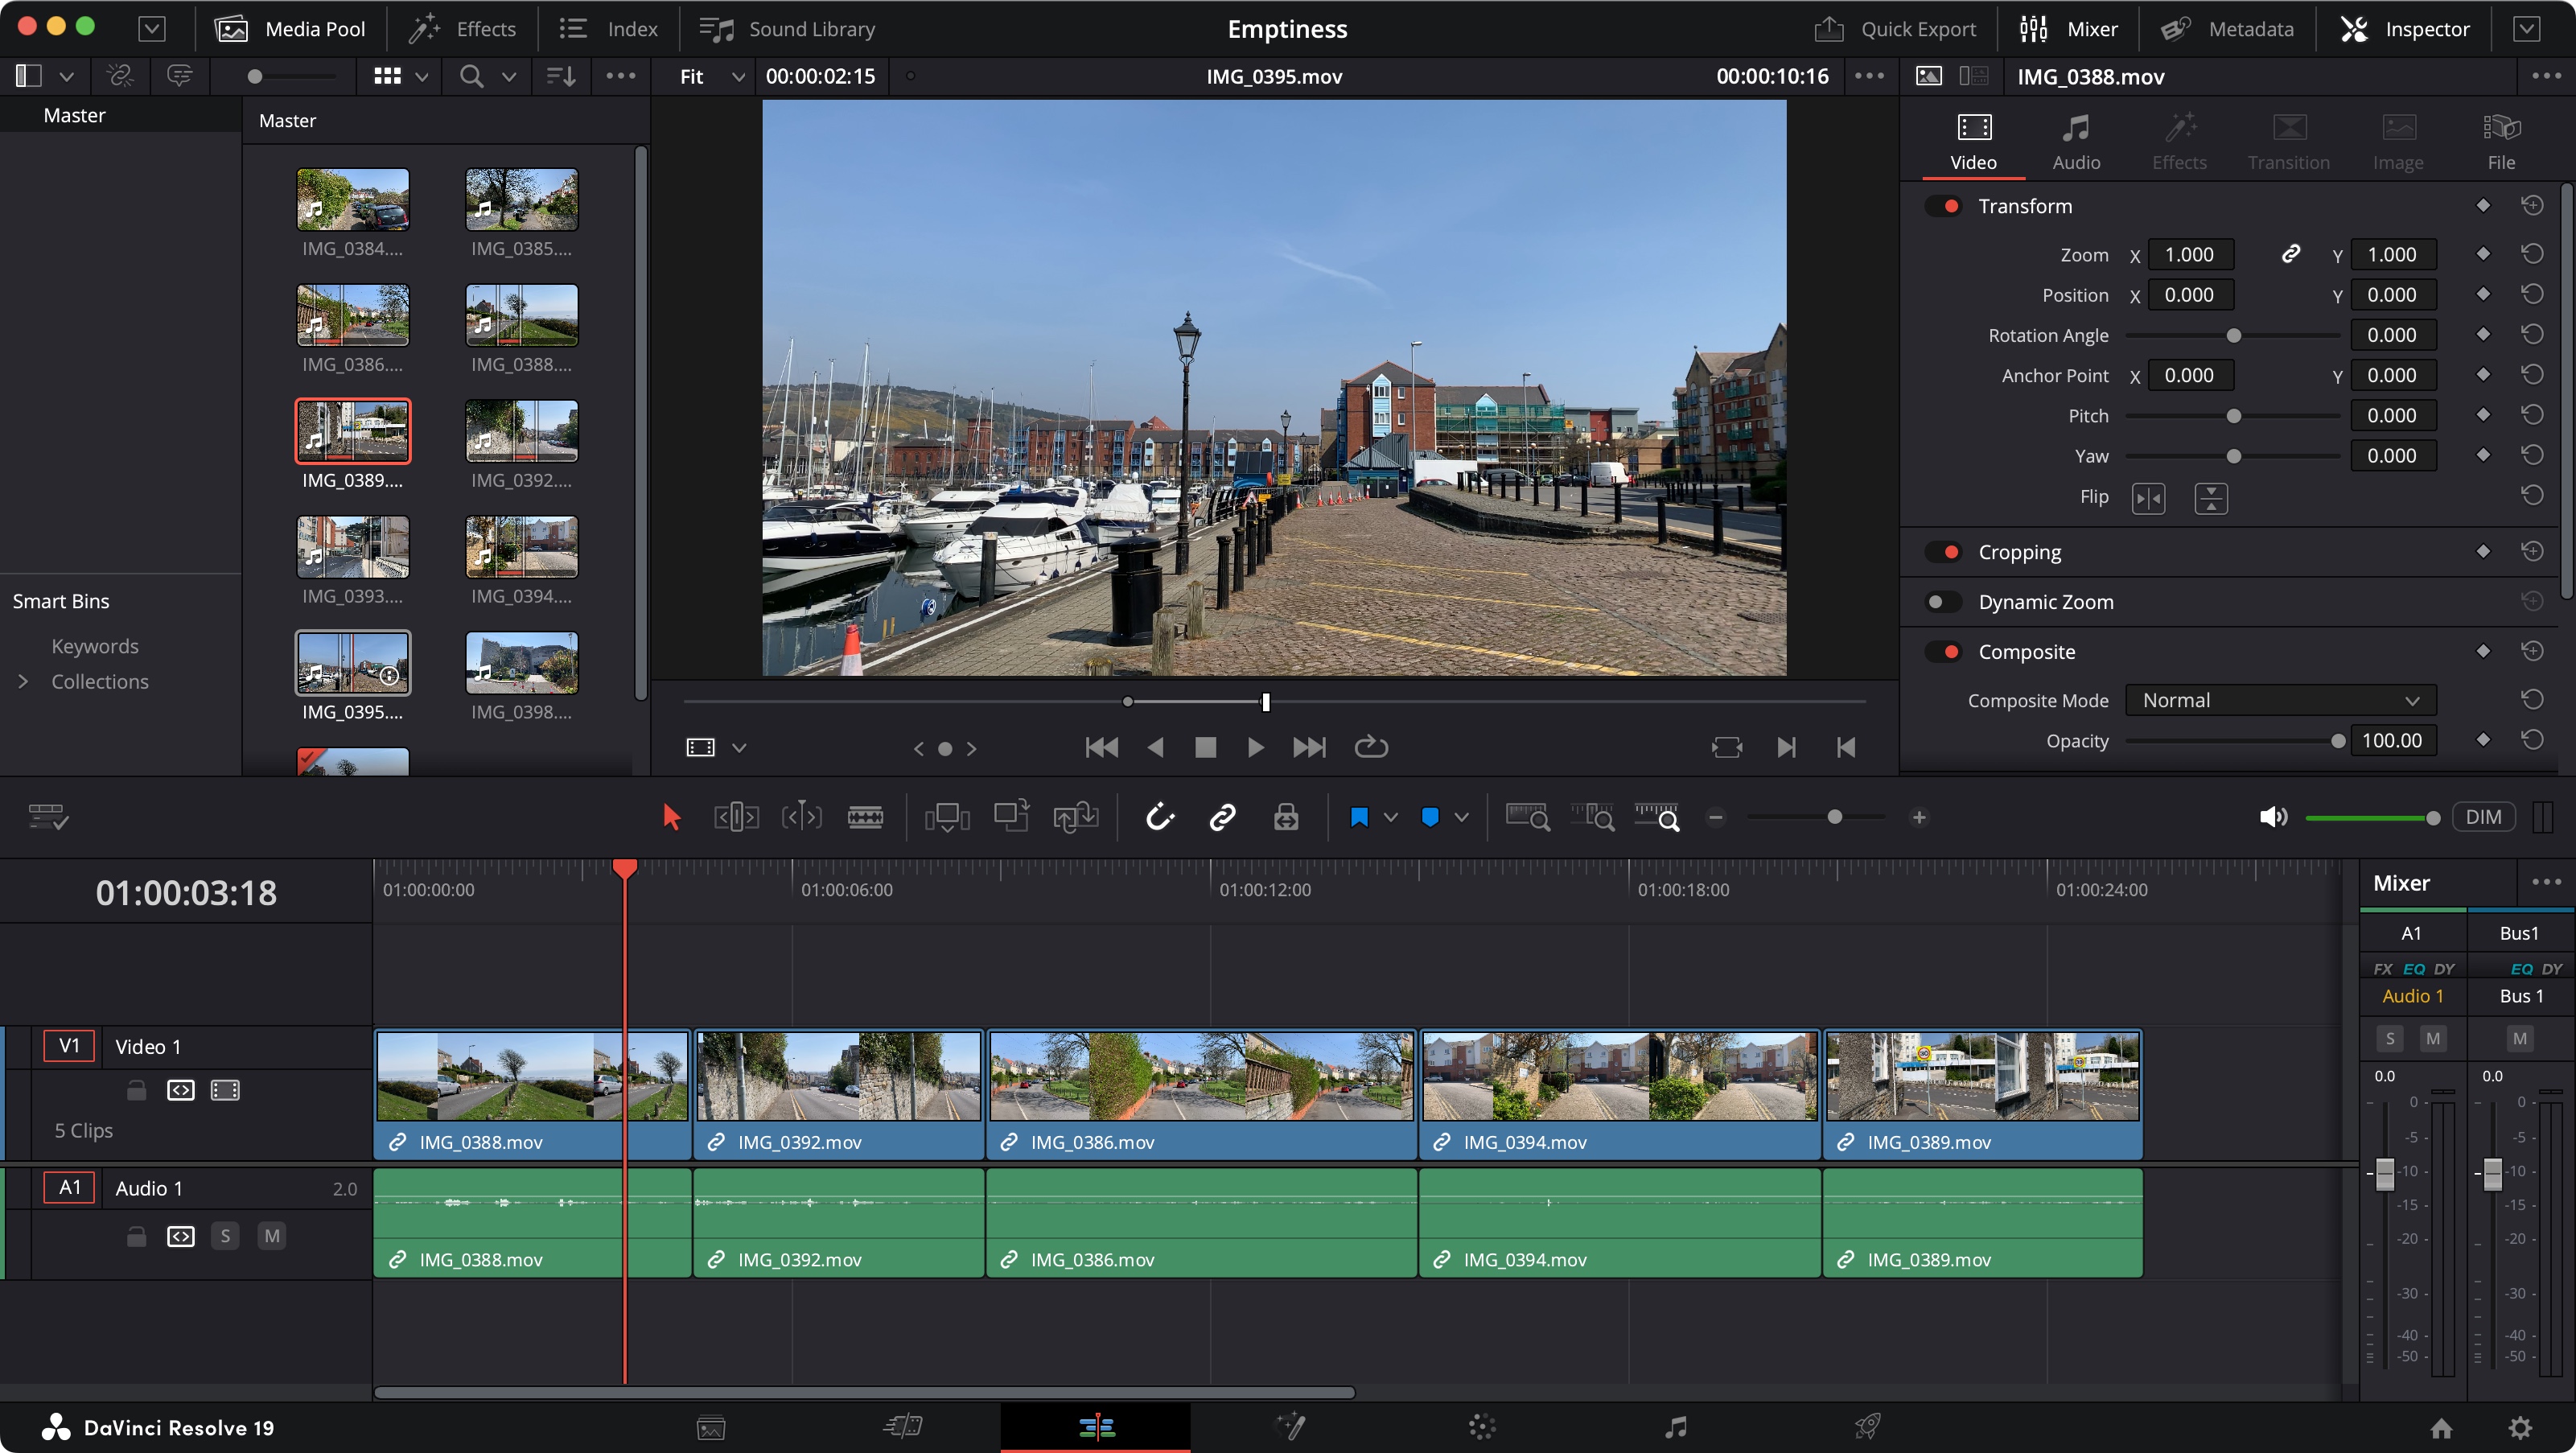
This is a more complicated interface but it has some crucial features, which for me, make it essential: the ability to zoom in and out of the timeline for one, enabling you to focus on a specific section of your project or see the whole edit in one go. Use Command-Plus or Command-Minus (replace Command with Ctrl for Windows users) to zoom in and out, and Shift-Z to resize the entire timeline to fit the available space.
Top right should be your clips. If you can’t see them, click on the ‘Media Pool’ tab. You can still mouse over to preview each clip, but now you can type ‘i’ or ‘o’ to set in and out points without having to open it in the Viewer. Much more convenient.
4. Adding titles
If you’ve followed the screenshots, you’ll have seen I’ve put the clips one after the other in the Sequence, but Resolve is much more flexible than that, as it allows you to work with multiple layers. You can use this ability to add any clip on different layers, creating a more complex and flexible edit, and you can take advantage of that capability to add a title over your clips.
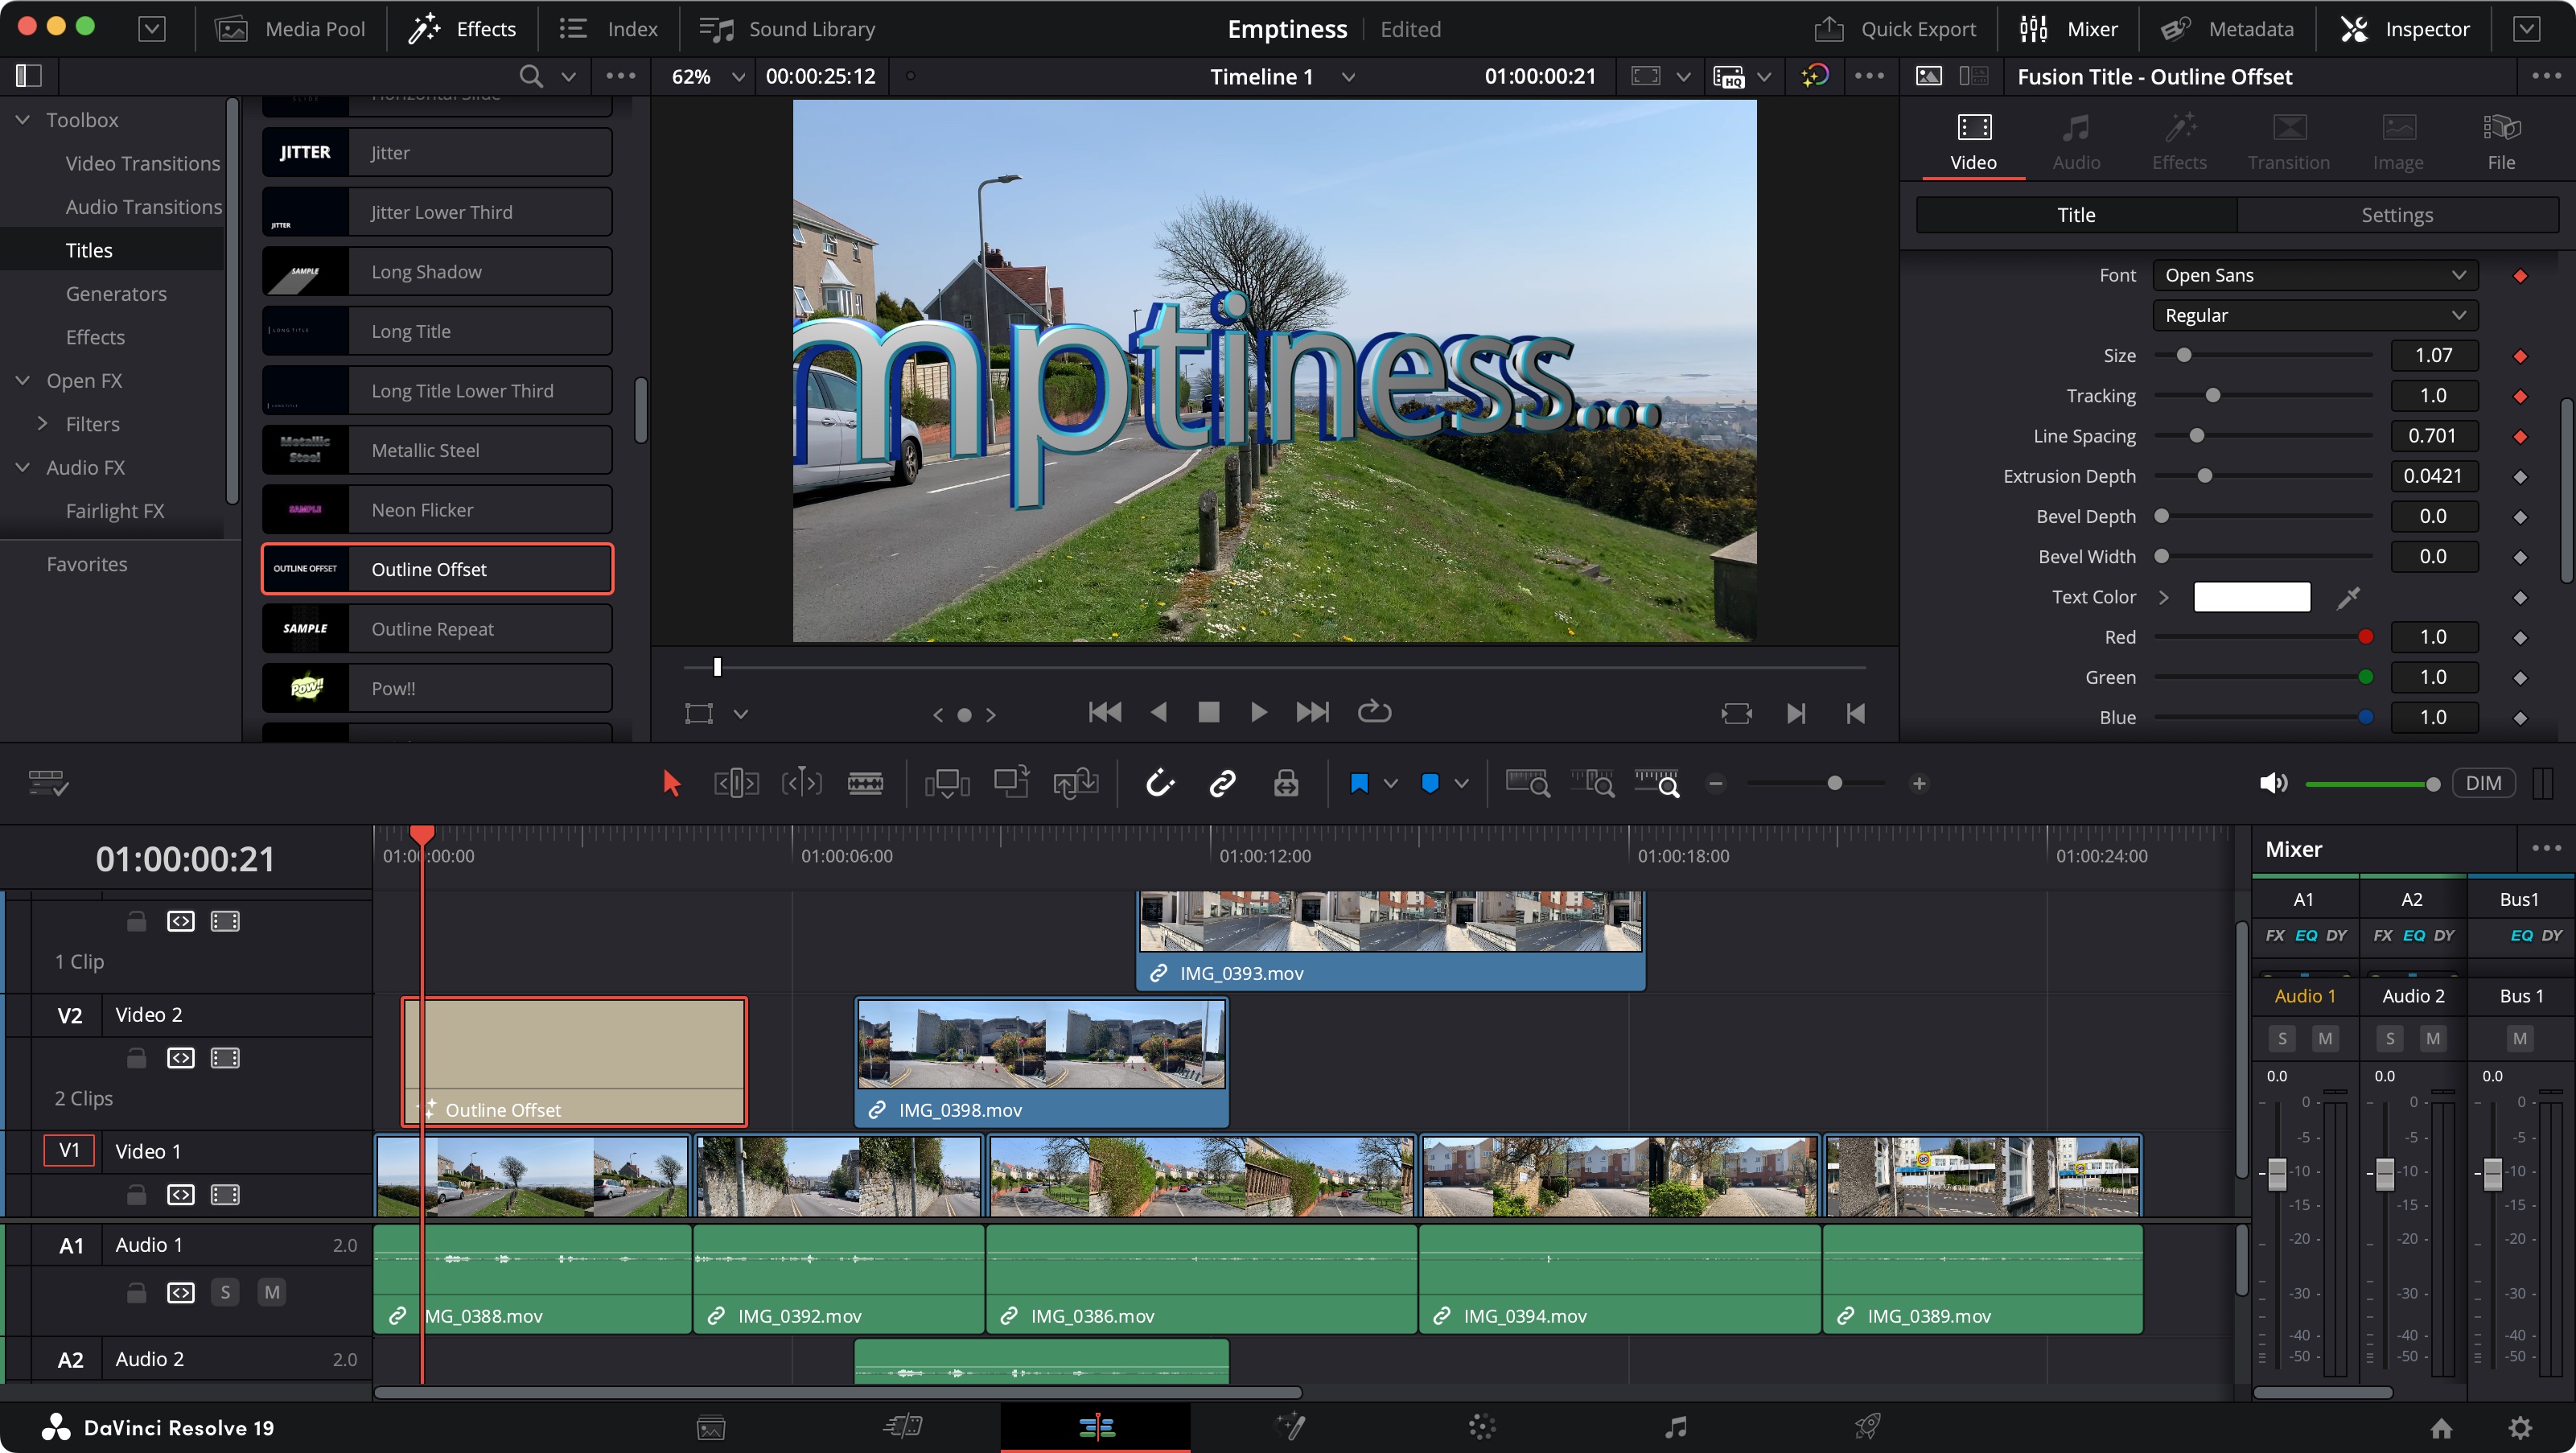
To do this, start by clicking on the ‘Effects’ tab, to the right of the ‘Media Pool’ tab. Your display of clips is replaced by a slew of effects, including Titles (which should be selected by default, but if it isn’t, click on it on the sidebar to the left).
Mouse over all available titles until you find the one you like, then drag it onto the Sequence. To change the wording, make sure the title you just added to the Sequence is selected, and go to the Inspector section - top right of the interface. The main text controls are there, which is where you get to customise the wording, but also change every aspect of the font you’re using.
5. Applying transitions
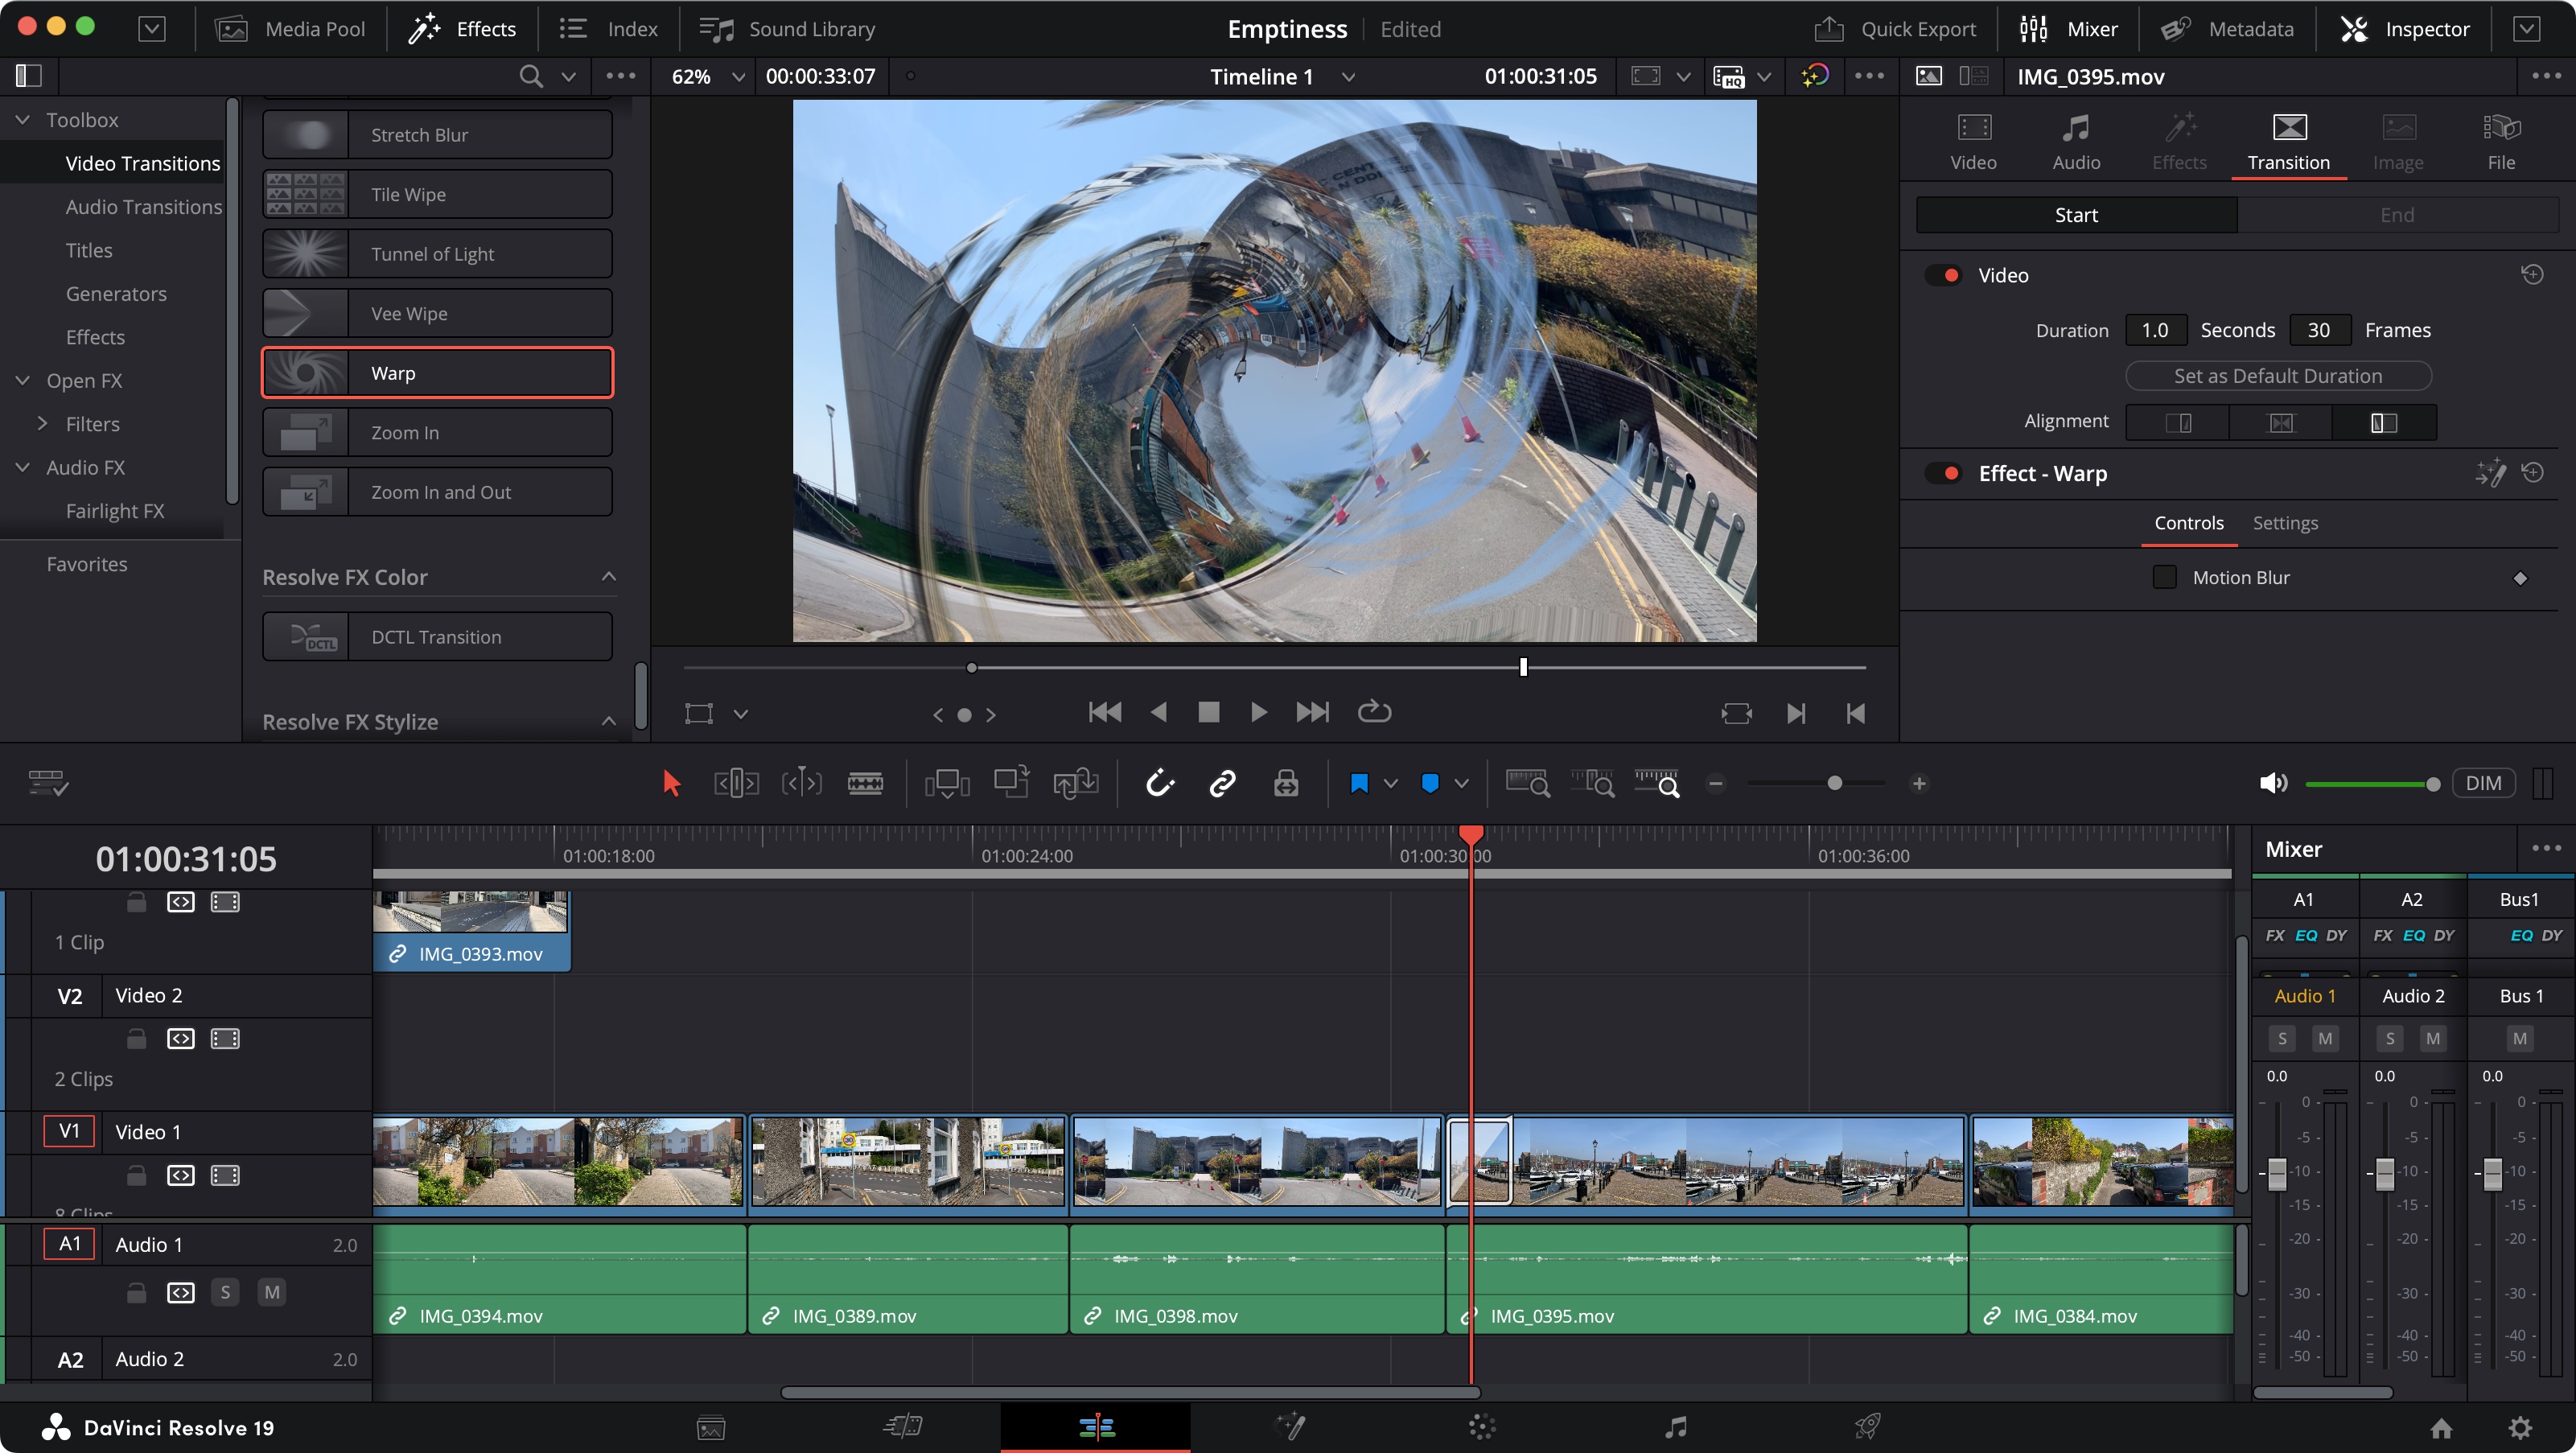
Another important aspect of editing is the transitions between clips. Since we’re already in the ‘Effects’ tab, let’s take a look at those. They’re stored just above the Titles in the sidebar. Click on ‘Video Transitions’ and you’ll see a long list of them.
As always, mouse left and right over any of them to see a preview of the transition in question. Once you’ve found the one you’d like to use, drag it from there, in between two clips in the timeline. As you do, you’ll notice you have a choice of where to place it: with the edit point at the centre, with the effect starting on said edit point, or ending on it. Let go of the mouse button over the one you wish.
The Inspector has a ‘Transition’ tab. Click on it to see and alter the various available parameters.
6. Deliver
Your project should be coming along nicely, and I’ve got just enough time to show you how to share the finished product with others.
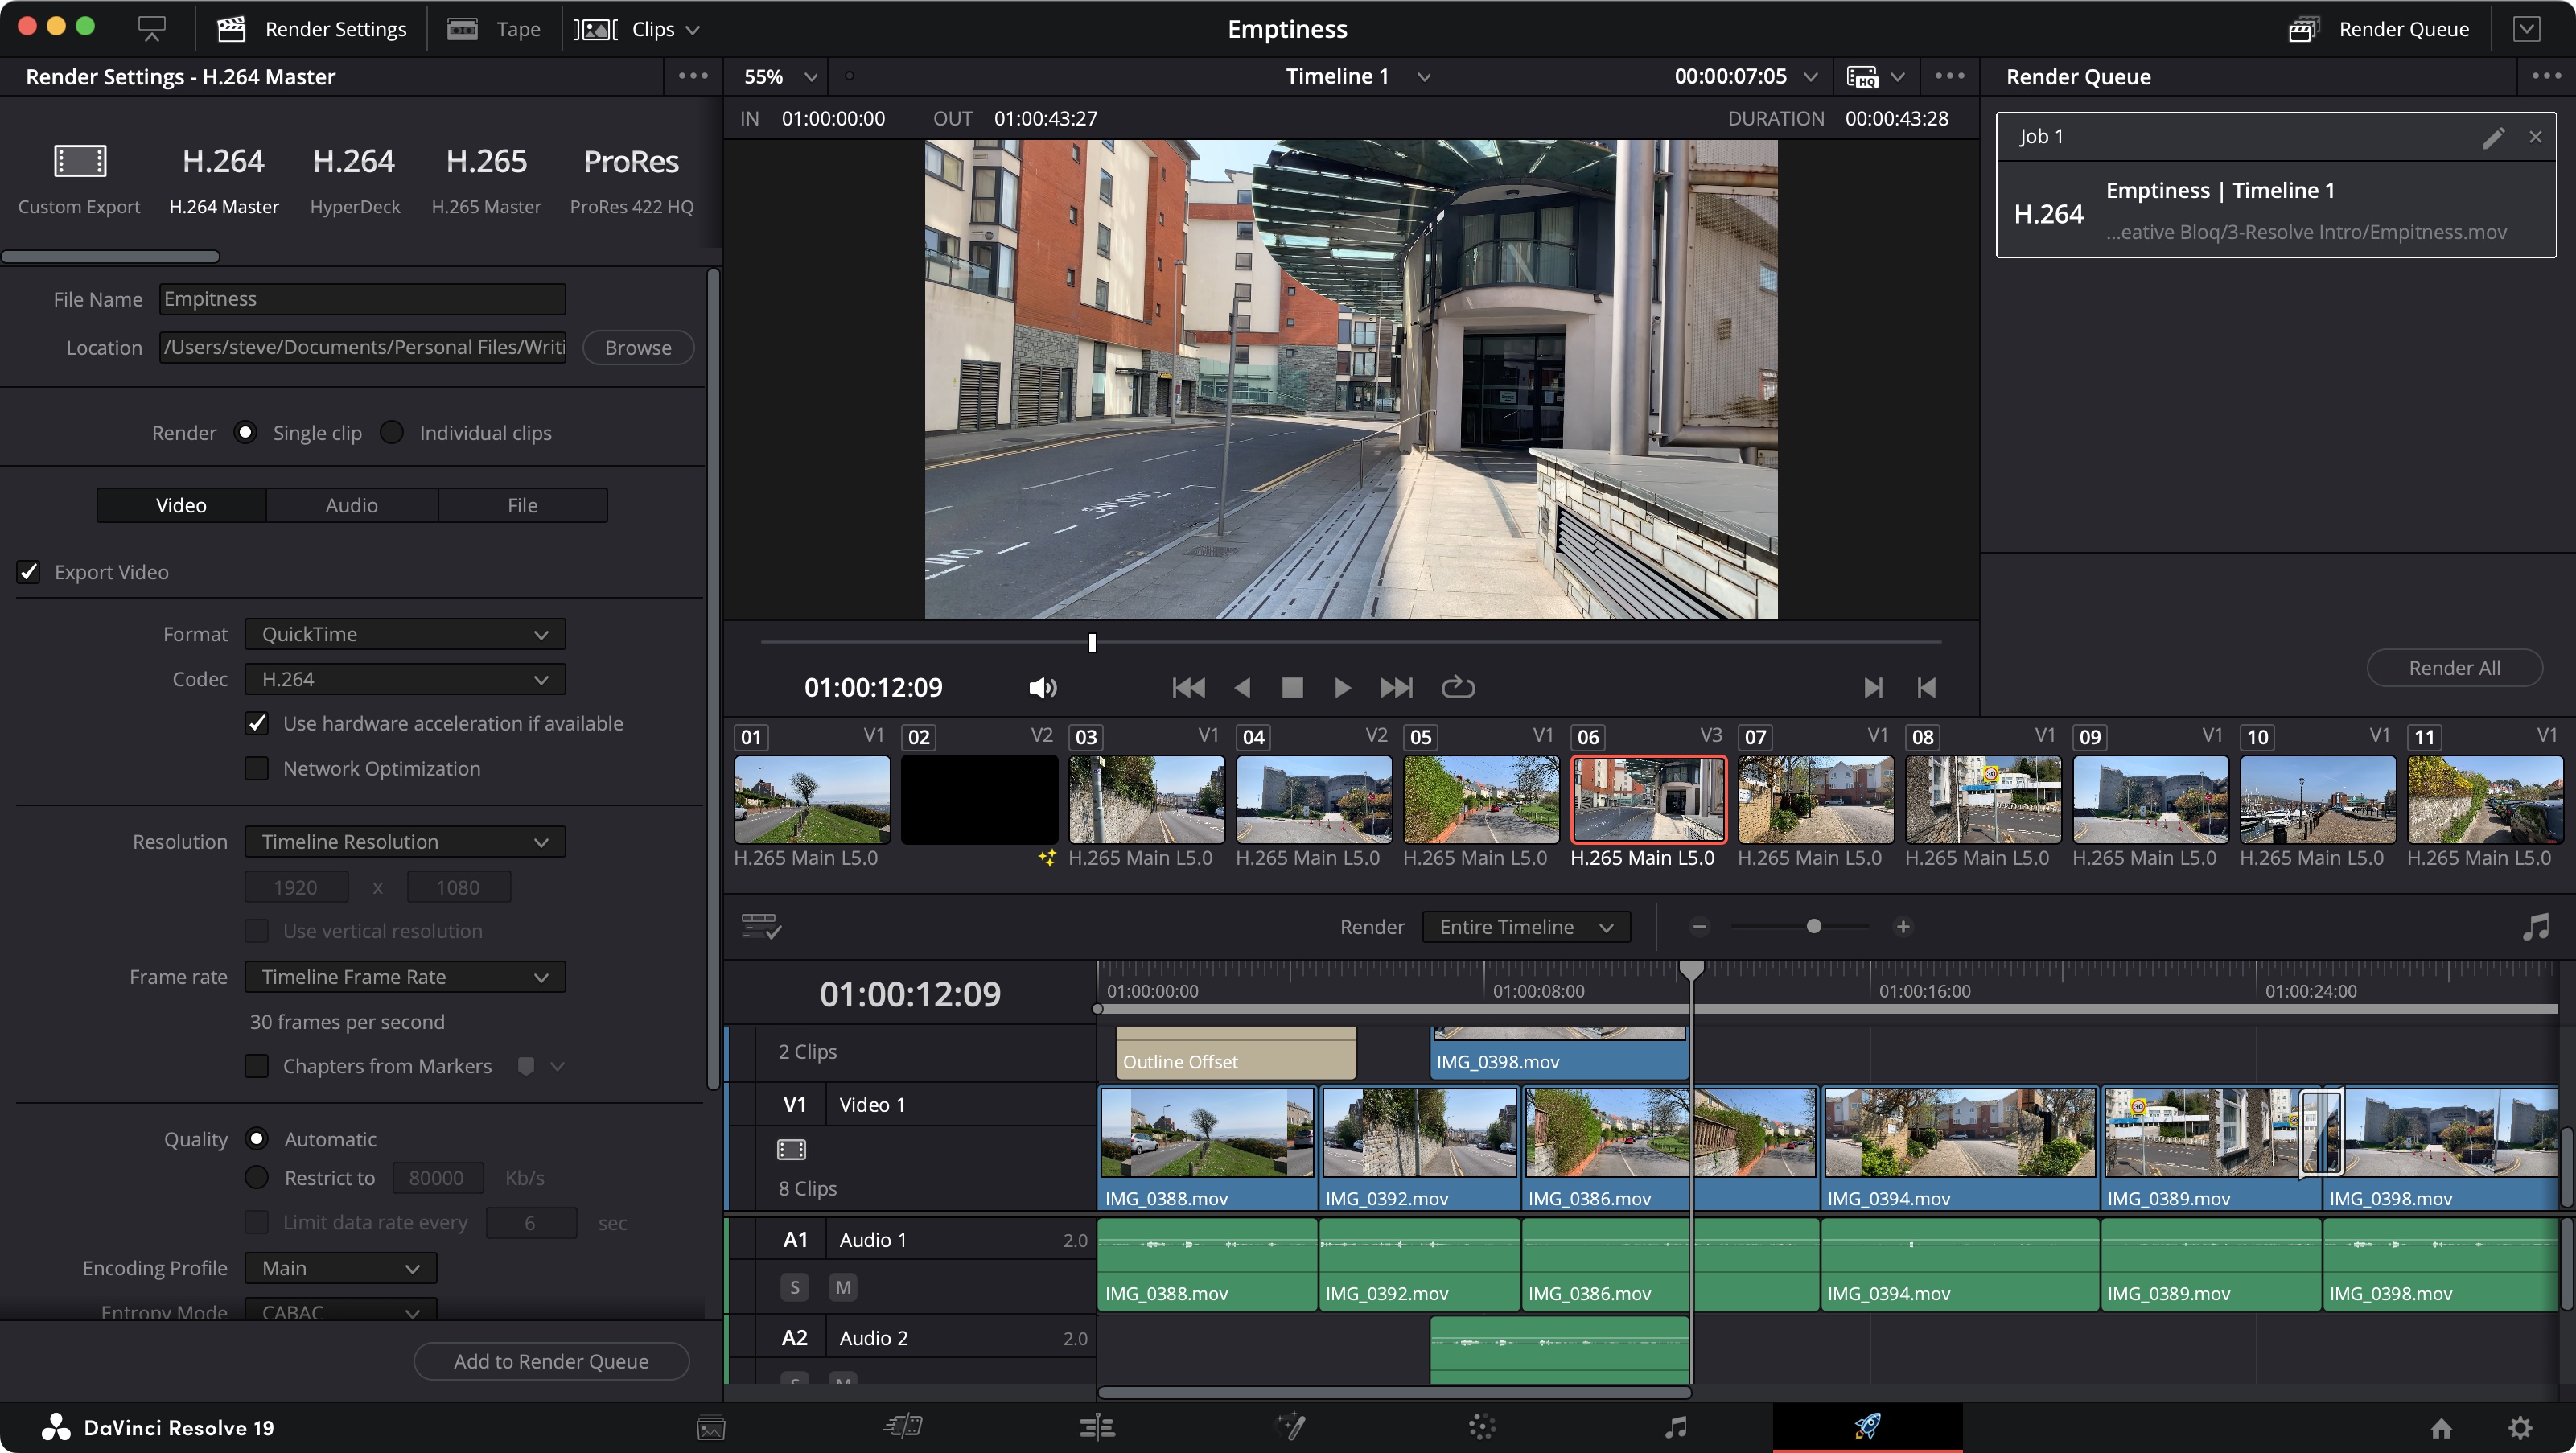
Check the bottom of the interface where all the various Pages’ icons are displayed. Click on the last one, shaped like a rocket. That’s the ‘Deliver’ Page.
Now this might well look intimidating, with a slew of options you might not be too certain about. But let’s keep it simple - this is an introduction to the application, after all! To the left is your export sidebar, with a series of tabs at the top. You might actually be on ‘Custom Export’ by default, but the simplest option you could choose is ‘H.264 Master’ (most if not all modern videos are rendered using the H.264 codec).
Give your export a name, set a location where to save the file, and click on ‘Add to Render Queue’ at the bottom of that sidebar. Then, go top right to the Render Queue section, and click on the ‘Render All’ button.
While Resolve works on the export, you can’t do any other work in the application, not even tweak a different project. You have to wait until the export is done.