It's an exciting time when you're planning how to design a small garden. At the same time, there is also a lot of pressure to make good decisions when you don't have the luxury of a large space.
Trying to squeeze all of your small garden ideas in to limited square footage can be a challenge. Yet, as any designer will attest, it's these constraints that can push you to be more creative.
So, where is the best place to start with your plans? We've asked award-winning garden designers how they approach a project and what they recommend when designing a small garden. Discover what they do and how you can do it too, to create a pleasingly petite outside space that works for you.
Step 1: Plan Out What You Want for Your Space
In a small garden, maximizing the space hinges on knowing what you want to use it for. Do you envisage long summer evenings in the garden entertaining friends, or is it more important for your kids to have a play area? Do you enjoy pottering around pruning plants and tackling gardening jobs, or would you prefer a low-maintenance option?
"Considering what you want in the garden and how you want to use it, it will define the areas you create," says garden designer Kate Gould, founder of Kate Gould Gardens. "Would you prefer to dine outside or just sit on sofas in the evening. Are furnishings the star of the show or do you want plants to take centre stage? Create a wish list and be realistic about what you can fit into the space."
"With a small garden you often can't have everything that you want, so it’s important to think about your priorities," says Sarah Kay, founder, Sarah Kay Garden Design "Whether it's for entertaining, family dining, sunbathing, food growing or child’s play, aim to limit your wish list to the essential and think about your garden long term.
"For example, children's needs change quickly, so designing your garden specifically for toddlers will not be future-proof. A good designer will look at creating multi-use areas, for example, a bench which doubles as storage or a raised bed which can serve as extra seating."
Step 2: Think About Where Your Garden Faces
Whether your garden faces north, south, east or west will have a bearing on how you can use it and what you can plant where. Even with a sunny south-facing garden, there may be neighboring buildings or tall trees that surround your space and create areas that will require partial shade plants. Understanding this will guide you towards a workable layout and planting scheme.
"Consider where the sun is at various times of the day and at different times of year, as this can vary quite significantly," advises Sarah. "Do you enjoy sitting in the sun? Even if you do, would you prefer to eat in the shade?
"Placing your seating or dining area in the sun, may mean less sunshine for planting areas, which will dictate the range of plants that will thrive there. A seating area in morning or evening sun for a morning coffee or evening drinks perch is a frequent request."
Step 3: It's Time to Do a Site Survey and Make a Plan
If you were planning a new kitchen layout, you wouldn't buy any furniture before measuring the space and making a floorplan. It's the same with a small garden. Knowing how much square footage you have to work with is essential. Also consider access points and whether large items and gardening materials will need to be carried through your home, especially if you live in an apartment or terrace.
"Small gardens can be really challenging spaces and require a lot of work on paper to get proportions correct," says Kate. "Undertaking a full survey is vital in any space but especially so in small gardens where access may prove problematic. Measure your doorways carefully on the internal side and then research planters and furniture to make sure all will fit through, before you buy anything."
"Planning is key and by mapping out each stage you reduce the risk of deviating from your original vision," says garden designer, Manoj Malde, author, Your Outdoor Room, who explains the importance of the site survey and site analysis.
"After surveying the site, you mark your measurements and findings on a plan. This could include damp or dry areas, shadows from trees and buildings, the north point, drainage issues, and any other details that could impact the design," says Manoj, who describes several more plans that a professional garden designer would create.
These include a 'concept plan', showing where trees, seating and other elements might be located, then a 'master plan' with all the details, including boundary lines, paving and pathways etc, drawn to scale and labelled correctly with dimensions.
In Your Outdoor Room, Manoj also suggests a 'level plan', showing existing and new levels, if your space isn't flat; a 'setting out plan', for marking out the garden; a 'planting plan', to show the eventual spread of the plant and a 'lighting plan', to indicate where any light fittings will go.
"The number of plans may sound excessive, but each of the layers plays a crucial role in the final design," he says.
Step 4: Have a Budget in Place
It's easy to get carried away buying beautiful things, whether its stone slabs, timber fencing, outdoor furniture or plenty of plants, so before you begin, work out how much you have to spend and allocate it accordingly. Also, decide which tasks you intend to do yourself and which require the skills of a professional, or additional labour. Remember, stone slabs, bags of gravel etc are heavy materials to move around.
"It's important to have an approximate budget in mind, so that you do not set your heart on a spectacular garden that will end up blowing the bank," says Manoj. "This will help you make decisions about the materials, plants and structures you can afford, but remember that sometimes a limited budget can bring innovation and creativity to the design, while ensuring your focus on what is essential.
"A new garden does not have to be built and planted in one go. Knowing your budget can help you plan in phases. First put the bones of your garden into place: the hardscaped areas, any bases for structures, electrical cables, and structural planting such as trees and shrubs.
"The second phase can include the installation of structures such as sheds, a garden studio, arches, pergolas, etc, and the last phase can be the softscaping - the planting areas for climbers, ferns, grasses and perennials. A good tip is to buy small plants and install them at the right time, as they will quickly fill out."
Step 5: Plant Strategically
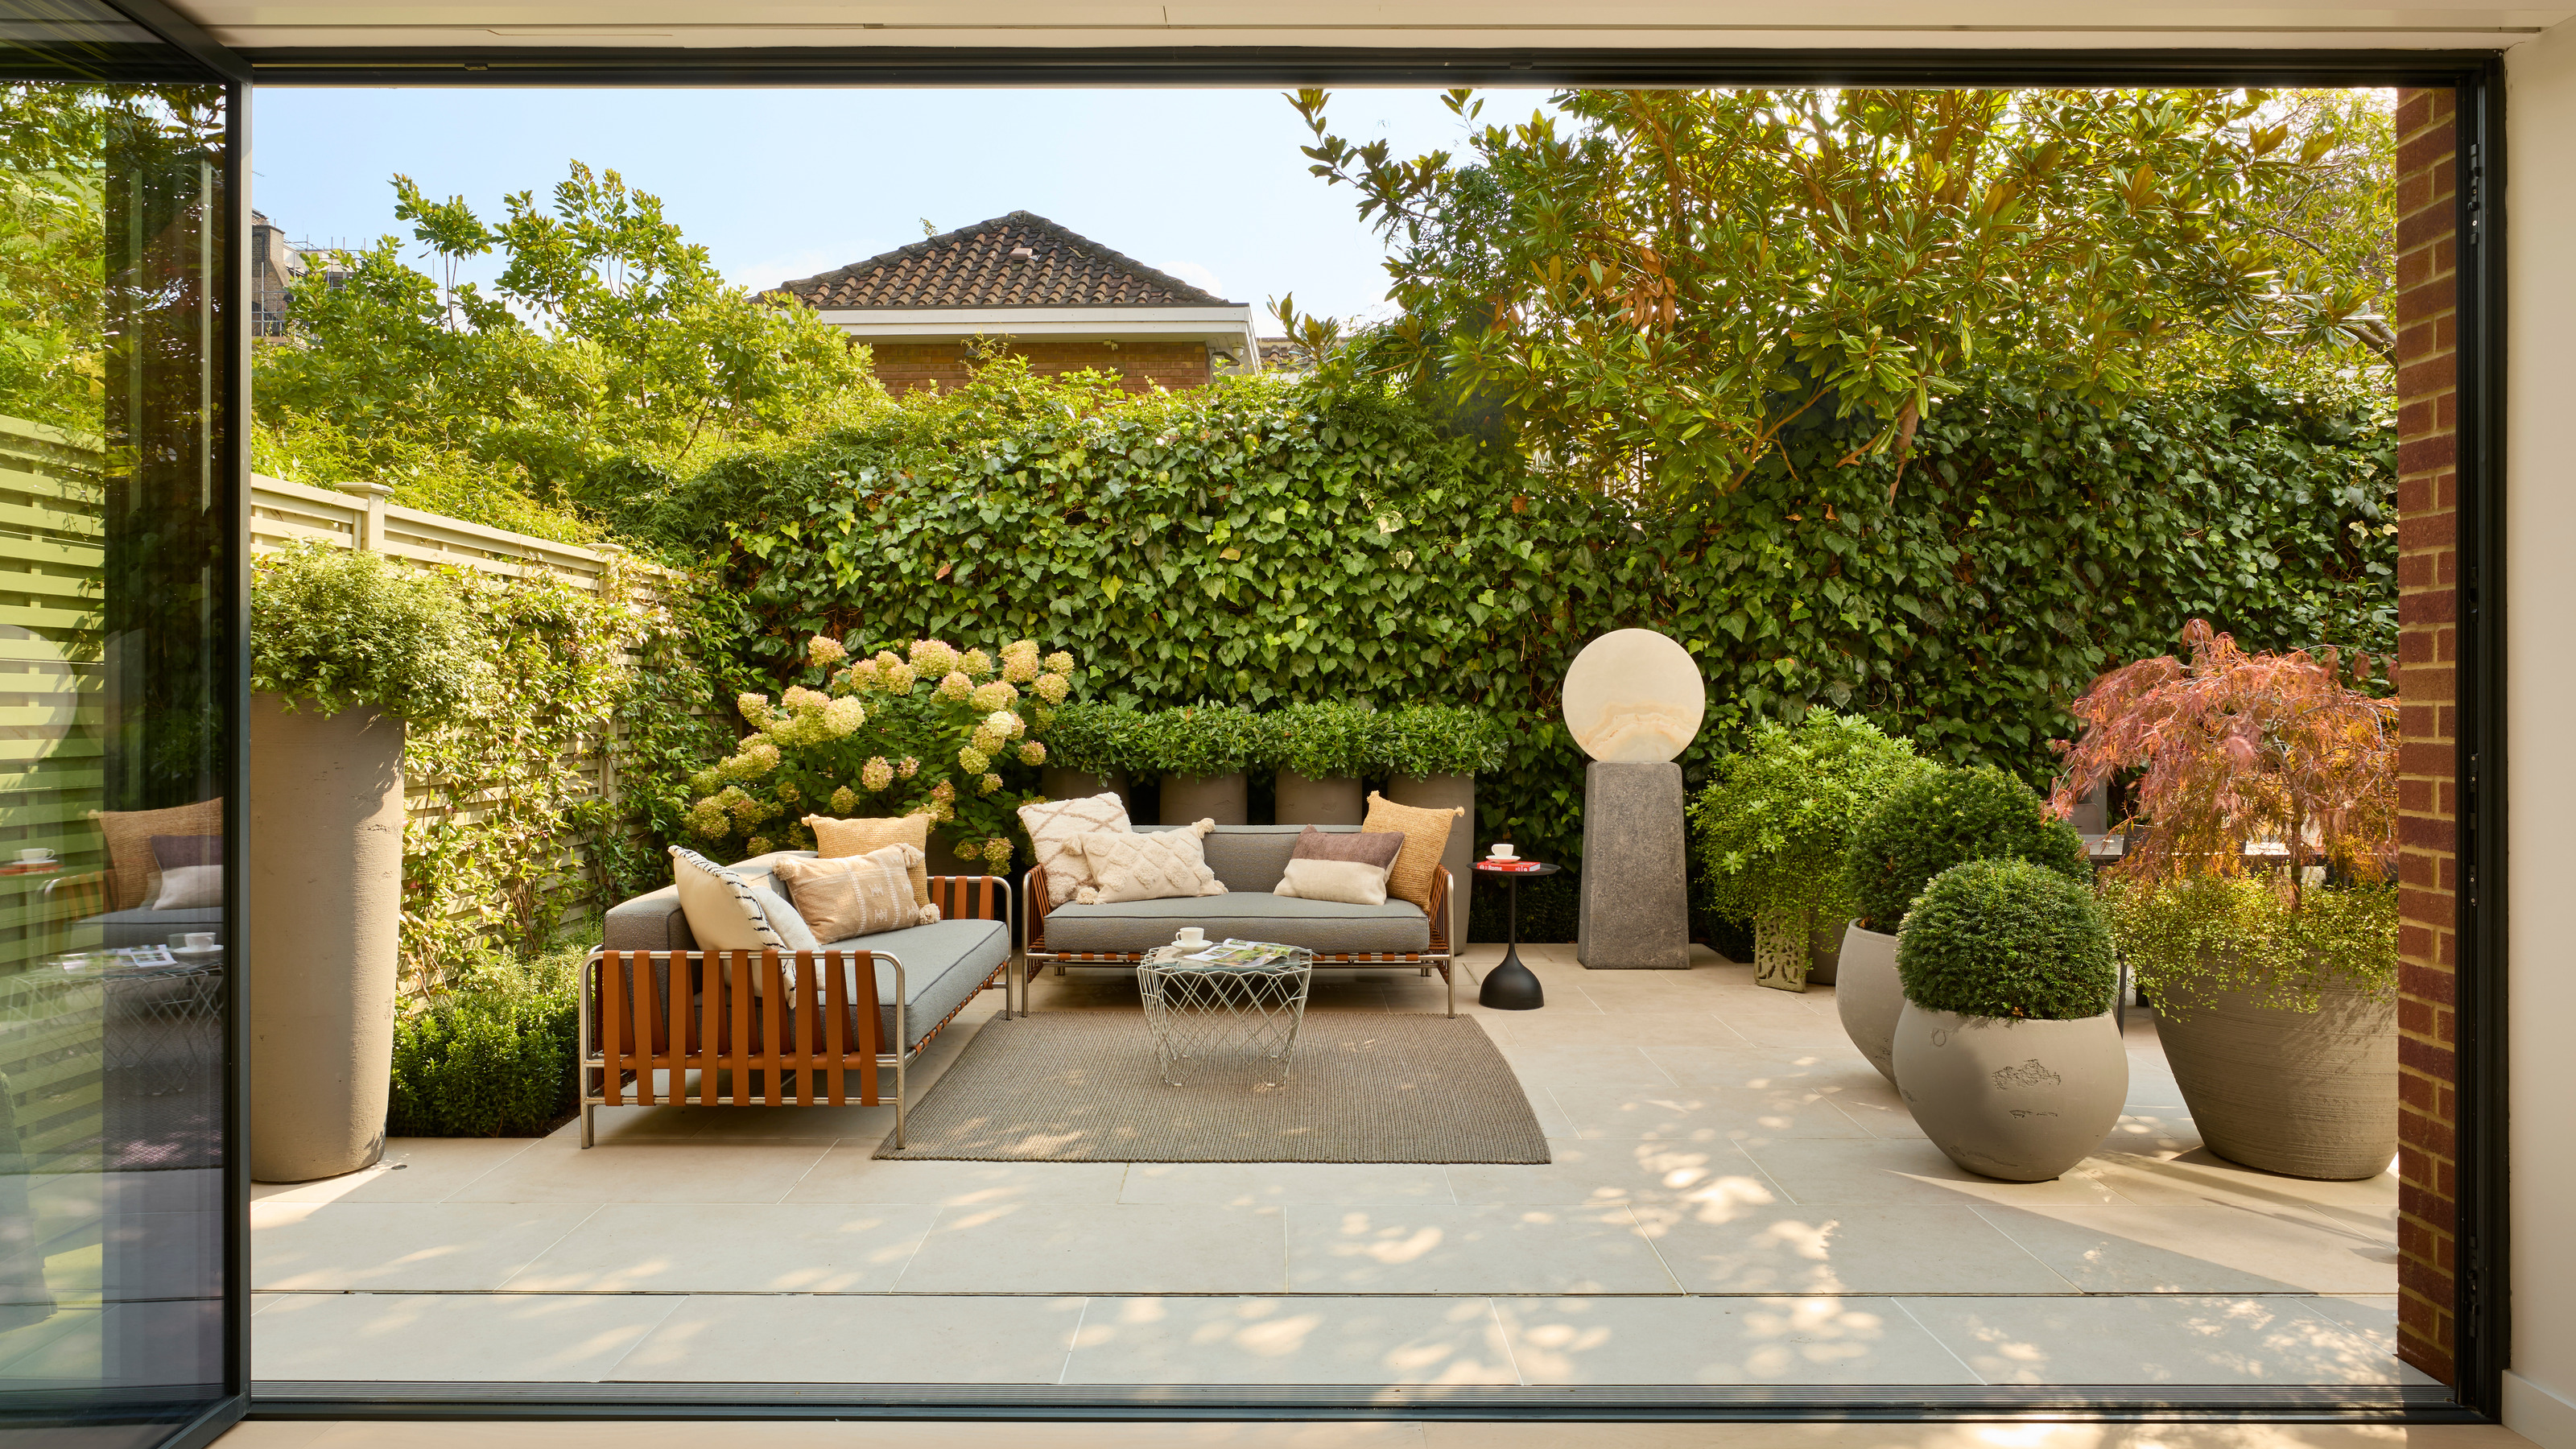
When you're deciding what and where to plant, and space is at a premium, it may feel tempting to keep flower beds narrow and hugged to the edges or perimeter of a small garden. However, this can be counter-productive. Being more generous and adventurous with the space you give to plants can result in a more flourishing outdoor area.
"Before we begin a project, I often see very narrow borders that can really only accommodate climbing plants on the fence or wall behind, planted with shrubs that want to grow to 2m across," says Kate Gould. "Consequently those plants are pruned regularly and then don’t flower or just look very odd and blocky."
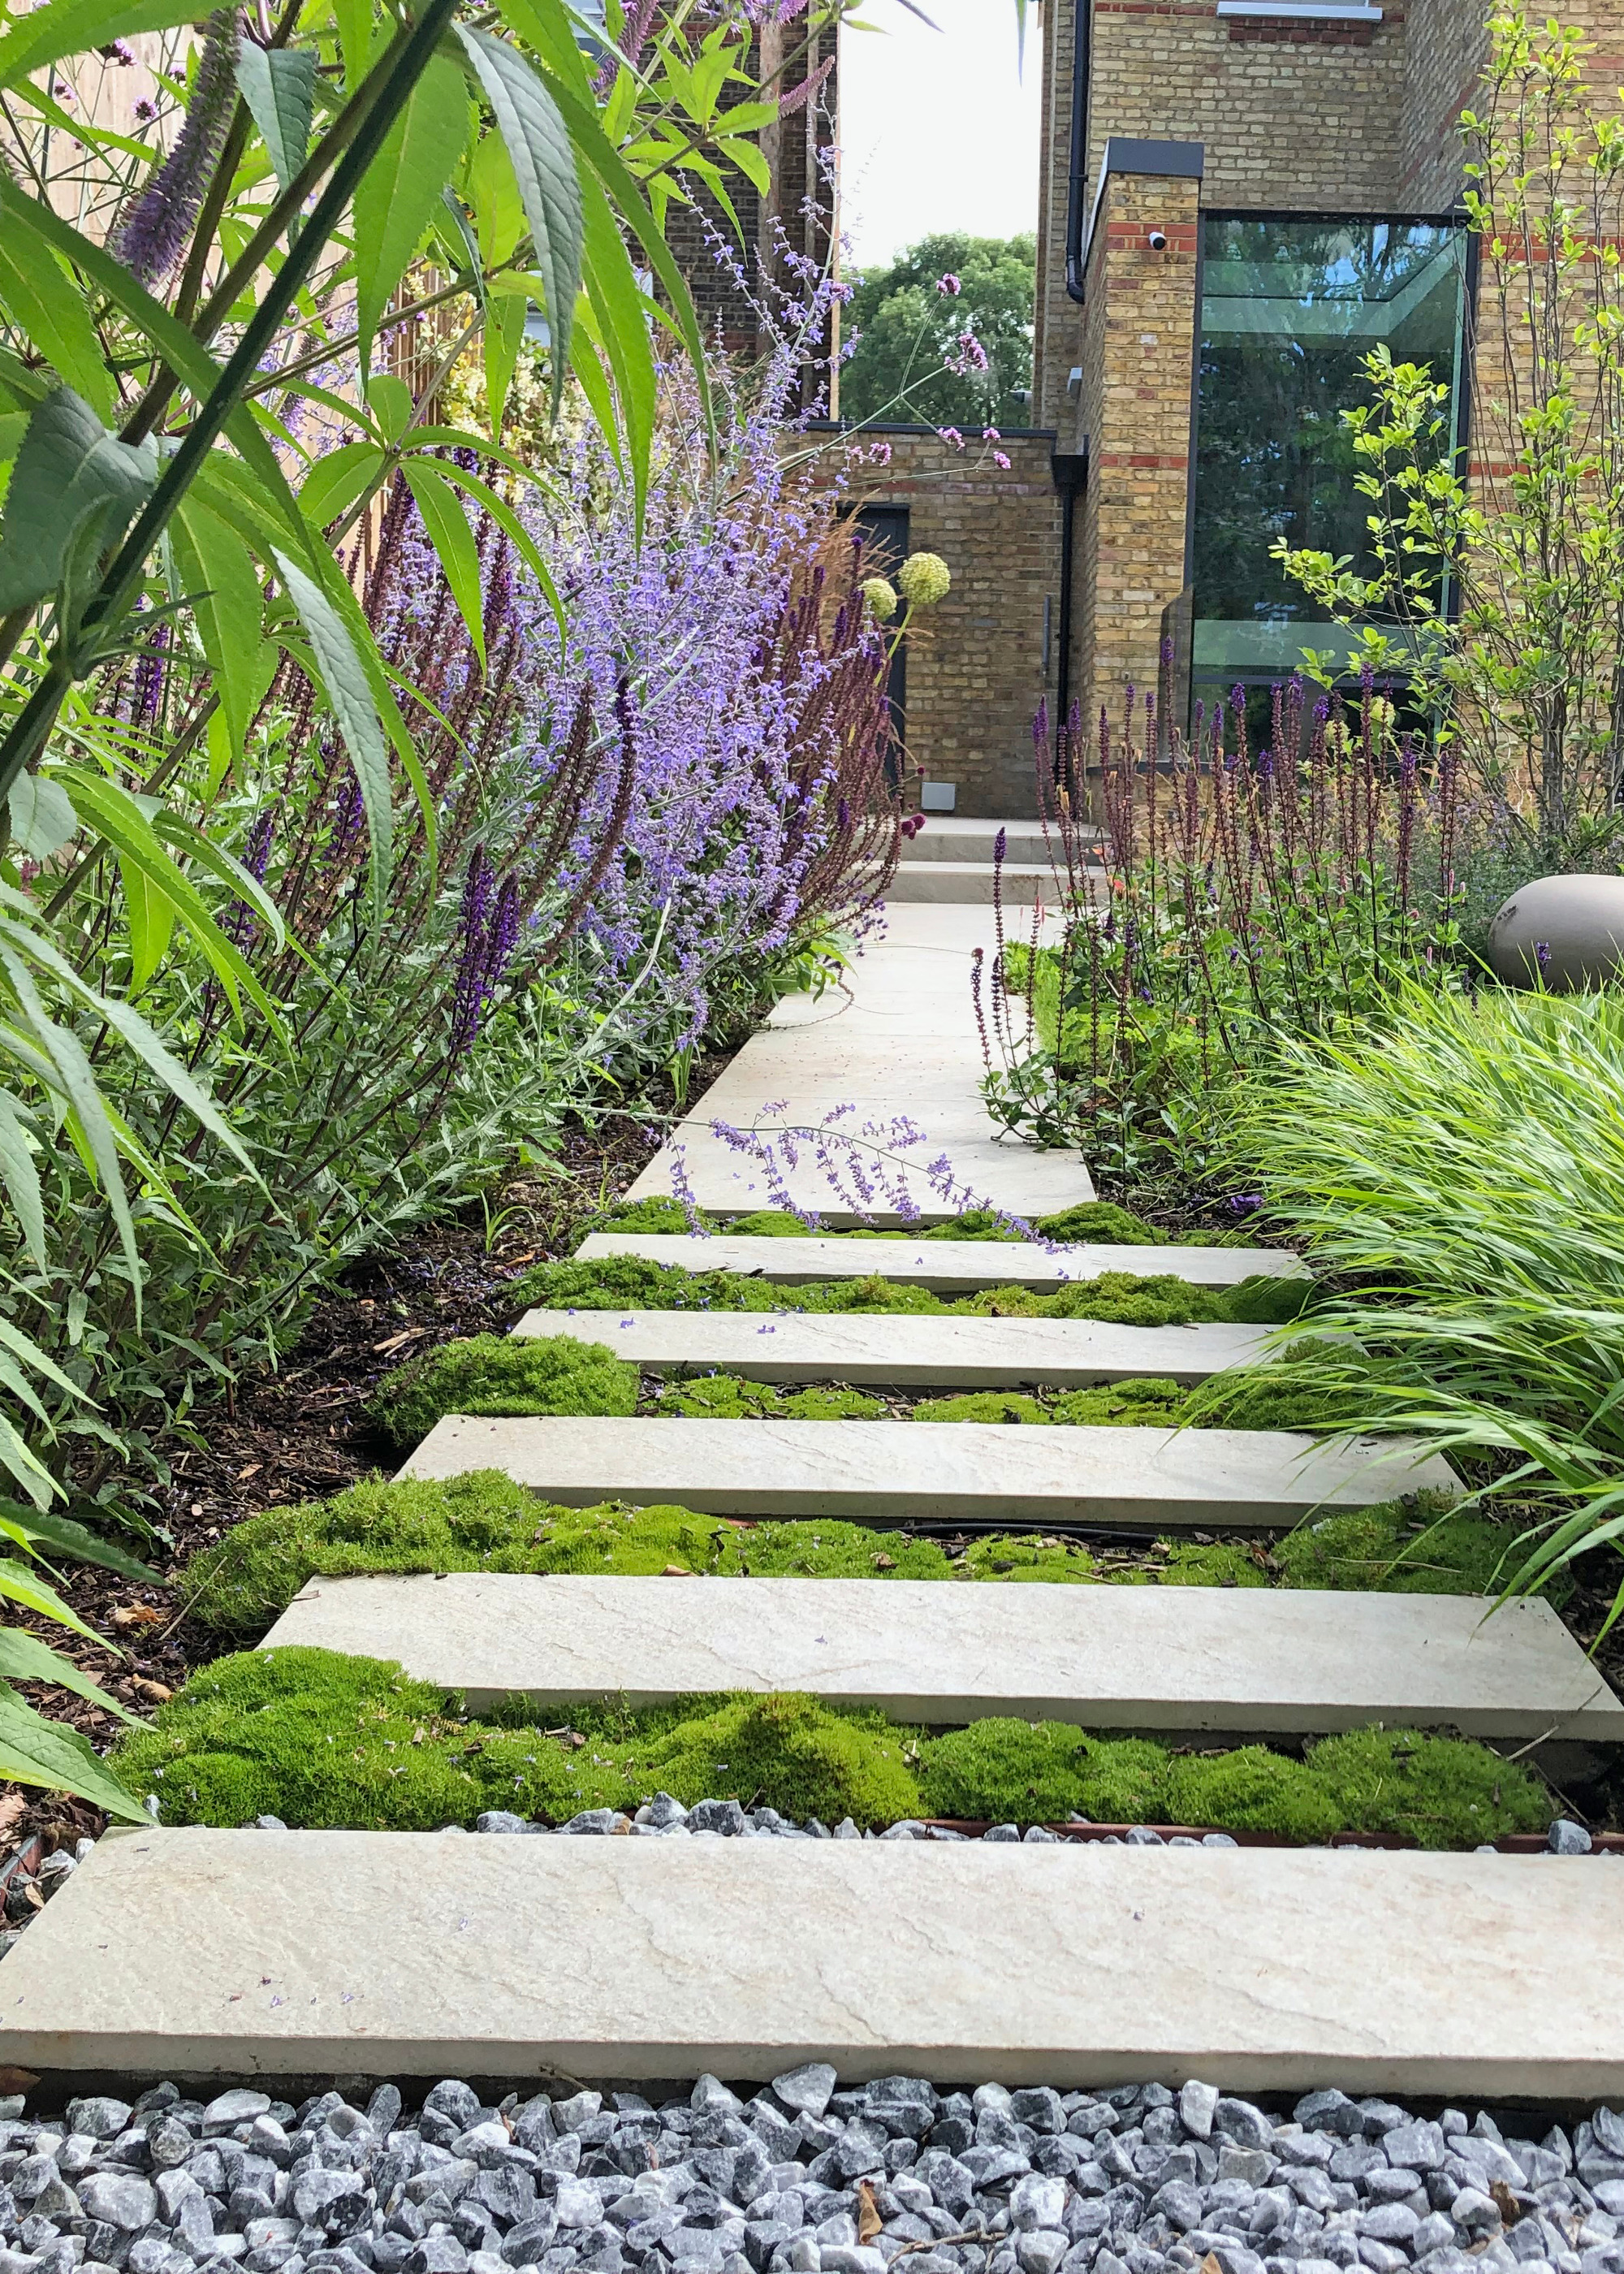
"Something that works with small gardens, is rather than design in straight lines at 90 degrees to the property, turn everything 45 degrees. This creates longer vista lines and will make the garden feel bigger. Also, try to avoid circles – they draw the eye in and will make the space feel smaller."
Step 6: Create a Seamless Indoor-Outdoor Feel
Just as using the same type of flooring and materials throughout kitchen, dining and living areas creates an illusion of space and flow in an interior, a similar trick can be used to blur the lines between your home and a small garden.
"Taking materials, colours, or stylistic inspiration from the house creates that indoor-outdoor room feeling," says Sarah. "It can also make your outdoor space feel bigger."
"Architecturally we often now live with large glass doors or windows looking out onto the garden,' says Kate. "So if you want to create a flow from the inside to the out, use materials that are tonally the same, but are suitable for exterior use.
"Try to keep materials to large format pavers or decking rather than small bricks as these will only draw your eye into the space rather than away from it. I see a lot of inappropriate hard landscaping, but just because you like it, doesn’t mean that it will look good outside.
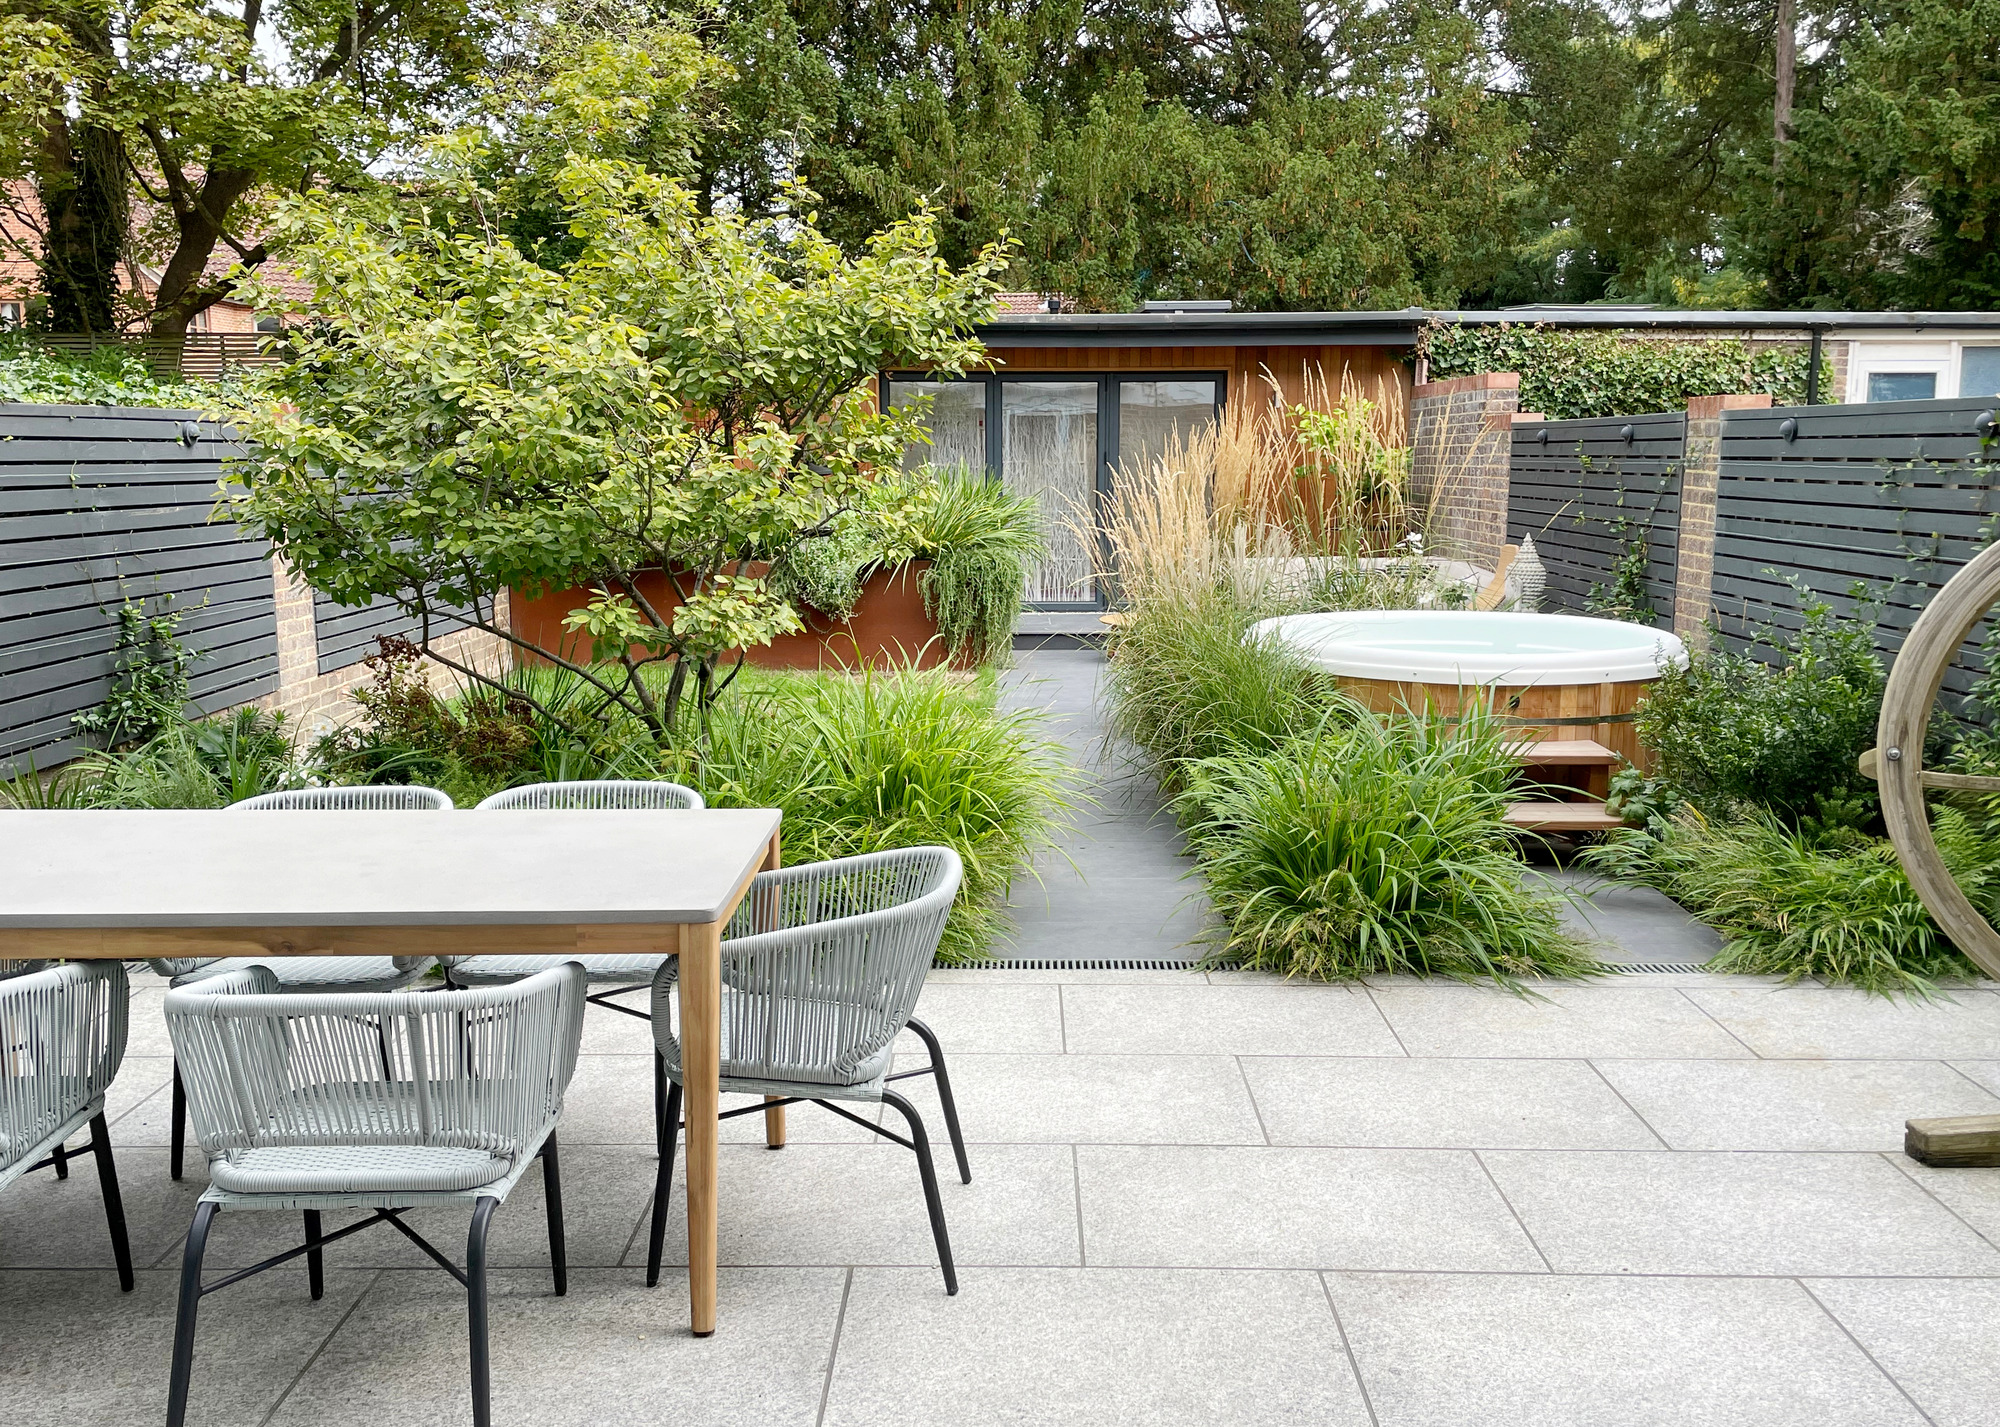
"Always try and provide dry access to washing lines and garden buildings," advises Kate. "These could be paths or stepping stones. Paths generally should be about 800-900mm wide - or wider for wheelchair access). So don’t make them narrower – they will look a bit mean.
"Everything should be designed to work in harmony, with space for hard landscaping being balanced by soft. It is vital to get those proportions correct, otherwise the scheme will look underdeveloped and often underwhelming."
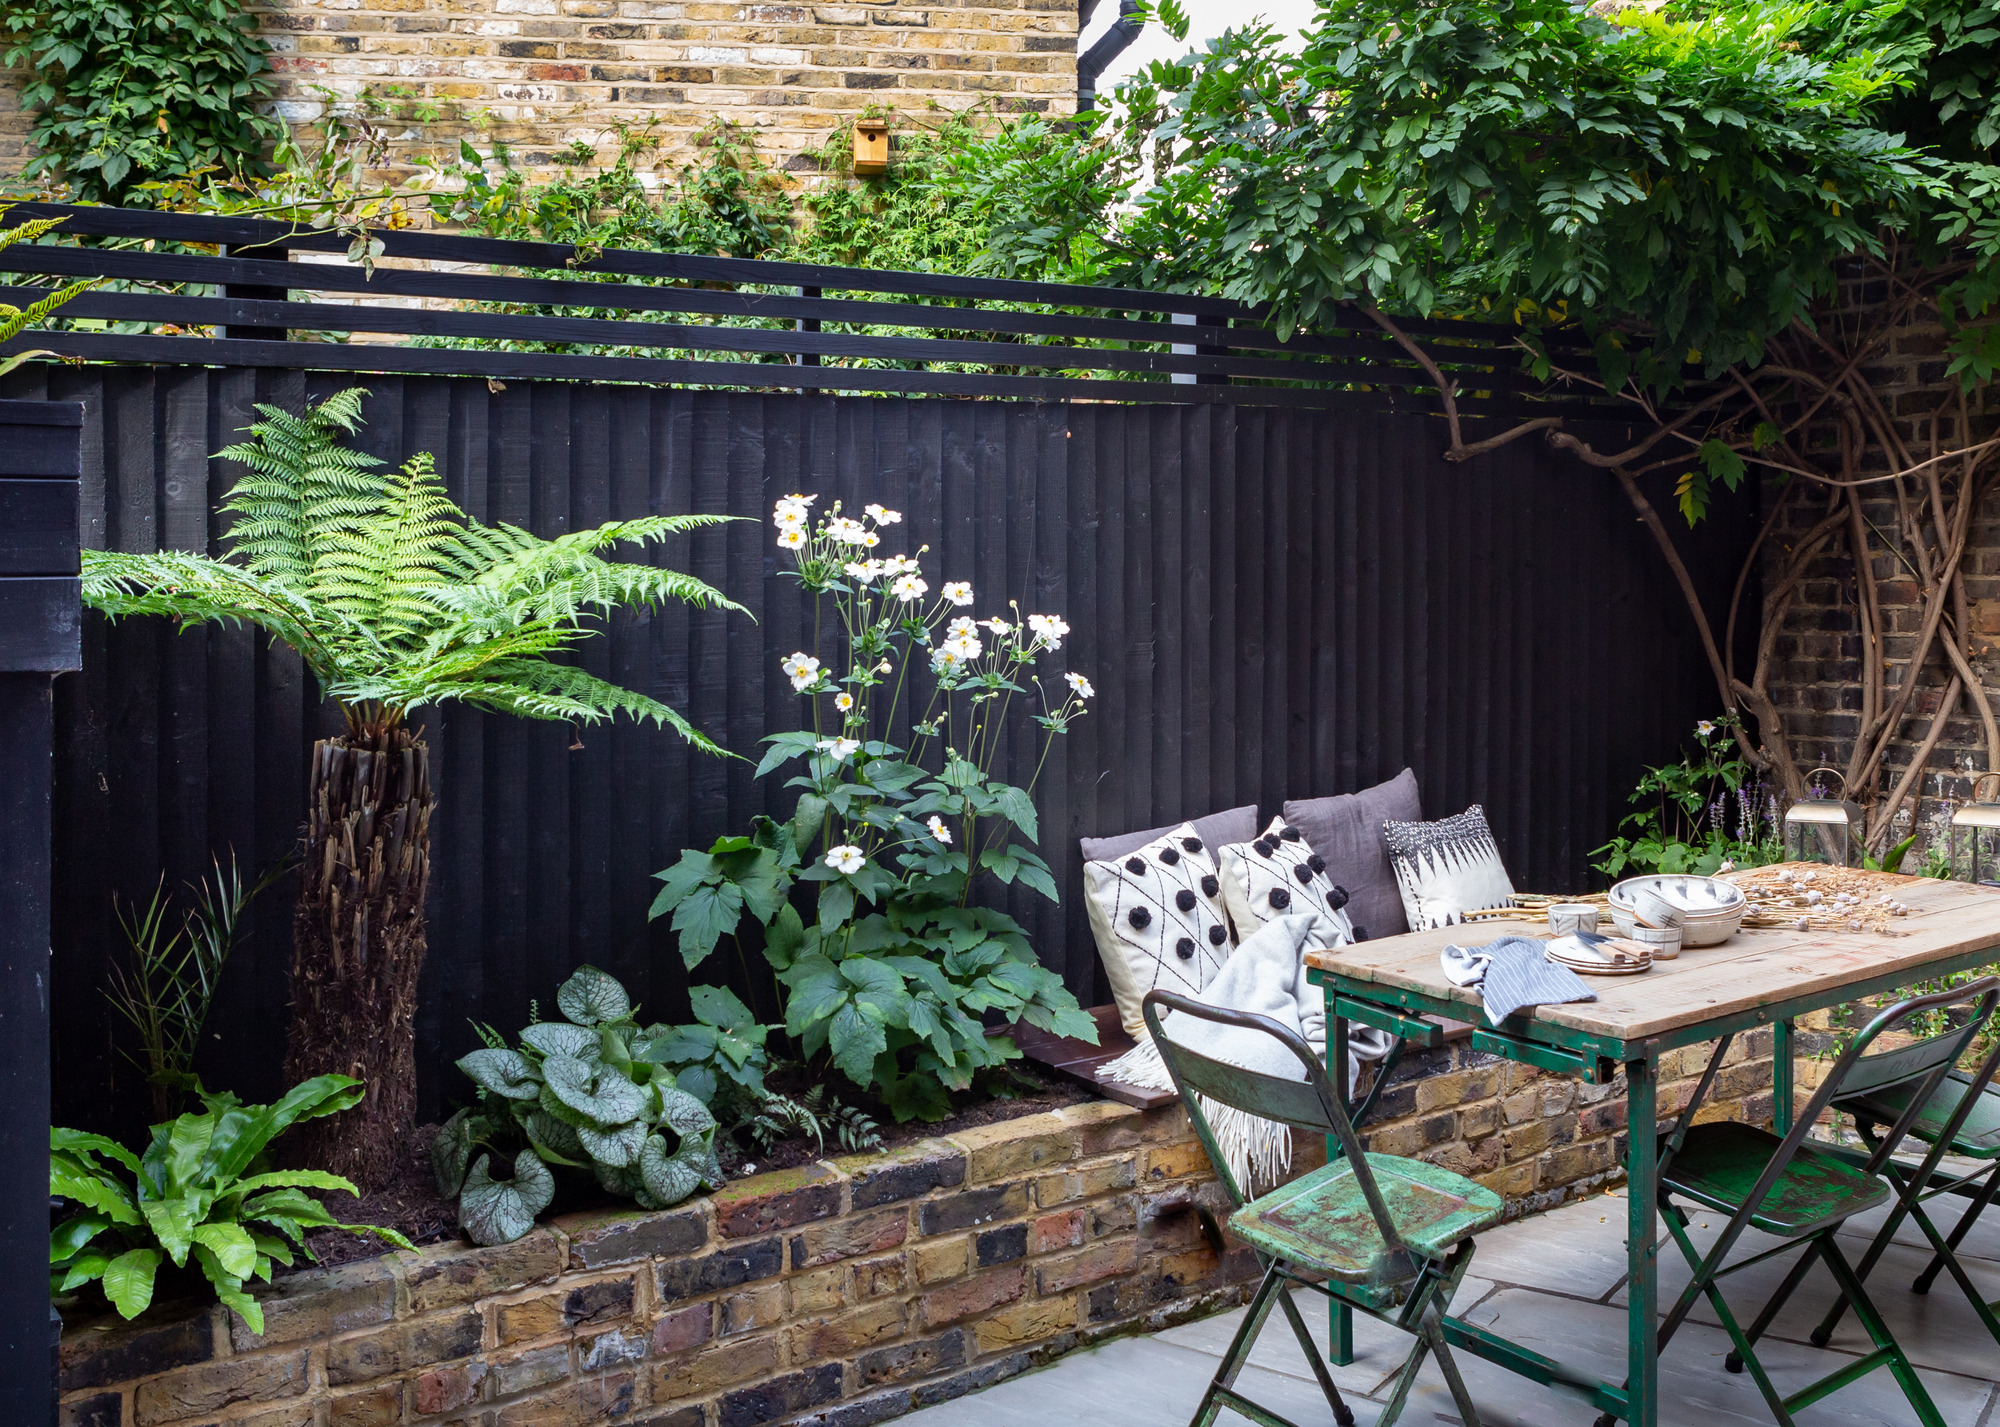
Step 7: Ensure You Use Up Vertical Space to Create Added Privacy
Small gardens tend to be surrounded on all sides by other gardens or properties with windows. Pergolas and arches are one way to avoid feeling like you're in a goldfish bowl. However, if space is limited, you can create privacy with your planting choices too. If you've made a planting plan, you'll know what to plant where, otherwise, think about the best spots to place trees and trellis with climbing vines to obscure views.
"Small gardens in urban areas are often very overlooked, so looking at ways to create privacy with strategically placed trees or trellis is definitely worth considering," says Sarah. "Your views from the house should also be considered.
"It goes without saying that it is always a good idea to speak to your neighbours about any potential privacy giving measures to get their agreement."
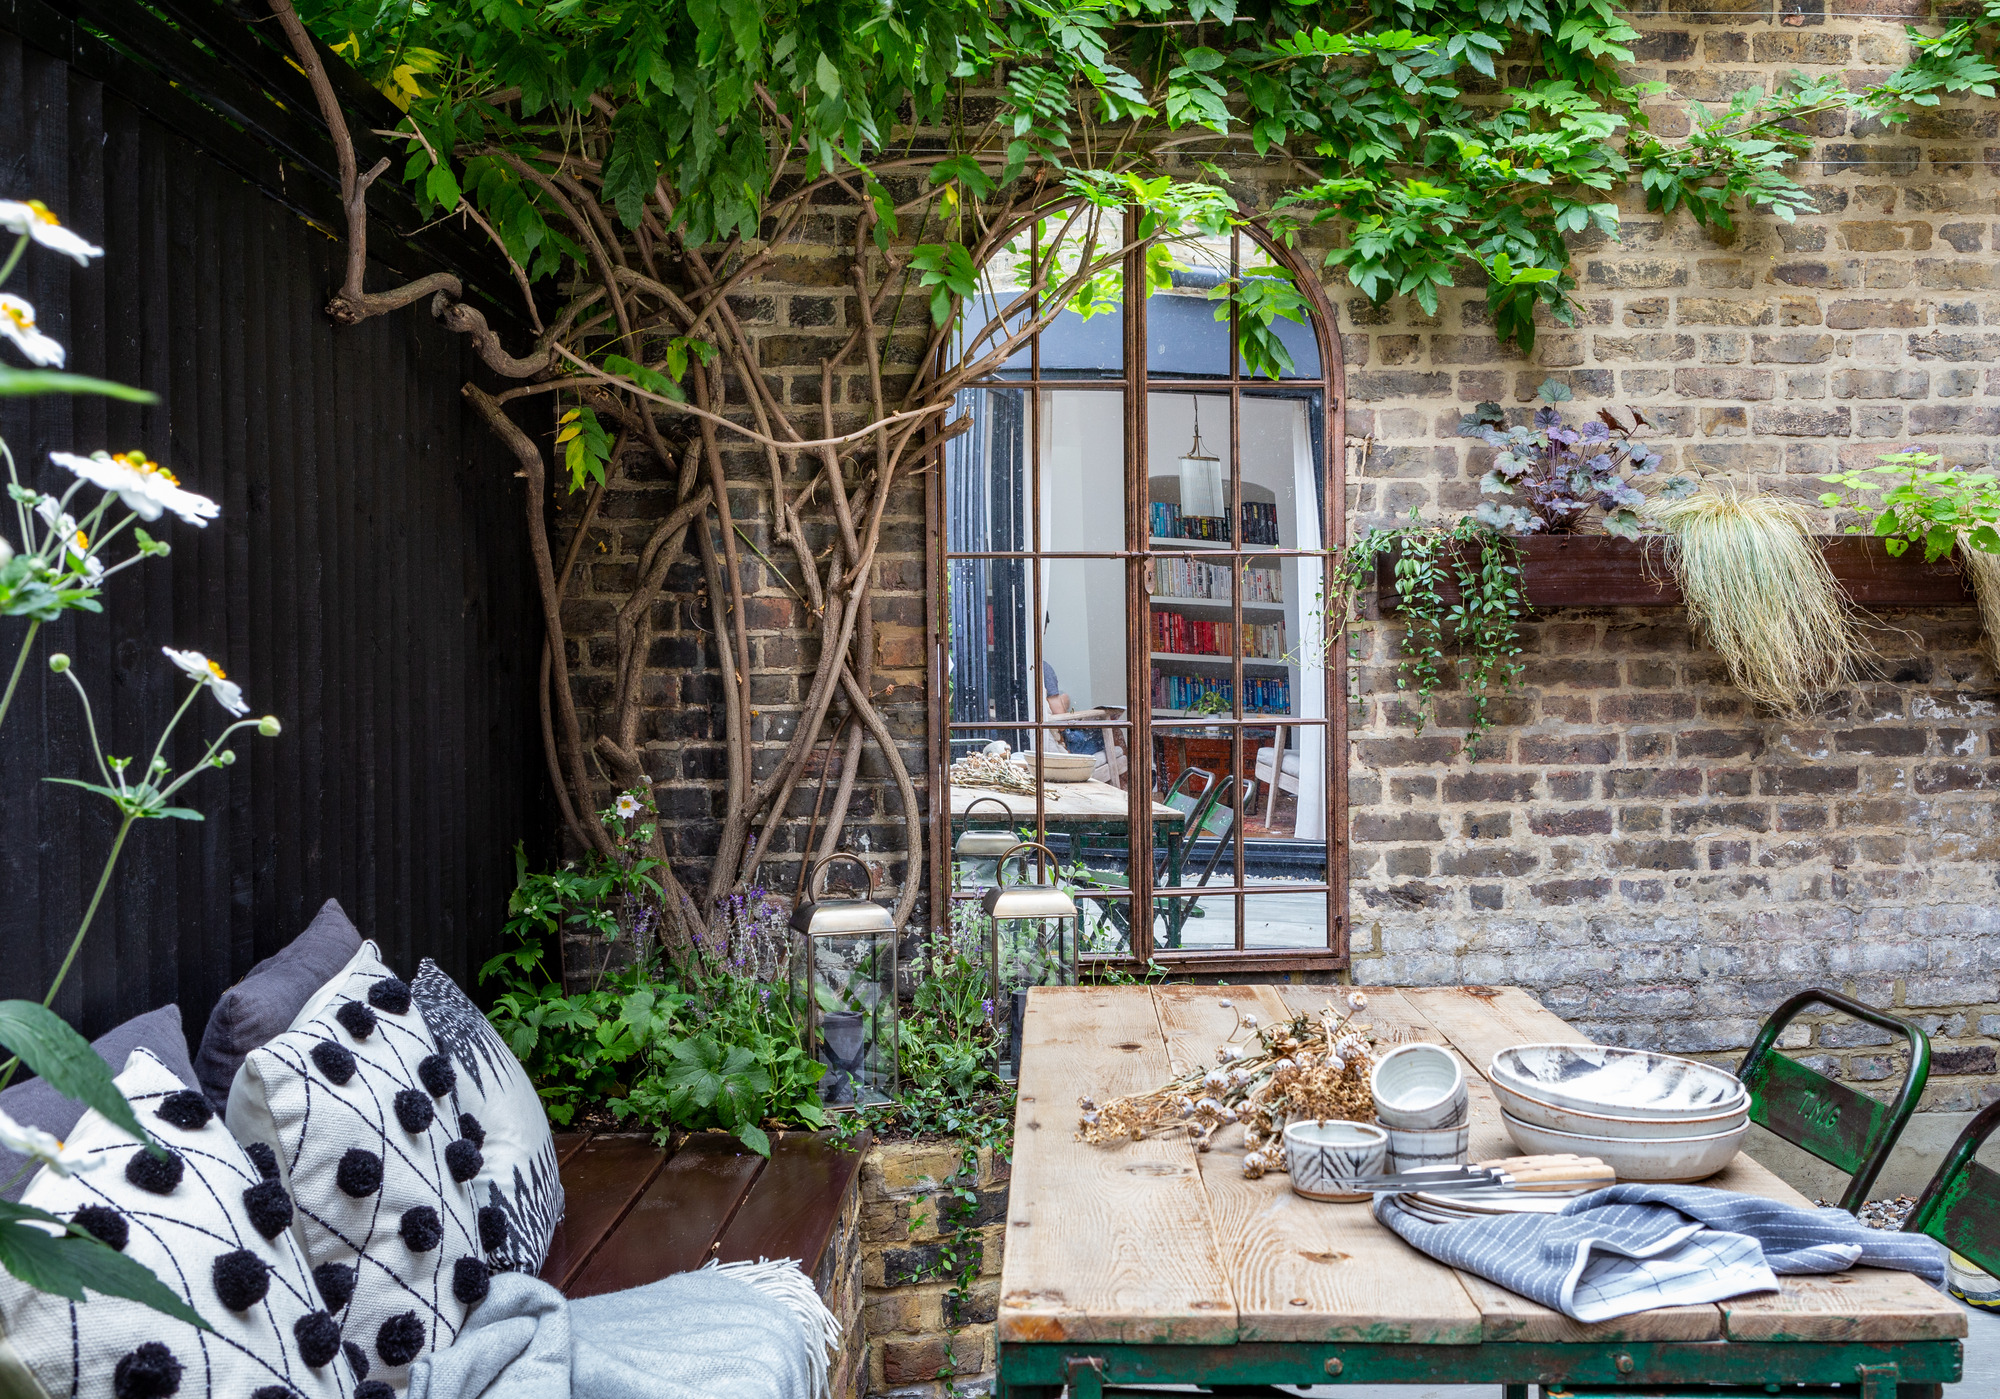
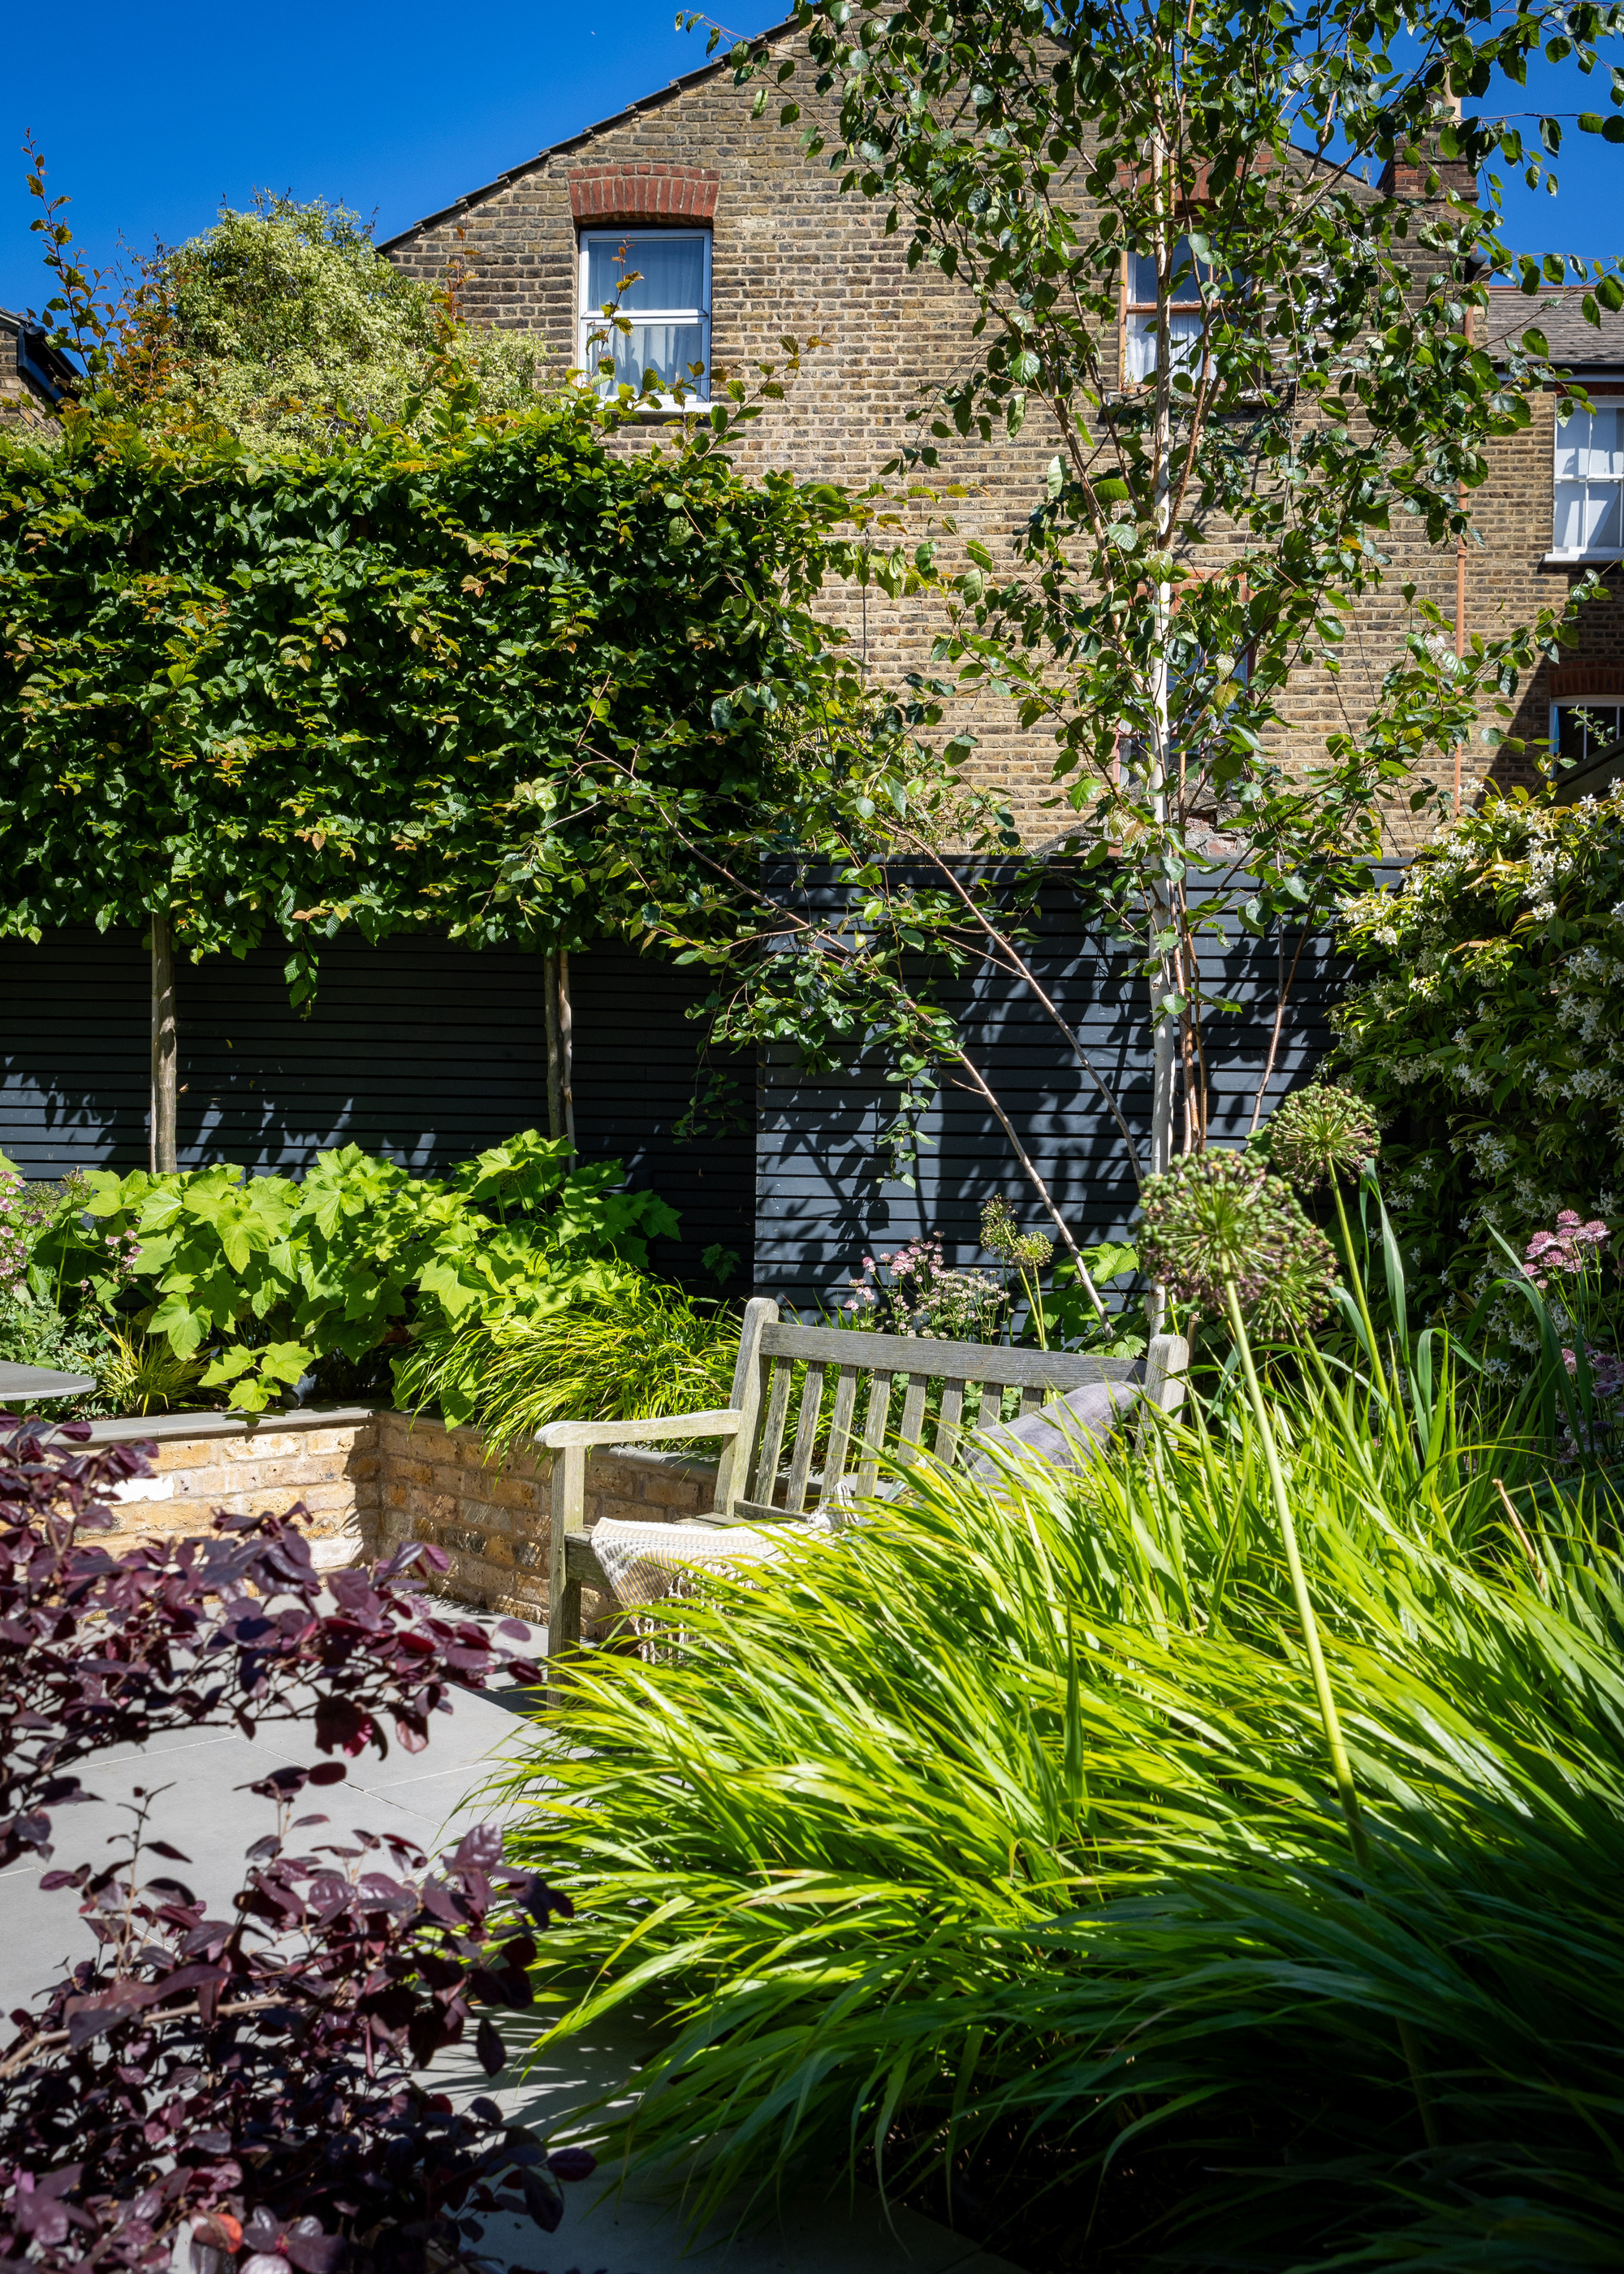
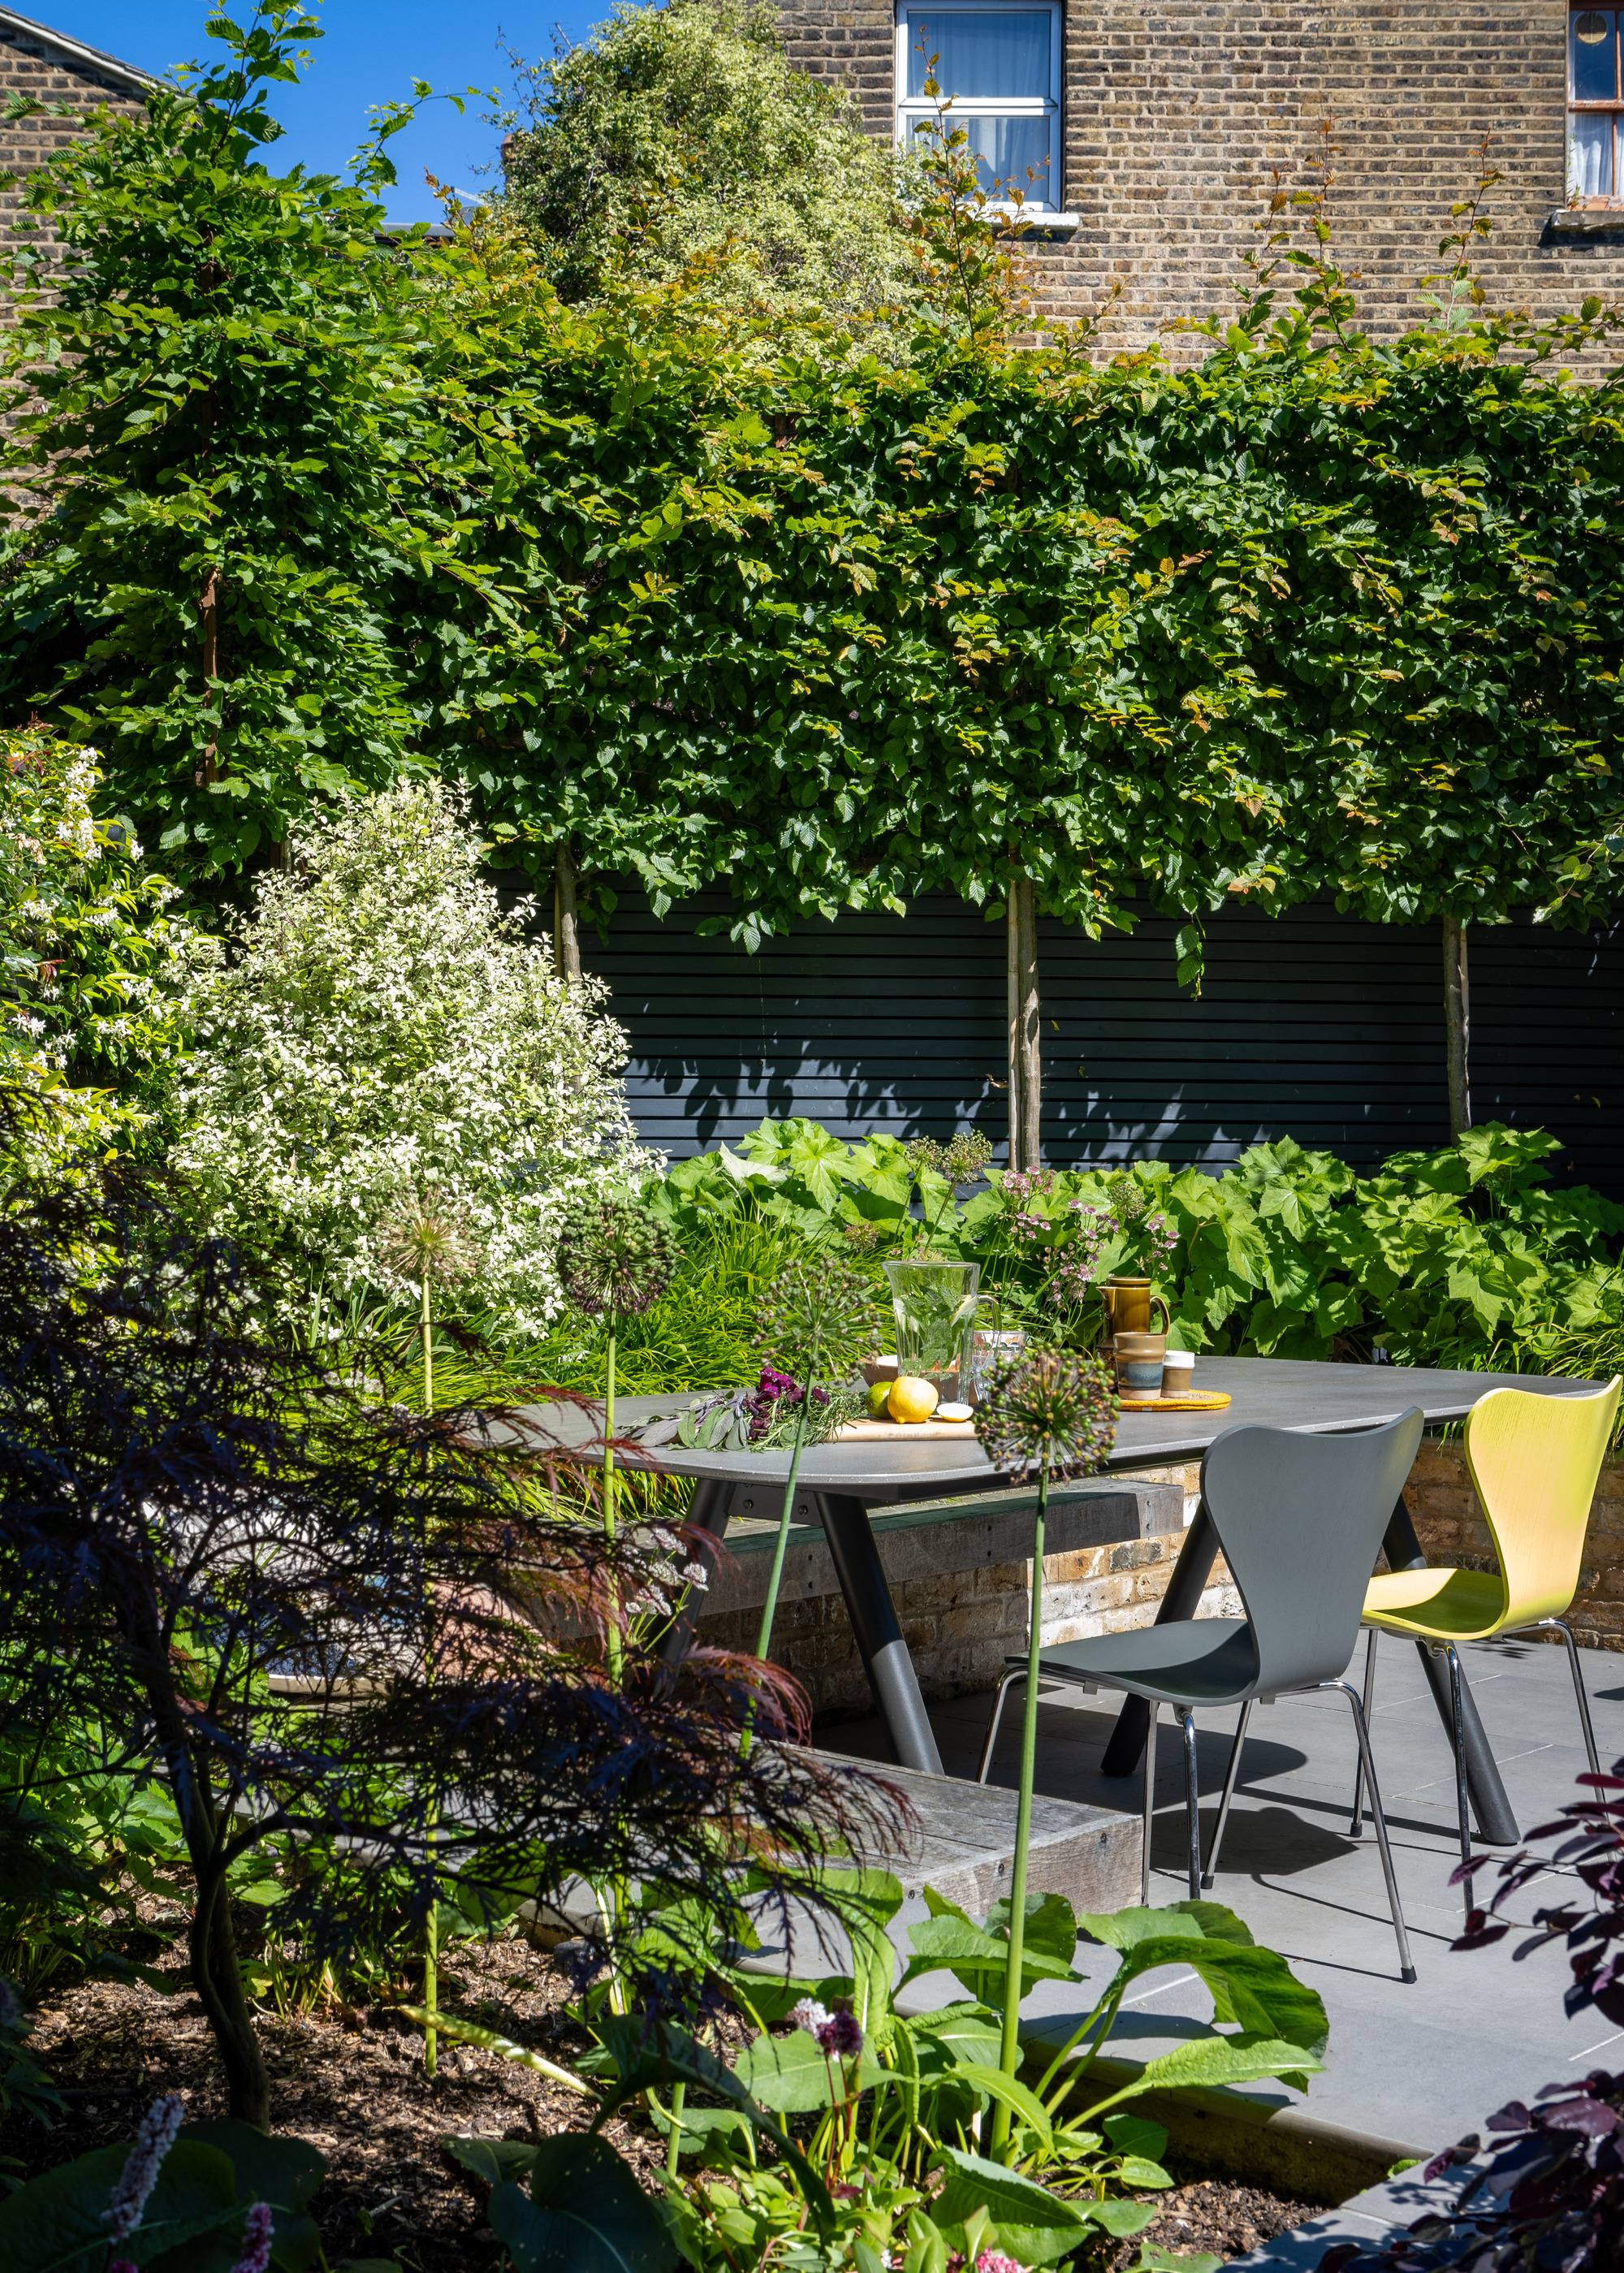
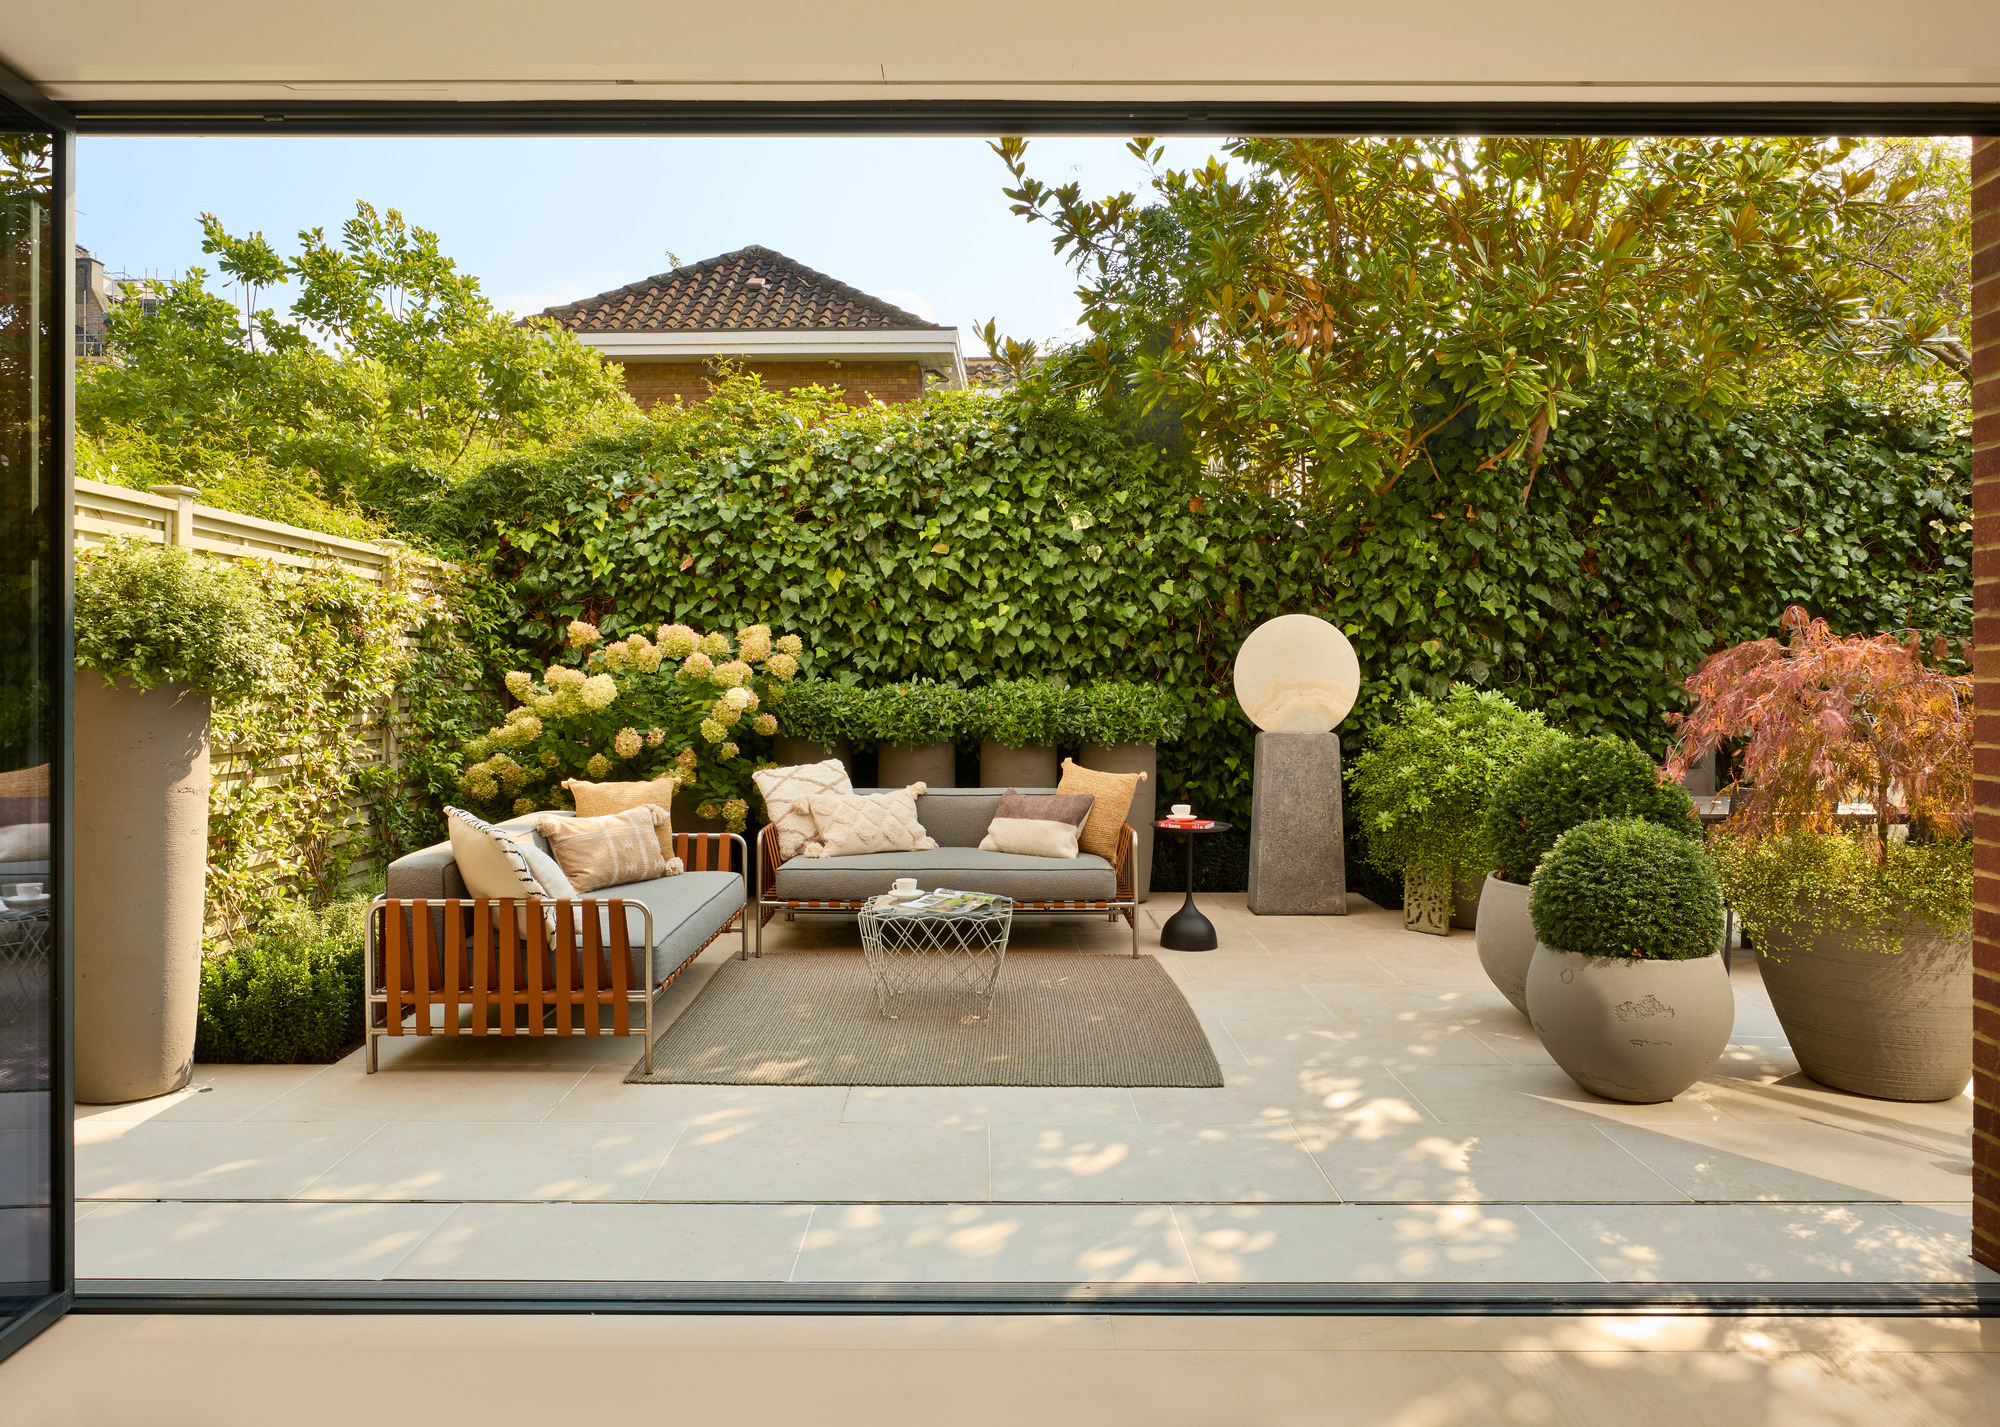
Planting pleached trees along a boundary or training vines to climb over fence toppers is a wonderful way to create privacy in an overlooked garden. However, using vertical space to create different levels and layers of planting adds interest too. It can also make a small garden look bigger by blurring the boundary edges.
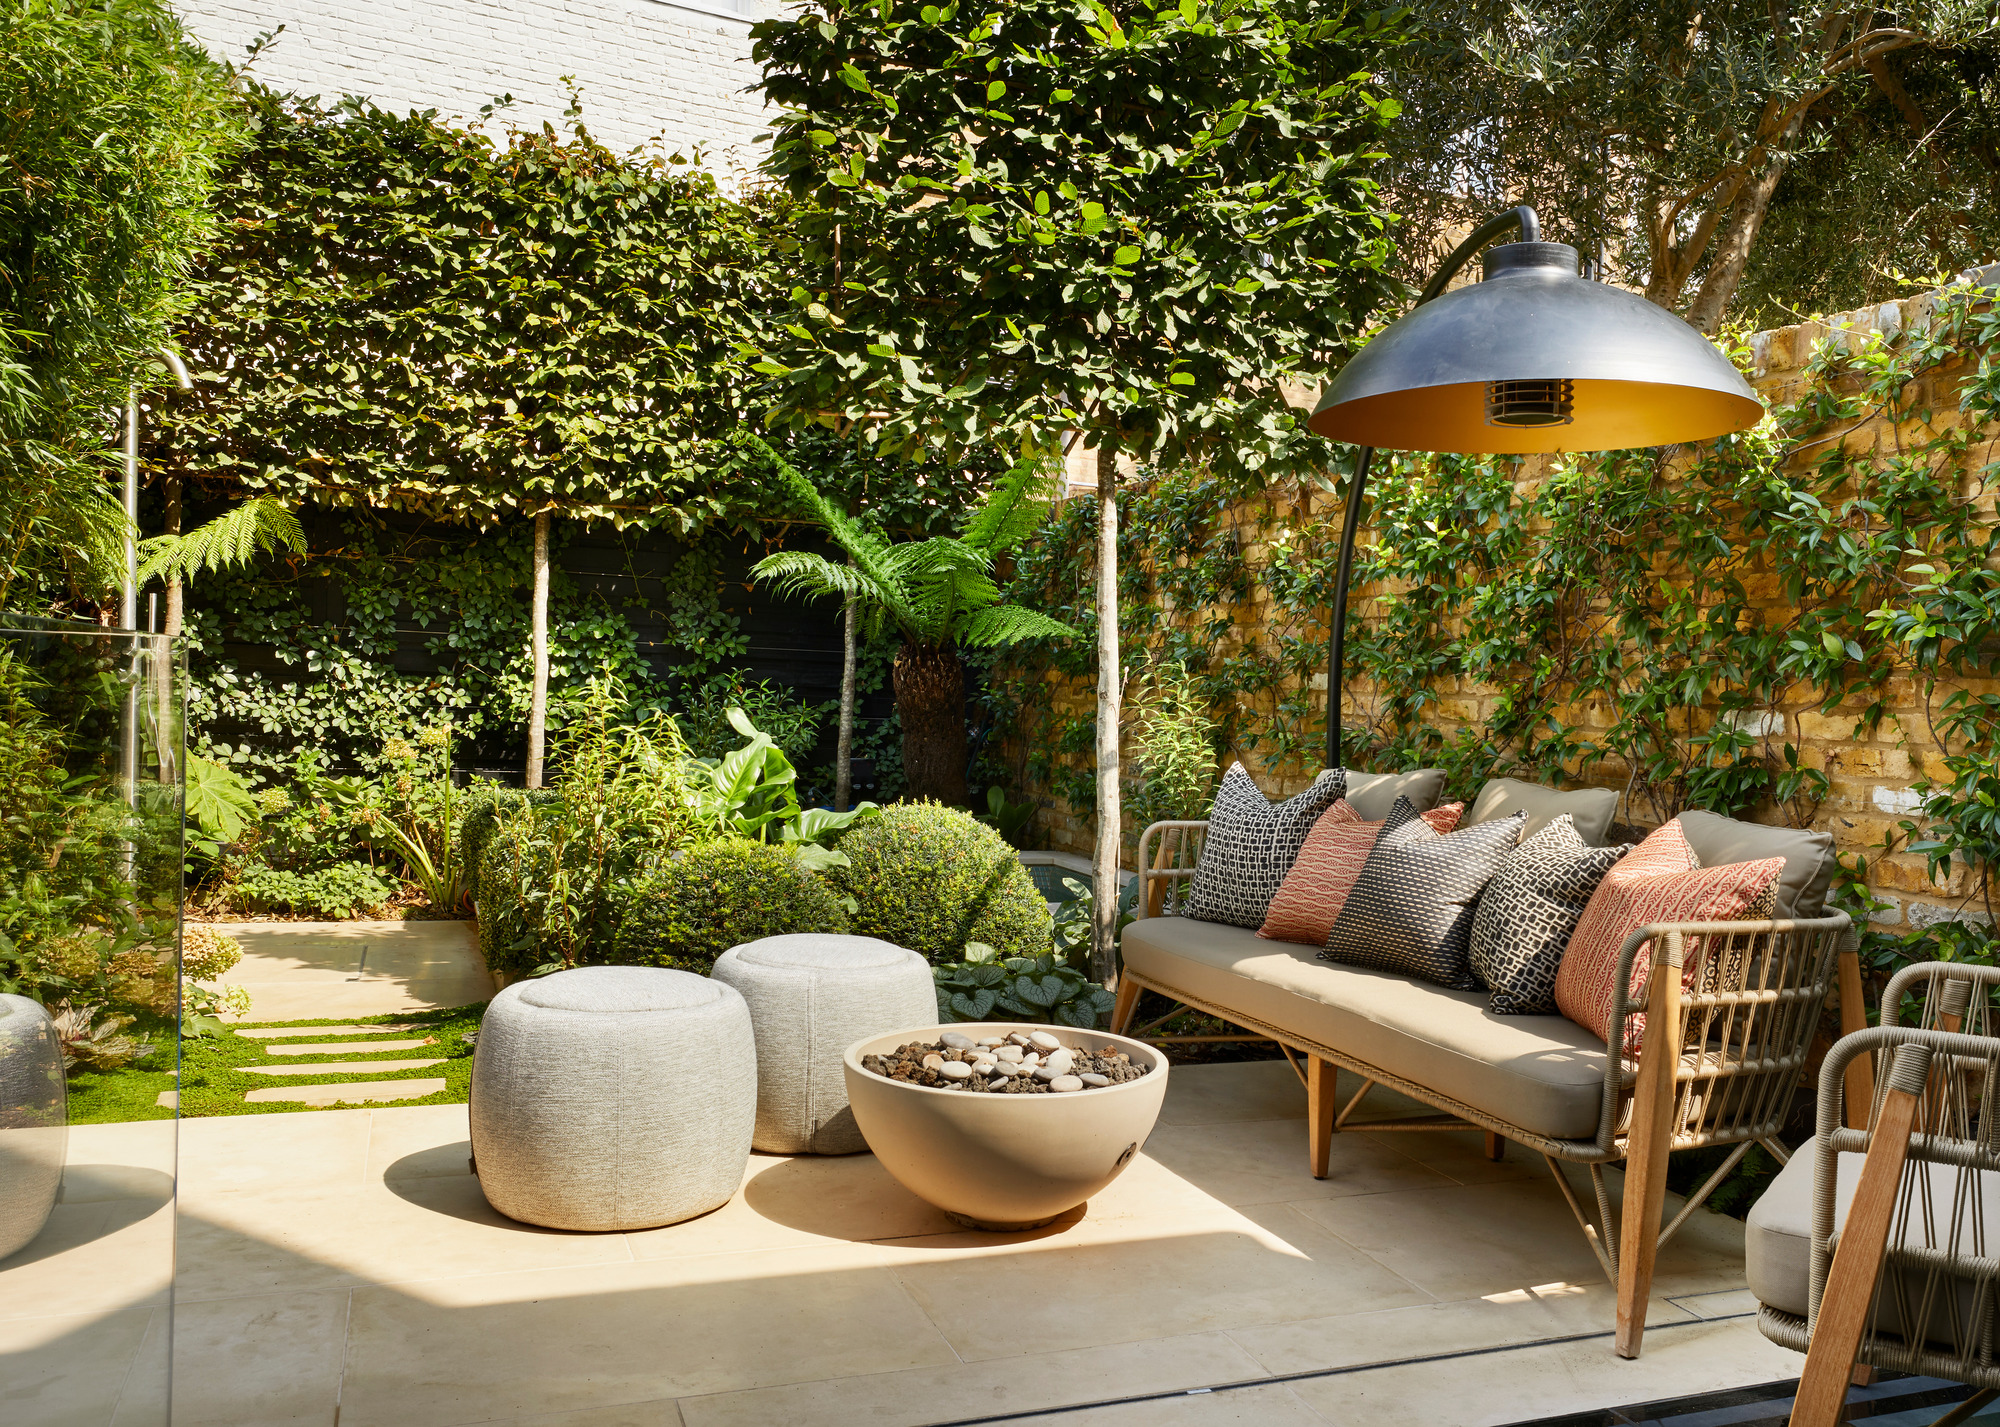
"Giving yourself some levels, be that with a raised area or with planters, enables you to stack your planting," says Kate. "It will make the areas more interesting and will feel more generous."
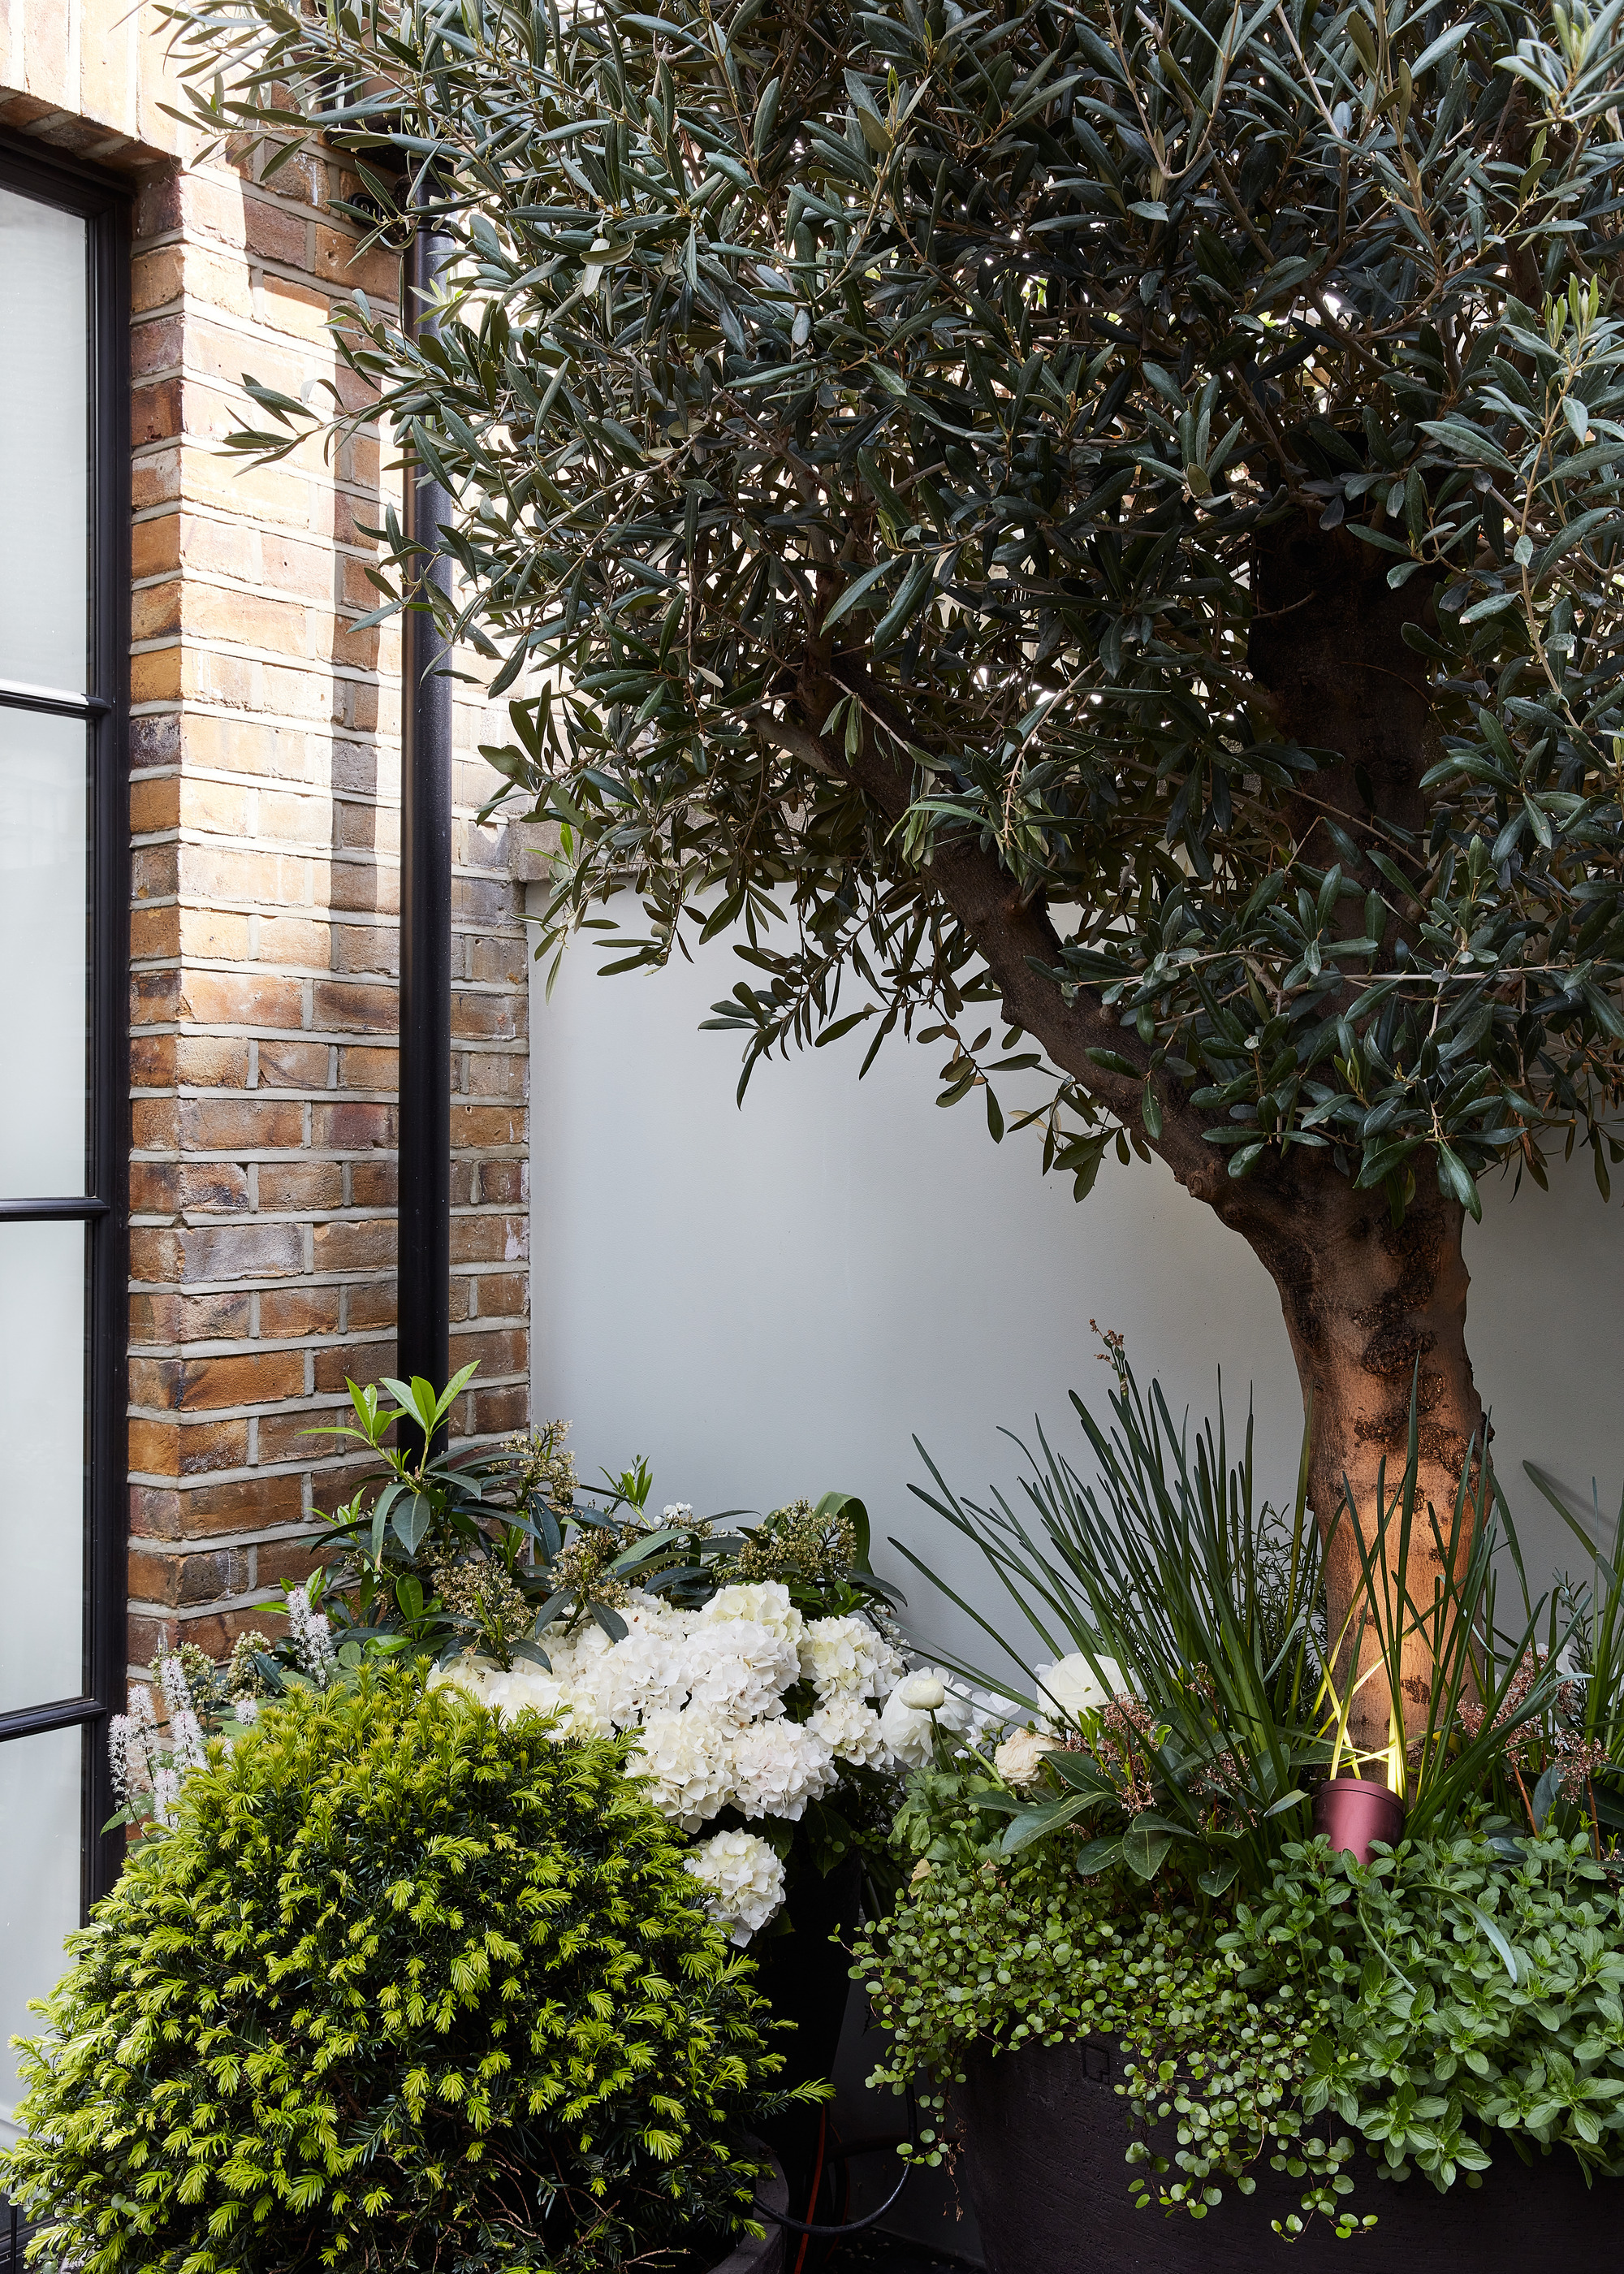
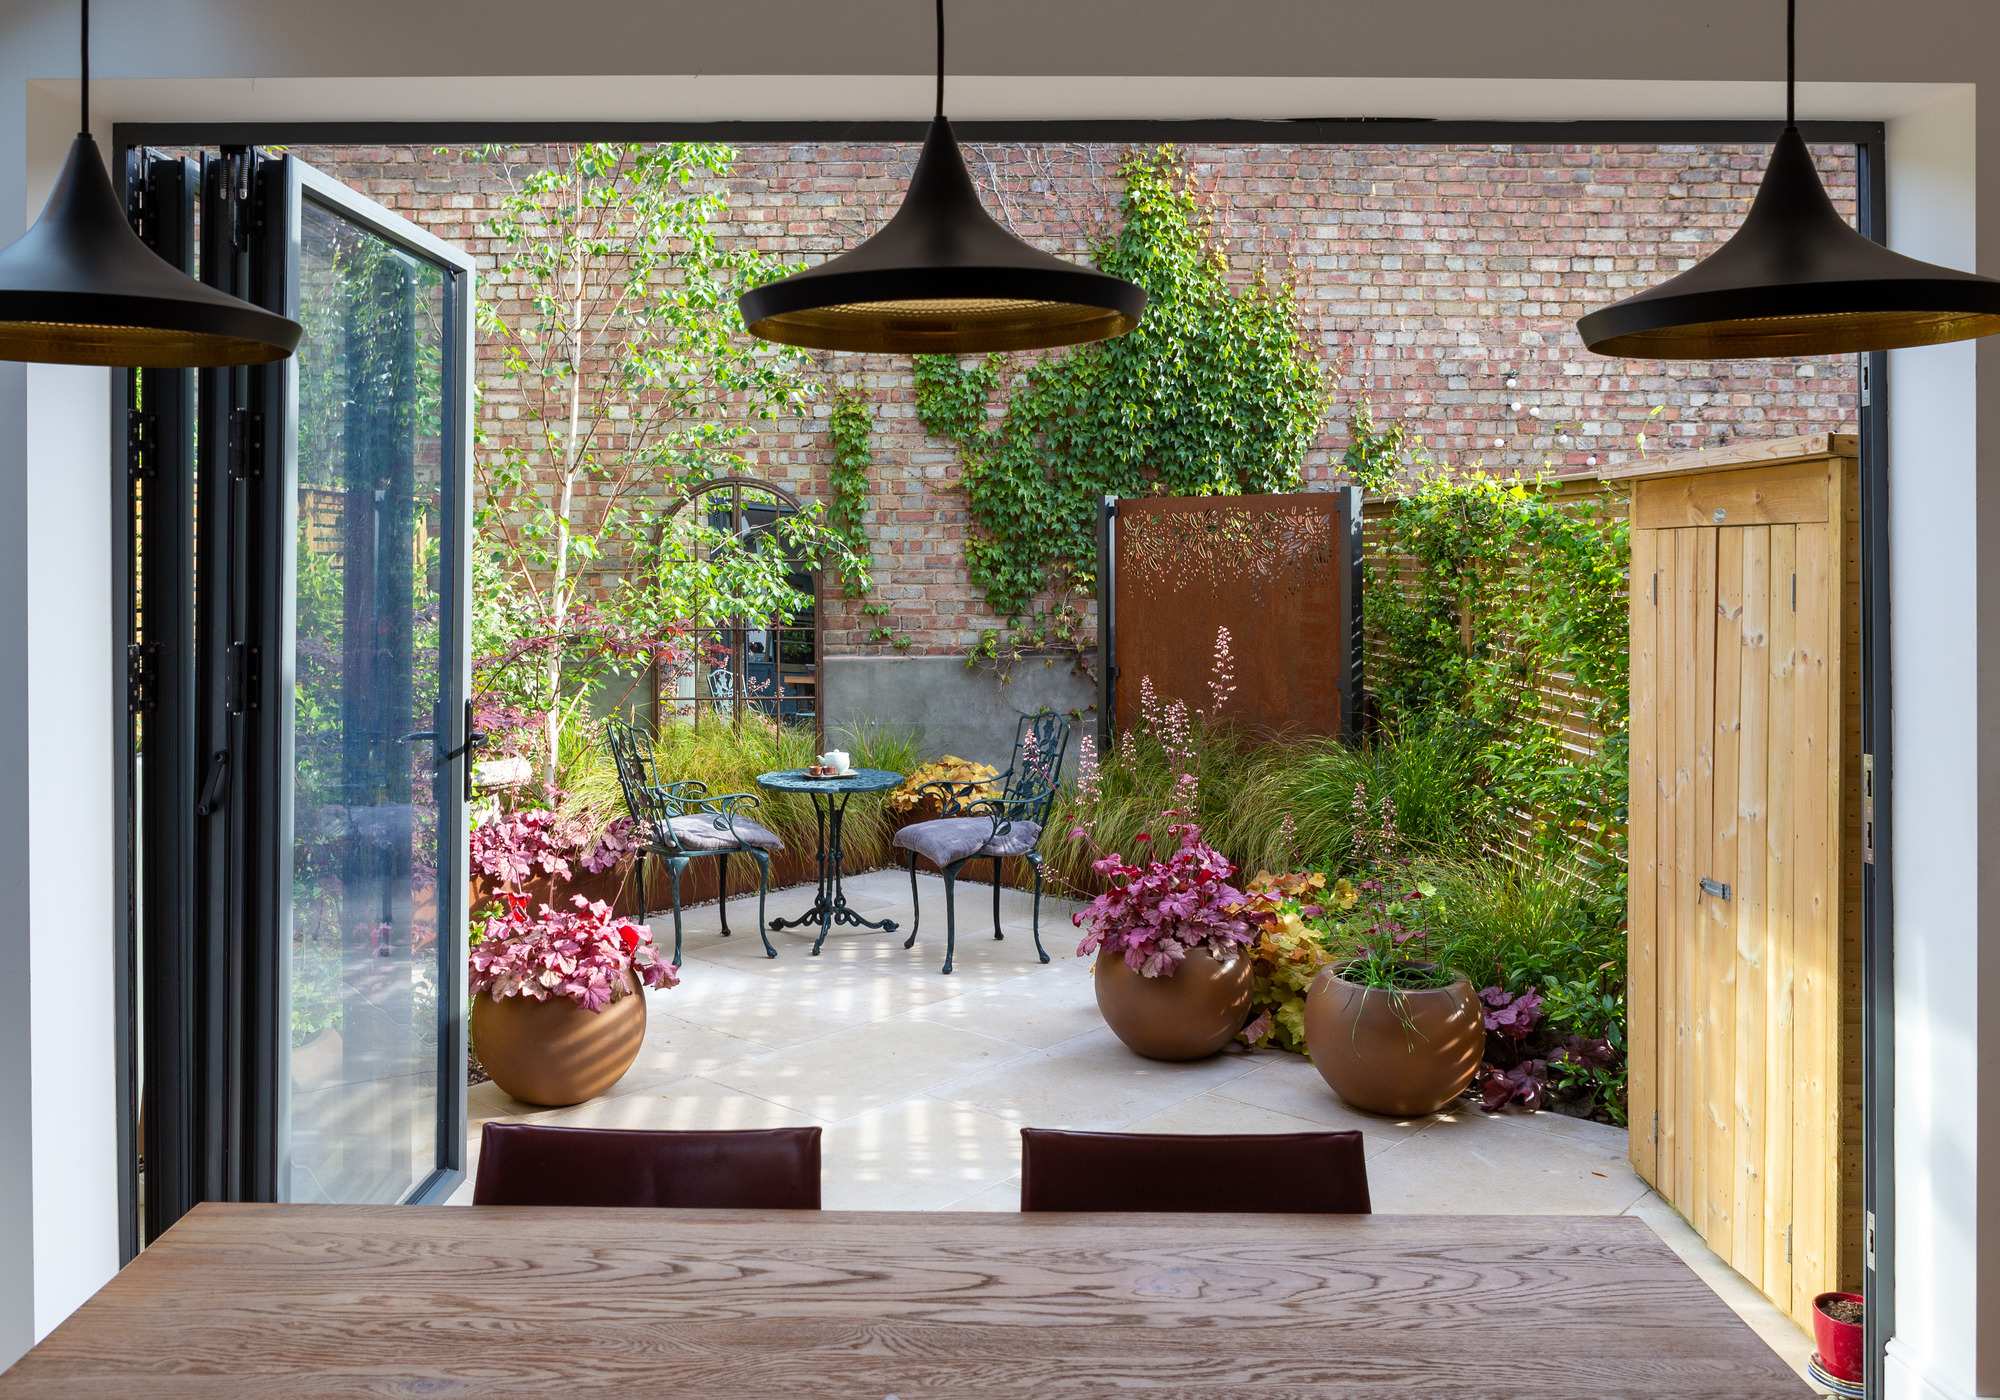
"Use of vertical spaces for plants, as well as mirrors and wall art, can help maximise the appeal of a small garden," says Sarah. "Think big too. One large planter with a tree or statement plant creates a calmer, simpler view than a cluster of small pots."
Step 8: Bring in Your Outdoor Furniture That Easily Fits Into Your Small Garden
There is now a good choice of well-designed modern outdoor furniture on the high street and online. However, resist the impulse to just buy what you like the look of. For a cohesive design, it's important to take your time and choose what will work in the space you have, in terms of size and style.
"Stay true to the theme of your garden by sourcing furniture that suits the look, and do not clutter the space up the space," says Manoj. "Buy furniture that is in proportion with your garden size. If it's too big, it will dominate your space and make it feel smaller.
"Likewise it it's too small, the furniture will look lost, and make the area less of a destination. In a small garden, consider buying either a dining table and chairs, or a comfy sofa that you can lounge on, rather than both. If you choose a sofa, you will need to eat off your lap, so buy what you will make the most use of.
"Also choose furniture that is lightweight, or has some transparency to allow light through. In a small garden, heavy furniture can look cumbersome and make the space feel enclosed."
Step 9: Have a Statement Corner or Area in Your Small Garden
We include focal points, such as a fireplace or an artwork, in a room, but it may not be something you have thought about in a small garden. Yet it's an idea that Kate Gould recommends.
"Create a focal point centred on a window or doorway that you can appreciate from the inside," says Kate. "It will stretch the view for you. This could be a sculpture, water feature, planter or even just a statement plant.
"It is always preferable to go larger rather than smaller on the basis of less is more. A single statement planter with a feature evergreen or architectural plant not only looks good during the day but can also be lit at night to create drama and impact."
Step 10: Embrace a Selection of Plants That Are Ideal for Your Space
Choosing plants for your garden isn't just about selecting your favorite foliage. You might love the idea of palm trees or grape vines but if your garden is north-facing or shaded, these sun-loving plants will likely struggle to thrive.
Save yourself the headache and pick plants that are appropriate to the conditions, such as the soil type, amount of shelter and quota of sunshine. Hostas and ferns are just a couple of understory species that don't need tons of sun and will make a shady outdoor space feel lush and alive.
"Small gardens are often shaded, so plant selection is important," says Kate. "In very small spaces where other buildings shade the garden you may have a limited palette to work with. The same goes for very sunny and hot roof terraces. The mantra here is always ‘right plant, right place'."
FAQs
What Are the Three Golden Rules of Garden Design?
When it comes to designing a small garden, these are the three golden rules that our garden designers recommend.
1. Unify your boundaries if possible. "Although these blend into the backdrop, one type of fence, wall or plant will set a scene for the rest of the garden and not conflict with it," says Kate.
2. Go larger rather than smaller when choosing containers and plants. "A single statement planter with a beautiful evergreen will look better than lots of smaller pots," says Kate.
3. Opt for large-format pavers or decking. "They tend to look better than small bricks or tiles in a small outside space."
It's worth approaching garden design in a similar way to interior design – with much thought and meticulous planning. While painting the fence, adding a sofa, and planting some foliage and flowers will spruce up a small garden, it will unlikely produce the results you're after. Approaching the project as you would a room renovation will garner a far more pleasing outdoor space that you can enjoy for many seasons.
When designing your garden, Manoj suggests creating a schedule of works and putting together a spreadsheet to assess the costs. "Insert columns for item, quantity, unit cost, total cost, supplier and delivery dates, and then fill the chart with all the items and materials you will need to fill your garden," he advises.
"This is a good way to assess the cost and make savings if needed. For example, you may find that the basalt slabs you wanted for your patio are too expensive, but the sandstone or porcelain are more affordable options. Focus on the hierarchy of expenditure, prioritising the bones of the garden, such as hardscaping and structural plants.
"Also, try to keep in mind the amount of time you can commit to maintaining it. While there is no such thing as a no-maintenance garden, you can reduce this by avoiding overly manicured features, such as striped lawns, and opting for simple plantings that look after themselves for much of the year. Leaving perennial plants to stand uncut over winter, and not clearing up too many leaves, lessens the load and is helpful to wildlife too."