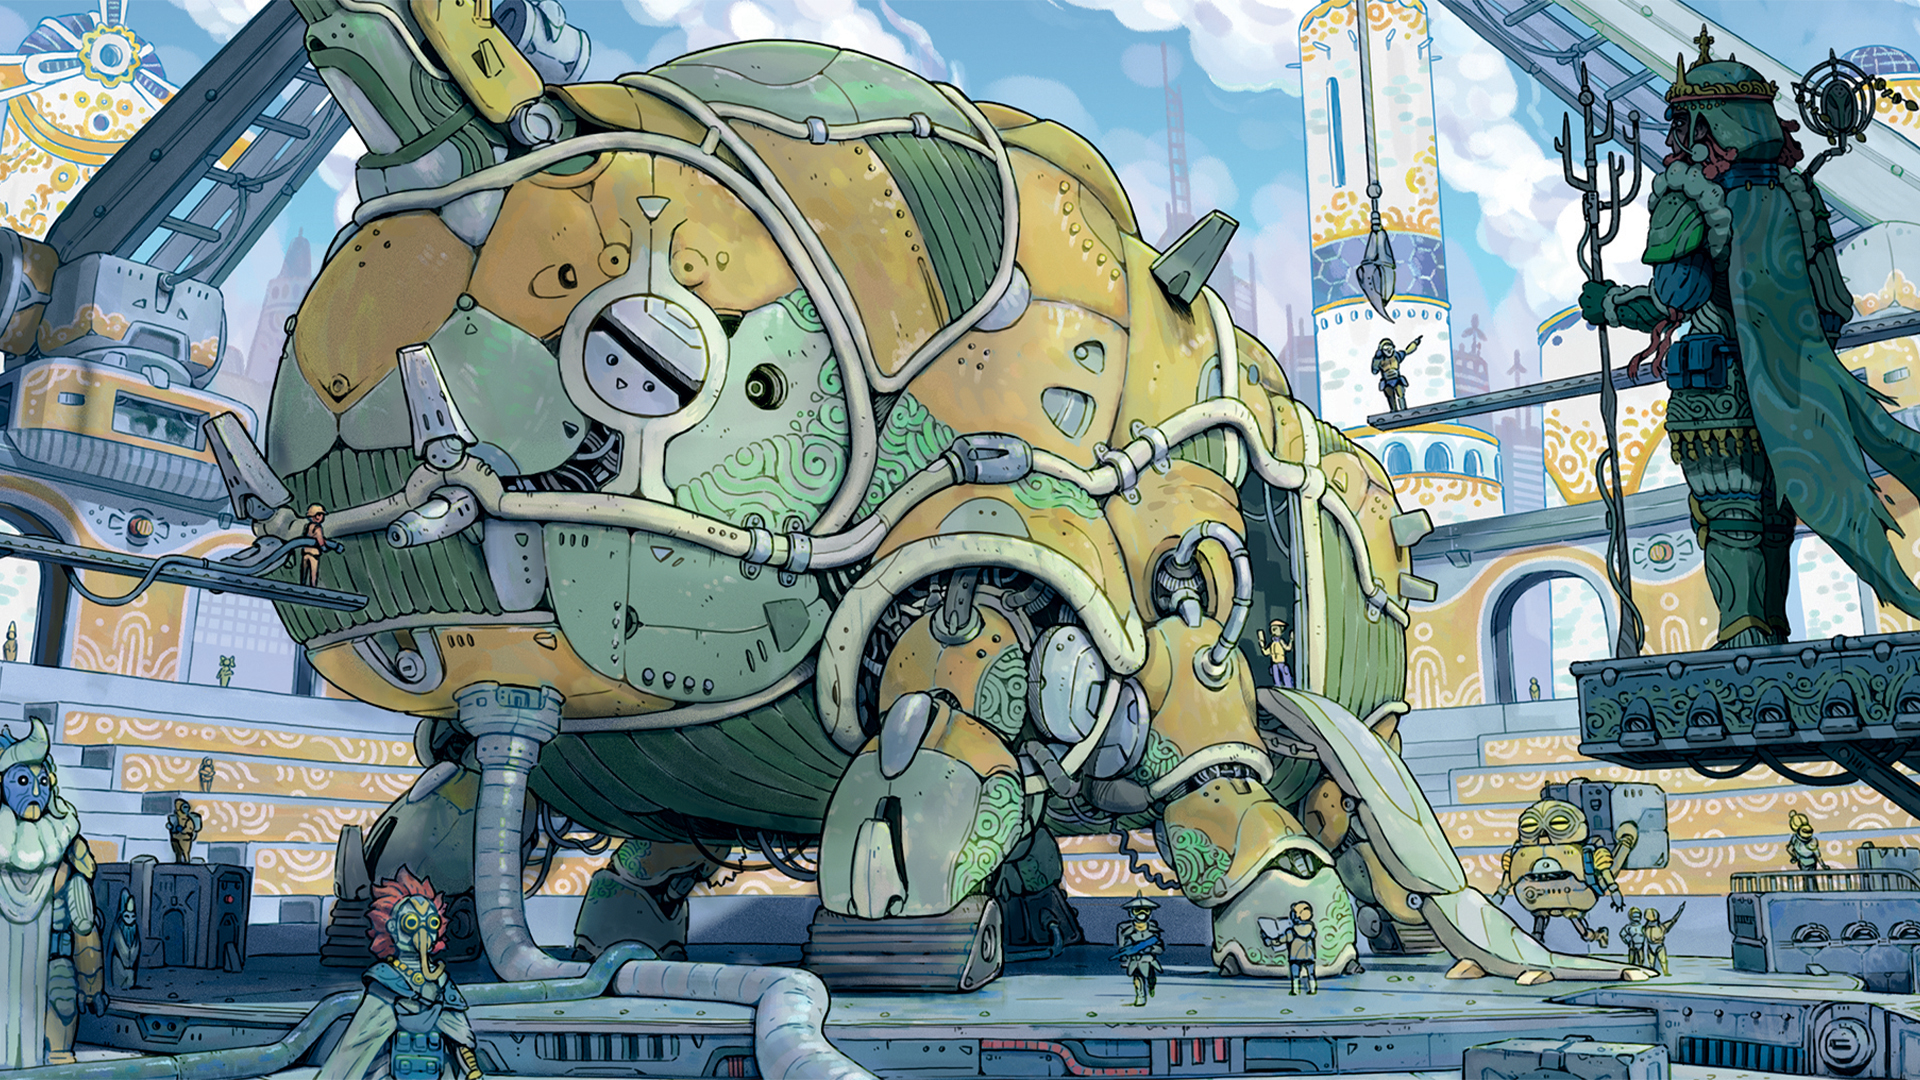
Generally, I’ll get commissioned for a keyframe when a game is reaching the end of production and there are already plenty of visual resources to rely on. In this case, it’s the other way around. The studio Strangers, for which I currently work as a lead artist, needed a keyframe in the pre-production of Trailblazers, a top-down sci-fi RPG in which you manage crews on gigantic landships.
In this instance, you have more responsibilities than when creating an artwork for a game at the end of production, as the keyframe will be presented to potential commercial partners. But you have the advantage of working with a more malleable project, which implies a greater creative freedom. In both cases, the purpose of the keyframe remains the same: to generate interest and convey the various themes of a complex project in a single image, all without straying too far from what the final product will offer.
In this workshop, I’ll explain all the tools that can be used to produce this type of artwork within a short timeframe. All you need to follow this workshop is a basic knowledge of drawing, of digital art software such as Photoshop or an equivalent, and the basics of 3D – but nothing complex – as I’ll also explain how I mix 2D and 3D to speed up the final rendering.
01. Study the project
The first task you need to do is carefully study the client’s expectations for the project you’re working on. Notion is a great tool to have all the team’s notes and documentation gathered and organised in one place. If the studio already has artworks by other artists, ask them to point out the positive and negative elements, and refer back to those to push the project forward.
02. Search for references
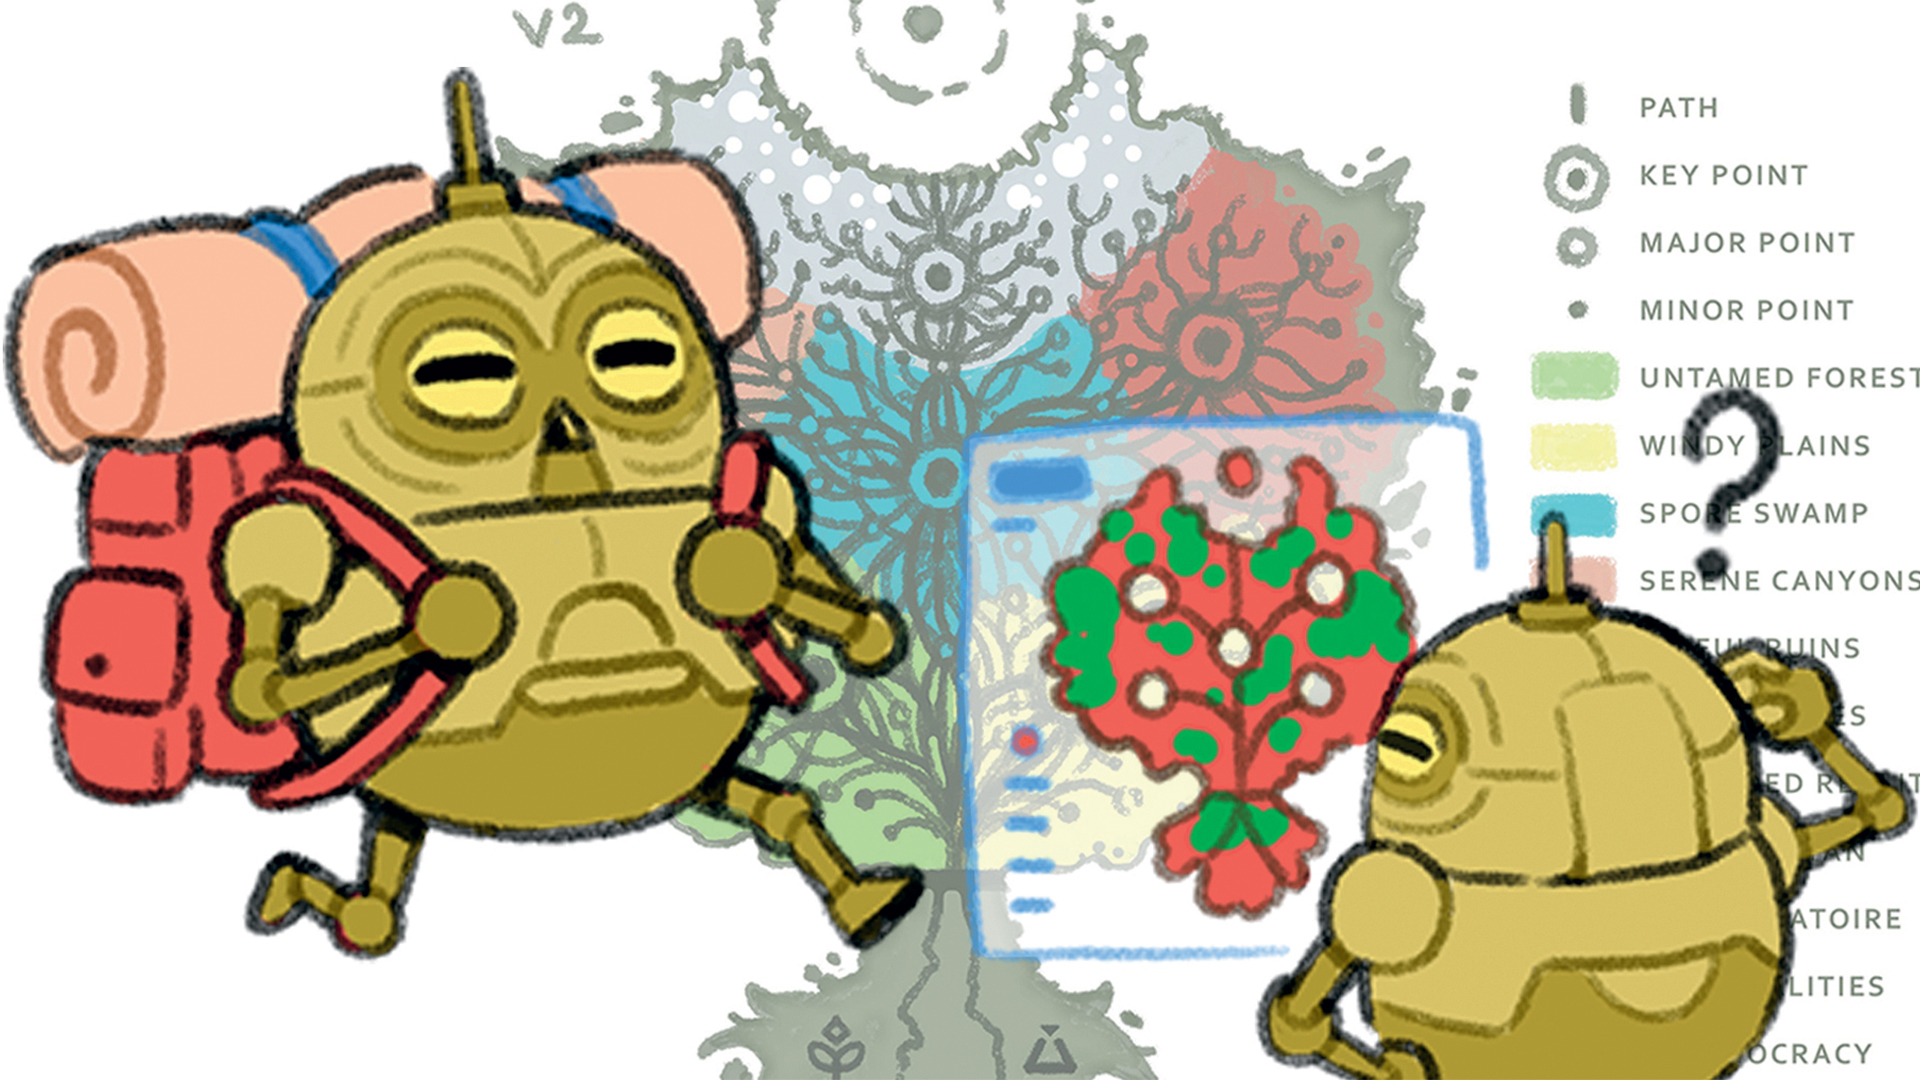
Trailblazers is set in a post-apocalyptic solarpunk universe, both dangerous and wonderful. When it comes to references, I use PureRef to gather and organise them. Those include many artists such as Moebius and Hayao Miyazaki. However, relying solely on artworks imbued with the style of other artists can actually limit creativity, which is why my mood board is mainly composed of photos of natural and man-made objects.
03. Decide what to include in your keyframe
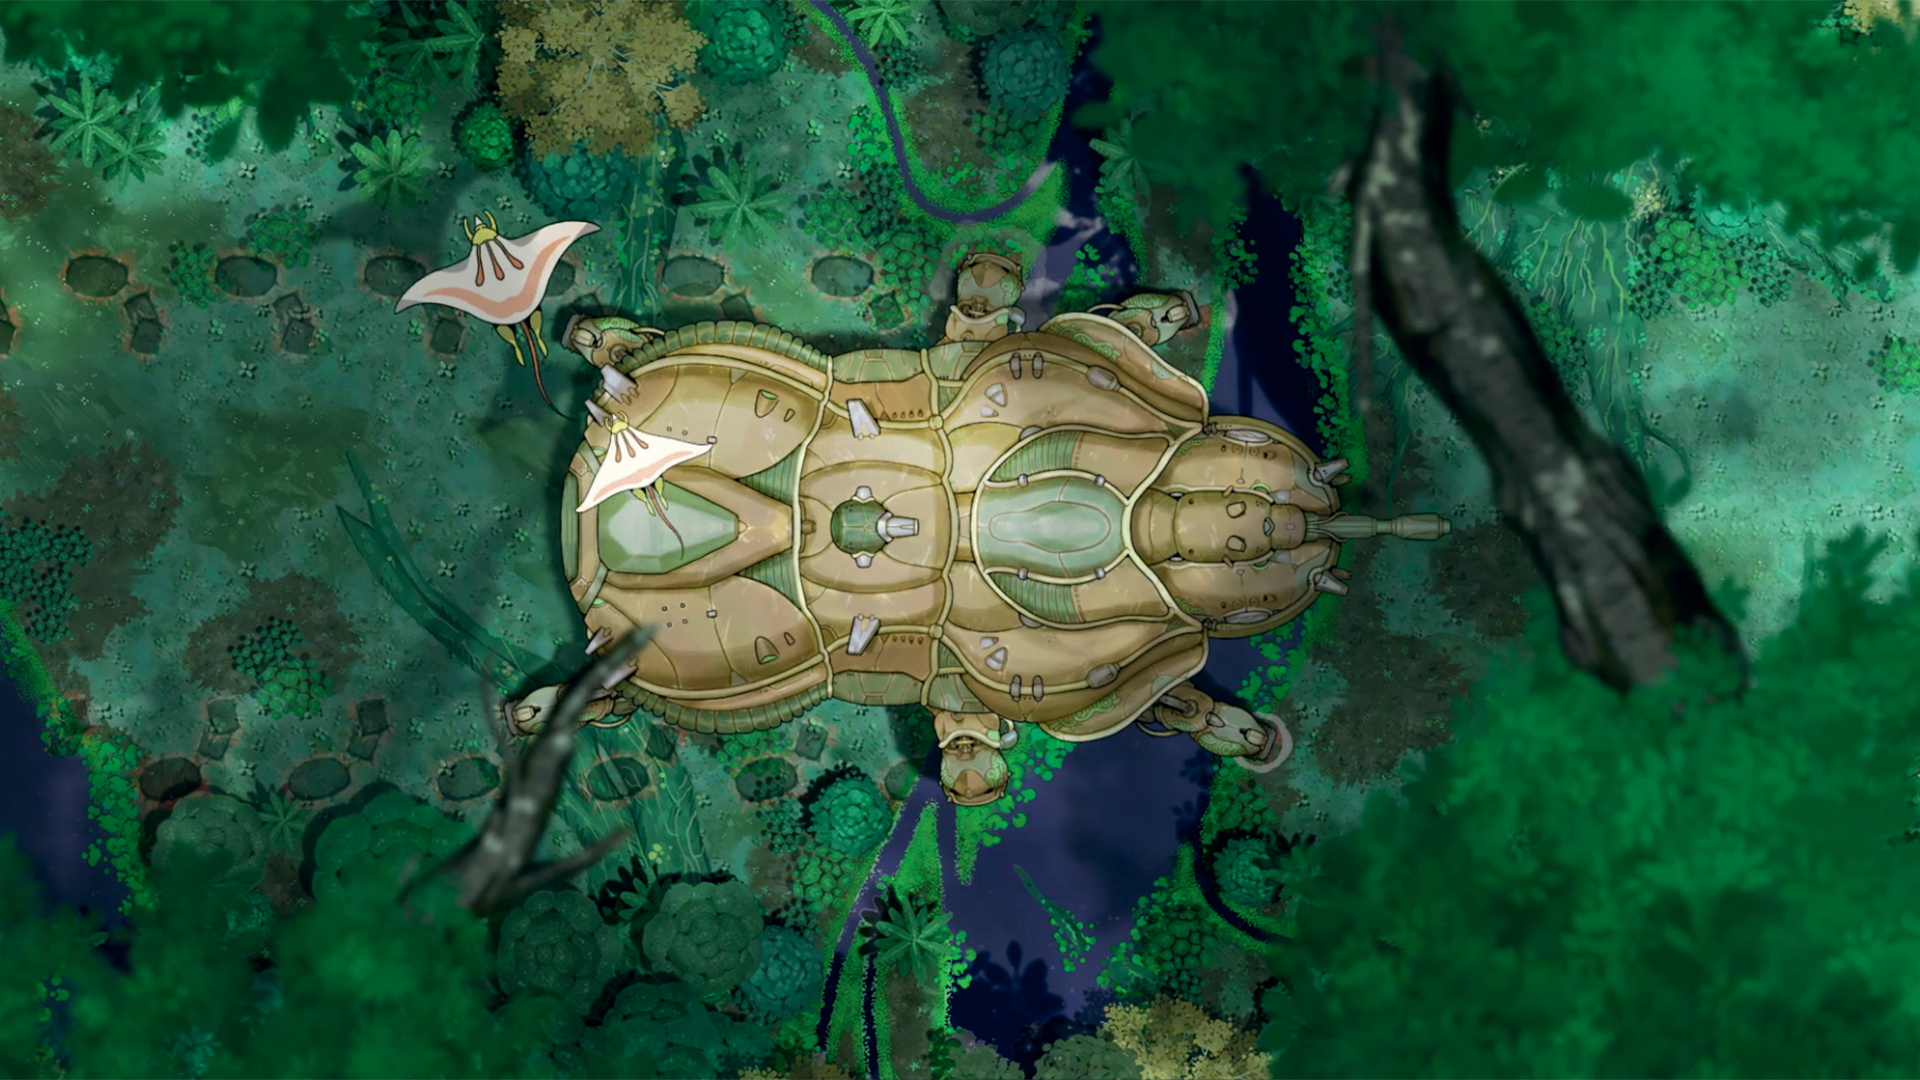
The challenge of a keyframe is to capture the gameplay of an entire game in a single piece of art. Between FTL: Faster Than Light and RimWorld, Trailblazers is about managing crews aboard gigantic landships across fantastical landscapes. As it’s impossible to depict all aspects and specifics of a game in one image, I’d advise you focus on one key element. In my case, it was the preparation of the ship before its journey.
04. Create character sketches
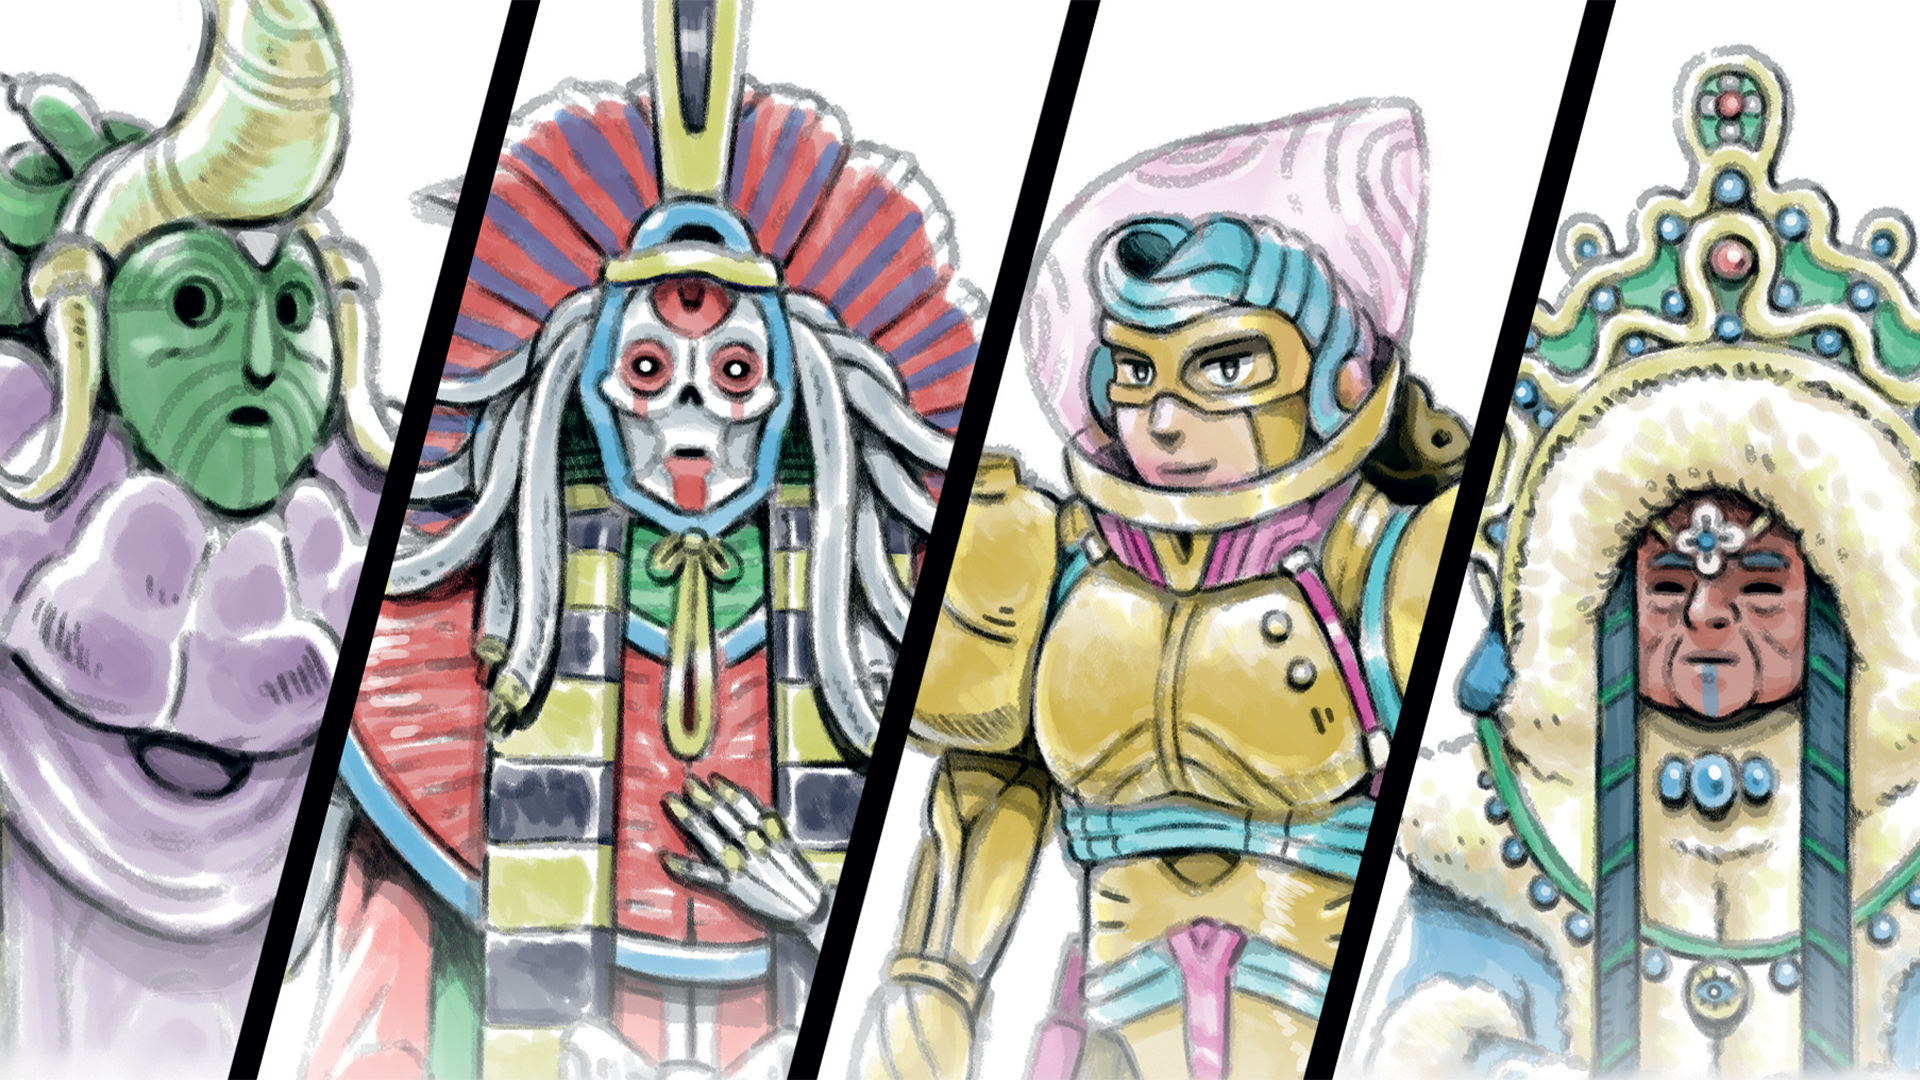
When it comes to sketches, you can start with whatever you want. In my case, it was the characters. The key was to create coherent designs for various characters and their factions. There are several factions, each with their own culture, abilities, patterns, colours and shapes.
05. Make vehicle design decisions
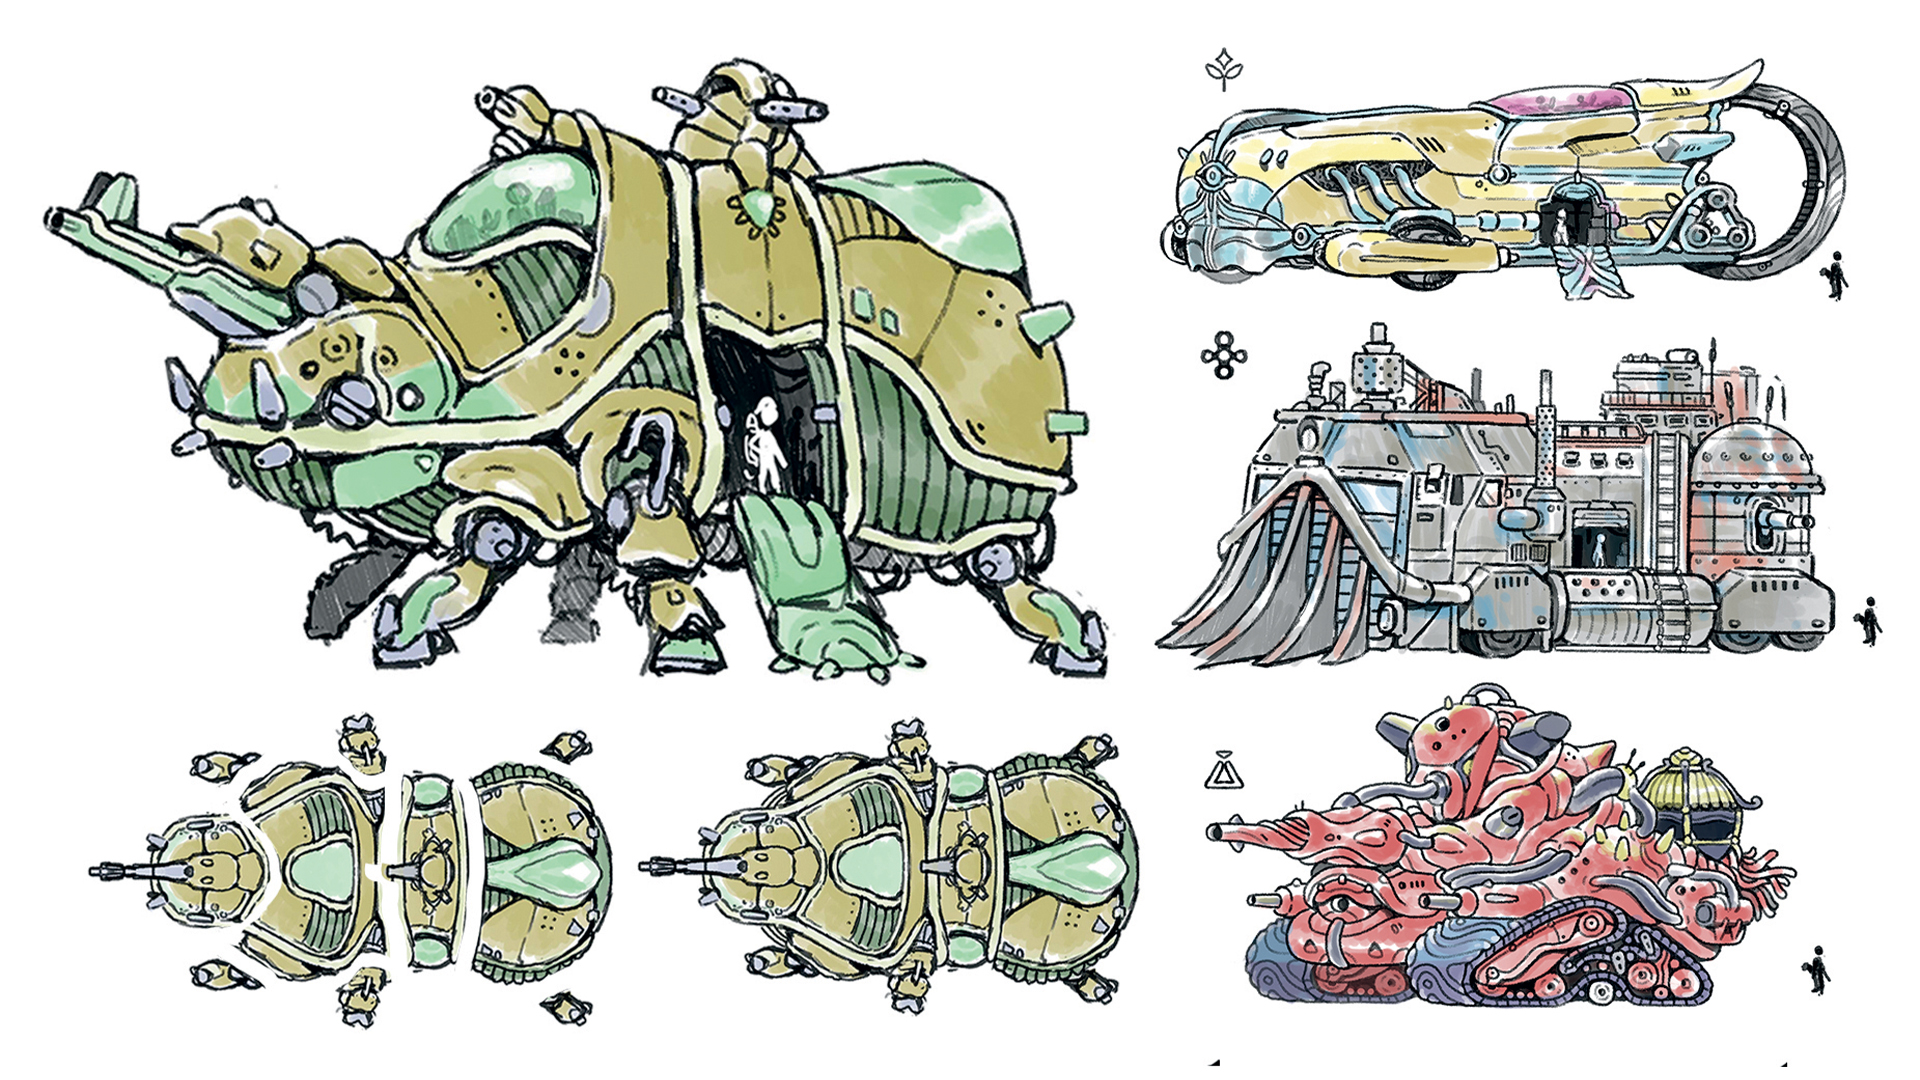
Sketching the characters helped me establish specific designs for each faction, and taking those into account also helped when I sketched vehicles with distinctive shapes and looks. For every landship, I also took into consideration key information such as their speed, properties, the environment in which it operates, and the game’s main camera angle, being a top-down view similar to FTL.
06. Plan an environment
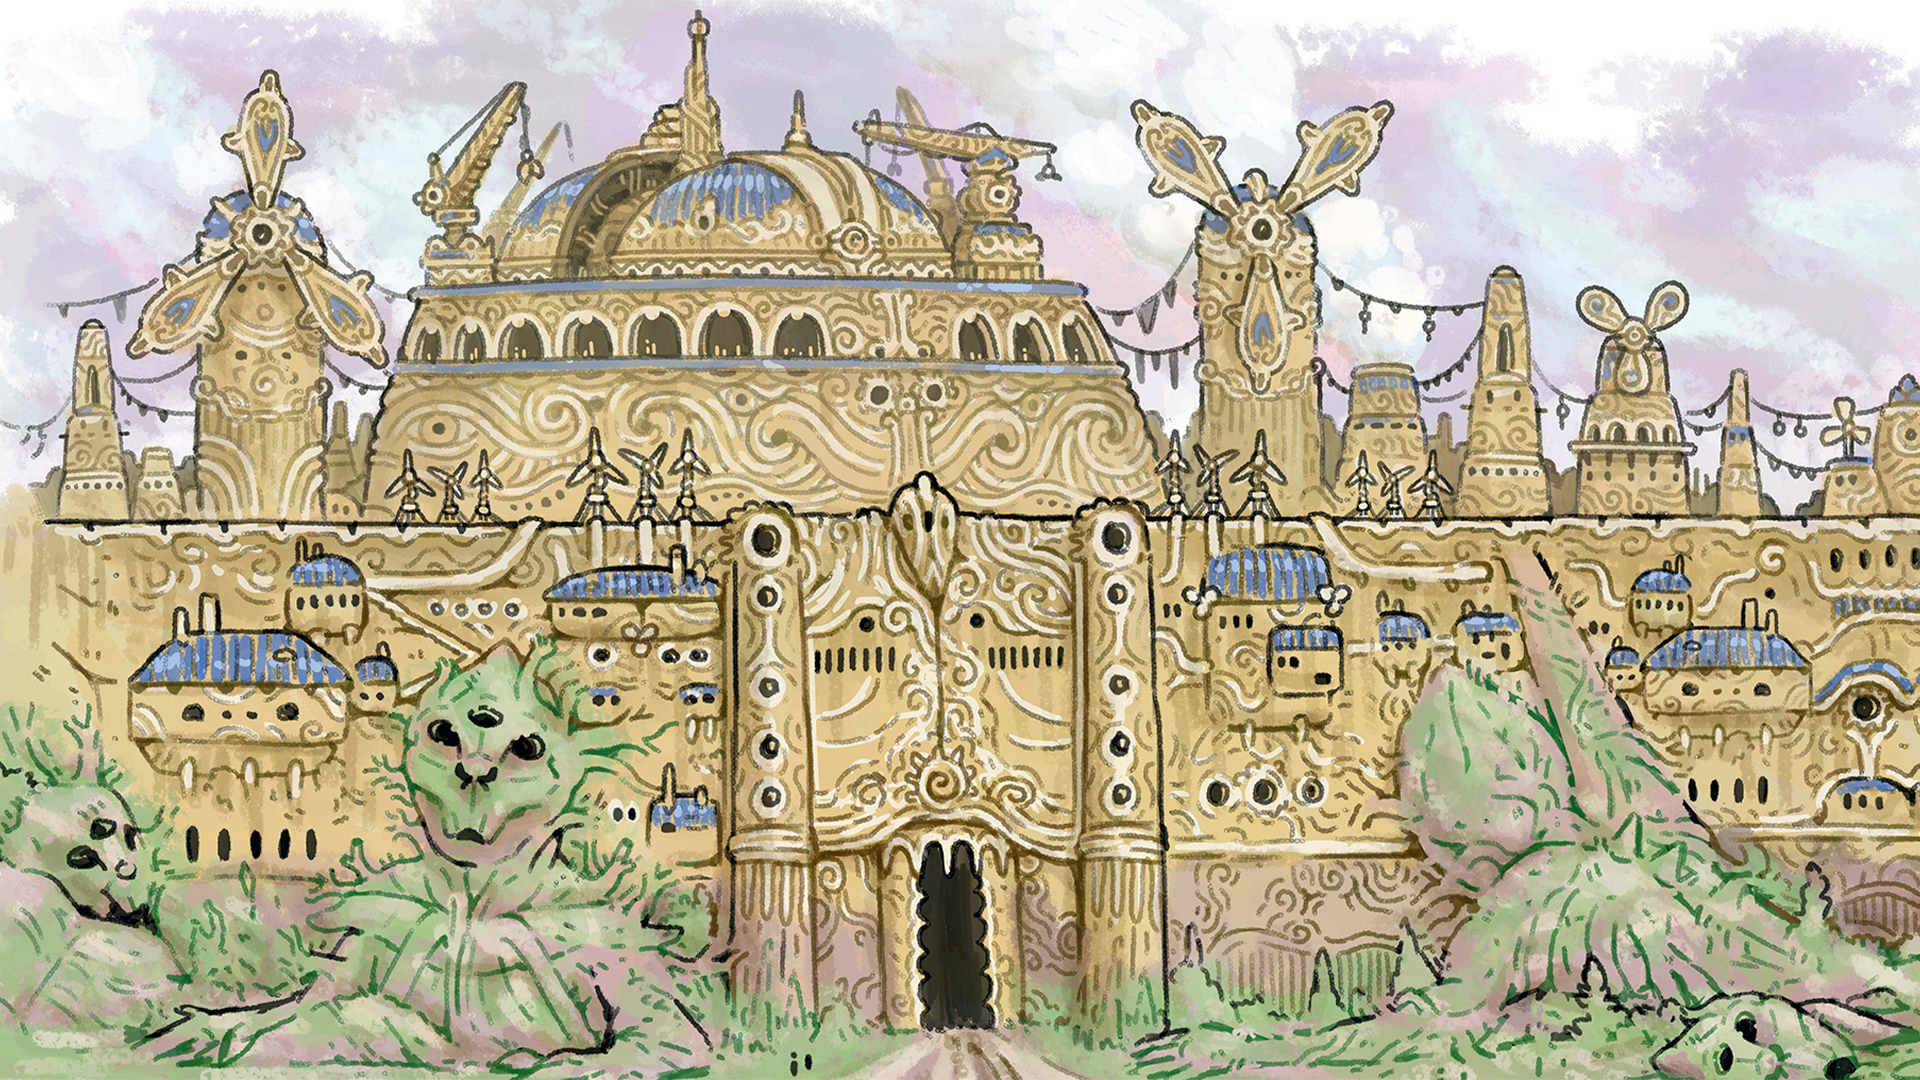
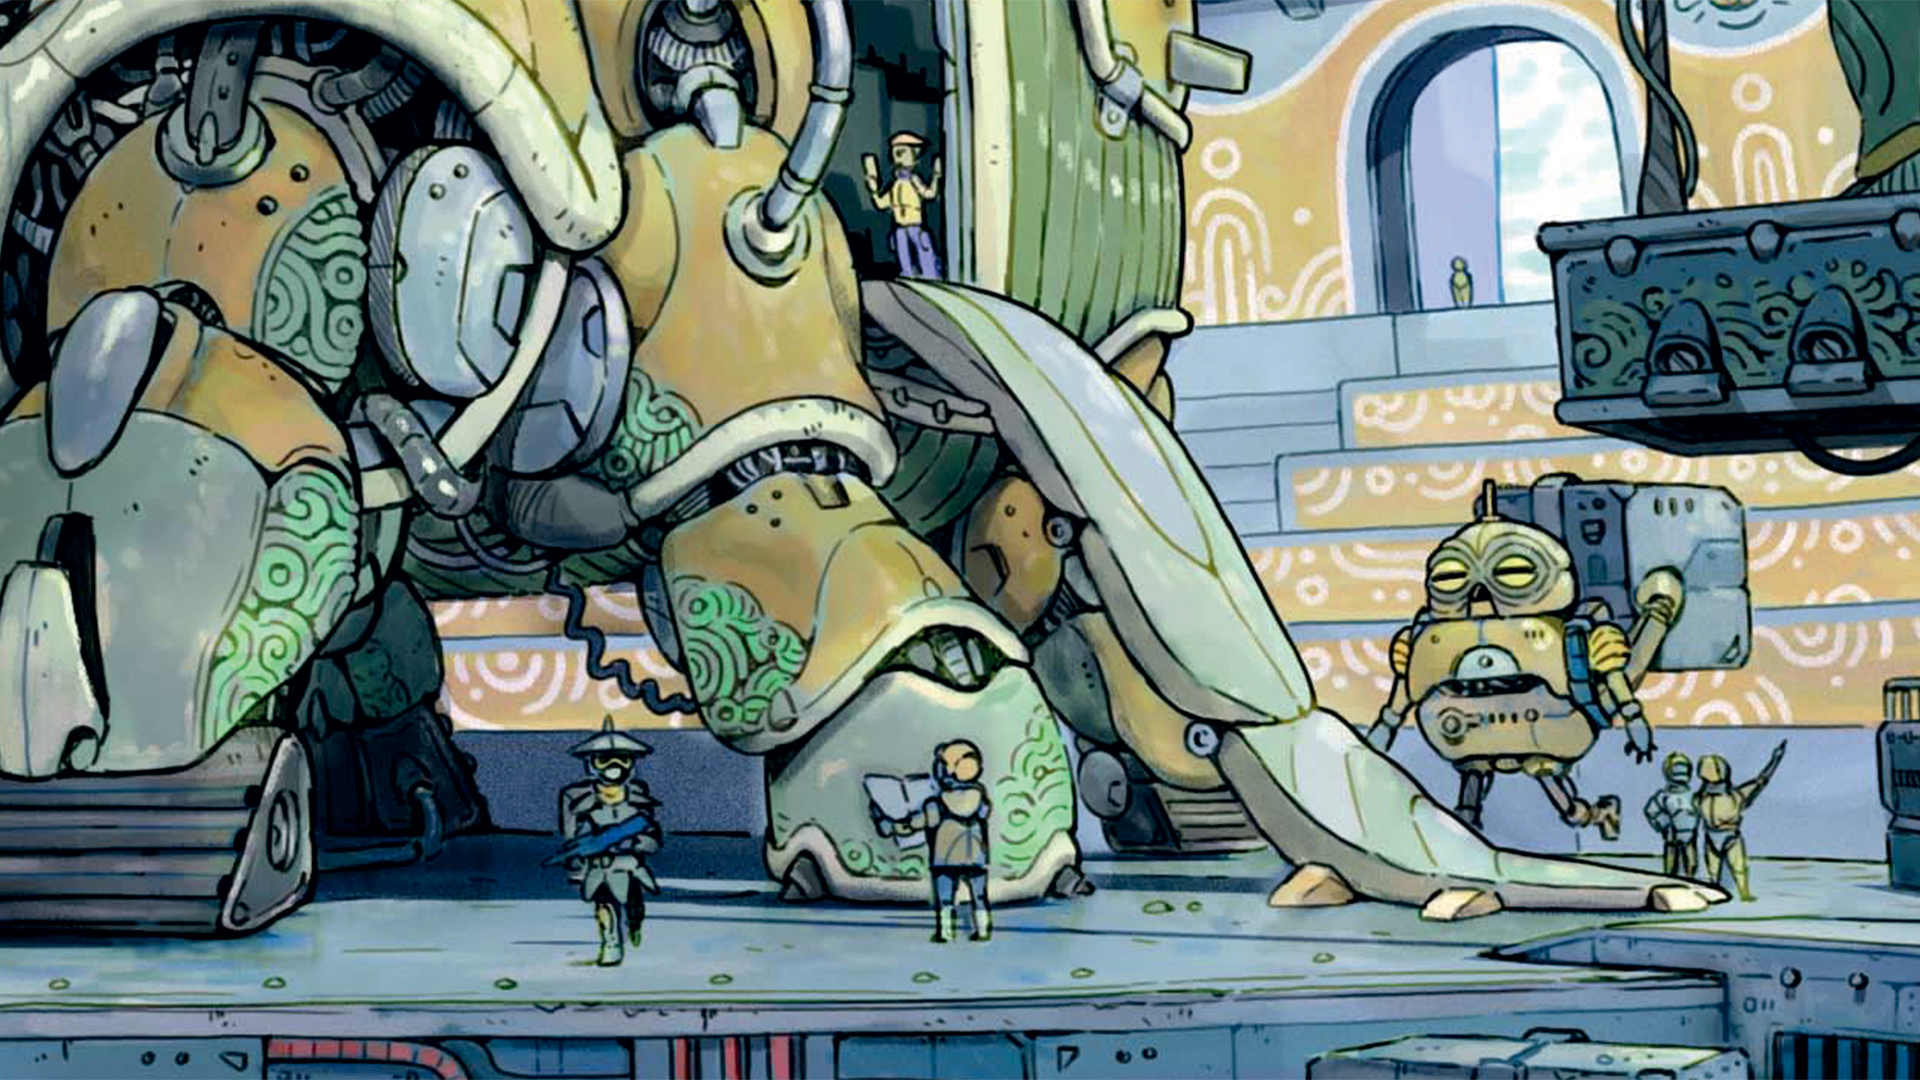
I had one environment to design for the keyframe: the Hub. It’s a vast industrial port where the landships are built, and serves as a passage towards The March, a hostile continent whose exploration is the main objective of Trailblazers. I therefore designed a location that felt ancient and marked by time, yet not frozen in time as it’s a busy place. To achieve this, my main inspiration were the beautiful backgrounds found in Nausicaä.
07. Choose your style
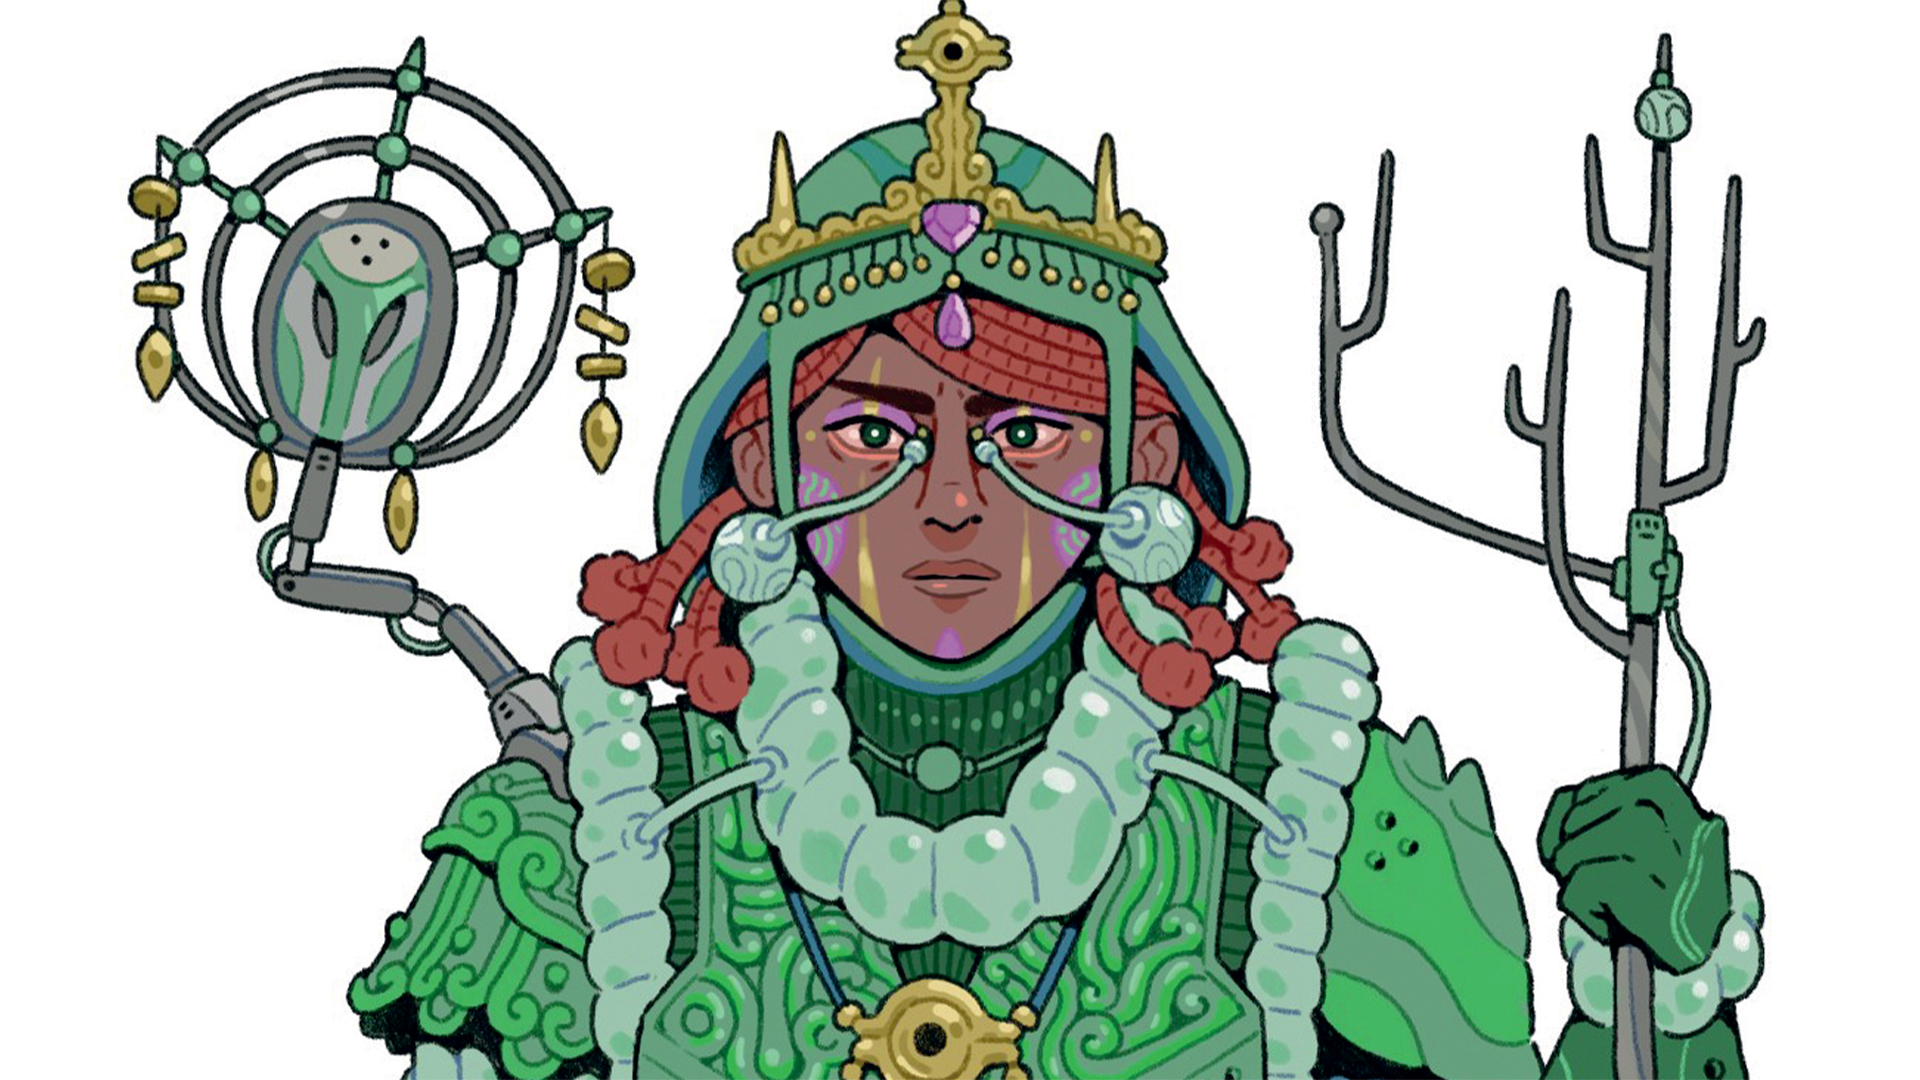
The key art should be close to the game’s visuals without imposing too many constraints. The aim is to come up with an original visual that will highlight the game. Trailblazers’ backgrounds are quite elaborate, so I opted for a stylised, Moebius-inspired rendering for the characters. Instead of experimenting with the chosen style on the whole scene, I rendered one character first. This saves time if you’re wavering between your choice of styles.
08. Use 3D software for composition and more
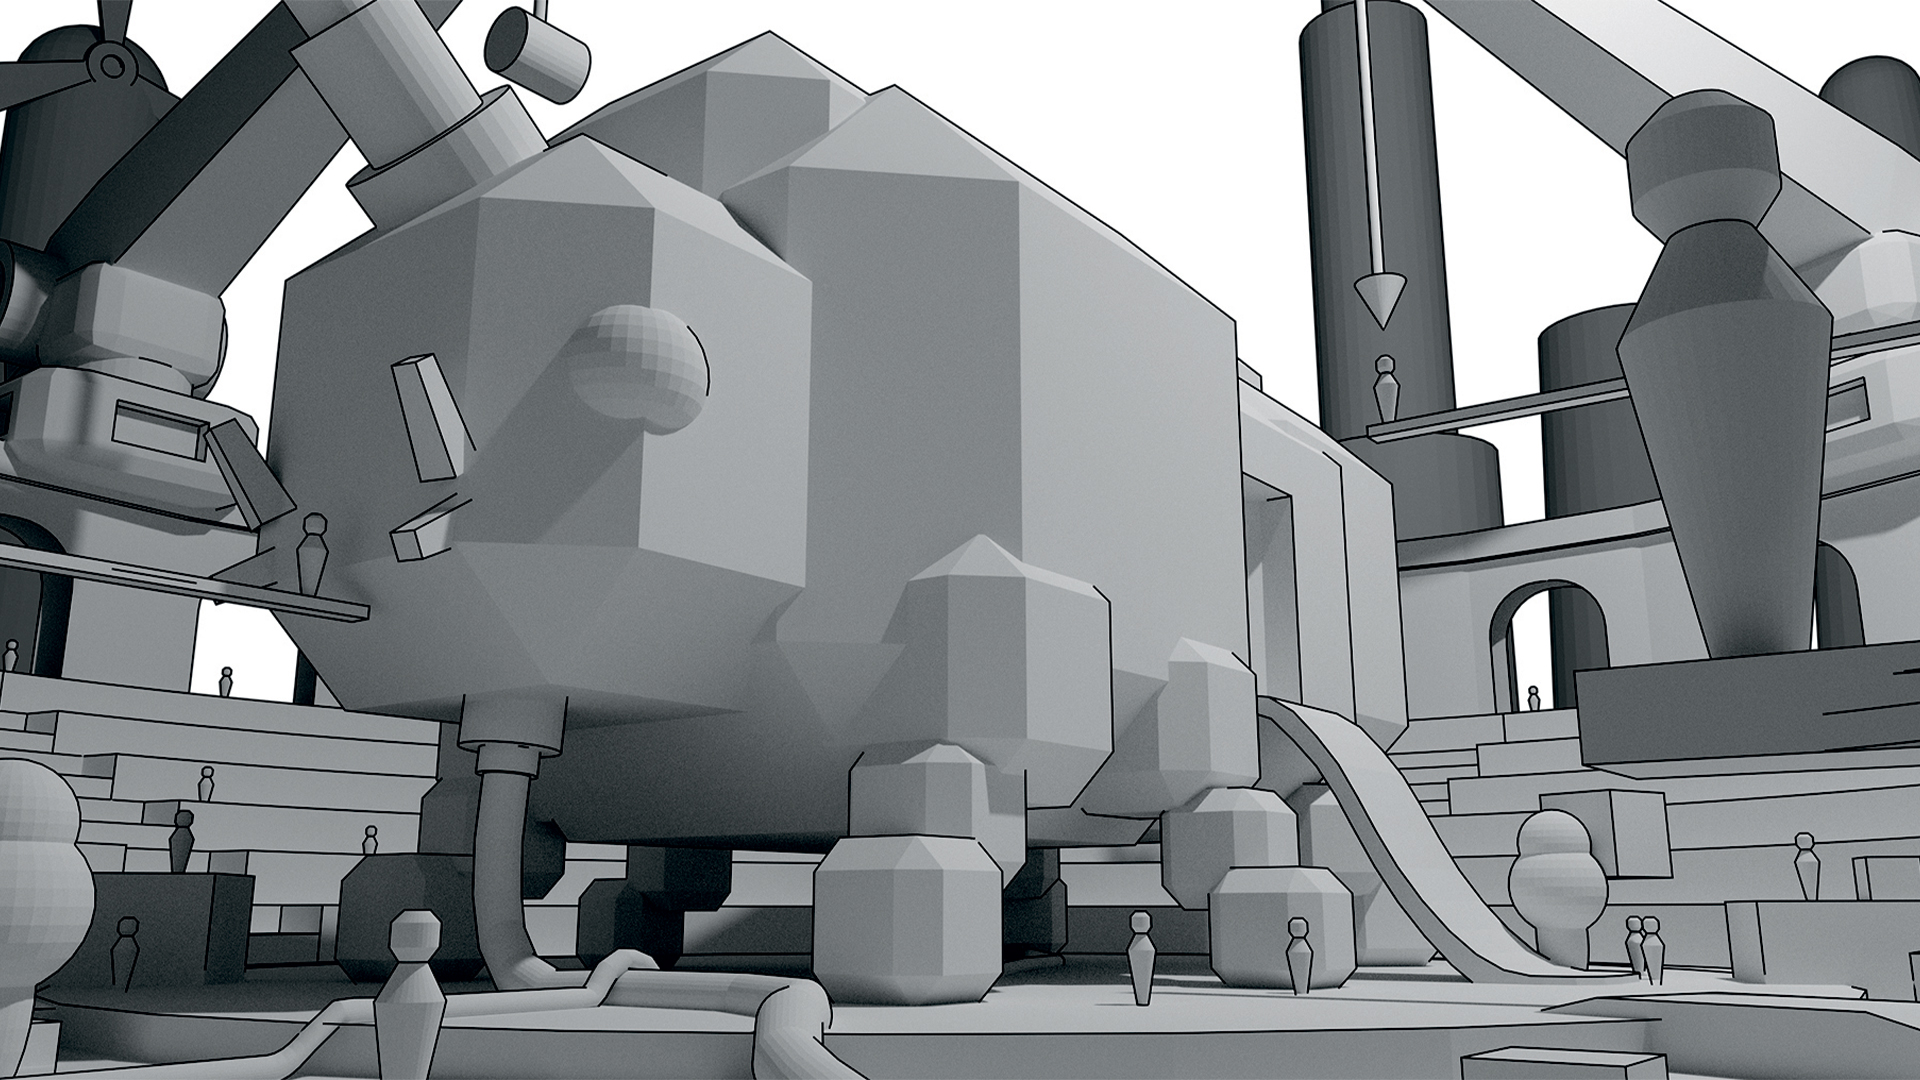
Sometimes you have a tight deadline to create a scene that requires a complex perspective or a large cast of characters. In such situations the use of 3D is a time-saver. I use Blender without even making textures. Just by placing simple, low-poly shapes likes cubes, spheres or cylinders, I can get an idea of the ideal composition, the most suitable camera angle, or the best placement for a light source.
09. Sketch over 3D elements
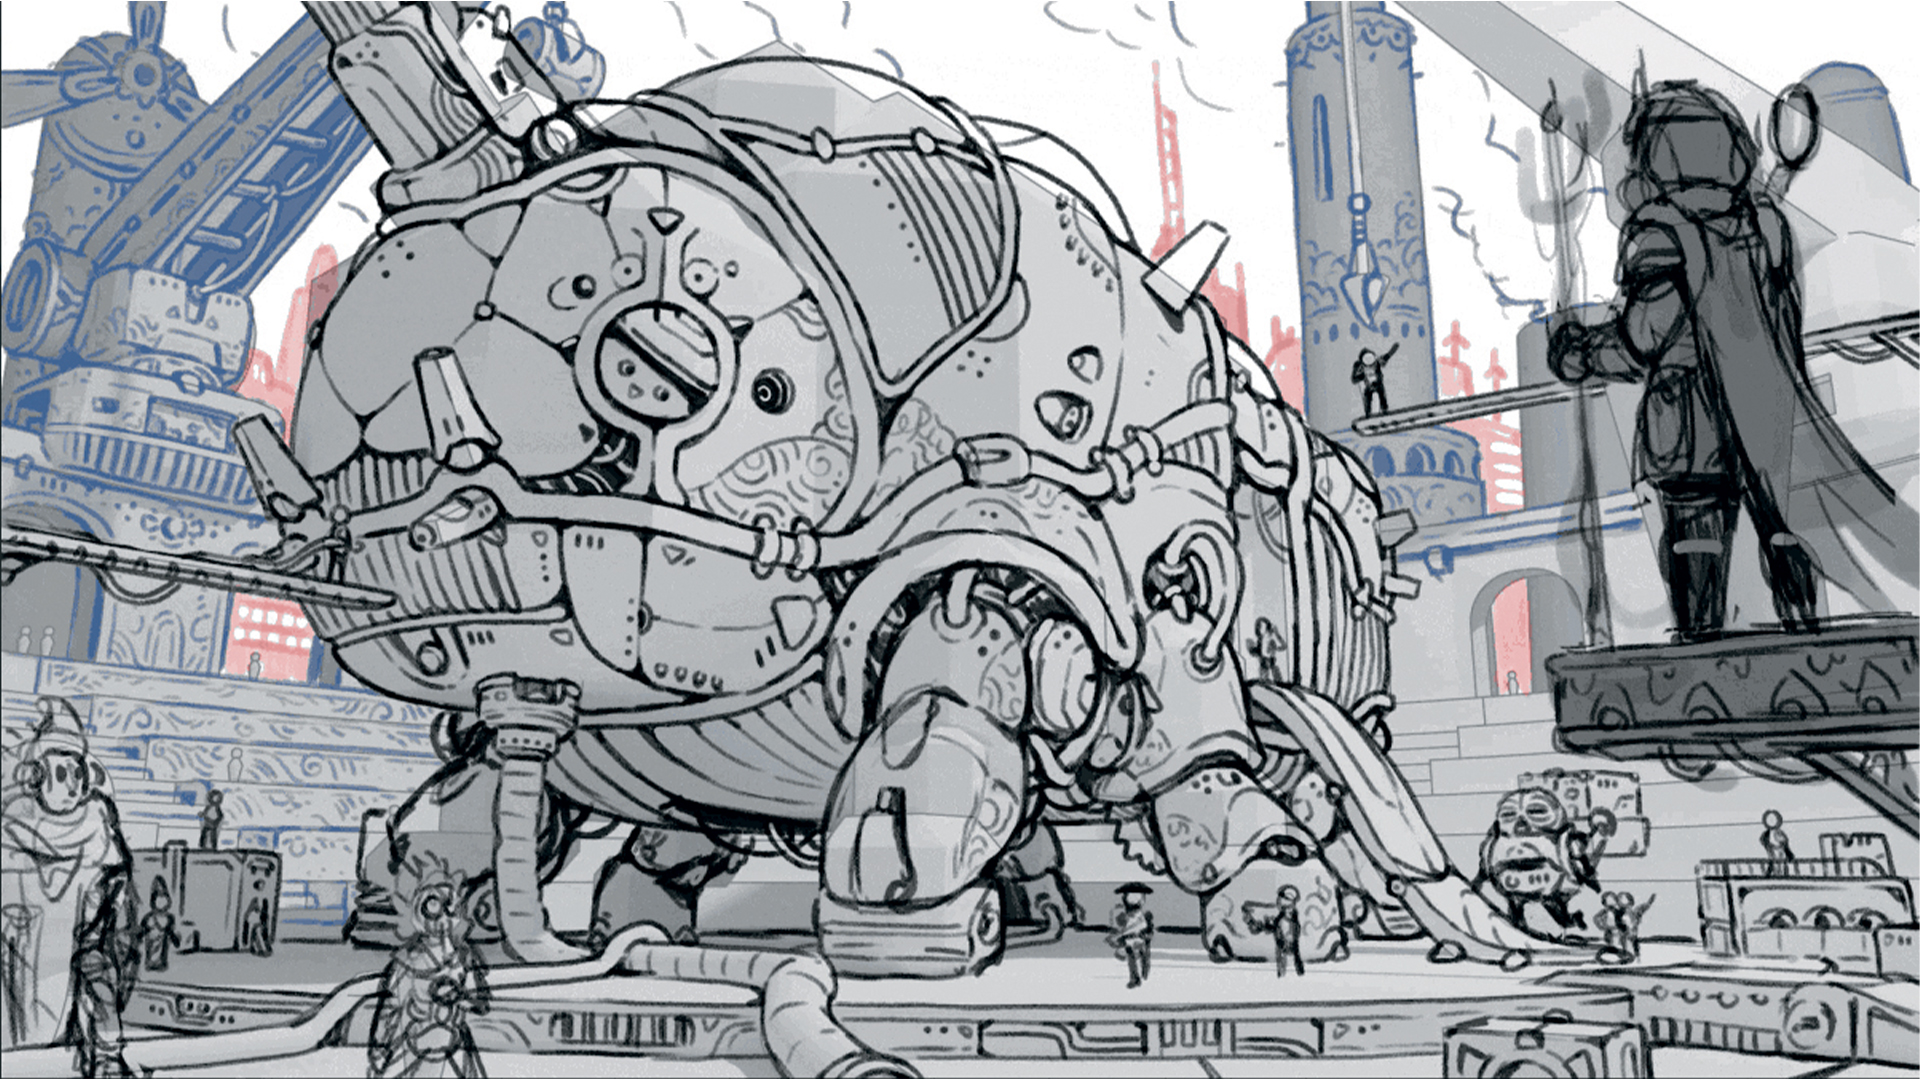
Once I’m satisfied with my 3D scene I take a screenshot and sketch over it, relying on my preliminary sketches and choosing which characters and vehicle to include. I decided to add elements specific to the Consiglieries, the faction that runs The Hub, notably a pattern of spirals inspired by Jomon-era Japanese pottery.
10. Refine the line art
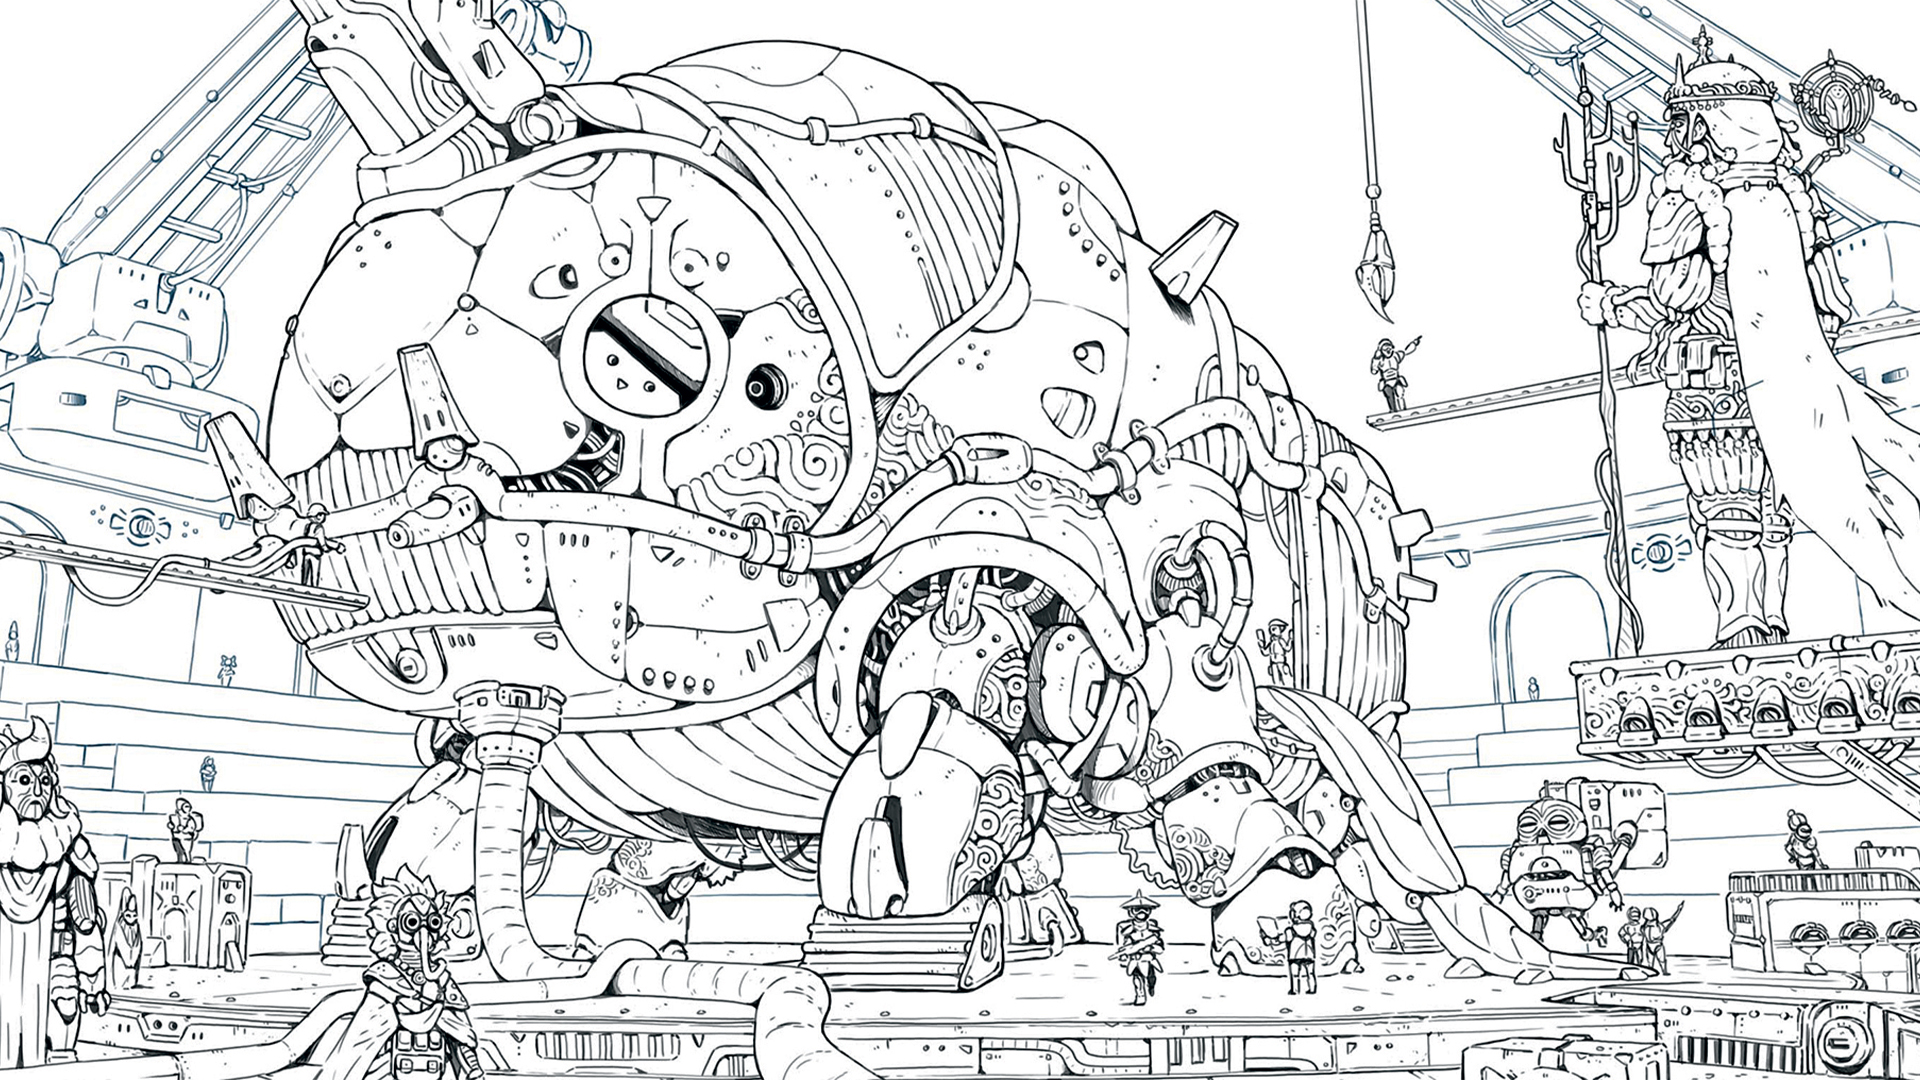
Next I used the Pencil Yujin brush, a slightly grainy brush from Kyle’s Manga brush pack, to refine the line art. Once the line-art is done, I create a clipping mask on the layer above and colour the lines, leaving the outline of each important element black to ensure that they stand out clearly from each other.
11. Add colour and texture
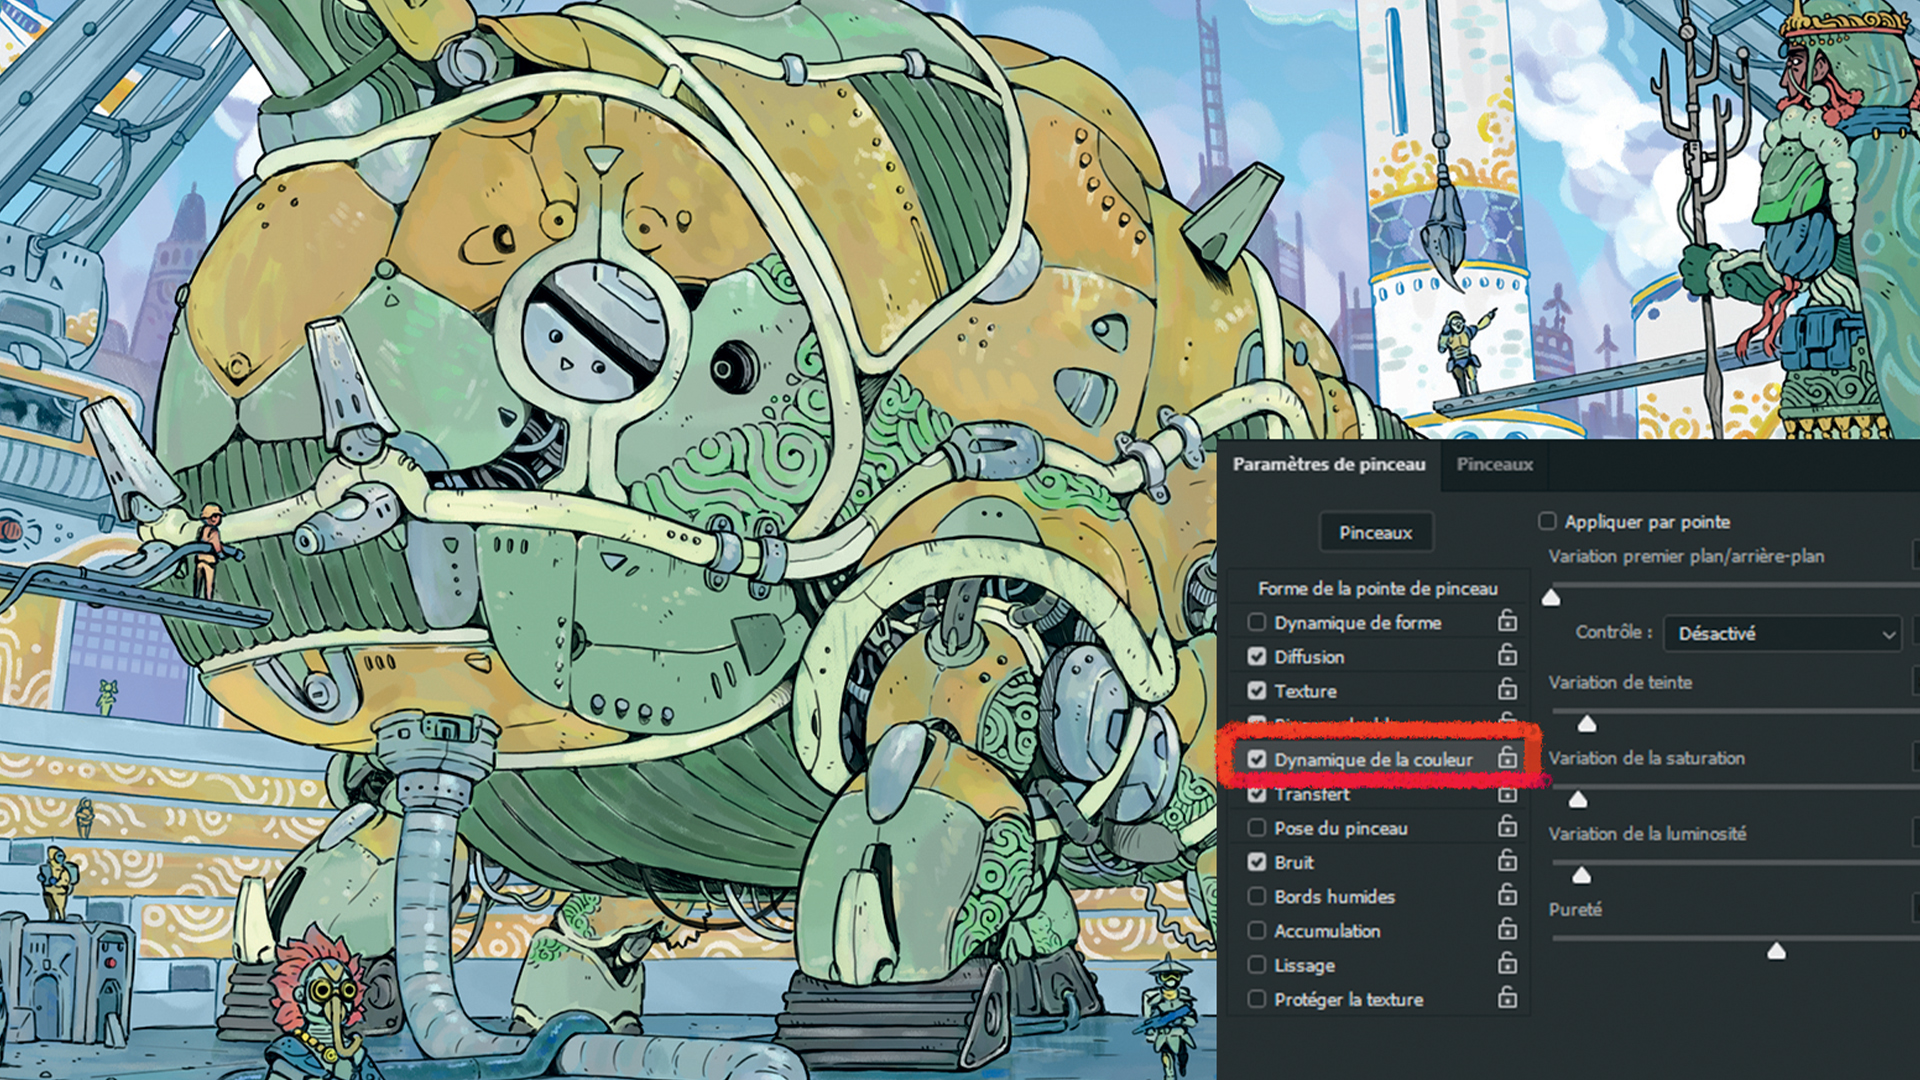
For smaller elements such as the characters, I’m opting for a solid colour, and for larger ones I’m turning on Color Dynamics, which adds a slight variation with each brushstroke and gives a more natural texture. I’m also adding light grey to the cracks in metal objects to simulate the wear and tear of the paint.
12. Create atmosphere and depth
To give depth to a landscape, the main point is to portray atmosphere. Atmosphere is ever-present, but it’s mostly visible from a great distance. The further an object, the denser the air between us and that object, which makes it appear lighter and less contrasted. Conversely, when it’s dark, more distant objects will instead appear darker, though this also depends on light sources and reflections.
13. Add volume with light and shadow

The 3D blockout, which was useful for finding the composition and perspective, is also useful when it comes to rendering, as it saves time to use it for shadows and lighting. To do so, I place my 3D rough rendering in a layer set to Multiply mode at 60 per cent Opacity, and all I need to do is blend and erase to make the low-poly shadows match my clean design.
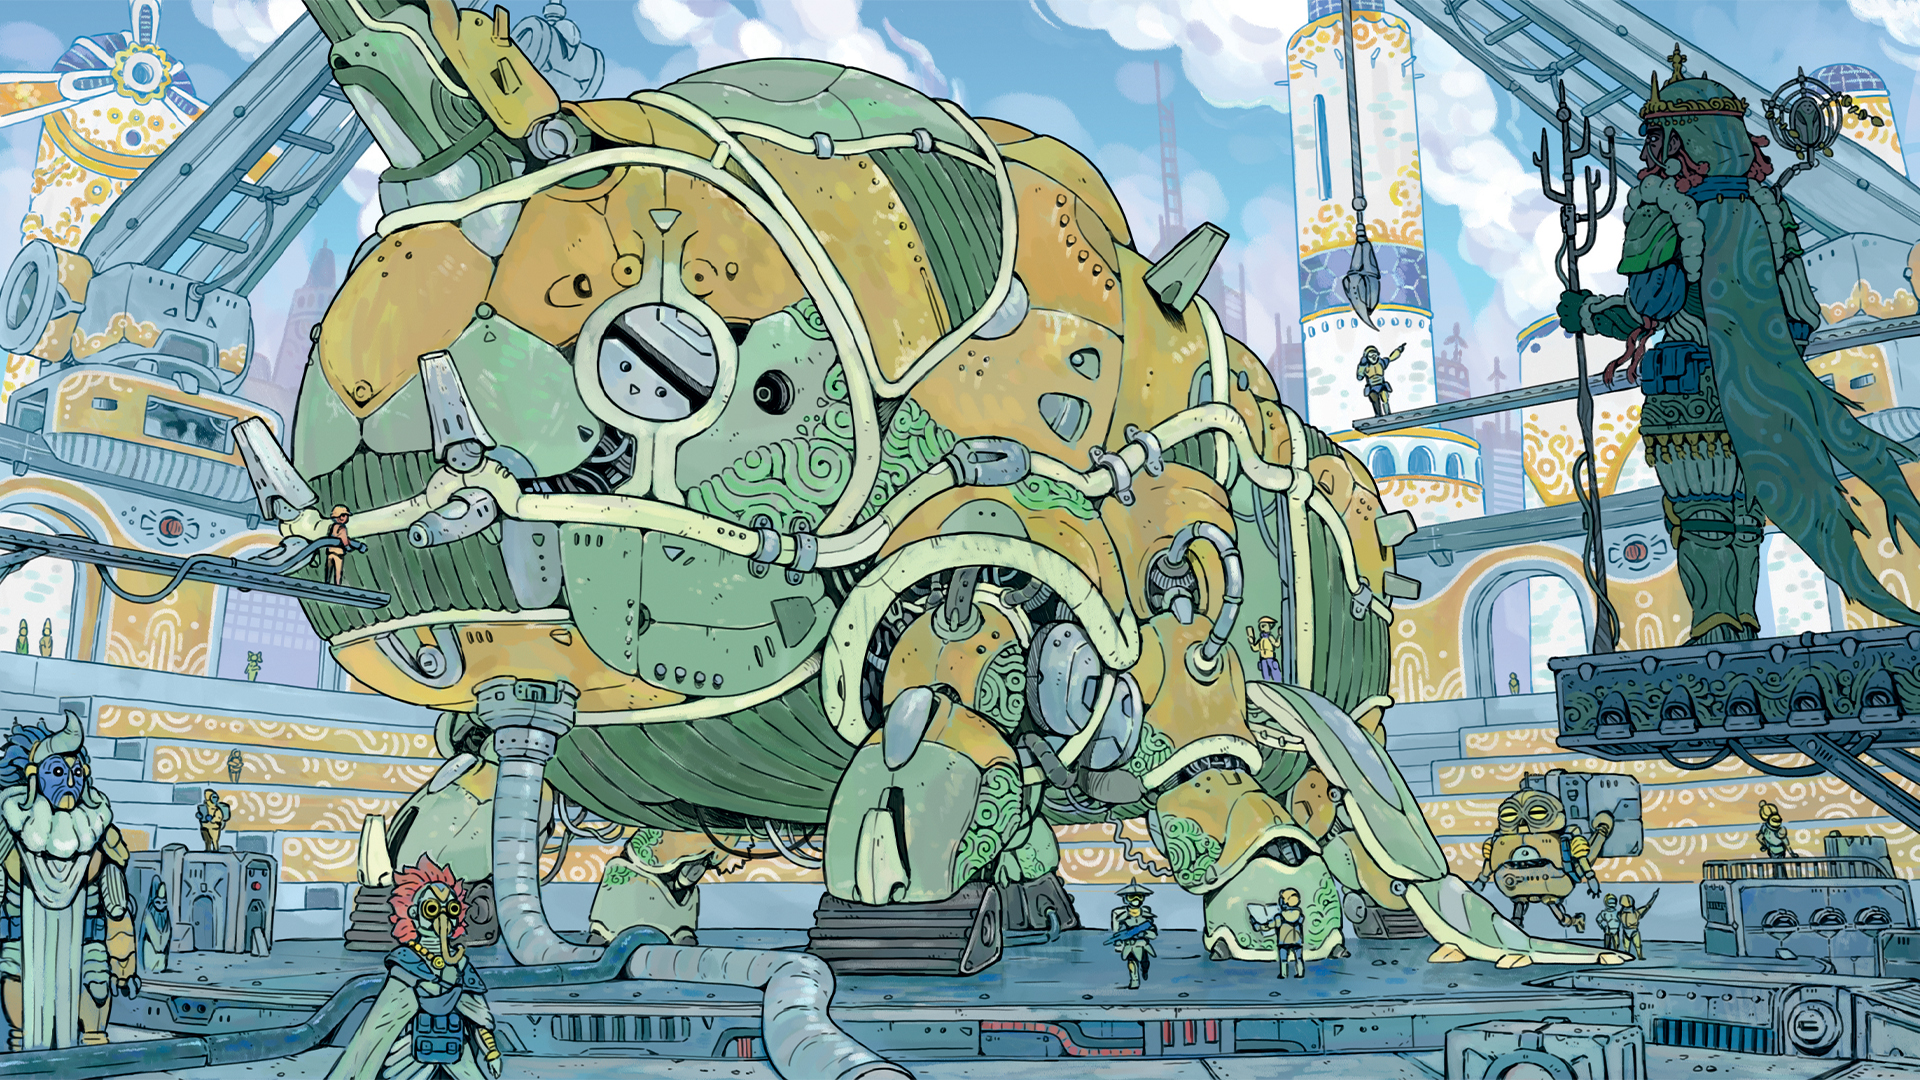
14. Apply the finishing touches
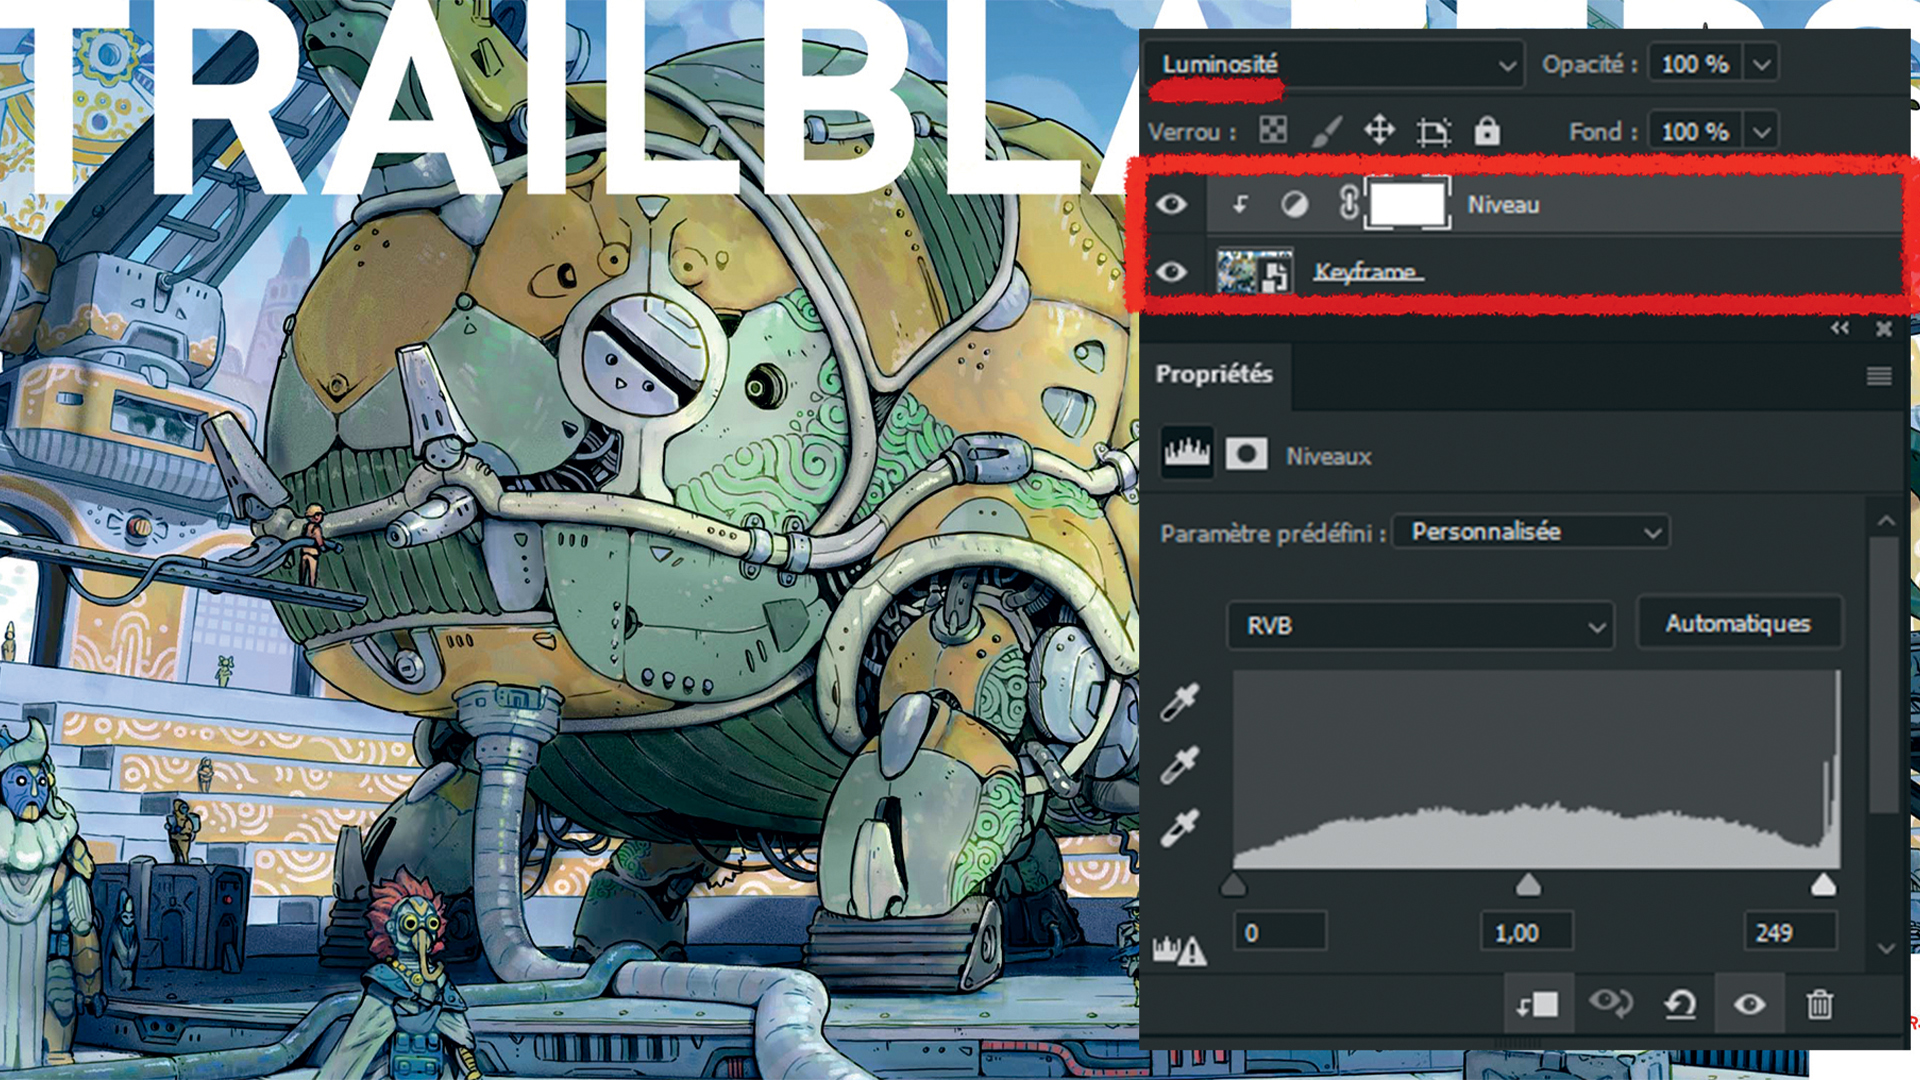
Wrapping up my key art consists of adjusting the contrasts with the Level filter to ensure the dark and light areas have the right intensities. To keep it from altering colour saturation, consider switching the filter layer to Luminosity mode. And with that, we’re done!
If you want to find out more about the Trailblazers project then feel free to have a look at our website and join the Trailblazers Discord channel.
This article originally appeared in ImagineFX. Subscribe to the magazine at Magazines Direct.