If you're planning to take a few days off from work or school, setting up automatic email replies is only part of the preparation. It's also important to update your Outlook calendar to let others know you’ll be unavailable, helping prevent unwanted meeting requests or project assignments during your time away.
In this how-to guide, I'll outline the steps to create an out-of-office calendar event across different versions of Outlook, including the desktop app, Outlook.com, and the new Outlook client on Windows 11.
How to create an 'Out of Office' calendar event from Outlook app
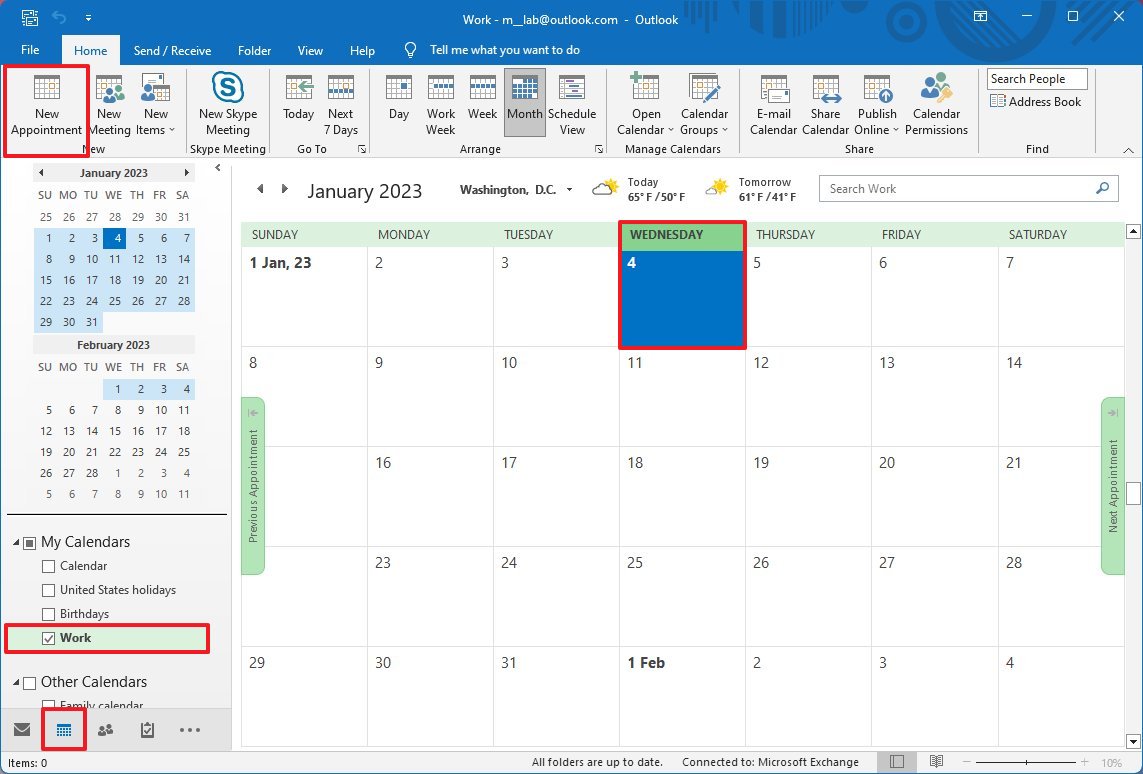
If you use Outlook 2024, 2021, 2019, or 2016 on Windows 11 (or 10), you can quickly create an event to let people in your circle know you won't be around for several days by creating an out-of-office calendar event.
To create an out-of-office calendar event on the desktop version of Outlook, use these steps:
- Open the Outlook app.
- Click the Calendar button in the bottom-left corner.
- Select the calendar to add the new event from the left pane. For instance, your shared work calendar.
- Select a day on the calendar.
- Click the New Appointment button in the "Home" tab.
- Confirm a descriptive title for the event in the "Subject" setting.
- Use the "Start time" picker to select the day you're planning to leave work.
- Use the "End time" picker to select the day you will return to work.
- Check the "All day event" option.
- Select the "Out of Office" option from the "Show As" setting in the "Event" tab.
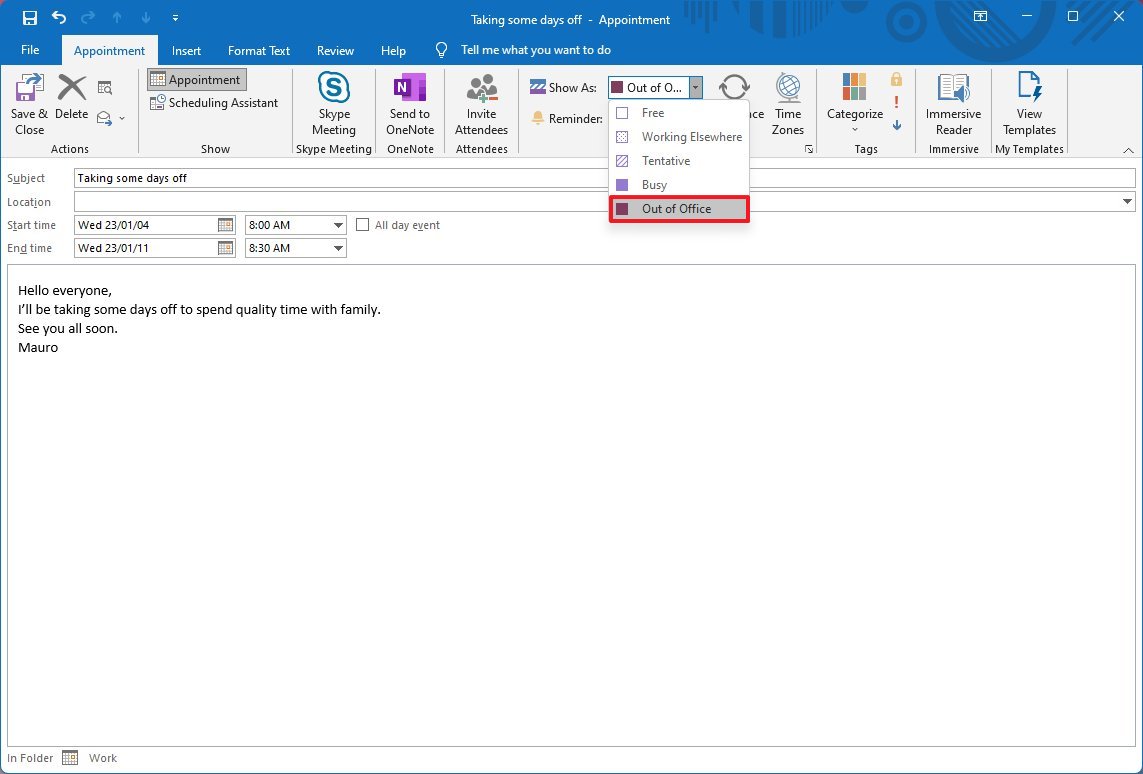
- (Optional) Create a custom message for anyone who will see your event.
- Click the "Save & Close" button in the top-left corner.
Once you complete the steps, people who have access to the calendar will see you won't be available for several days.
How to create an 'Out of Office' calendar event from Outlook web
It's also possible to create an out-of-office calendar event when you plan to vacation using Outlook on the web.
To create an out-of-office calendar event on the web, use these steps:
- Open Outlook (web) on the browser.
- Click the app launcher button in the top-left corner.
- Click on Calendar.
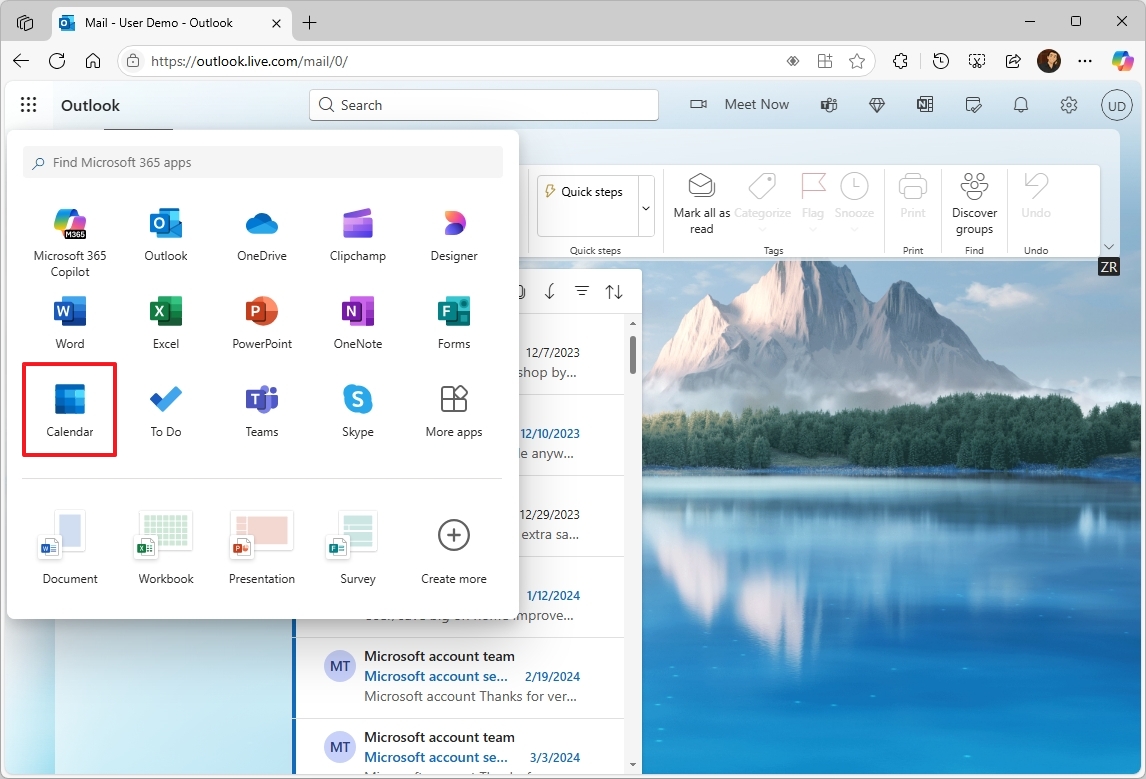
- Click the New event button from the toolbar.

- (Optional) Click the expand button in the top-right corner of the event to access the full view.
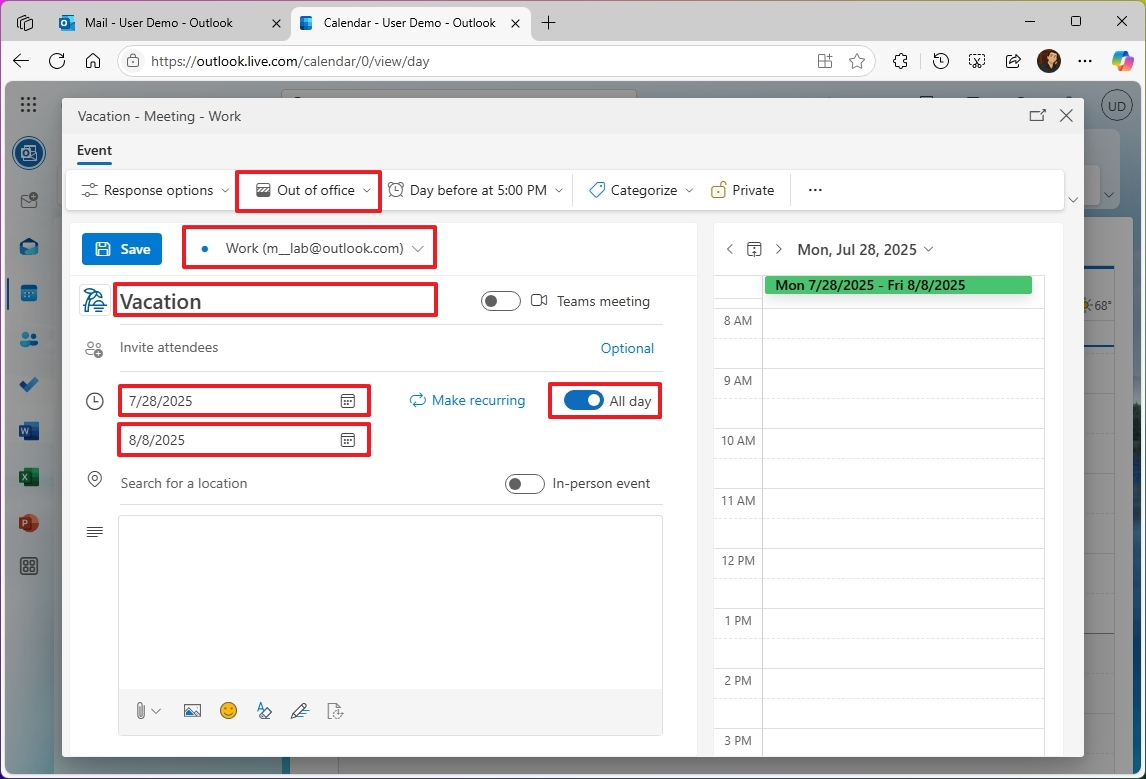
- Select the "Out of Office" option in the "Event" toolbar.
- Select the calendar (for example, "Work") to add the event with the drop-down menu next to the "Save" button.
- Confirm a descriptive title for the event.
- Use the Start date picker to select the day you leave work.
- Turn on the "All day" toggle switch.
- Select the Custom option for the number of days.
- Use the End date picker to select the day you will return to work.
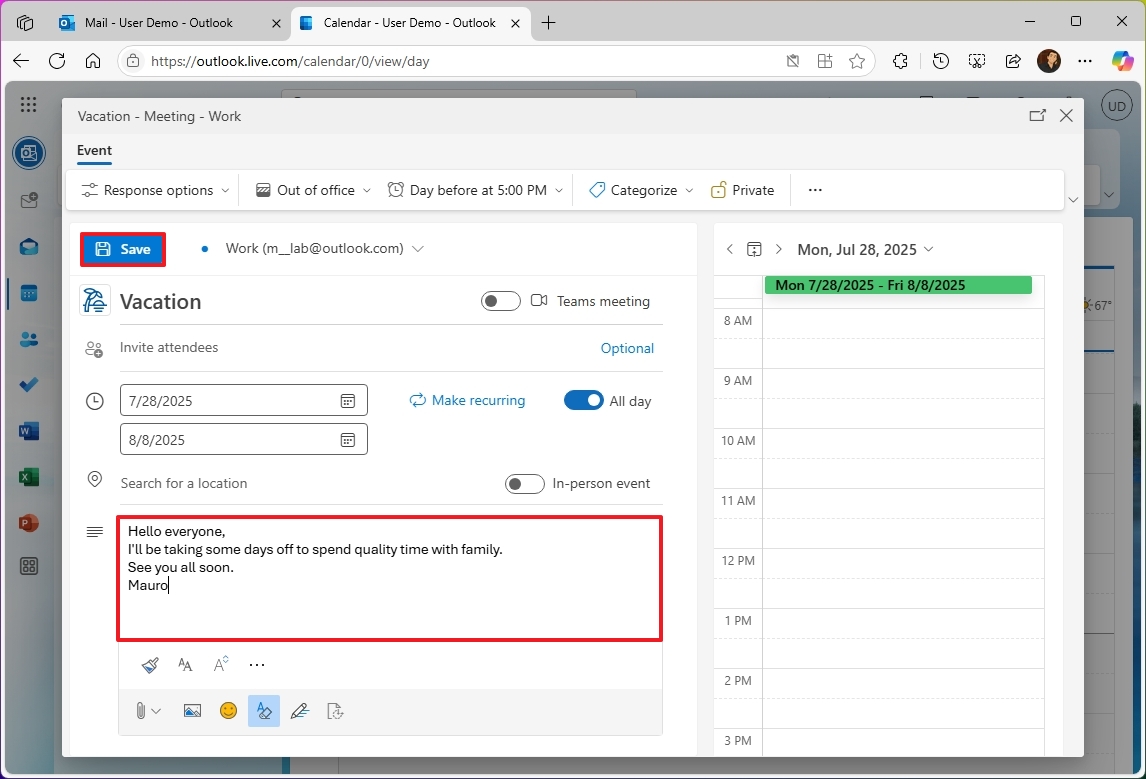
- (Optional) Create a custom message for anyone who will see your event.
- Click the Save button in the top-left corner.
After completing the steps, those with access to the calendar, whether they use Outlook.com or a supported email client, will see you're in vacation.
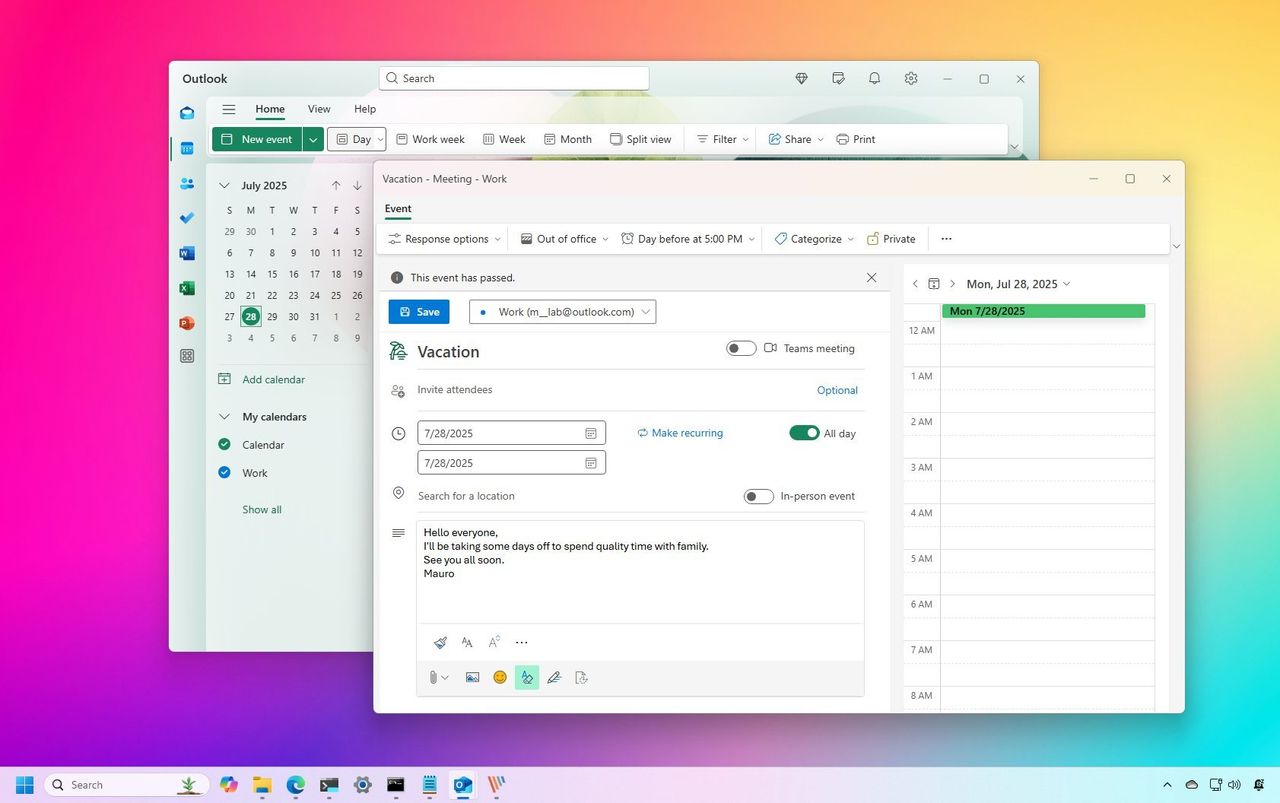
How to create an 'Out of Office' calendar event from new Outlook app
If you have switched to the new Outlook app for Windows 11 (with or without a Microsoft 365 subscription), the new experience also includes the ability to create an out-of-office calendar event.
To create a calendar event on the new Outlook app, use these steps:
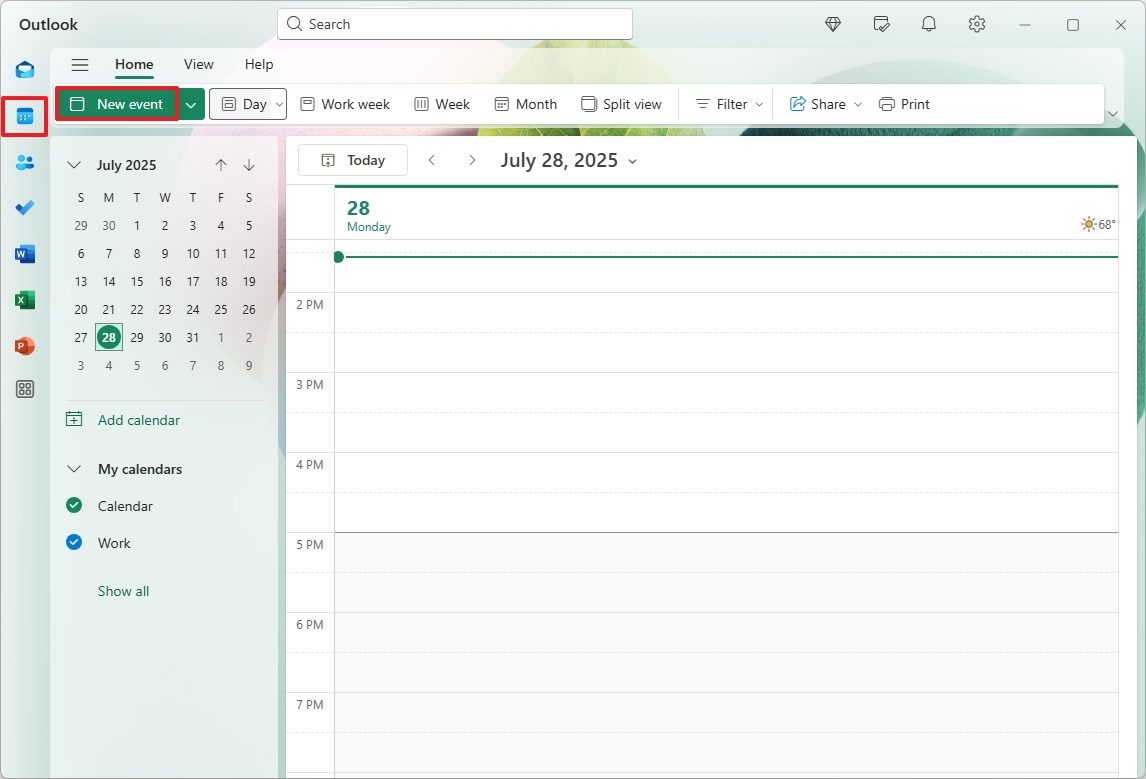
- Open Outlook app.
- Click on Calendar from the left navigation pane.
- Click the New event button from the toolbar.
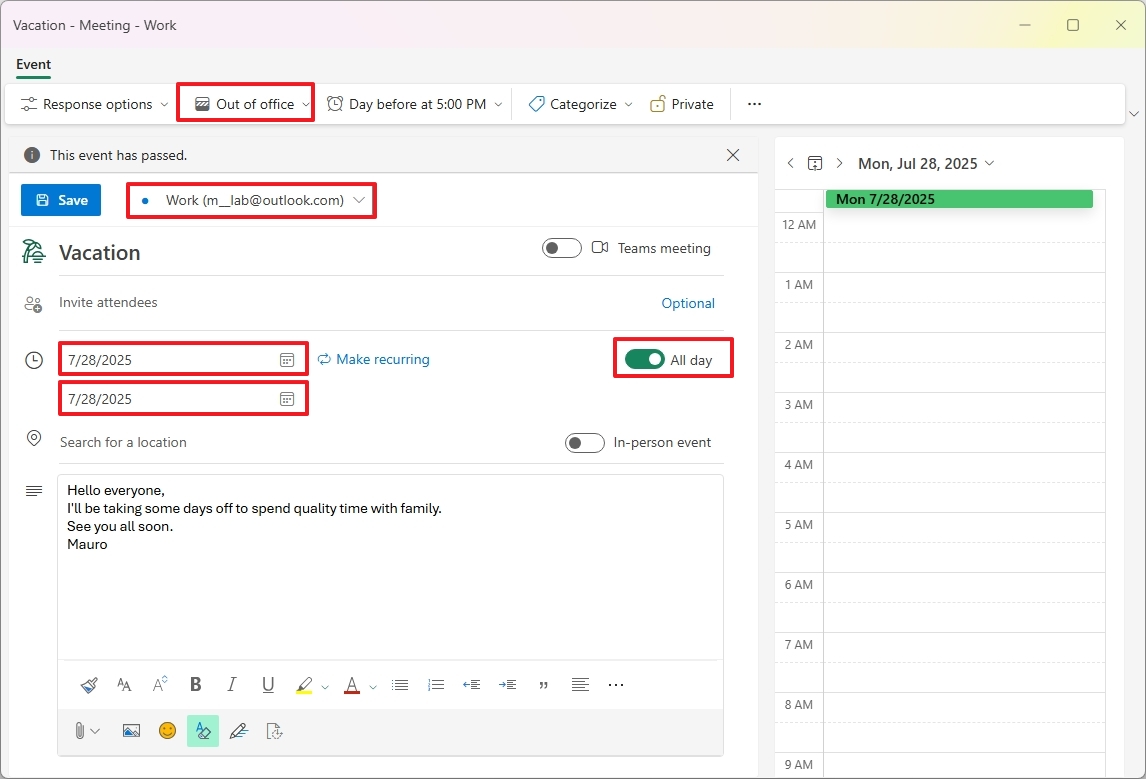
- Select the "Out of office" option from the "Event" toolbar.
- Select the calendar (for example, "Work") to add the event with the drop-down menu next to the "Save" button.
- Confirm a descriptive title for the event.
- Use the Start date picker to select the day you leave work.
- Turn on the "All day" toggle switch.
- Select the Custom option for the number of days.
- Use the End date picker to select the day you will return to work.
- (Optional) Create a custom message for anyone who will see your event.
- Click the Save button in the top-left corner.
After you complete the steps, people with access to the calendar will be able to notice you will be out of reach for some time.
More resources
For more helpful articles, coverage, and answers to common questions about Windows 10 and Windows 11, visit the following resources: