On Windows 10, knowing how long your computer has been running (also known as system uptime) can be surprisingly helpful. Personally, I've found that this information can come in handy in several situations. Whether I'm troubleshooting performance issues or trying to figure out if a recent update forced a reboot, checking uptime usually gives me some clues. Also, it can be especially useful when my device starts acting up during a resource-intensive task, and I suspect it’s overdue for a restart.
Although Windows 10 doesn't display uptime on the desktop, it's still easy to find (once you know where to look). You can check your system uptime using several built-in tools, including Task Manager, Control Panel, Command Prompt, and PowerShell. Each method gives you a quick glimpse into your PC's recent activity, helping you stay in control of your system's performance.
In this How-to guide, I'll outline four simple ways to check your device's uptime without scripts or restarting.
How to check PC uptime using Task Manager
The easiest way to check your device uptime is using Task Manager with these steps:
- Open Start.
- Search for Task Manager and click the top result to open the experience.
- Quick tip: You can also open Task Manager using the "Ctrl + Shift + Esc" keyboard shortcut or by right-clicking the taskbar and selecting Task Manager from the menu.
- Click the More details button (if you're using the compact view).
- Click the Performance tab.
- Select the CPU section.
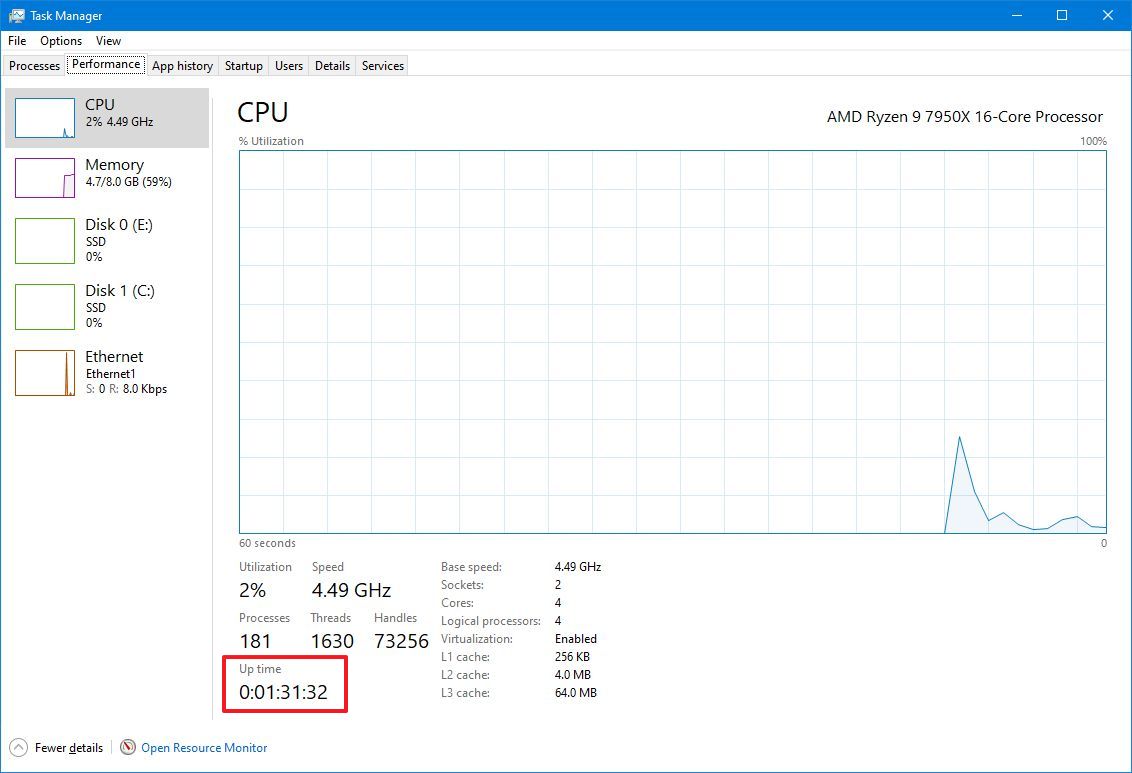
Once you complete the steps, you'll see your device uptime on the right, at the bottom of the page.
How to check PC uptime using Control Panel
To determine your computer's uptime from Control Panel, use these steps:
- Open Start.
- Search for Control Panel and click the top result to open the experience.
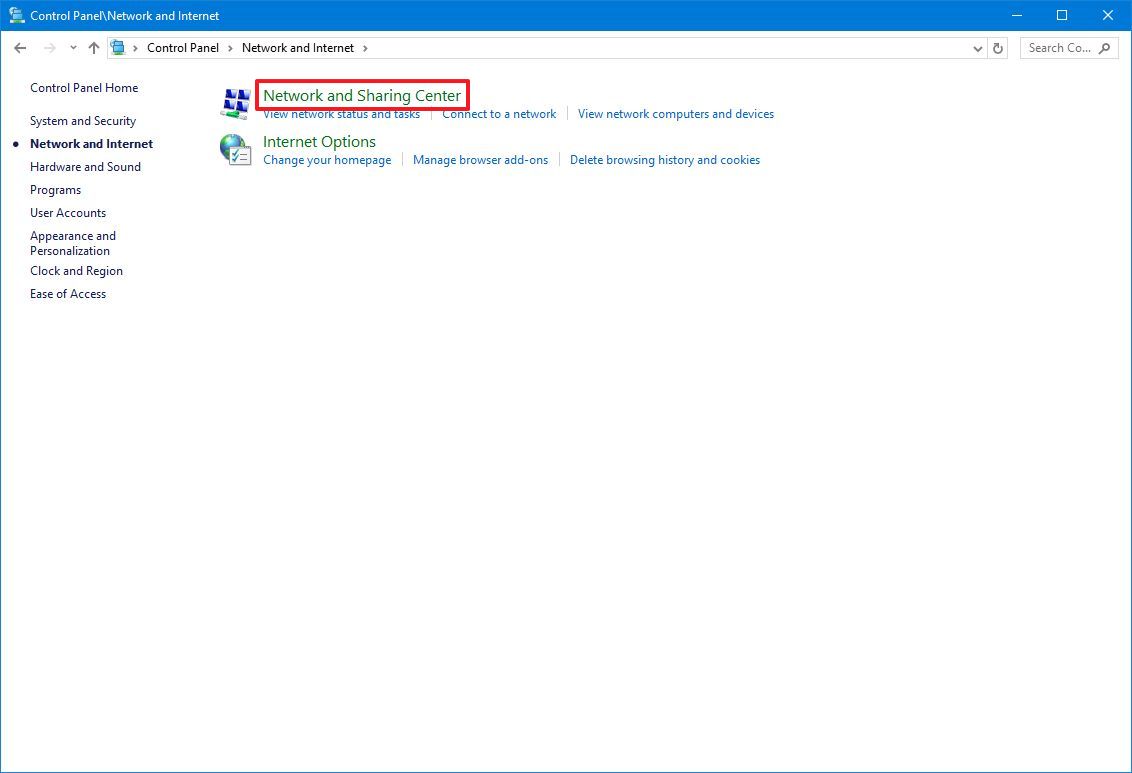
- Click on Network and Internet.
- Click on Network and Sharing Center.
- Click the "Change adapter settings" option in the left pane.
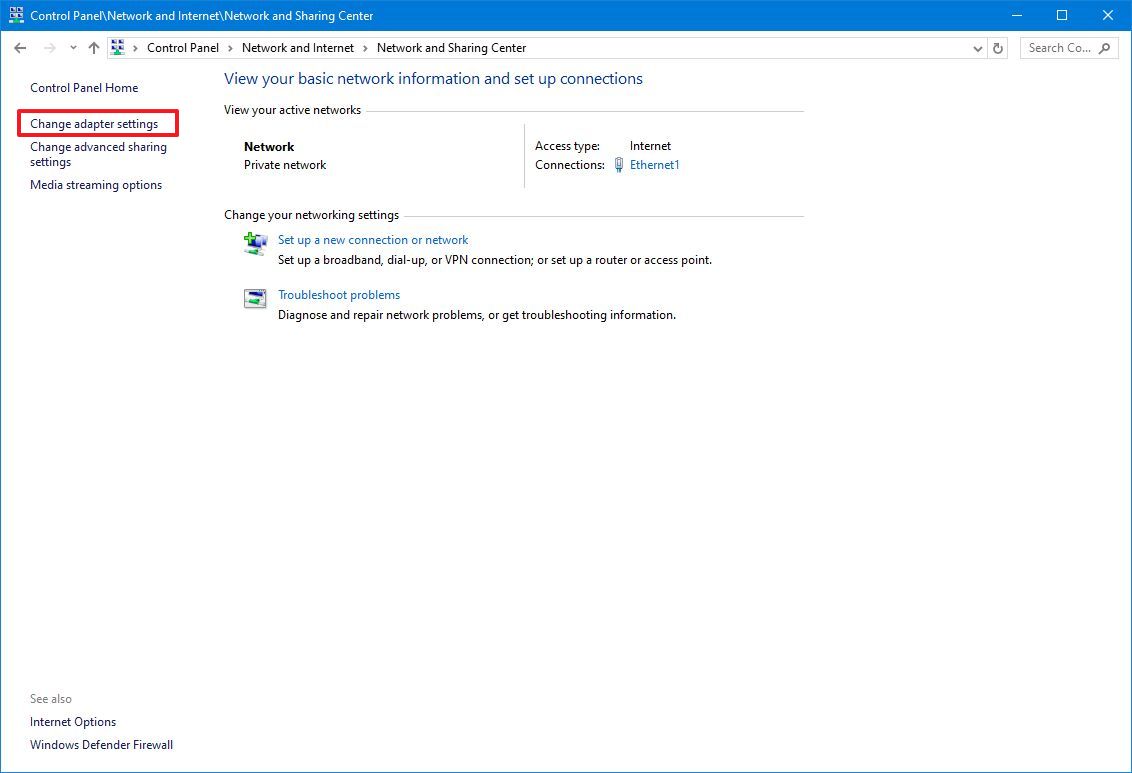
- Double-click the network adapter connected to the internet.
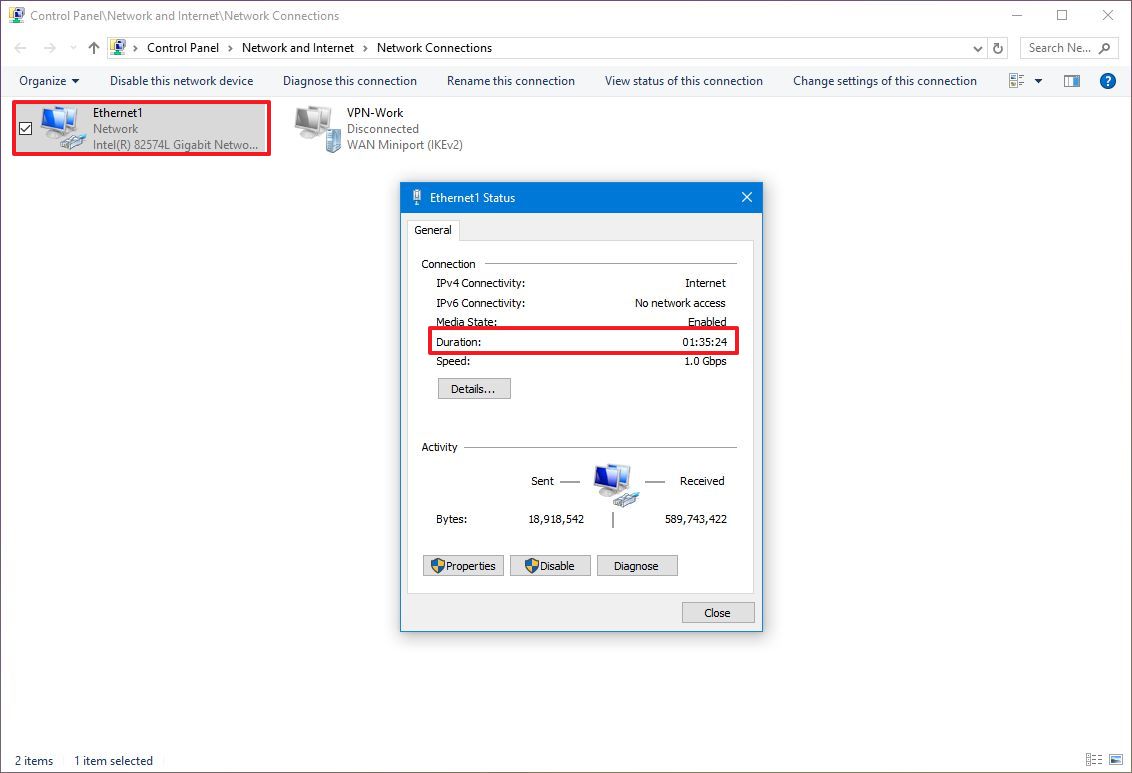
After completing the steps, you can deduce the uptime using the "Duration" information. This information indicates the uptime from the network connection that resets every time the computer starts. However, this method works only as long as you haven't reset your network connection since the last time you booted the device.
How to check PC uptime using Command Prompt
There are at least two ways to use Command Prompt to check your device's uptime.
WMIC method
To check the device uptime with Command Prompt on Windows 10, use these steps:
- Open Start.
- Search for Command Prompt, right-click the top result, and click the Run as administrator option.
- Type the following command to query the device's last boot time and press Enter: wmic path Win32_OperatingSystem get LastBootUpTime
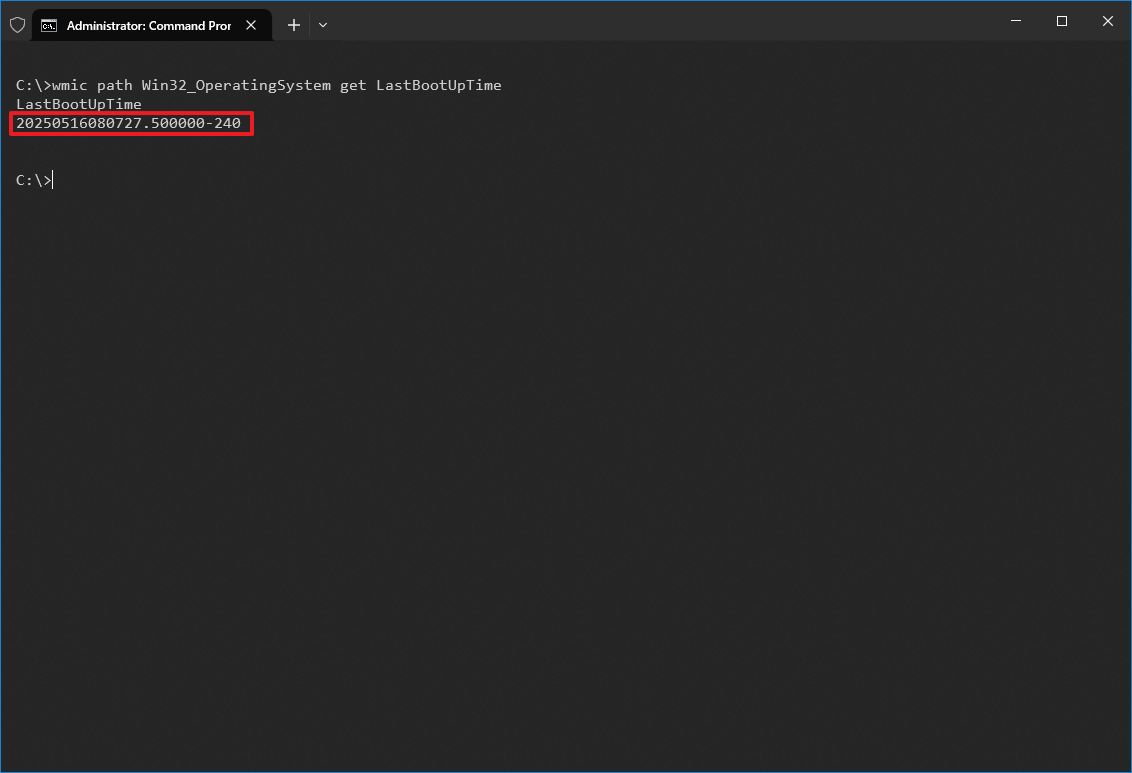
Once you complete the steps, you'll notice an output may look intimidating, but it's not difficult to decode so you can understand your device's uptime.
For example, the LastBootUpTime 20250516080727.500000-240 can be broken down using the info below.
- Year: 2025.
- Month: 05.
- Day: 16.
- Hour: 08.
- Minutes: 07.
- Seconds: 27.
- Milliseconds: 500000.
- GMT: -300 (5 hours ahead of GMT).
This means that the computer has been up and running since May 16, 2025, at 07:27 AM. If you want to be more specific, subtract the last boot time from the current time to deduce the number of days, hours, and minutes the device has been in operation.
System Information method
You can also see your system uptime in a more user-friendly format using the System Information tool with these steps:
- Open Start.
- Search for Command Prompt, right-click the top result, and click the Run as administrator option.
- Type the following command to query the device's last boot time and press Enter: systeminfo | find "System Boot Time"
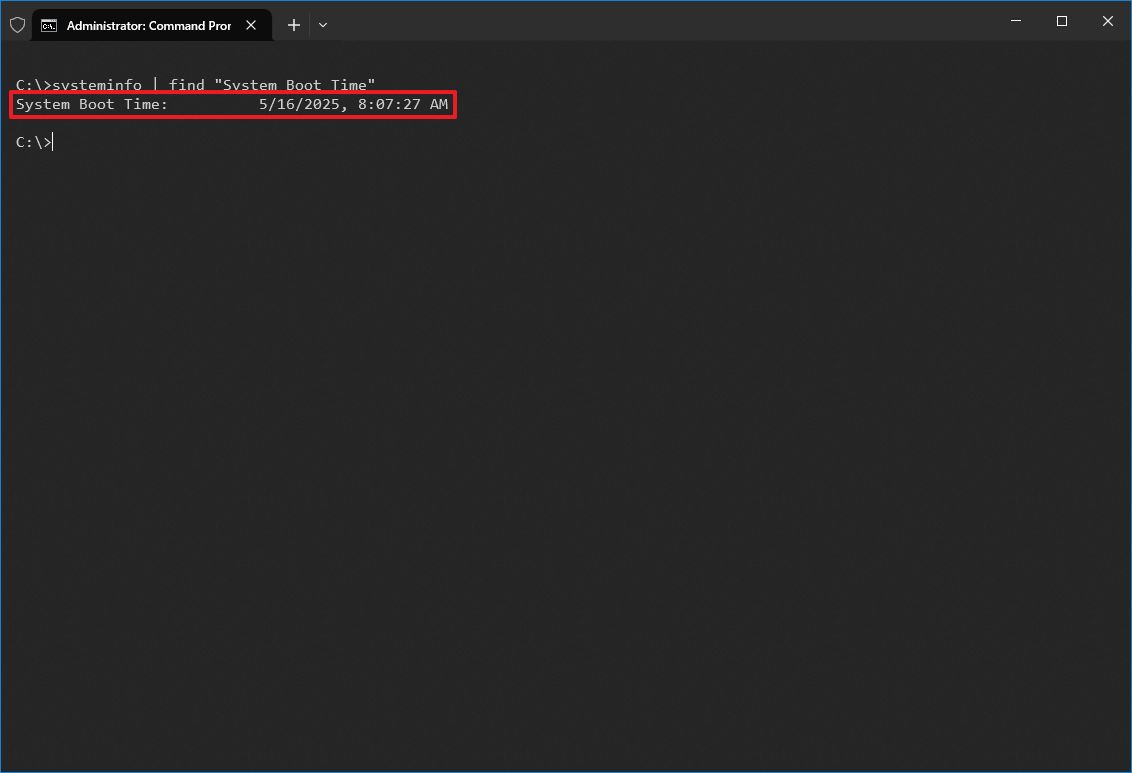
The System Information tool can quickly show the last time your system rebooted in an easy-to-read format. Also, like the wmic command, you can subtract the last boot time from the current time to determine the number of days, hours, and minutes the device has been running.
How to check PC uptime using PowerShell
It's also possible to check your device uptime using PowerShell with these steps:
- Open Start.
- Search for Command Prompt, right-click the top result, and click the Run as administrator option.
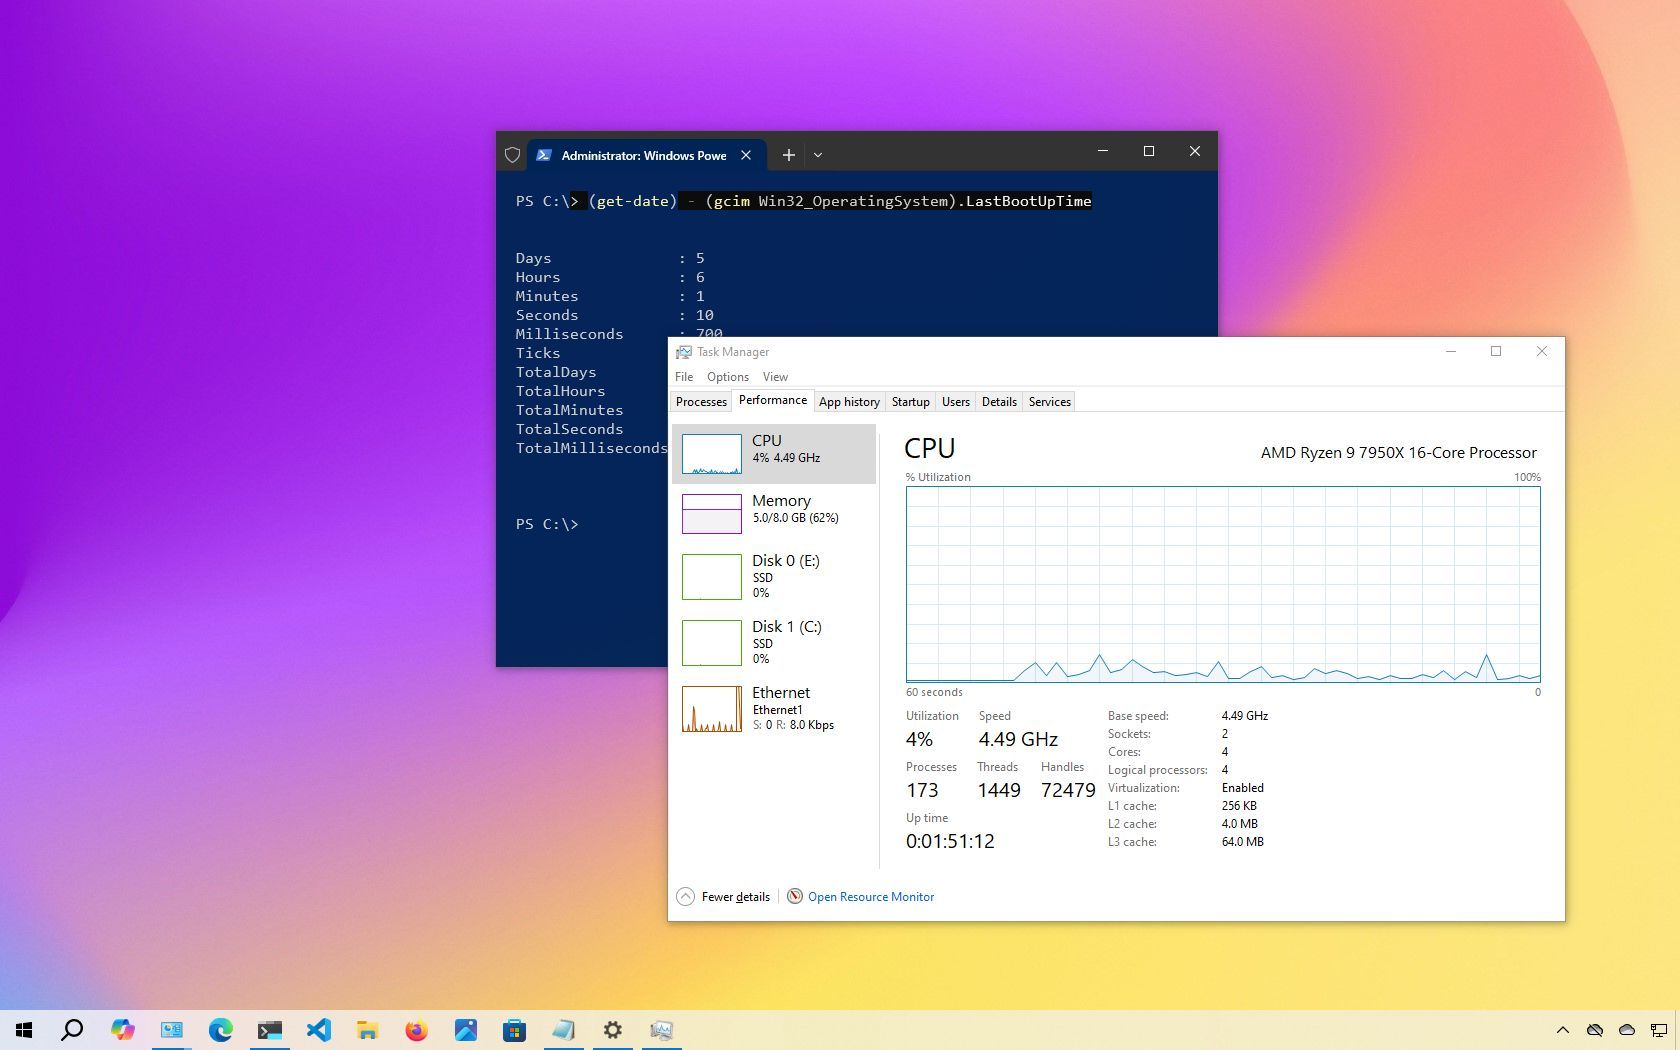
- Type the following command to query the device uptime and press Enter: (get-date) - (gcim Win32_OperatingSystem).LastBootUpTime
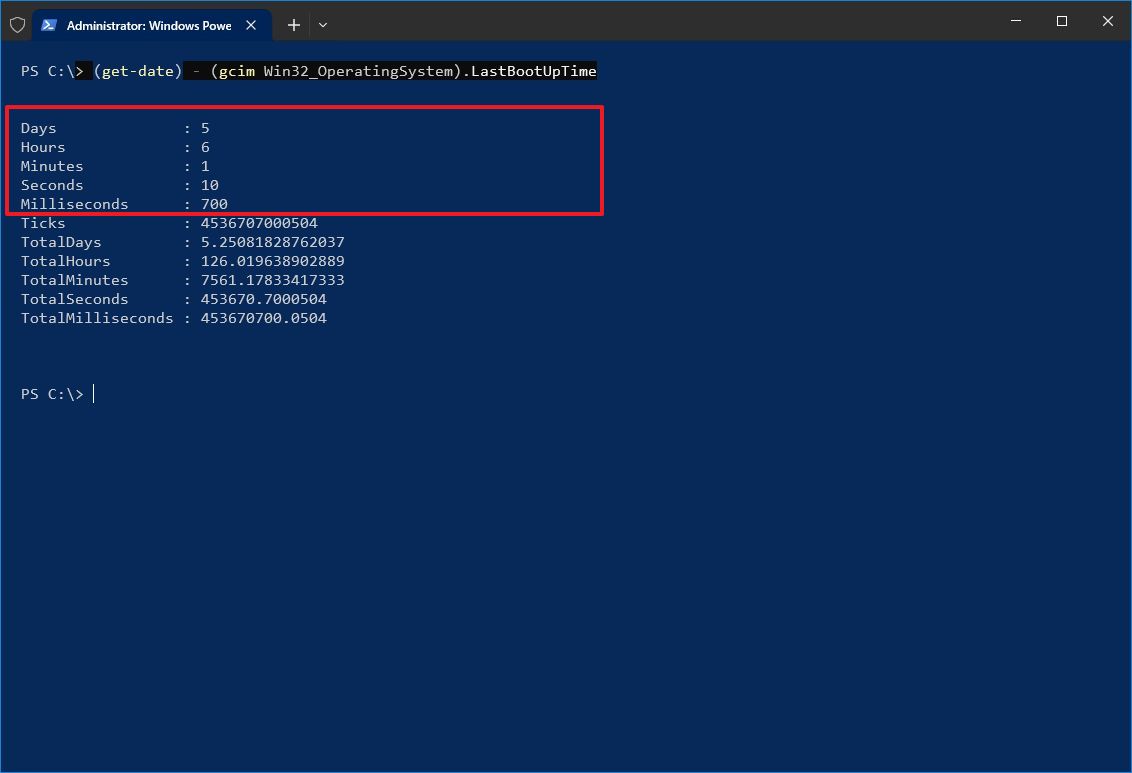
After completing the steps, you'll get the uptime information in a list format with the days, hours, and minutes.
This guide outlines several ways to check your device uptime, but you can always find many other ways to determine the same information using Command Prompt and PowerShell scripts. However, these are the most straightforward methods.
More resources
For more helpful articles, coverage, and answers to common questions about Windows 10 and Windows 11, visit the following resources: