On Windows 11 and Windows 10, the .NET Framework (often referred to as “dot net”) is a comprehensive development platform that includes programming languages, libraries, and tools used to create a wide range of applications. Developers rely on it to build software for desktops, laptops, tablets, servers, websites, and even games.
While .NET originated as a Windows-specific framework, it has evolved into an open-source and cross-platform technology. Today, it runs not only on Windows but also on macOS and Linux, making it a flexible solution for modern software development.
For most everyday users, the installed version of .NET typically isn’t a concern. However, certain programs require specific versions of the framework to install or run correctly. For developers, managing multiple versions is often essential for building and testing apps across different environments.
That’s why knowing which version of the .NET Framework is installed on your device can be useful, whether you're troubleshooting app compatibility or setting up a development workspace.
Whatever the reason, Windows 11 and 10 offer several ways to check the .NET version, including through File Explorer, Registry, Command Prompt, and PowerShell.
In this how-to guide, I'll outline the steps to determine the .NET Framework version installed on Windows 11 (and 10).
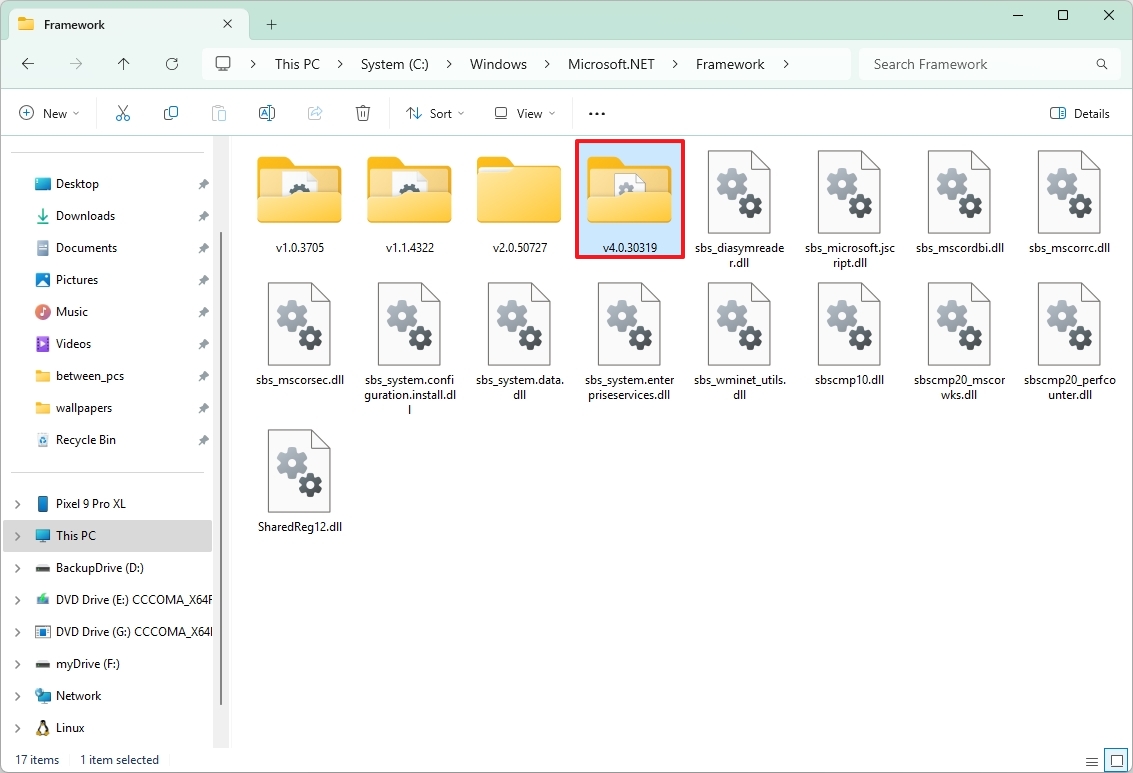
How to check .NET version using File Explorer
To use File Explorer to check the .NET Framework version on Windows 11, use these steps:
- Open File Explorer.
- Open the following path: C:\Windows\Microsoft.NET\Framework
- Open the folder with the latest version – for example, v4.0.30319.
- Right-click any of the ".dll" files and select the Properties option.
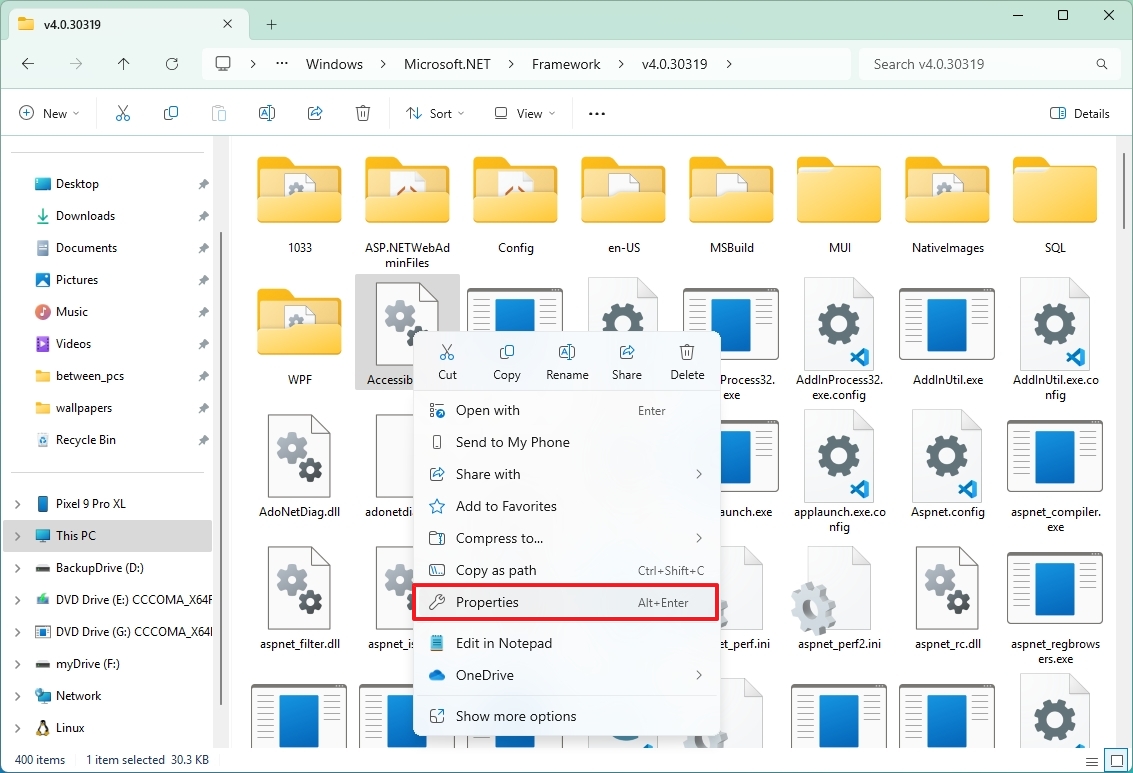
- Click the Details tab.
- In the "Product version" section, confirm the version of .NET – for example, 4.8.9032.0.
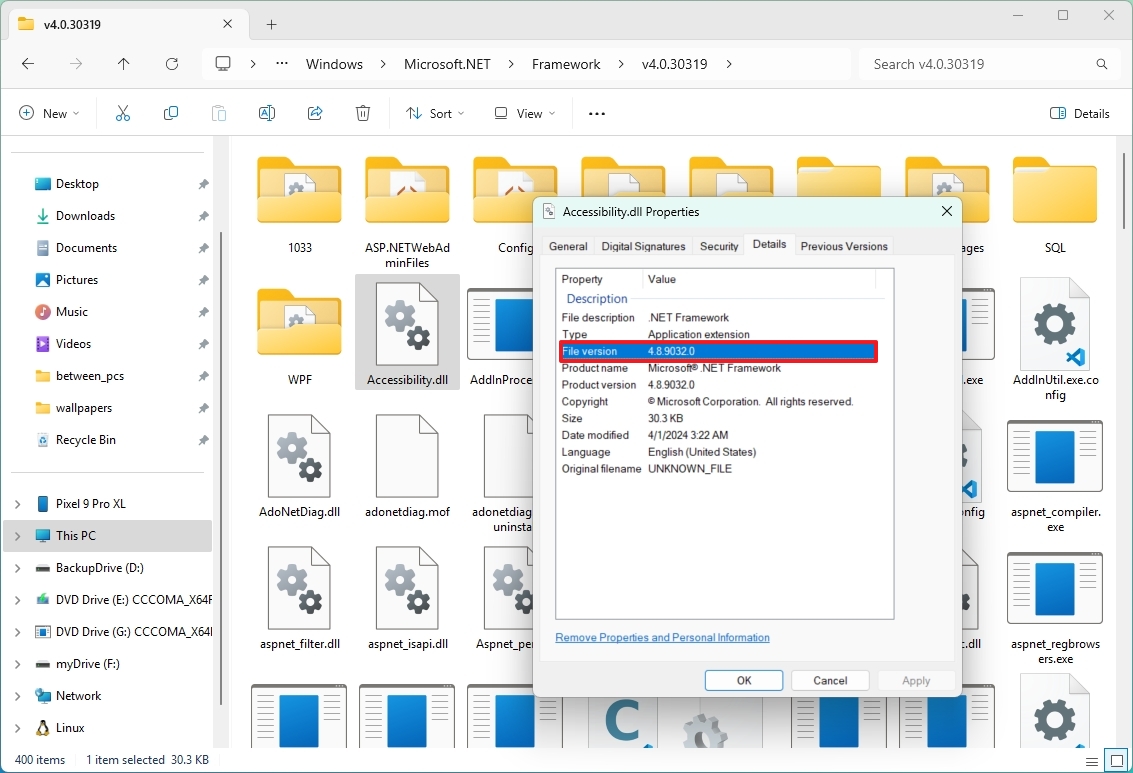
Once you complete the steps, the file details will unveil the framework platform's version installed on Windows.
How to check .NET version using Registry
To determine the .NET Framework version through the Registry, use these steps:
- Open Start.
- Search for regedit and click the top result to open the Registry.
- Browse the following path: HKEY_LOCAL_MACHINE\SOFTWARE\Microsoft\NET Framework Setup\NDP
- Expand the main version key – for example, v4.
- Select the Client key.
- Quick tip: In releases older than version 4, the key will be a number or "Setup." For example, .NET version 3.5 includes the version number under the 1033 key.
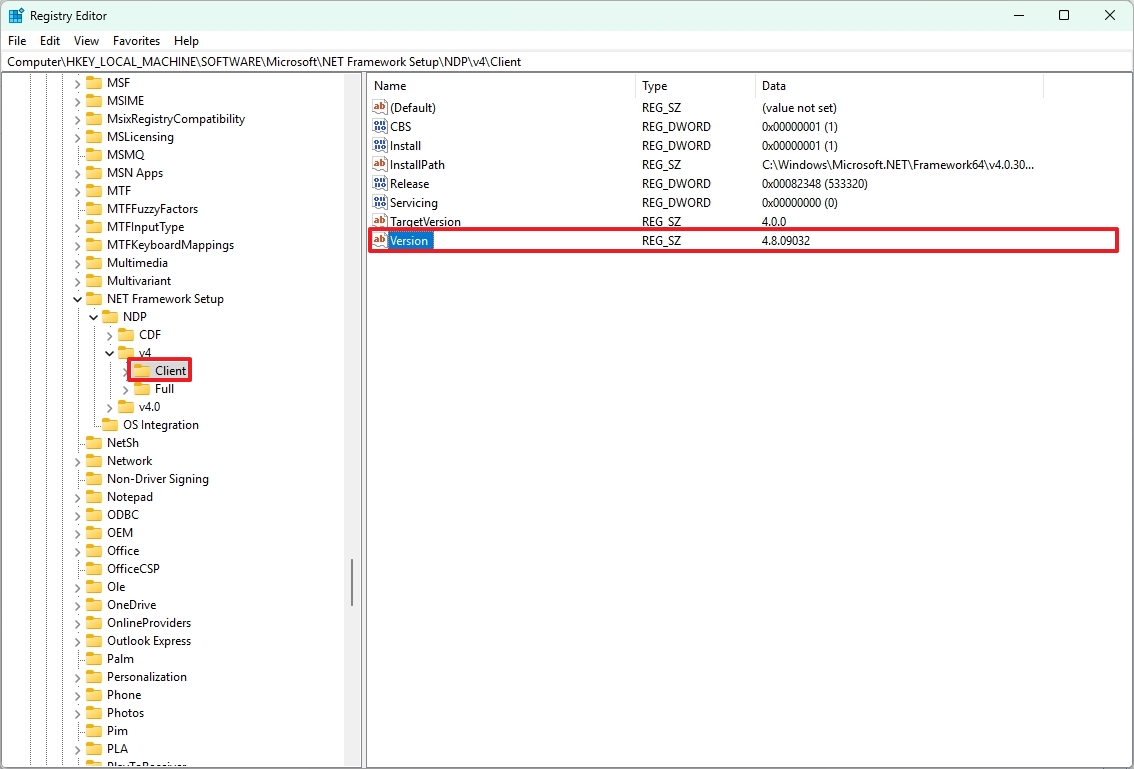
- On the right, check the "Version" string to determine the release of the .NET Framework.
After you complete the steps, you will know the releases of the Microsoft framework available on your version of Windows.
How to check .NET version with Command Prompt
To check the version of the .NET Framework with Command Prompt on Windows 11, use these steps:
- Open Start.
- Search for Command Prompt, right-click the top result, and select the Run as administrator option.
- Type the following command to determine the version of .NET installed on Windows and press Enter: reg query "HKLM\SOFTWARE\Microsoft\Net Framework Setup\NDP" /s
To make sure that version 4.x is installed, use this variant of the command: reg query "HKLM\SOFTWARE\Microsoft\Net Framework Setup\NDP\v4" /s
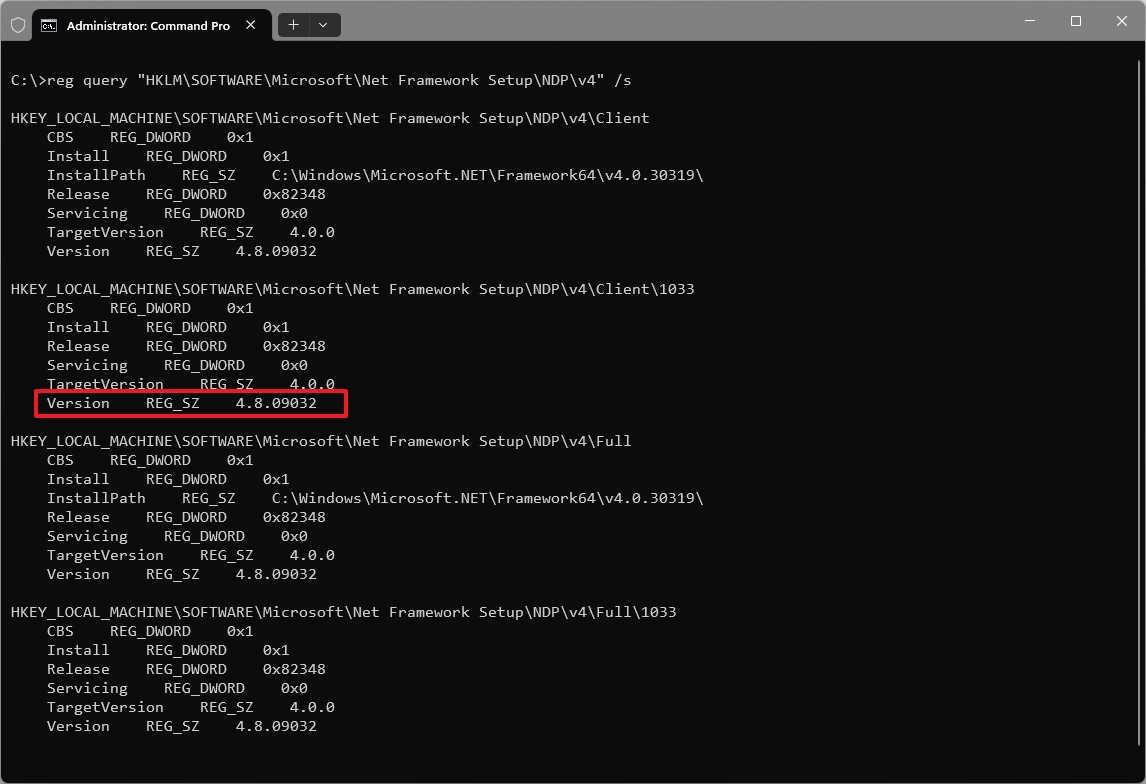
- Check the "Version" field to confirm the releases of the .NET Framework installed on Windows 11.
Once you complete the steps, the versions of .NET running on the computer will be revealed.
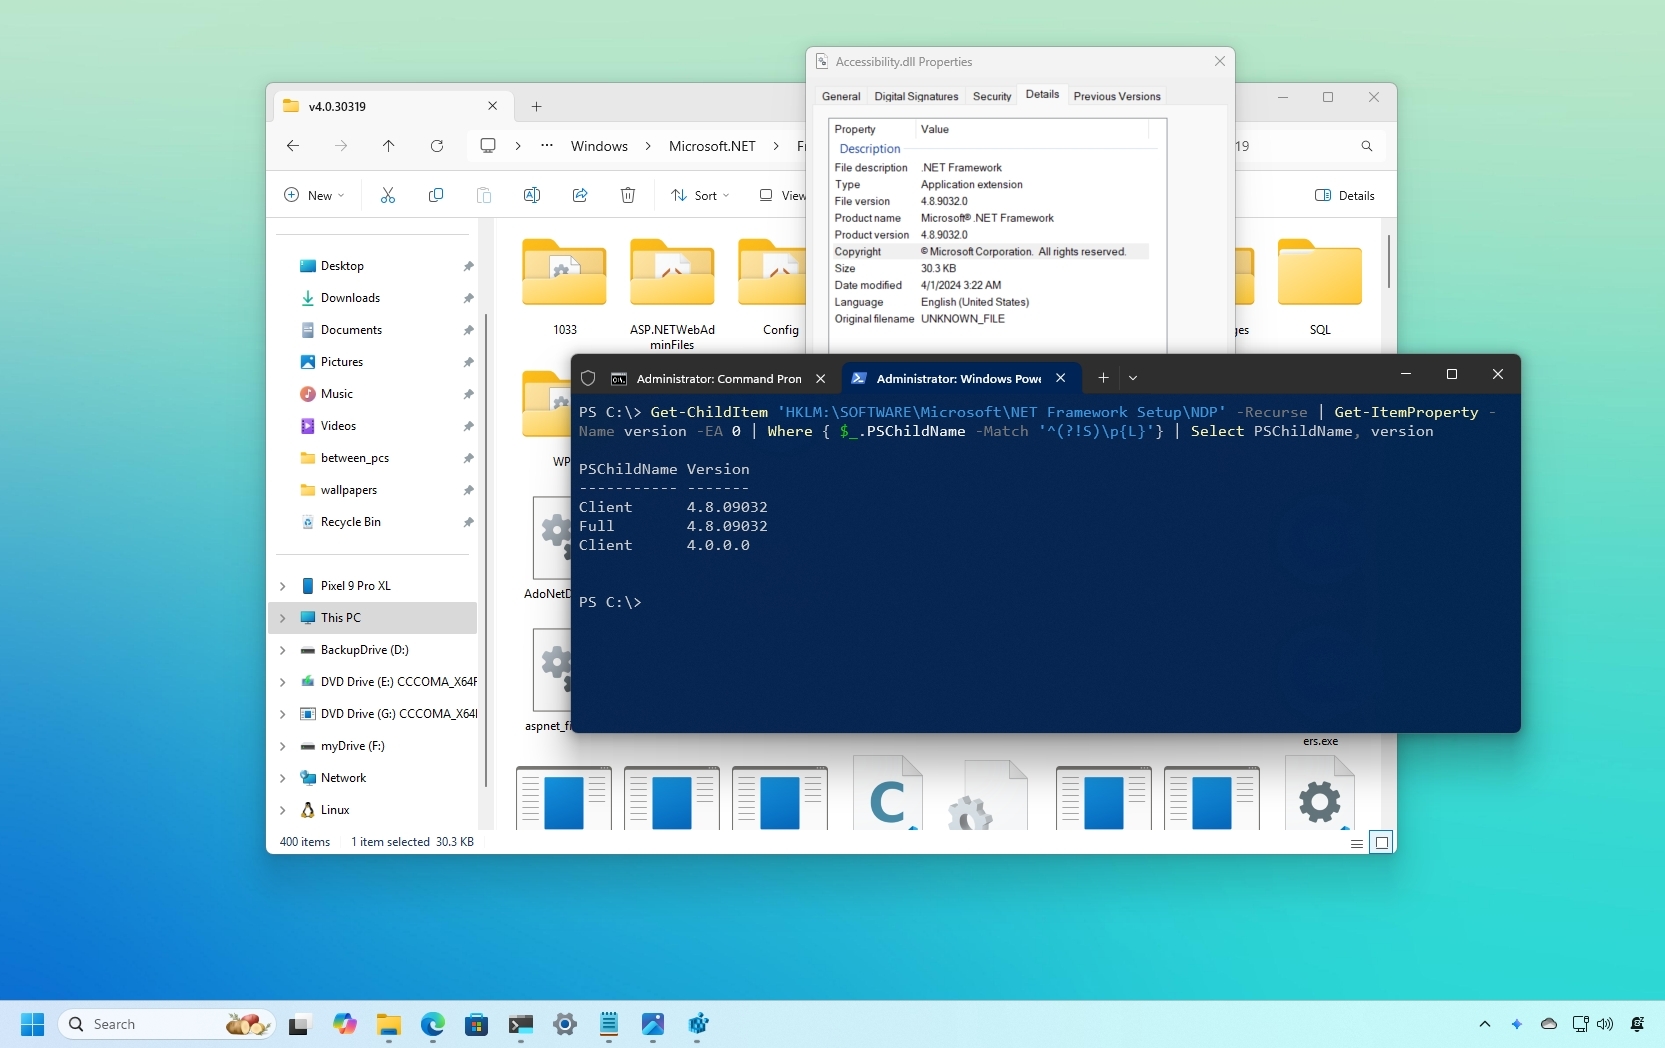
How to check .NET version with PowerShell
To check the .NET version with PowerShell on Windows 11, use these steps:
- Open Start.
- Search for PowerShell, right-click the top result, and select the Run as administrator option.
- Type the following command to check the version of .NET installed and press Enter: Get-ChildItem 'HKLM:\SOFTWARE\Microsoft\NET Framework Setup\NDP' -Recurse | Get-ItemProperty -Name version -EA 0 | Where { $_.PSChildName -Match '^(?!S)\p{L}'} | Select PSChildName, version
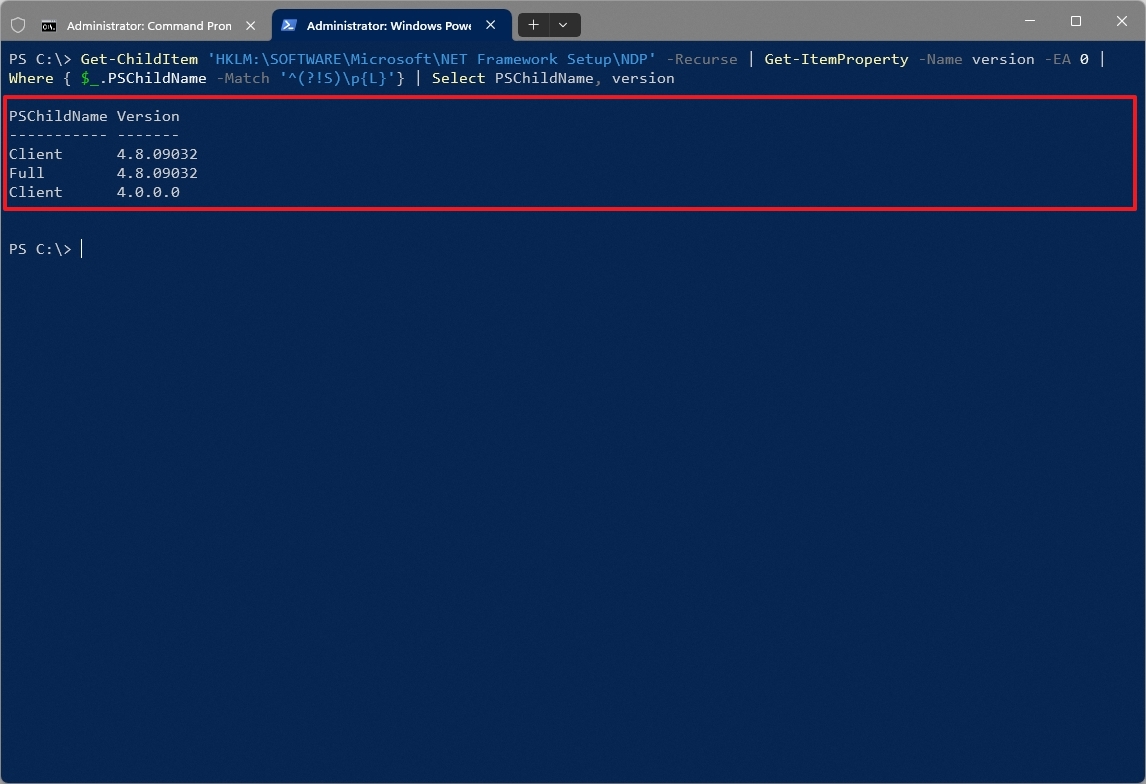
- Confirm the version of the .NET Framework installed on the computer.
After you complete the steps, PowerShell will unveil the information for both the client and the full version of .NET installed on Windows 11 (or 10) (if applicable).
More resources
For more helpful articles, coverage, and answers to common questions about Windows 10 and Windows 11, visit the following resources: