
If you want a stunning online presence without complex coding, Squarespace is a great choice. After consulting with countless teams using Squarespace websites, I can confidently say that this small business website builder stands out for combining style with substance.
Basically, Squarespace is a website builder designed for creative workers. It lets you create professional-looking sites with pre-built templates and drag-and-drop components. Artists, photographers, designers, and other creatives love it for its award-winning template designs and powerful editing options for showcasing images, videos, and music.
In this guide, I’ll show you how to create your own Squarespace website from scratch. We’ll cover choosing the right template, customizing your design, adding content, and publishing your site. Whether you’re a beginner or want to sharpen your skills, you’ll see how easy it is to build a site that reflects your vision.
1. Choosing your plan
Let’s begin your Squarespace journey by picking the right plan. This choice can greatly affect what your site can do, so think carefully about your needs.
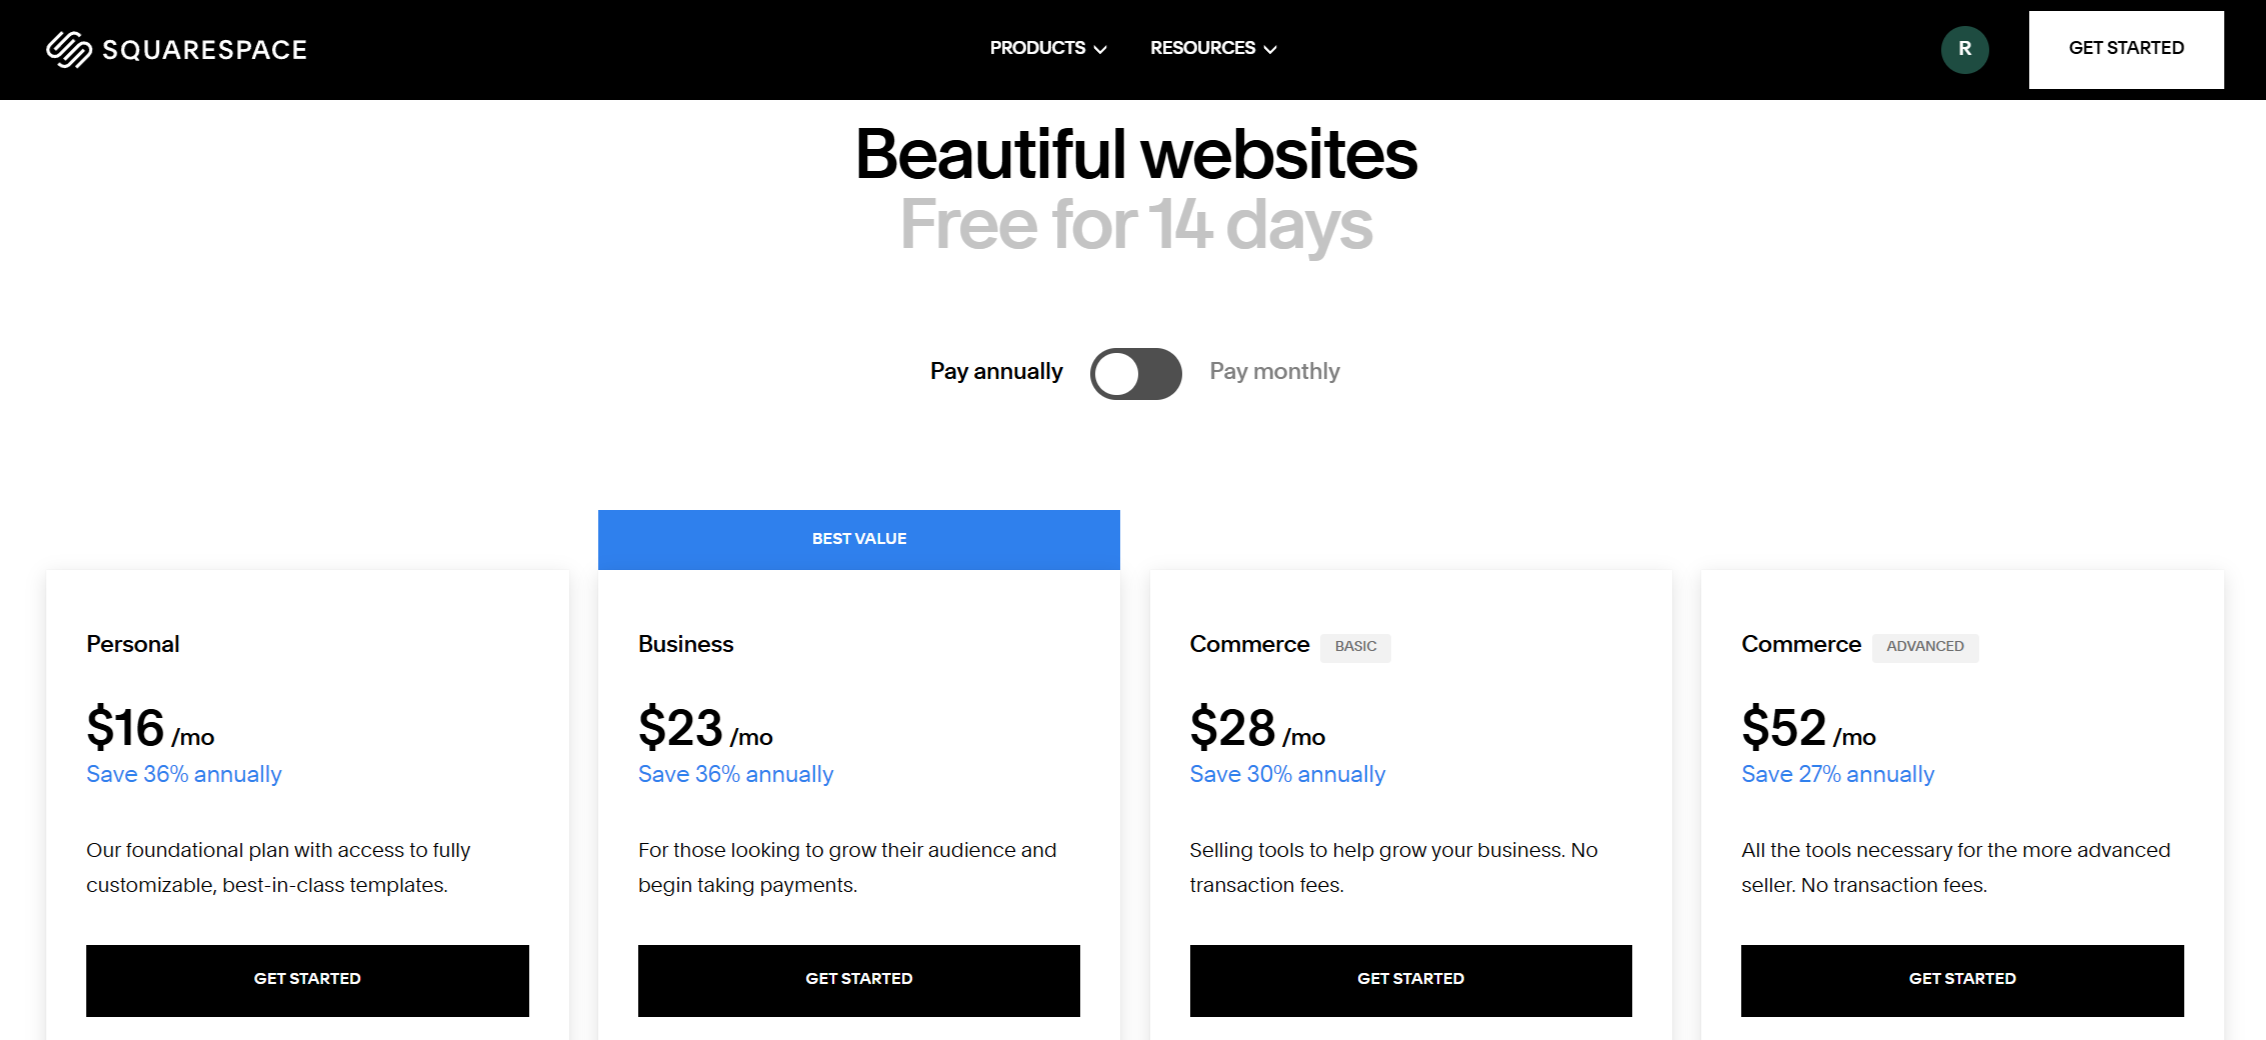
Squarespace has several options, from Personal to Advanced Commerce. If you're showcasing a portfolio or a blog, the Personal plan at $16/month is a great fit. It offers unlimited storage, bandwidth, a free custom domain (with an annual subscription), and mobile-friendly templates. For more features, check out the Business plan for $23. It adds professional email, advanced analytics, and basic e-commerce tools with a small transaction fee.
If your main goal is selling, consider the Commerce plans. The Basic Commerce plan ($28/month) removes transaction fees and includes customer accounts. The Advanced Commerce plan ($52/month) offers abandoned cart recovery and advanced shipping options. These features really help serious online sellers.
Not sure which plan to pick? Here’s a tip: start with the Business plan and enjoy a 14-day free trial. You can upgrade or downgrade later as your needs change. Choose features that match your goals instead of paying for tools you won't use.
2. Theme, structure and pages
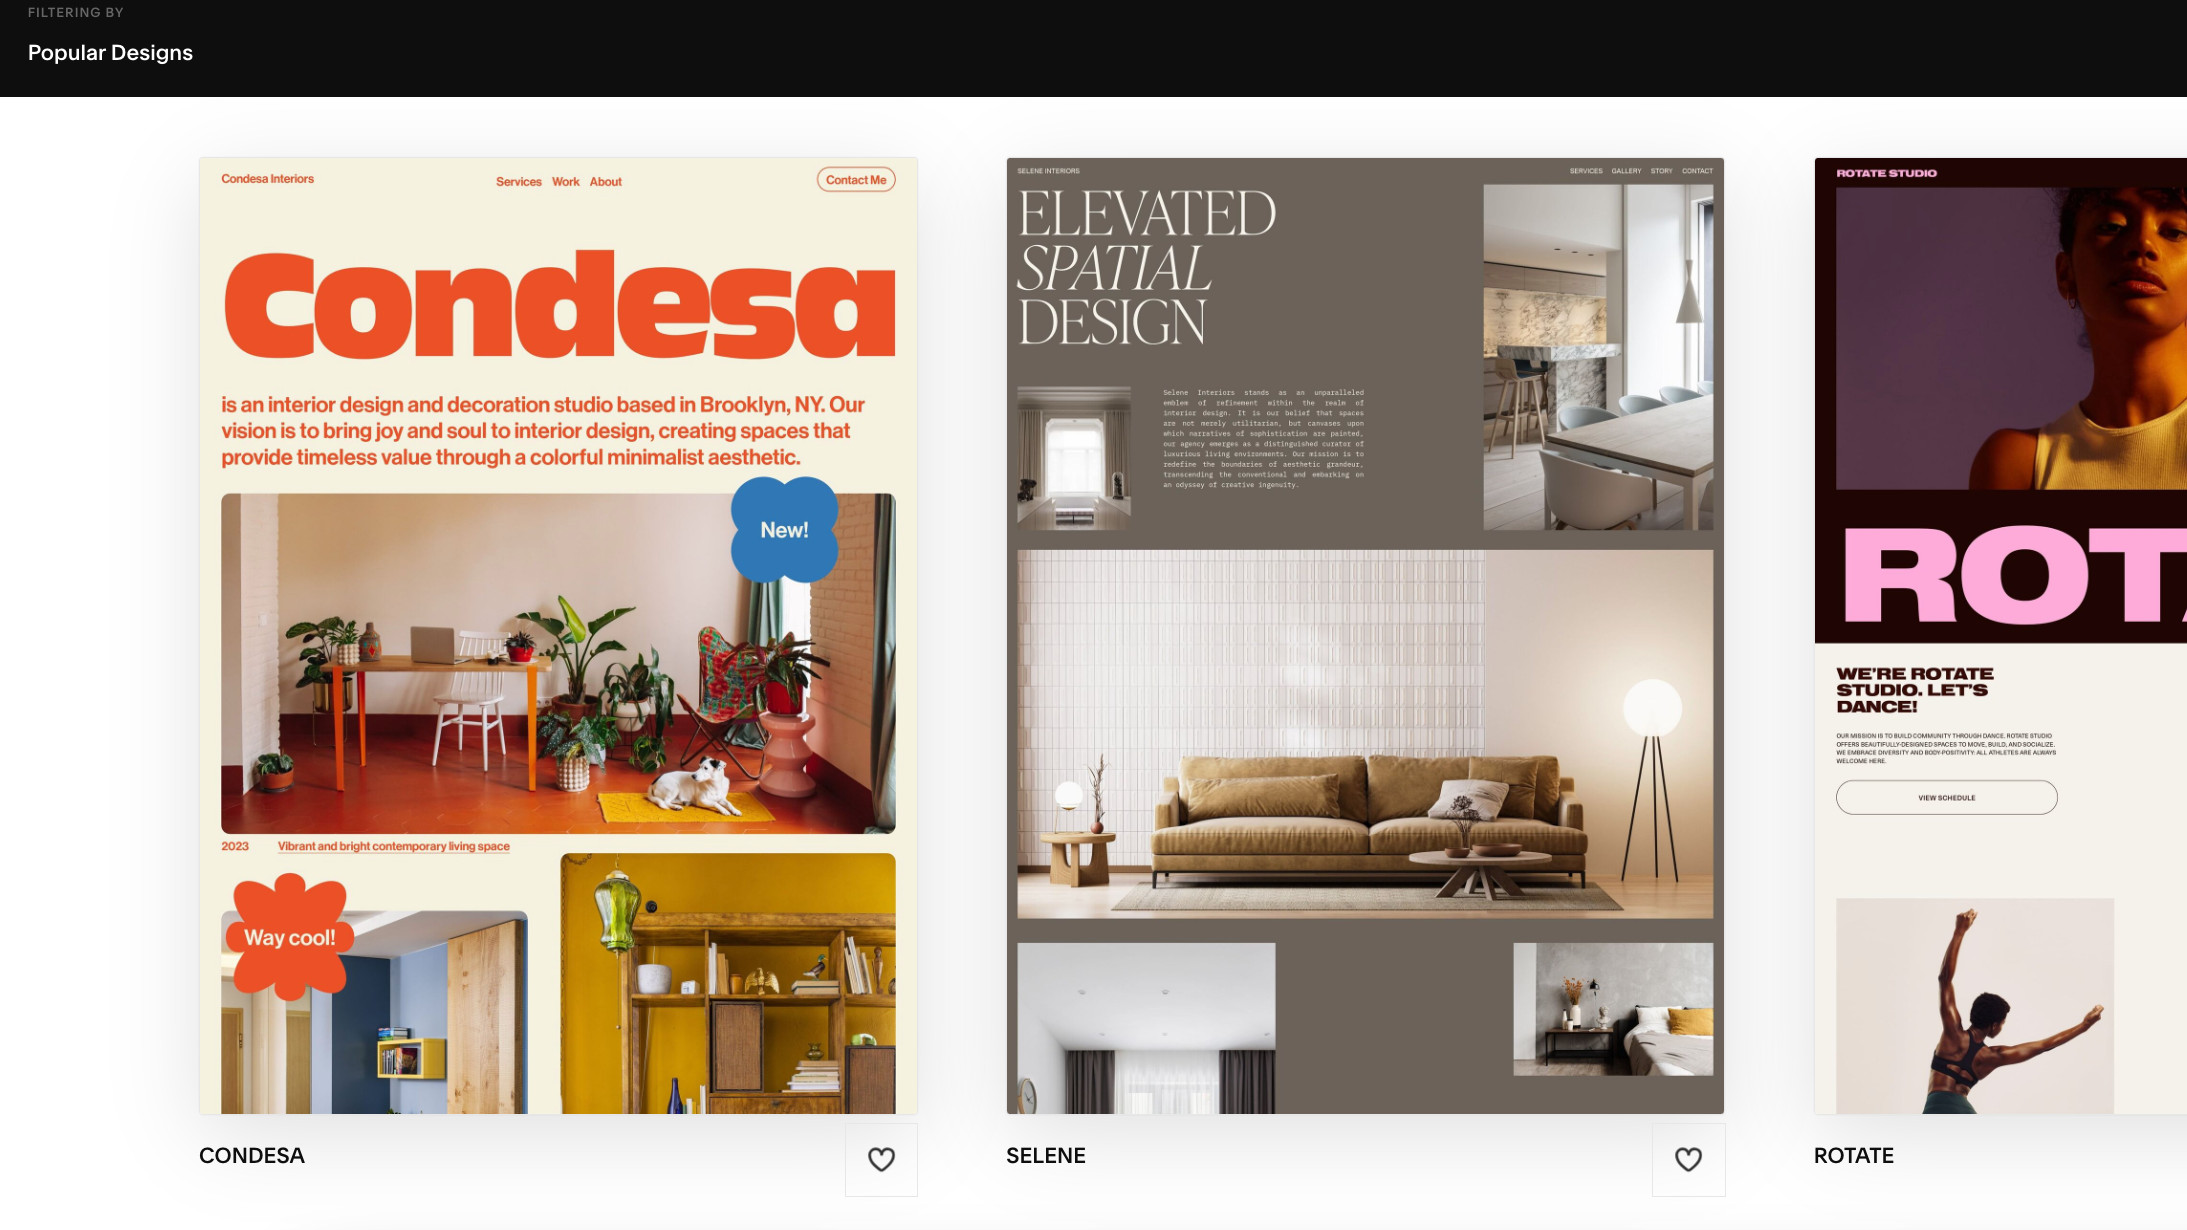
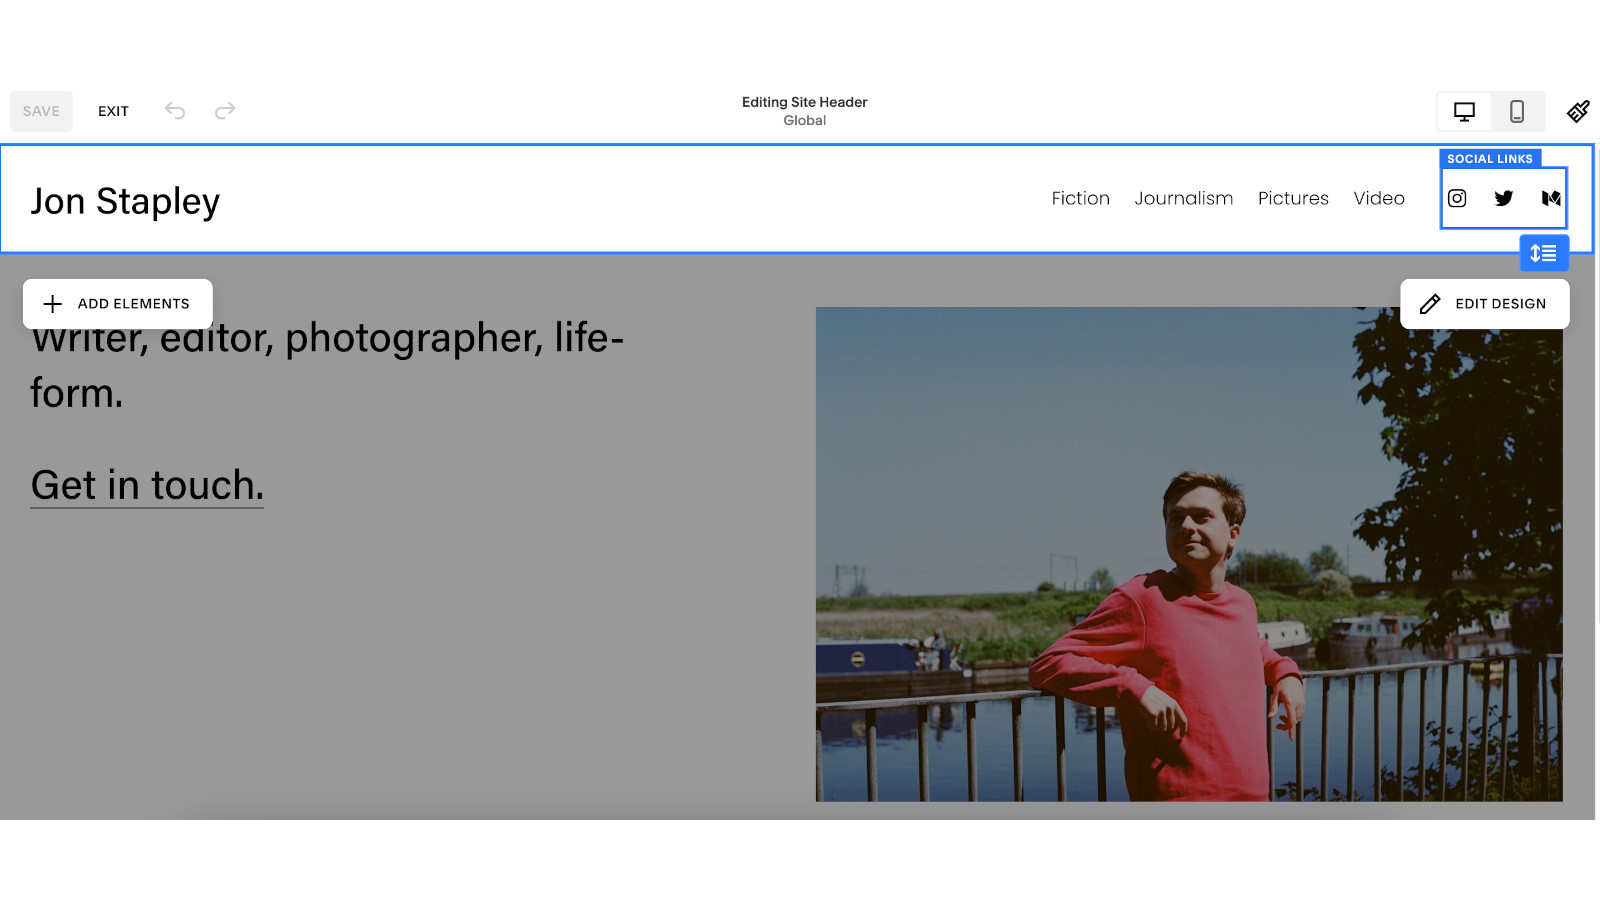
Now for the fun part: bringing your vision to life through design! Squarespace's themes (or templates) are what first drew me to the platform. They still impress with their professional looks and smart layouts.
Start by browsing Squarespace's template library. It's organized by purpose, like portfolios, blogs, and online stores. I always suggest picking a template that matches your goals, not just one that looks good. Each template has unique features and layouts optimized for its purpose. For example, Brine (my favorite for creatives) offers side-by-side images and text. Adirondack is great for long-form content and blogs.
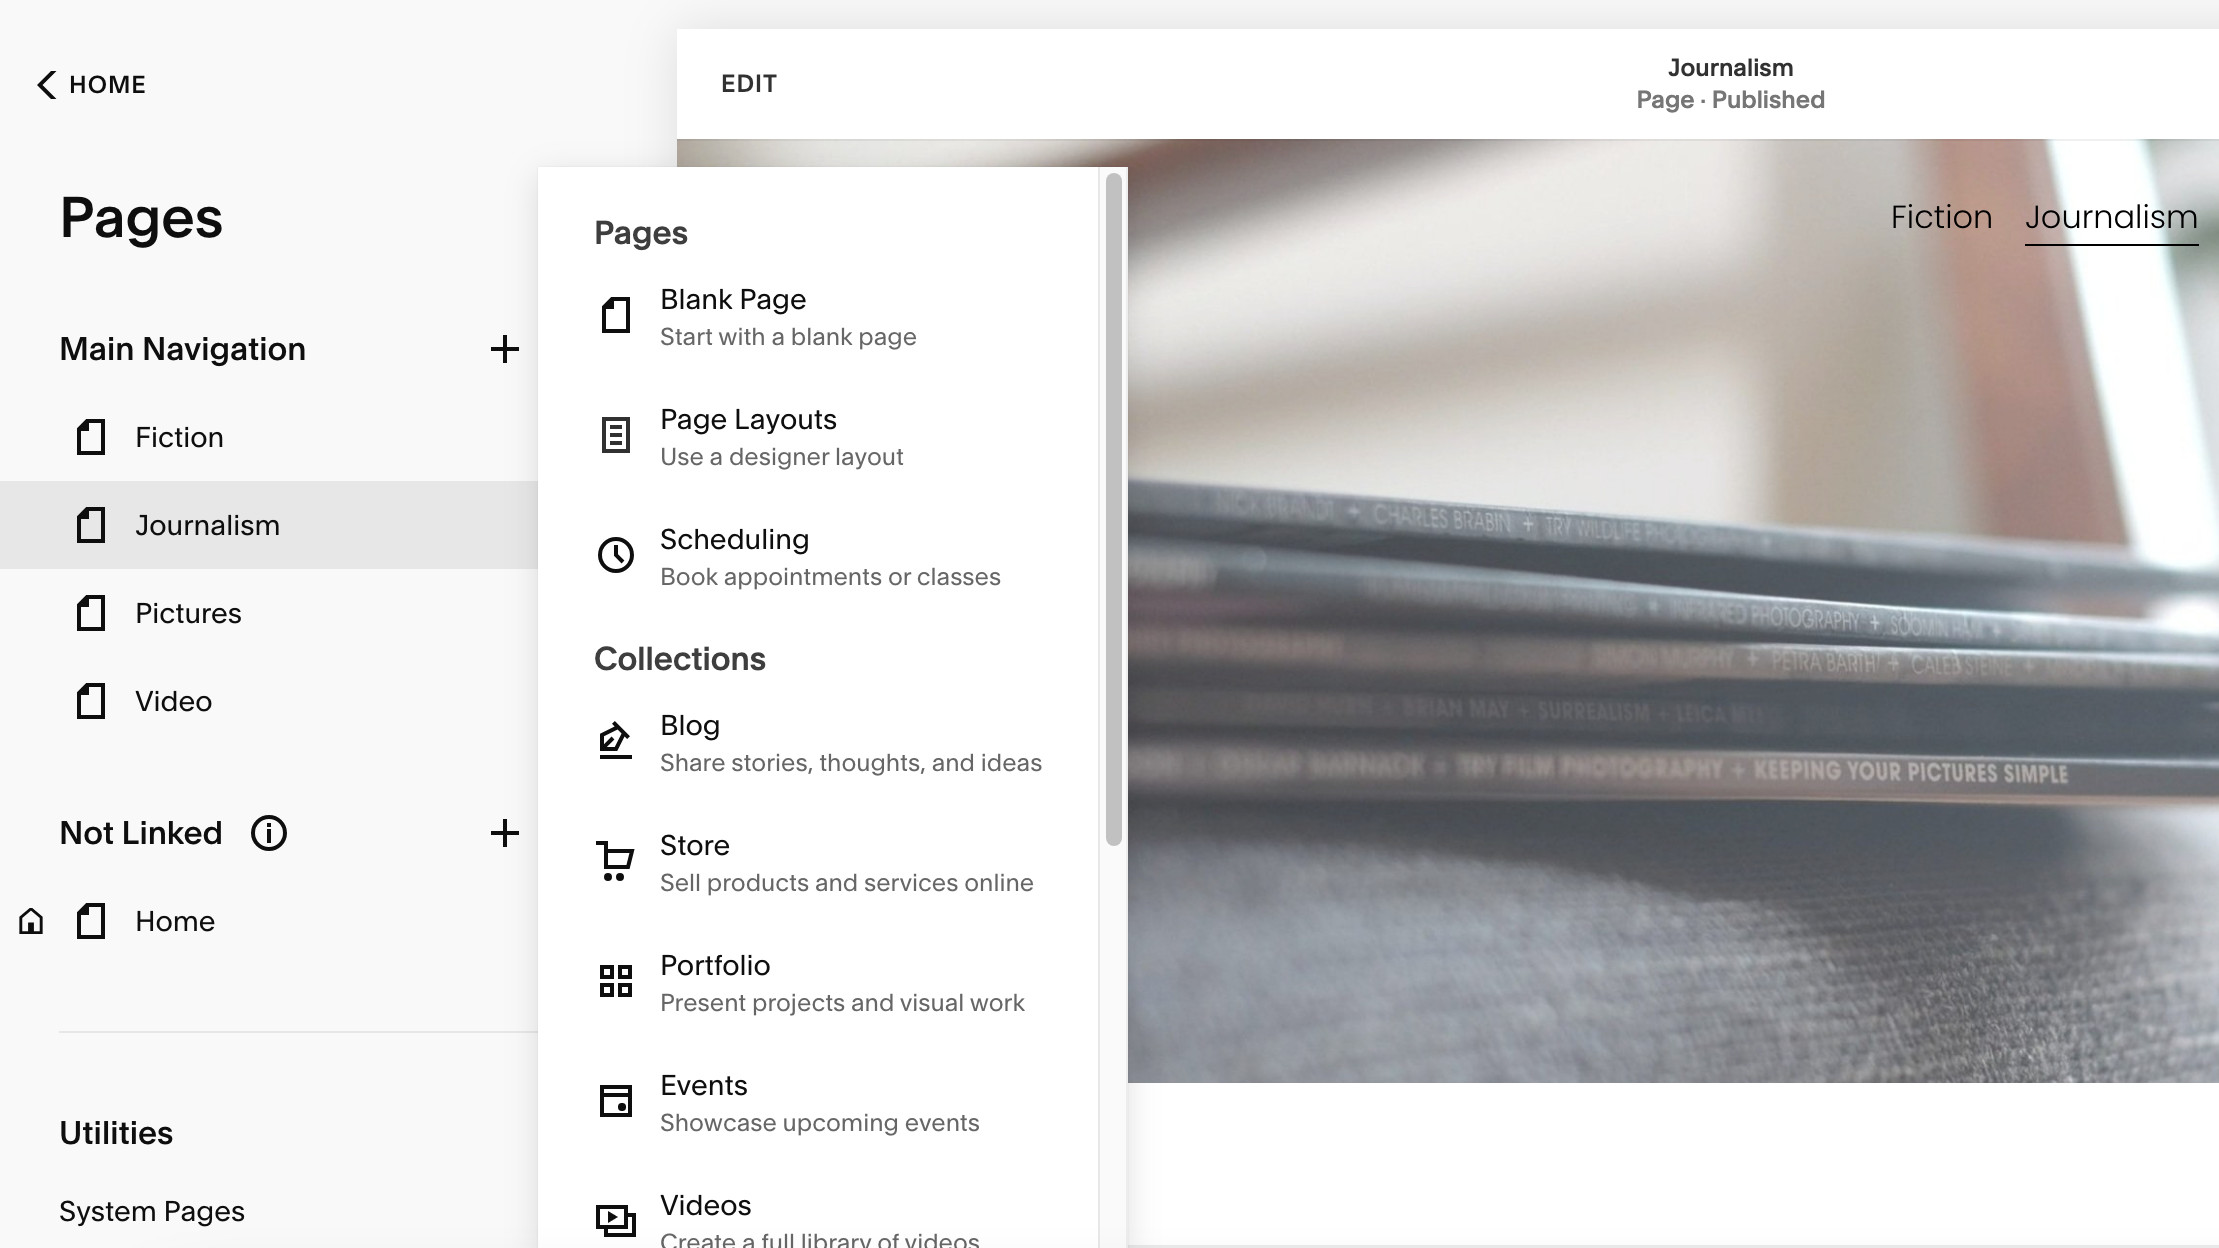
After selecting your template, structure your site. Go to the Pages panel in your Squarespace dashboard to add, remove, or rearrange pages. I usually start with essential pages like Home, About, Services/Work, and Contact. Think about your visitor's journey. What do they need to know, and in what order? Your navigation should feel natural, guiding visitors through your content.
For each page, decide on a layout. Squarespace uses a new block-based editor that lets you add sections like text, images, galleries, and forms. I find it helpful to sketch out each page's structure before building. This saves time and creates a more cohesive result. Don't stress about perfection now; you can easily rearrange blocks by dragging and dropping.
Keep in mind that mobile responsiveness is built into every Squarespace template. Still, I recommend previewing your site on different devices as you build. Sometimes spacing that looks good on desktop needs tweaking for smaller screens. It’s easier to fix these issues along the way than all at once at the end.
3. Populating with content
With your structure set, it’s time to add engaging content. This is where having a unique voice shines, turning a template into a site that’s truly yours.
Start with visual assets. High-quality images greatly enhance your site's professional look. Squarespace sites look amazing with sharp, well-composed photos. If you lack professional images, use Squarespace’s free Unsplash integration for stock photos. Alternatively, invest in a few key custom images for your top pages. When uploading, check image dimensions and file sizes. I aim for web-optimized images under 500KB for fast loading.

Next, focus on your written content. Your site's About page should share your story and connect with visitors. Service descriptions must highlight benefits, not just features. FAQs can be helpful too.
Always write in a consistent voice that matches your brand, whether it's formal or casual. If writing isn't your strength, jot down key points first, then polish the language later. You could also hire a copywriter for this important step.

4. Implementing ecommerce
If you want to sell products or services, Squarespace makes it easy to turn your website into an online store. I’ve known many creatives who earn money this way, whether with digital downloads or physical products.
First, choose a plan that fits your commerce needs. The Business plan allows basic selling but has a 3% transaction fee. In contrast, Commerce plans remove this fee and add features like customer accounts, abandoned cart recovery, and advanced shipping options. After you choose your plan, go to the Commerce section in your dashboard to set up your store.
Creating products is simple but needs attention. For each item, include strong images (I suggest 3-5 for physical products to show different angles), a clear description, price, and inventory settings. Organize your products with categories and tags for easier browsing. I like the product variants feature, which is great for items with different sizes, colors, or materials. Spend time on your product descriptions; better copy can double conversion rates by answering customer questions and highlighting benefits.
Next, set up your payment, shipping, and tax settings. Squarespace works well with Stripe and PayPal for payments. It also offers flexible shipping options like flat rates, weight-based, or real-time carrier calculations. For digital products, you can set up automatic delivery, which my clients selling templates, e-books, or music really appreciate. The tax settings automatically calculate the right rates based on your location and where you sell, saving you headaches at tax time.
Finally, think about your customers' experience from browsing to after they buy. Add clear shopping policies, FAQs, and return info to build trust. I recommend setting up automated order confirmation and shipping emails. You can customize these to match your brand voice. If you have an Advanced Commerce plan, use abandoned cart recovery emails. I’ve seen these recover up to 15% of lost sales by gently reminding customers about their left items.
5. Final touch-ups
Before launching your Squarespace site, make these final tweaks to elevate it. Attention to detail can turn a good site into an exceptional one.
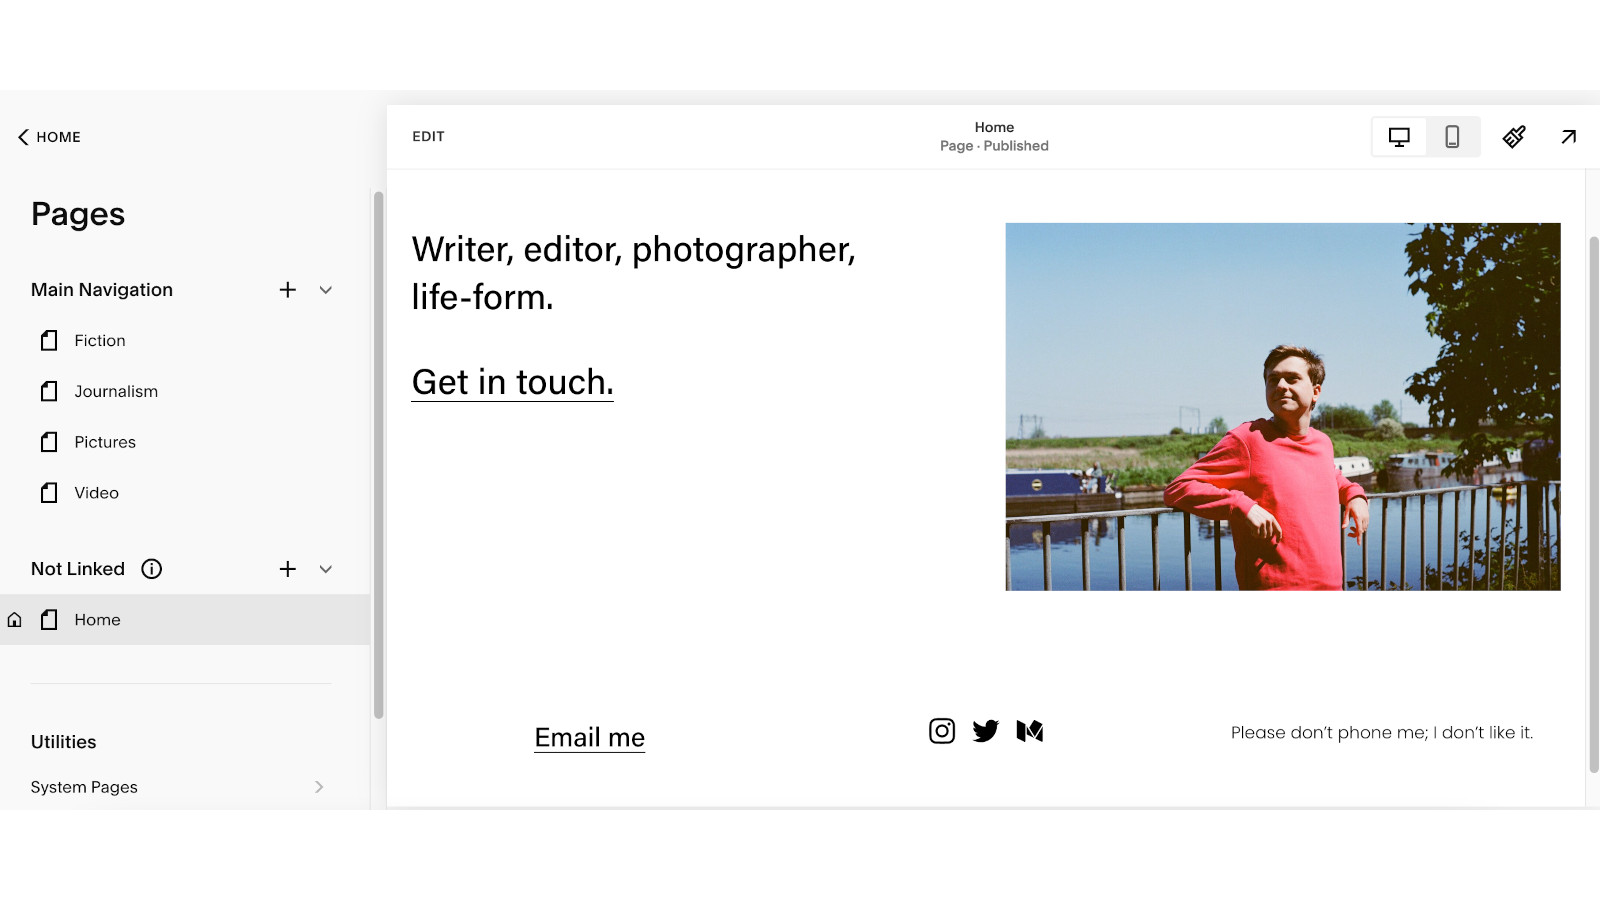
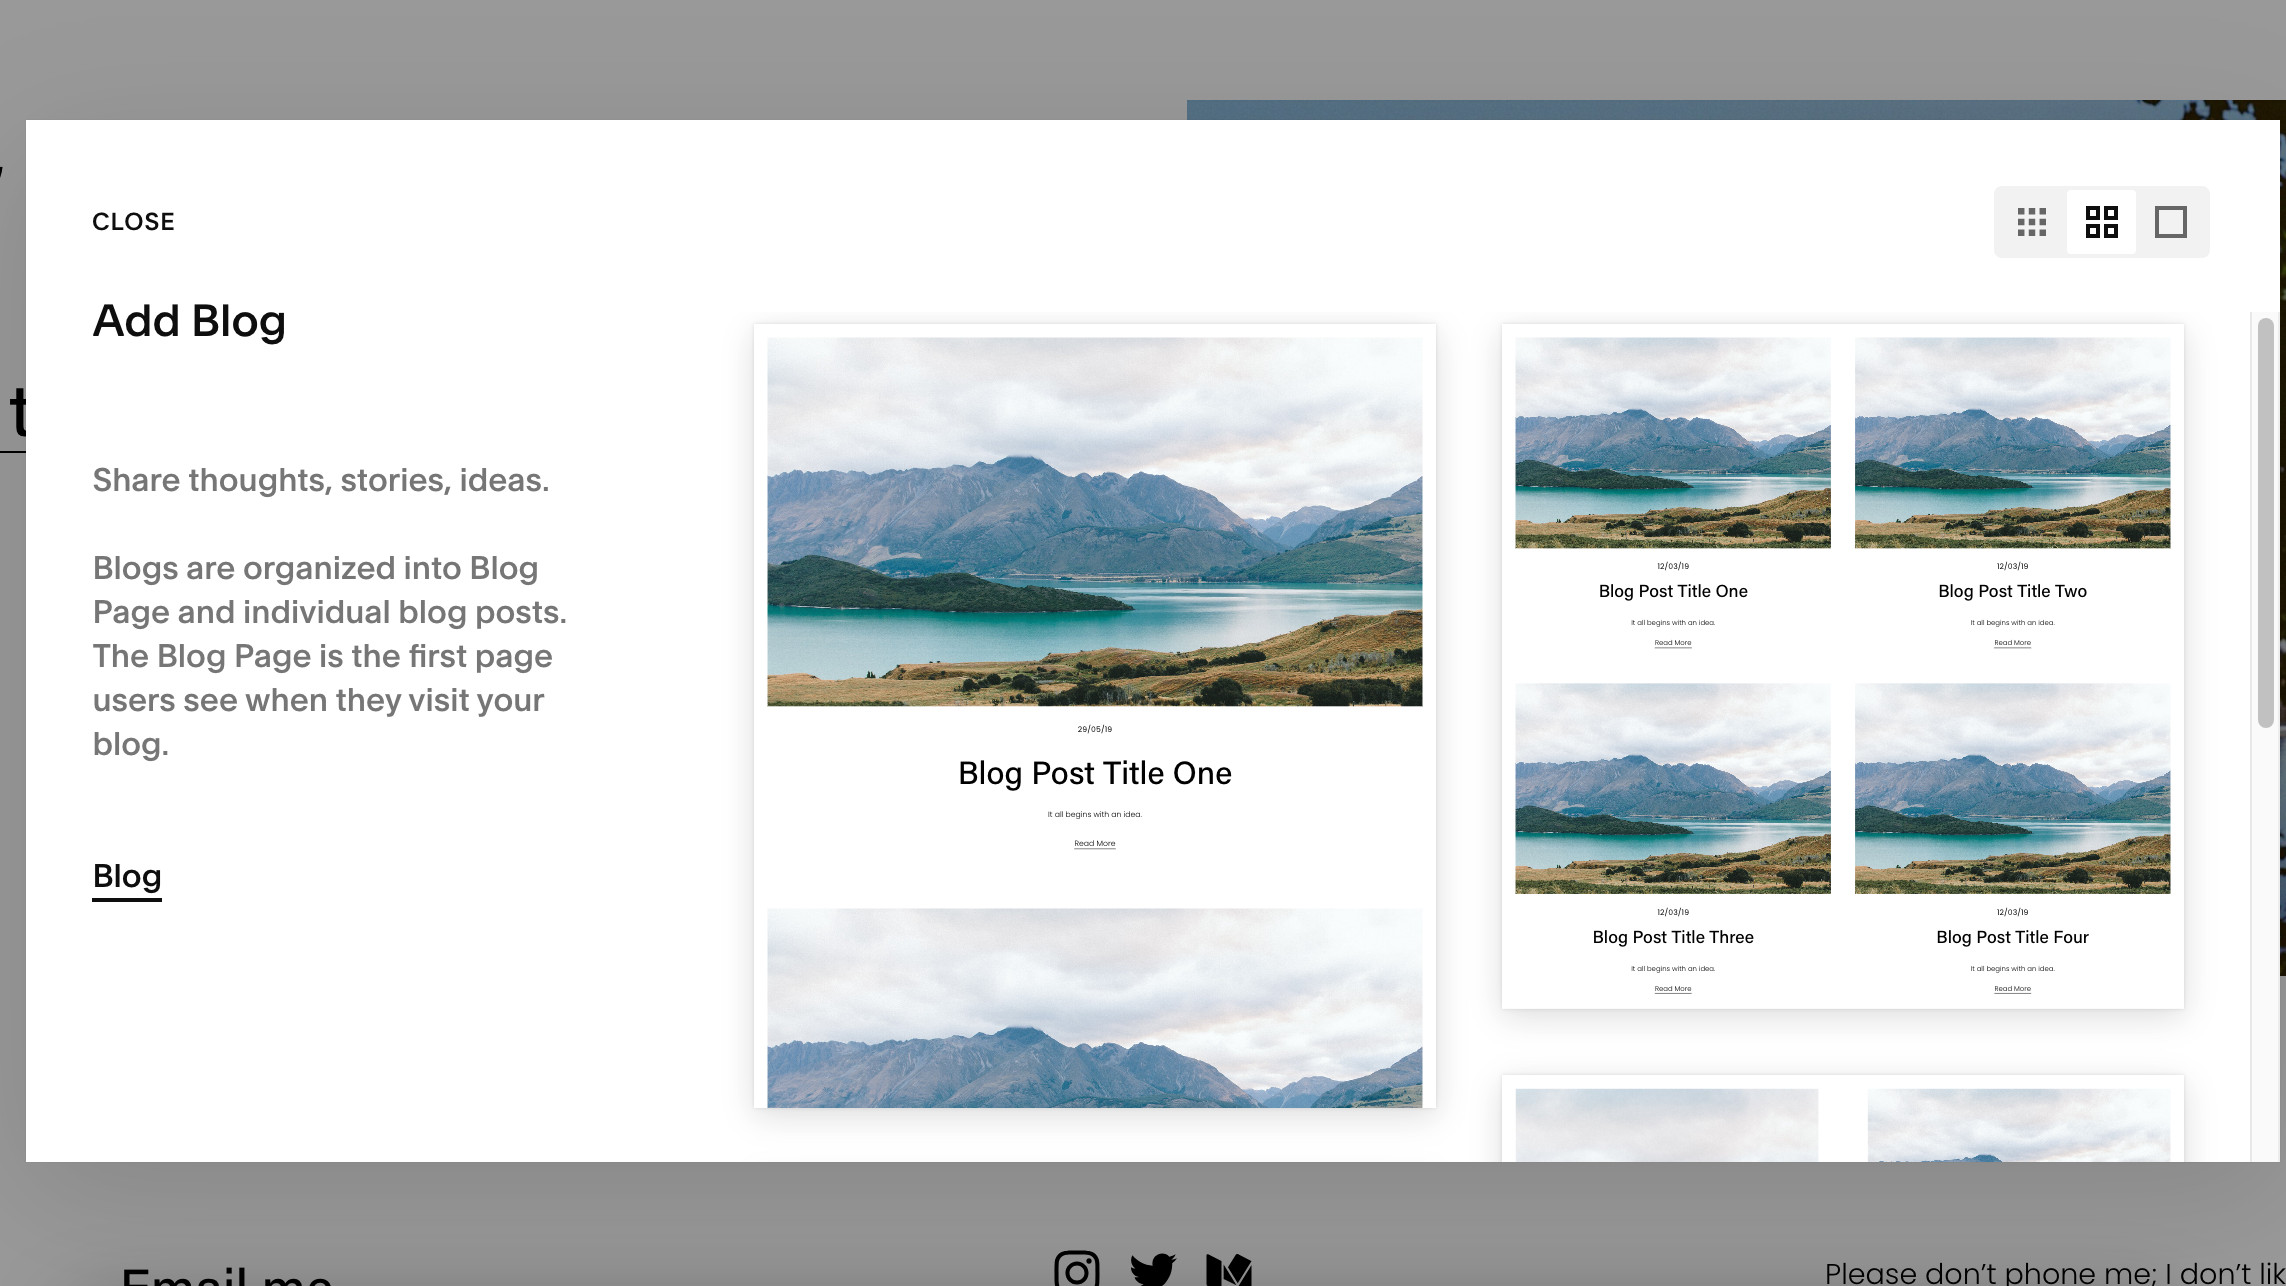
Start by reviewing your site on different devices. What looks great on your desktop may seem awkward on mobile, where most visitors will browse. Check text spacing, image cropping, and button placement on phones and tablets. Use Squarespace's device view toggle, but also test on actual devices when you can. Focus on key pages and conversion points — contact forms, checkout processes, and email sign-ups must work perfectly on any screen size. You could also add a blog for SEO purposes.
Next, add professional touches to boost credibility. Connect your custom domain if you haven't done this yet (this is included with annual plans). Add favicon images (the tiny icon in browser tabs), set up social sharing images, and ensure your site title and description show correctly in search results. I always suggest connecting Google Analytics at this stage to track visitor behavior after launch. If you have a logo, add it to your site header and check how it appears across different sections.
Don't overlook security and legal compliance. Include a privacy policy and terms of service, especially if you collect visitor data or sell products. Squarespace provides SSL certification automatically, but ensure your site displays the secure padlock icon in browsers. If you collect email addresses, comply with regulations like GDPR or CCPA by including consent mechanisms and disclosure statements.
Finally, conduct a content audit with fresh eyes. I often step away for a day before this final review to catch missed issues. Look for typos, broken links, and consistent formatting. Test all forms by submitting them yourself to confirm you receive responses. Check that all images have alt text for accessibility and SEO. Consider asking a trusted friend to navigate your site with specific goals and provide feedback on any confusing elements.
Remember, your website is never truly "finished." It will grow as your business or creative practice evolves. With these careful adjustments complete, you can confidently launch a Squarespace site that represents your work well and serves your visitors effectively. I still feel excitement every time I help someone hit that "publish" button, knowing their creative vision is ready for the world!