AI is a revolutionary technology that gives artists like me the time to focus more of our efforts on creativity. Still, to get the most out of AI, we need to harness our imagination and hone the technical skills necessary to operate AI in the first place. It is equally important to be aware of the ethical and legal implications of relying on AI to generate artwork, especially regarding transparency around the way these tools are used in the creative process.
The information in this article is lifted from the AI with Cartoon Animator (CTA) tutorial video, which you are encouraged to watch for a comprehensive insight into my creative process. You can see an example of the final animation described in this article by watching the tutorial video (below).
01. Use good prompts
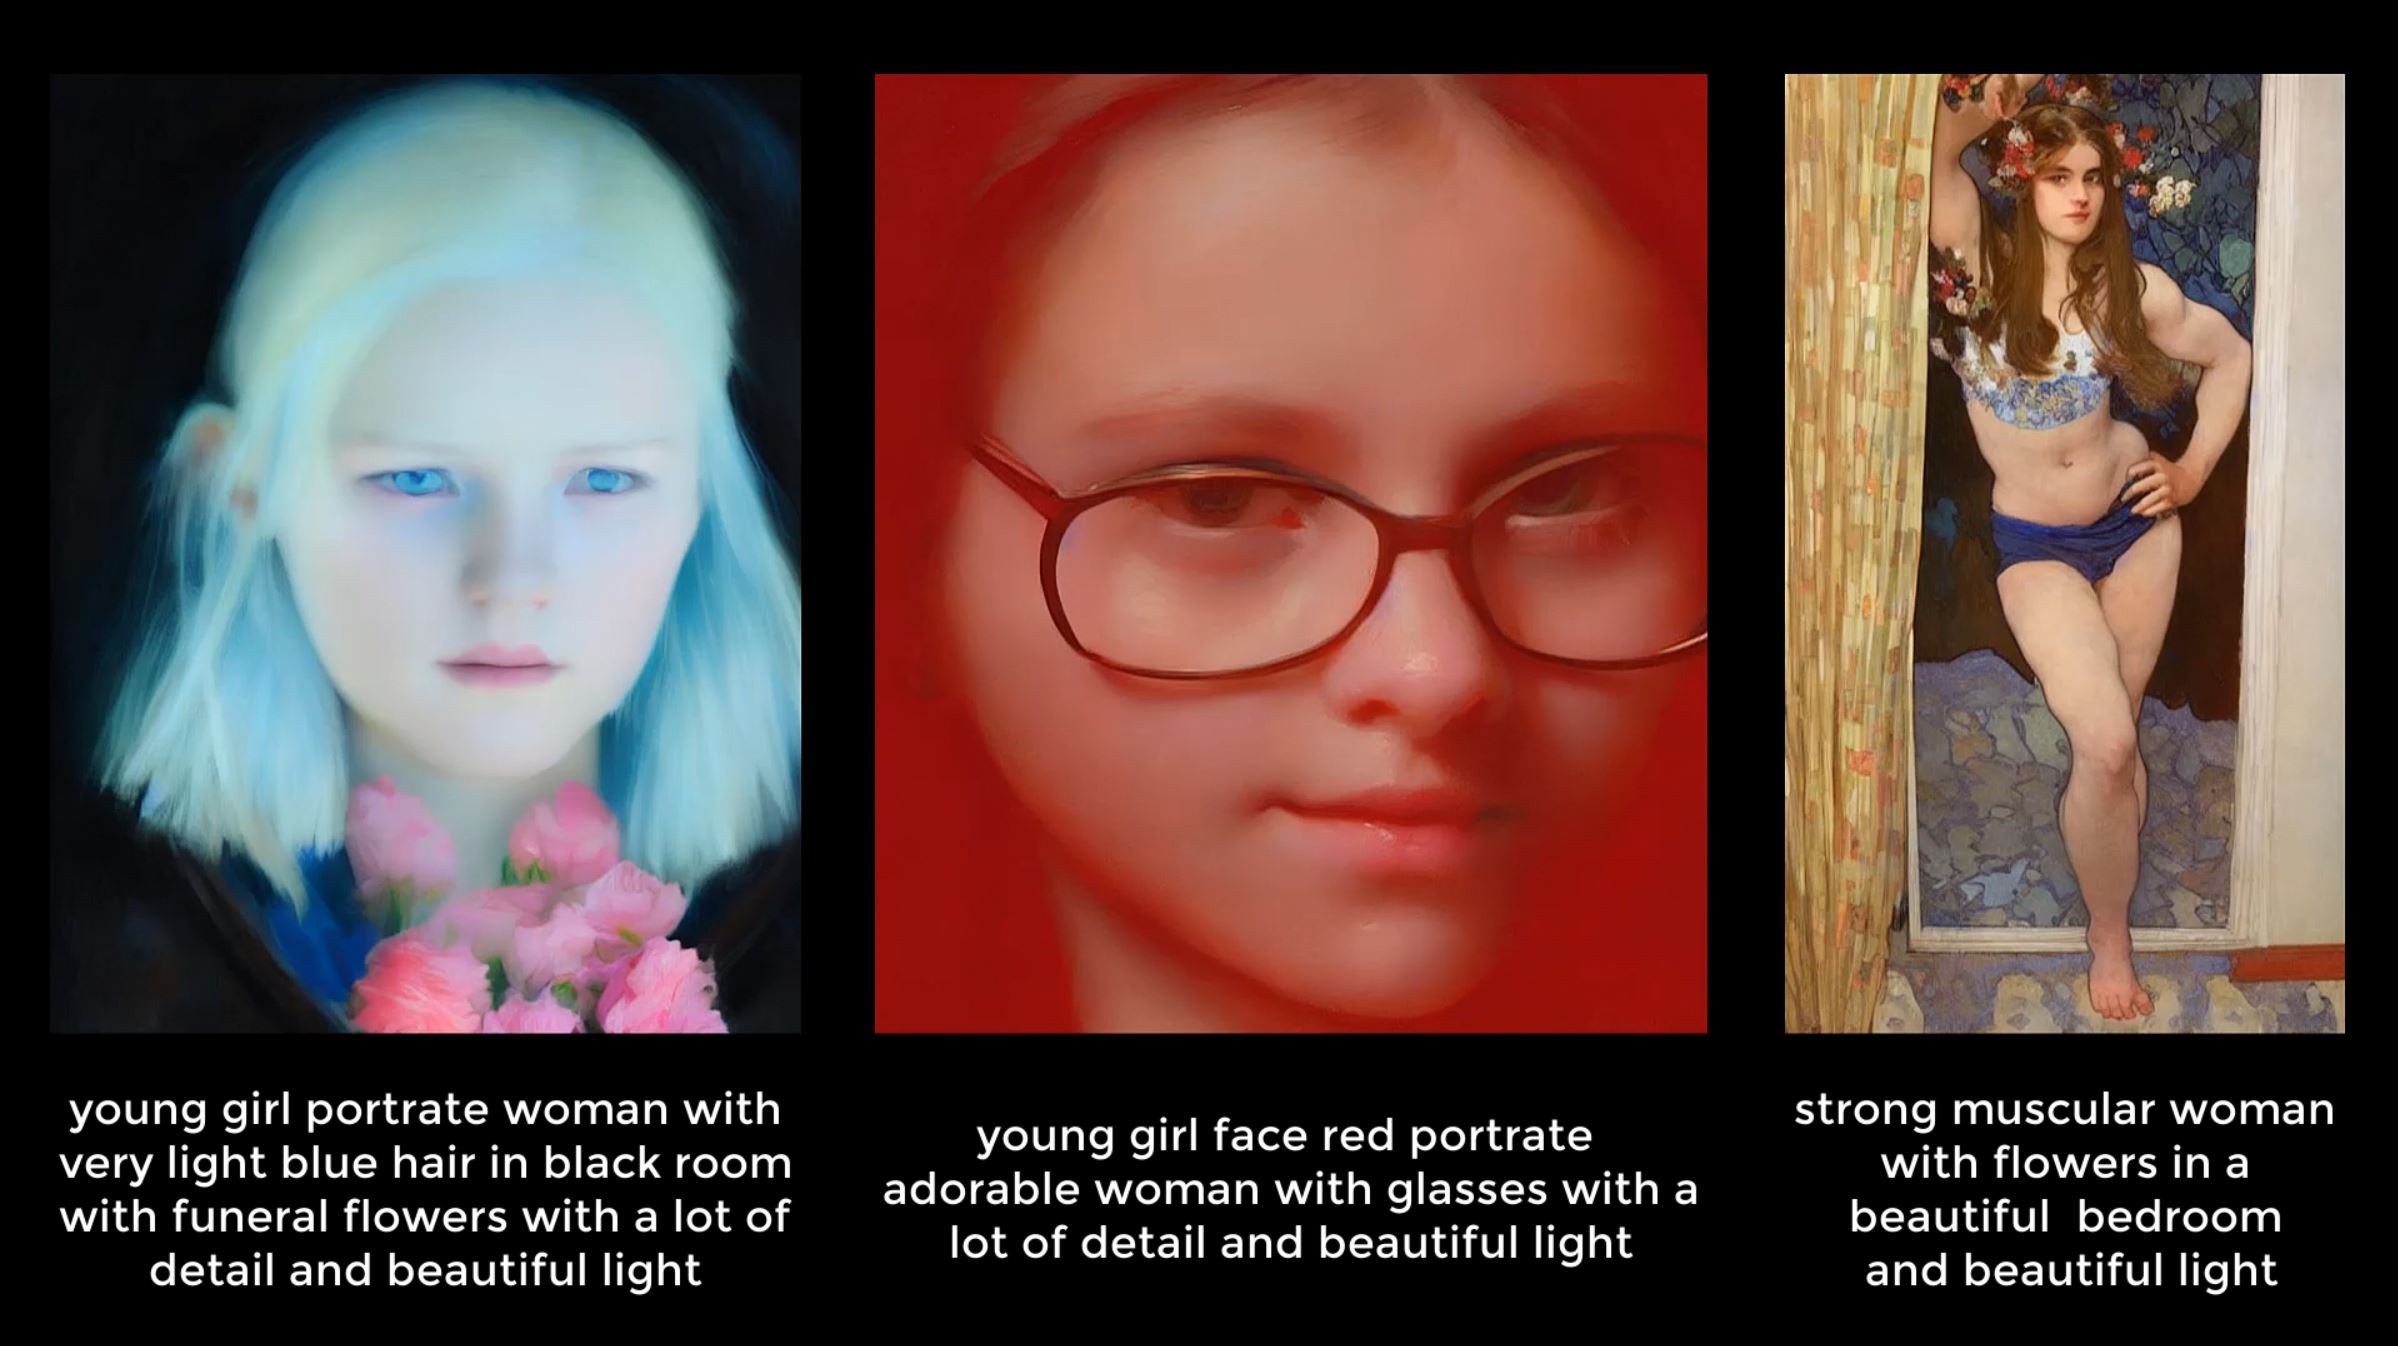
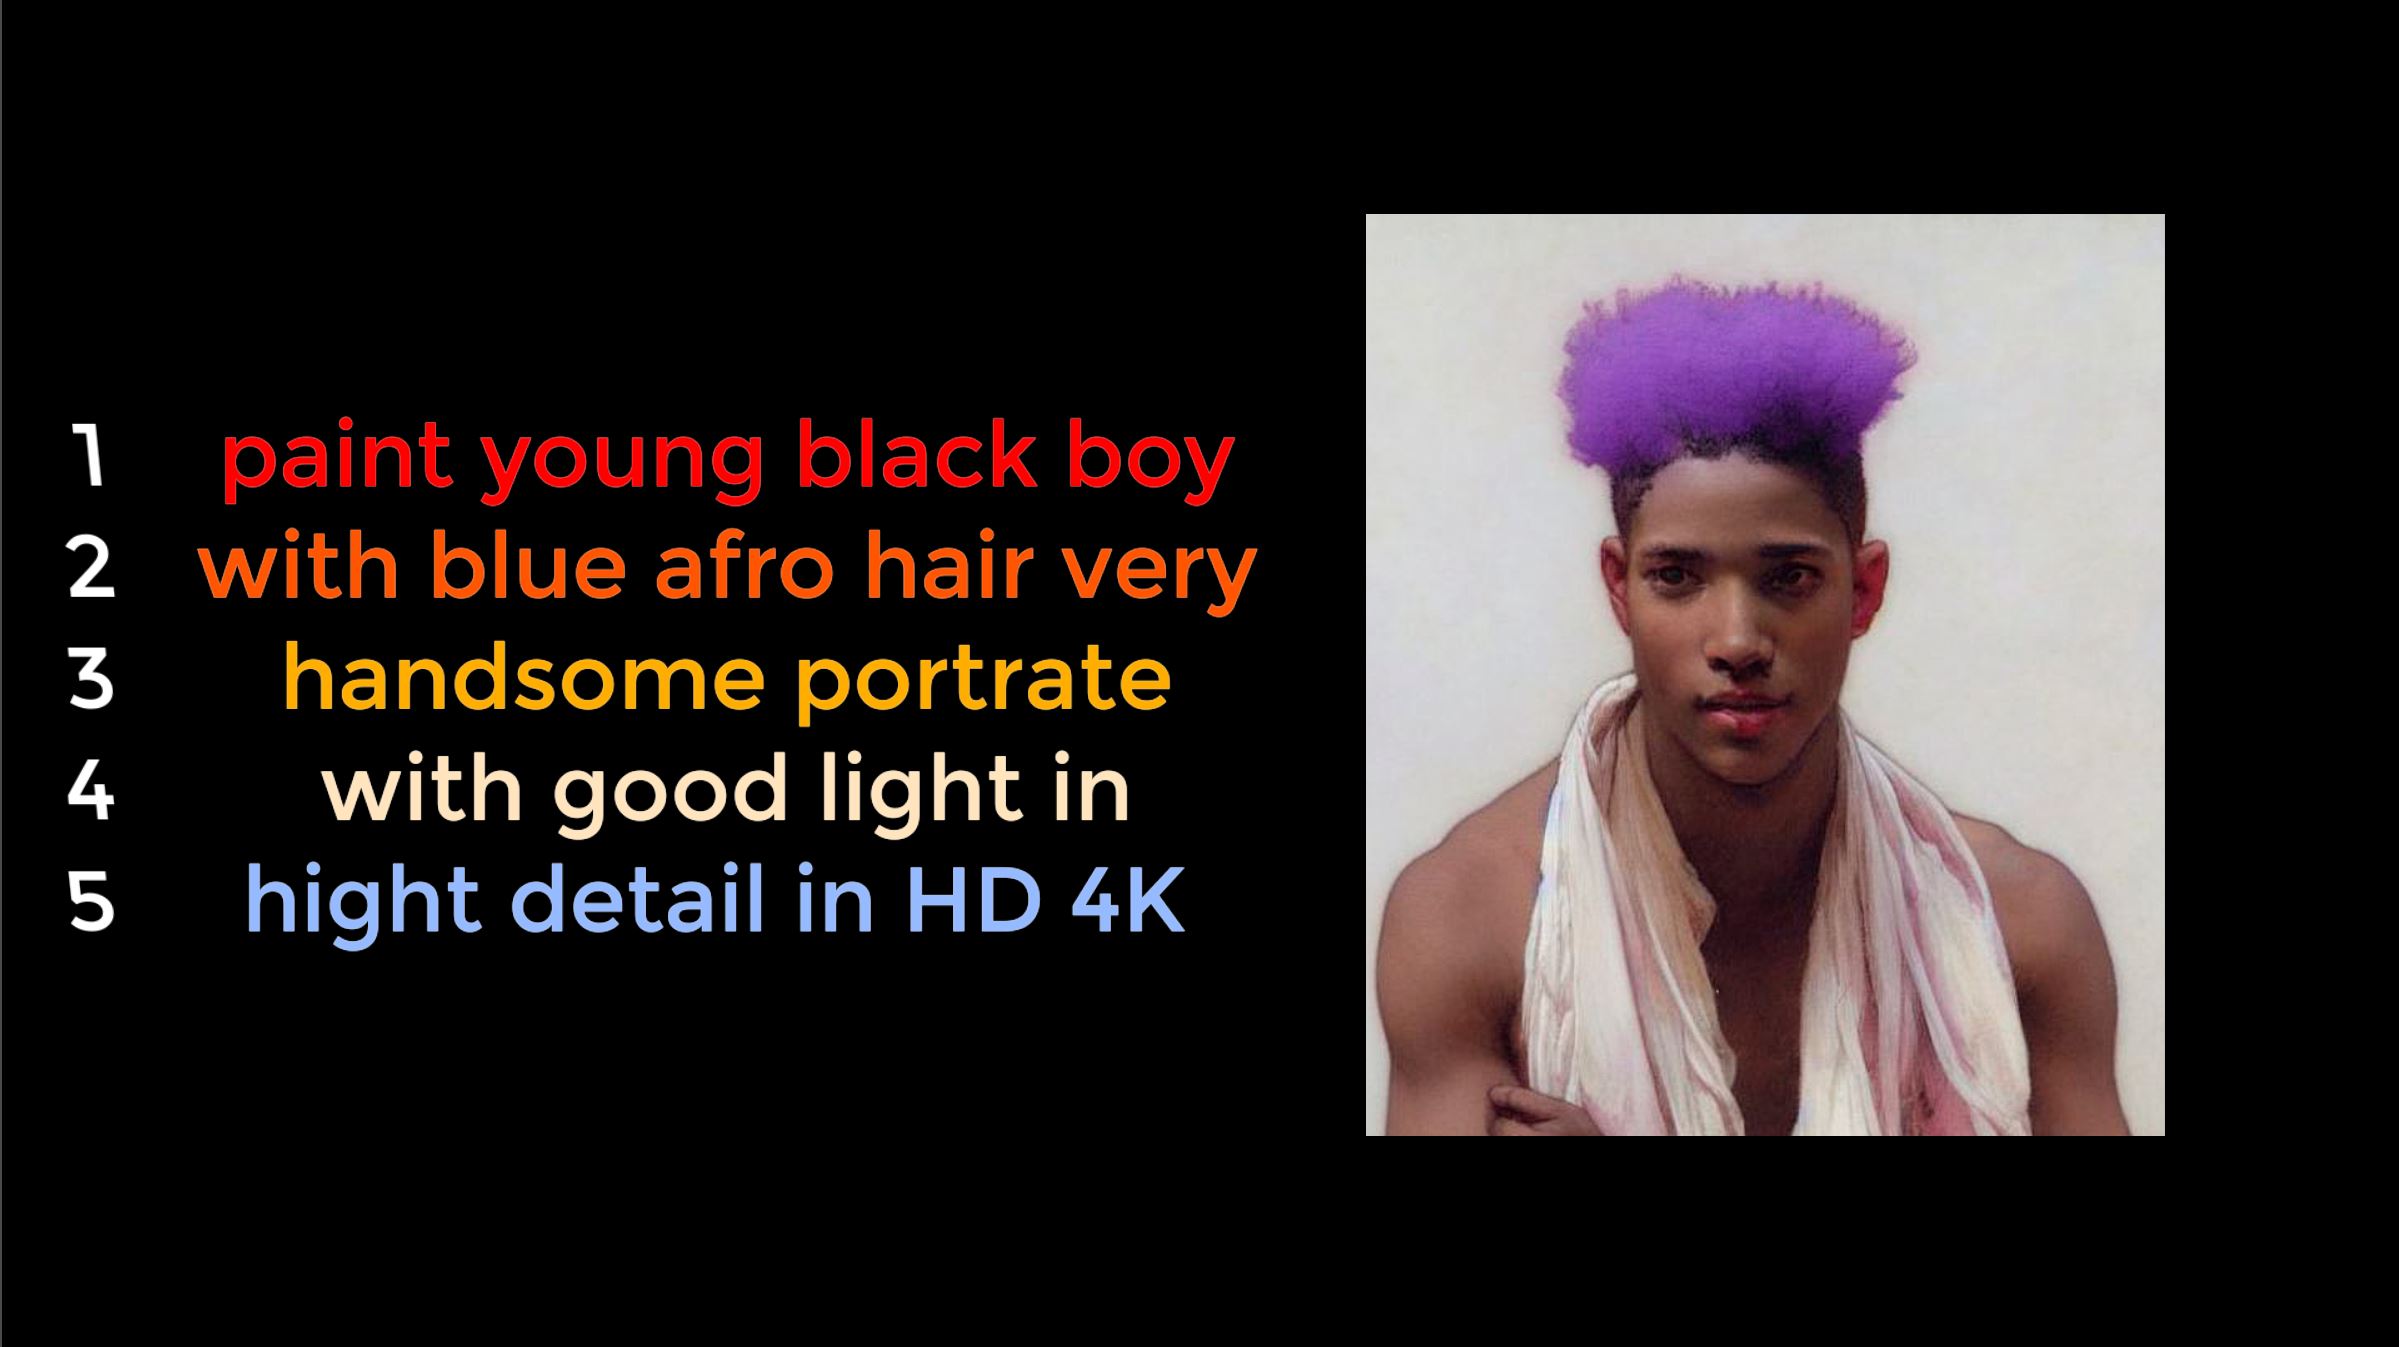
Getting the AI to generate images that we want can be difficult. The smart way to go about it is to give it consistently good prompts. But, what exactly is a prompt? Simply put, it is a set of words describing the image that we want to generate, and it is usually fed to the AI from a chatbox interface. By pulling data from what it has learned from its countless sessions with training models, the AI can analyse the given information to come up with an appropriate response.
When writing prompts, I suggest only allowing the AI to derive results from images that are in the public domain. There is a high probability in the future that all AI will base their creations solely on publicly available images; But for now, we must manually direct it to do so.
One way to do this is to include the name of an original creator whose works are already in the public domain. High-quality digitized images of their works are likely readily available in the AI’s database – take, for instance, the great works of John William Waterhouse. However, there is a method that gives us more control, and thereby, better results.
02. Let AI derive character concepts
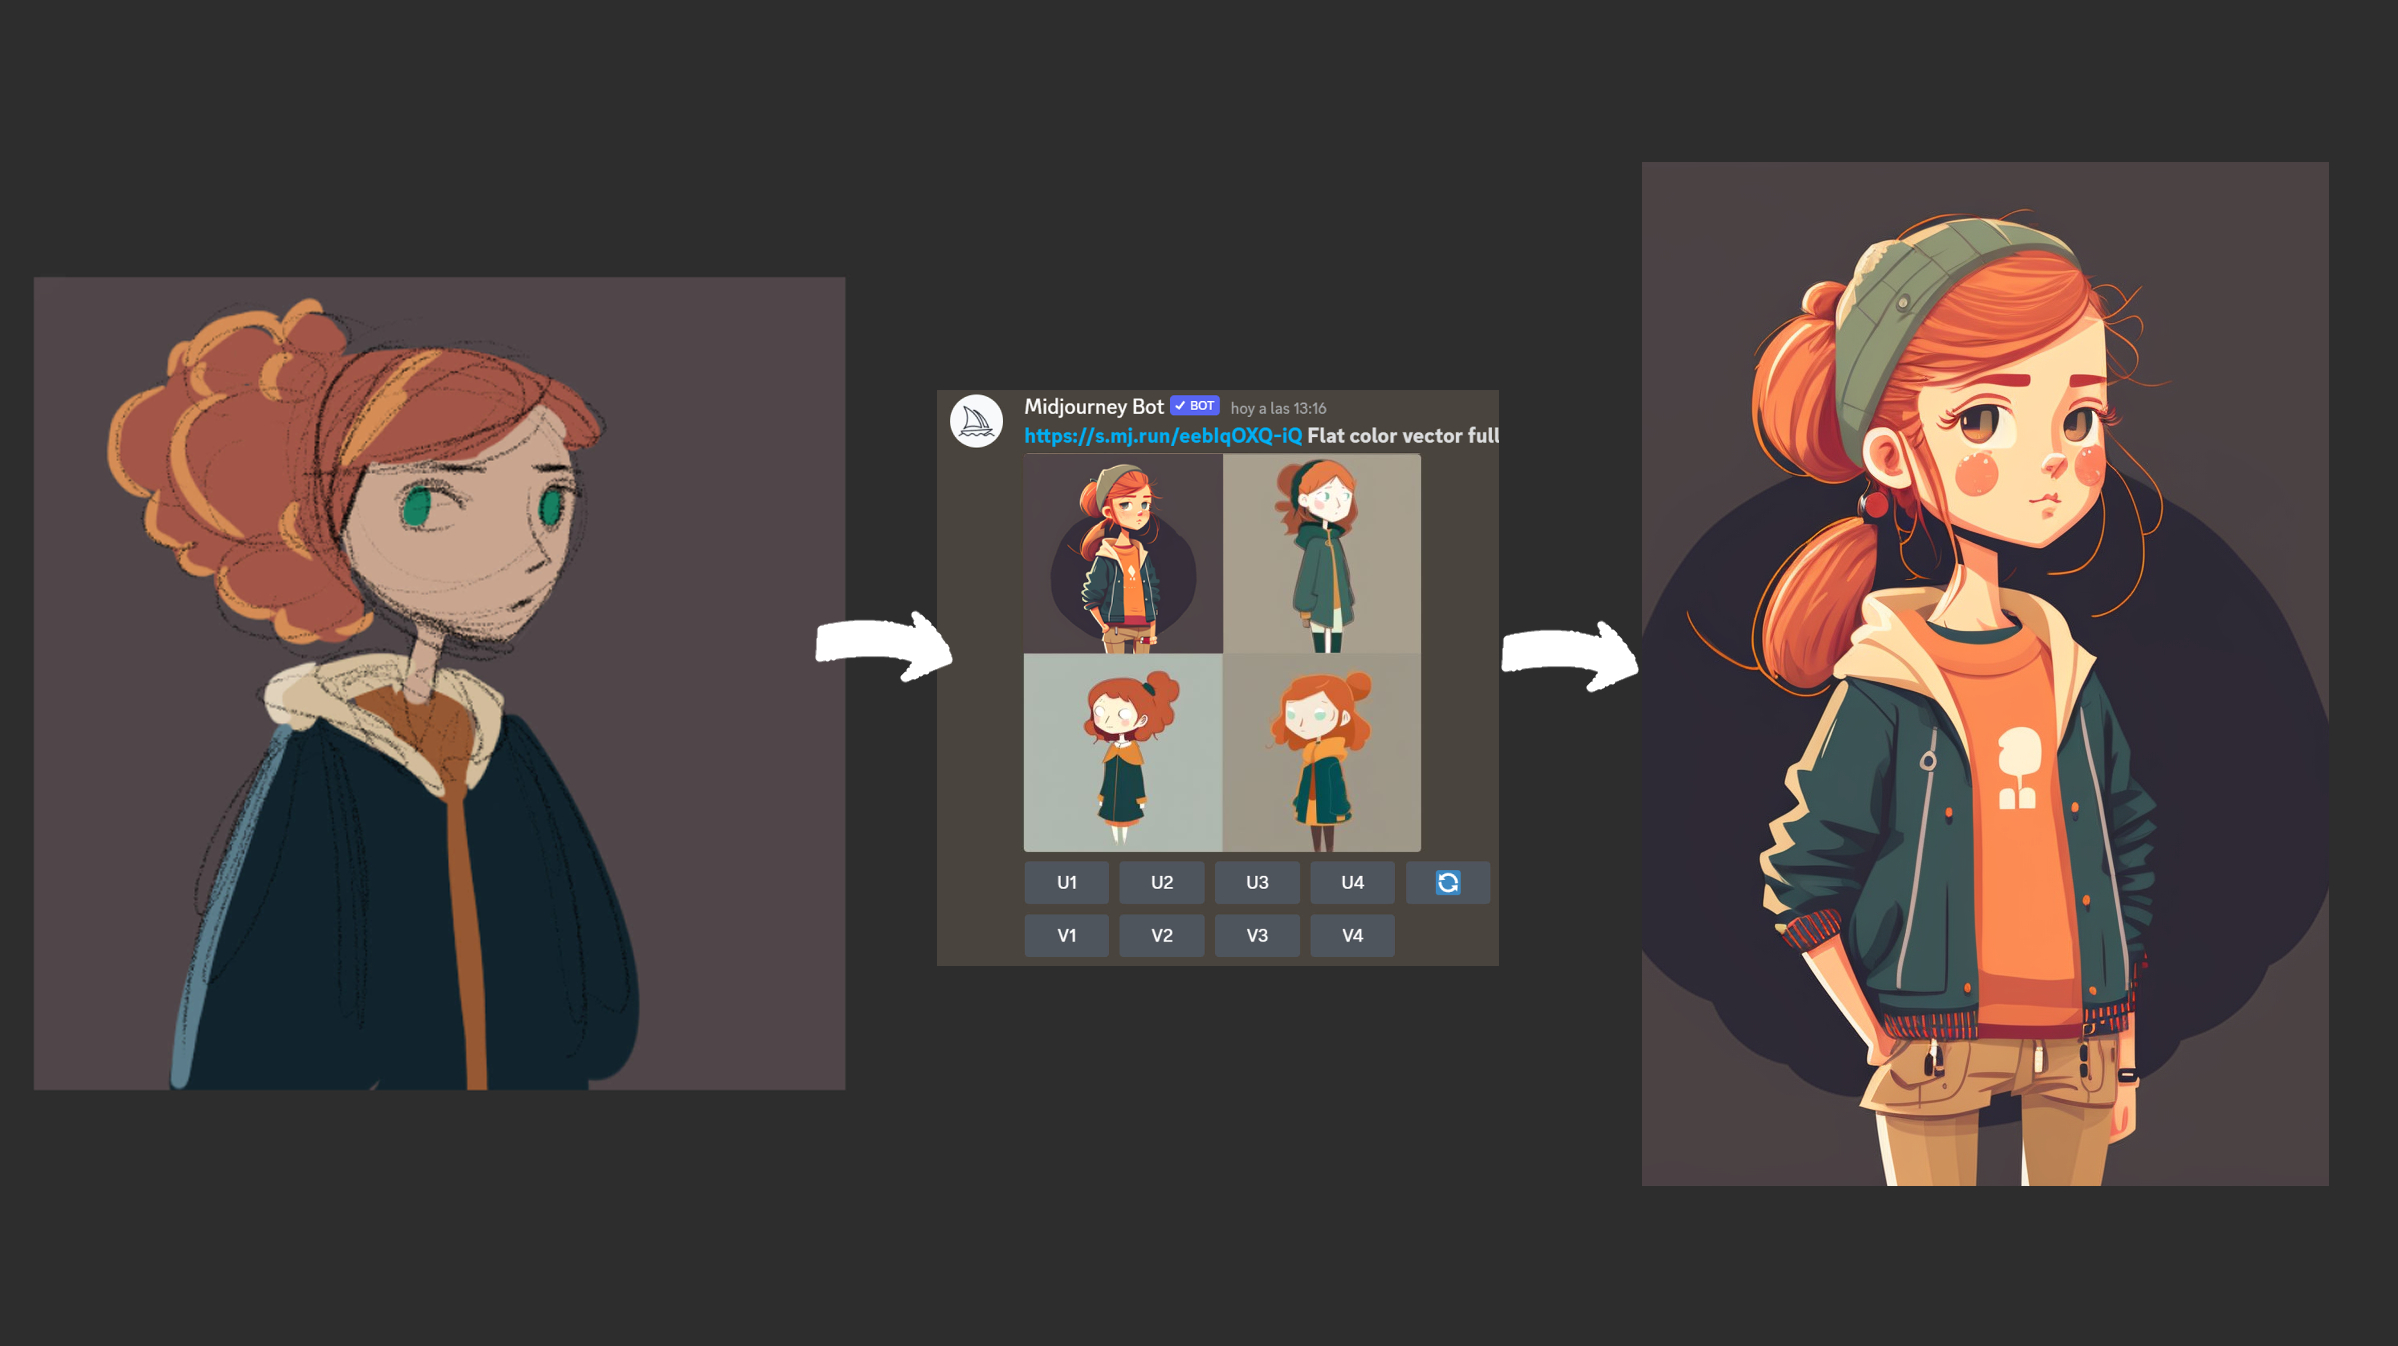
The technique I’m about to mention can be used with almost any image-generating AI. That is the use of images to generate other images using a machine-learning model. To elaborate, if the AI is fed a sketch with the concepts we want our illustration to have, we can have it generate alternative images based on our original concept. In this way, AI can help with 2D character creation.
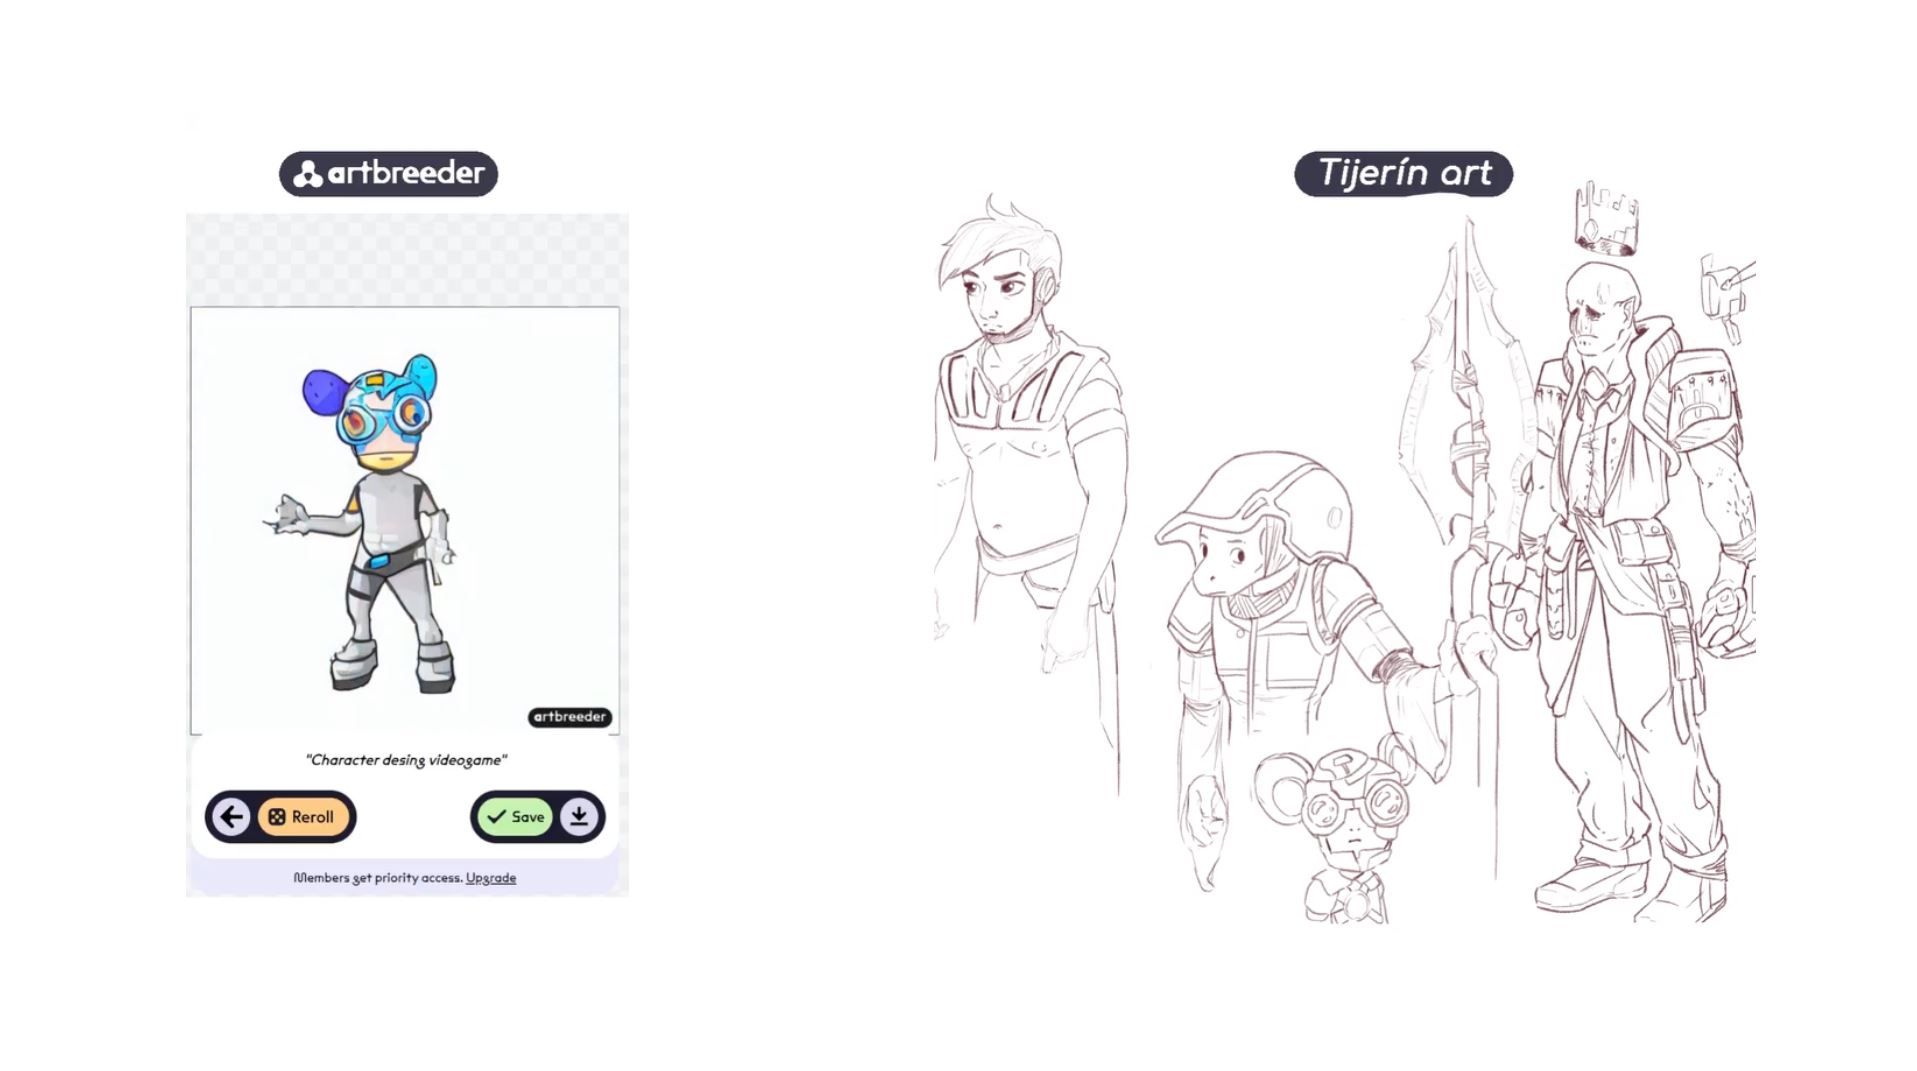
Personally, I prefer to put a few character sketches into the Artbreeder AI and let it quickly derive a few more character concepts. Out of the ideas that it gives me, I continue to refine my ideas based on what resonates. It’s a very fun way of working that I highly recommend you try.
03. Don't lose sight of the goal
Whatever procedure you choose, a good rule of thumb is to master the tool rather than have it master you – that includes not losing sight of the goal. In this particular case, we are looking for a result that lends itself to painless animation in CTA, and that would require us to retouch the character – like furnishing the rest of my example image with the missing legs. For solutions to problems such as these, you can consult the AI community . On the Hugging Face site, you can explore all sorts of great AIs that can be used for free, right in the browser.
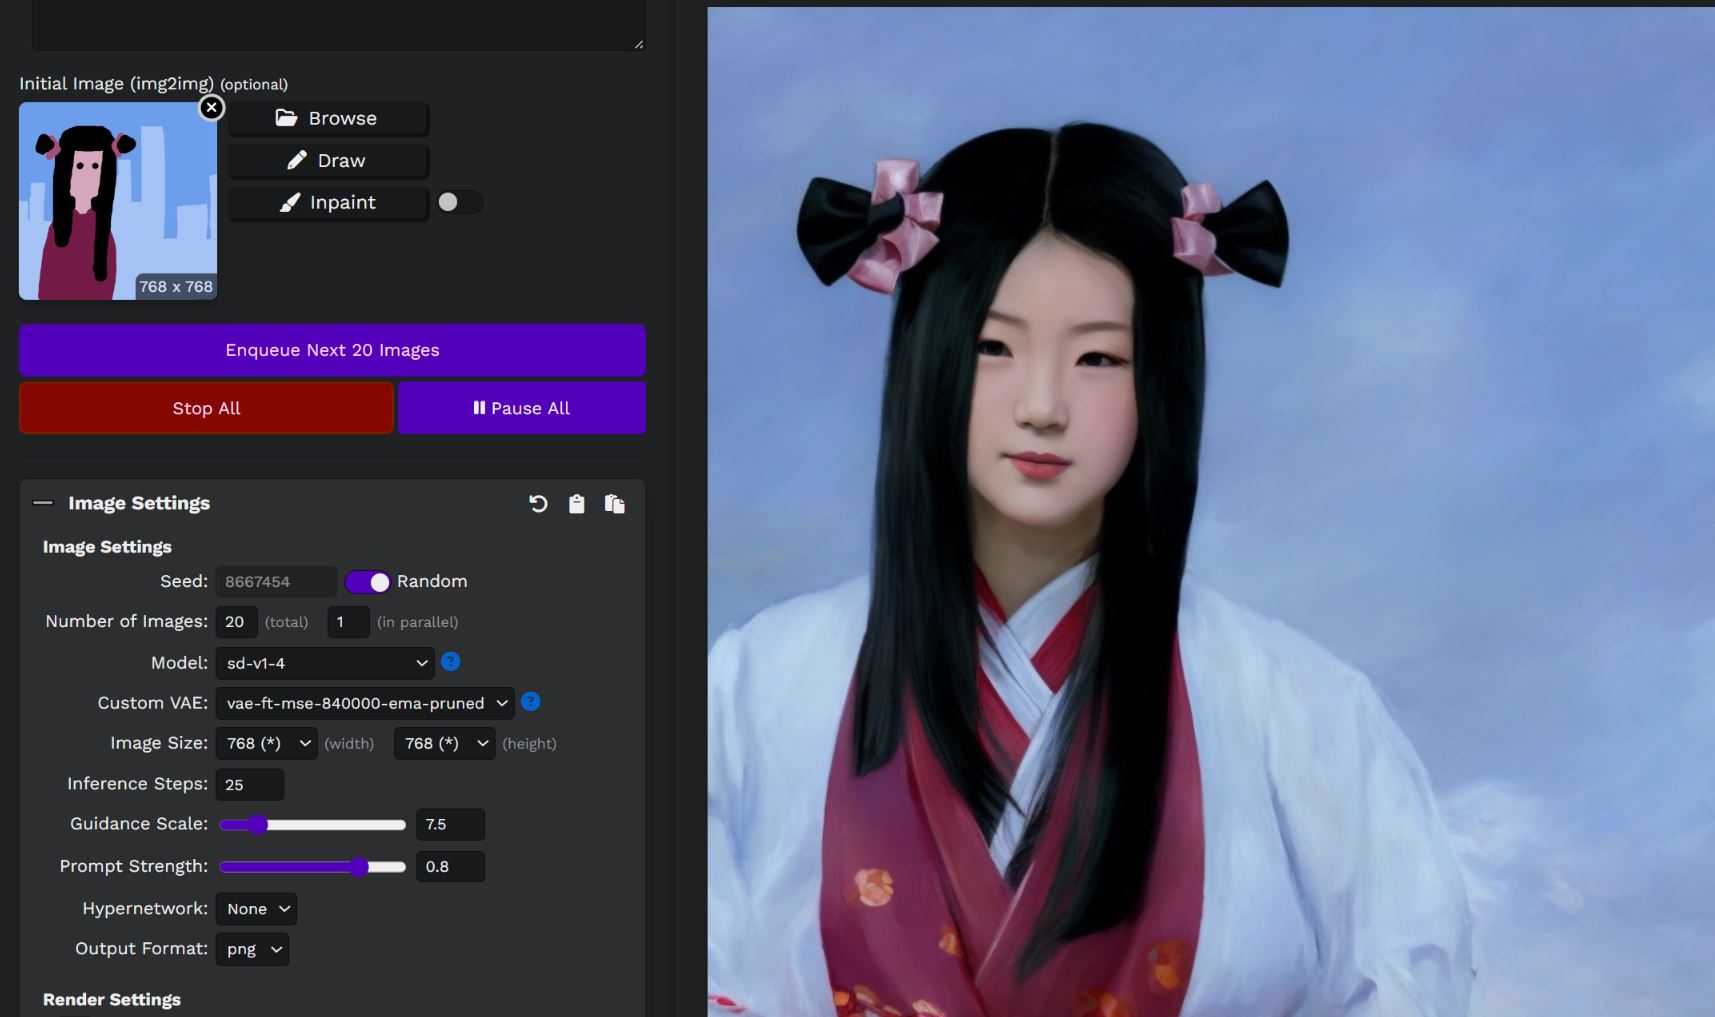
Of particular interest is Stable Diffusion Infinity, which is promoted for its ability to zoom into an image with great accuracy. It belongs to a broader family of tools under the Stable Diffusion technology. This AI is completely free and, unlike others, remains open source. It is also my favourite and I use it exclusively for its accuracy.
That said, it does require copious amounts of prompts to get it there. The more prompts given, the better the final result will be and the closer the output image will match what you had in mind. Lastly, if you are using the Image-to-Image function, be cognizant of the input image resolution as that will affect the quality of the generated images. For high-quality results, be sure to feed it images with adequate resolution and detail.
04. Start retouching your AI image
When your sketch has been turned into the desired illustration with the help of AI, you can start retouching it. Our initial instinct may start us off with refining the hands, but I recommend taking this opportunity to make the illustration more our own.
Namely, you should modify the 2D character and decorative elements according to your tastes and bring them closer to the style of character you have in mind. This process is of vital importance if you are working on a project with multiple characters and they all need to complement each other in a cohesive style. Personally, I think it’s best to remove the whole inside of the face and make it individually. This way, all the faces of the characters will have a consistent style and this lets us animate with ease in CTA.
05. Use free vector templates
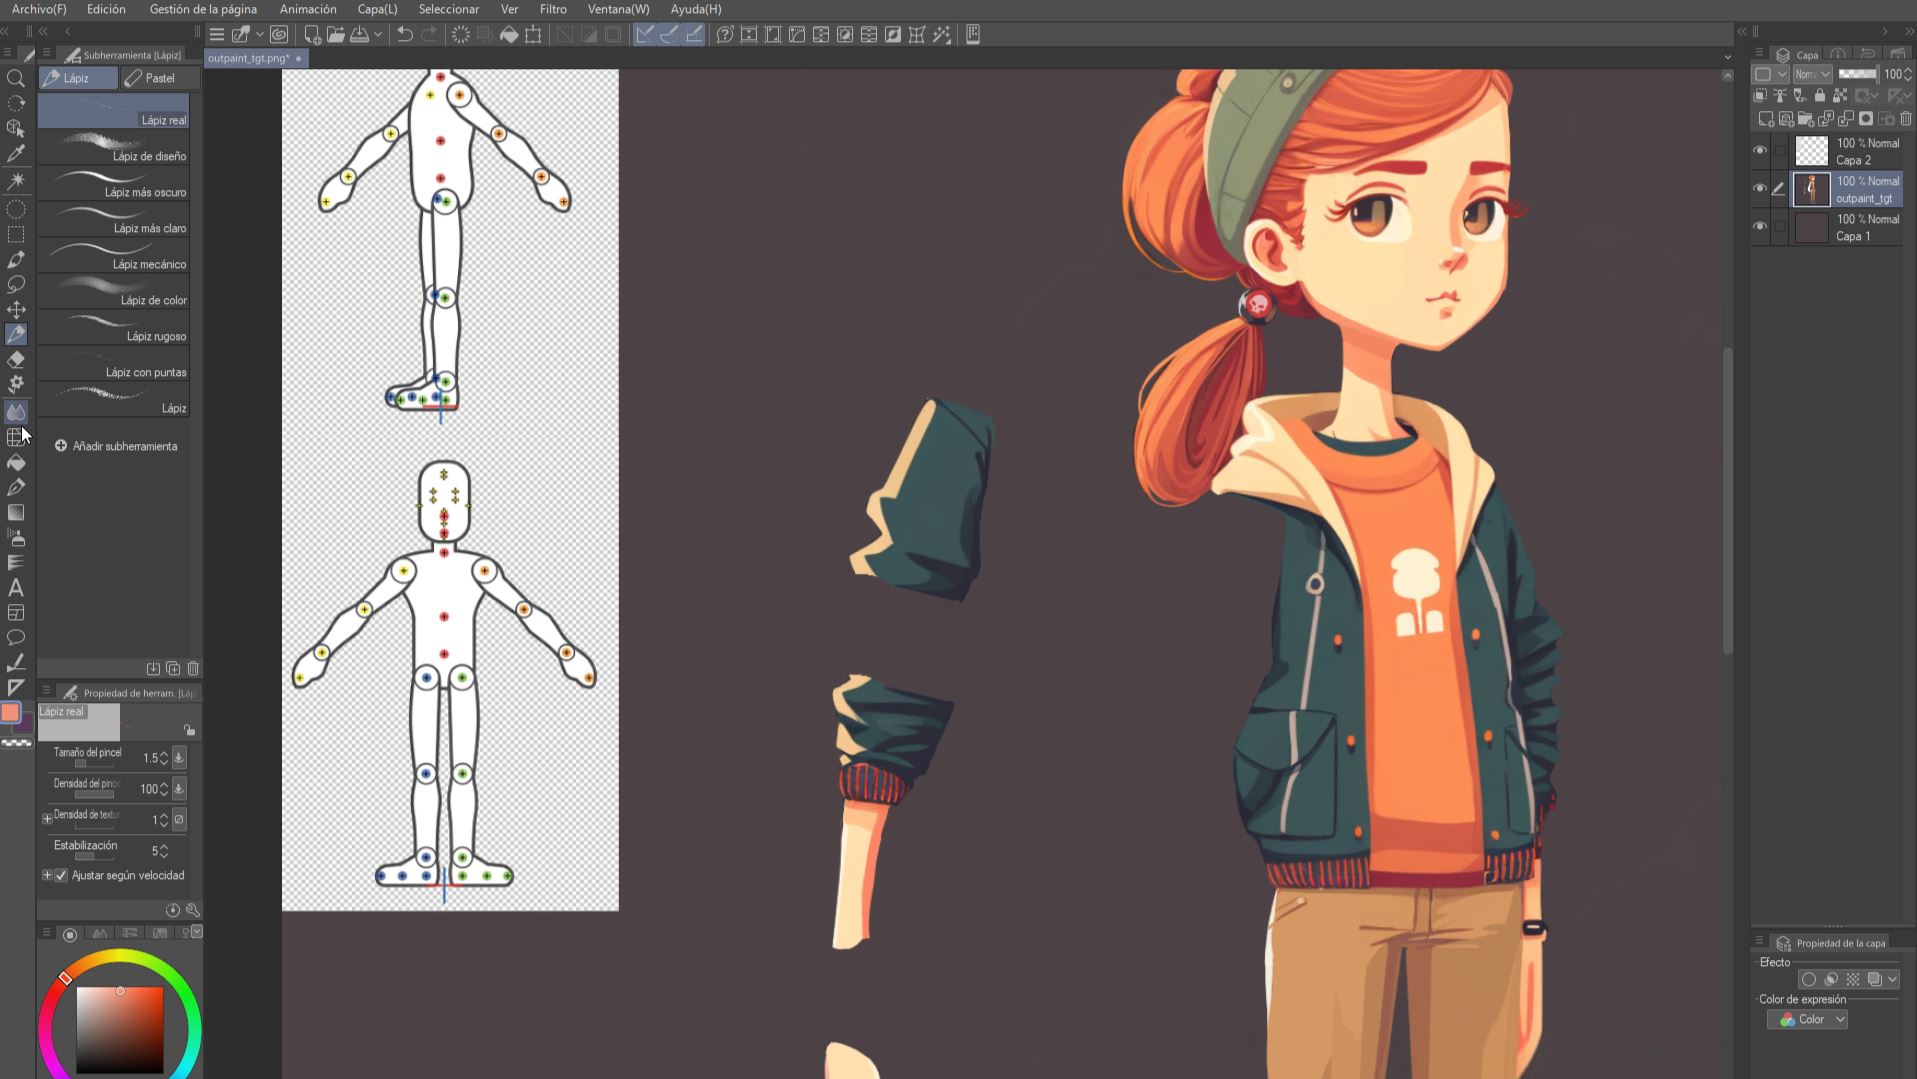
When you have finished with the 2D character creation, it is time to visit the CTA website and download the free templates to animate your character. If we open them, we can see that they work by separating the joints of the body by layers and grouping them into folders. We will need to do the same with our character by separating it into parts. In the process, we must take into account the layers that go on top and those that go beneath. By imagining the poses that the character will assume during animation, we can make sure to not leave gaps in the design that will cause the character to look unsightly in the final animation.
CTA allows us to import vector graphics for limitless resizing while keeping the resolution sharp and quality high for graphic animations. If we use a program to automatically vectorise the illustration, we can easily make use of this advantage.
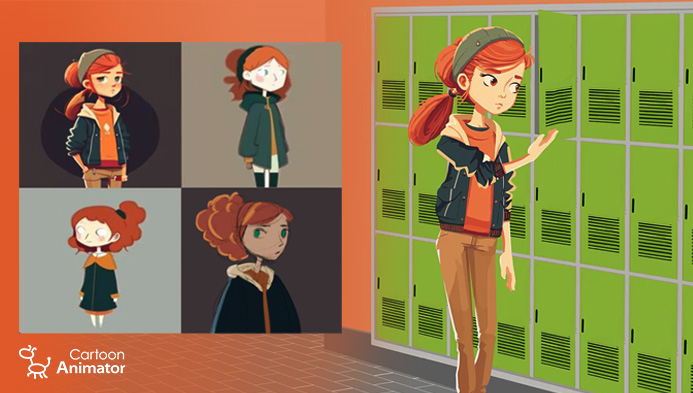
Save time with Cartoon Animator 5
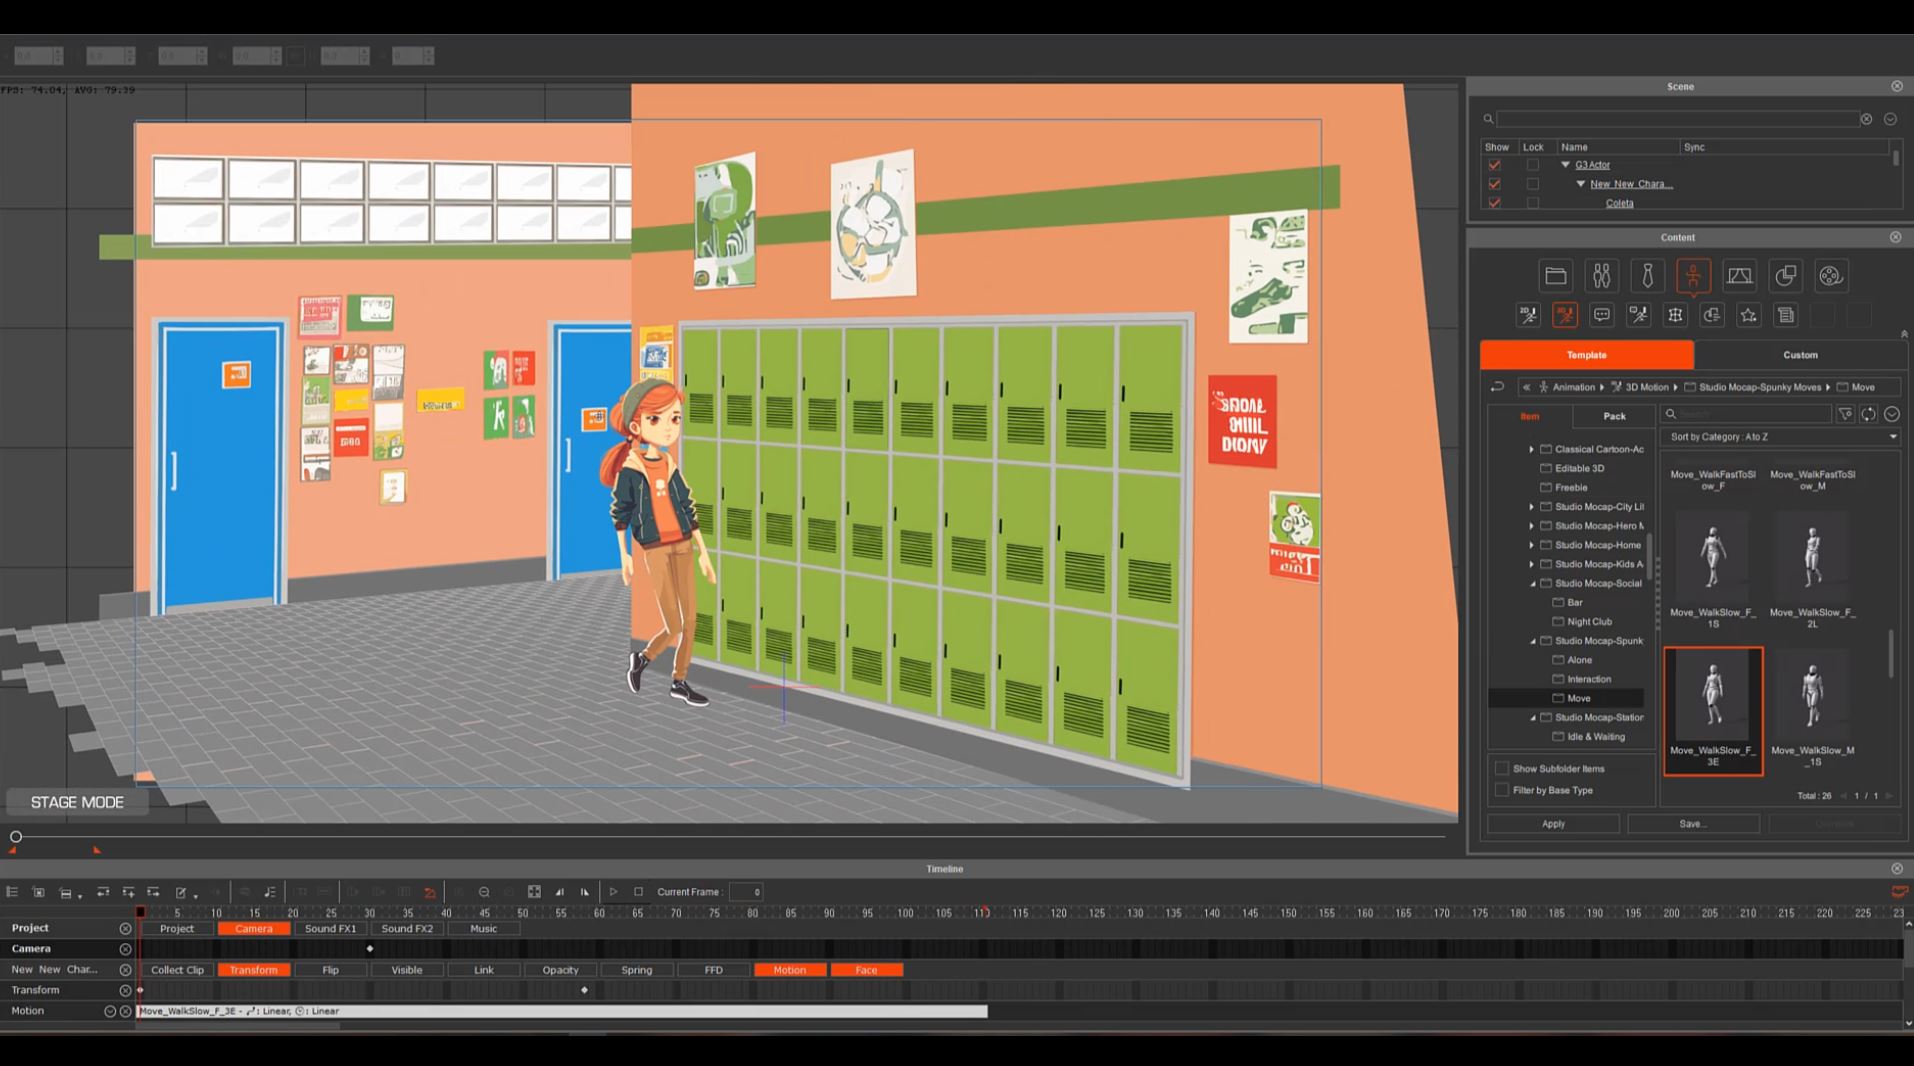
Never before has it been so easy to create an animated 2D character of such high quality in such a short amount of time. Thanks to CTA, we can bring illustrations to life in a very simple way and without the need to have much knowledge of 2D animation. When the exported character is introduced in CTA, it comes pre-rigged, which saves us a ton of time. When a background scene is generated with AI, we can easily integrate it with our character with the help of the intuitive tools of the program.
Giving life to our character is just a couple of clicks away when we use the large library of motions that Cartoon Animator 5 has to offer. The ones I like to use the most are the 3D motion effects. With them, I can control the animation on the 2D plane with precision.
Find out more and get a free 30 day trial, including over 1,700 pieces of ready made content at Reallusion's website.