Box modelling in Blender may feel a bit weird and alien when you try it for the first time. It certainly took me a while to get used to it, but once you have the hang of the basics it becomes very simple.
In the tutorial below, I'll show you how to use the basics of box modelling in Blender by making a very simple (and hopefully rather cute) cat. You might be surprised by how simple it is. Remember to check out our bumper roundup of Blender tutorials for more tips, and see our guide to the best 3D modelling software if you're looking to add more options to your toolkit.
To make a cat using box modelling in Blender, we'll start with adding a cube, applying a Level 2 Subdivision Surface Modifier and scaling it on the X and Y axes to form the basic shape of our cat. Next, we’ll extrude selected faces at the bottom to create the legs, and use inset to refine them. A similar method used on two top faces will give us the ears, which we finish by scaling the faces on the Y axis.
We'll then add a UV sphere, duplicate it and add a Mirror Modifier for eyes and a nose, and we'll create the tail by adding a Bezier curve. You can see the whole process demonstrated above, or follow alone with written instructions for each step below.
Quick tip: When you want to create a more complex object, try breaking it down into primitives first. Even the most complex models are usually made from simple, basic shapes. When you have your shapes blocked out, the rest of the process is just adding details step by step
01. Creating the base shape
Press Shift + A, choose Mesh → Cube.
Add a Subdivision Surface Modifier (Levels: 2) and apply it.
Go to Edit Mode (Tab), scale the shape using S + Z and S + Y.
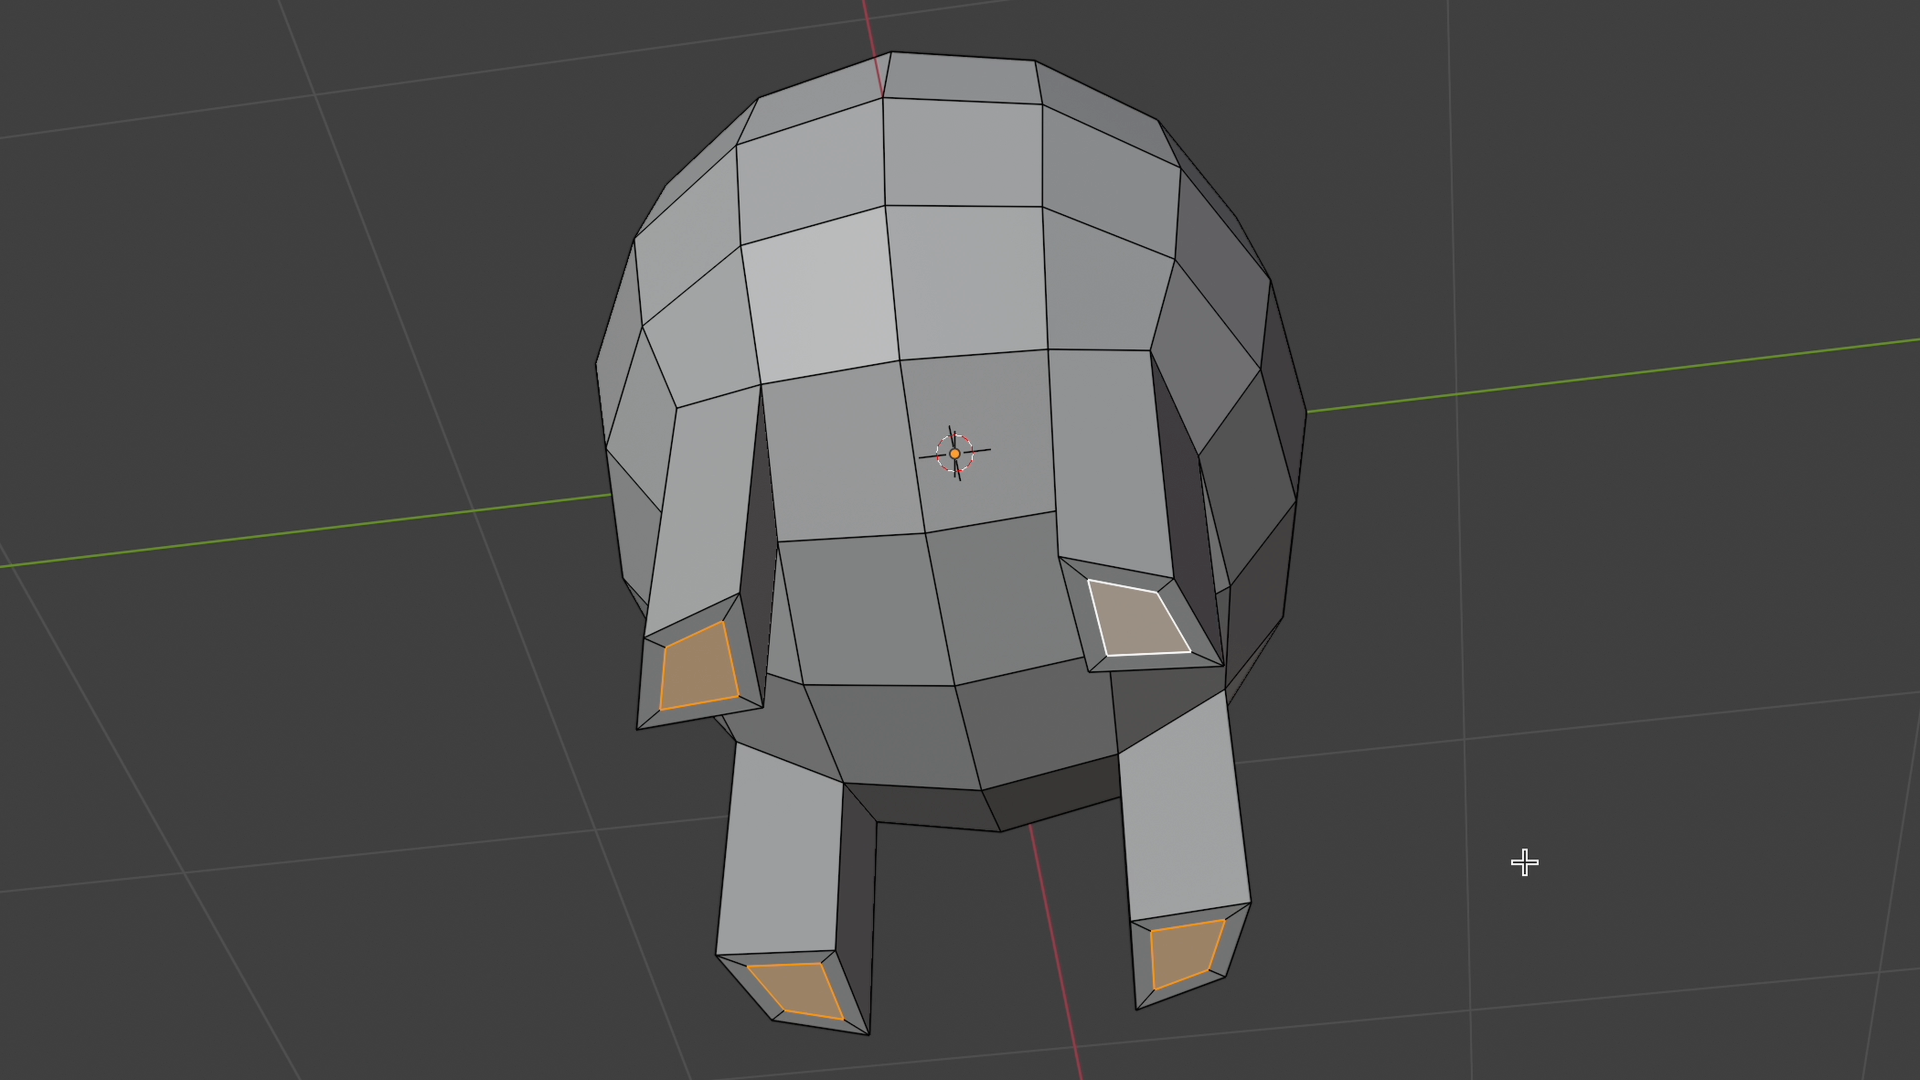
Select the four bottom faces, press E → Z to extrude down.
Flatten them with S + Z → 0, then press I to inset.
Select the top faces, press E → Z to extrude up, then S + Y to scale. Apply another Subdivision Modifier with Ctrl + 2.
With our cat body selected, right click and shade Smooth.
02. Adding nose and eyes
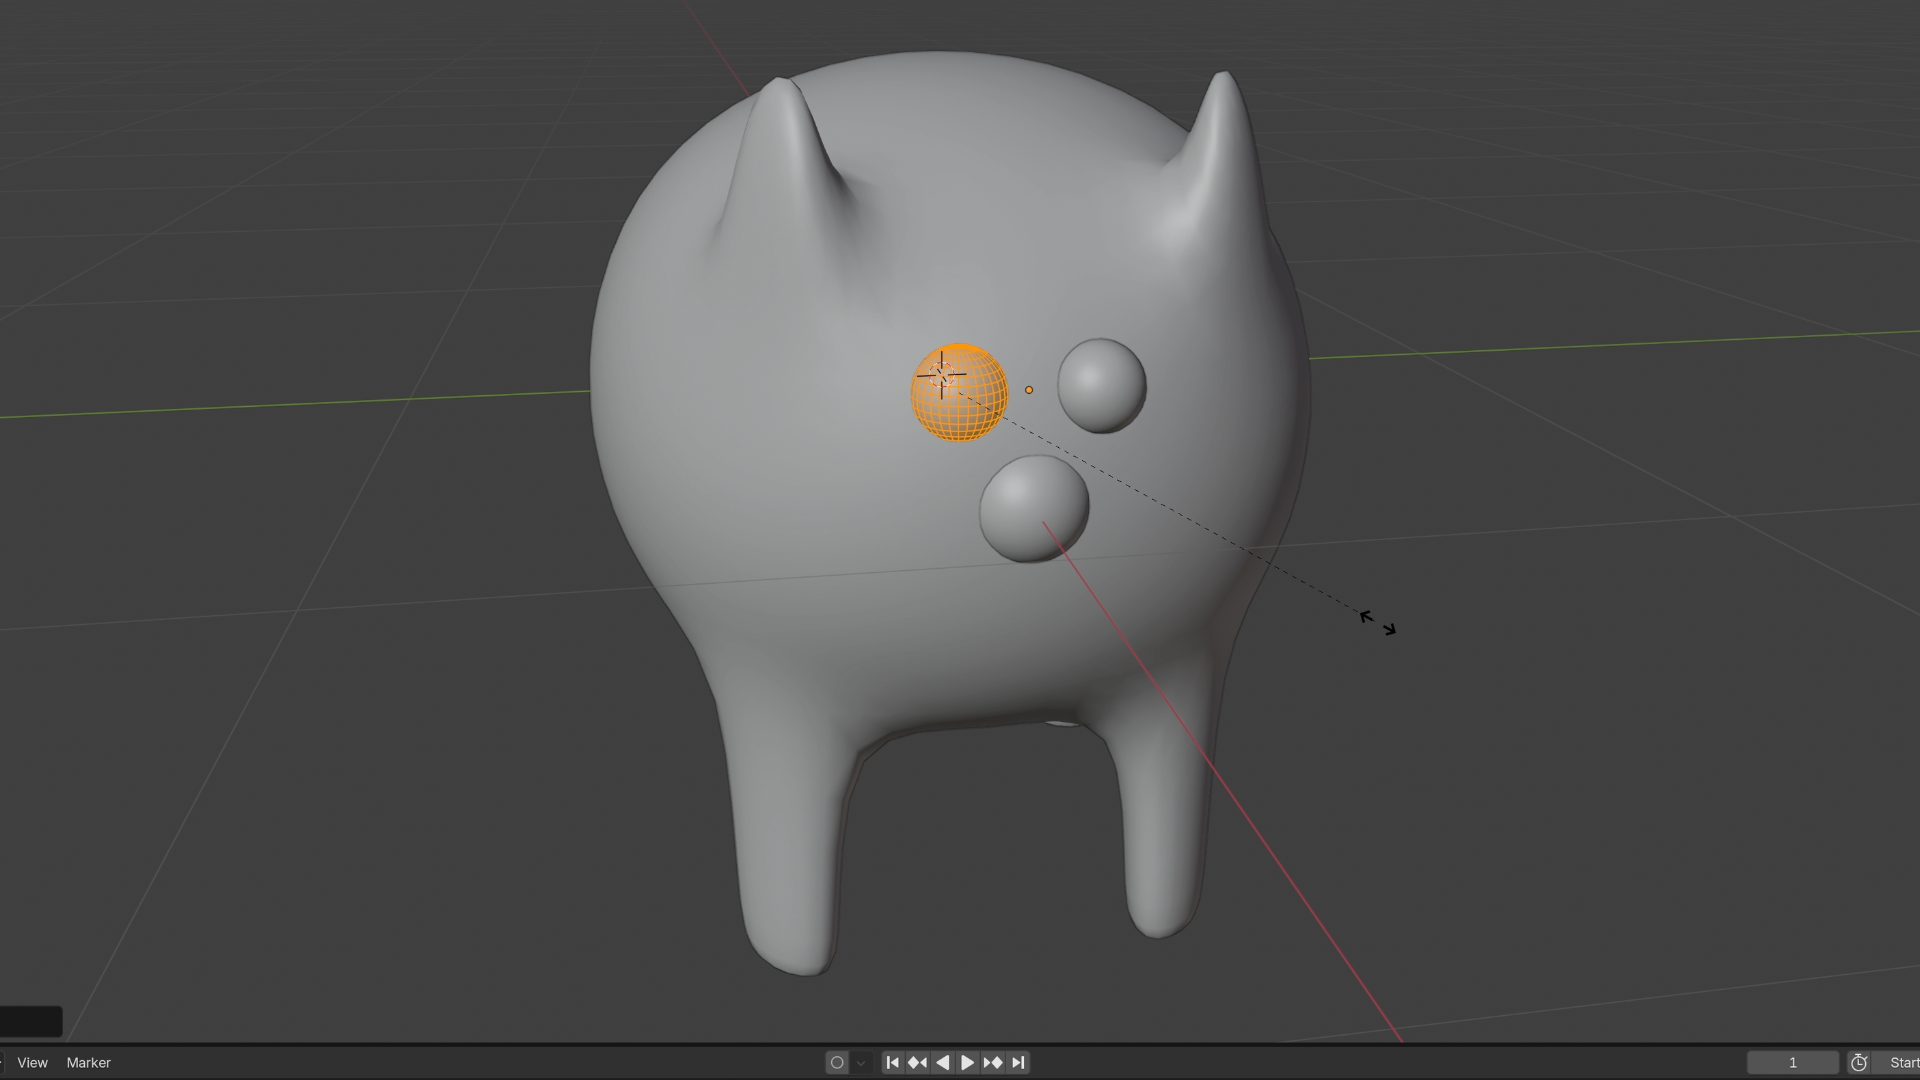
Add a UV Sphere, right-click → Shade Smooth.
Scale it down, move it forward to form the nose.
Shift + D to duplicate it, move it up.
Add a Mirror Modifier, select the Y-axis, and adjust to form the eyes.
03. Creating the tail
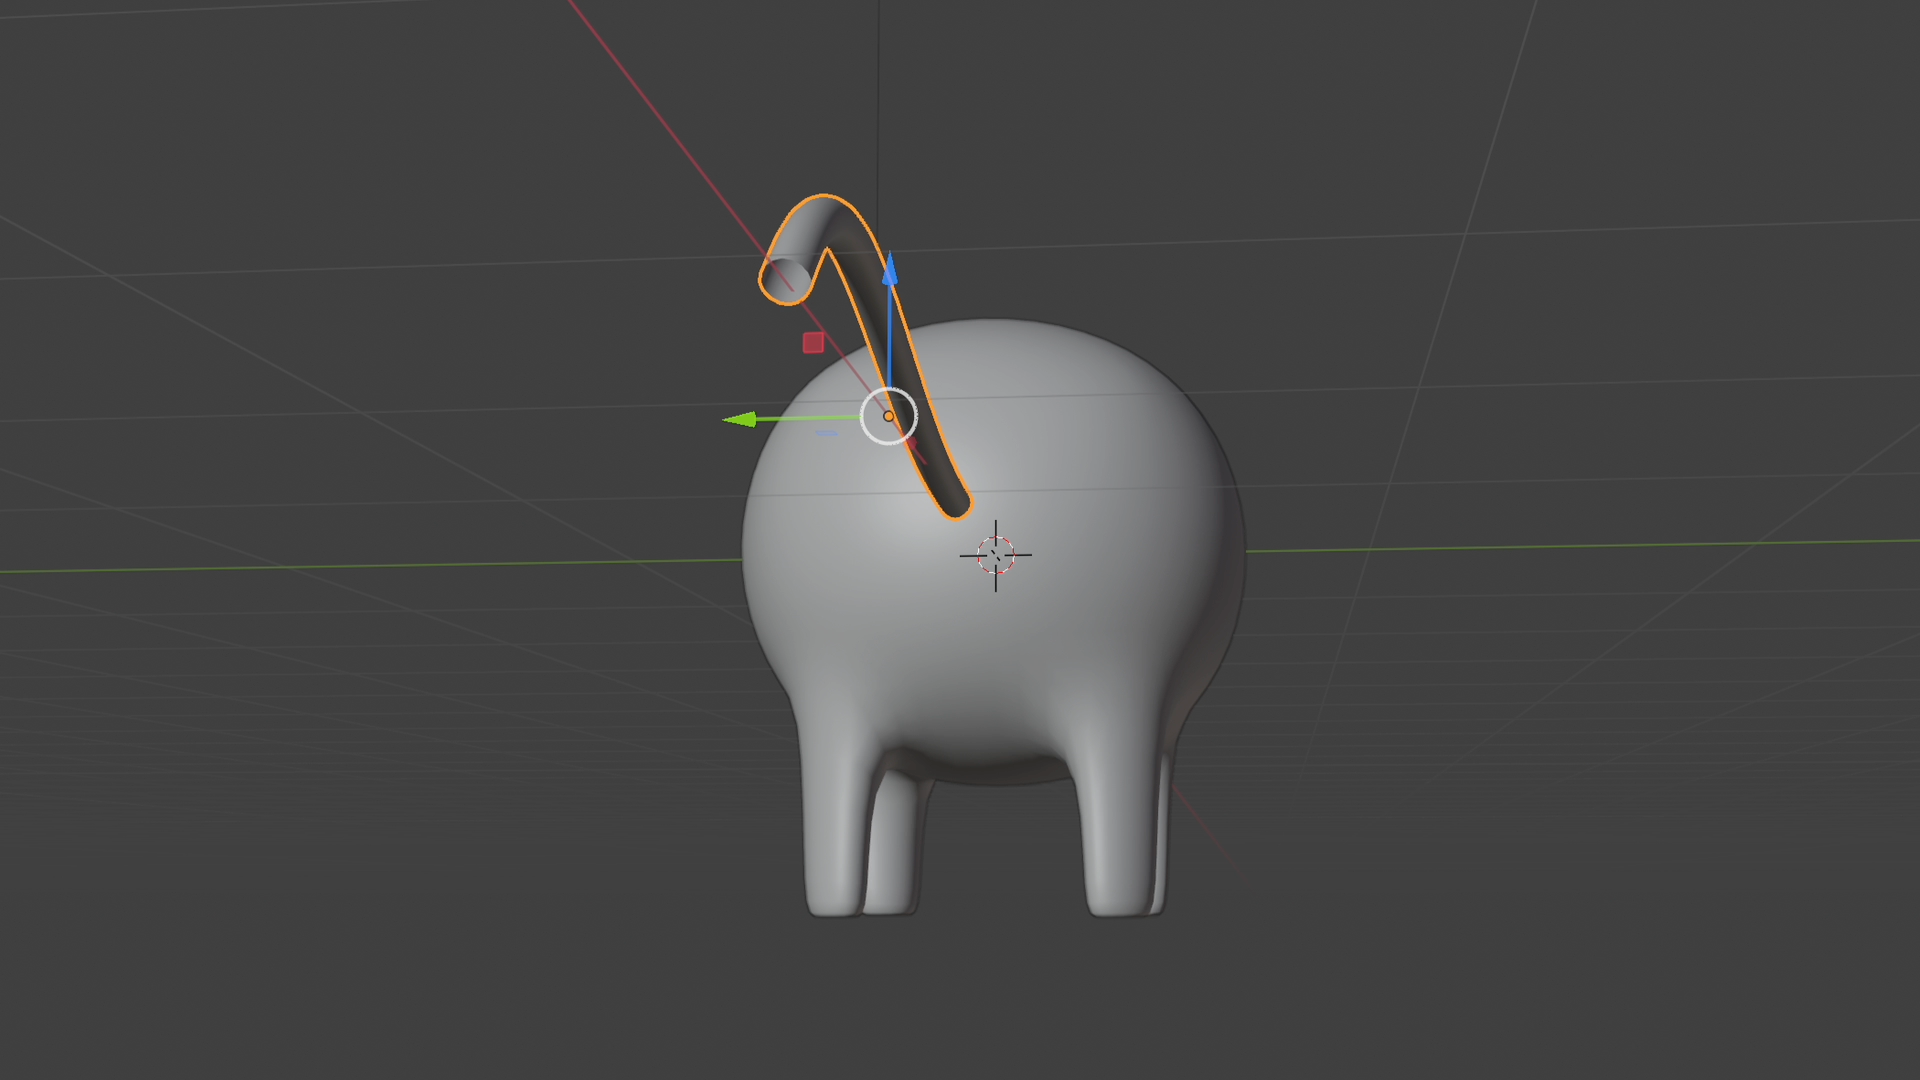
Press Shift + A → Curve → Bezier.
Move it out from the body, then press R → X → 90° to rotate.
In the Curve properties, increase the Bevel Depth to give it thickness. Enable Fill Caps and set the resolution to 0.
Add a Weld Modifier, then a Subdivision Surface Modifier to round it.
04. Final adjustments
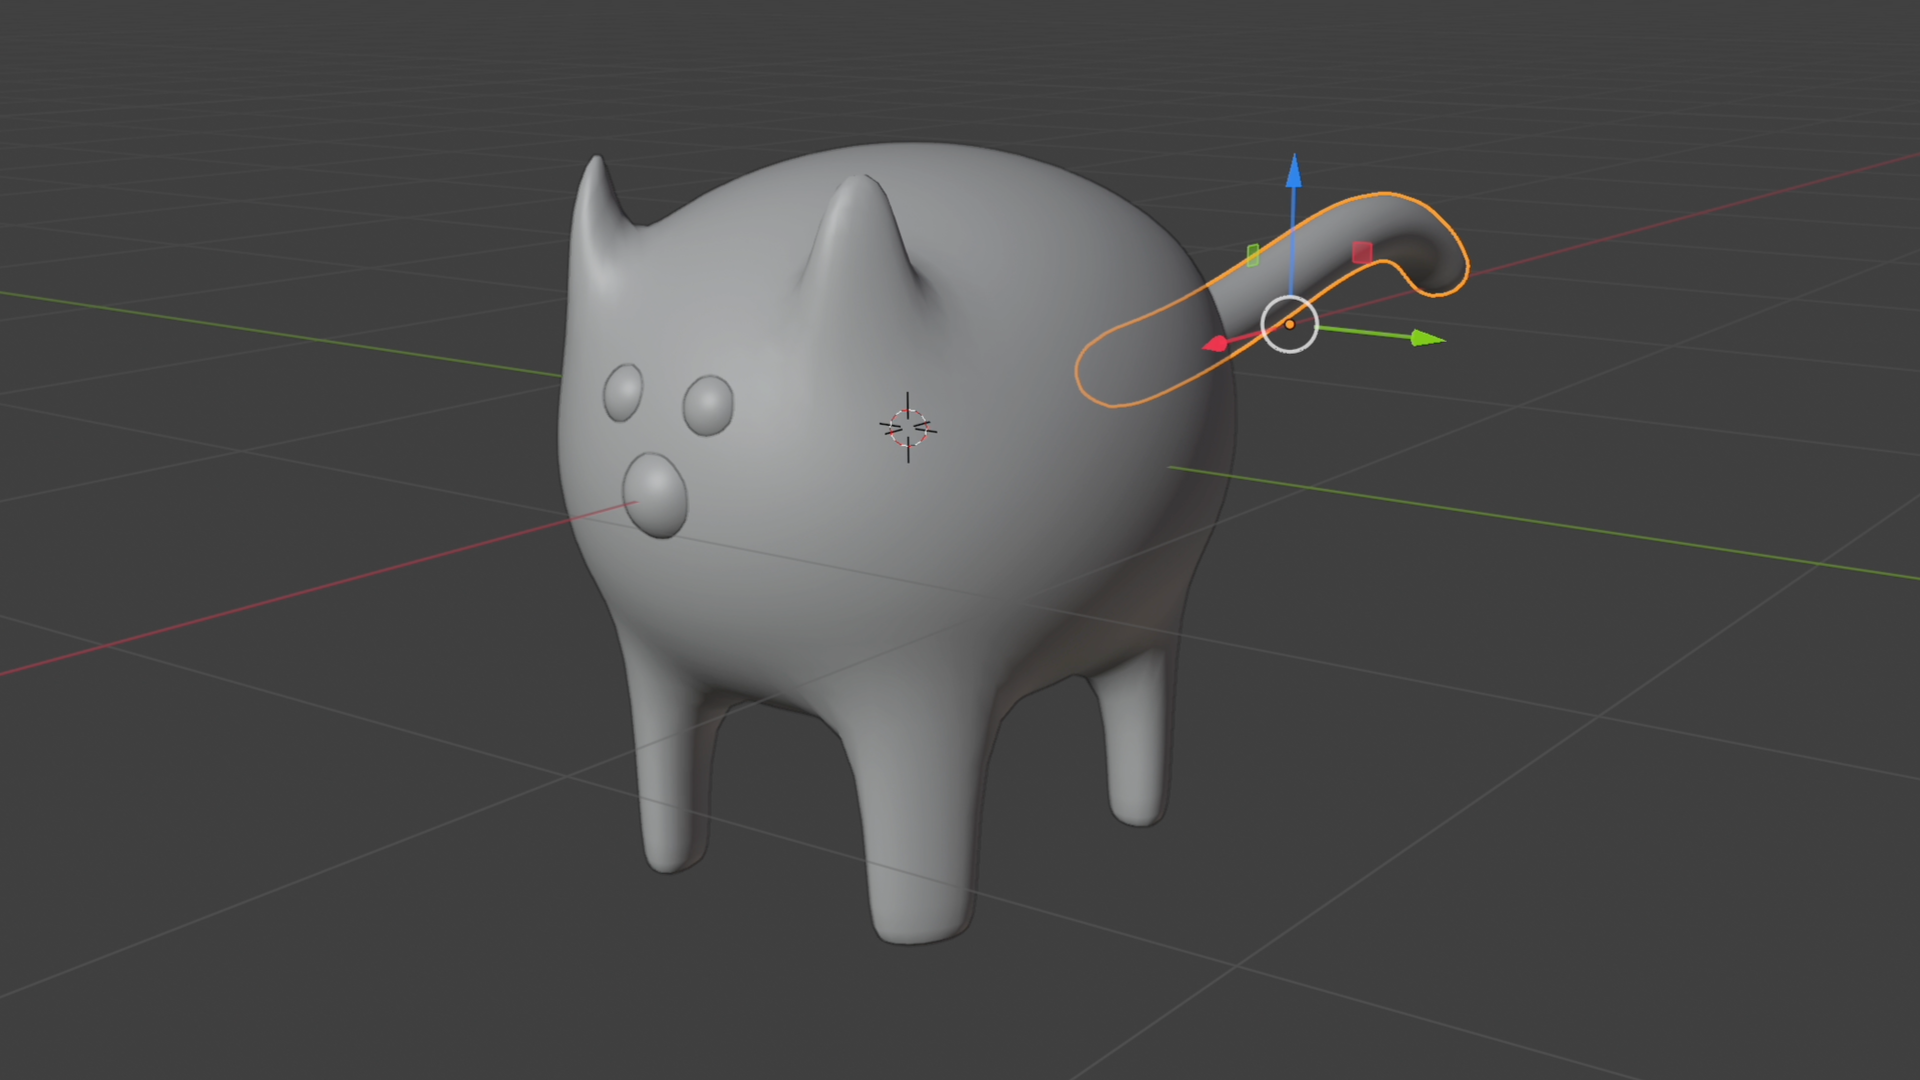
In Edit Mode (Tab), press G to move and R to rotate points of the tail.
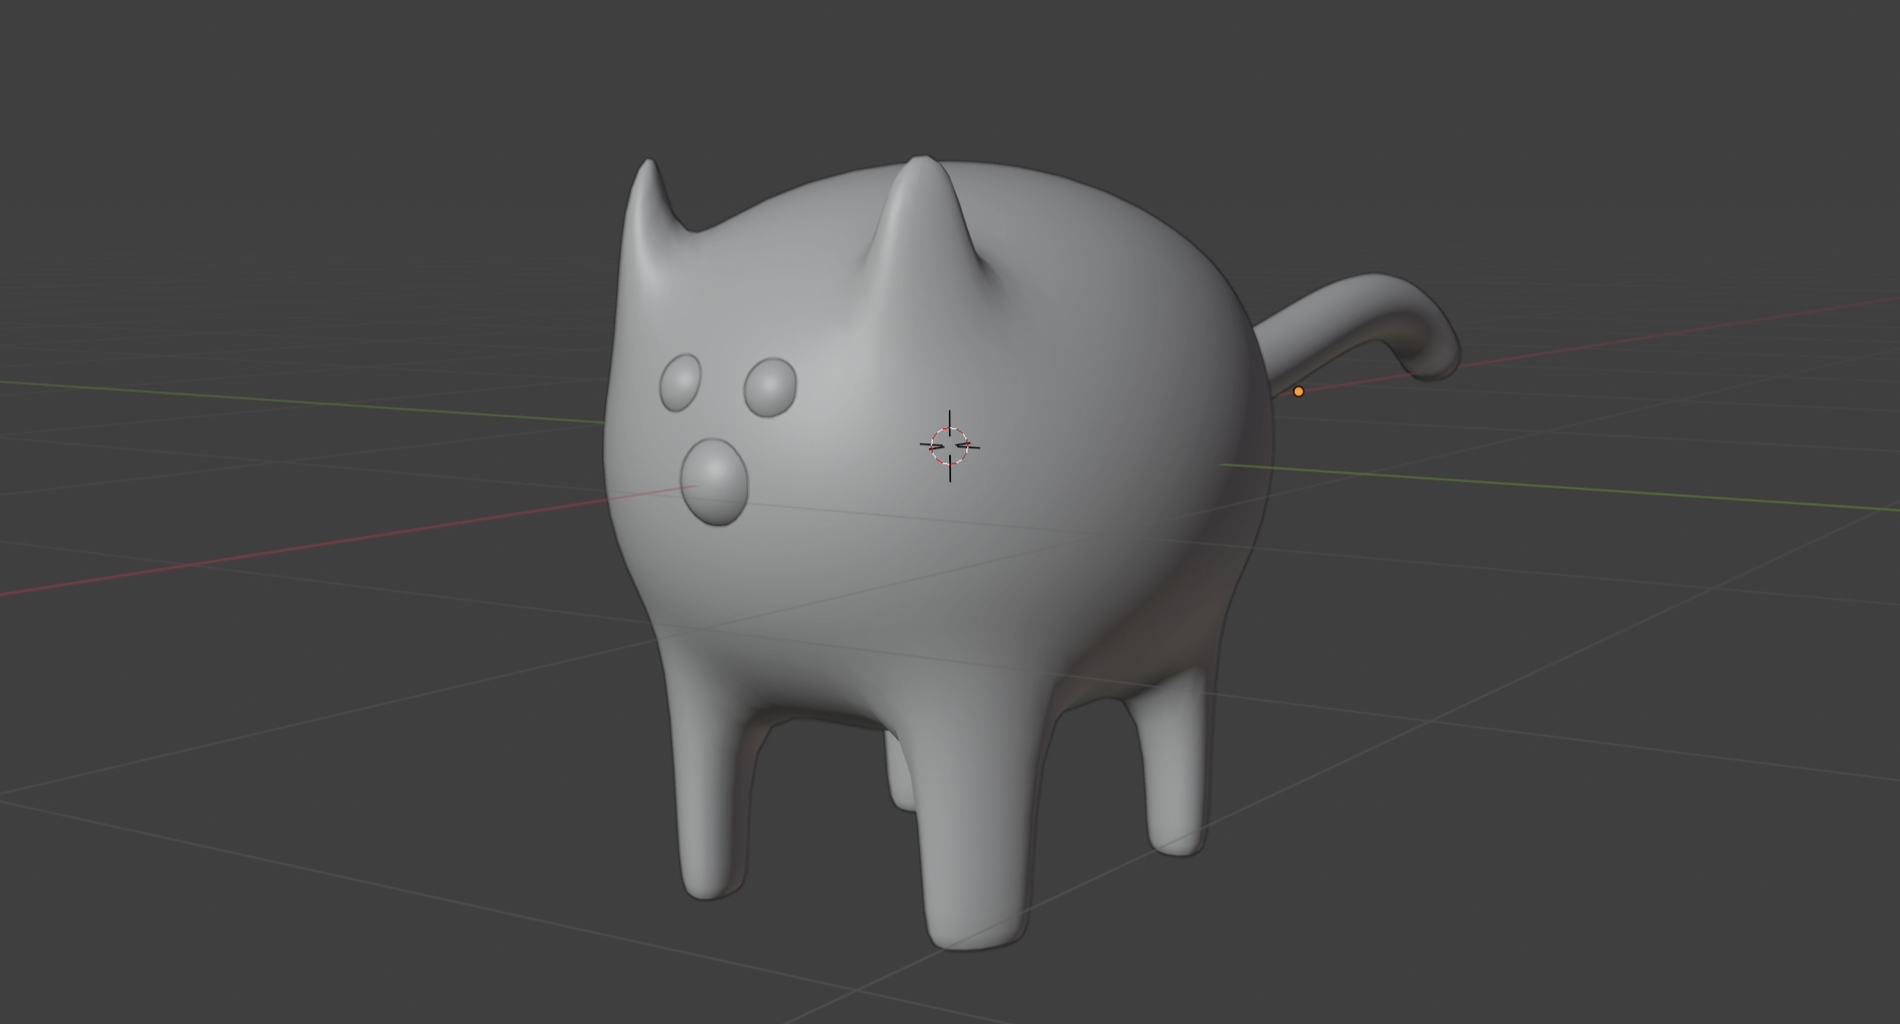
Adjust the shape as needed to refine your cat model, and it's ready. You now have a cute cat to use for whatever you want to use it for.
Let me know in the comments how you got on if you followed the tutorial. Things not working out? Then see my tips on what to do when things look wrong in Blender. I've also done a tutorial on How to set up a shadow catcher in Blender
What is box modelling in Blender?
Box modelling is a 3D design technique based on the premise that you can model anything from a basic shape, known as a primitive, like a cube, a sphere or a cylinder (yes, it's called 'box modelling', but you don't necessarily need to start with a box; the same principle can apply to any basic shape. Essentially, you start with the basic shape, and gradually refine it into something more much detailed, like a character or environment.
What software can you use for box modelling?
Box modelling can be done in various 3D software programs, not just Blender. Cinema 4D and Autodesk's 3ds Max and Maya are some of our other favourites.