Watch video (above): Fake the long exposure look in Affinity Photo
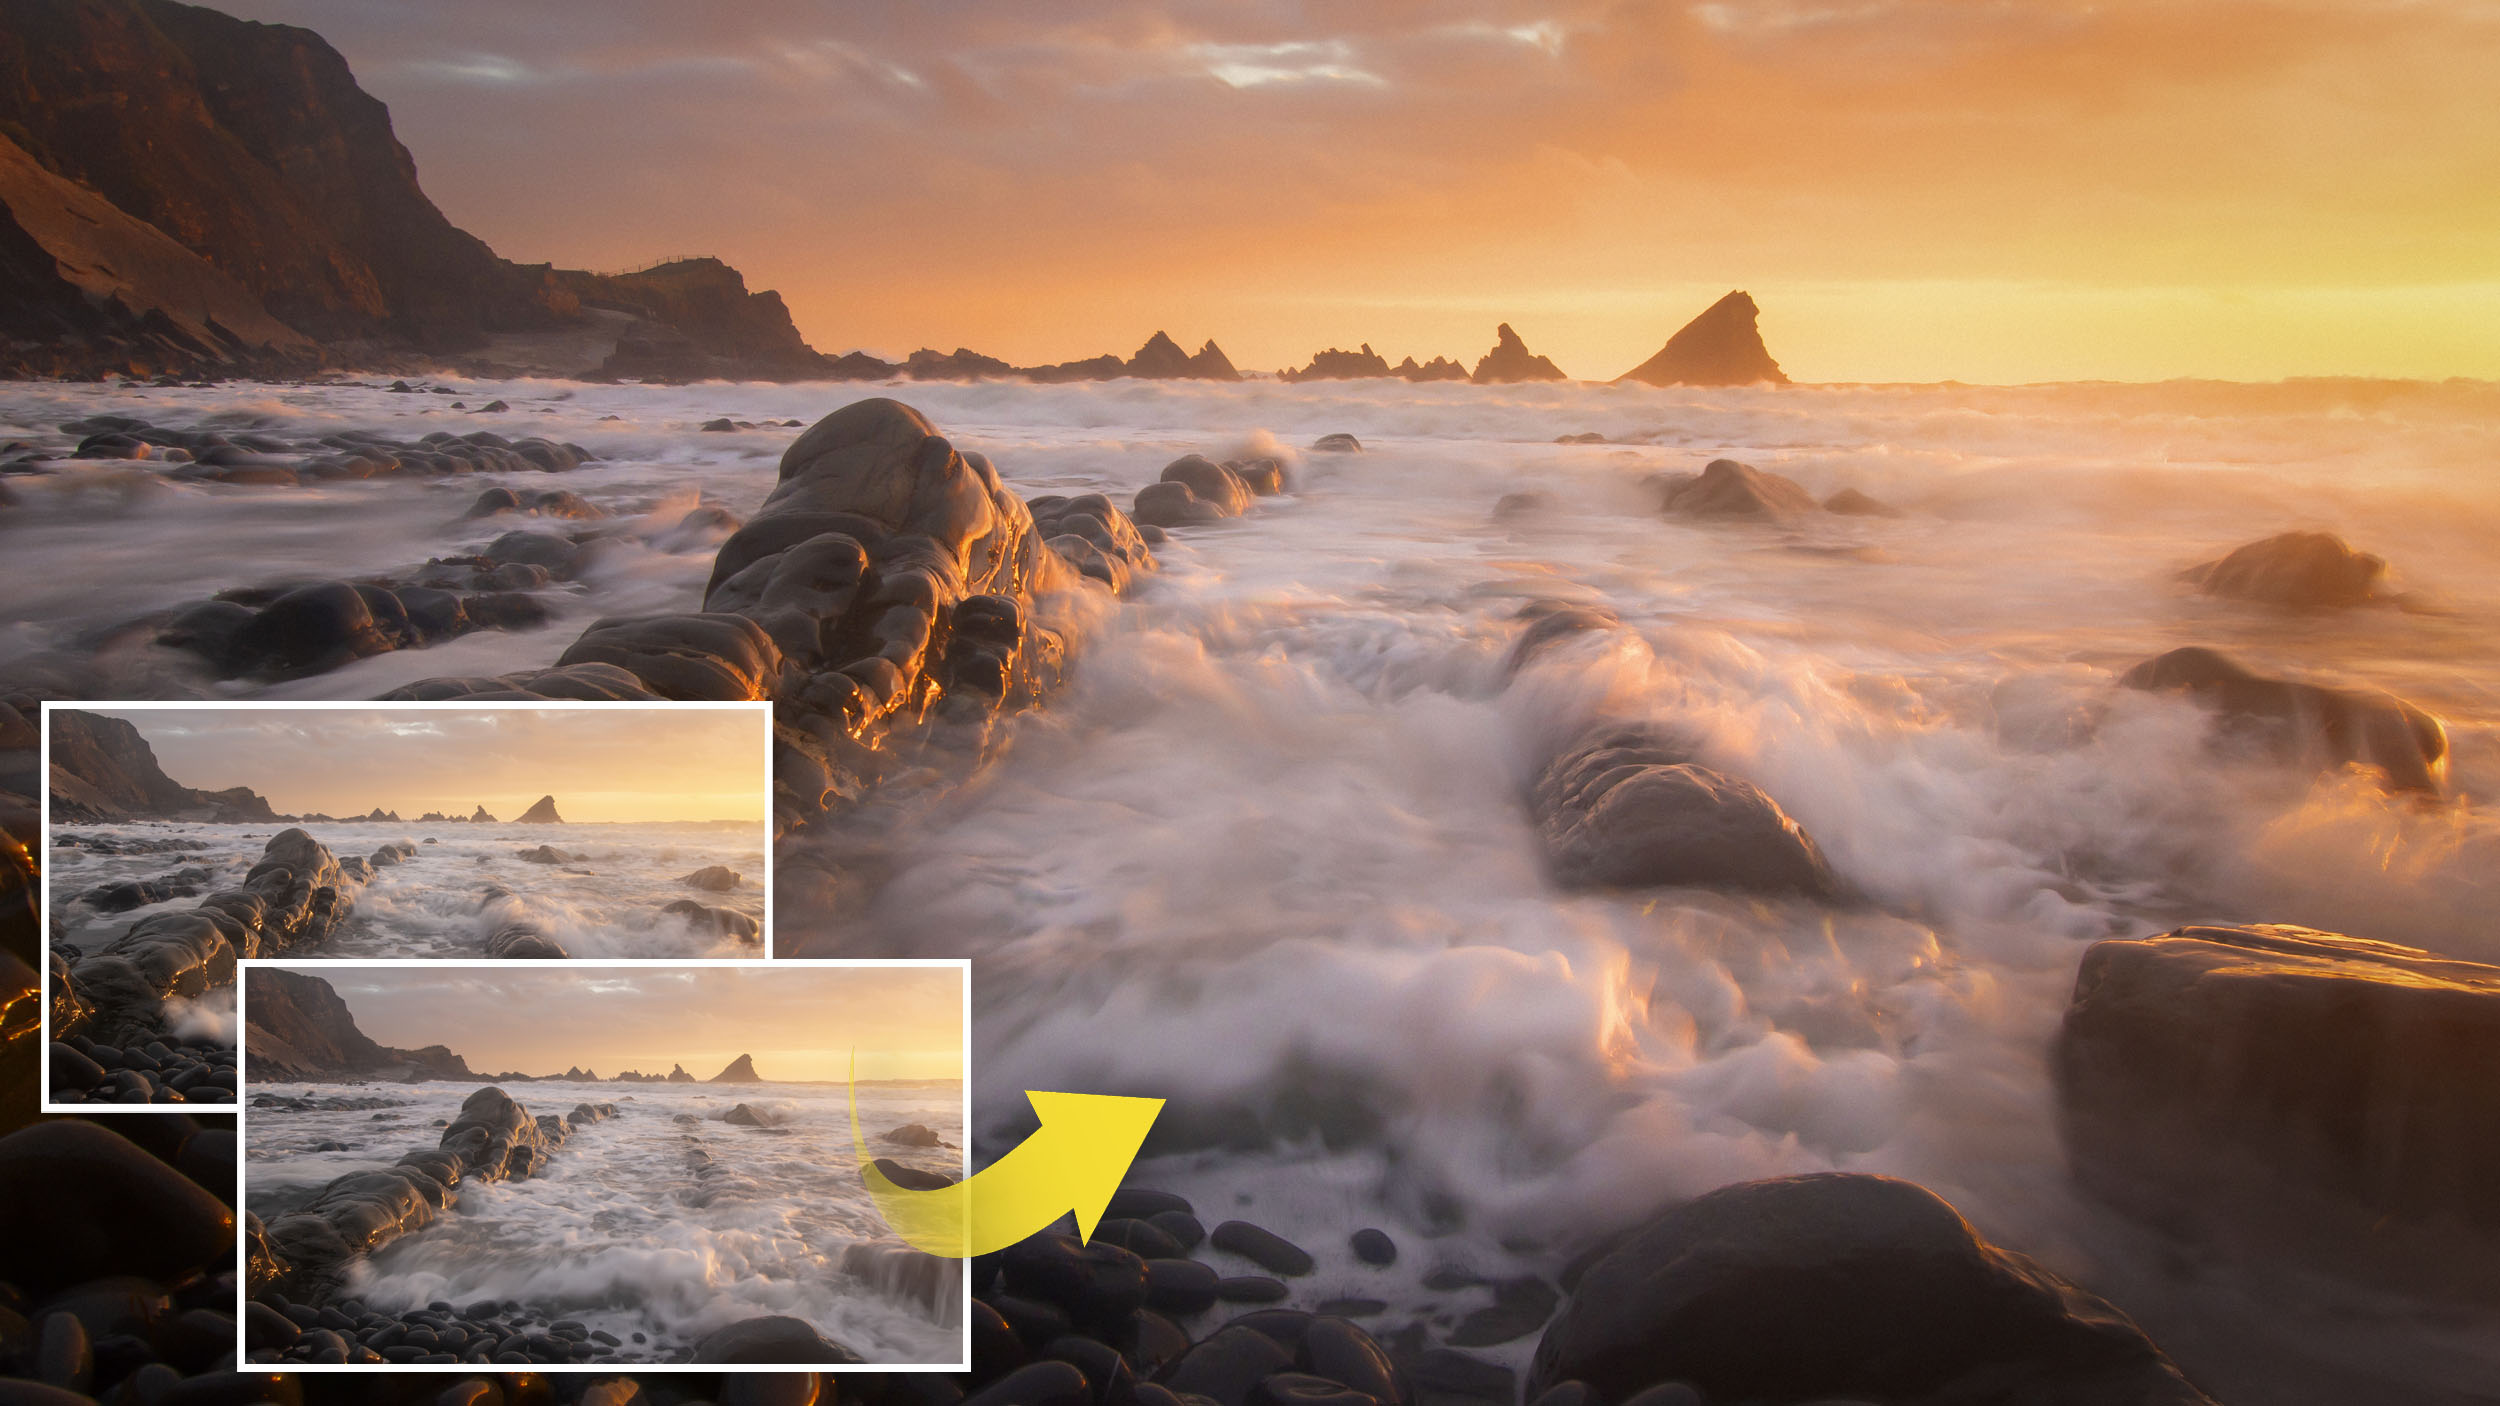
Few photography effects can beat the look of a long exposure, especially the beautiful motion blur you get when shooting moving water with a slow shutter speed. During daylight hours, the sort of slow shutter speeds you need can usually only be achieved with the use of a neutral density filter, which reduces the flow of light into your camera. But sometimes you can be caught short without a neutral density filter and the water appears too choppy and detailed. If so, there’s another option. Using a tripod, shoot a series of frames in quick succession of the moving water and then blend them together afterwards in Affinity Photo.
It helps if the frames you intend to use are shot at your slowest possible speed. Here, our shots were taken with an aperture of f/16 and ISO100, allowing us to achieve a shutter speed of 1/2 sec at sunset. This was long enough to create a touch of blur in the waves, but nowhere near long enough to get the misty water effect in seascapes you really only see with exposures upwards of 30 seconds.
We’ll begin here by using the Stack feature in Affinity Photo to blend our frames with a neat trick that averages out the motion in each, then combine two blending methods before adding filters to enhance the blur. Finally, we can reveal parts from our original images to complete the effect. It’s not quite as good as real in-camera motion blur, but it’s the next best thing.
Read more: Long exposures: tips and techniques
1. Load into a stack
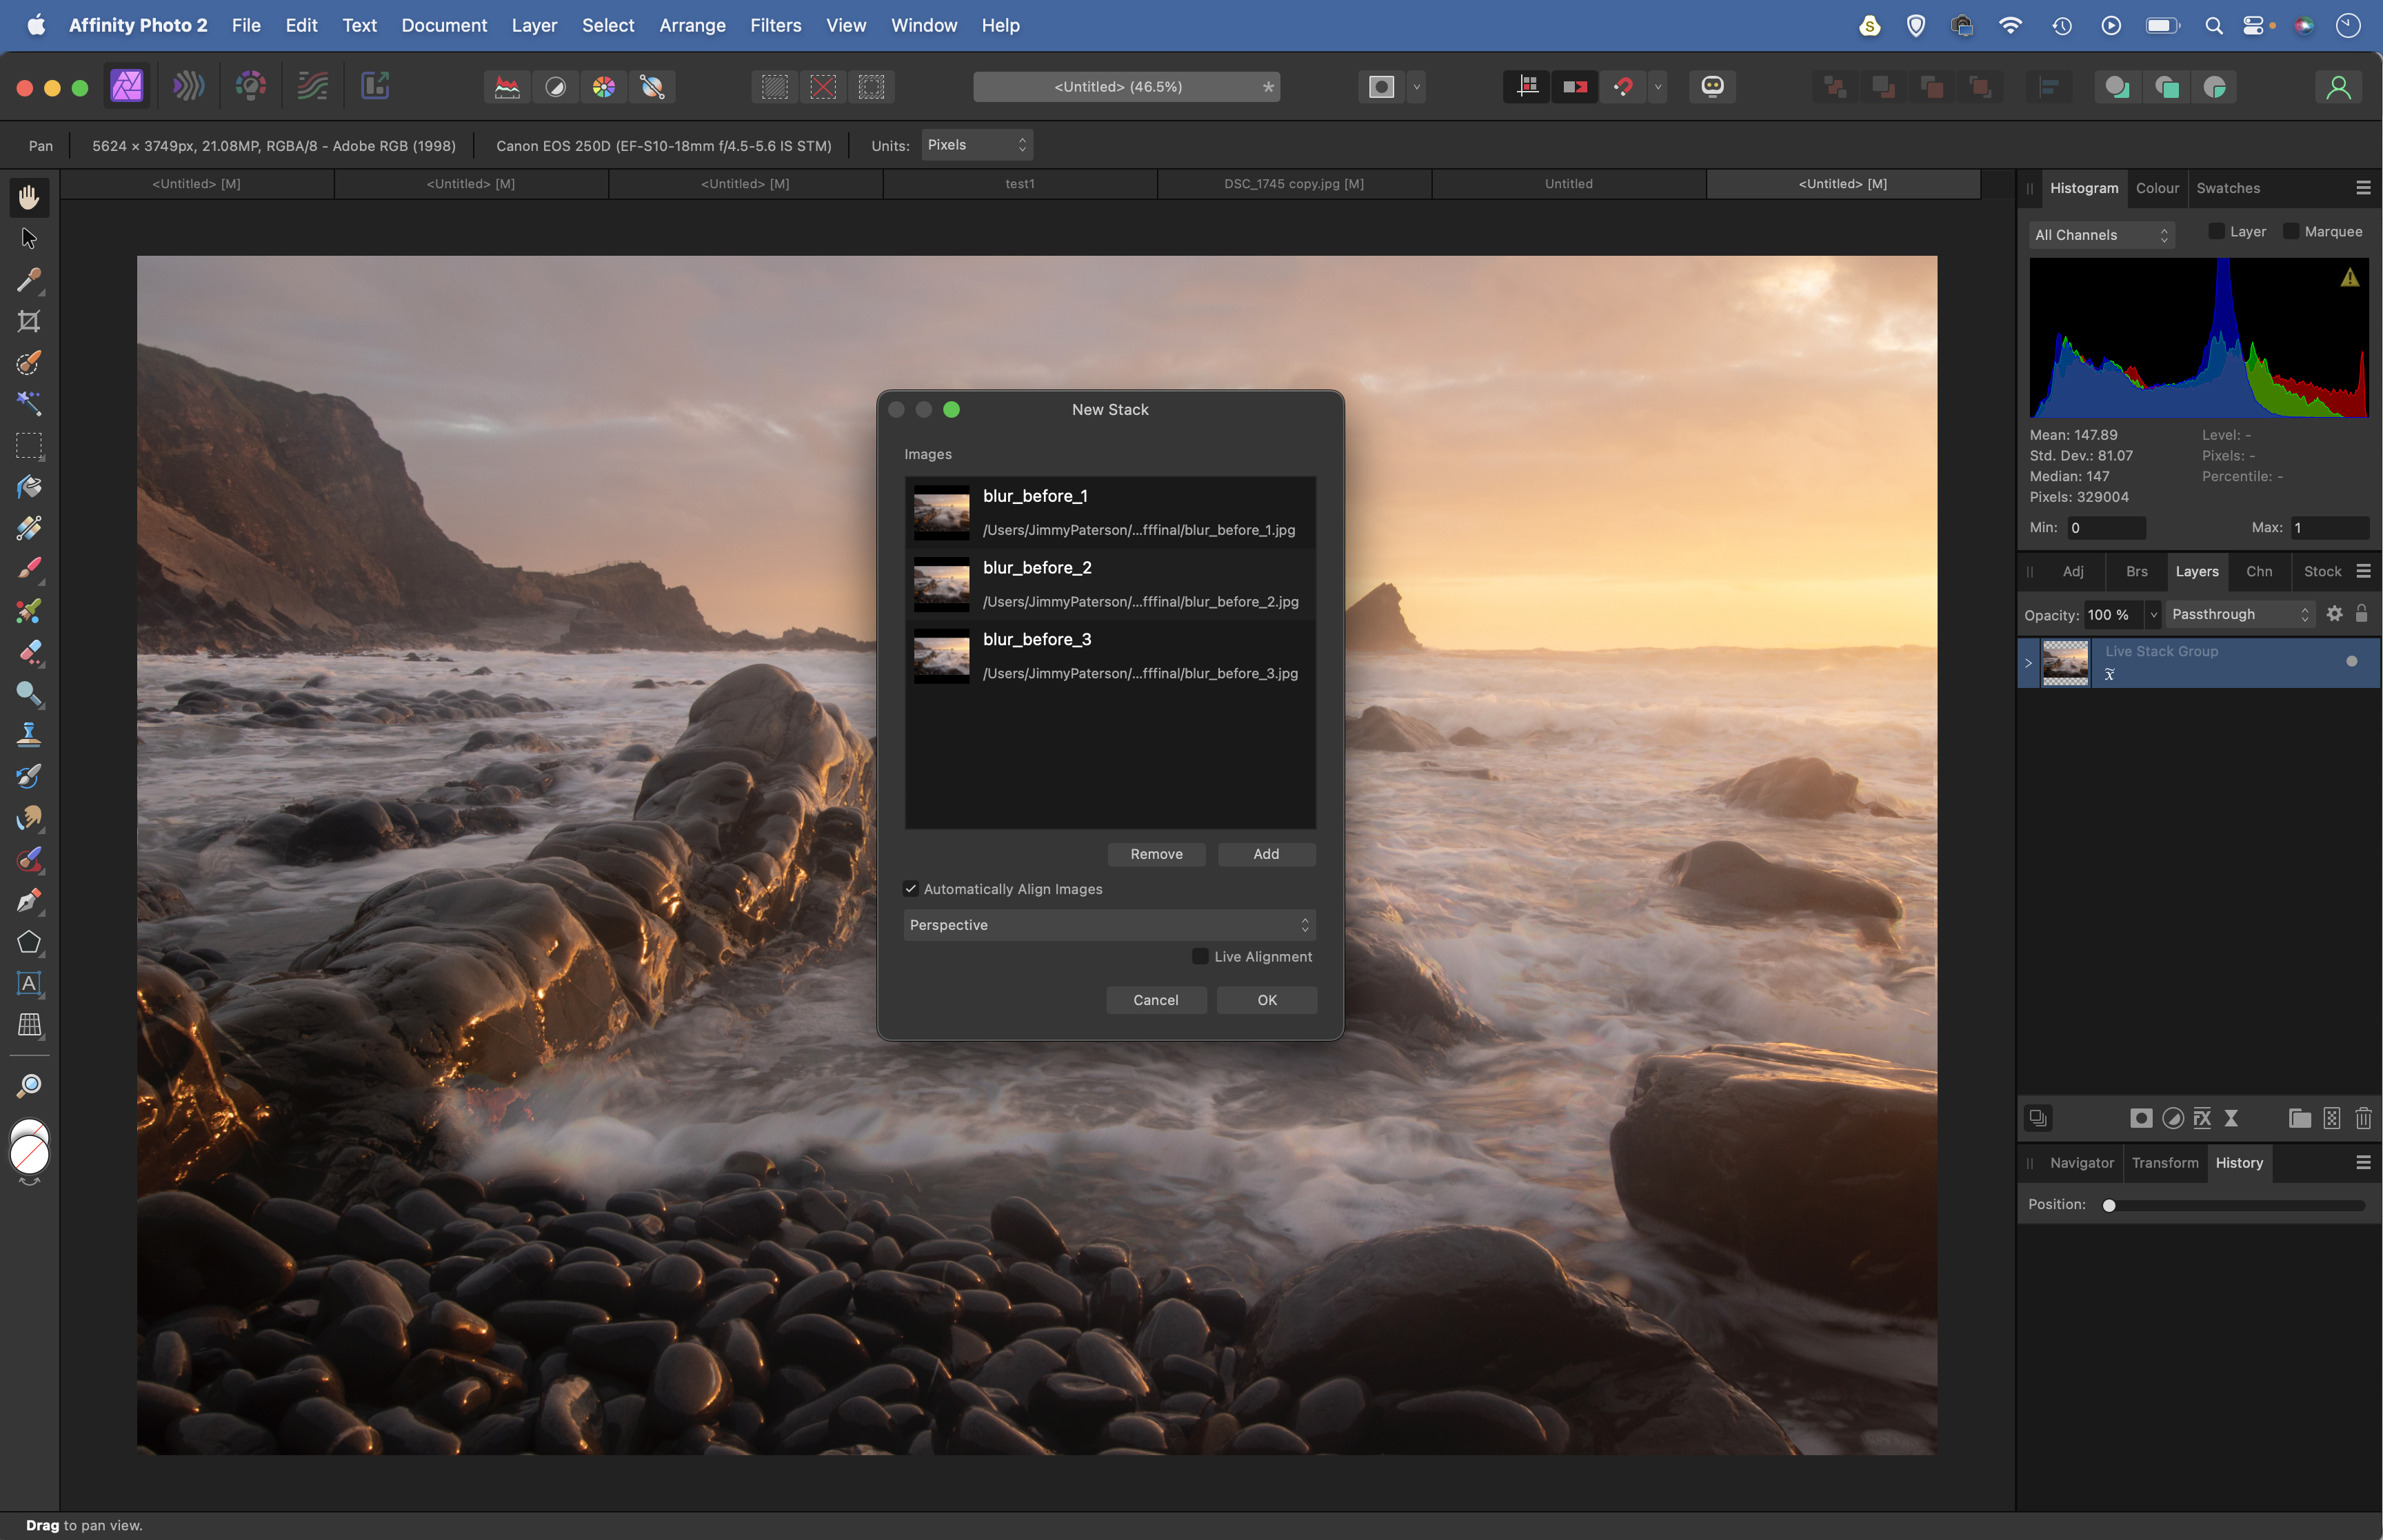
Use the start files or your own set of rapid-fire photos of waves or waterfalls. Open Affinity Photo then go to File > New Stack. Click Add and navigate to your images. Load them. Check Automatically Align Images if you shot the sequence handheld or if there’s movement between frames. Hit OK.
2. Set to Mean
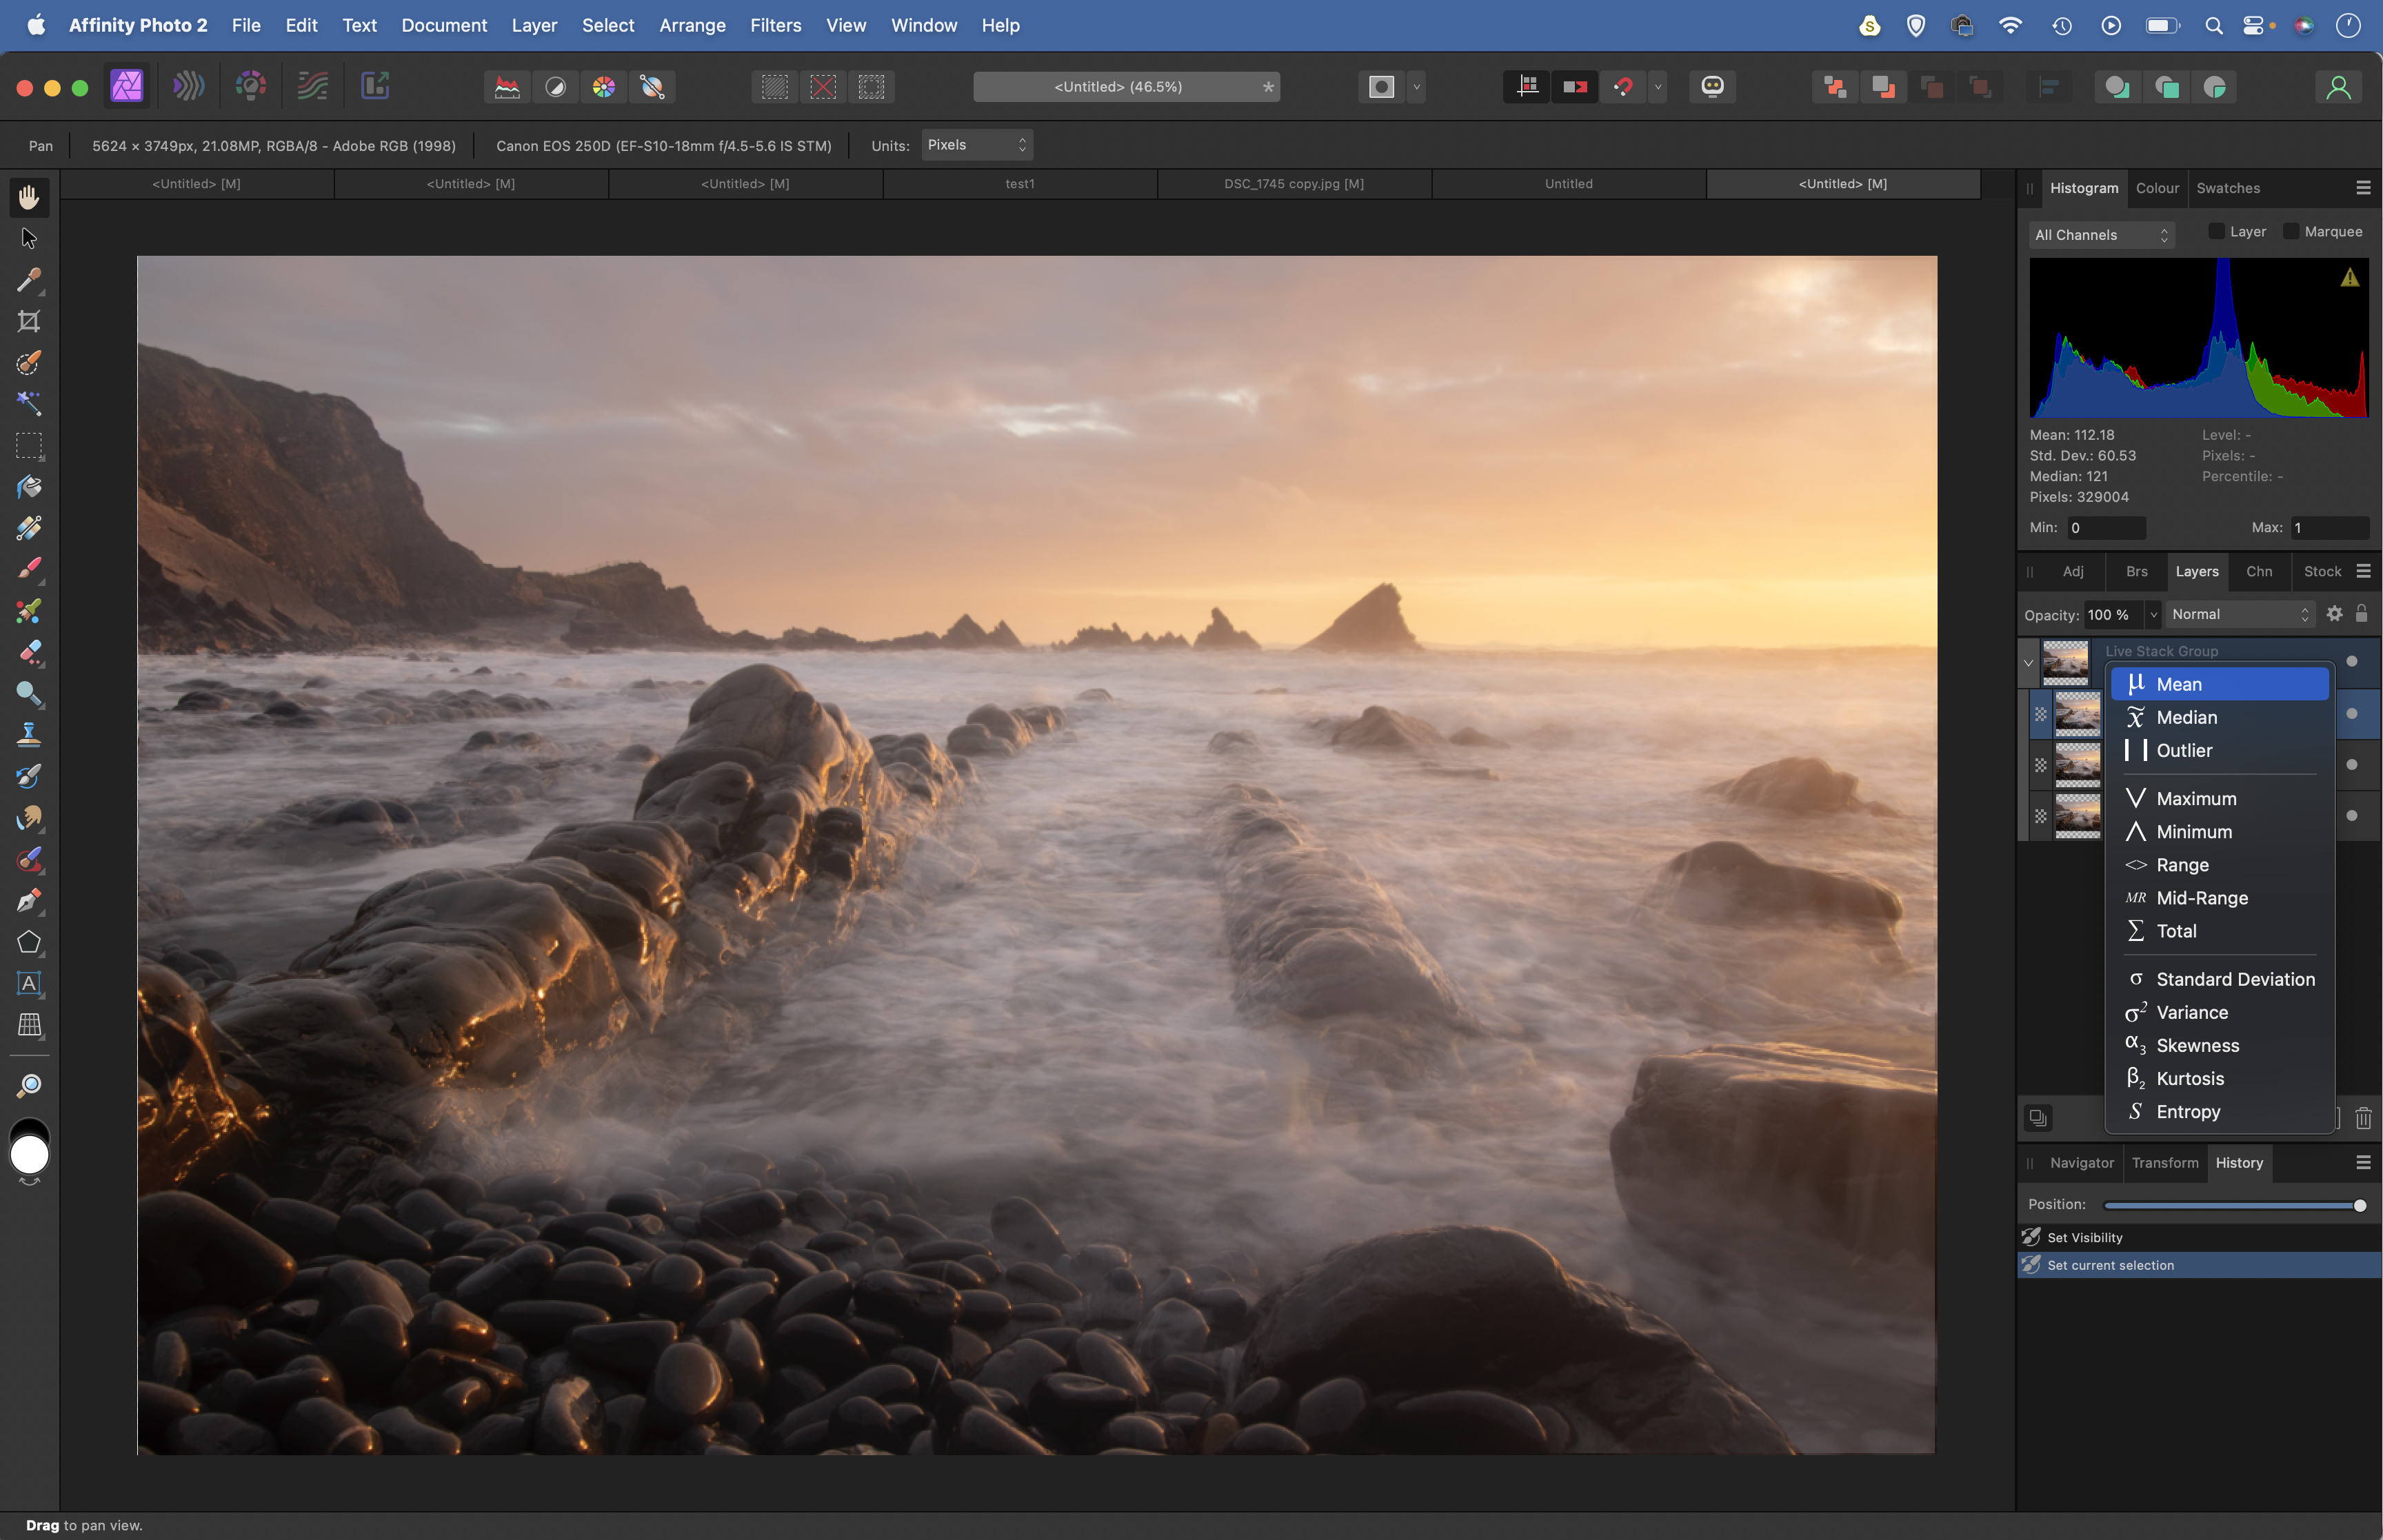
Go to the Layers Panel and you’ll see a new stack group. You can expand this to see all the images within. Click the small icon on the Live Stack Group. This gives you a list of blending options you can hover over to experiment with. Mean, Median and Maximum work best for blending water. First set it to Mean.
3. Merge twice & blend
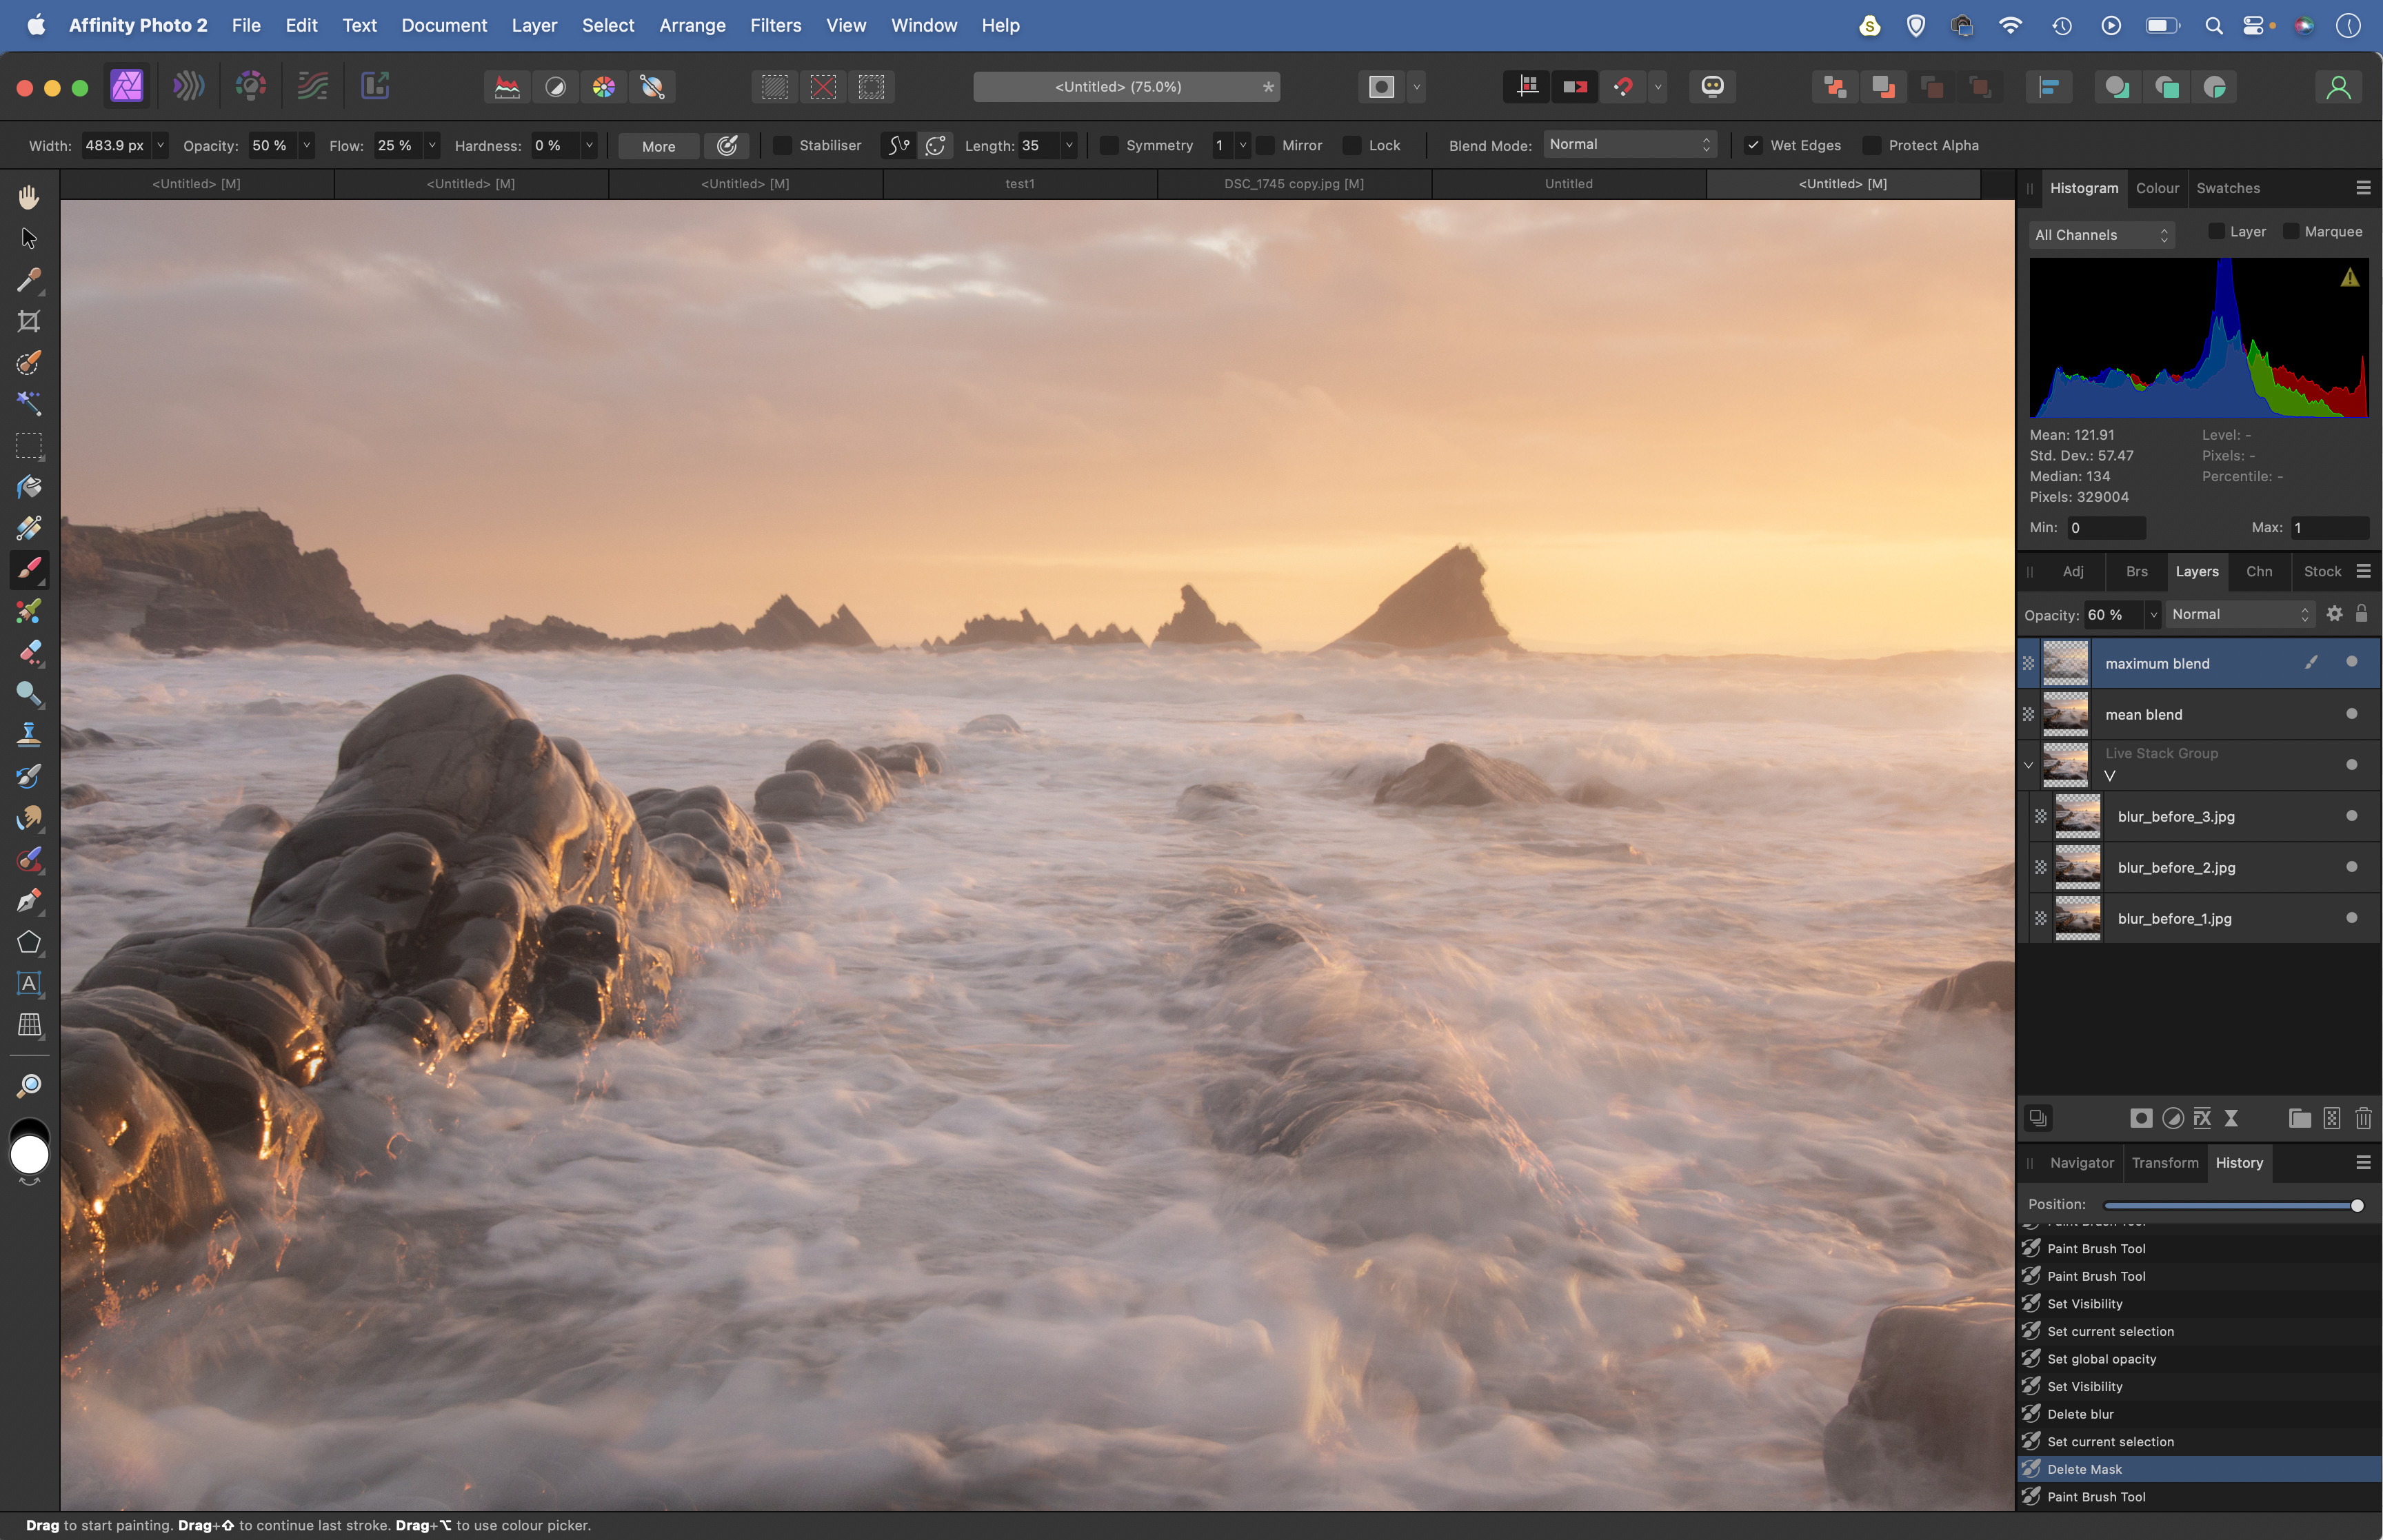
Press Cmd/Ctrl+Shift+Alt+E to merge a copy of all the layers into a new layer. Hide the layer for now. Go back to the stack blending menu and this time set it to Maximum and again merge another copy. Experiment with layer opacity to combine the two merged layers until you get a satisfactory blur effect.
4. Add a blur filter
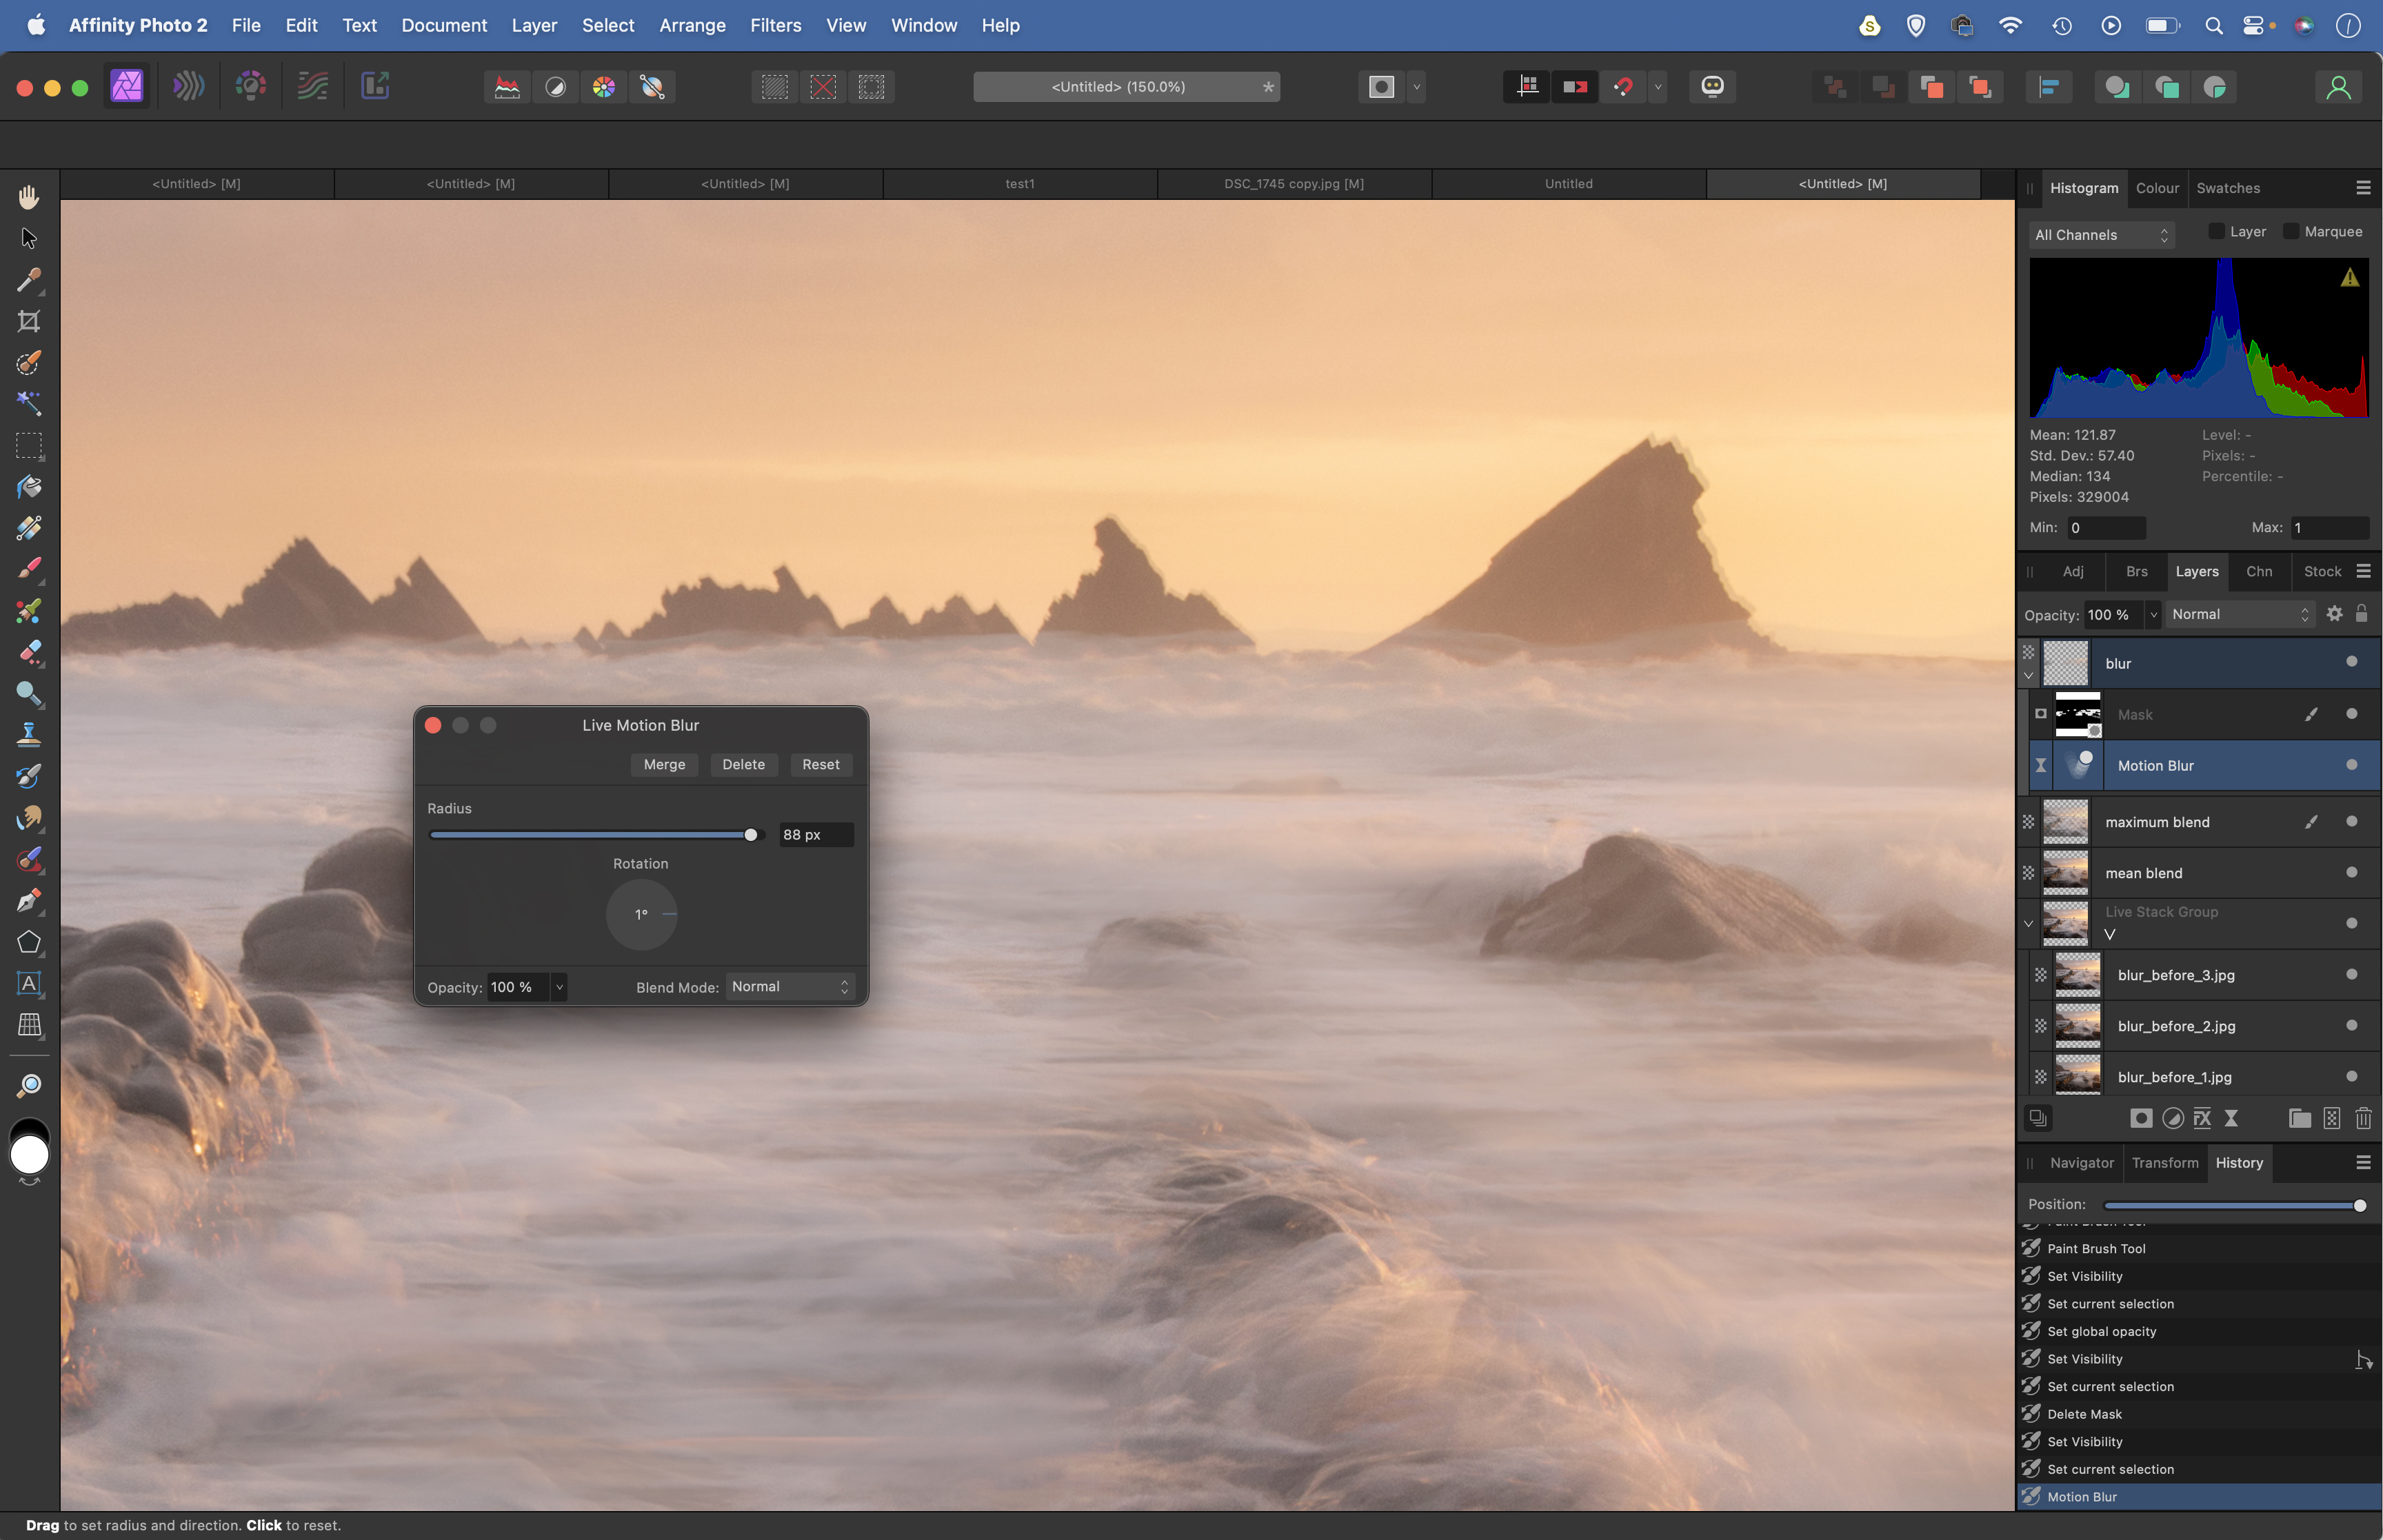
Hit Cmd/Ctrl+Shift+Alt+E to merge another copy, then go to Layer > New Live Filter Layer > Blur > Motion Blur. Click in the image and drag to the right or left to make a horizontal blur effect. Next click the Add Mask icon, then hit Cmd/Ctrl+I to invert the mask to black. Paint white to reveal the blur over the water.
5. Smudge the waves
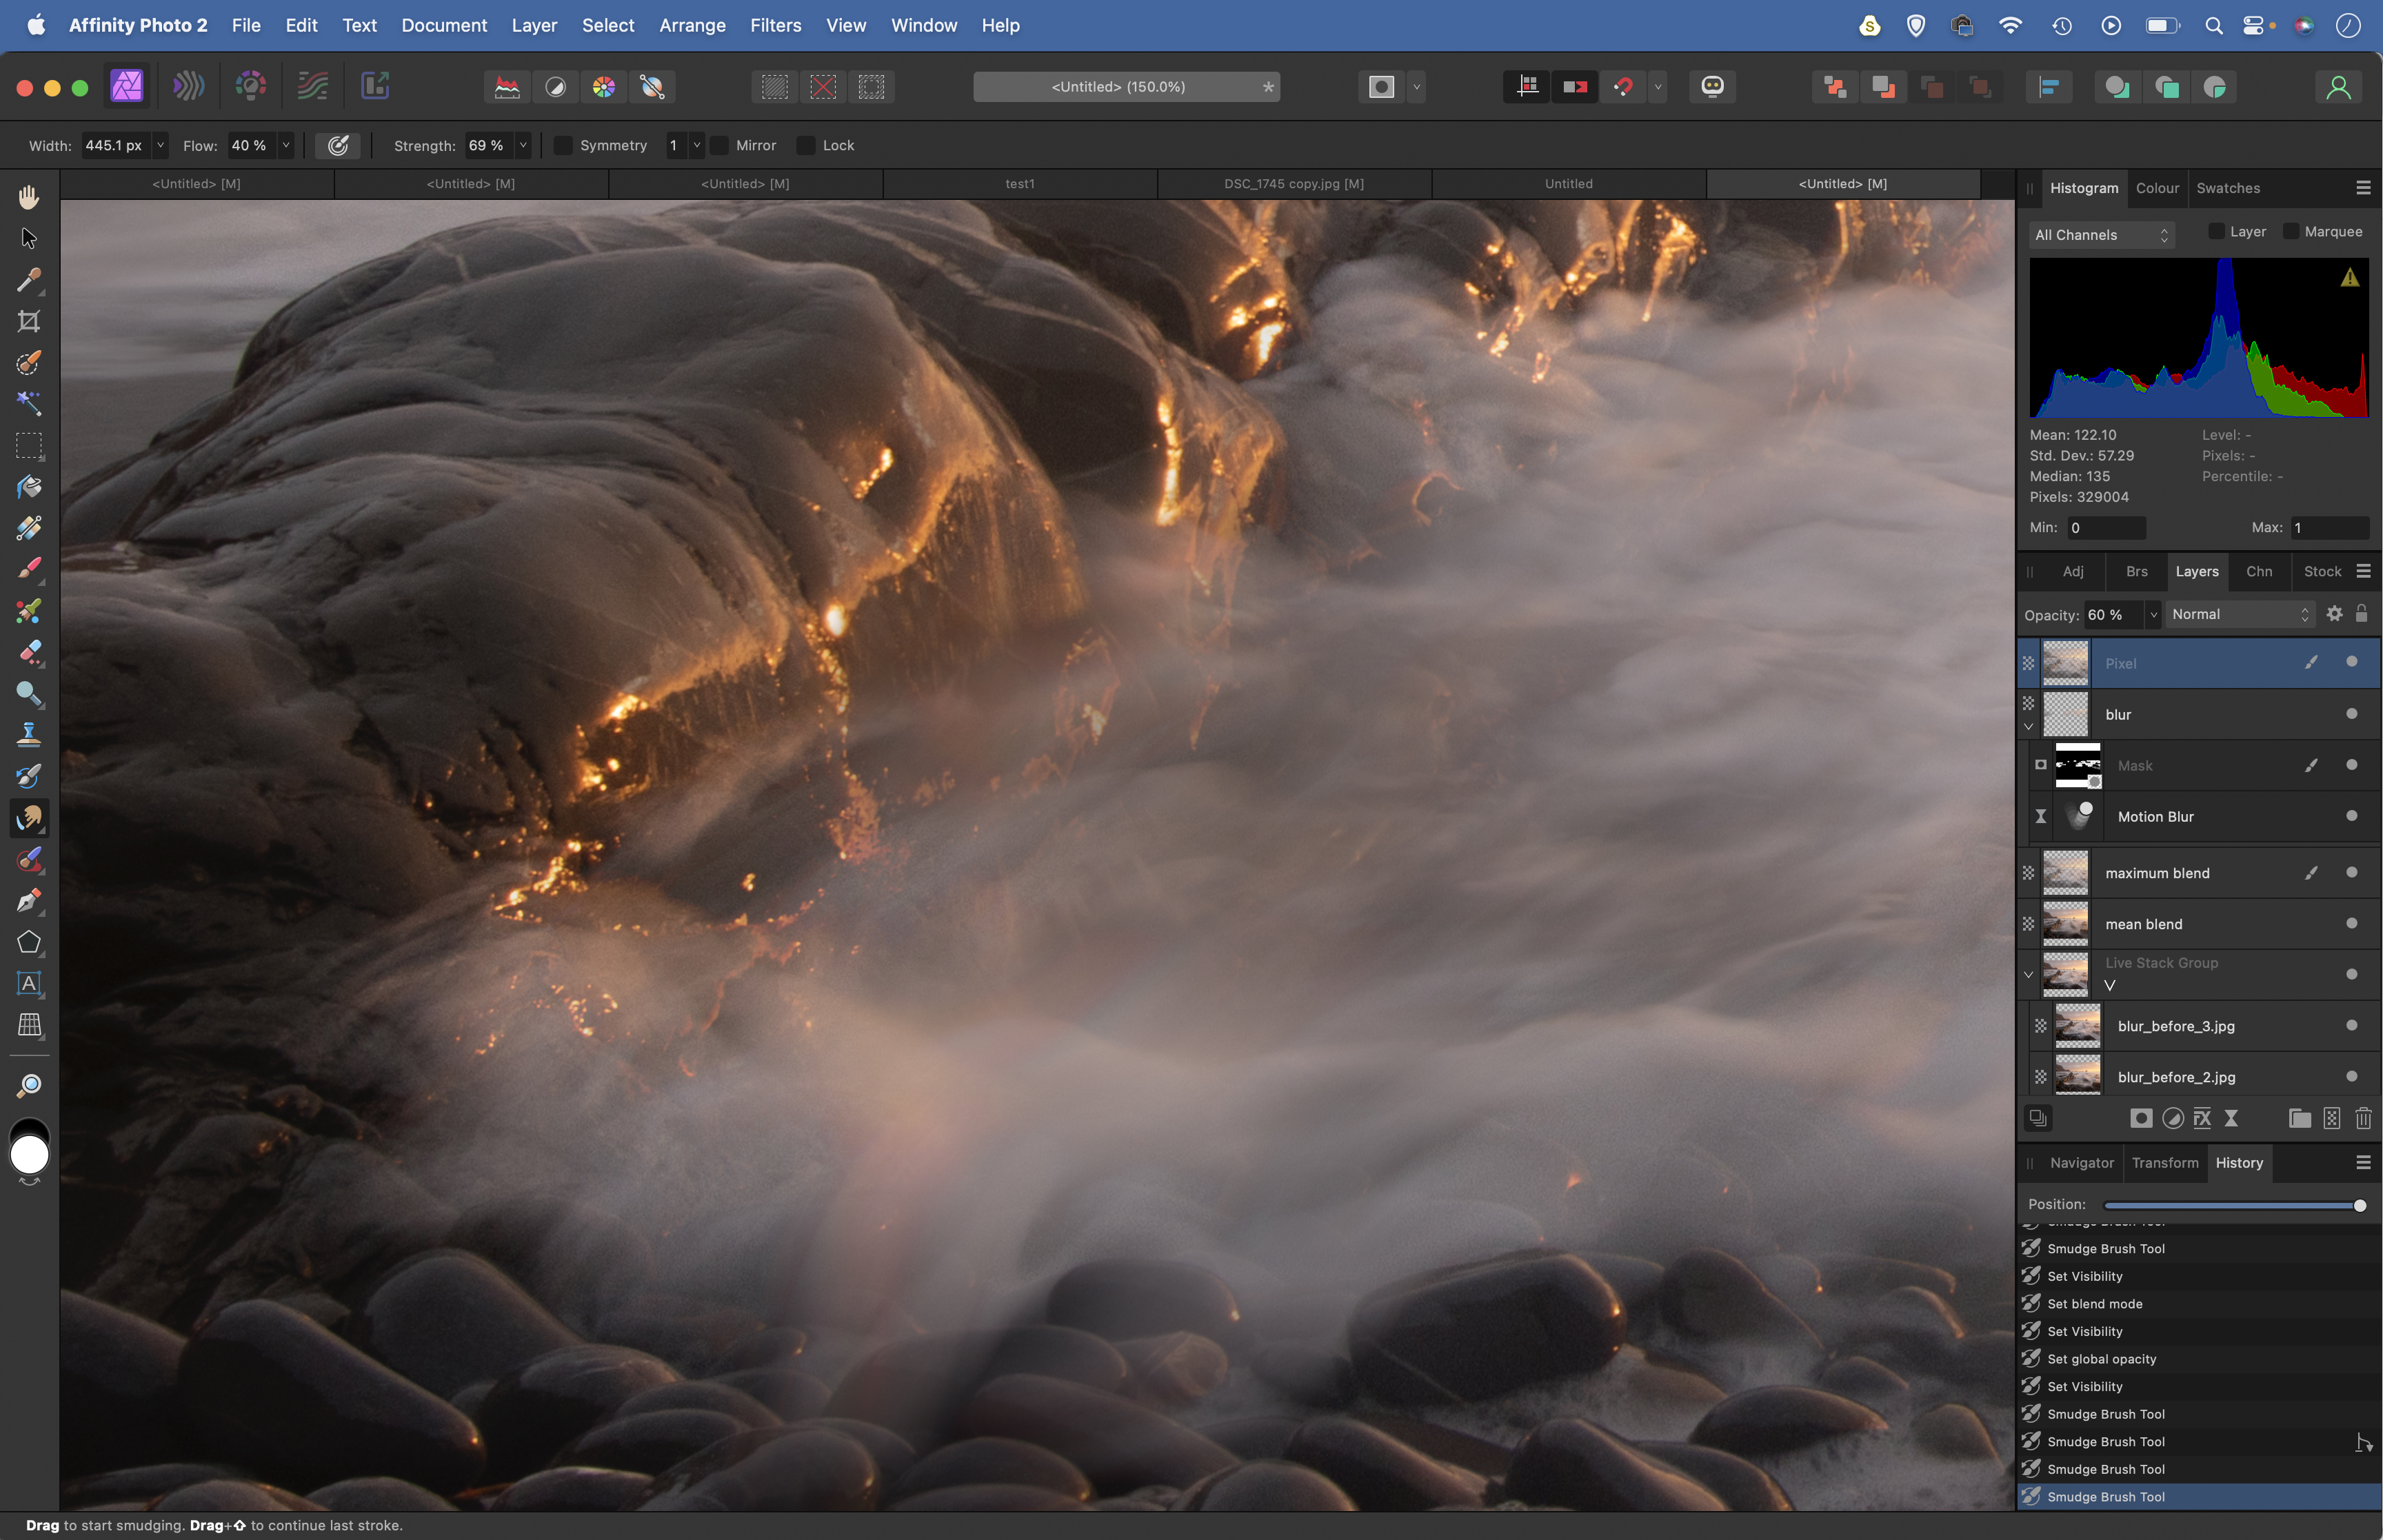
Merge another layer with Cmd/Ctrl+Shift+Alt+E. Grab the Smudge tool and set the Flow to 40, Strength 70. Zoom in close and use the tool to smudge the waves into blurred shapes that follow the natural flow of the water. Experiment with layer opacity to tone the effect down until it looks right.
6. Blend original details
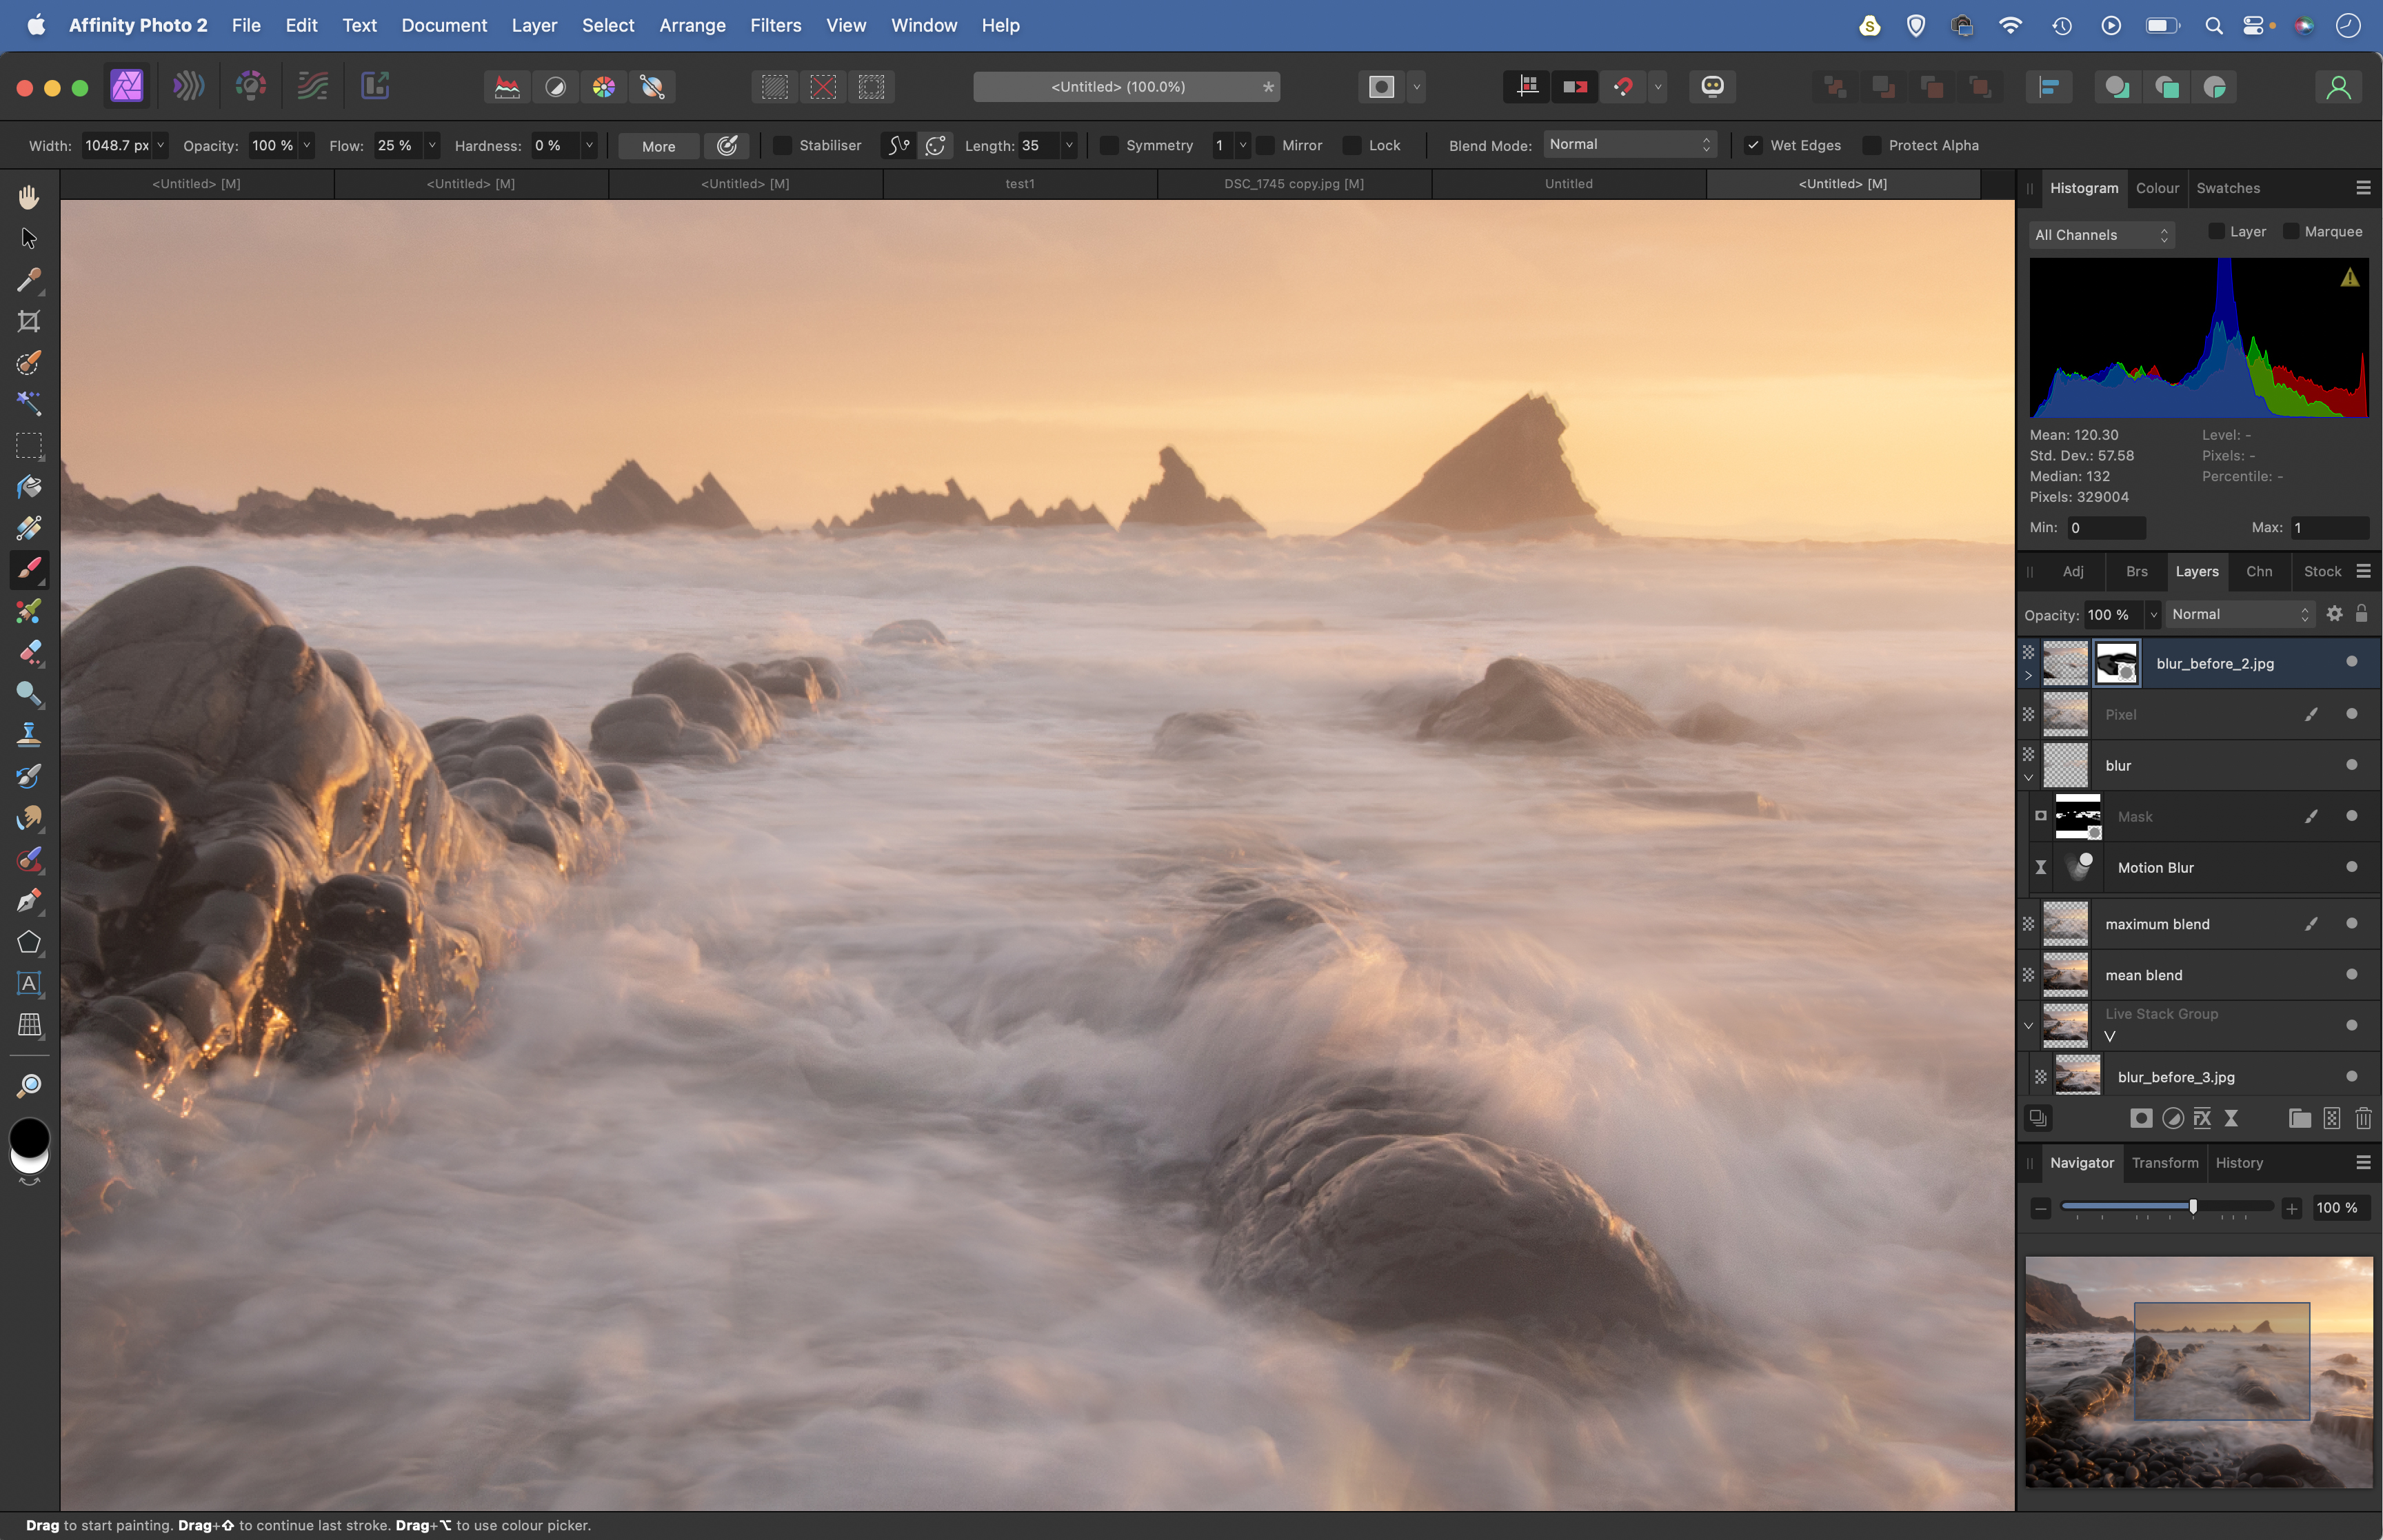
Alt-click on the layer thumbnails of the three original images layers in the stack to check if there’s a better area in any of them that you can blend with your overall image. If so, duplicate the layer with Cmd/Ctrl+J, drag to the top of the stack then add a layer mask and paint black to hide all but the area you want.
• See more of our Affinity Photo tutorials
If you enjoyed this tutorial but want a bit more power from your laptop, why not look at the best photo-editing laptops? If you're really keen to improve your skills further then online photography courses could be the way to go.