While Adobe Camera Raw [ACR] was originally intended to be used on RAW files being imported into Adobe Lightroom and, in this tutorial, Adobe Photoshop, it’s so useful that Adobe made it available as a filter that could be used inside the main host application and on files such as JPEGs.
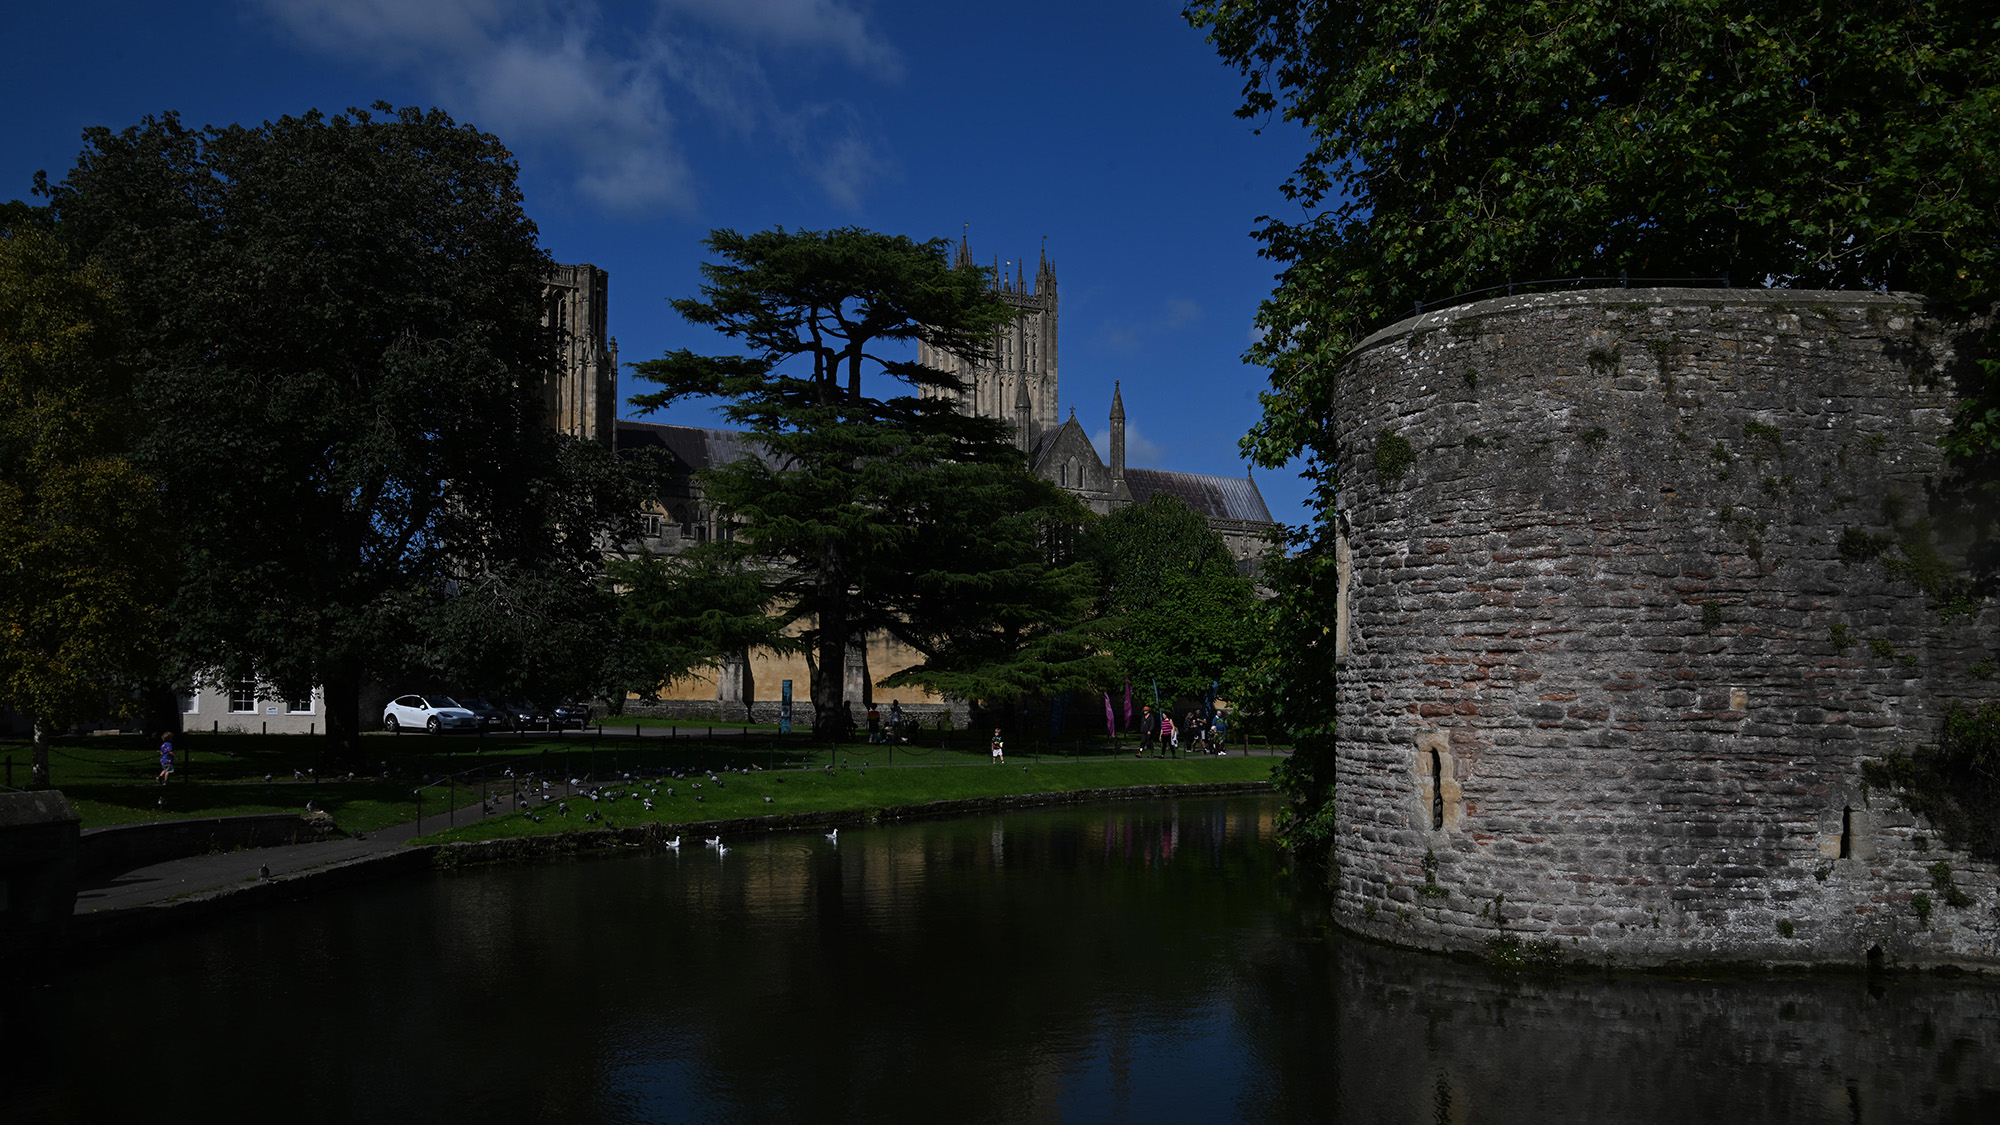
So, if you have some old photos that you didn’t shoot in RAW format (naughty!) and want to see what you can make of them, this is the place to experiment.
Start by loading your image, duplicating your background layer and going to Filter > Camera Raw Filter. In the histogram on the top right, it’s worth clicking on the left and right tick boxes to turn shadow and highlight clipping warnings on.
1. Fix the exposure
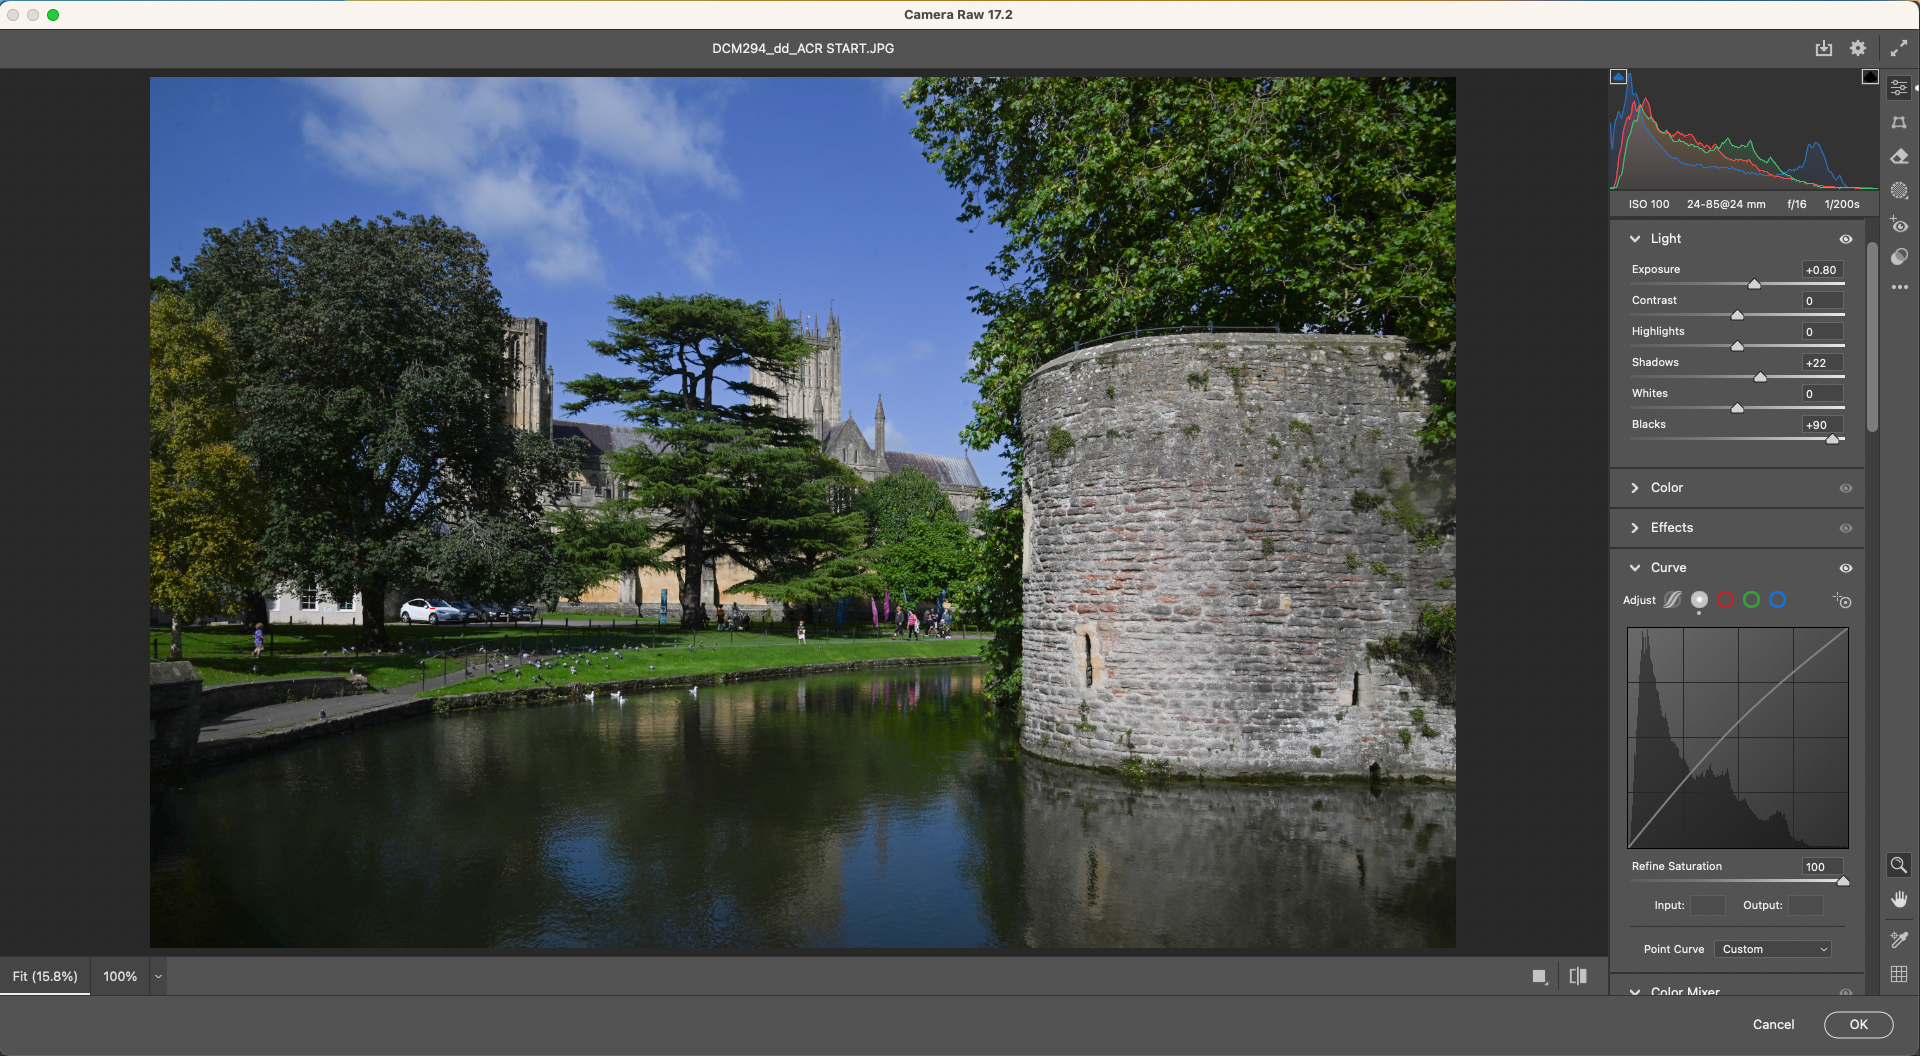
This photo was underexposed to avoid losing the white highlights. To balance the exposure, go to the Light panel and move the Exposure slider until red clipping warning pixels start to appear on the image, then reduce the slider until they are gone. Move the Blacks slider to the right to about +90. Then use the Curves panel to pull up the mid-tones.
2. Colour and vibrance
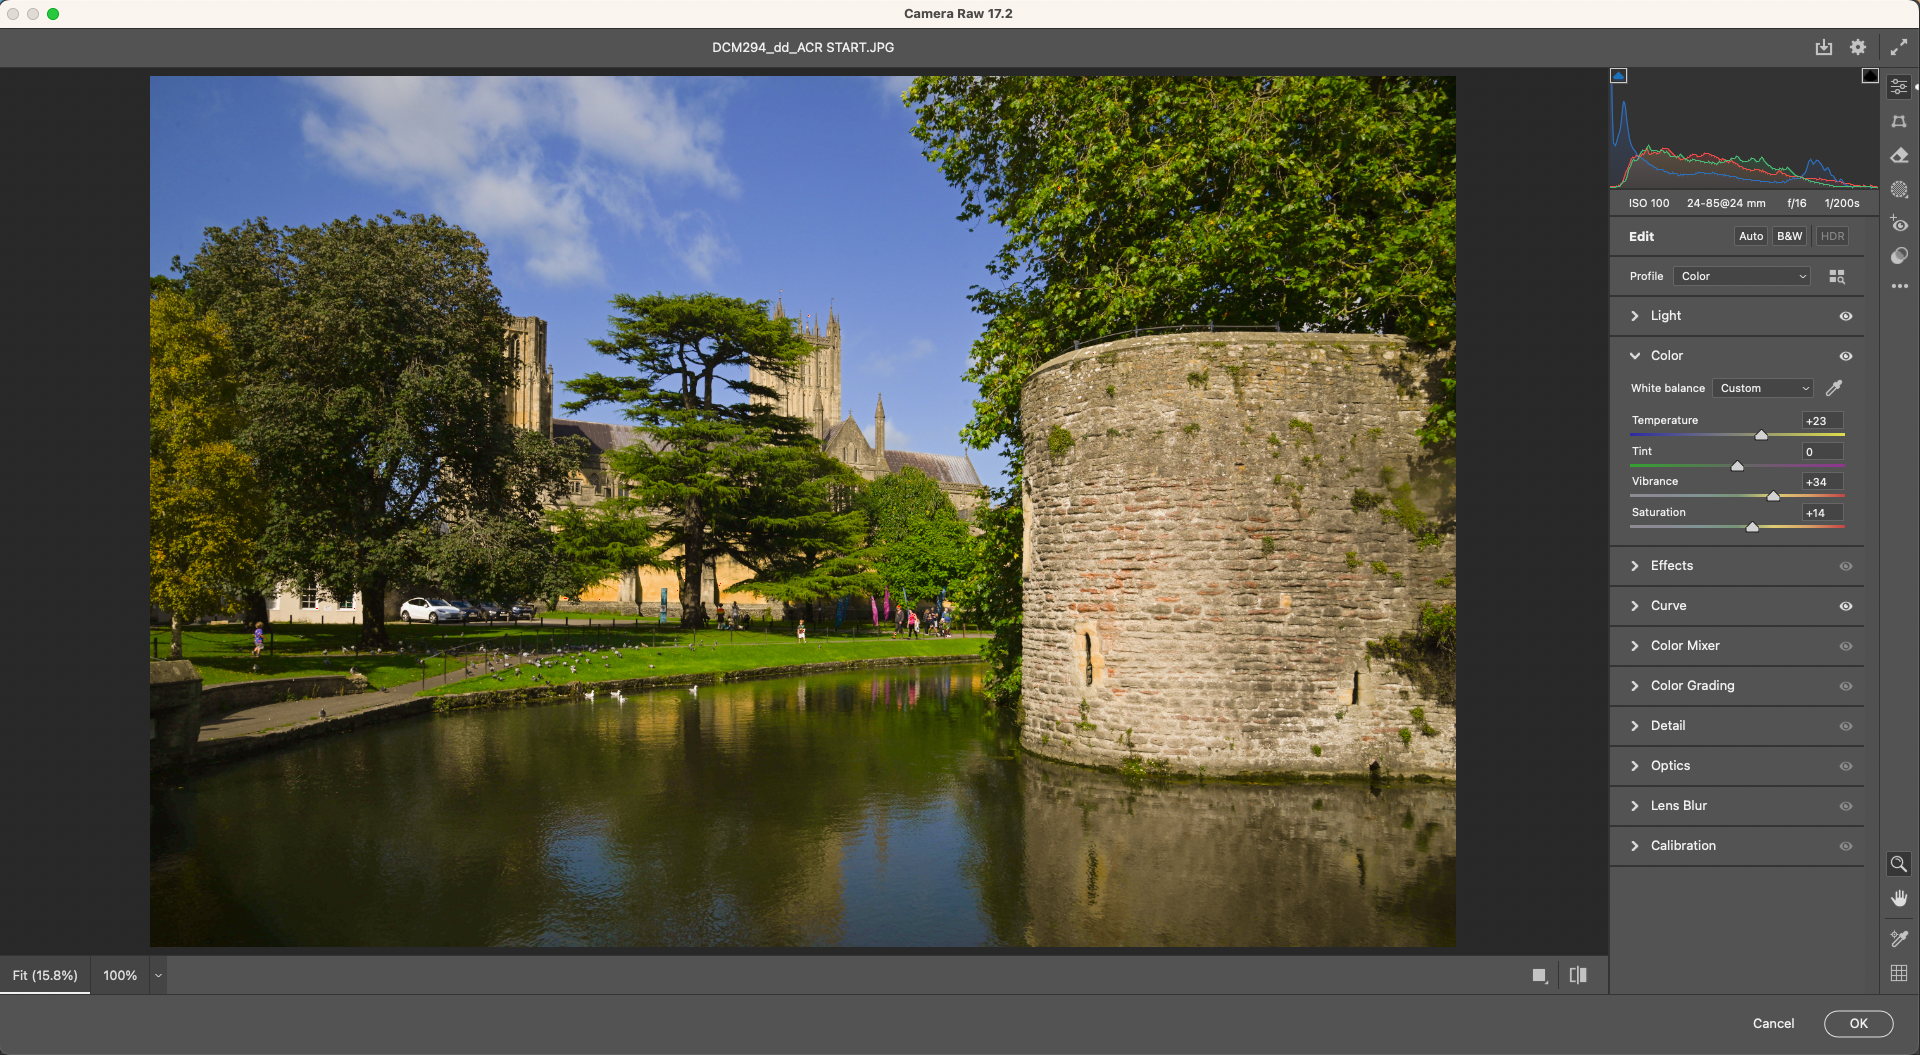
Go to the Color panel. The White Balance and Temperature settings aren’t the same as on Raw files, so click on White Balance and select Auto. Again, keep an eye out for red clipping pixels and manually reduce the Temperature when you get them. Increase the Vibrance for weak colors and overall Saturation.
3. Clarity and texture
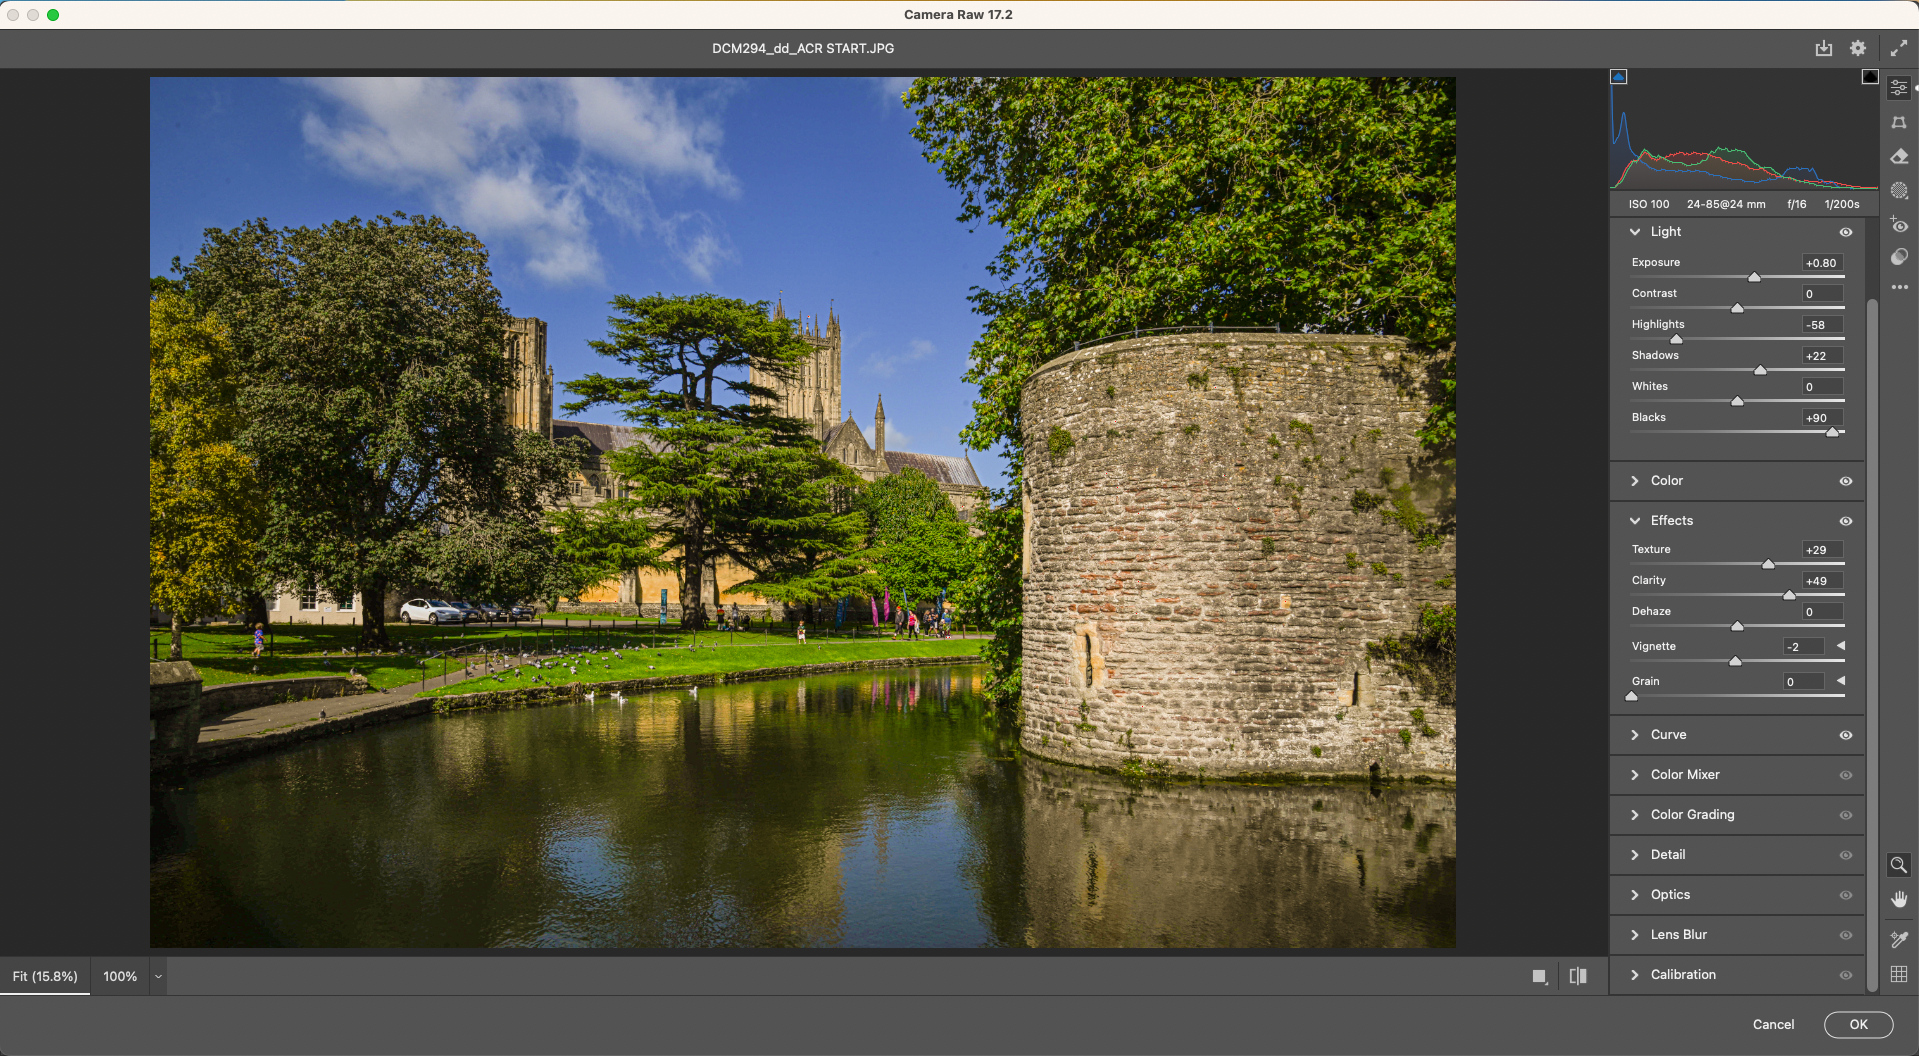
Next is the Effects panel. Increase the Clarity to make landscapes more distinct and if there’s any stonework in the photo, increase the Texture as well. Use the Vignette slider to either remove any vignetting or add it for effect. If you get red clipping pixels, either tweak one of the previous settings or reduce the Highlights slider in the Light panel.
4. Optics and noise
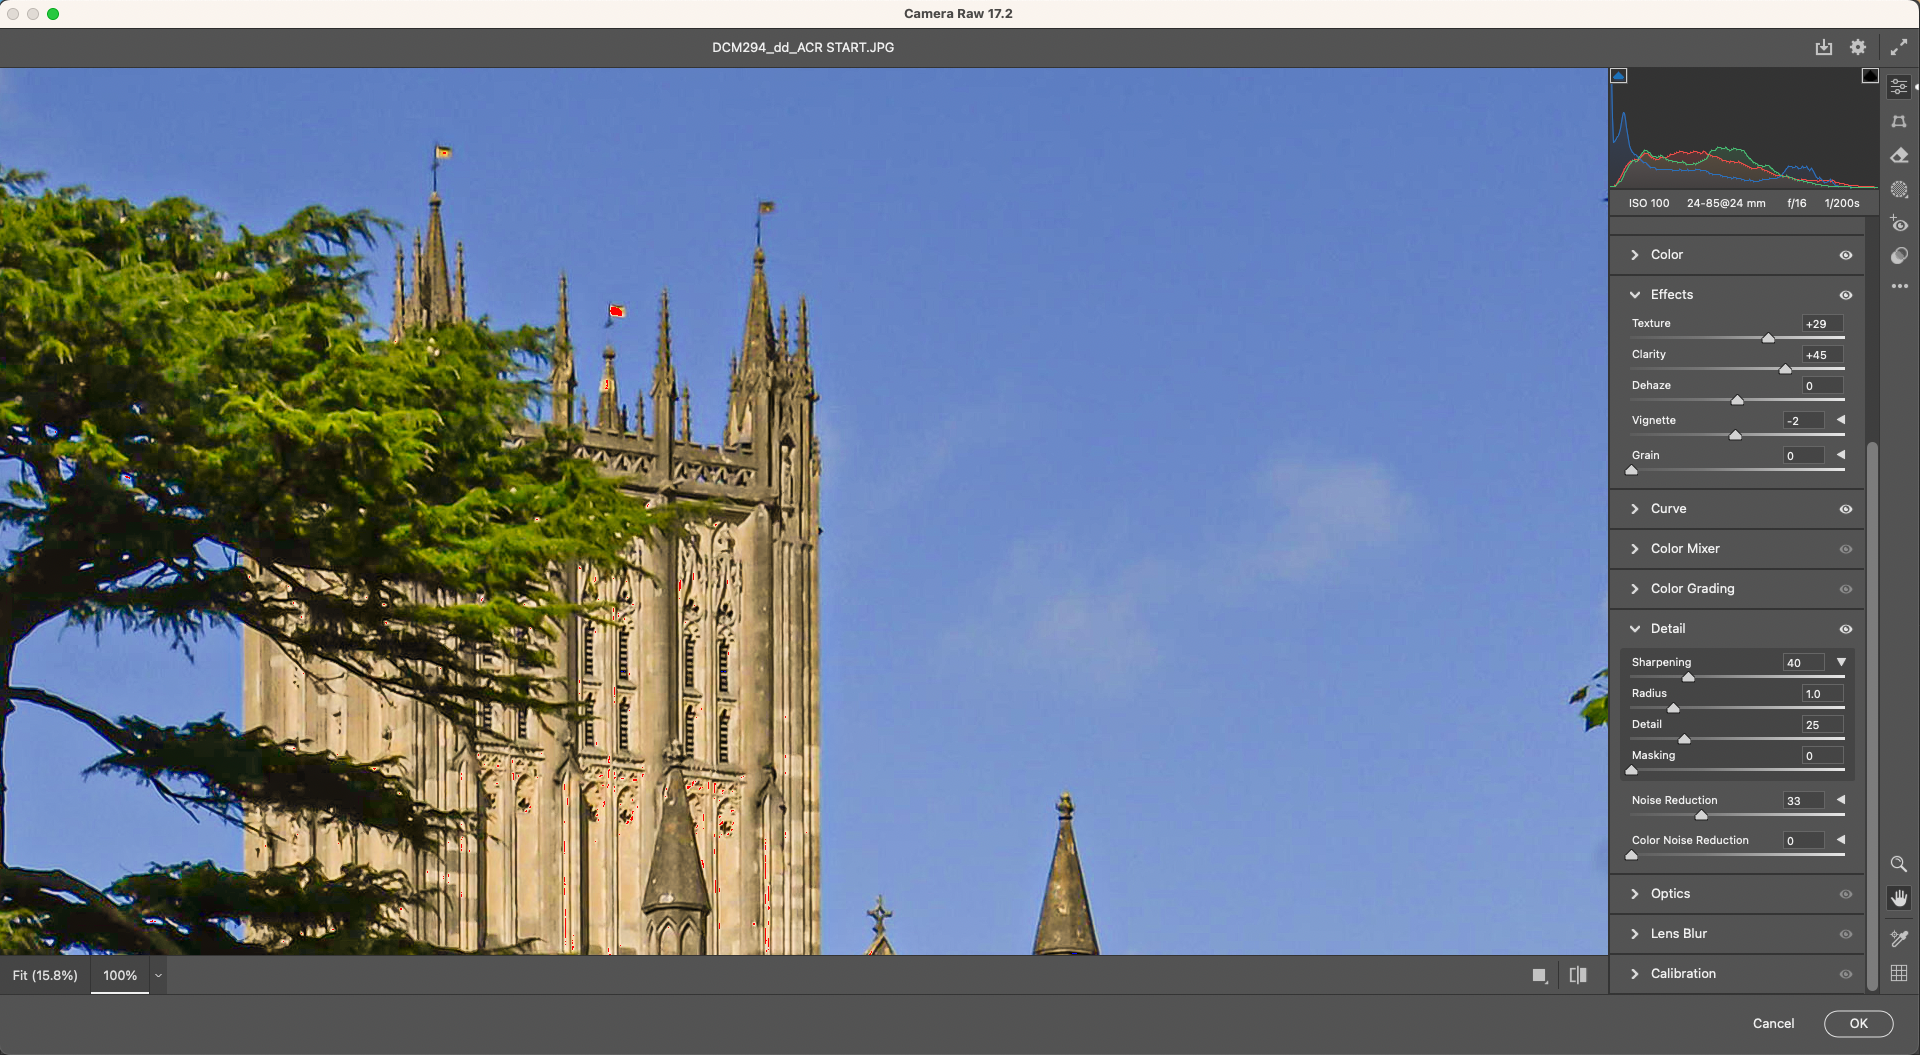
Go to the Detail panel and see whether the image needs any Sharpening and Noise Reduction, which JPEGs can introduce into areas like the sky. Zoom in to 100% and use the toggle button to check the before and after as these controls affect each other. So, it’s a balancing act between how much sharpening you need versus how smooth the sky is.
5. Get creative with color
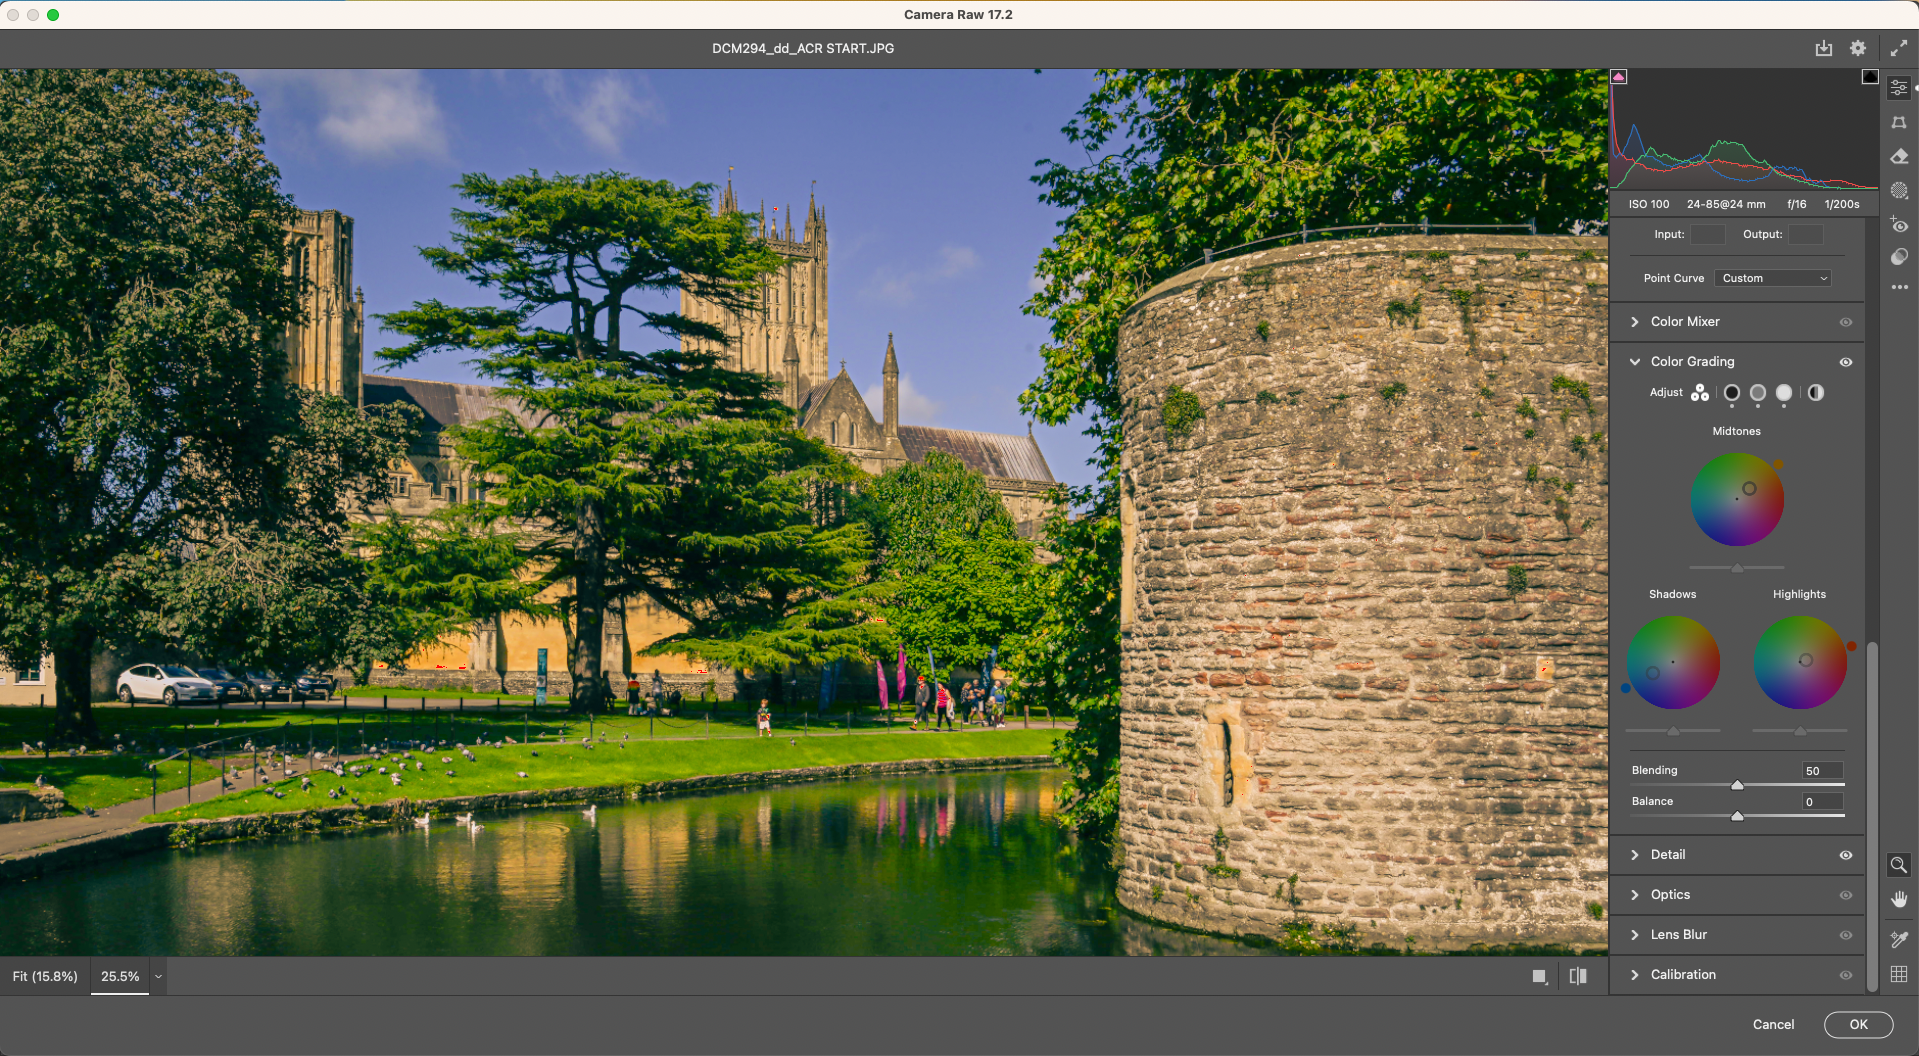
The Color Mixer and the Color Grading panels offer the opportunity to give your images a different look and feel. The Color Grading wheels, which cover Shadows, Midtones and Highlights, offer a very visual way of seeing the effects. Click on a part of the color wheel to select it, then click and slide to adjust the Saturation.
You might also like...
Want more JPEG-related content? Why a JPEG detox could do my photography a world of good. Perhaps you're looking to upgrade your kit to one of the best cameras for landscapes. Or maybe you'd like to learn about Photoshop's Dehaze slider.