Watch video (above): Use shape and glow effects in Affinity Photo
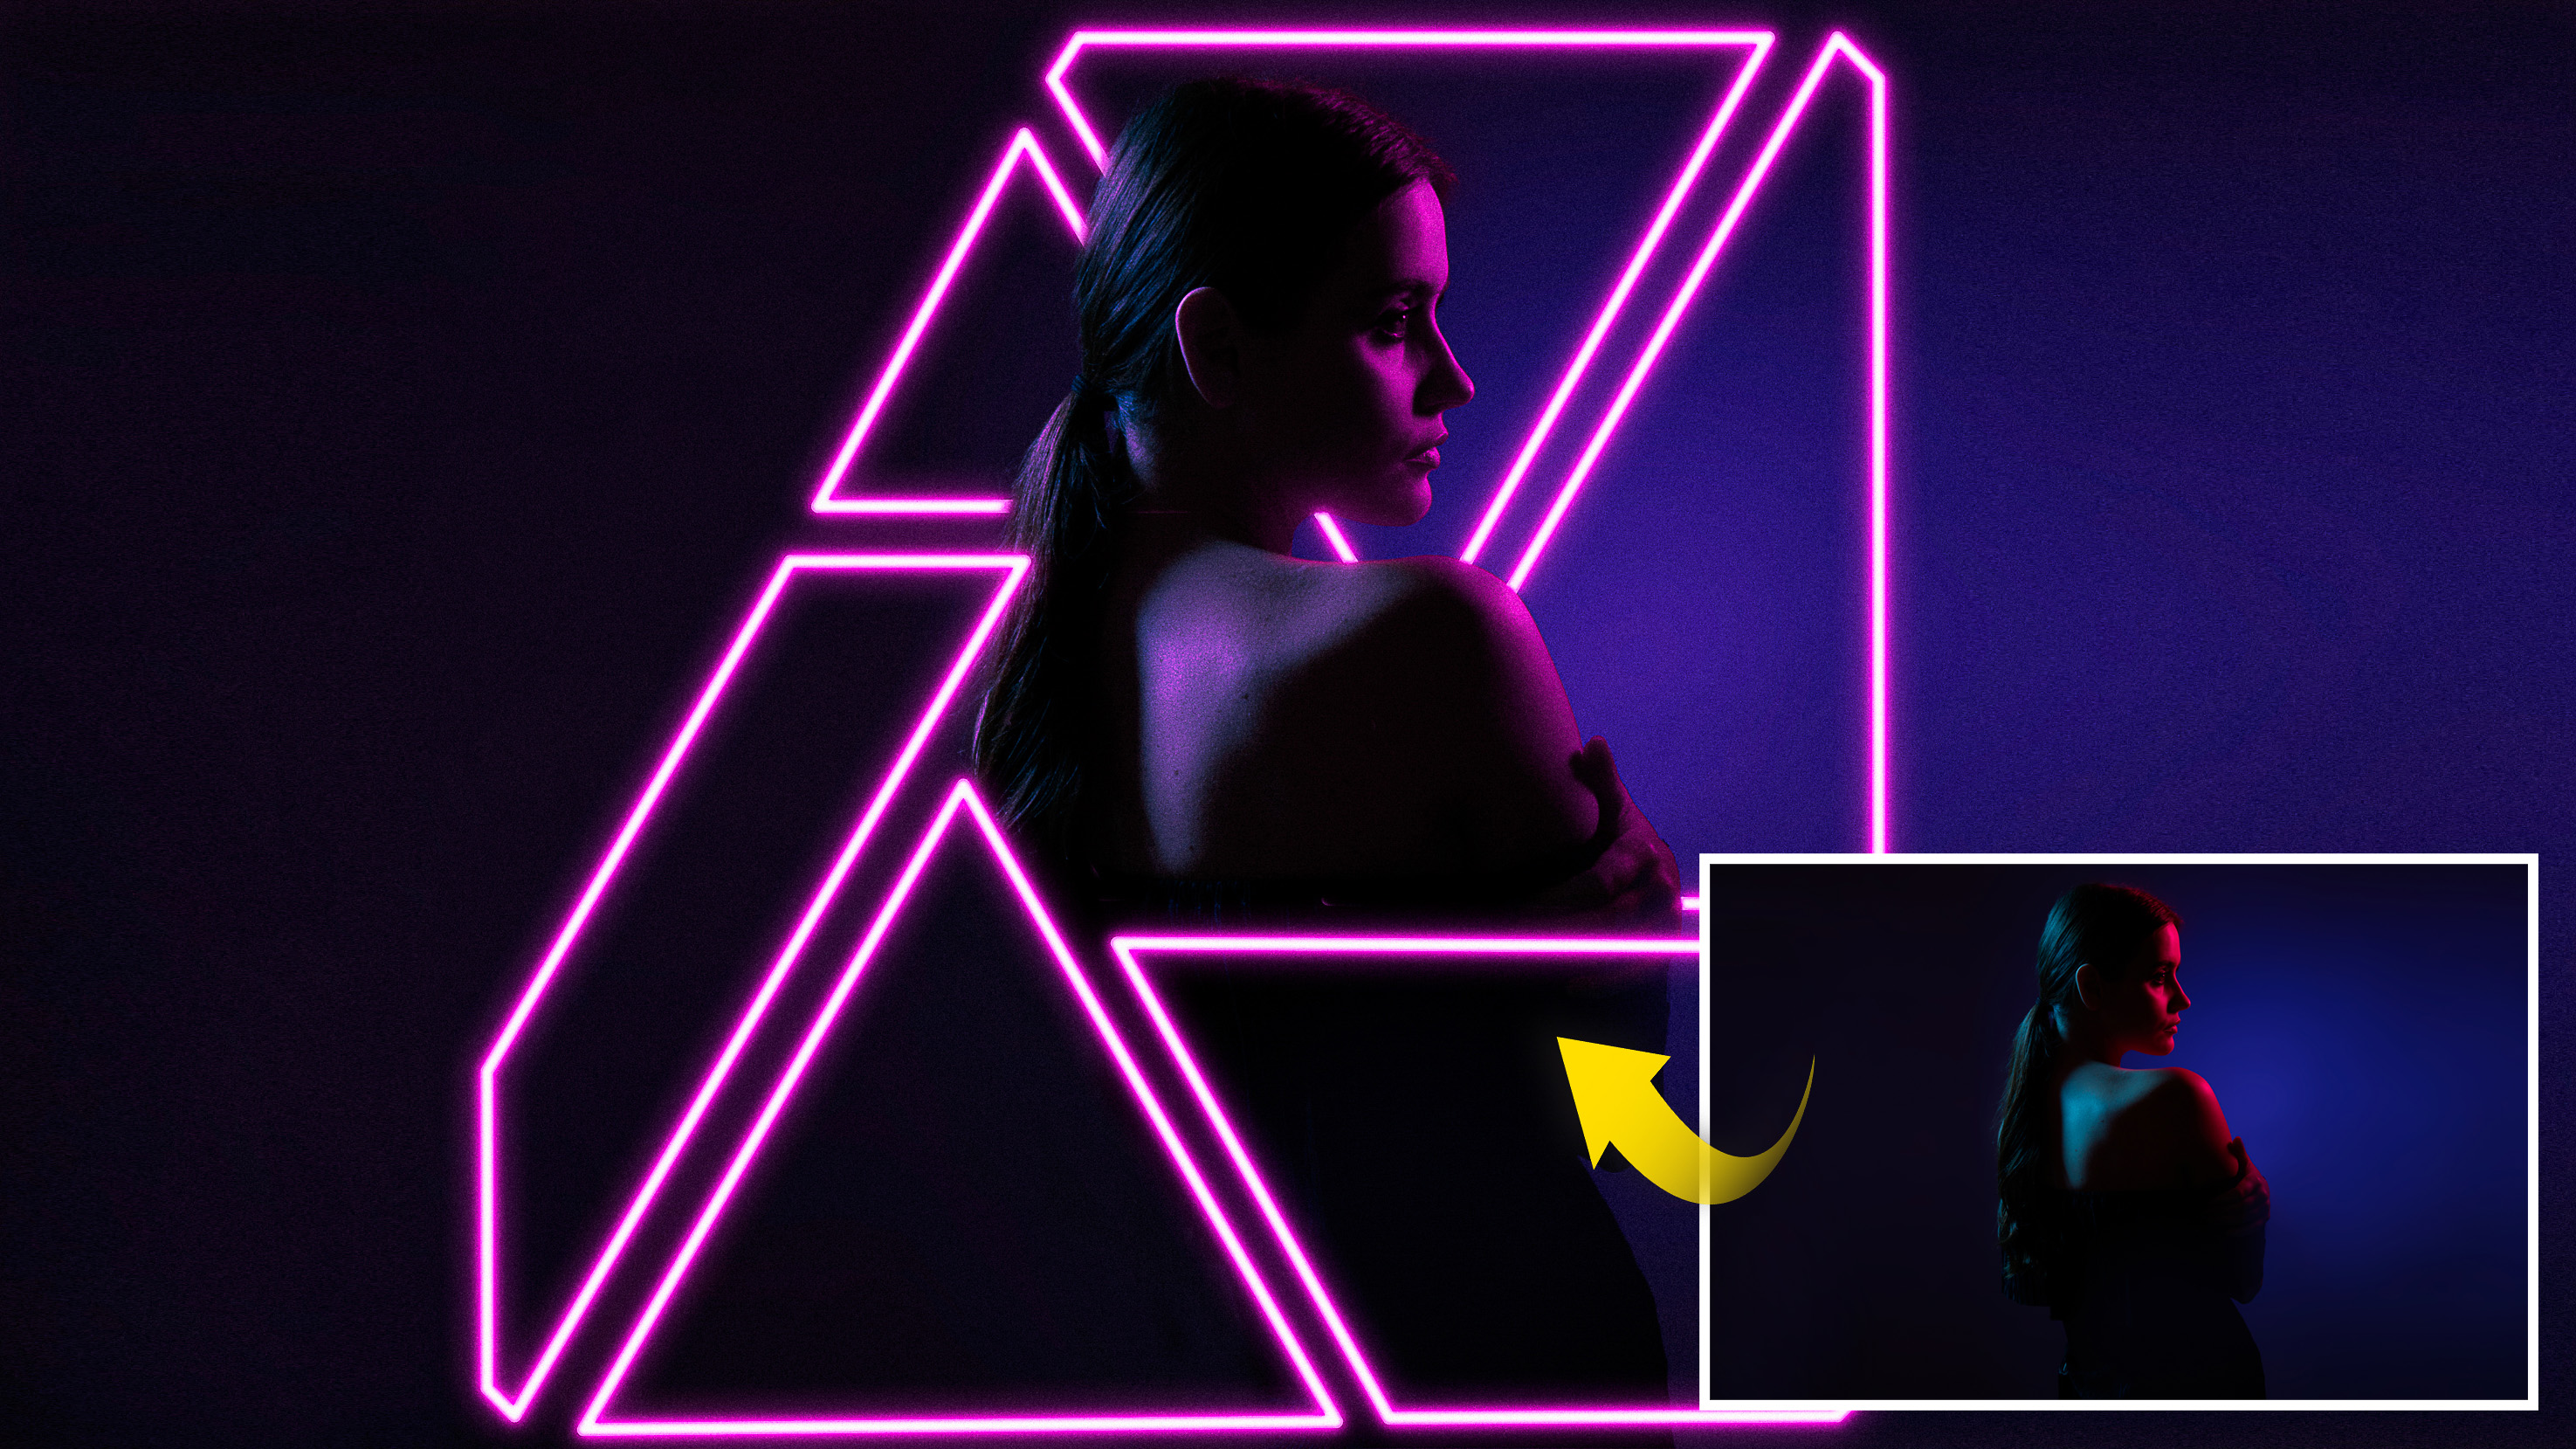
We can create stylish glow effects in Affinity Photo with the Outer and Inner glow layer effects command. Here we’ve chosen to use the Affinity logo as a shape, but you can use the same skills to make any glowing shape you like. Then with simple layer and masking skills, we can combine our shots with a portrait, or an image of our choice.
It works best if the image is dark, as this allows the glowing lines to show through. We begin here with the Pen tool, which allows us to trace a simple outline around the Affinity Photo logo. Once done, we can copy the shapes on to the Shape.jpg start image, add our glow effects, and experiment with masks so that the shapes intertwine with our subject. Finally, we can tint our subject so that the colors match the glow of the shape. Along the way, we’ll encounter a host of fundamental Affinity skills, from transforming and masking to Adjustments and color controls.
If you want to shoot your own image for this effect, then think about matching the lighting on the subject with the intended position of your glowing shapes. Backlighting like this is ideal, as it matches with the shapes that appear ‘behind’ the subject. If you want to take it further, you can use color gels on your lights to match the glowing colors. When our shooting and editing workflows come together in harmony like this, the results are invariably much more satisfying, so give it a go!
1. Trace a shape
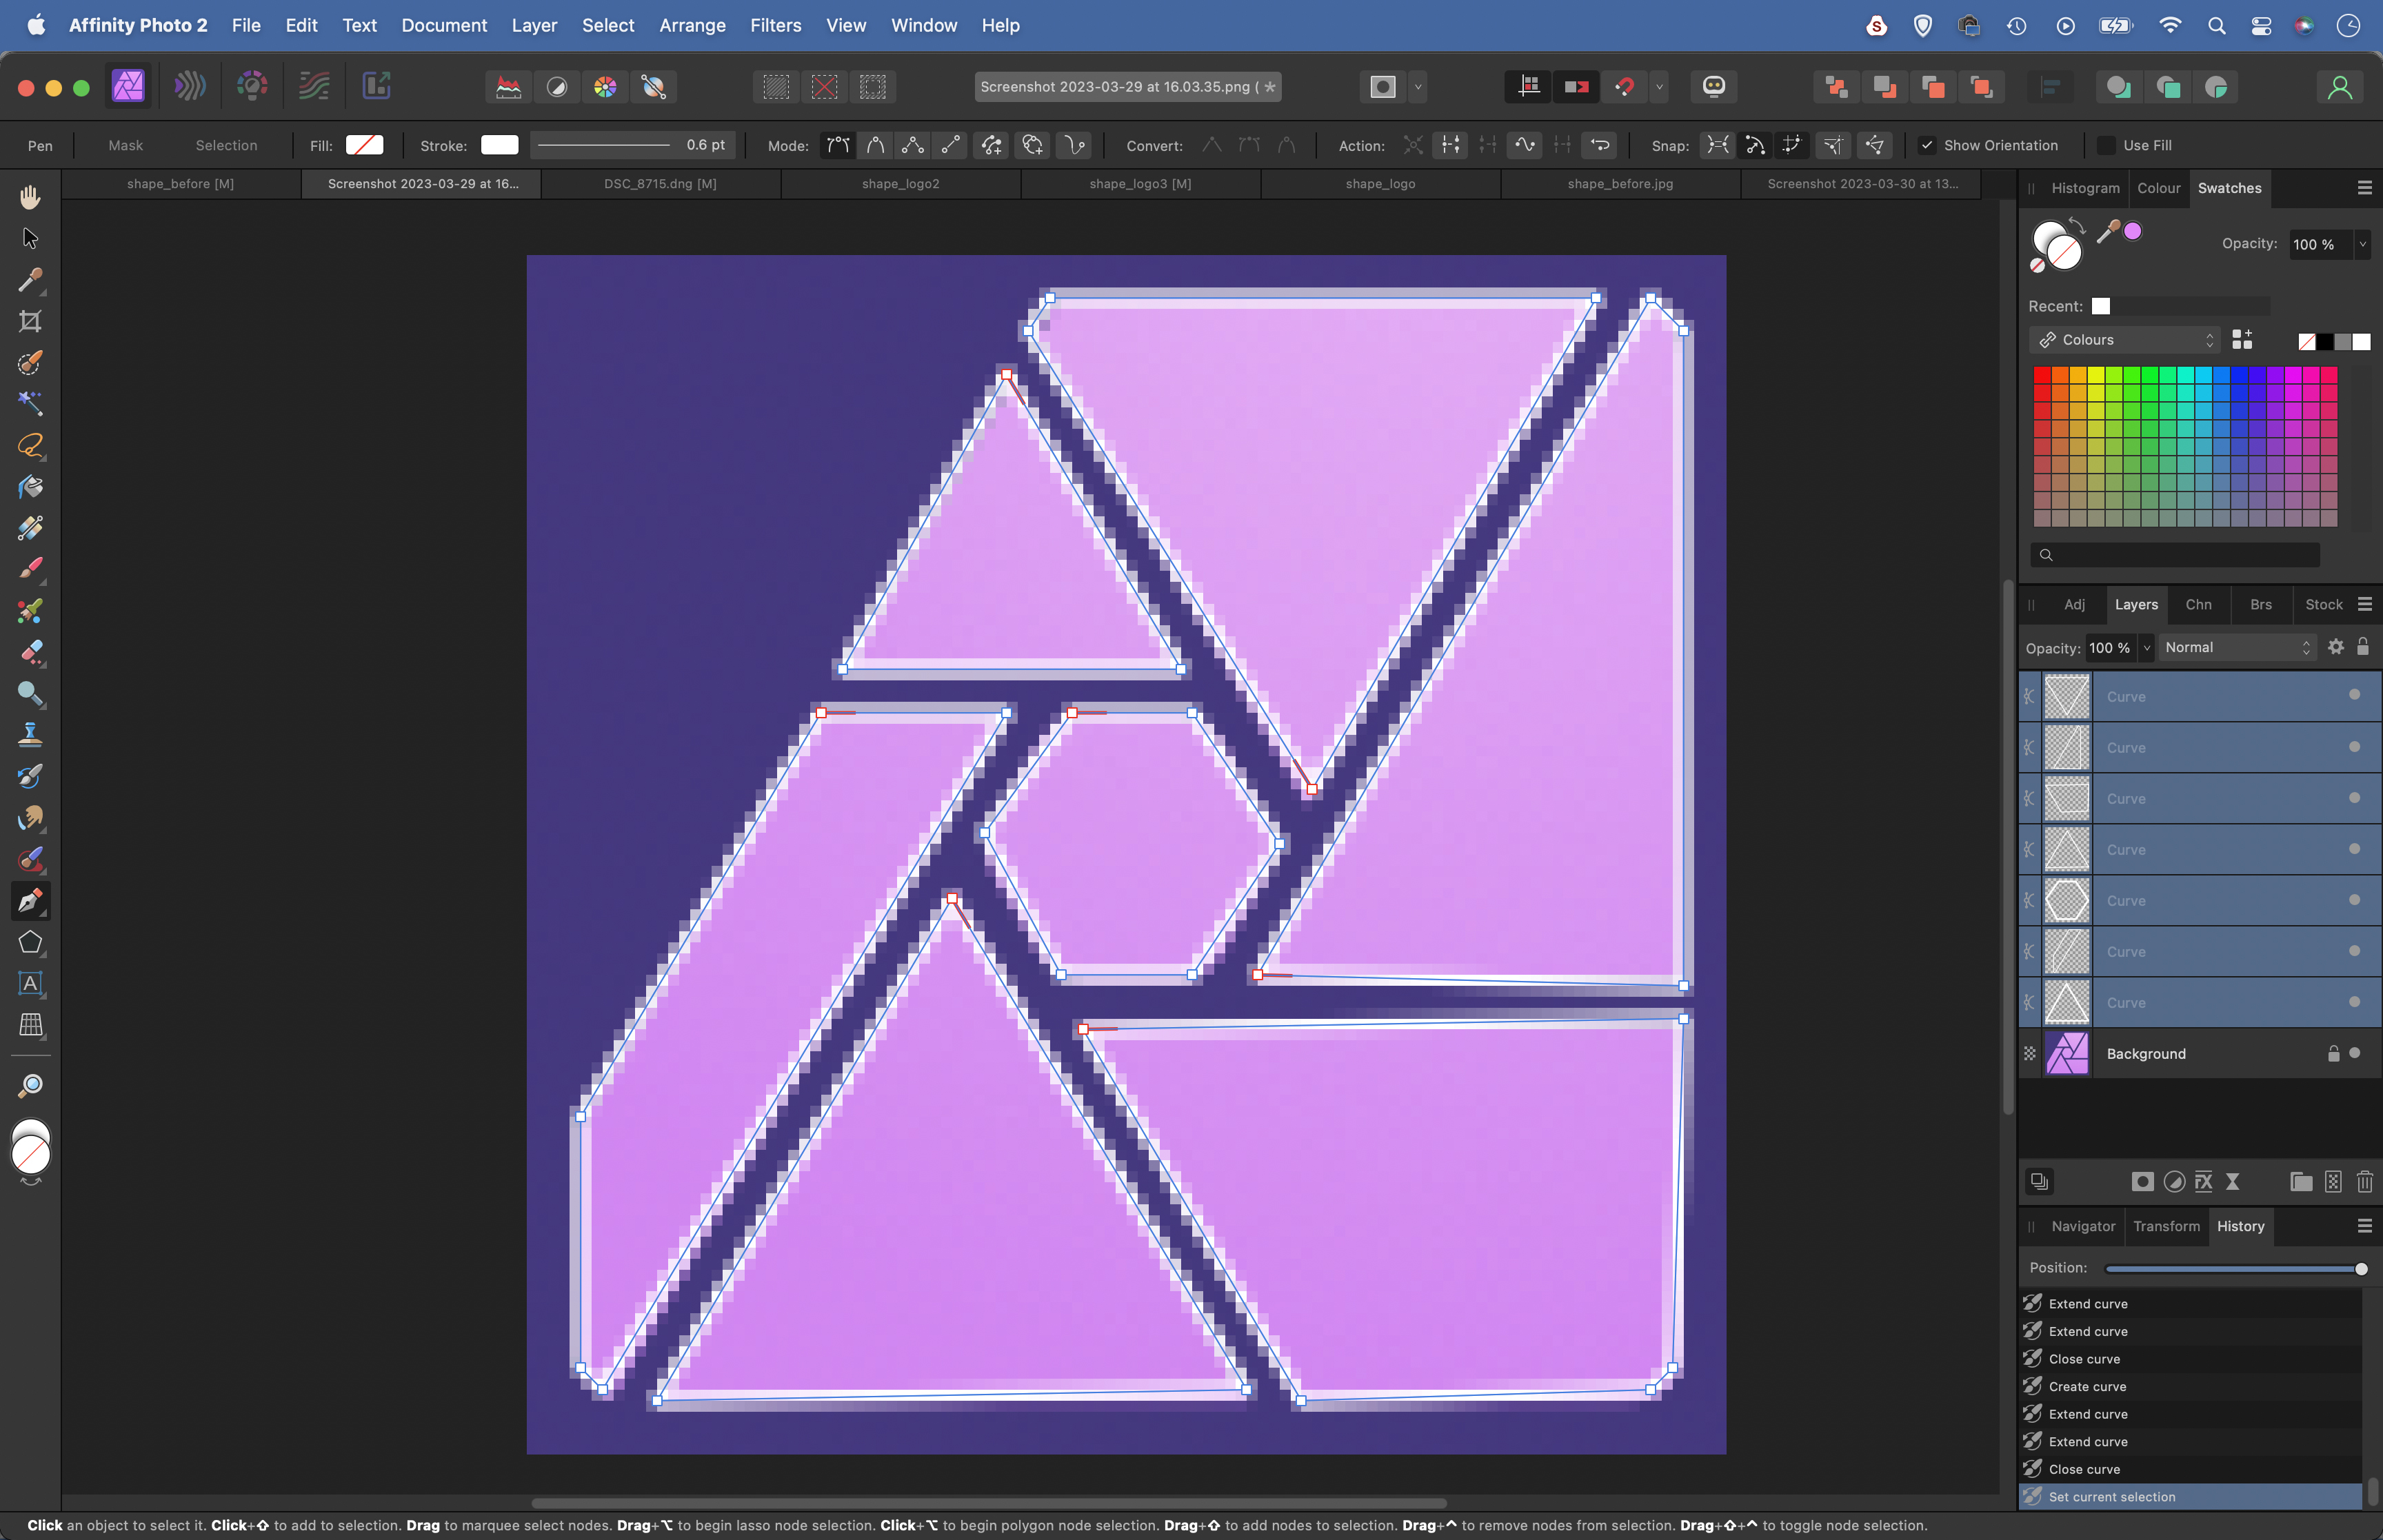
Make a shape with the Pen tool. We’ve used the Affinity logo. Go to Affinity Photo > About for the logo, make a screenshot and open it in Affinity Photo. Click around the shape with pen tool to add anchor points. Set Fill to empty and set a stroke color and size.
2. Paste into the portrait
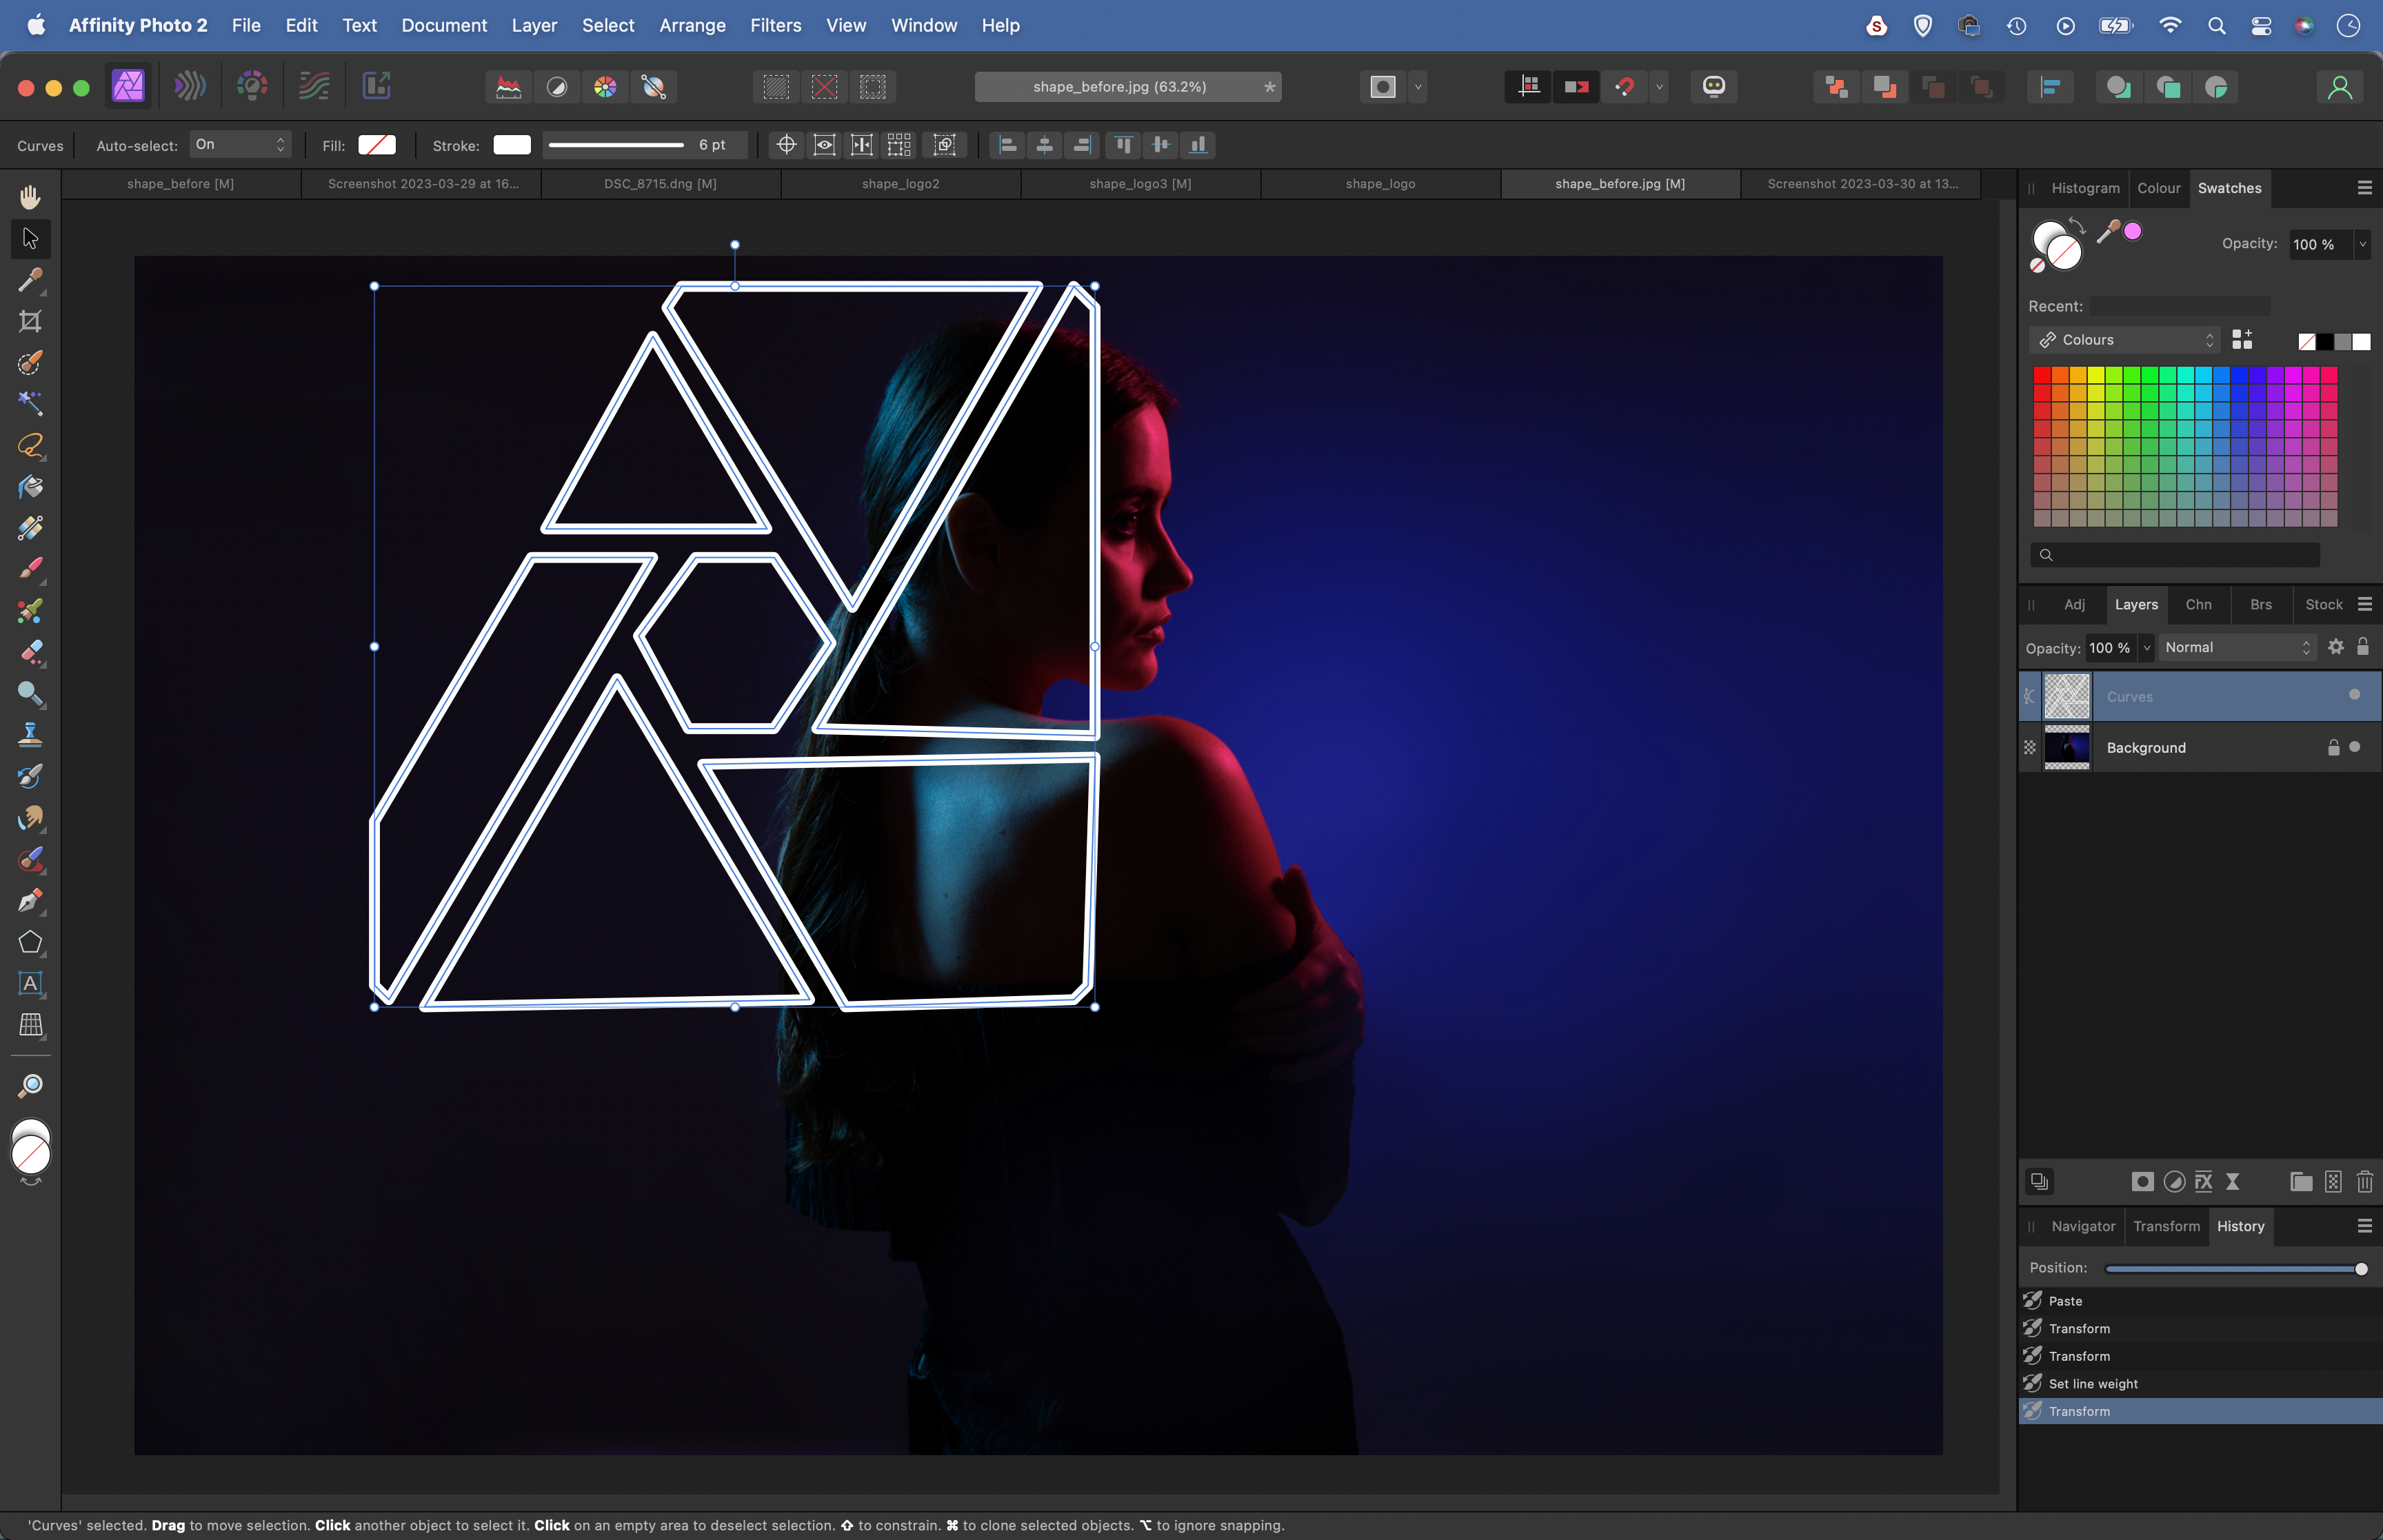
Once you’ve traced around all the shapes with the Pen tool, highlight the shape layers (Cmd/Ctrl+click to highlight more than one) then go to Layer > Geometry > Add to combine them. Copy with Cmd/Ctrl+C. Open Shape.jpg and paste in with Cmd/Ctrl+V.
3. Make it glow
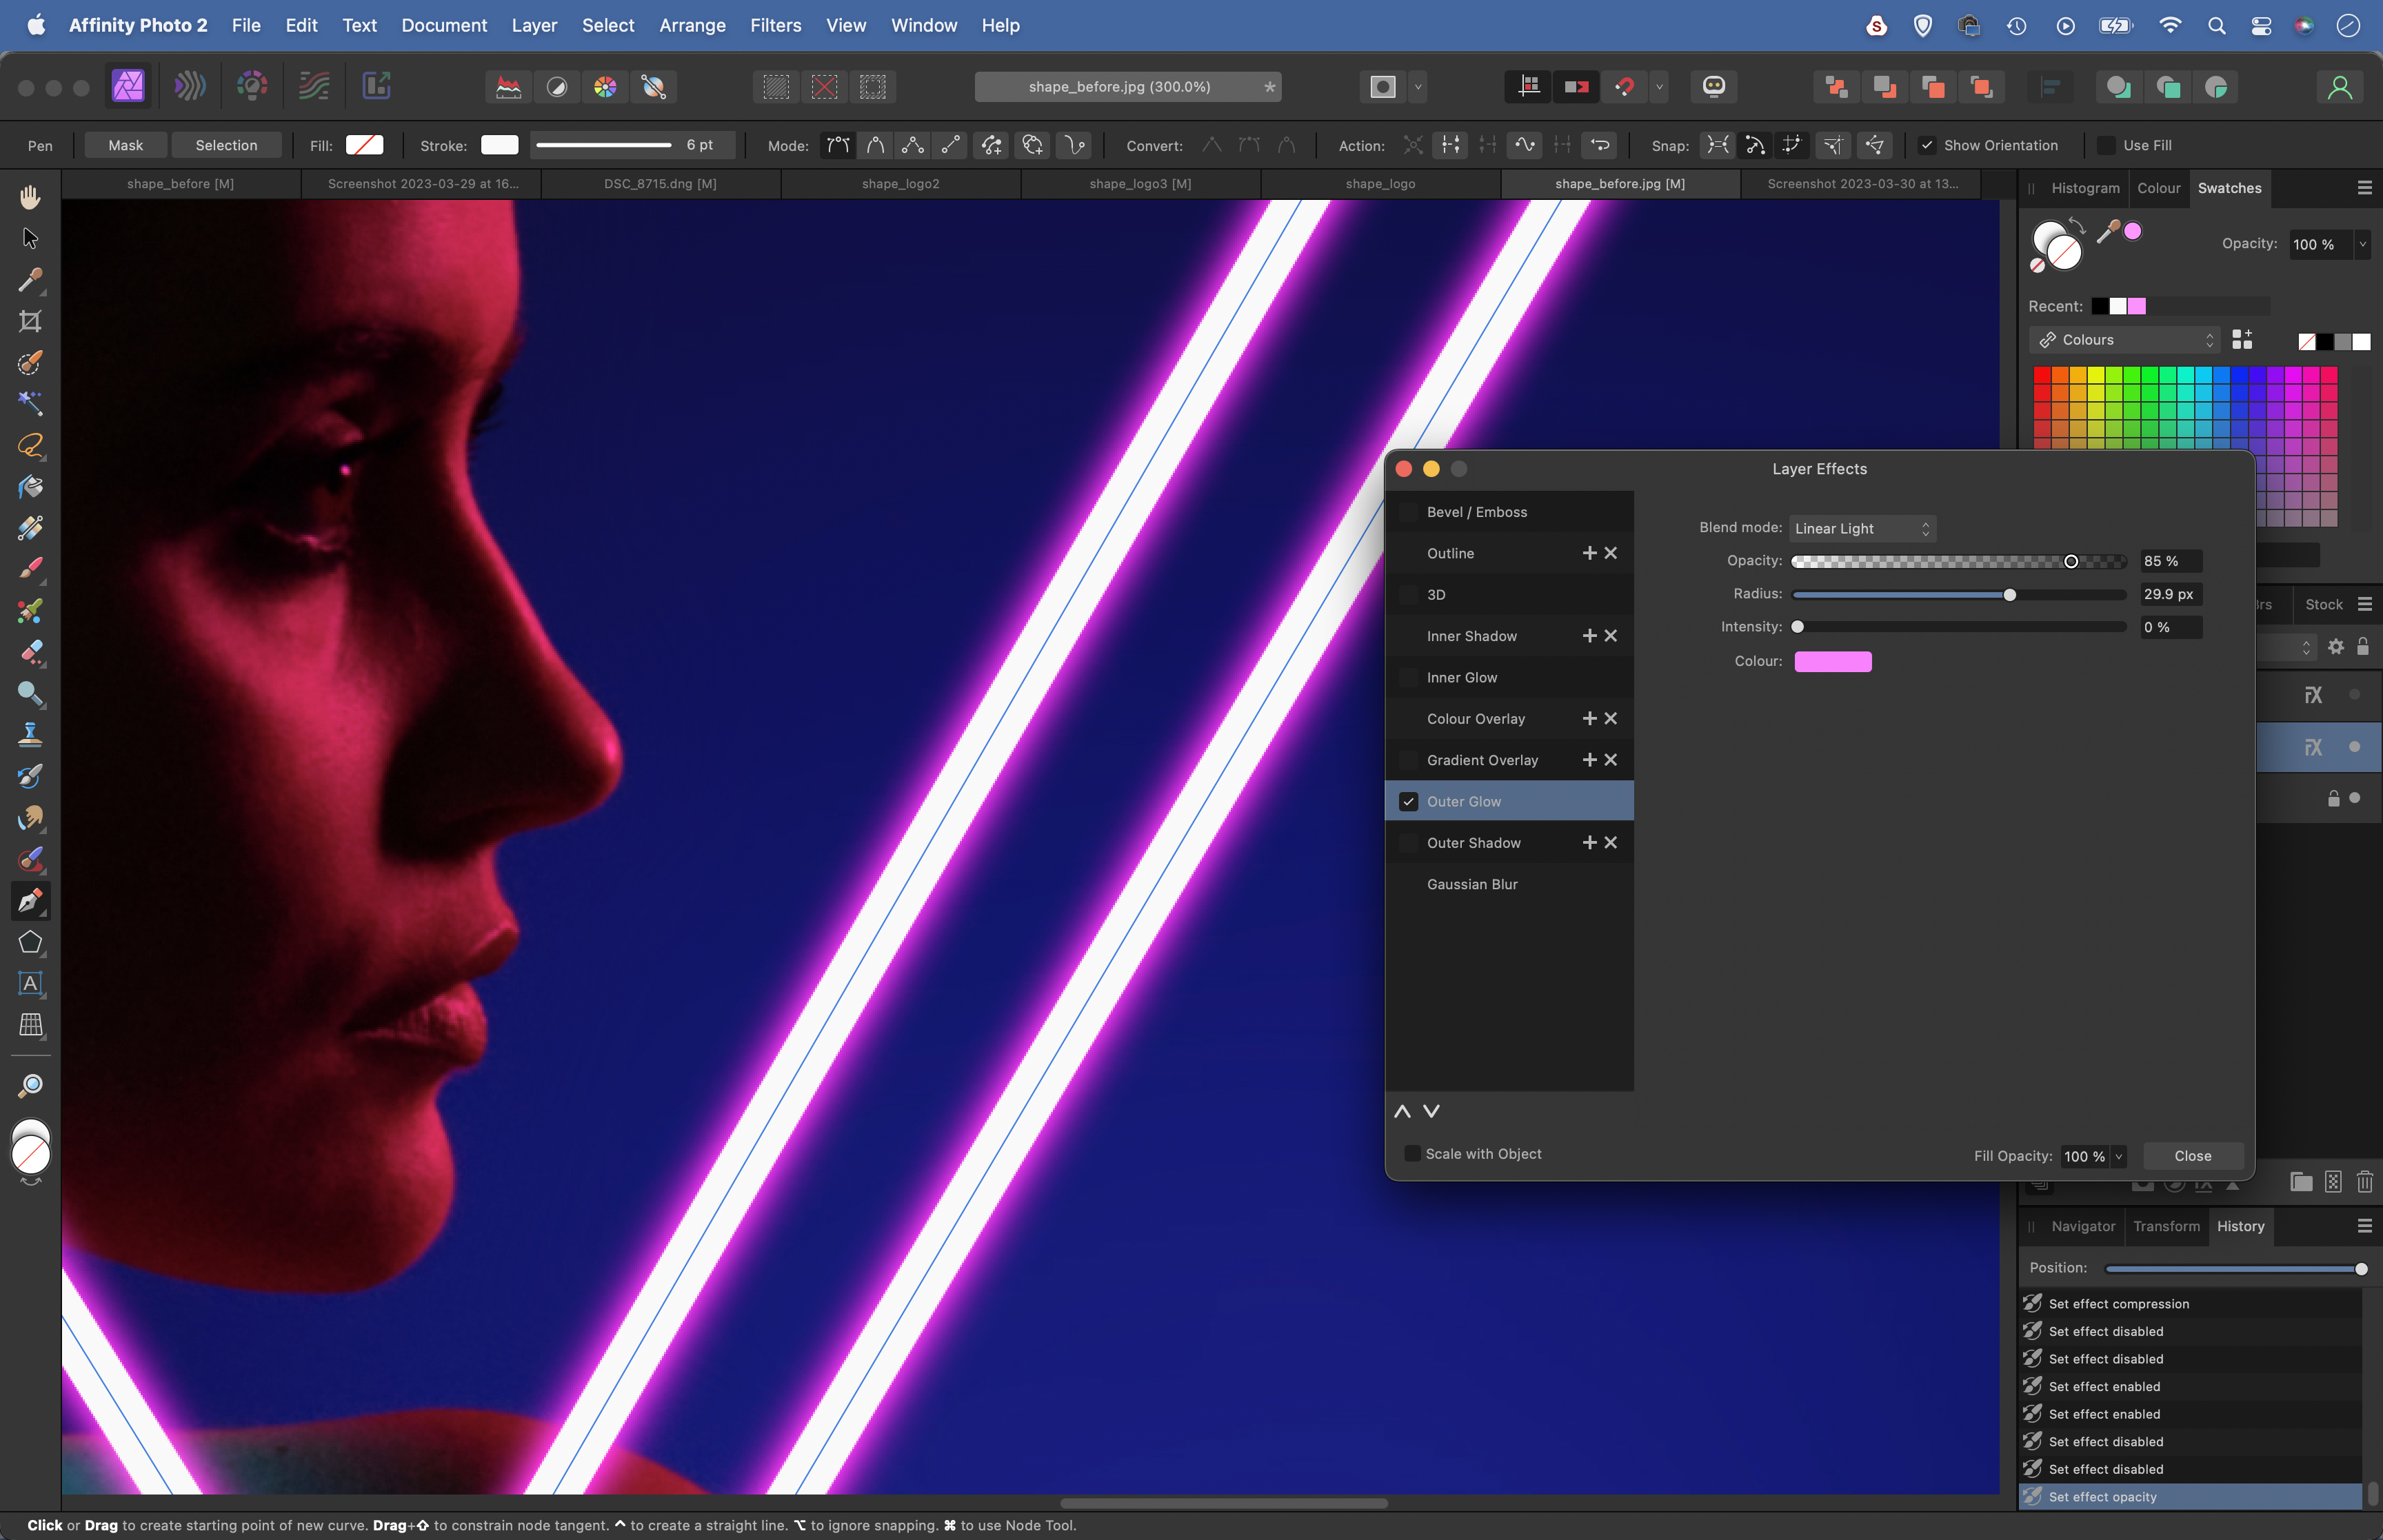
Grab the Move tool and use the bounding box to resize the shape to fit the portrait. You might want to adjust the stroke size. Click the FX icon in the Layers Panel. Check Outer Glow and set Blend Mode: Linear LIght, Opacity 85%. Set Intensity 0, then increase Radius.
4. Add more layer effects
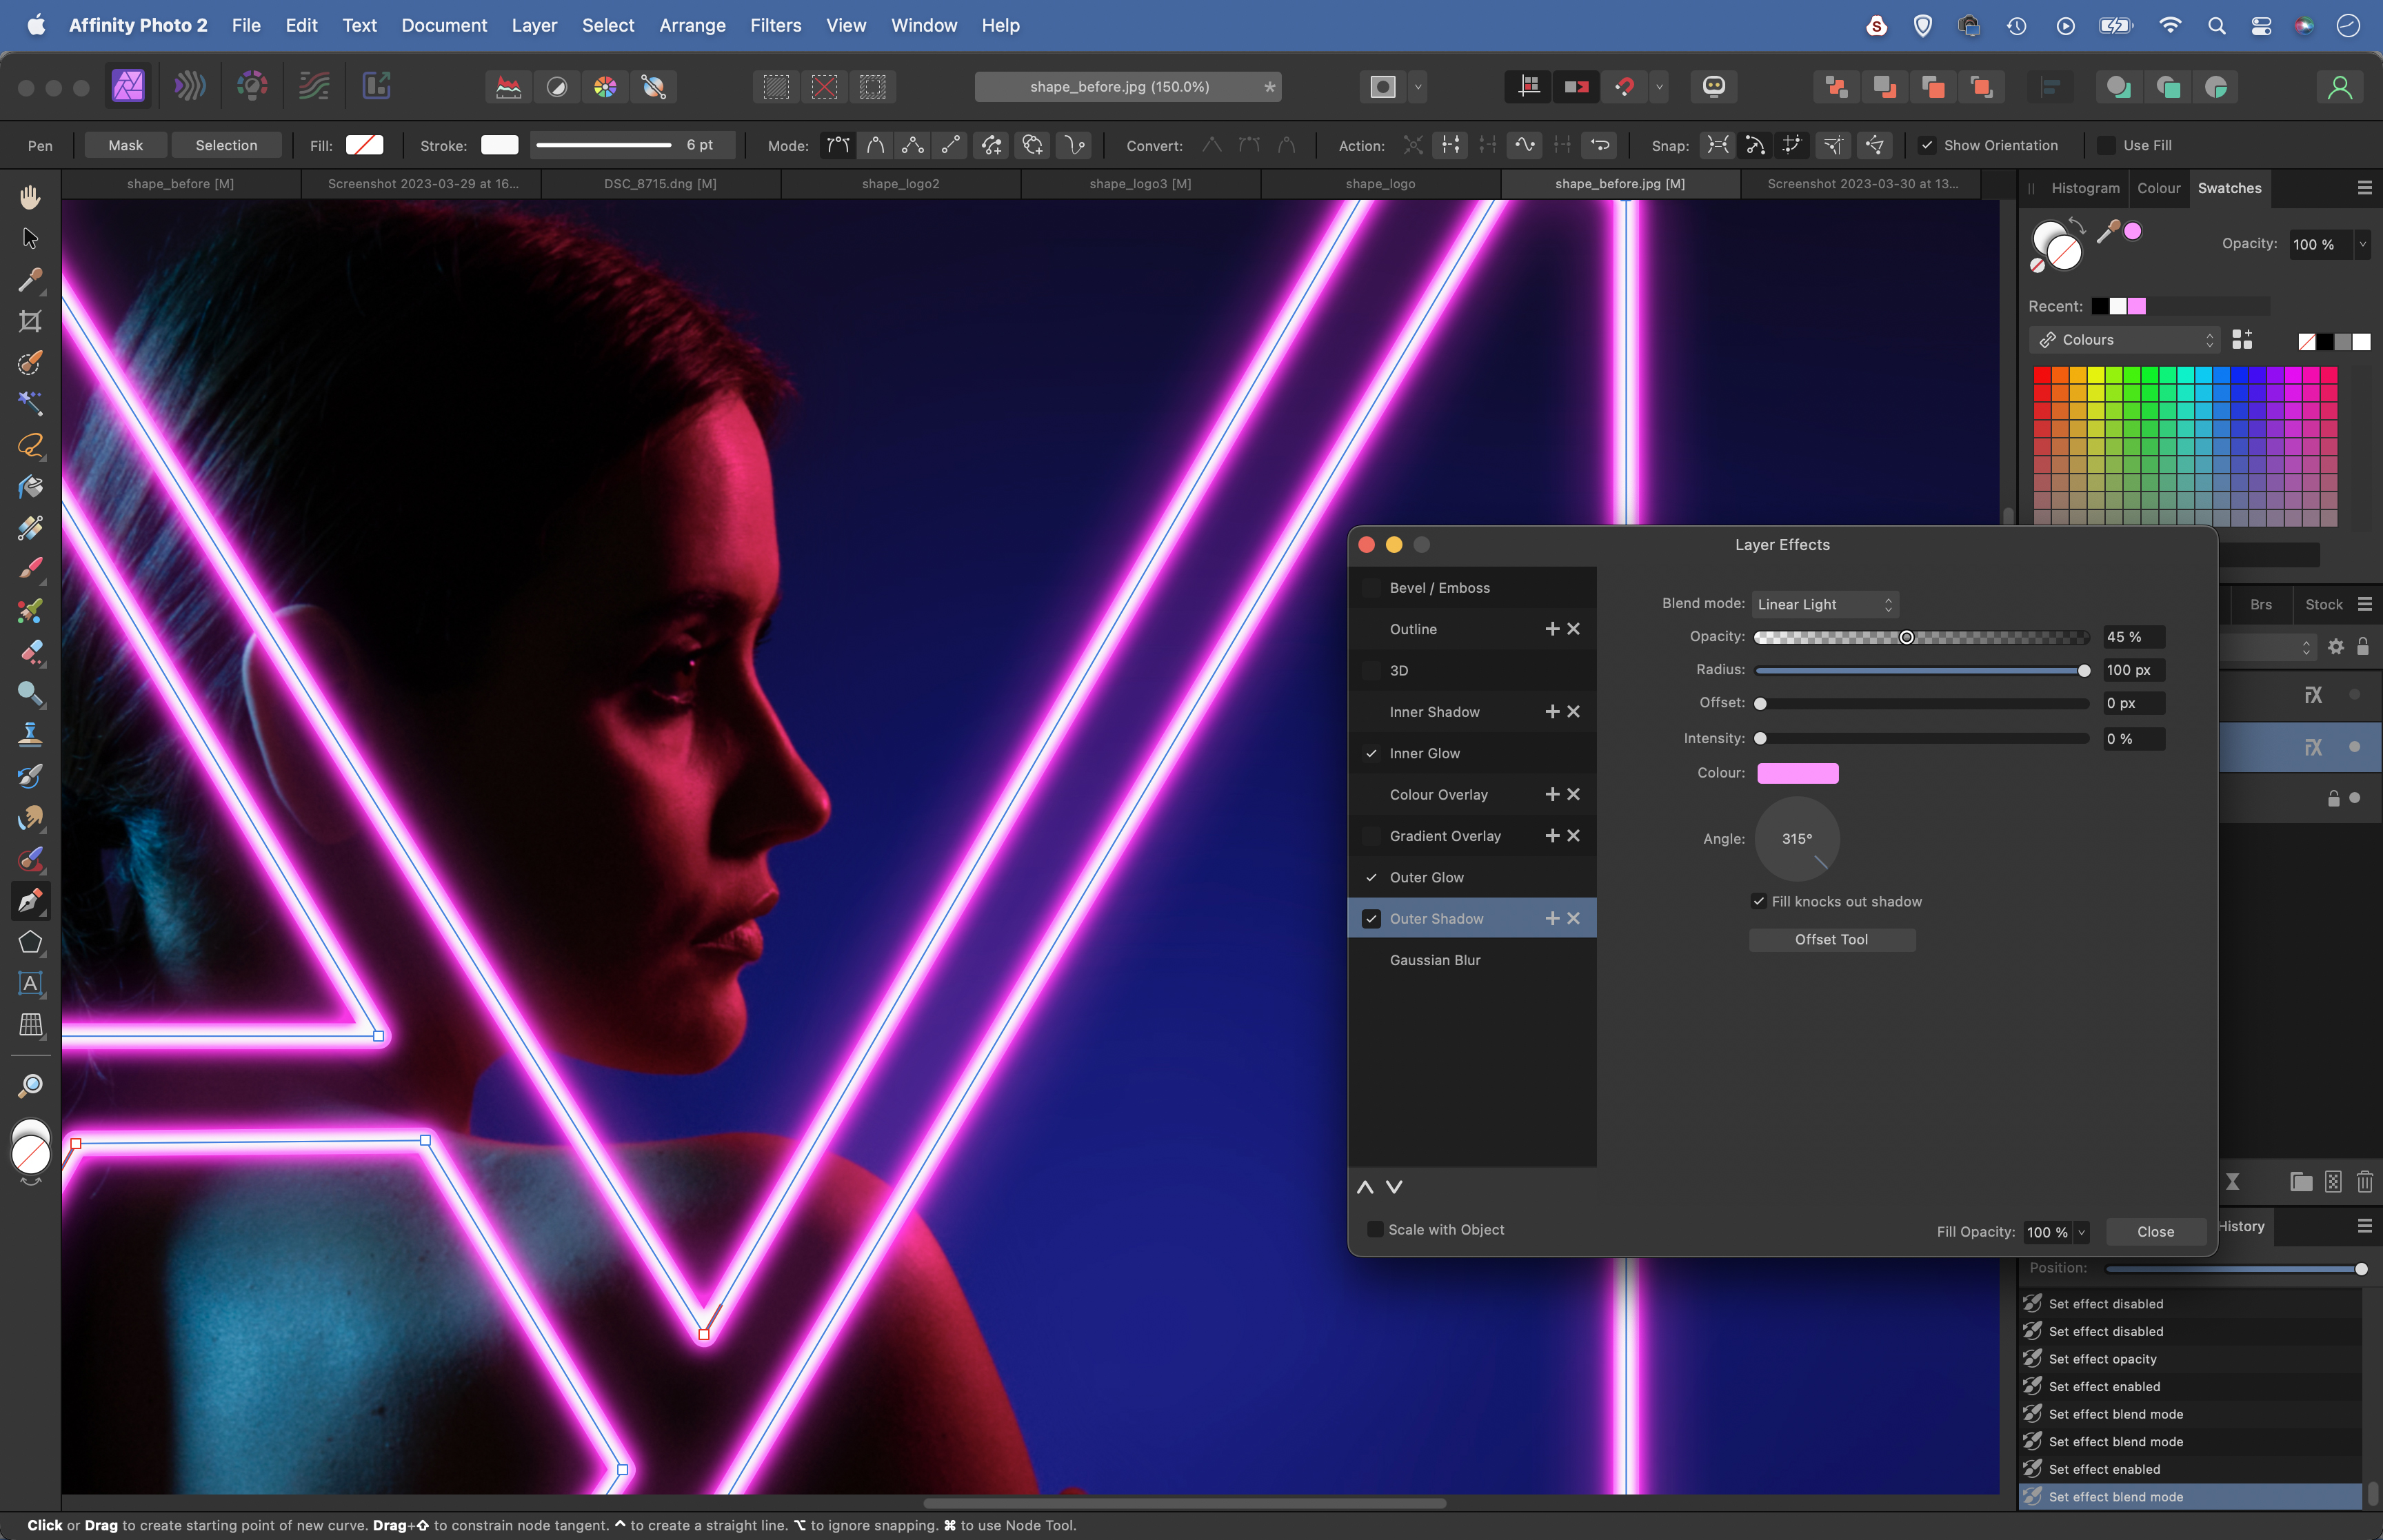
Check Inner Glow and choose a pink color. Set Blend Mode: Normal, Opacity 100% then adjust Radius and Intensity to give the lines a colored edge. Next check Outer Shadow. Set Blend Mode: Linear Light, Opacity 45%, Offset 0, Intensity 0, then increase Radius.
5. Mask the shape
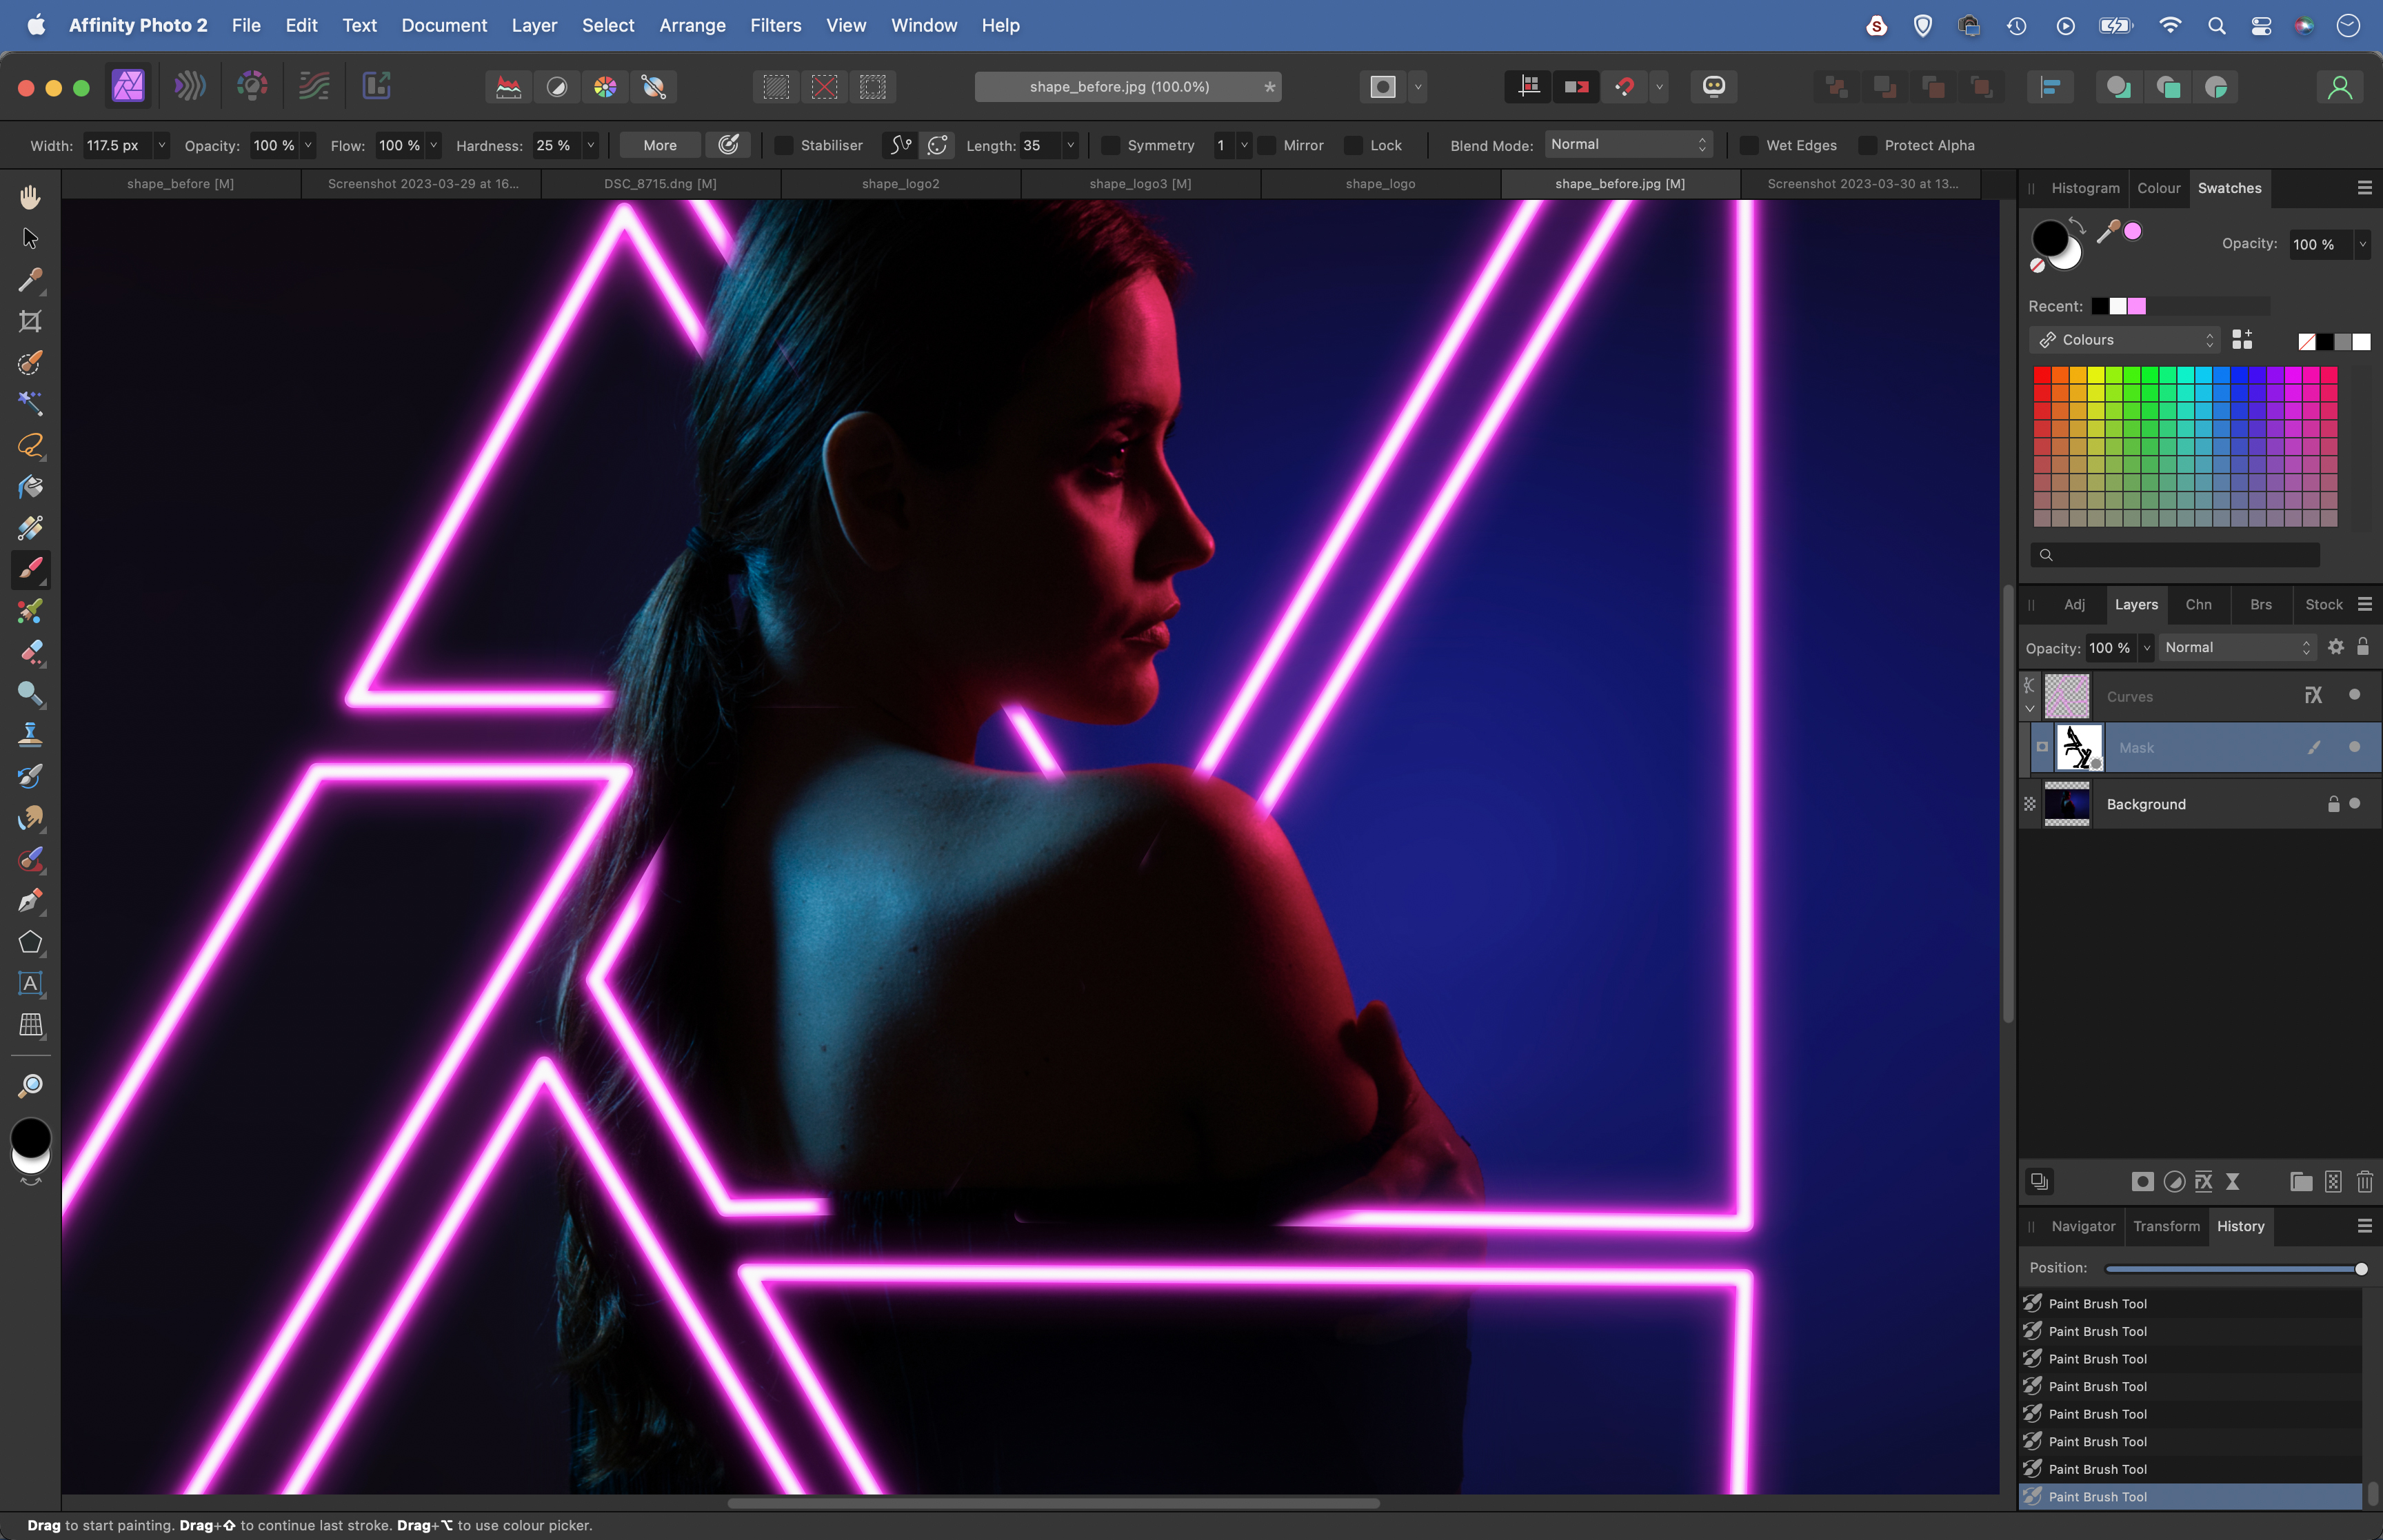
Click the Mask icon in the Layers Panel to add a mask to the shape layer. Grab the brush tool and set color to black paint to hide parts of the shape so it looks as if it’s going behind the subject. You can clone out parts to make it look as if the shapes are in front.
6. Match the colors
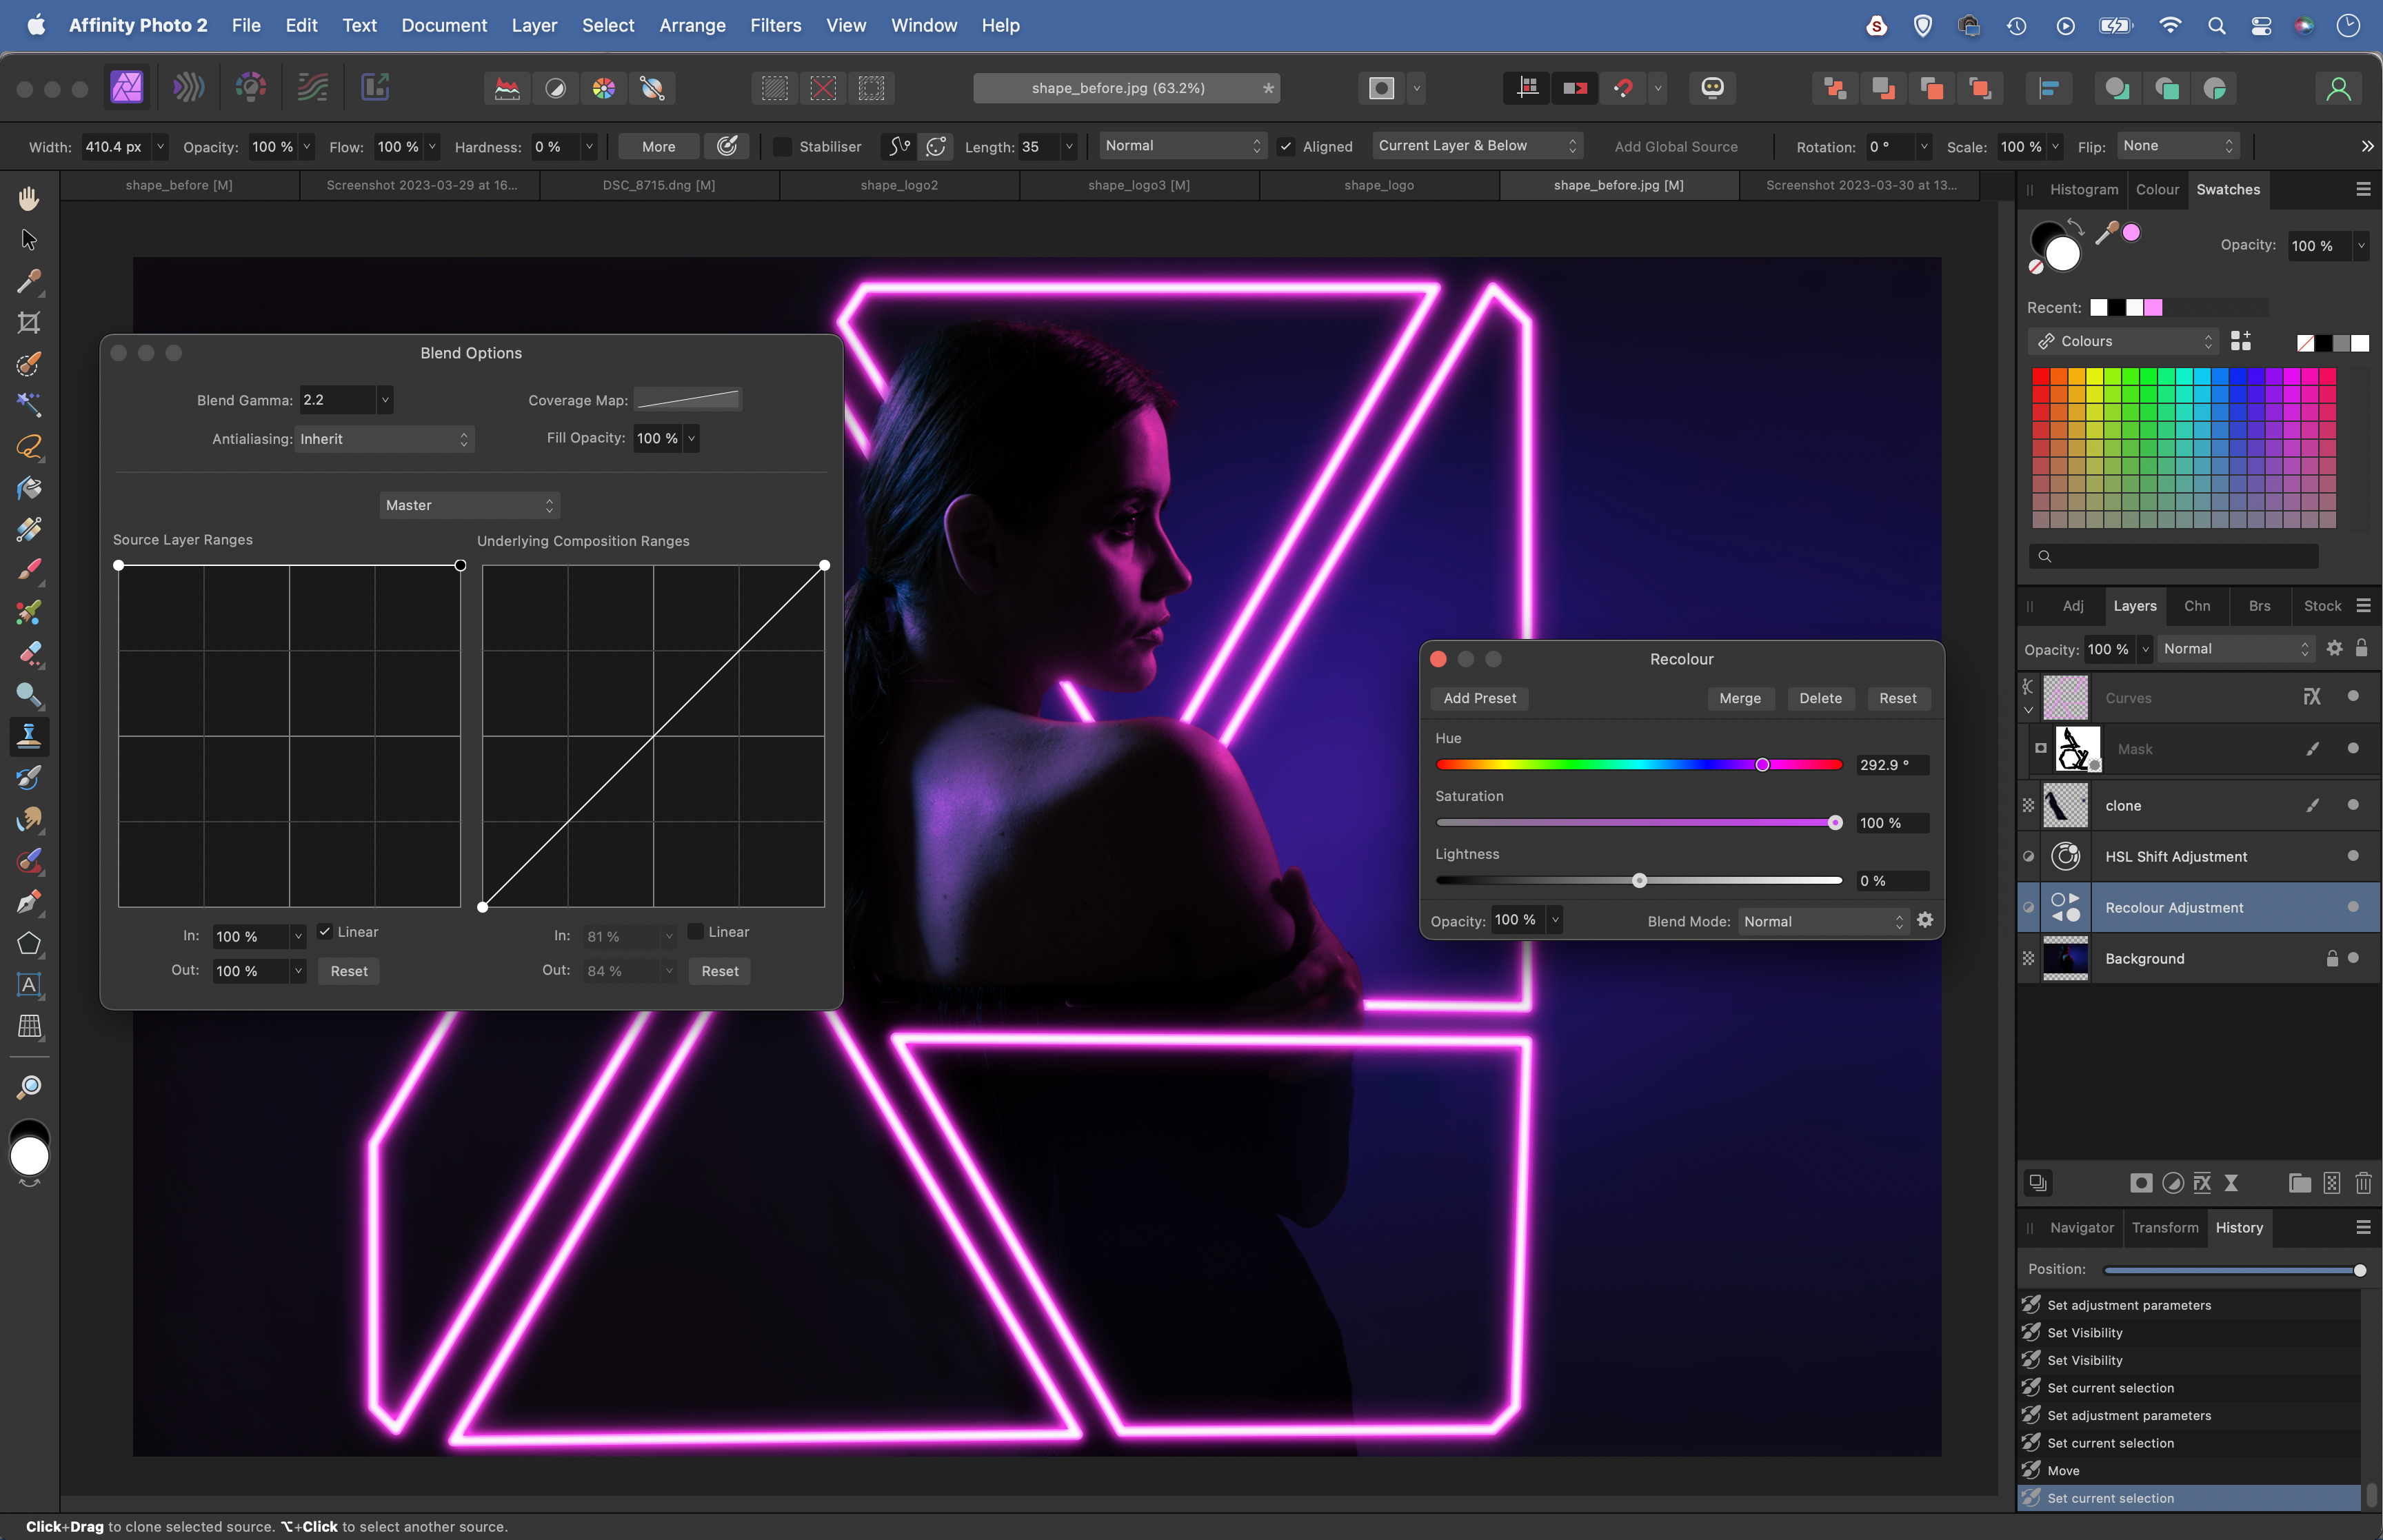
Highlight the bottom layer then click the Adjustment icon and choose Recolour. Shift the Hue to a pink tone. Click the cog icon for Blend options and drag the left point on the right side graph to color the highlights. Add a HSL adjustment, shift reds to a pinker hue.
If you enjoyed this tutorial but want a bit more power from your laptop, why not look at the best photo-editing laptops? And do check out our other Affinity Photo tutorials