Finally on our test bench is a motherboard that doesn’t from one of the four major board partners. Specifically, we’re looking at the Biostar Z790 Valkyrie. This flagship-class SKU offers users the full complement of features from the Z790 platform, including PCIe 5.0 slots, M.2 sockets, and support for Intel’s 12th and 13th Gen processors. Currently found online for over $600, it comes with last-gen flagship-class audio, plenty of storage options and USB ports, and robust power delivery to support the high-end Intel processors. However, it is missing integrated Wi-Fi. Its looks are also basic for the price, but you won’t need to hide it in your chassis.
Biostar’s product stack has just two motherboards for Z790, the Valkyrie we’re reviewing here and the much lower-priced Z790A-Silver. You won’t find any Micro ATX or Mini-ITX boards or other SKUs here. Biostar’s options are simple and straightforward, but not also limited compared to the competition.
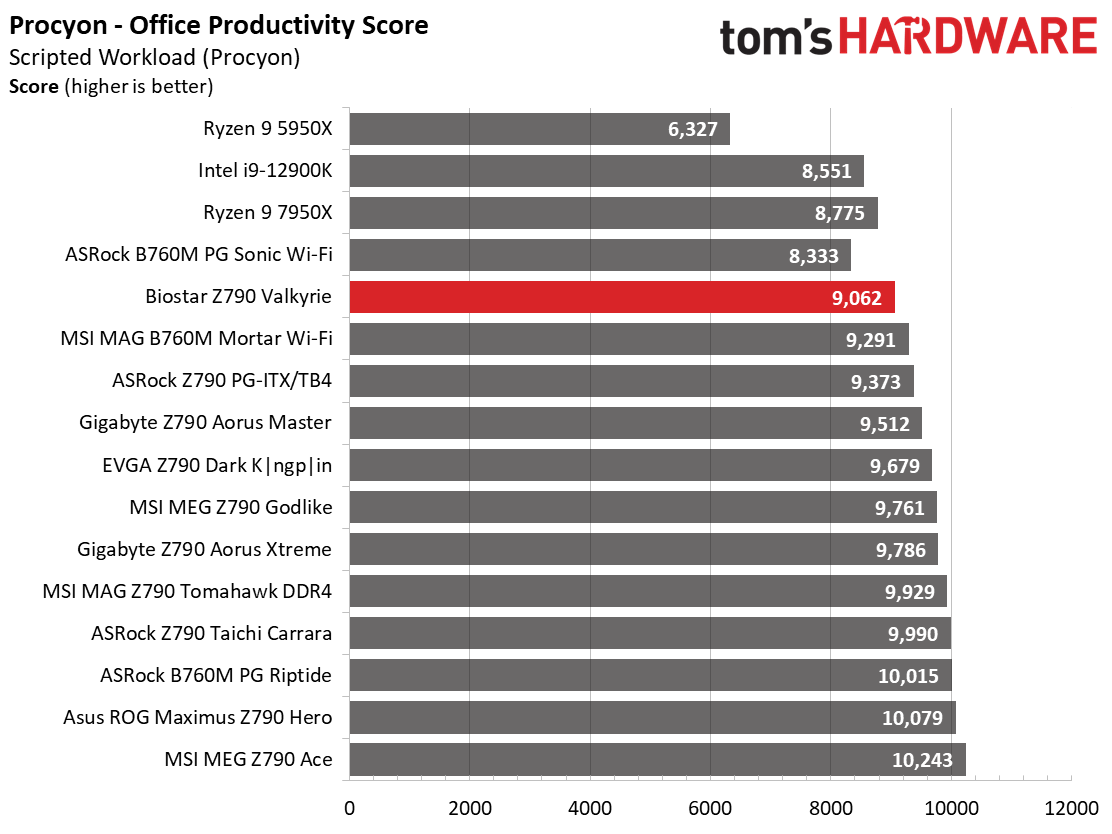
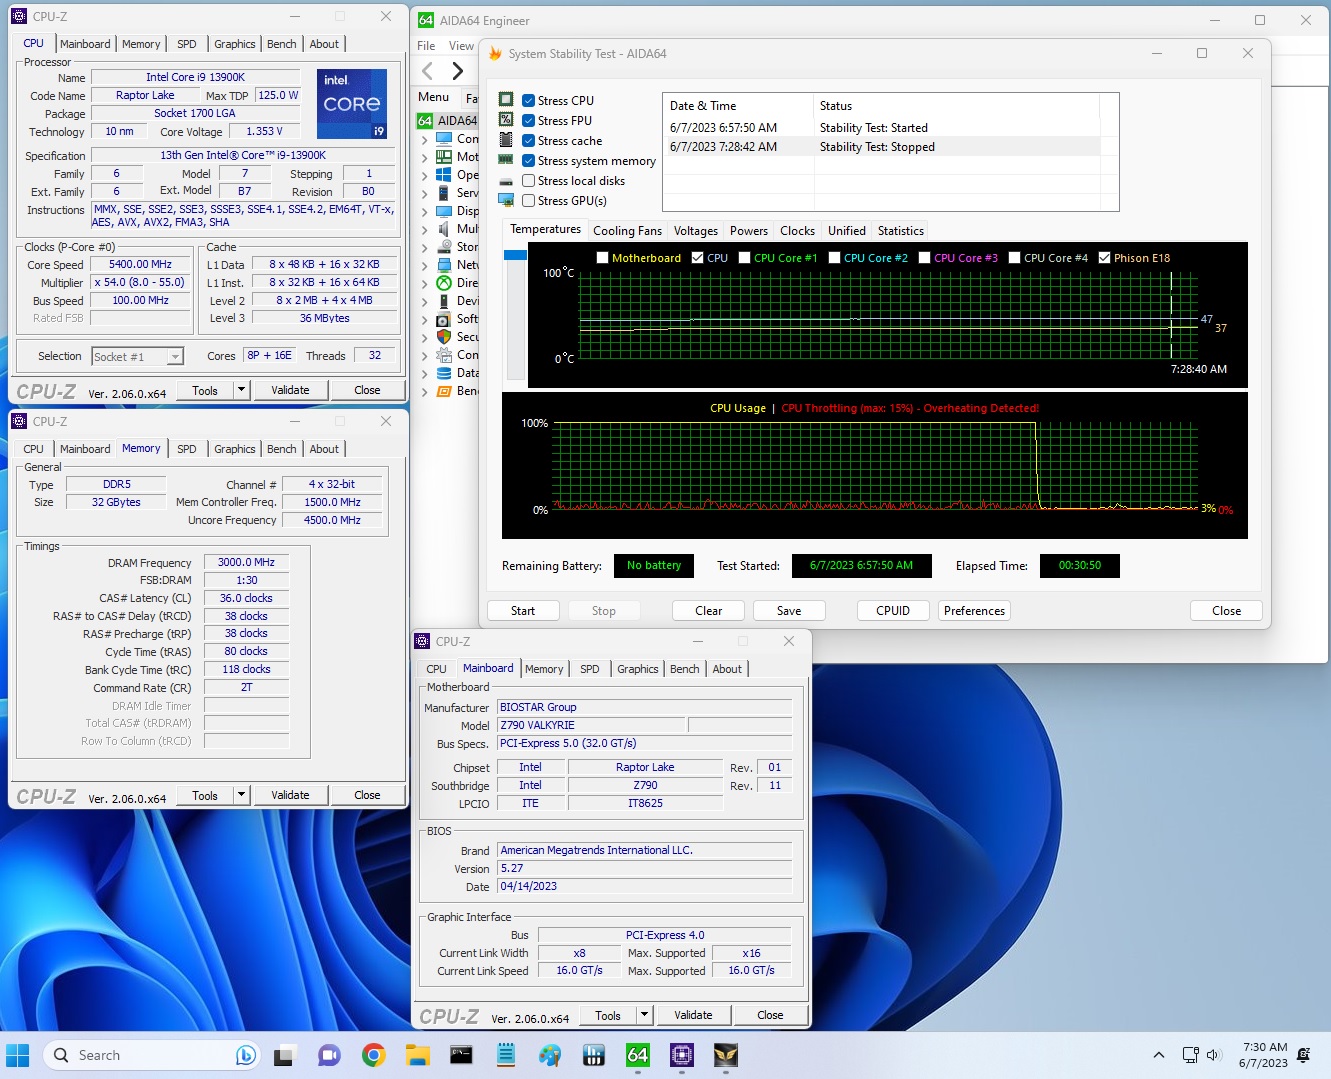
Regarding performance, the Z790 was below average with our Intel i9-13900K. Like most other Z790 boards, the Valkyrie lets the processor run free within Intel specifications, but gets hindered by thermal throttling. We saw above-average results in Handbrake, but surprisingly lower results in the Procyon Office tests. For those concerned about gaming, performance was average all around there. If you need more performance, there are options within the BIOS to run with raised limits. Just be sure you have the cooling to support it (and perhaps run a negative offset for Vcore).
This board doesn’t earn a spot on our best motherboards list, but it does present users with another option in the crowded Z790 market. Before we get into our testing and board specifics, though, we’ll start by listing the specifications from Biostar’s website.
Specifications: Biostar Z790 Valkyrie
Inside the Box of the Biostar Z790 Valkyrie
Inside the box, along with the motherboard, is a simple accessory stack designed to get you started without an additional trip to the store. Below is a complete list of the included accessories:
- (4) SATA cables
- Driver disk
- User Manual
- Smart connector
Design of the Z790 Valkyrie
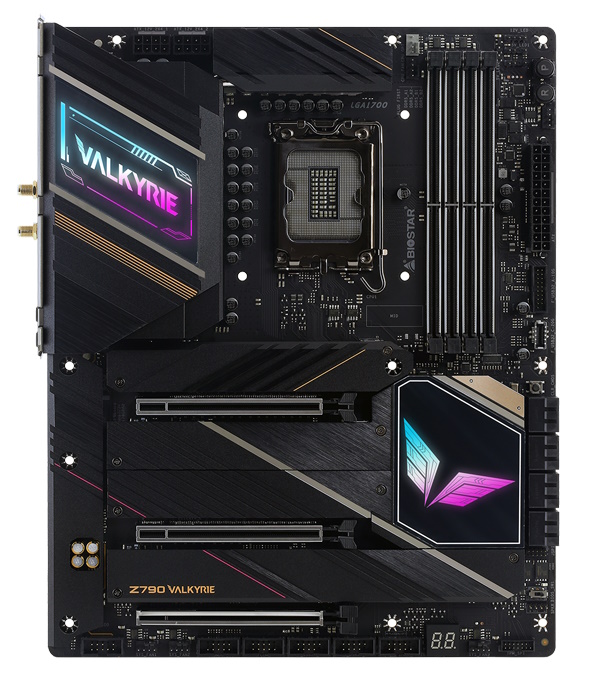

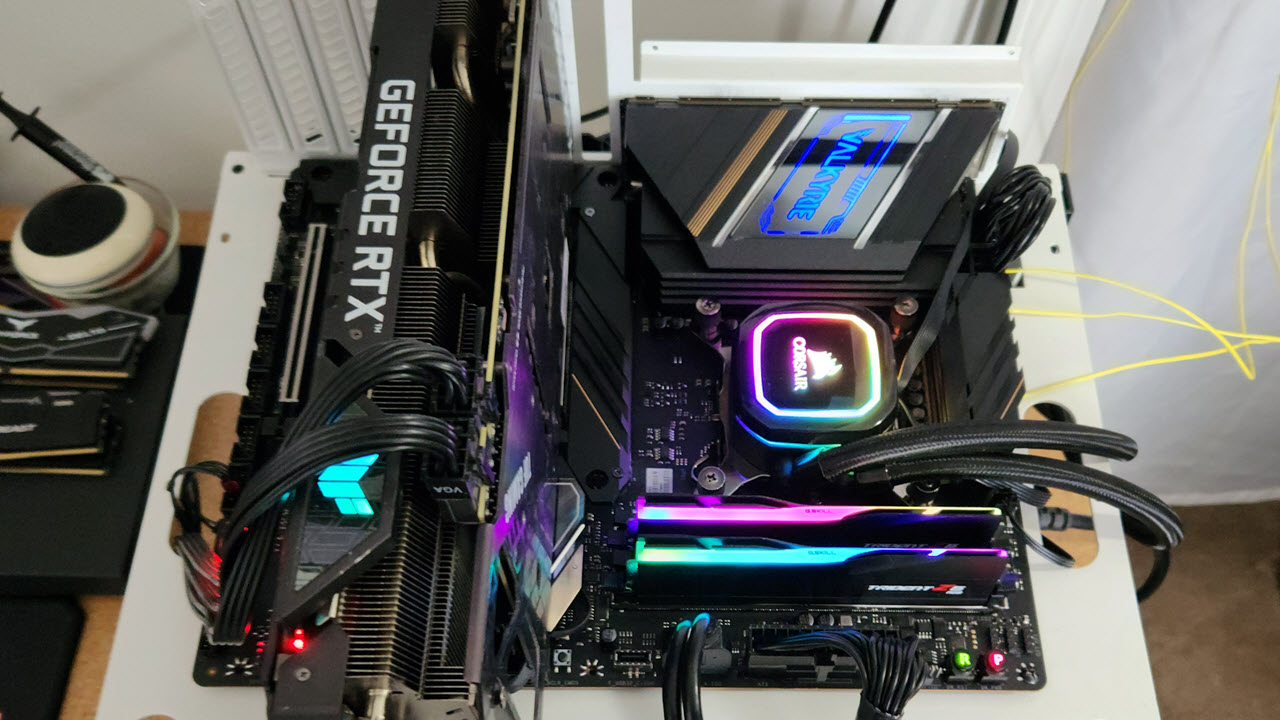
The Z790 Valkyrie sits on a matte-black 8-layer PCB, sporting black heatsinks and shrouds with gold accents, plus a brushed aluminum finish covering the unsightly parts of the board. The left VRM bank and chipset heatsinks include the Valkyrie branding, backlit with RGB LEDs. The board doesn’t look bad, but its similarly priced competition does look better and more premium.
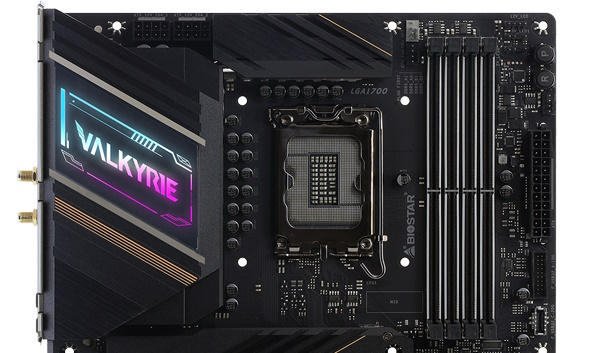
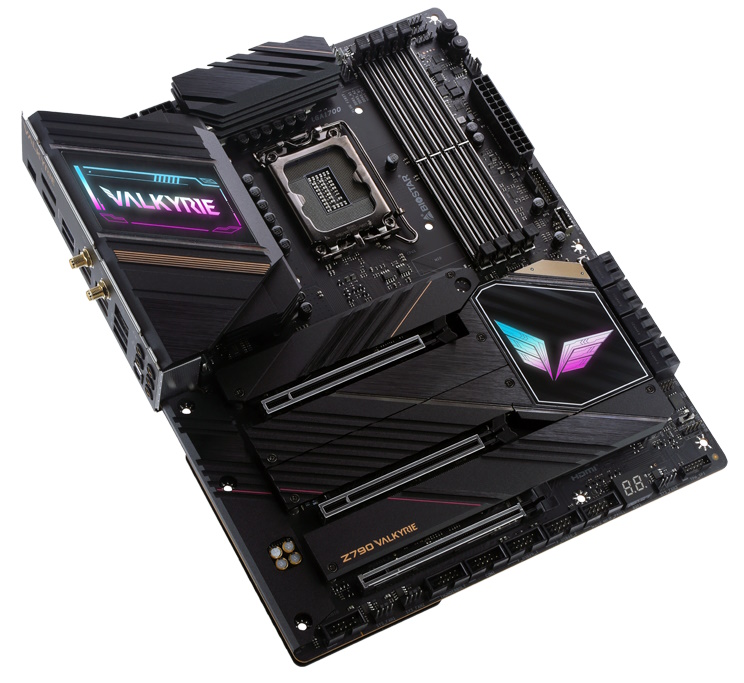
Focusing on the top half of the board, we get a better look at the large heatpipe-connected VRM heatsinks and the Valkyrie branding on the IO cover. Like the AMD-based X670E Valkyrie, the VRM heatsinks are loaded with wide-mitered cutouts to increase surface area and performance, and they do a more-than-adequate job keeping the MOSFETs running well within specification. Above the VRM heatsinks are two 8-pin EPS connectors (one required) to power the Intel processor.
Moving past the socket, we hit the four reinforced DDR5 DRAM slots, with locking mechanisms on both sides. Biostar lists support up to DDR5-7200, which is low compared to similarly priced options. We didn’t have any trouble with our DDR5-5600 or DD5-6000 kits, but the fastest we had (DDR5-7200) didn’t want to play nice here. However, the sticks are not on the QVL list, and are at the very top of listed support, so I can’t say we expected that to work anyway.
Next to the DRAM slots are the first two (of six) 4-pin fan headers. You can adjust the PWM and DC-controlled devices in the BIOS or through the Aurora software. Biostar documentation doesn’t appear to list the output of these headers on the specs page or in the manual. You can safely assume the headers all have 1A/12W available to them without fear (more would be concerning). Overloading these headers can cause permanent damage to your motherboard.
Past the DRAM slots along the right edge, we find a slew of headers, including all three RGB headers (2x 3-pin ARGB and 1x 4-pin RGB) nicely tucked in this location which helps with cable management. Down the right edge are the power and reset buttons, another 4-pin fan header, and the 24-pin ATX connector to power the board. Below is a 19-pin USB 3.2 Gen 1 (5 Gbps) connector and a front panel USB 3.2 Gen 2x2 (20 Gbps) Type-C connector.
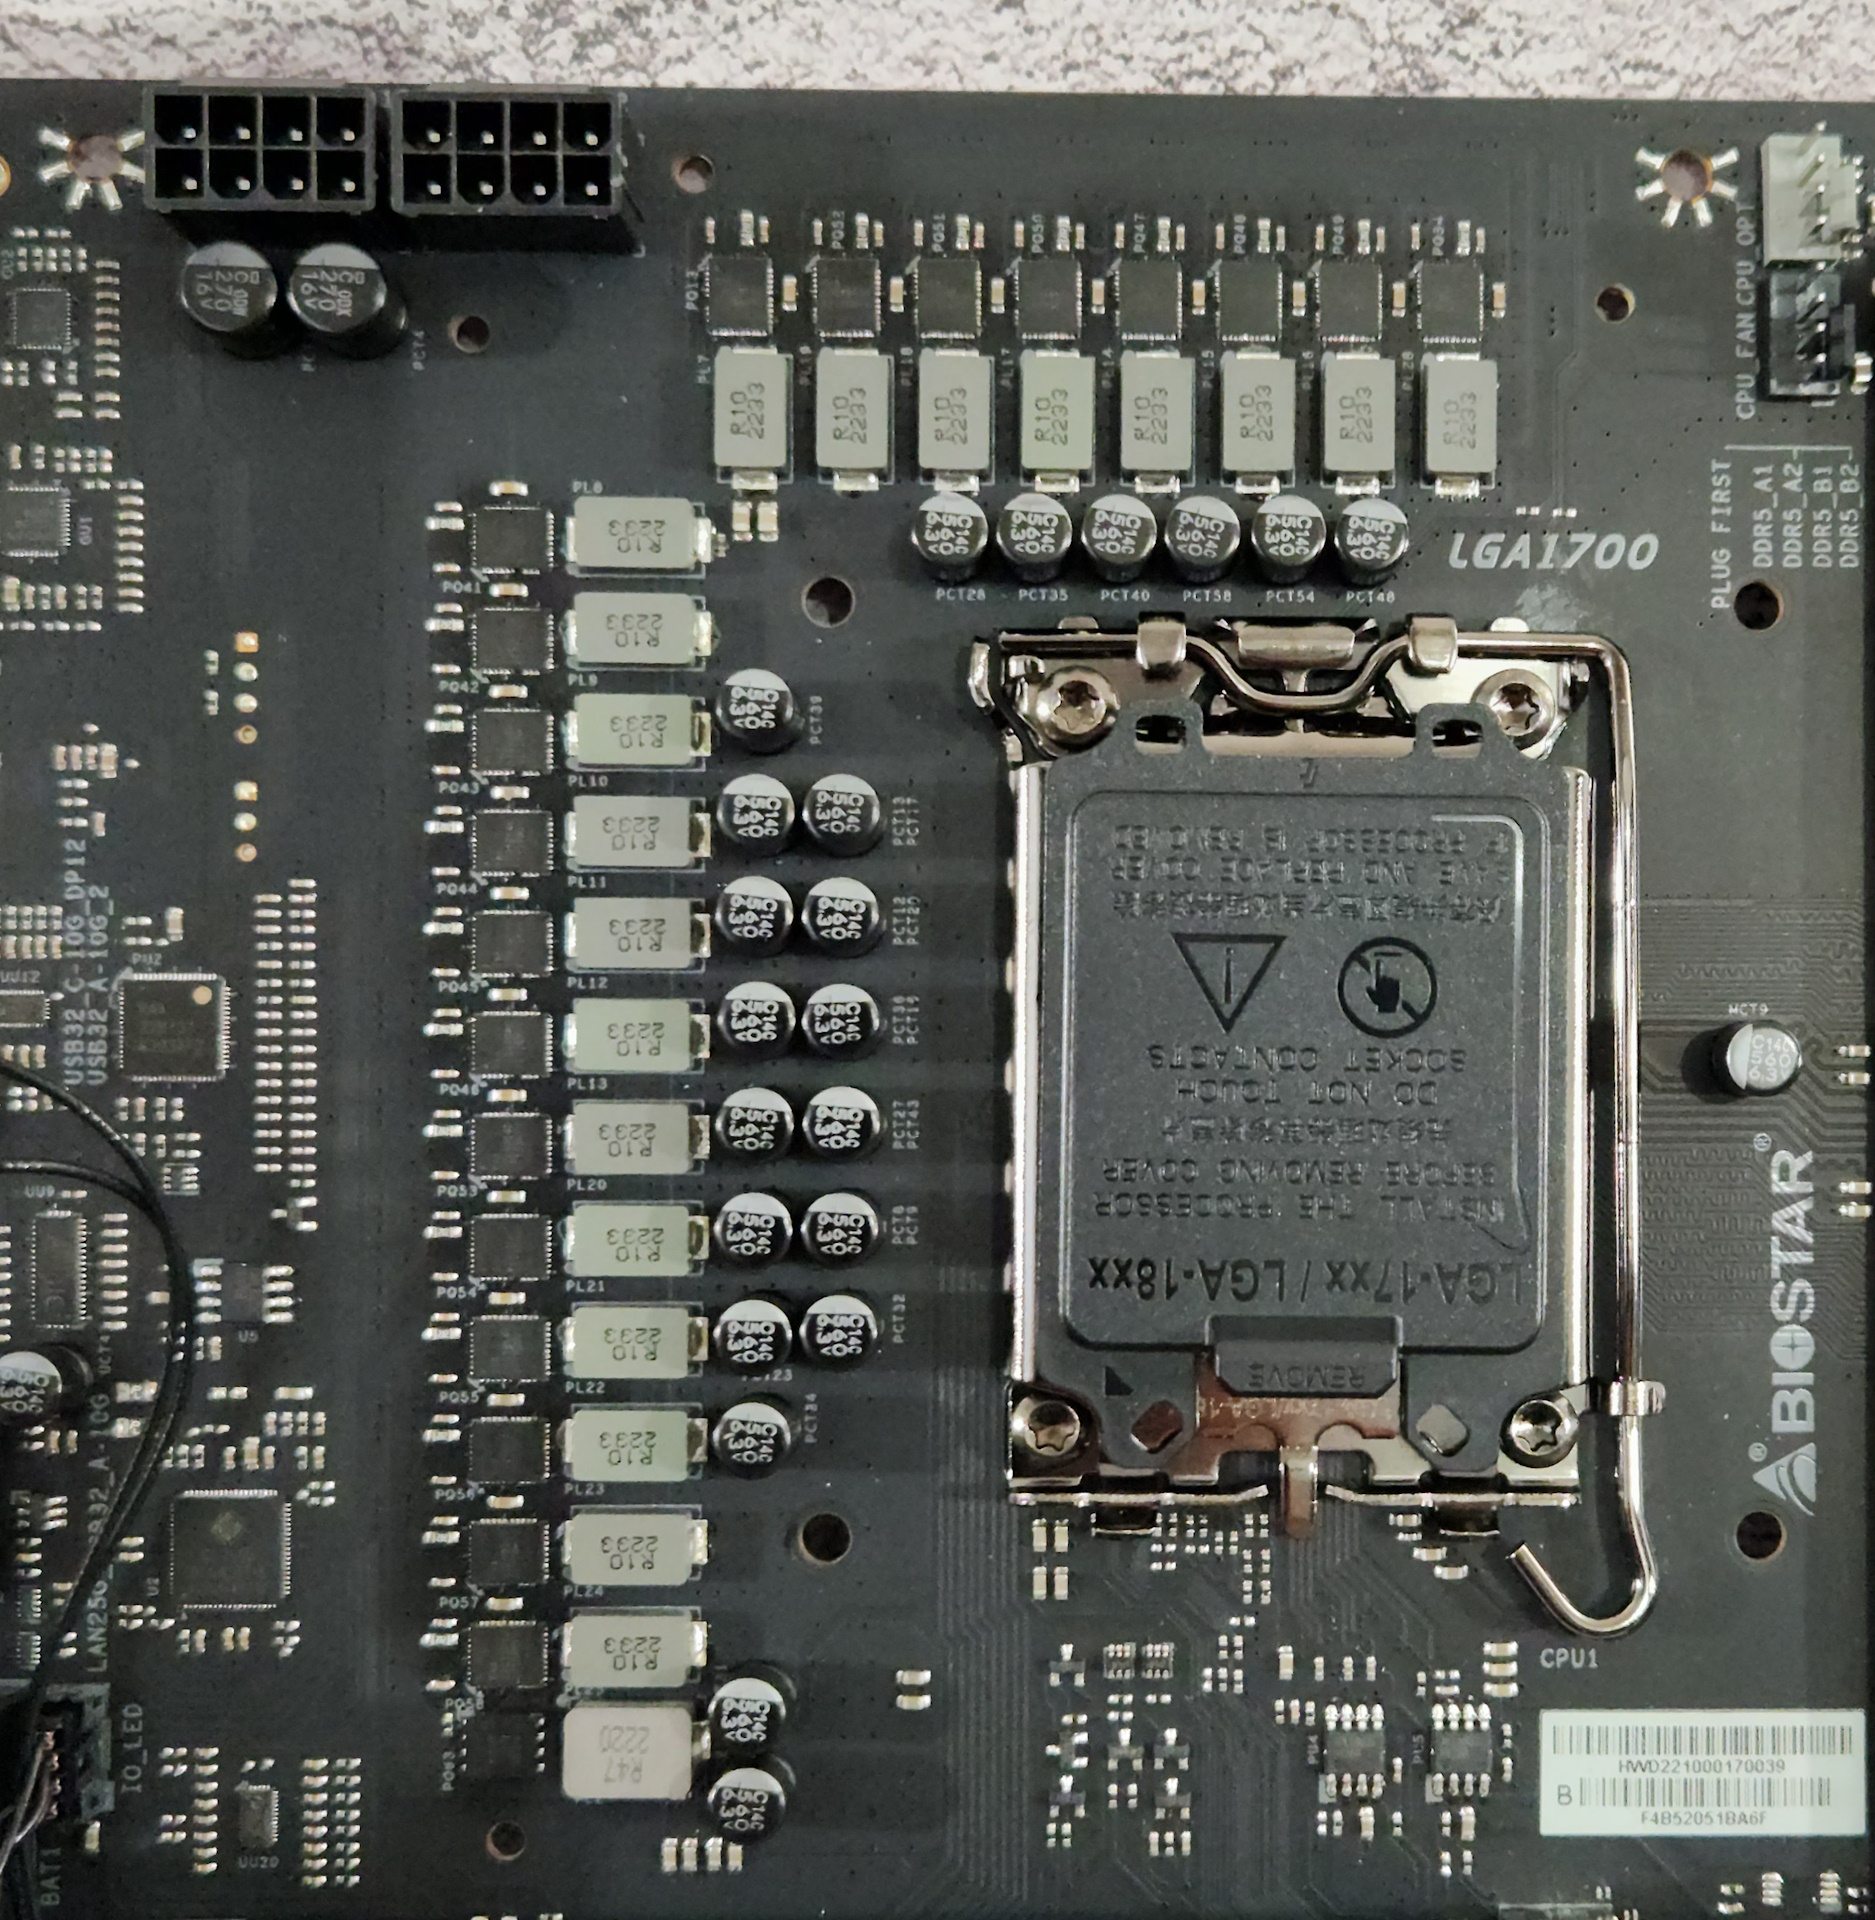
The VRMs on the Z790 Valkyrie are some of the more capable we’ll see on the Z790 platform. For Vcore, there are a total of 20 phases. Power comes from the 8-pin EPS connector(s) onto the Renesas RAA229131 controller. Power then moves to 20x 105A Renesas RAA22010540 SPS MOSFETs. The mind-blowing 2,100A available for Vcore is one of the highest we’ve seen and more than enough to handle the flagship Intel i9-13900K at stock and while overclocked, even when using sub-ambient cooling methods.
On the bottom of the board, starting with the left side, we find a mostly hidden audio area. The only thing visible is four yellow capacitors dedicated to audio use. Hiding under the shroud is the last-generation flagship Realtek ALC1220 codec. While most users are satisfied with this codec, I want to see the latest and greatest on a flagship-class motherboard.
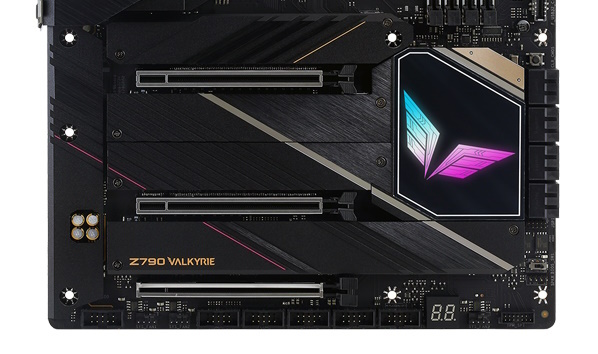
In the middle of the board are three reinforced full-length PCIe slots, poking out between five M.2 sockets, all of which hidden under heatsinks. Starting with the PCIe slots, the top two slots connect through the CPU and run at PCIe 5.0 speeds. The top slot supports up to x16 while the second slot supports a maximum of PCIe 5.0 8x speeds. With both in use, the top slot breaks down to x8 speeds to share the bandwidth with the second slot. The bottom full-length socket connects through the chipset and supports PCIe 4.0 x4 bandwidth. There are plenty of slots and sockets to go around, but there is some lane sharing (more on this below) you need to consider.
Mixed in among slots are five total M.2 sockets. There’s one PCIe 5.0 x4 (128 Gbps) socket and four PCIe 4.0 x4 (64 Gbps) sockets, with one of those able to run SATA- and NVMe-based modules. There’s also a Key-E socket available for CNVi-based Wi-Fi cards. Byt don’t let the antenna connections on the back fool you, there’s no Wi-Fi included in the box.
Again, some lane sharing is inevitable with these sockets, slots, and SATA ports. If you’re using a PCIe-based module on M2M_CPU1 (top socket), the second PCIe slot is disabled, and the primary slot (top) drops to x8, so there’s enough bandwidth to go around. Additionally, if you’re running a SATA-based SSD in M2M_SB3, you’ll lose one SATA port (SATA8). In short, you can run all five M.2 sockets and all eight SATA ports concurrently if you aren’t running a SATA-based M.2 module.
Next, we spy a CLR CMOS button along the right edge to reset the active BIOS. Next to it are eight SATA ports, the BIOS selector switch, and another 4-pin fan header. Across the bottom of the are several exposed headers. You’ll find the typical fare here with USB, audio, and fan headers. Below is a complete list from left to right:
- Front panel audio
- (2) 4-pin System Fan headers
- Thunderbolt AIC header
- COM port
- (2) USB 2.0 headers
- Front Panel
- Debug LED
- 4-pin fan header
- TPM header
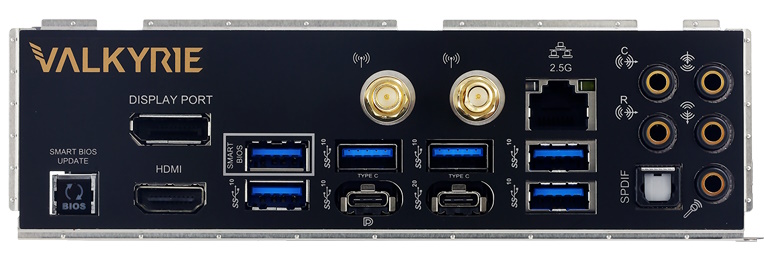
The rear IO on the Z790 Valkyrie comes pre-installed and attached to the motherboard. It sports a black background with white labeling on the ports, which makes things easy to read. There are eight USB ports total: two Type-C (10 and 20 Gbps ports) and six USB 3.2 Gen2 (10 Gbps) Type-A ports. On the left are two video outputs (DisplayPort and HDMI), as well as a Smart BIOS update button. Above the USB ports is the Wi-Fi antenna connections, but note the board does not come with Wi-Fi! You must purchase and install your own in the available Key-E slot. On the right is the five-plug analog plus SPDIF audio stack, and laslyt, the 2.5 GbE port.
MORE: Best Motherboards
MORE: How To Choose A Motherboard
MORE: All Motherboard Content
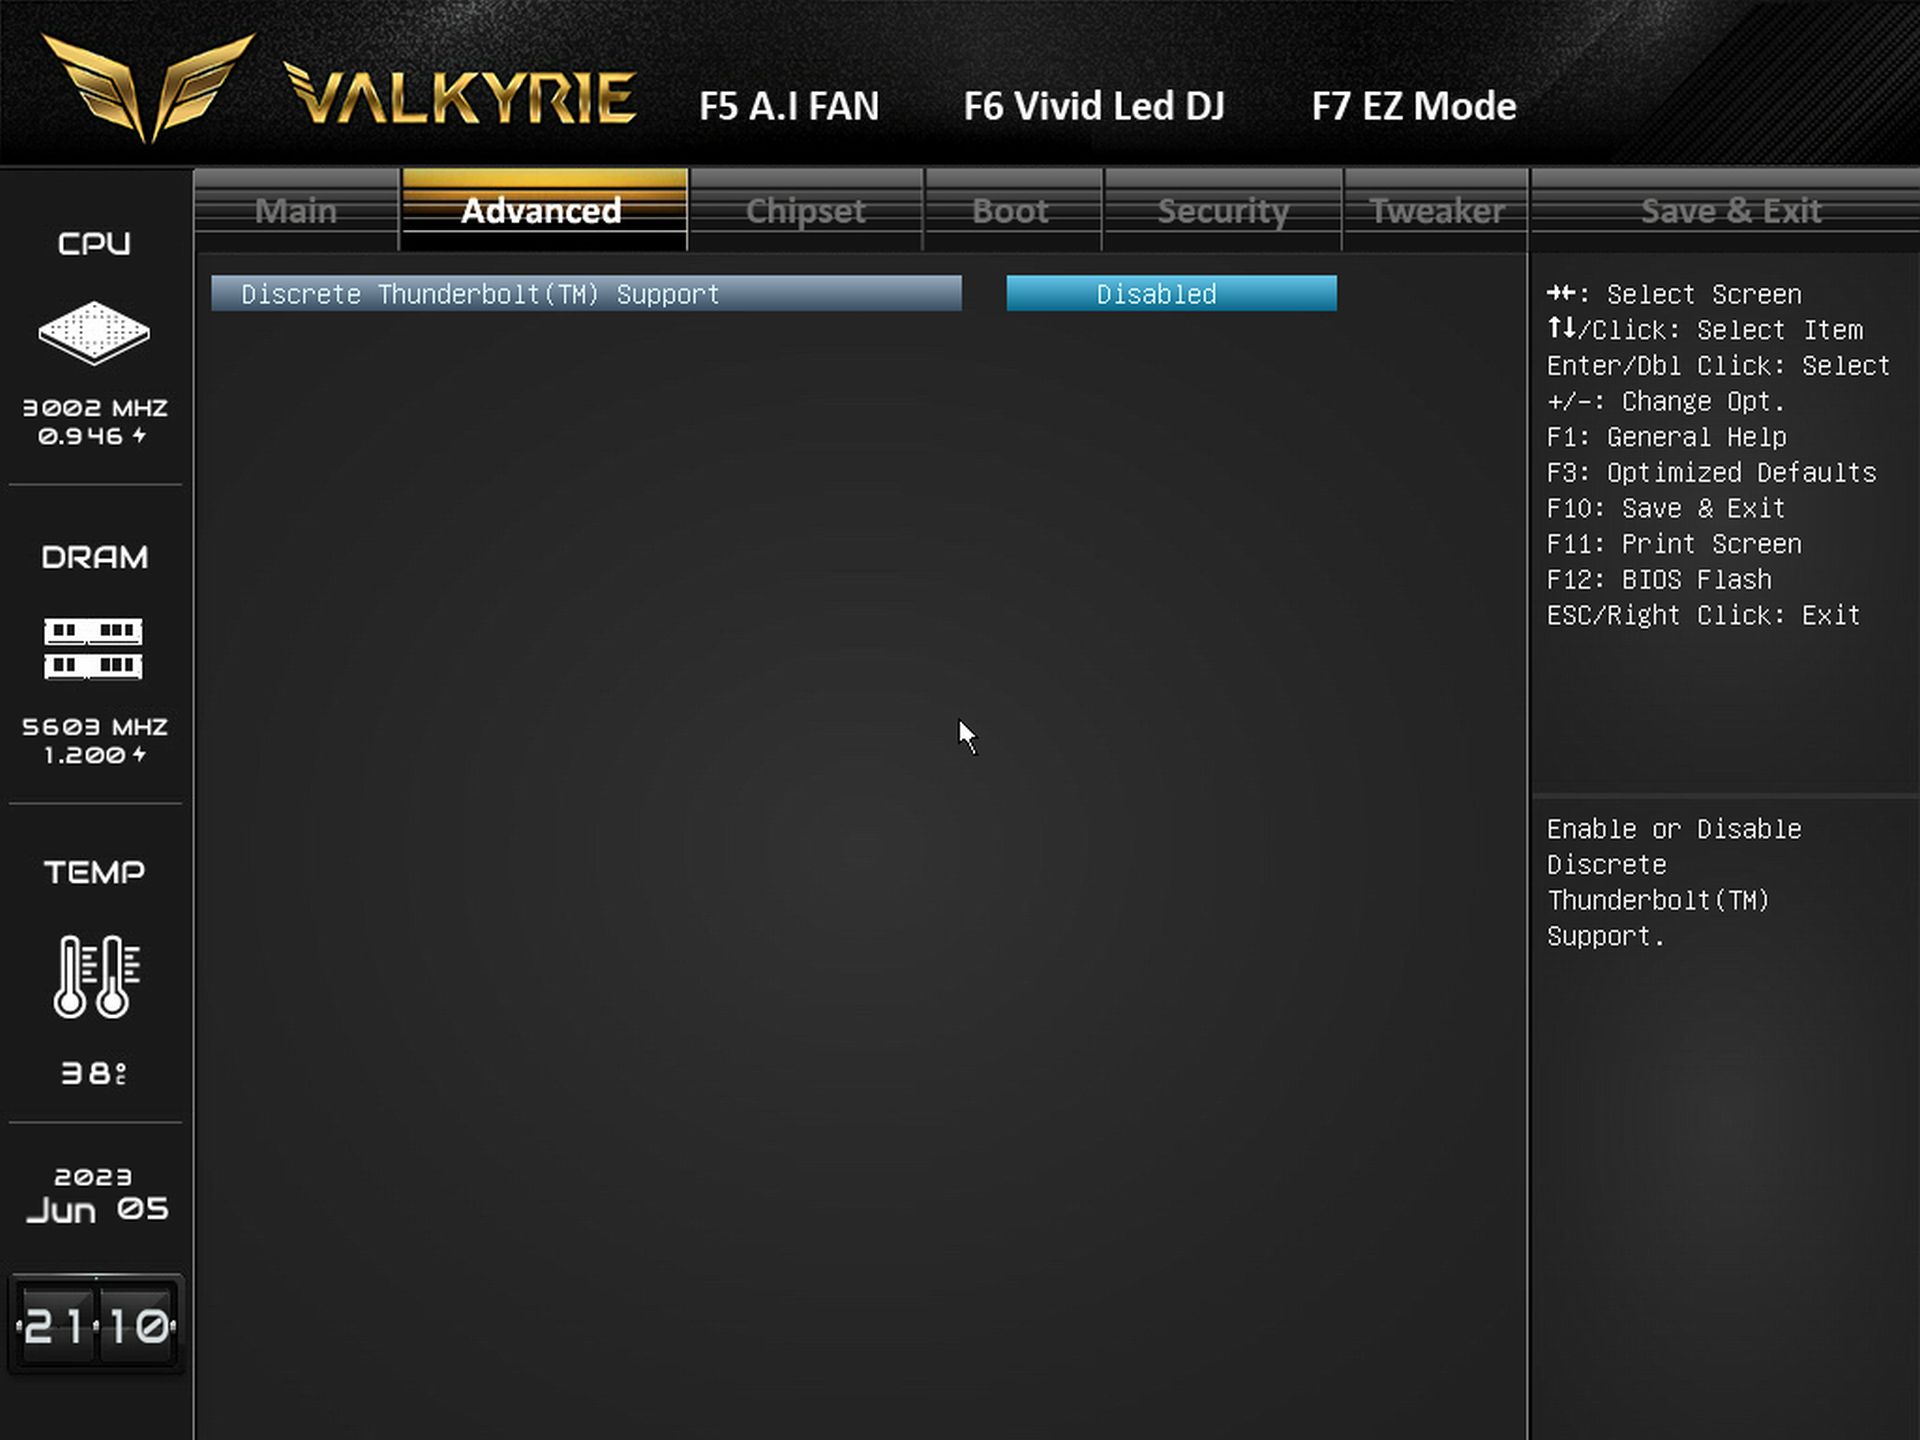
Firmware
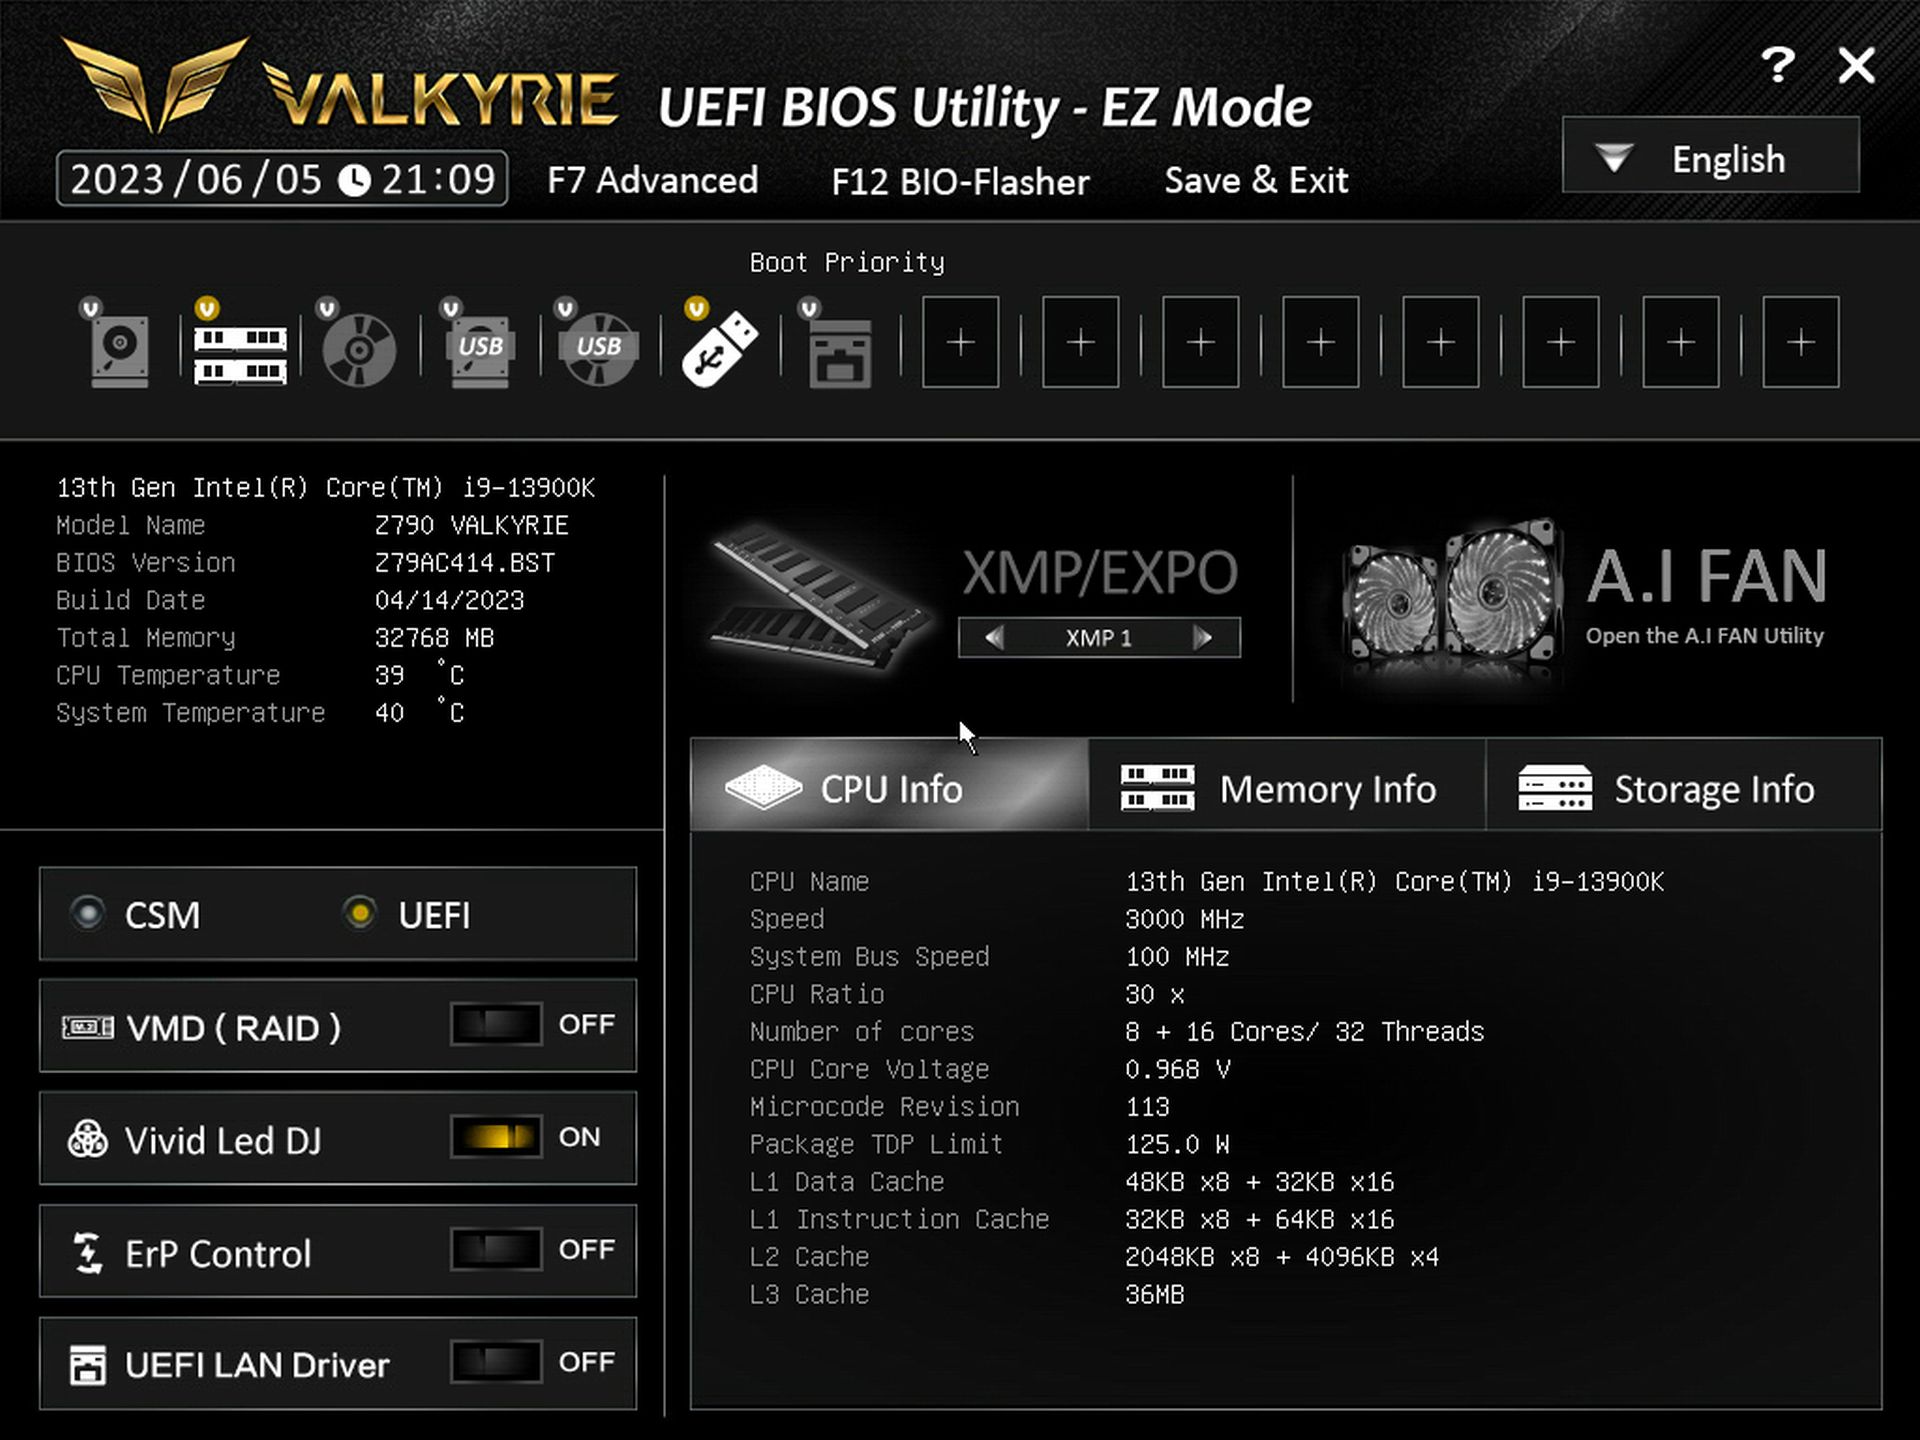
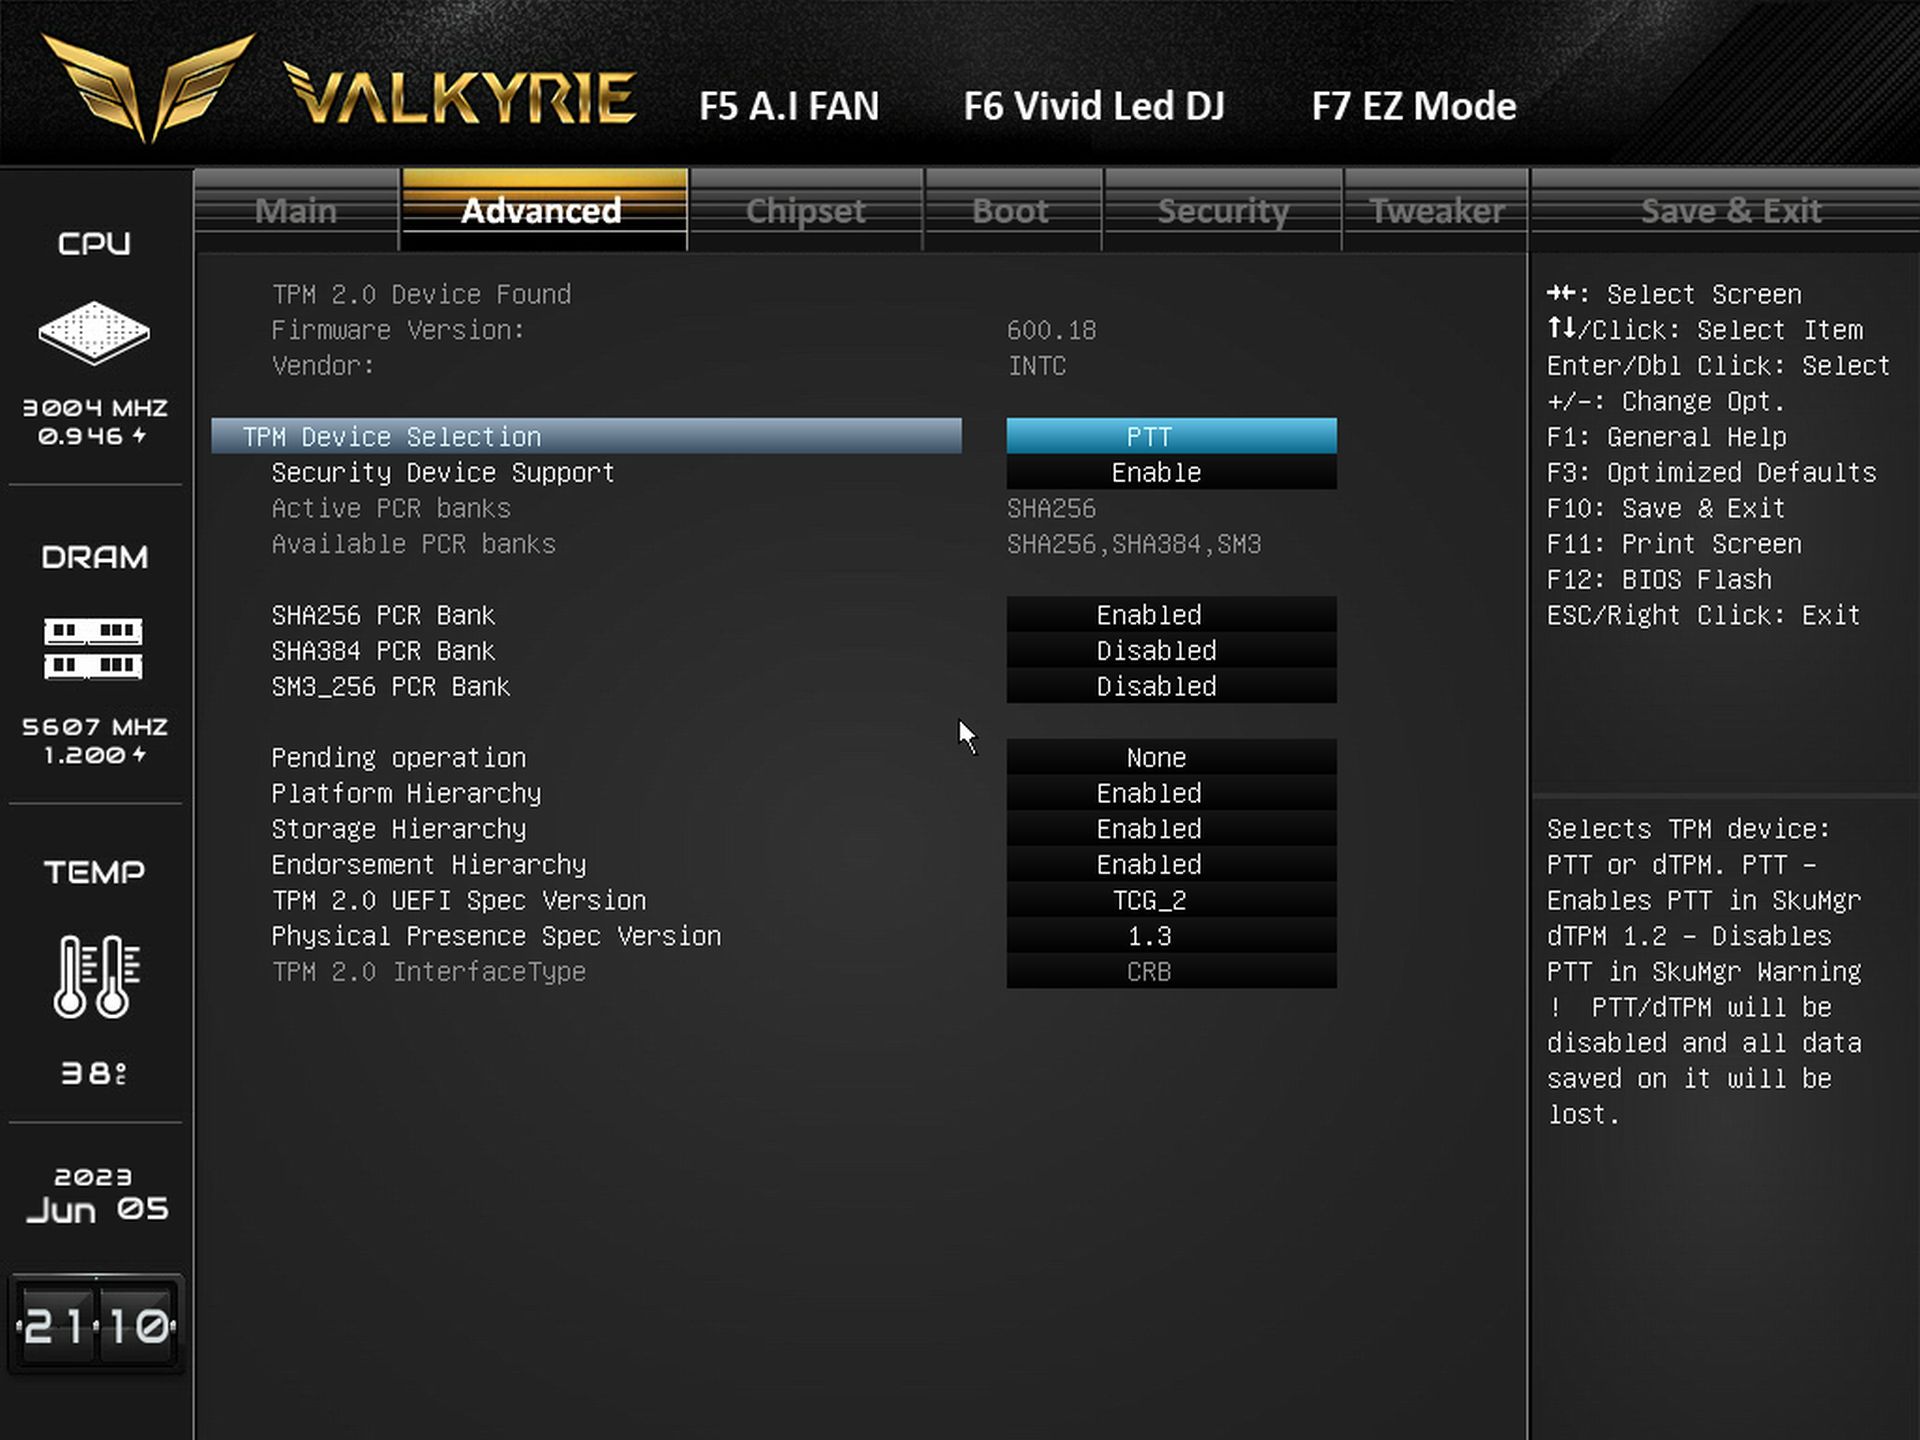
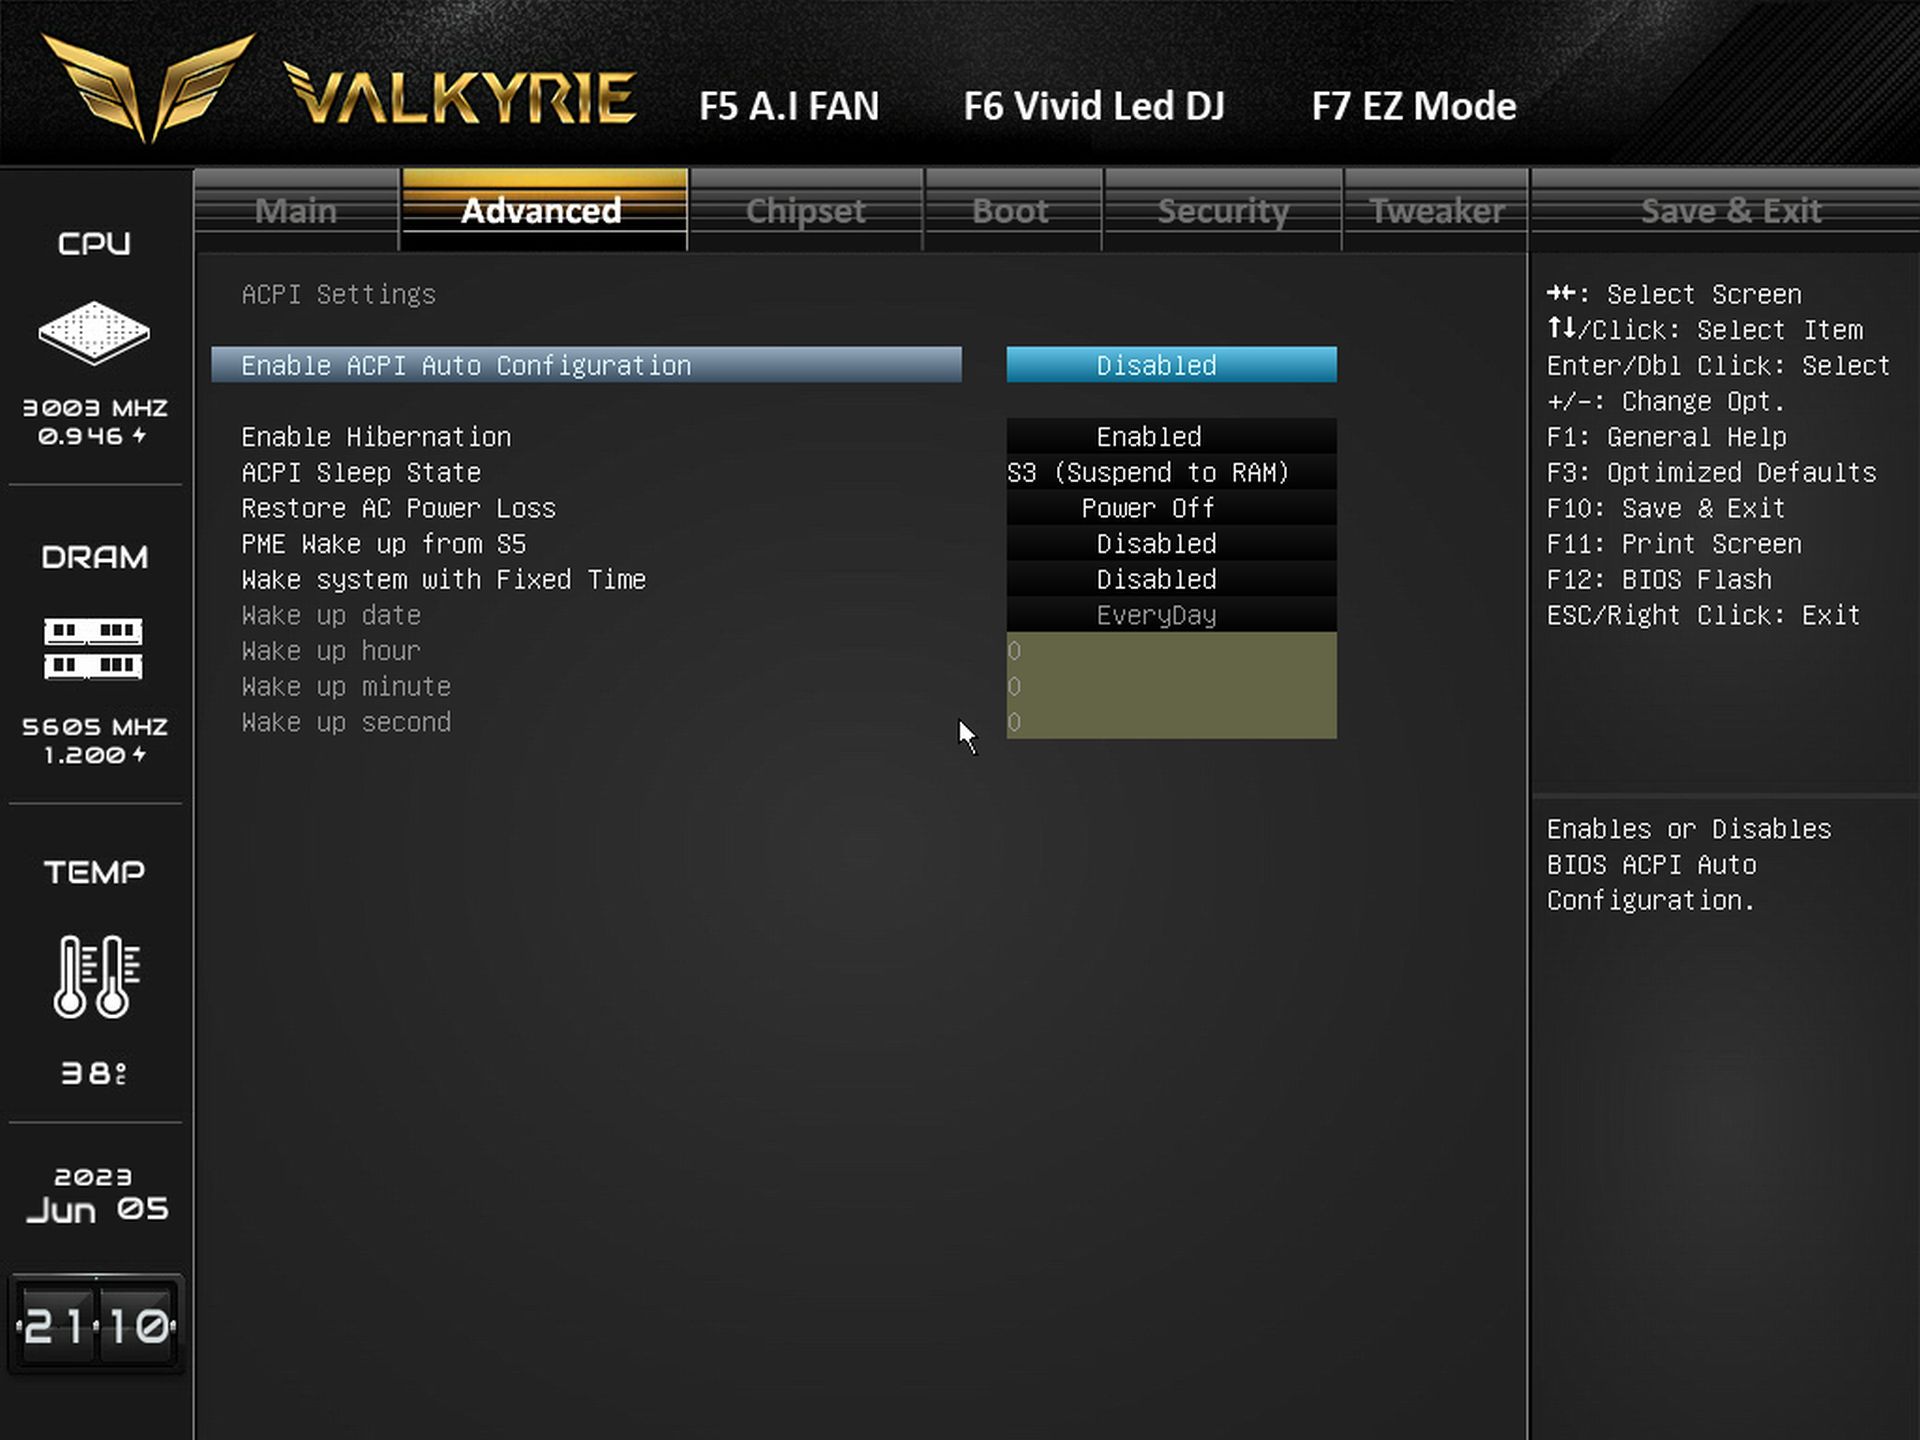
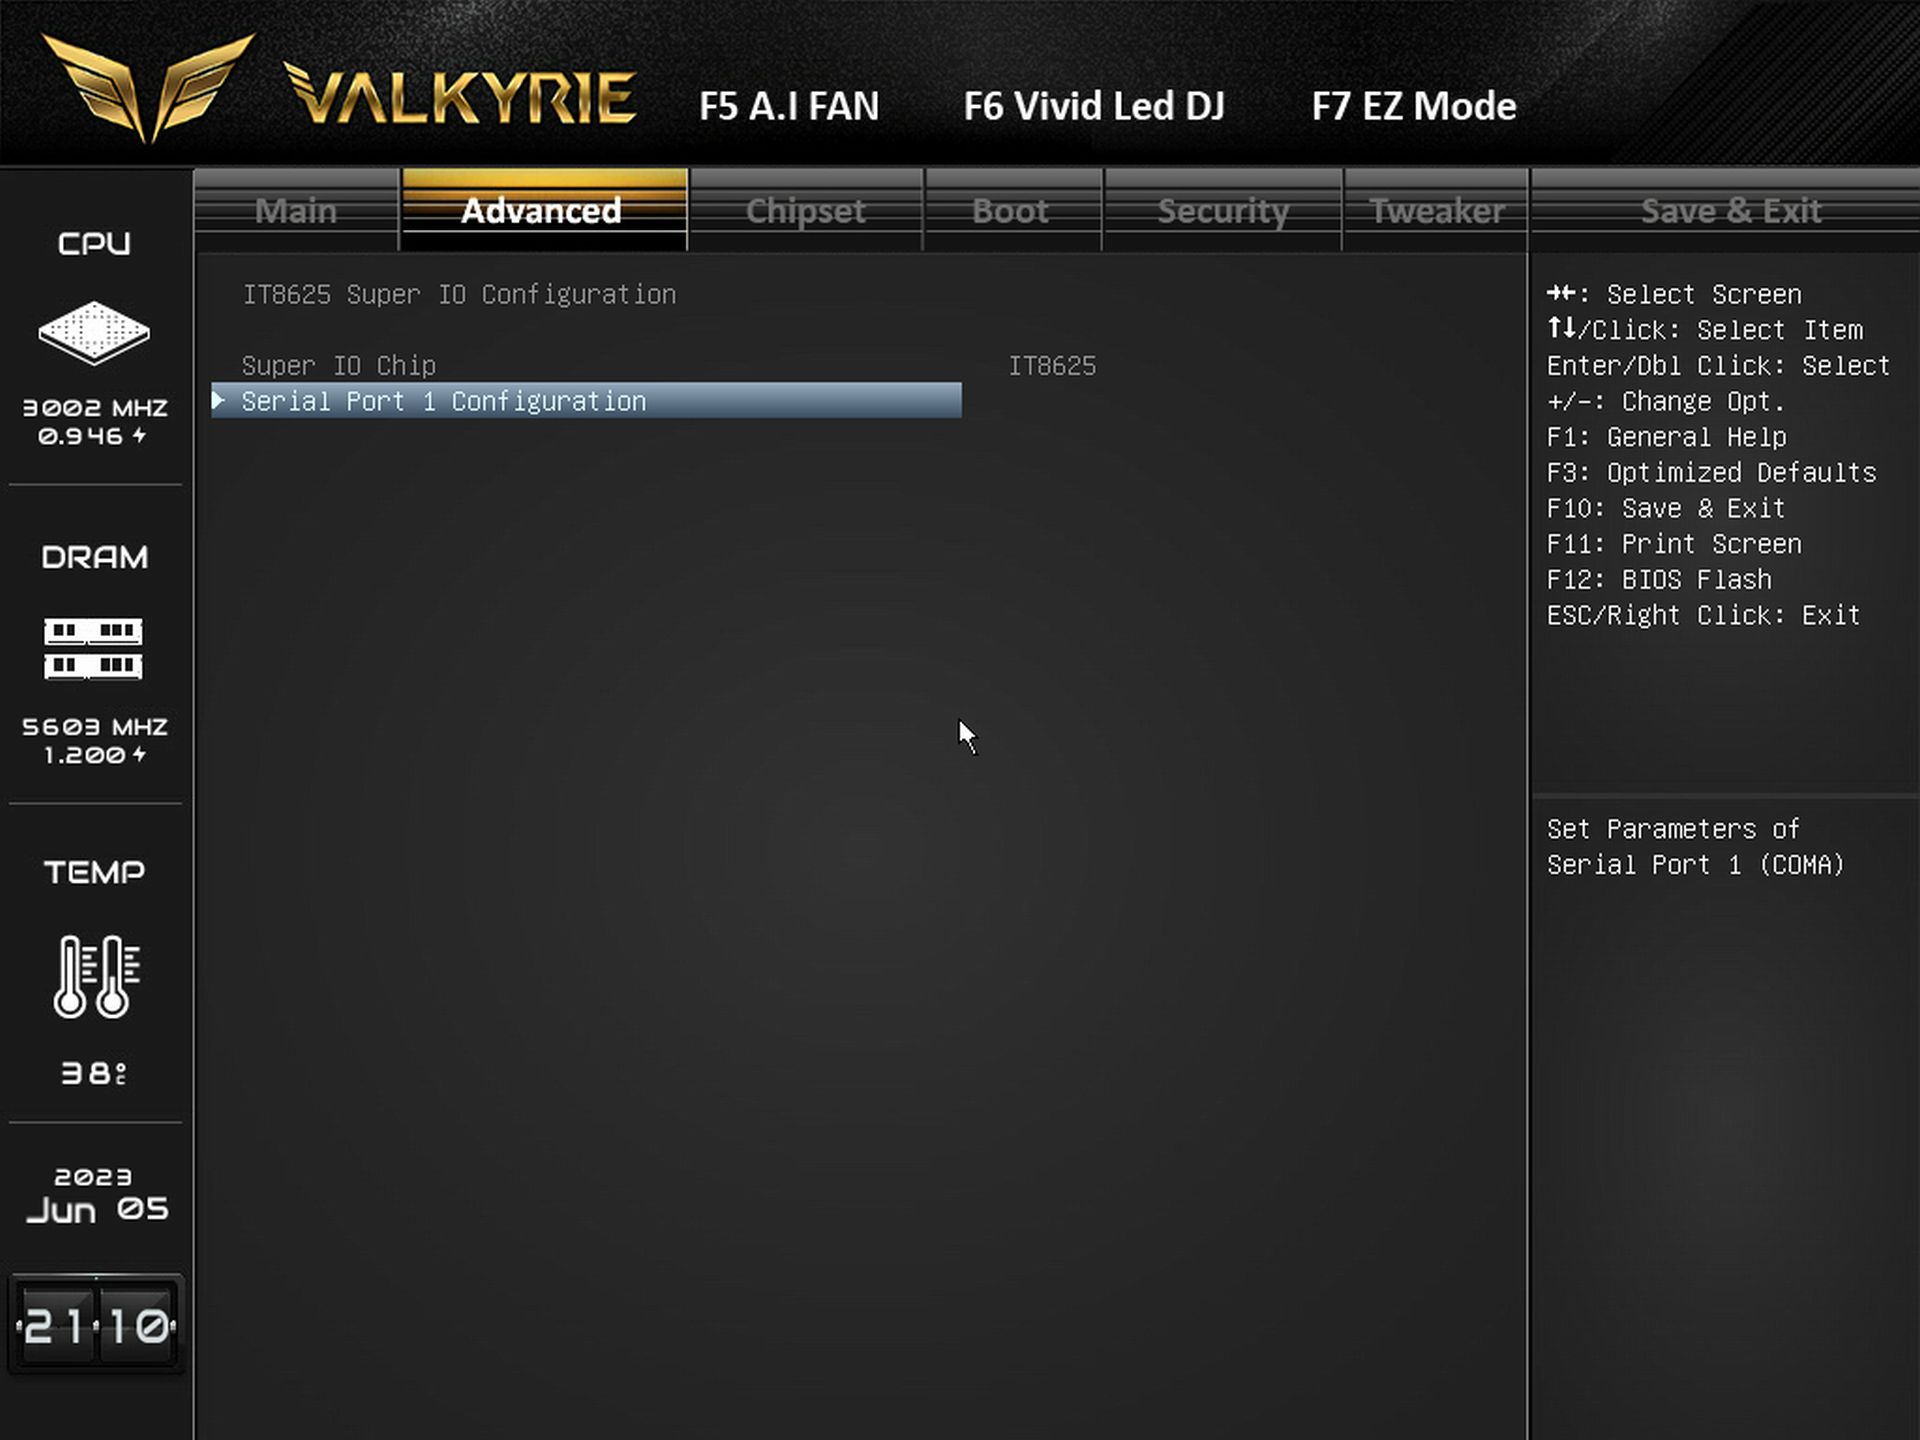
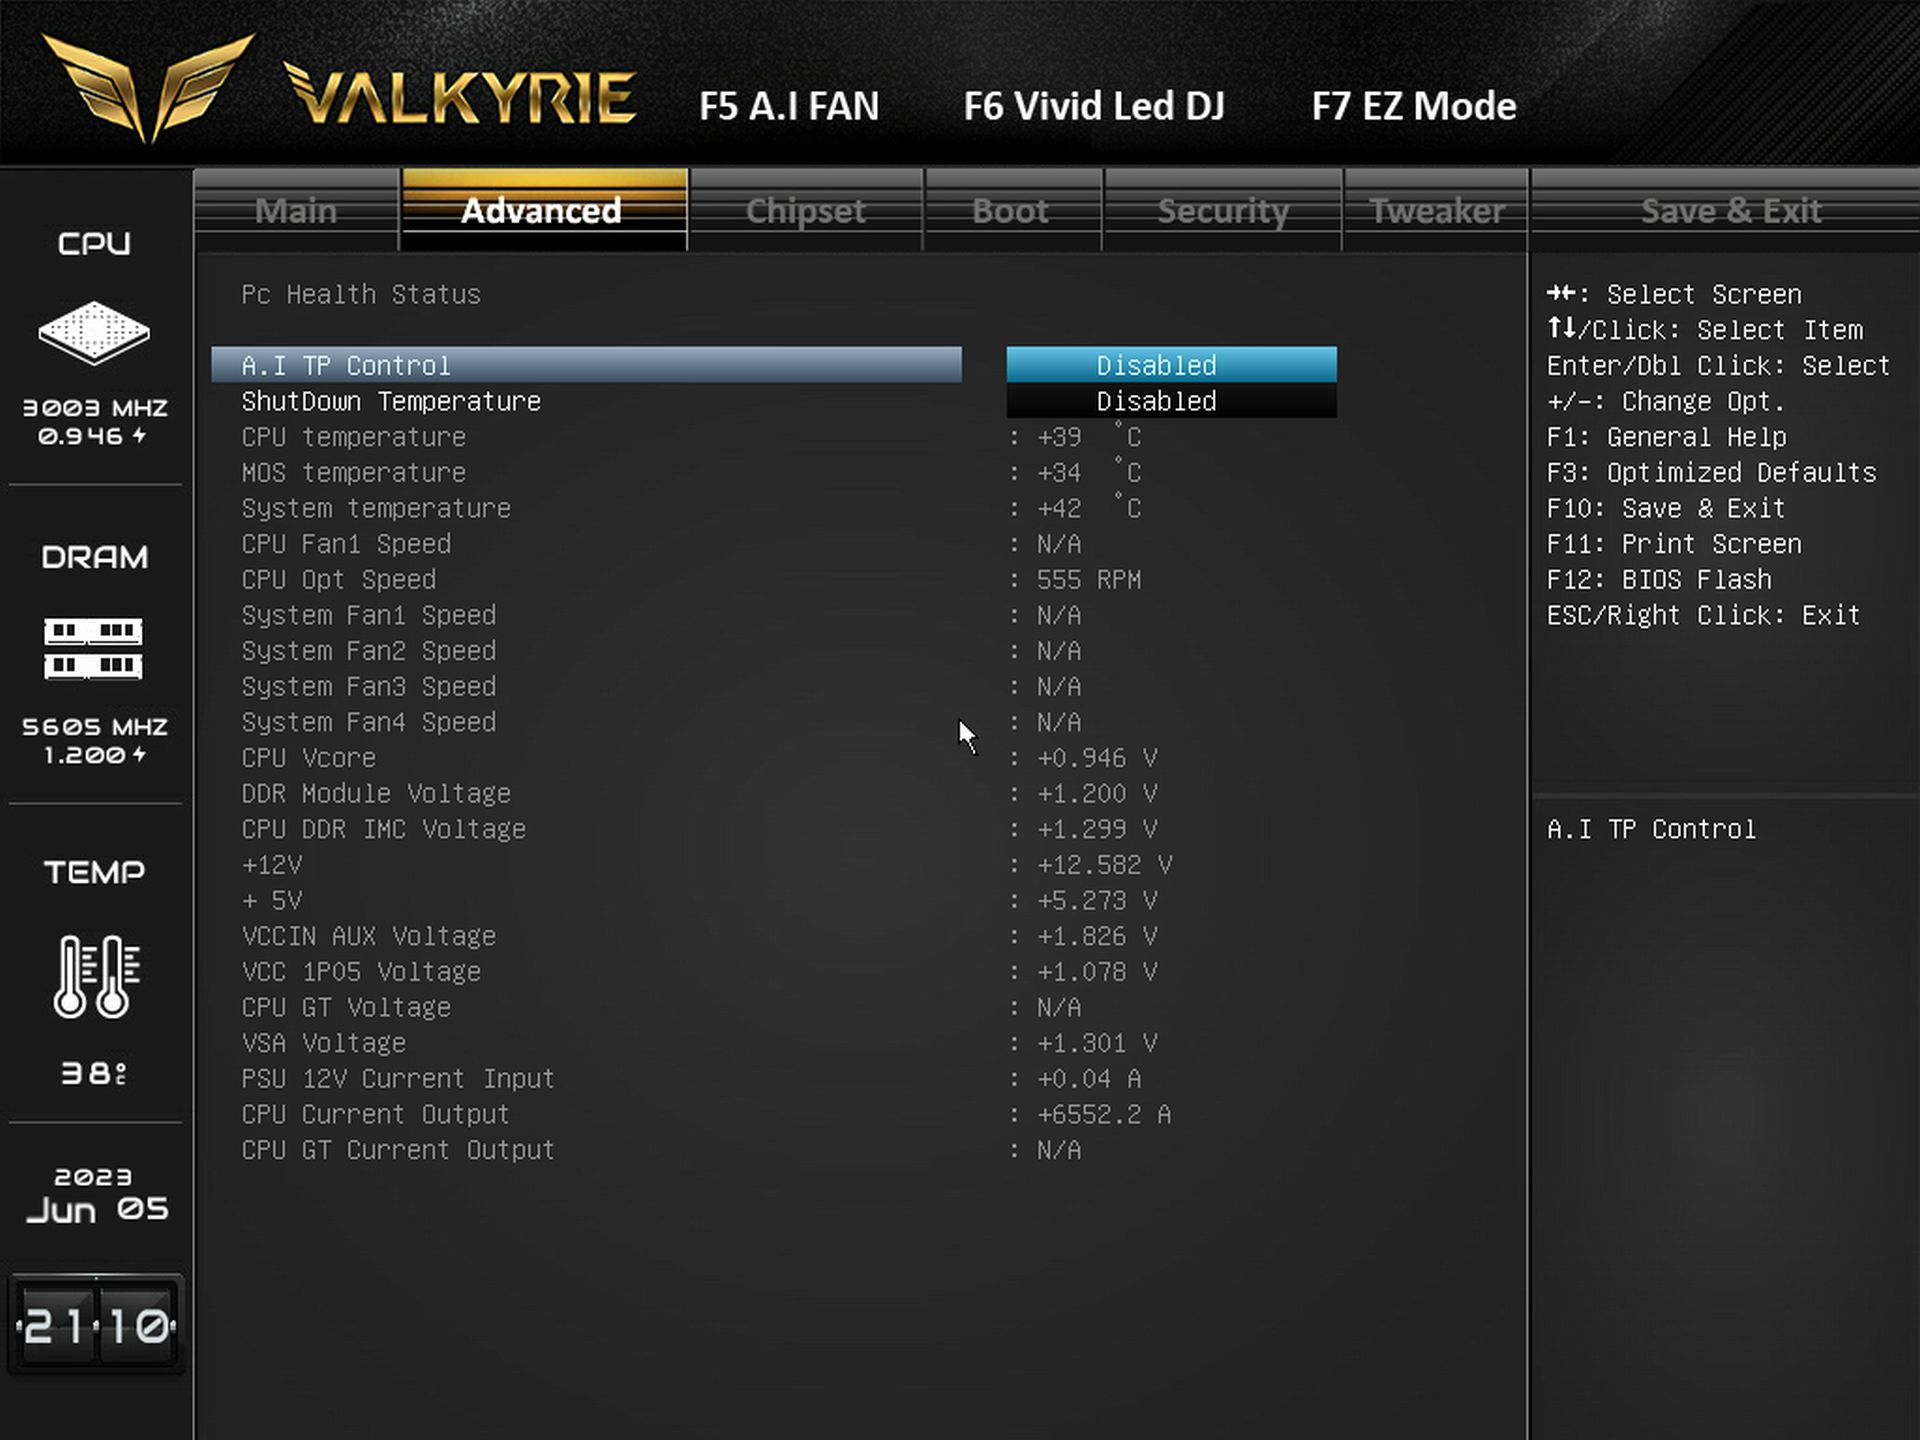
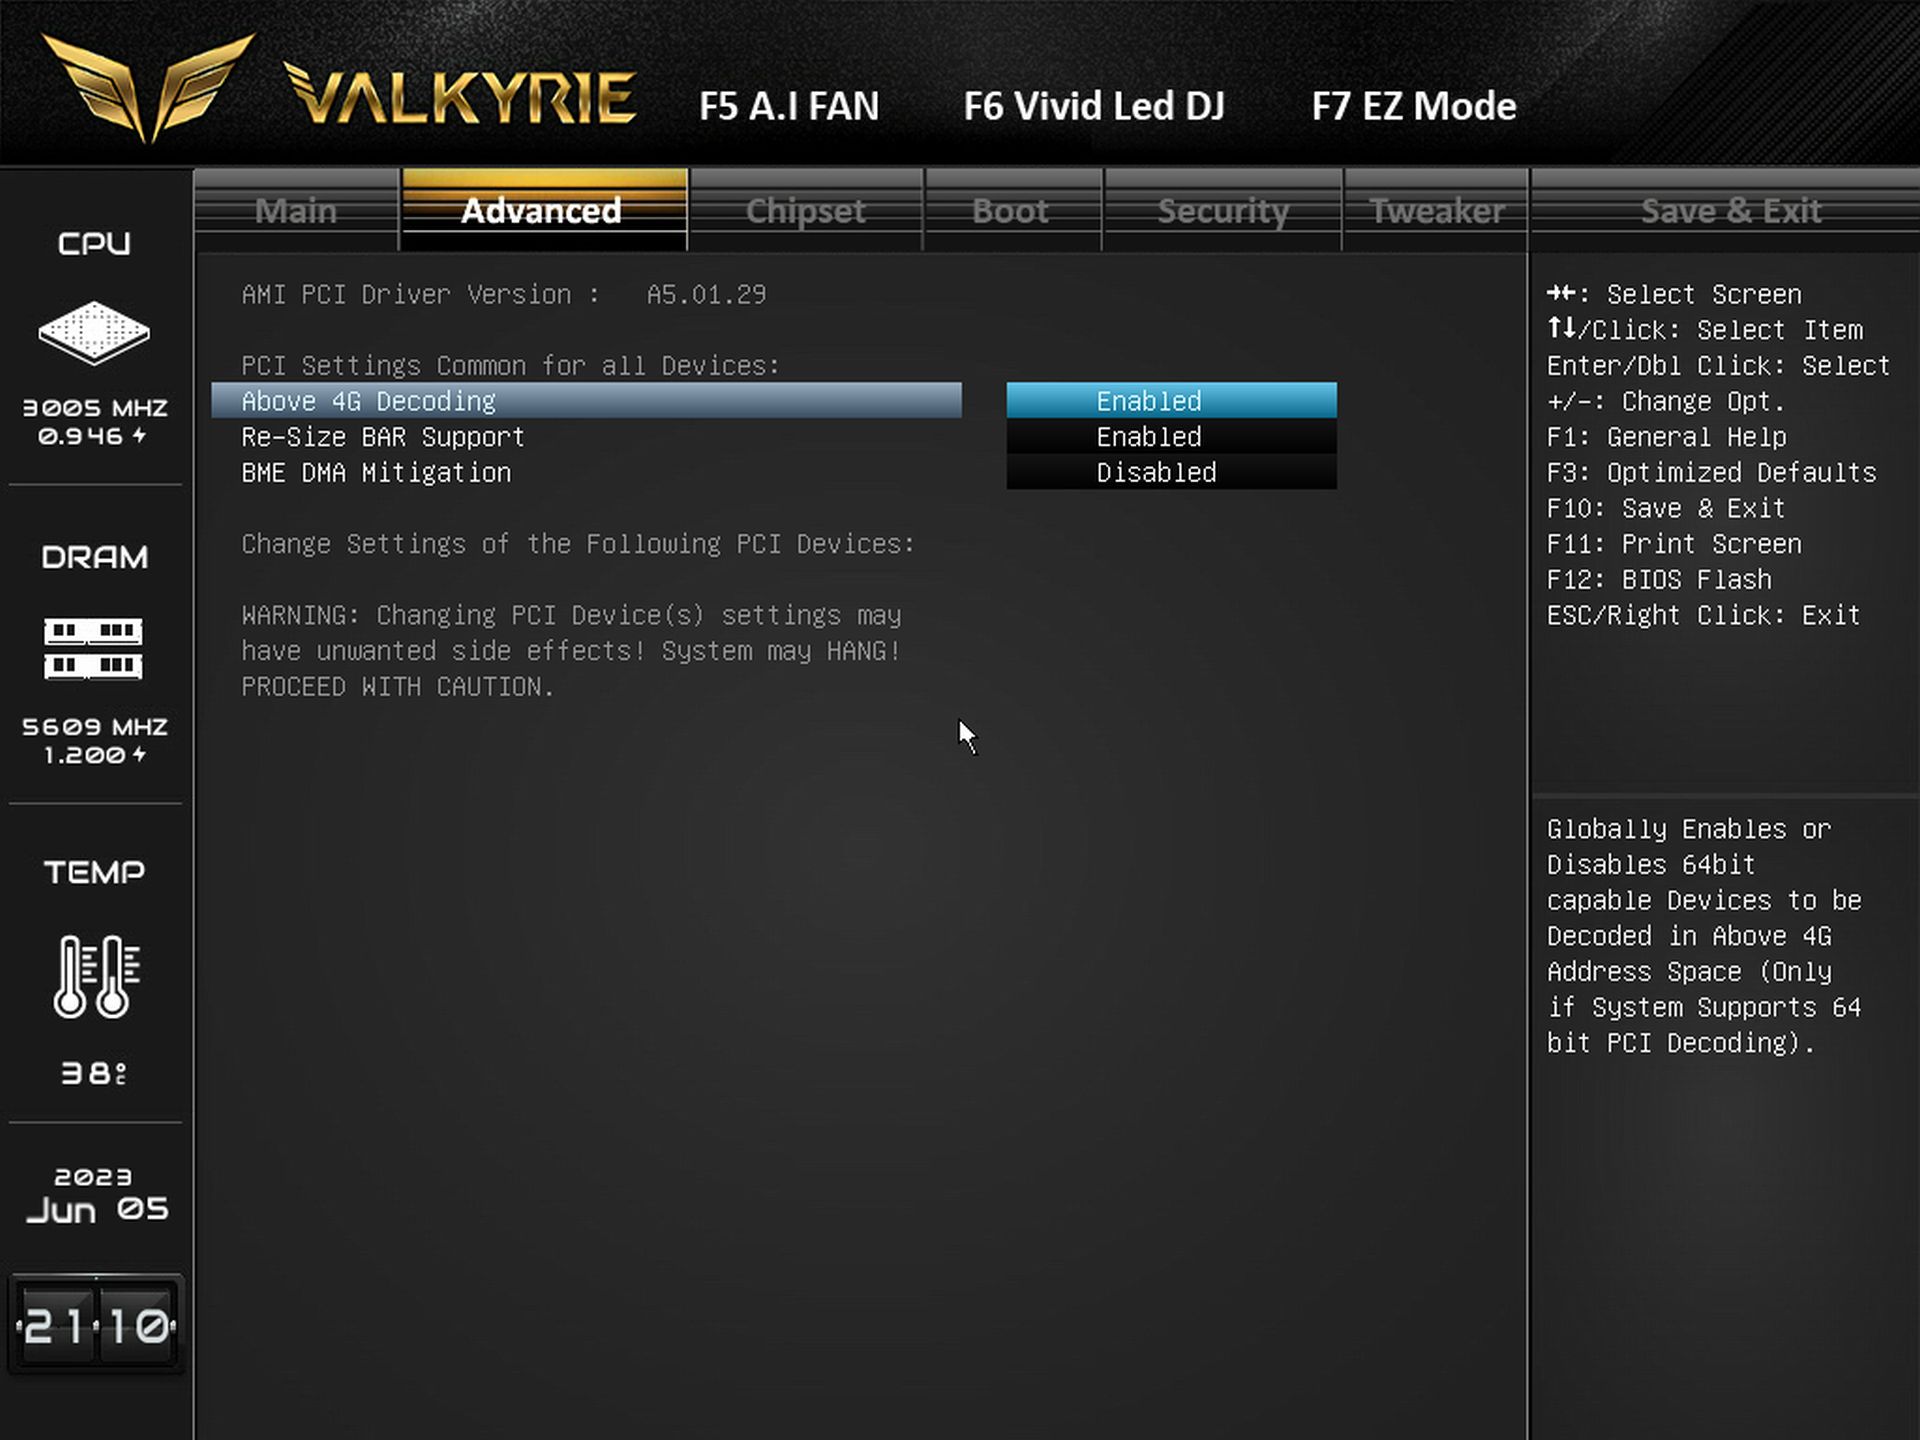
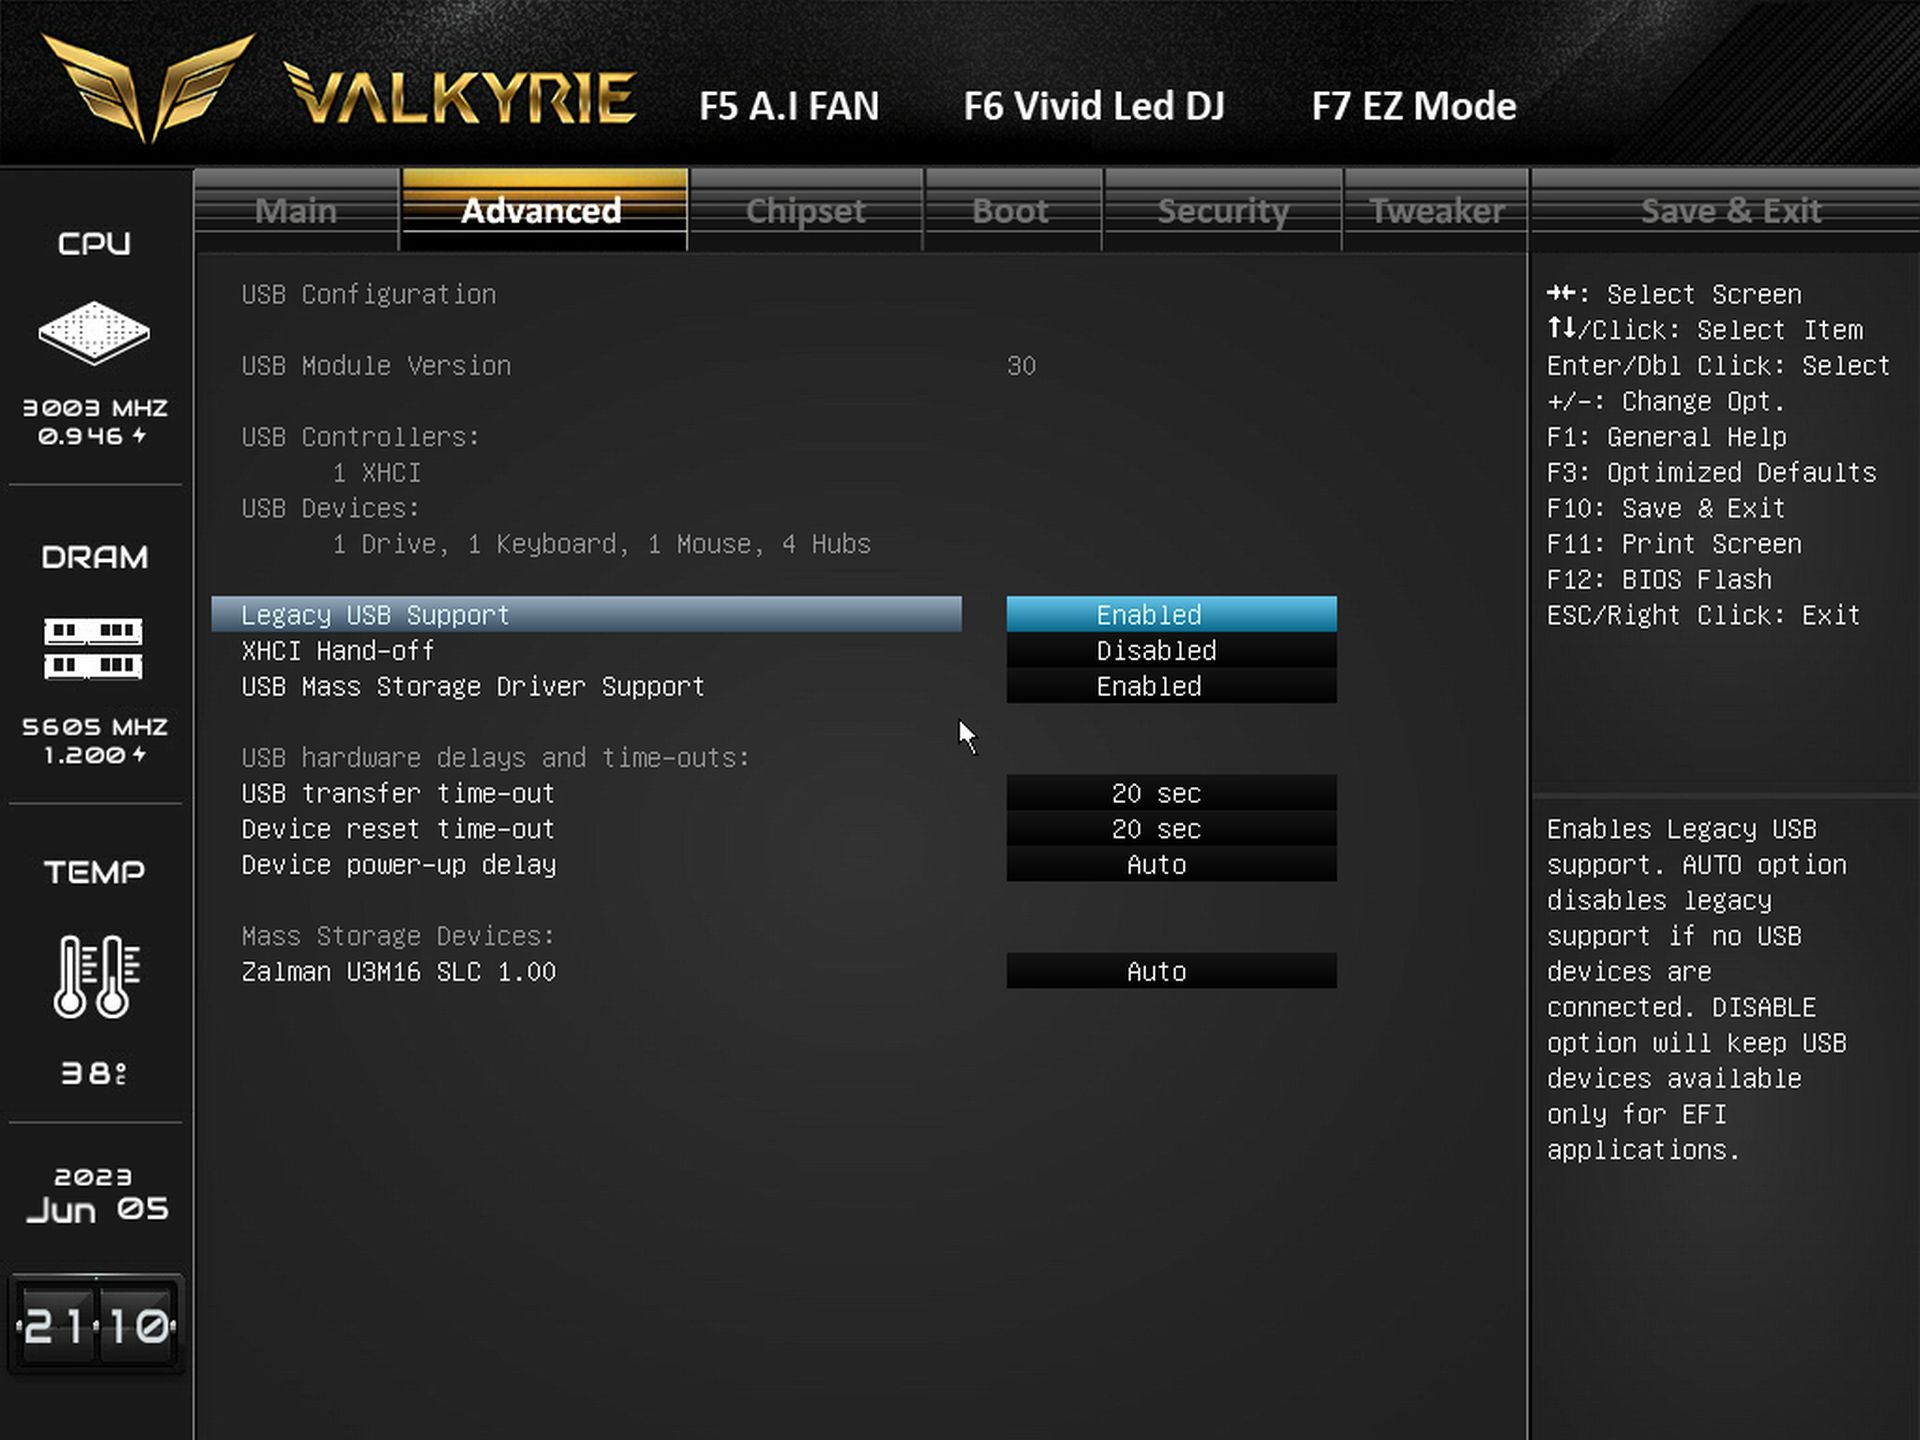
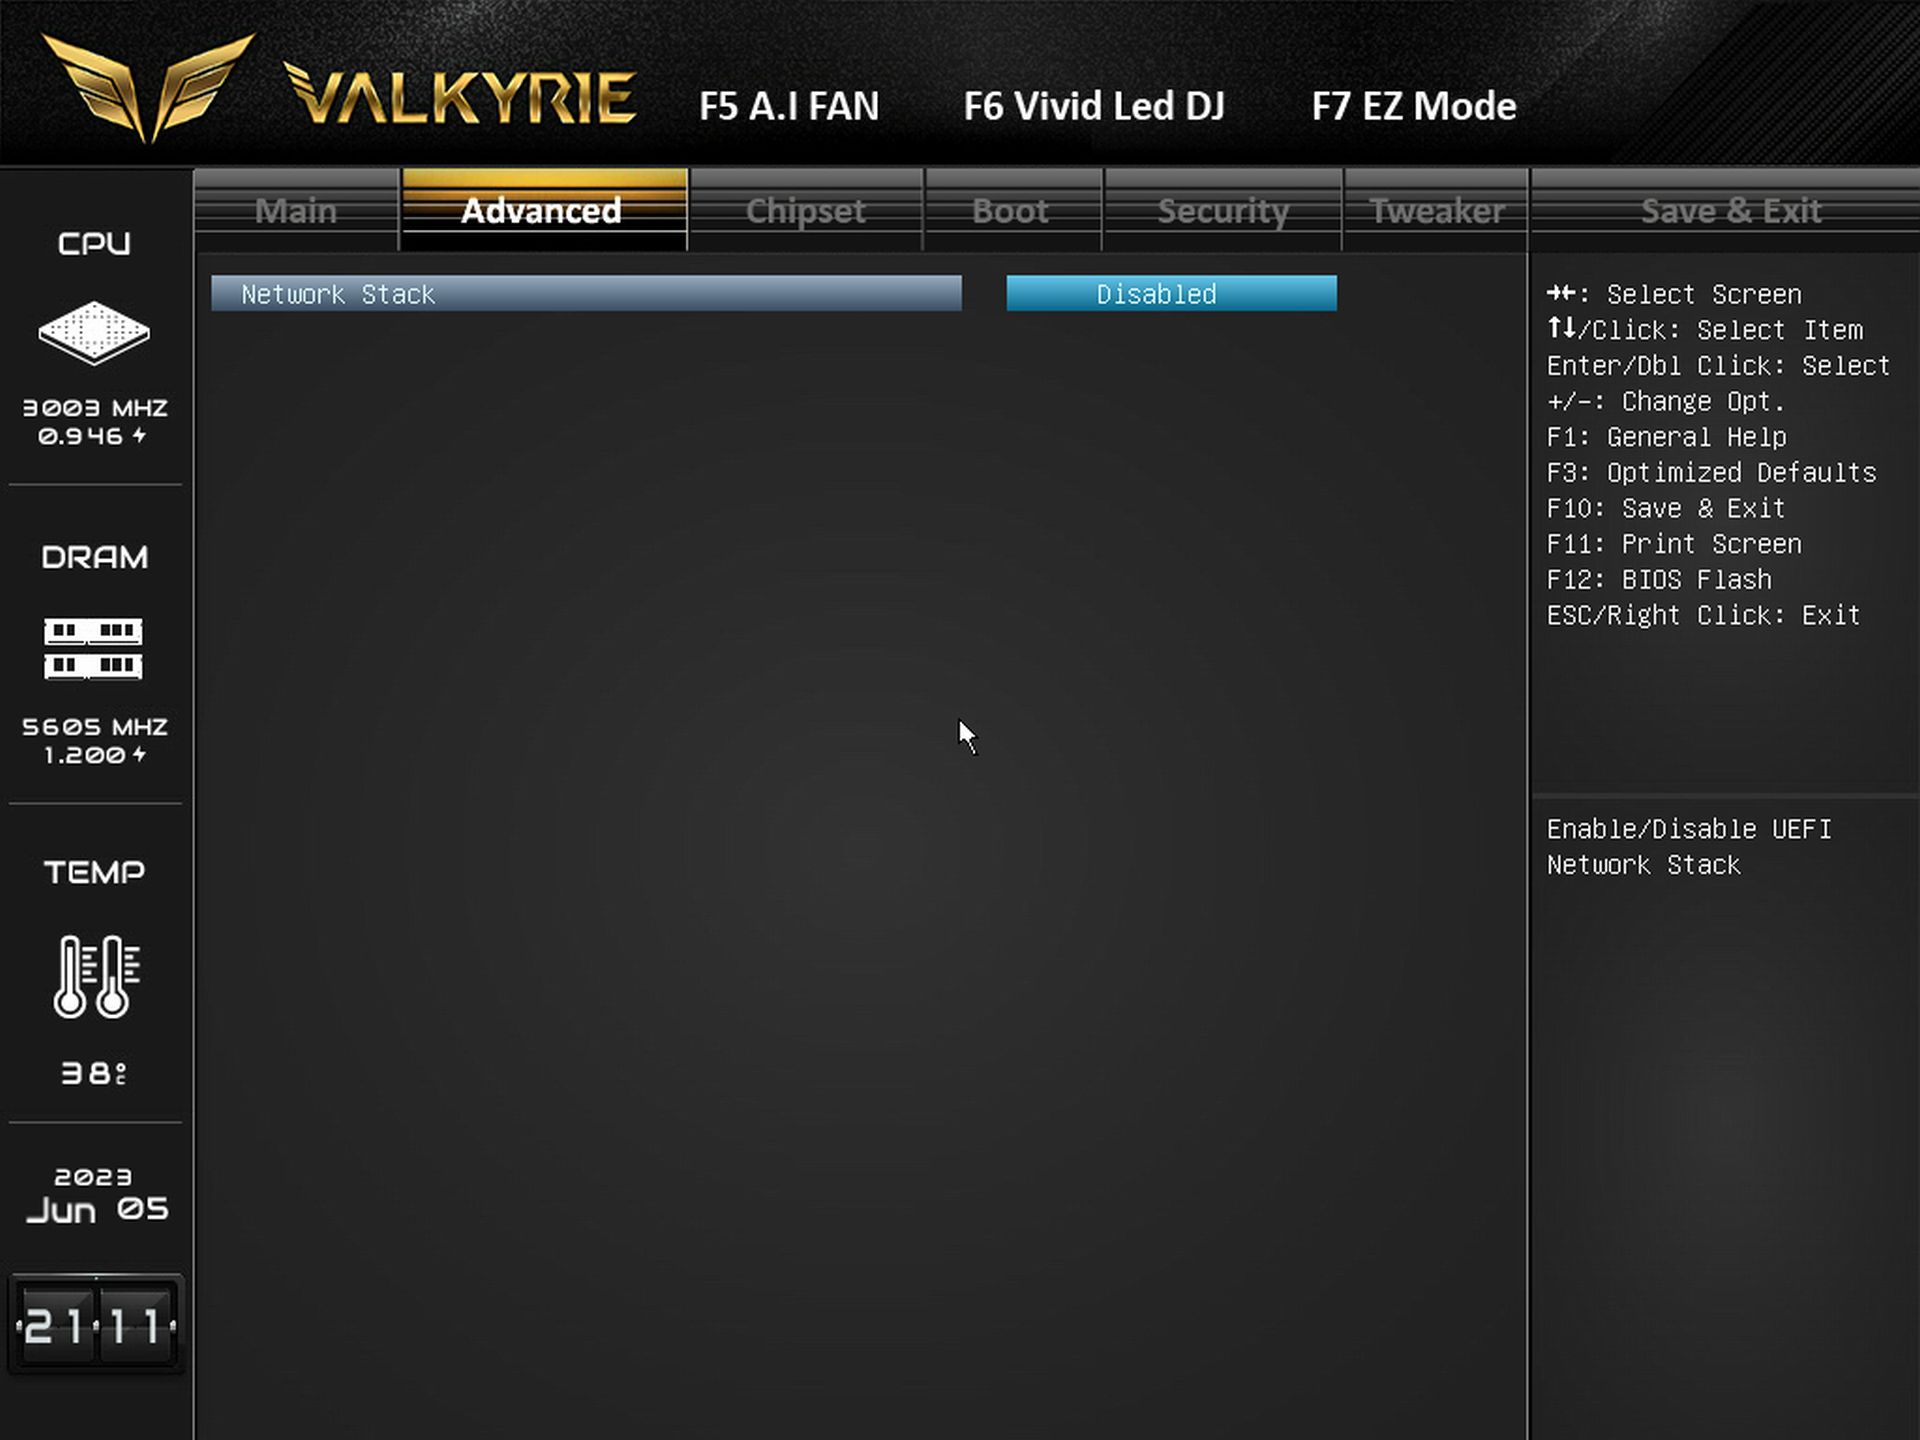
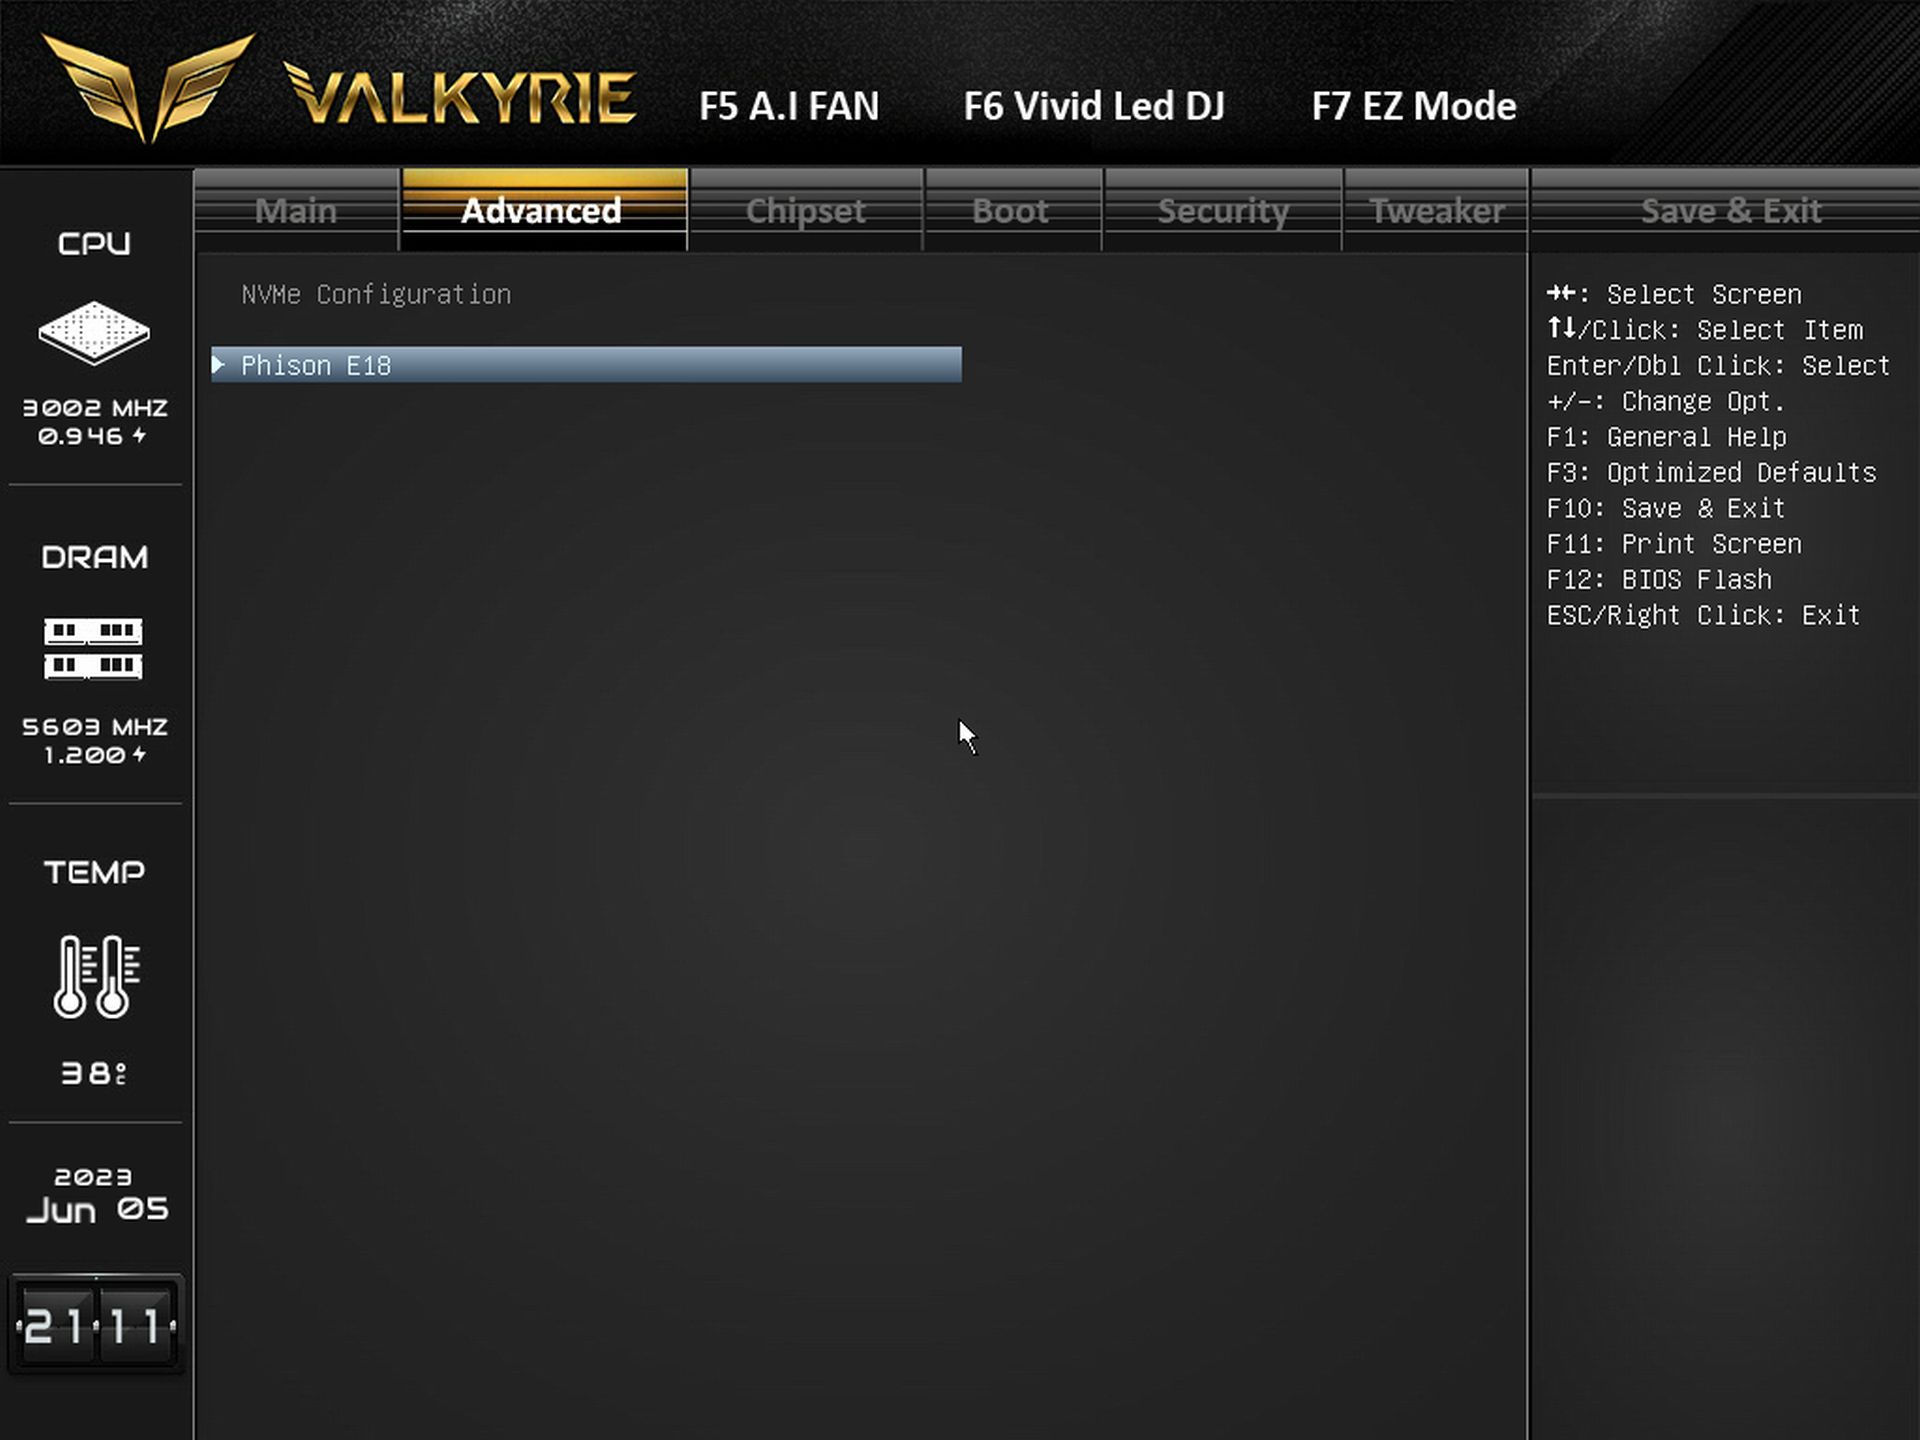
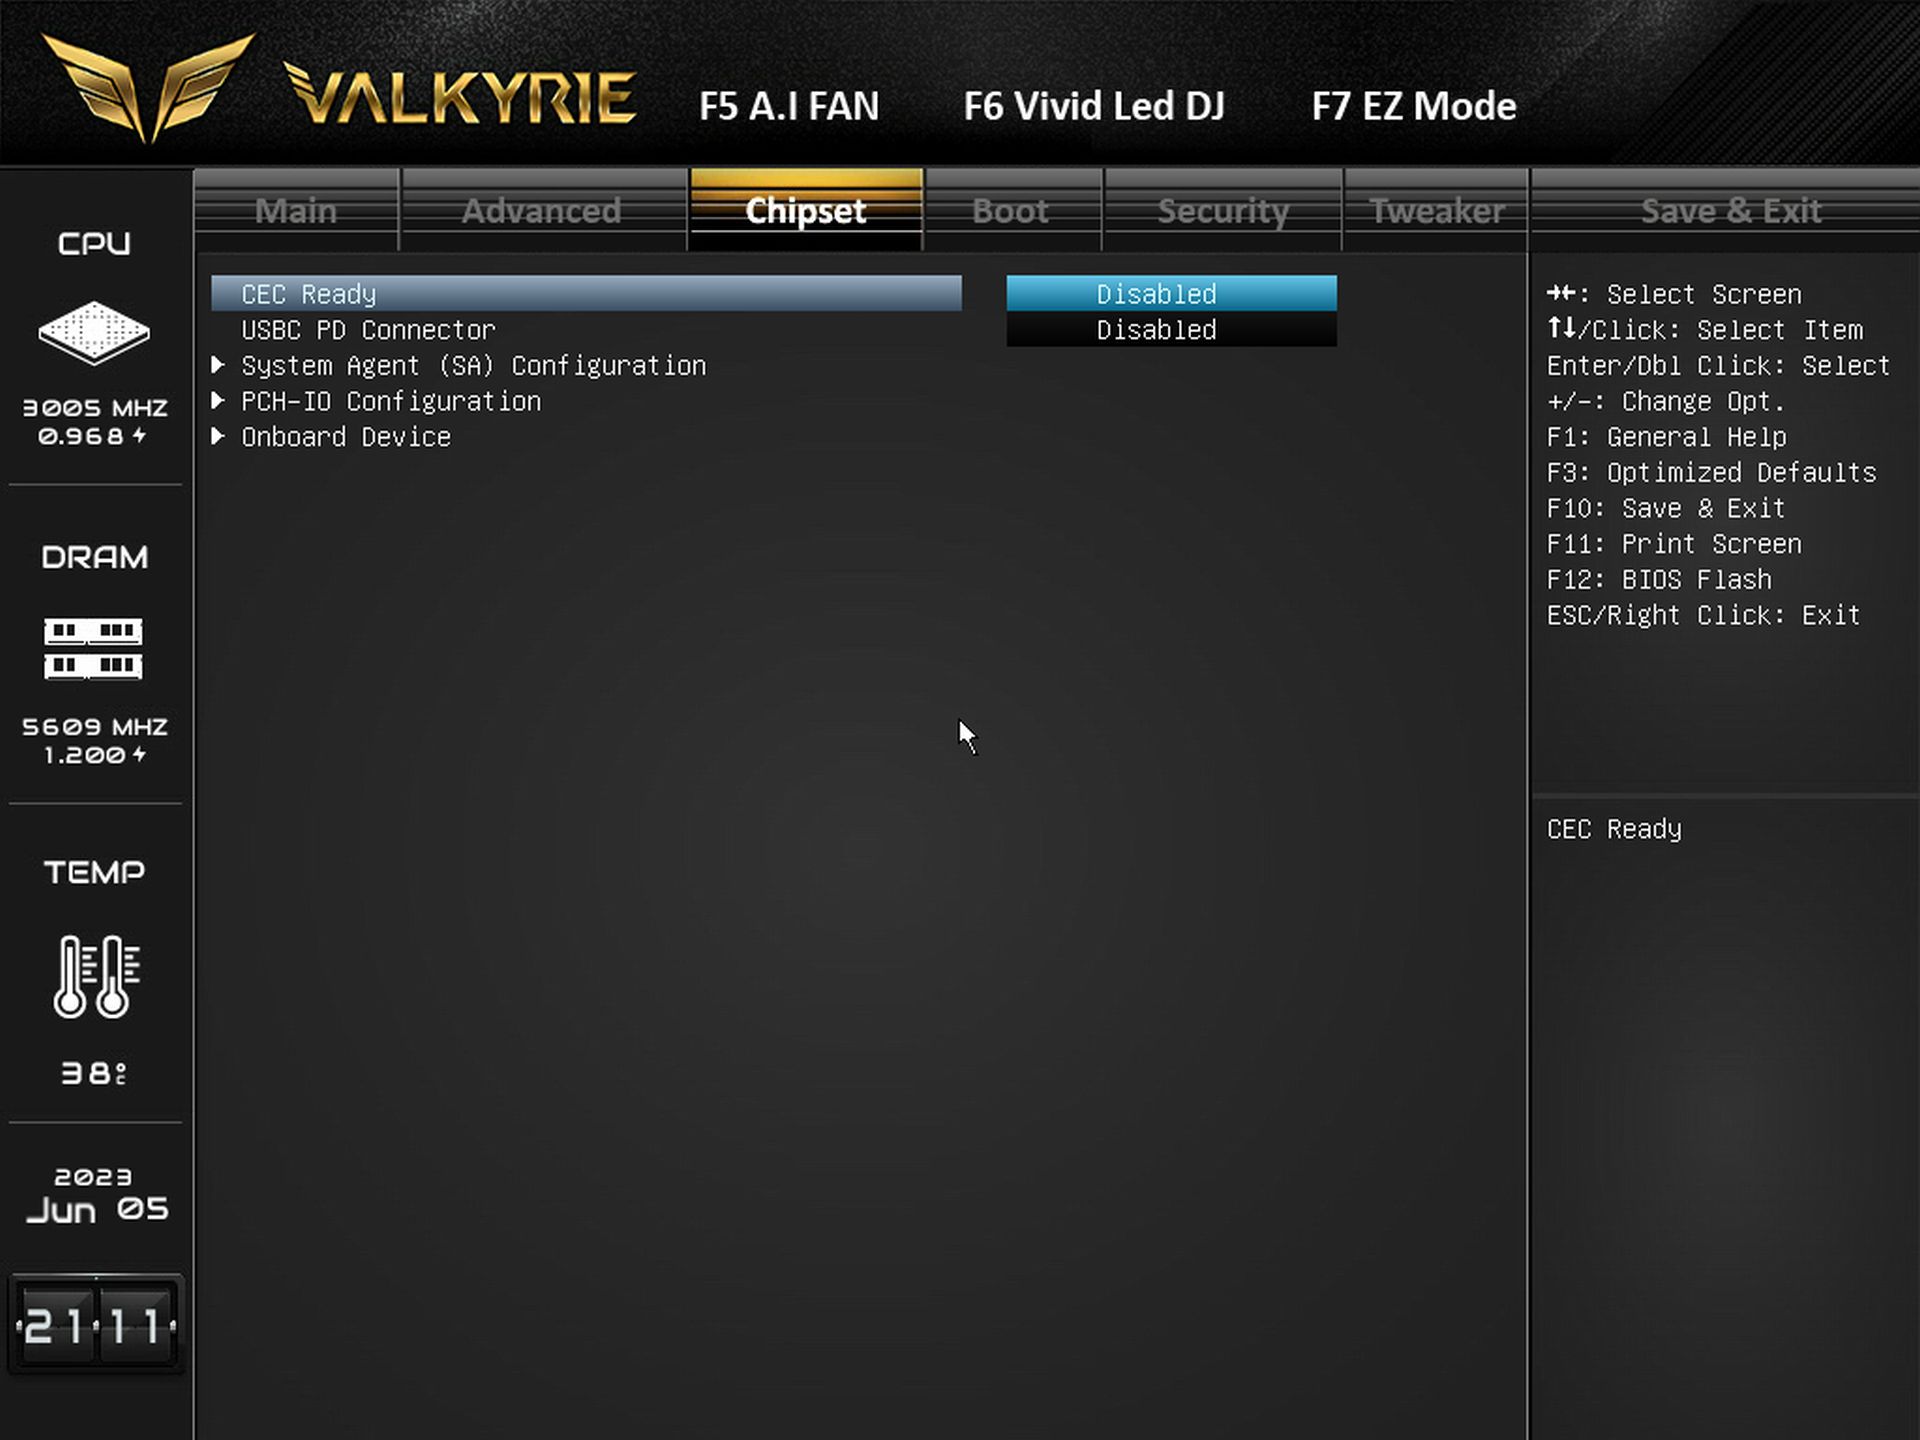
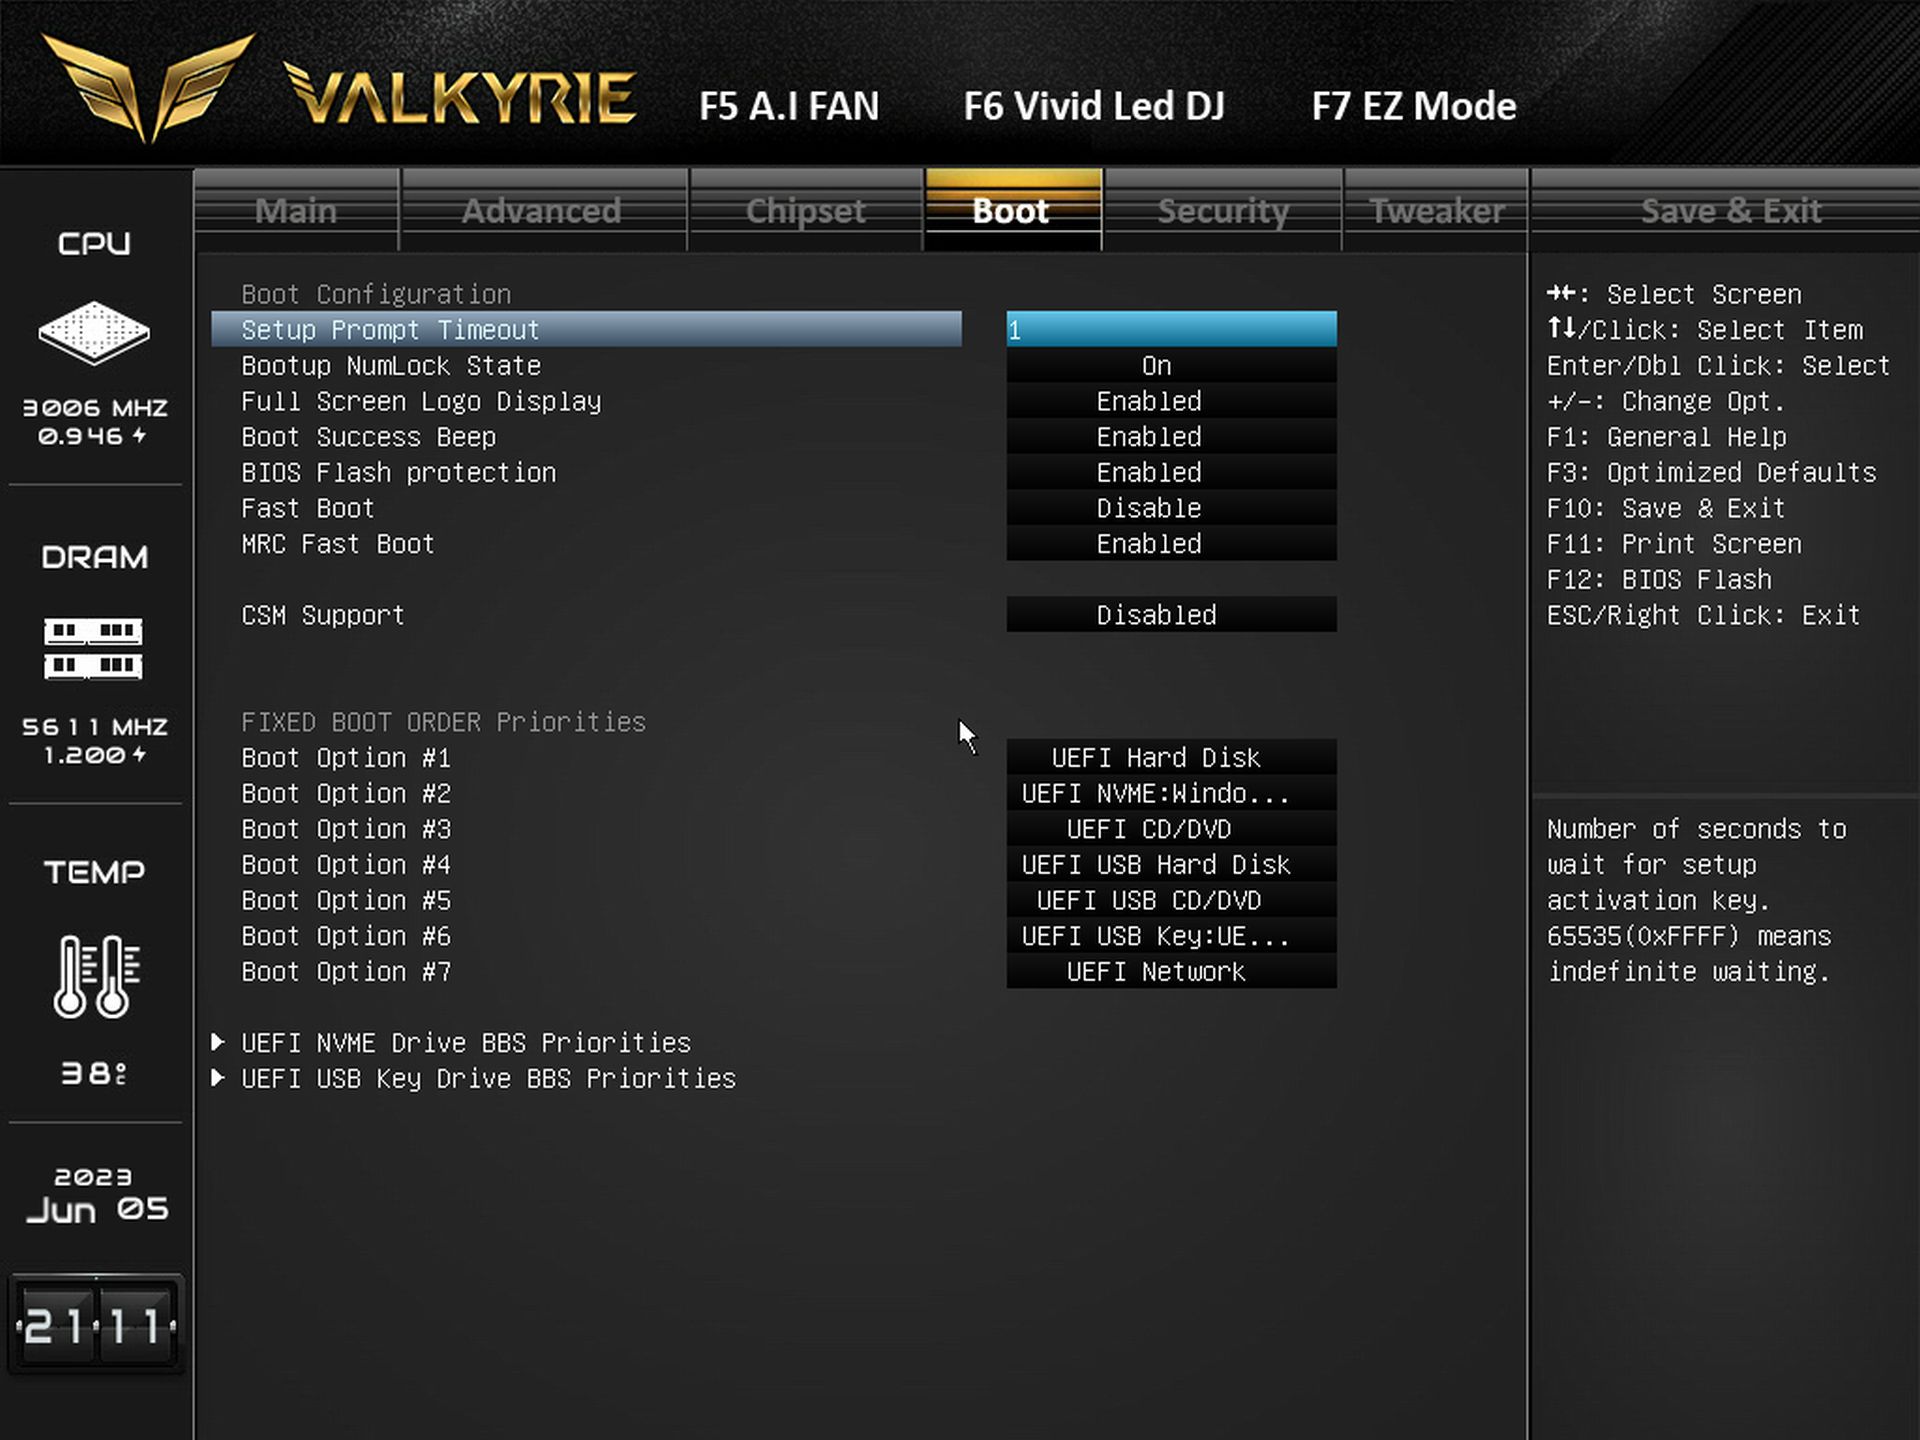
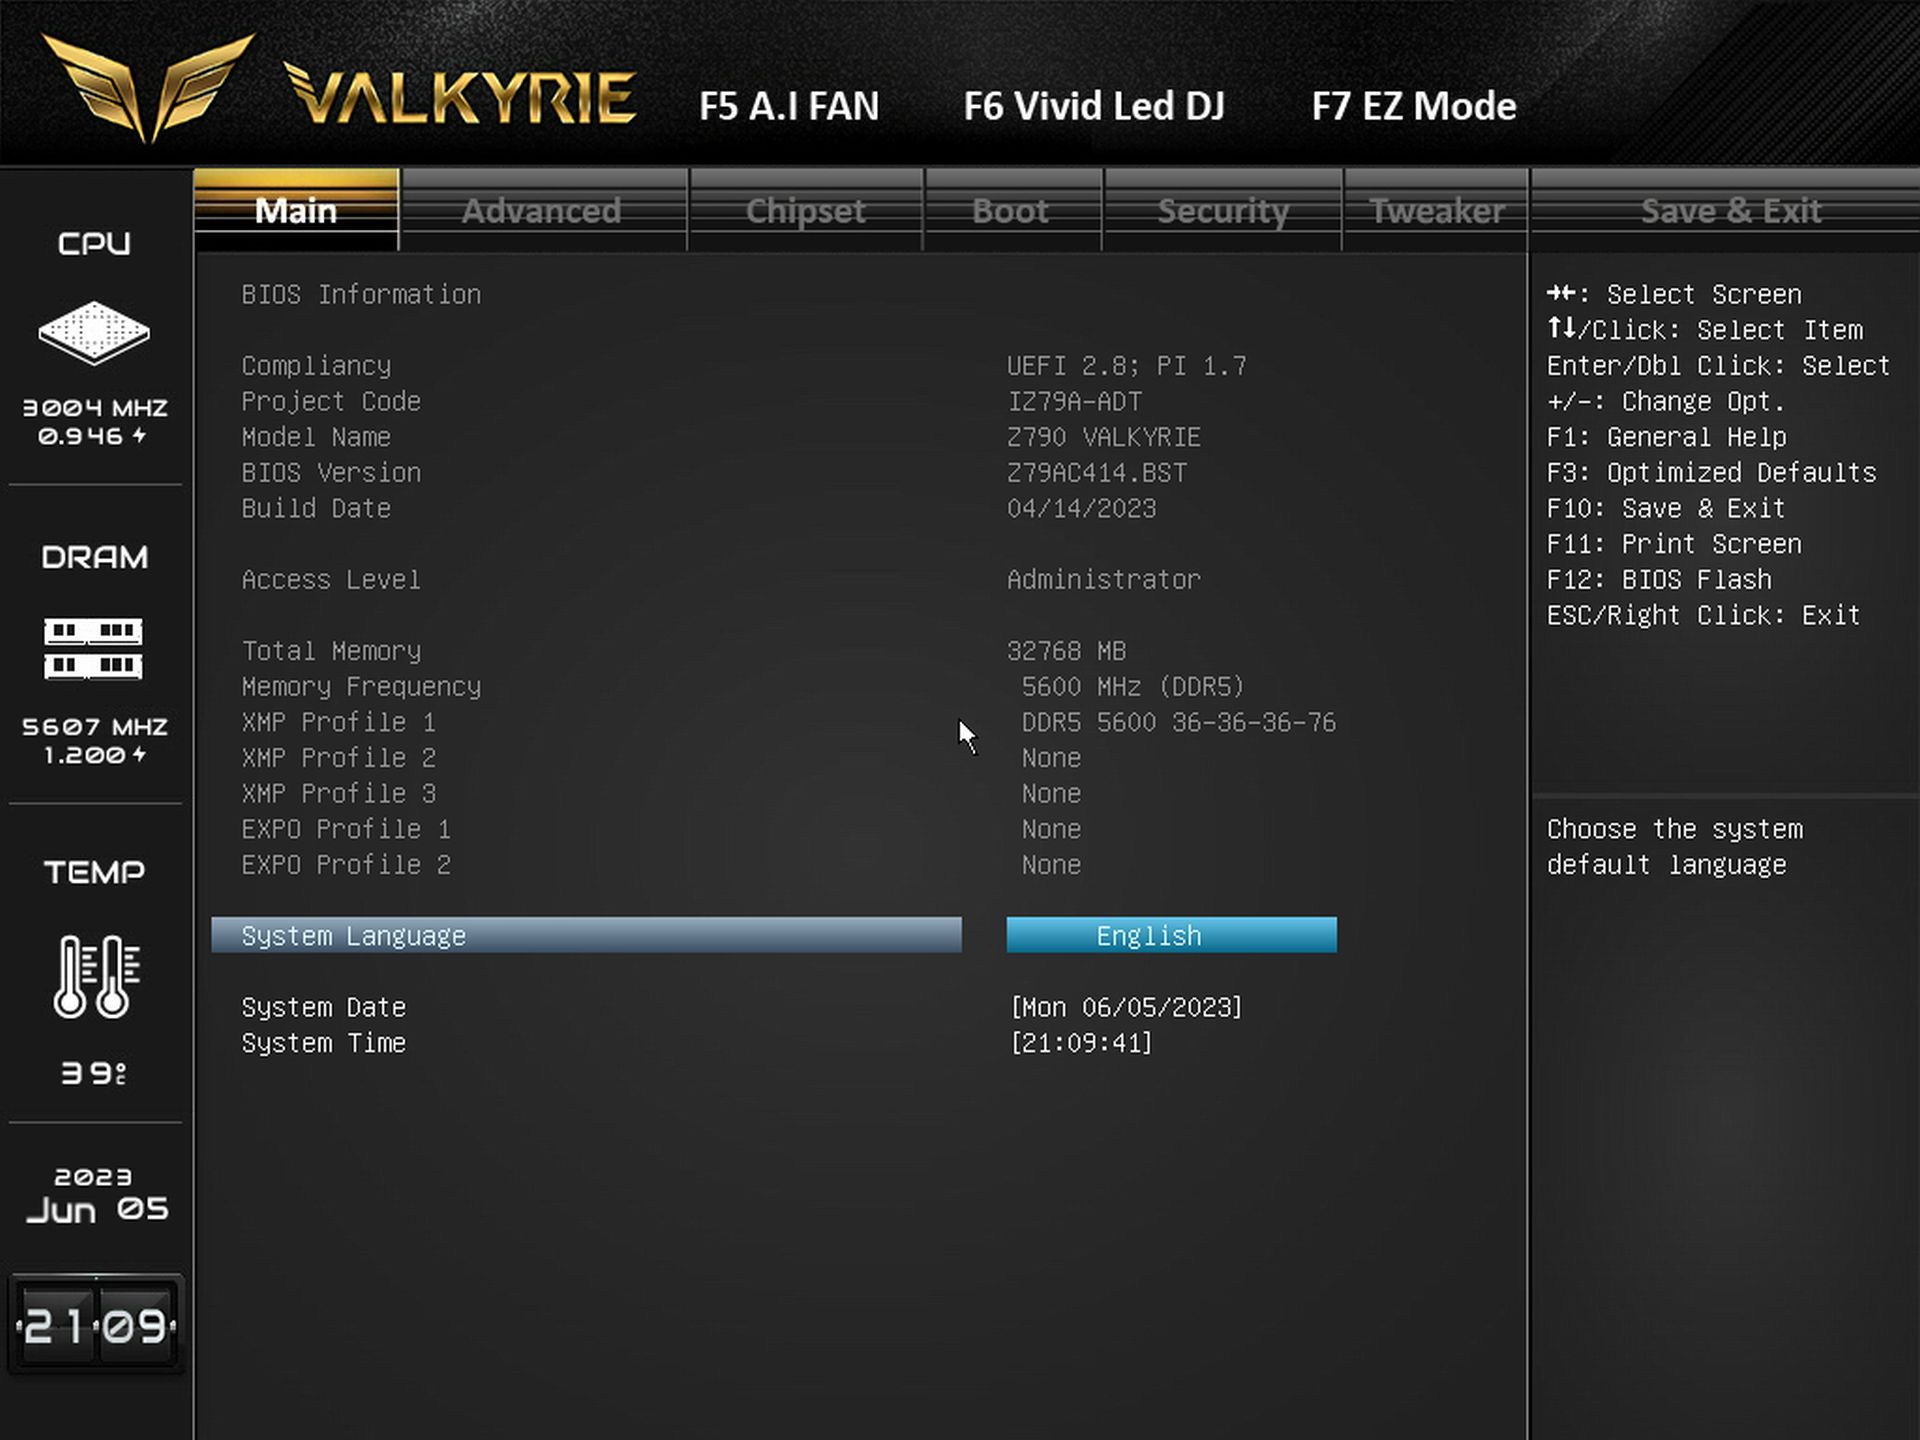
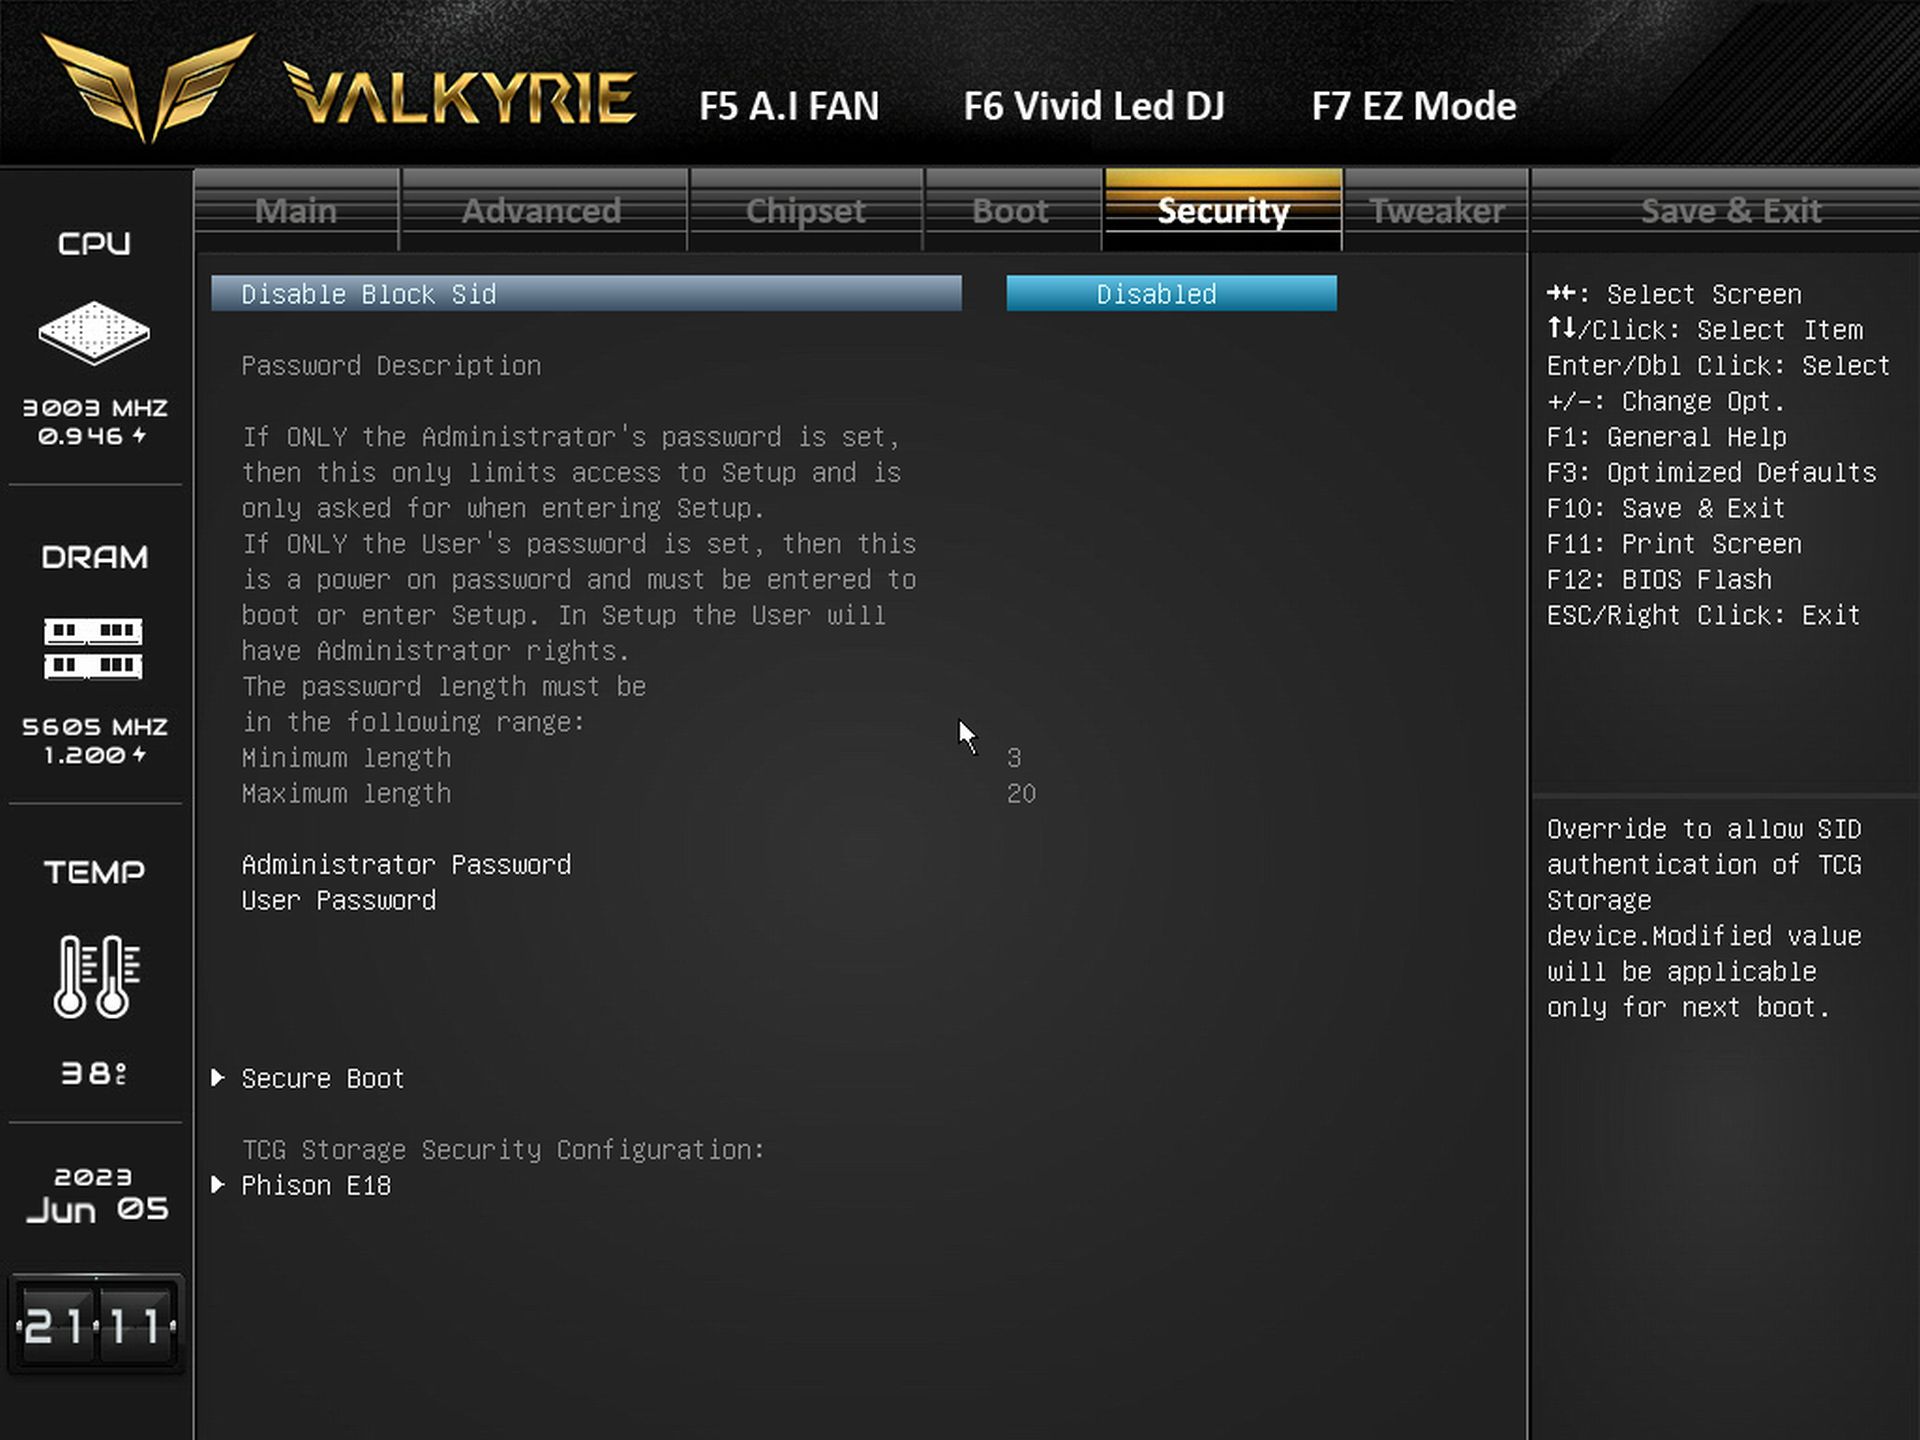
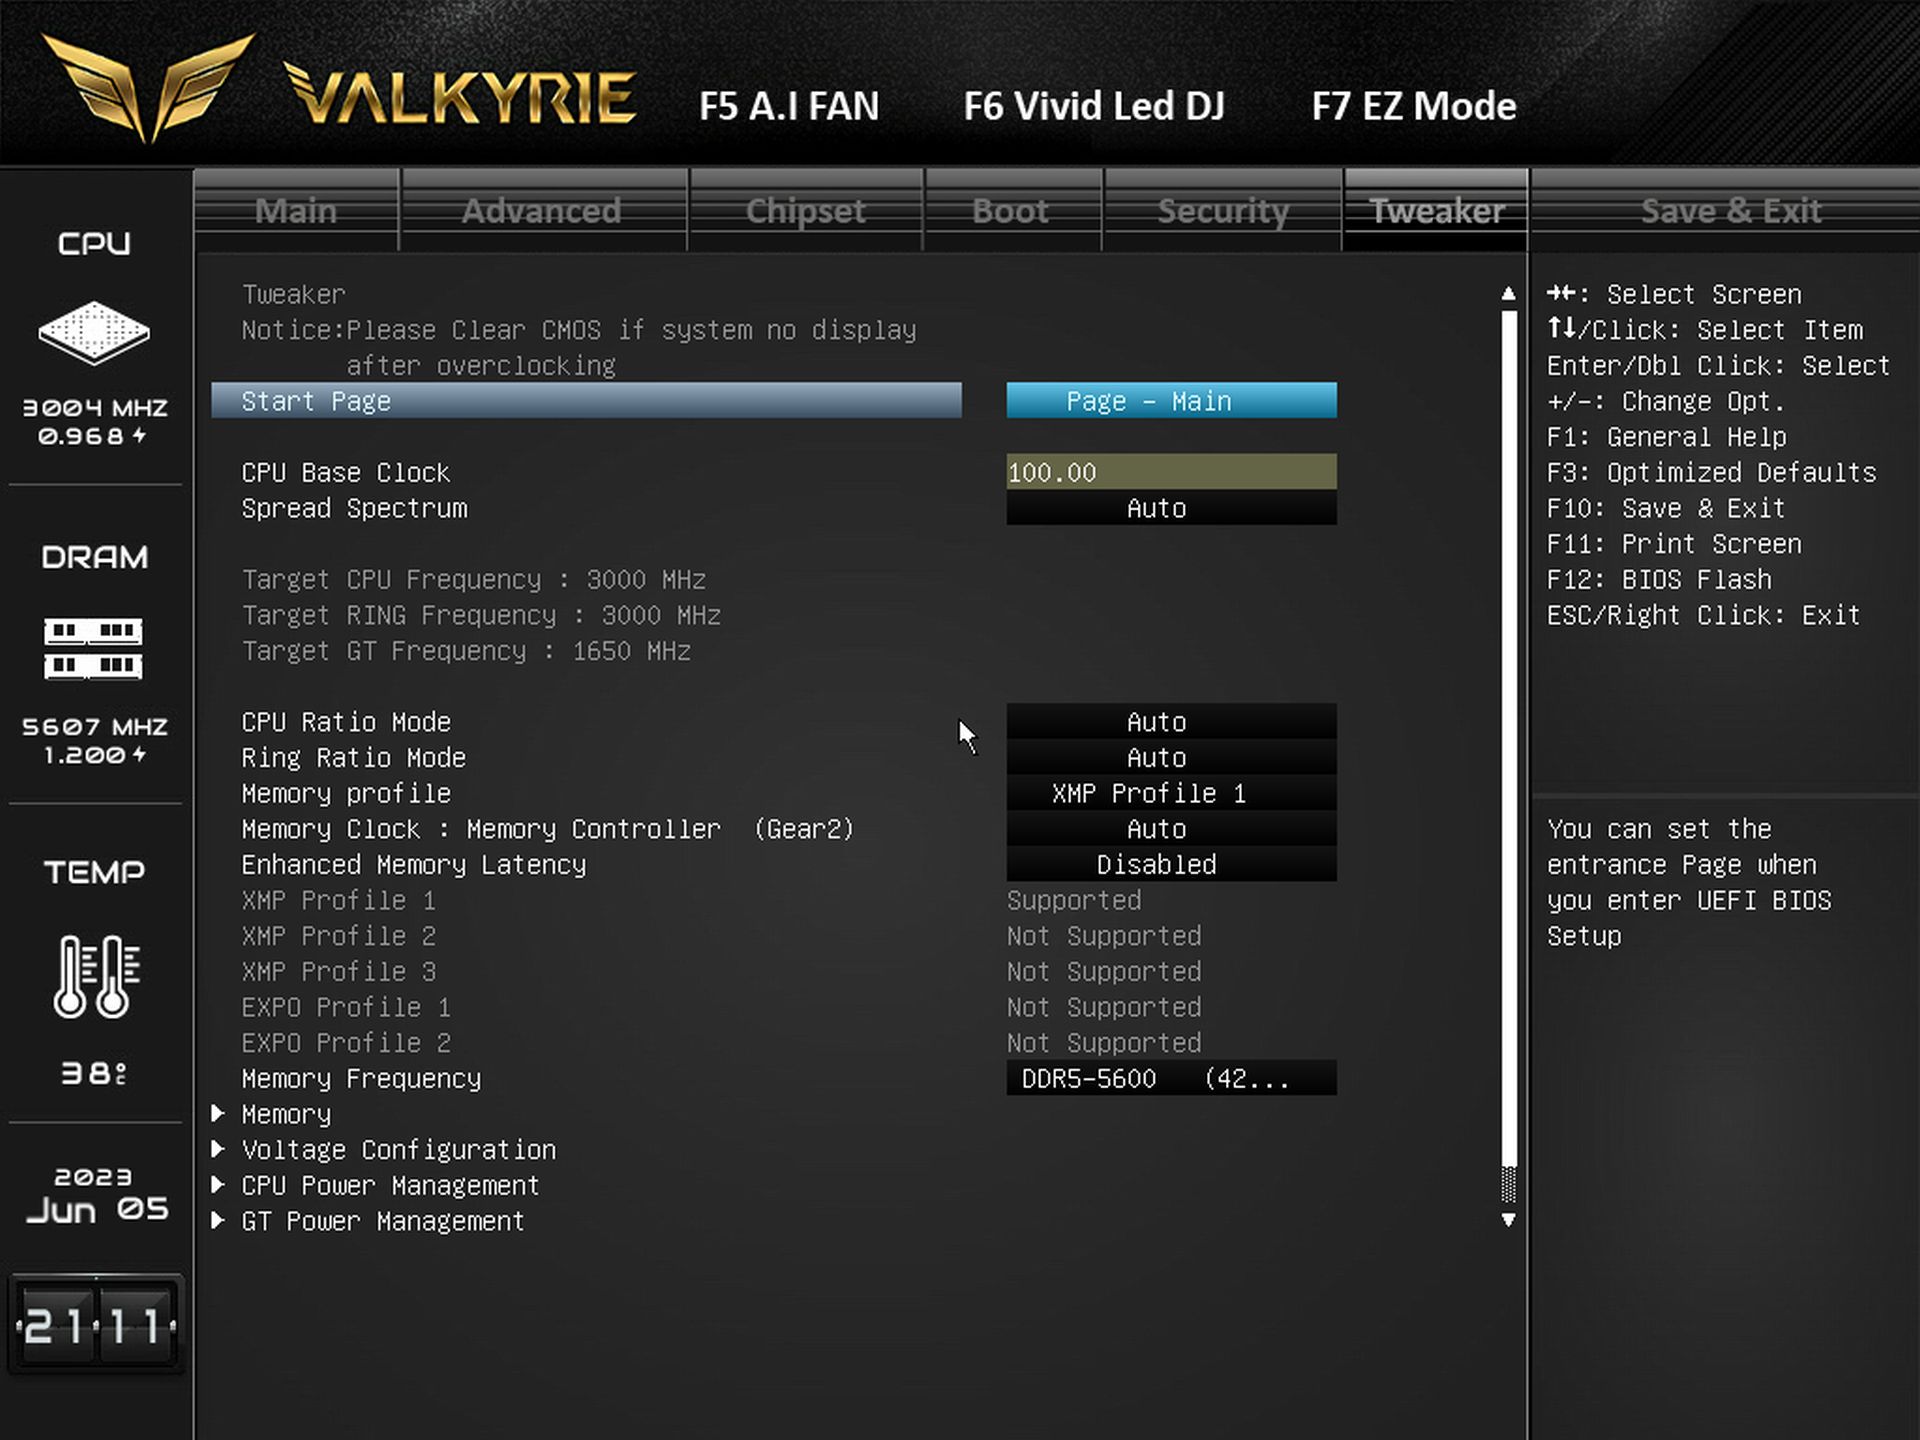
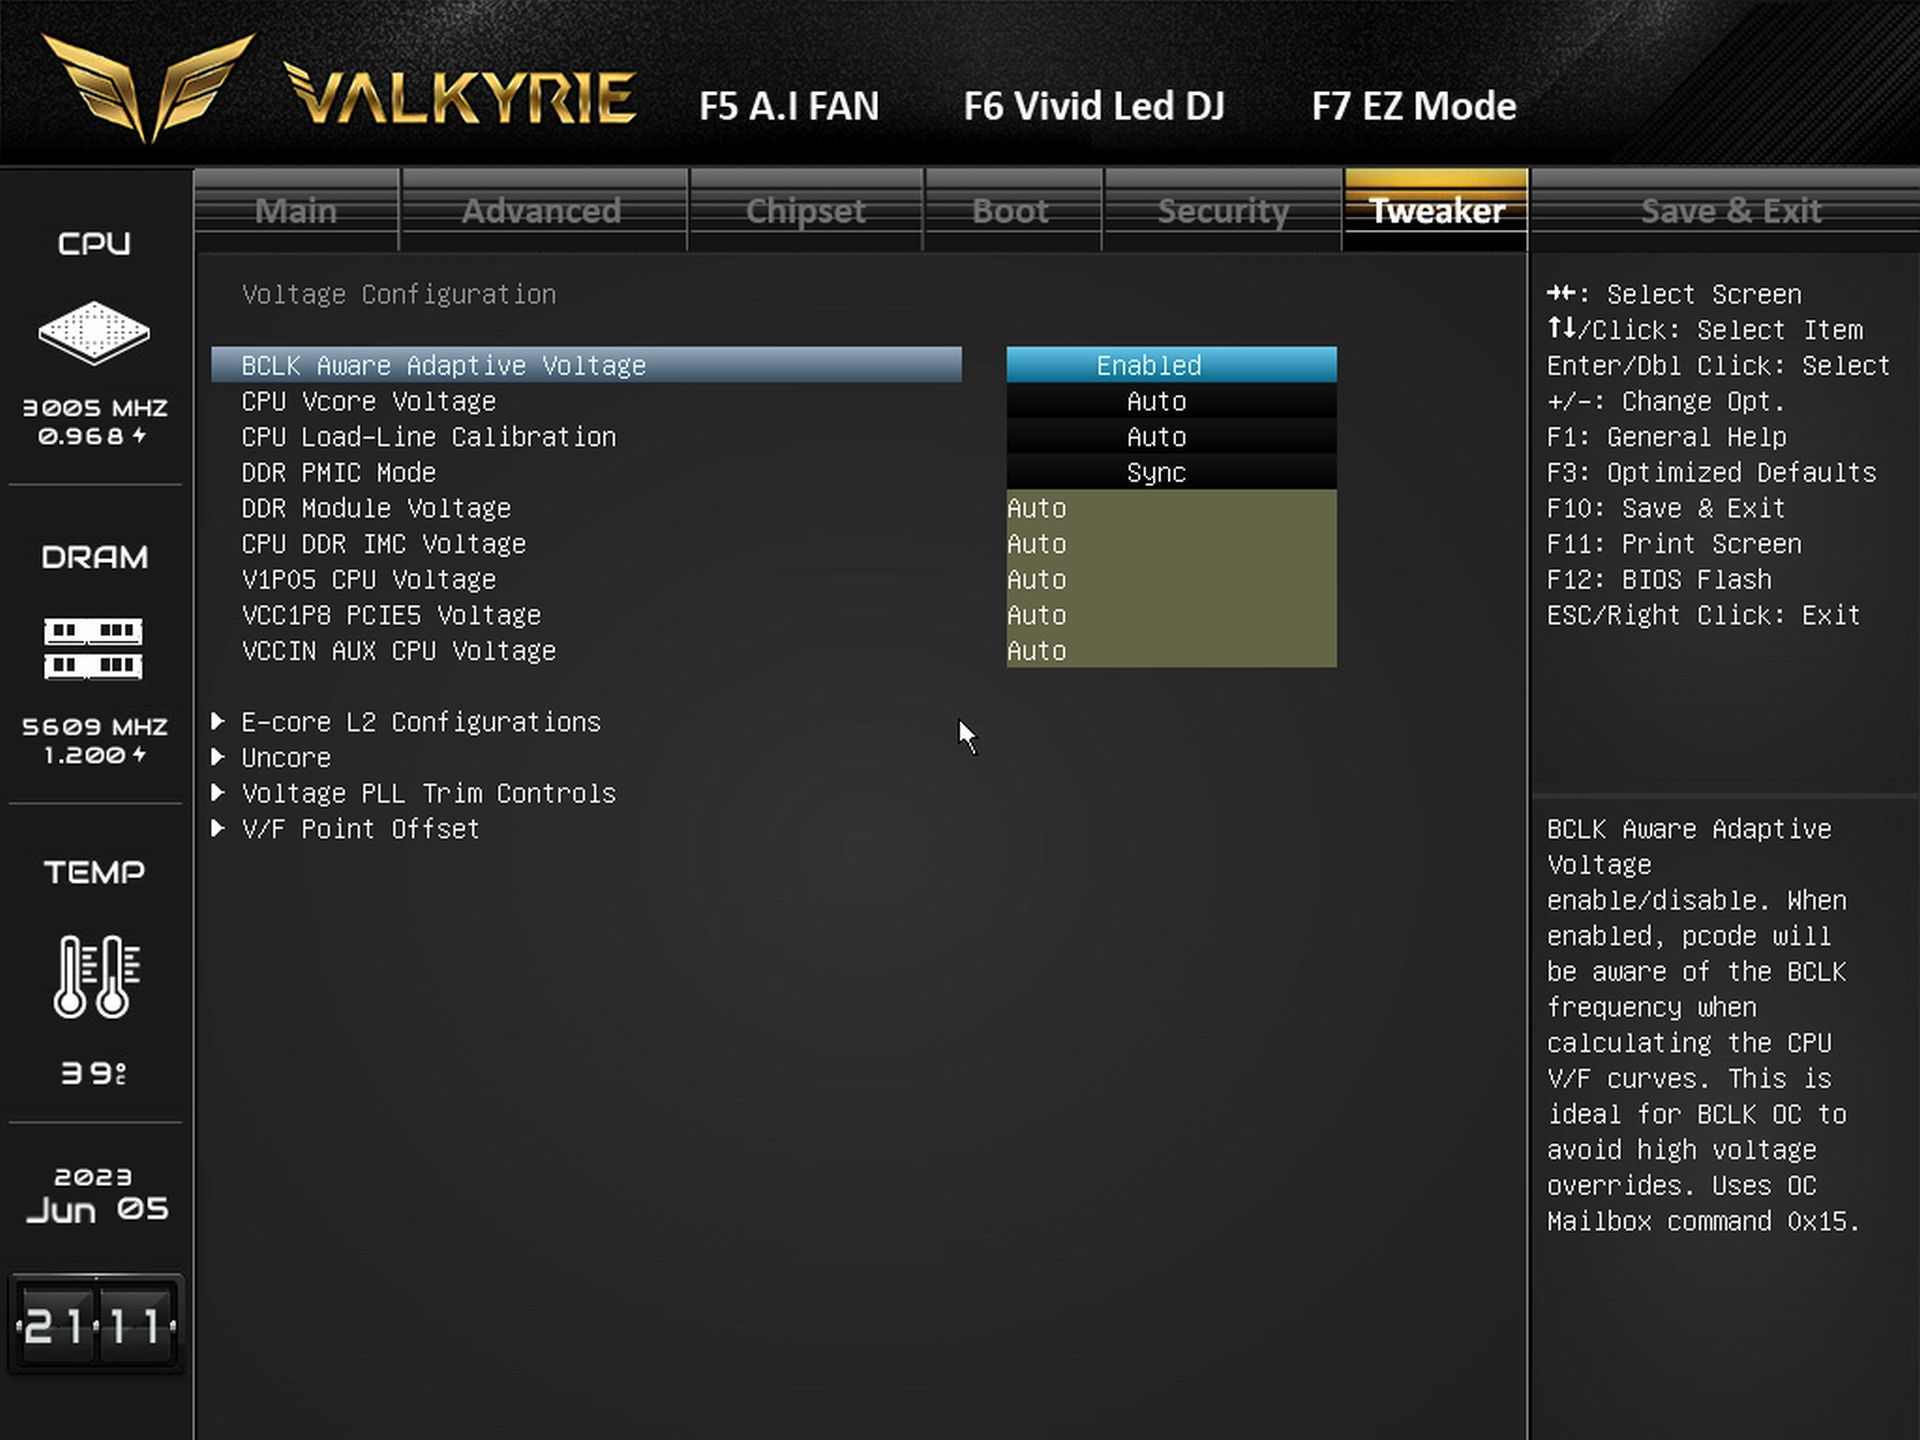
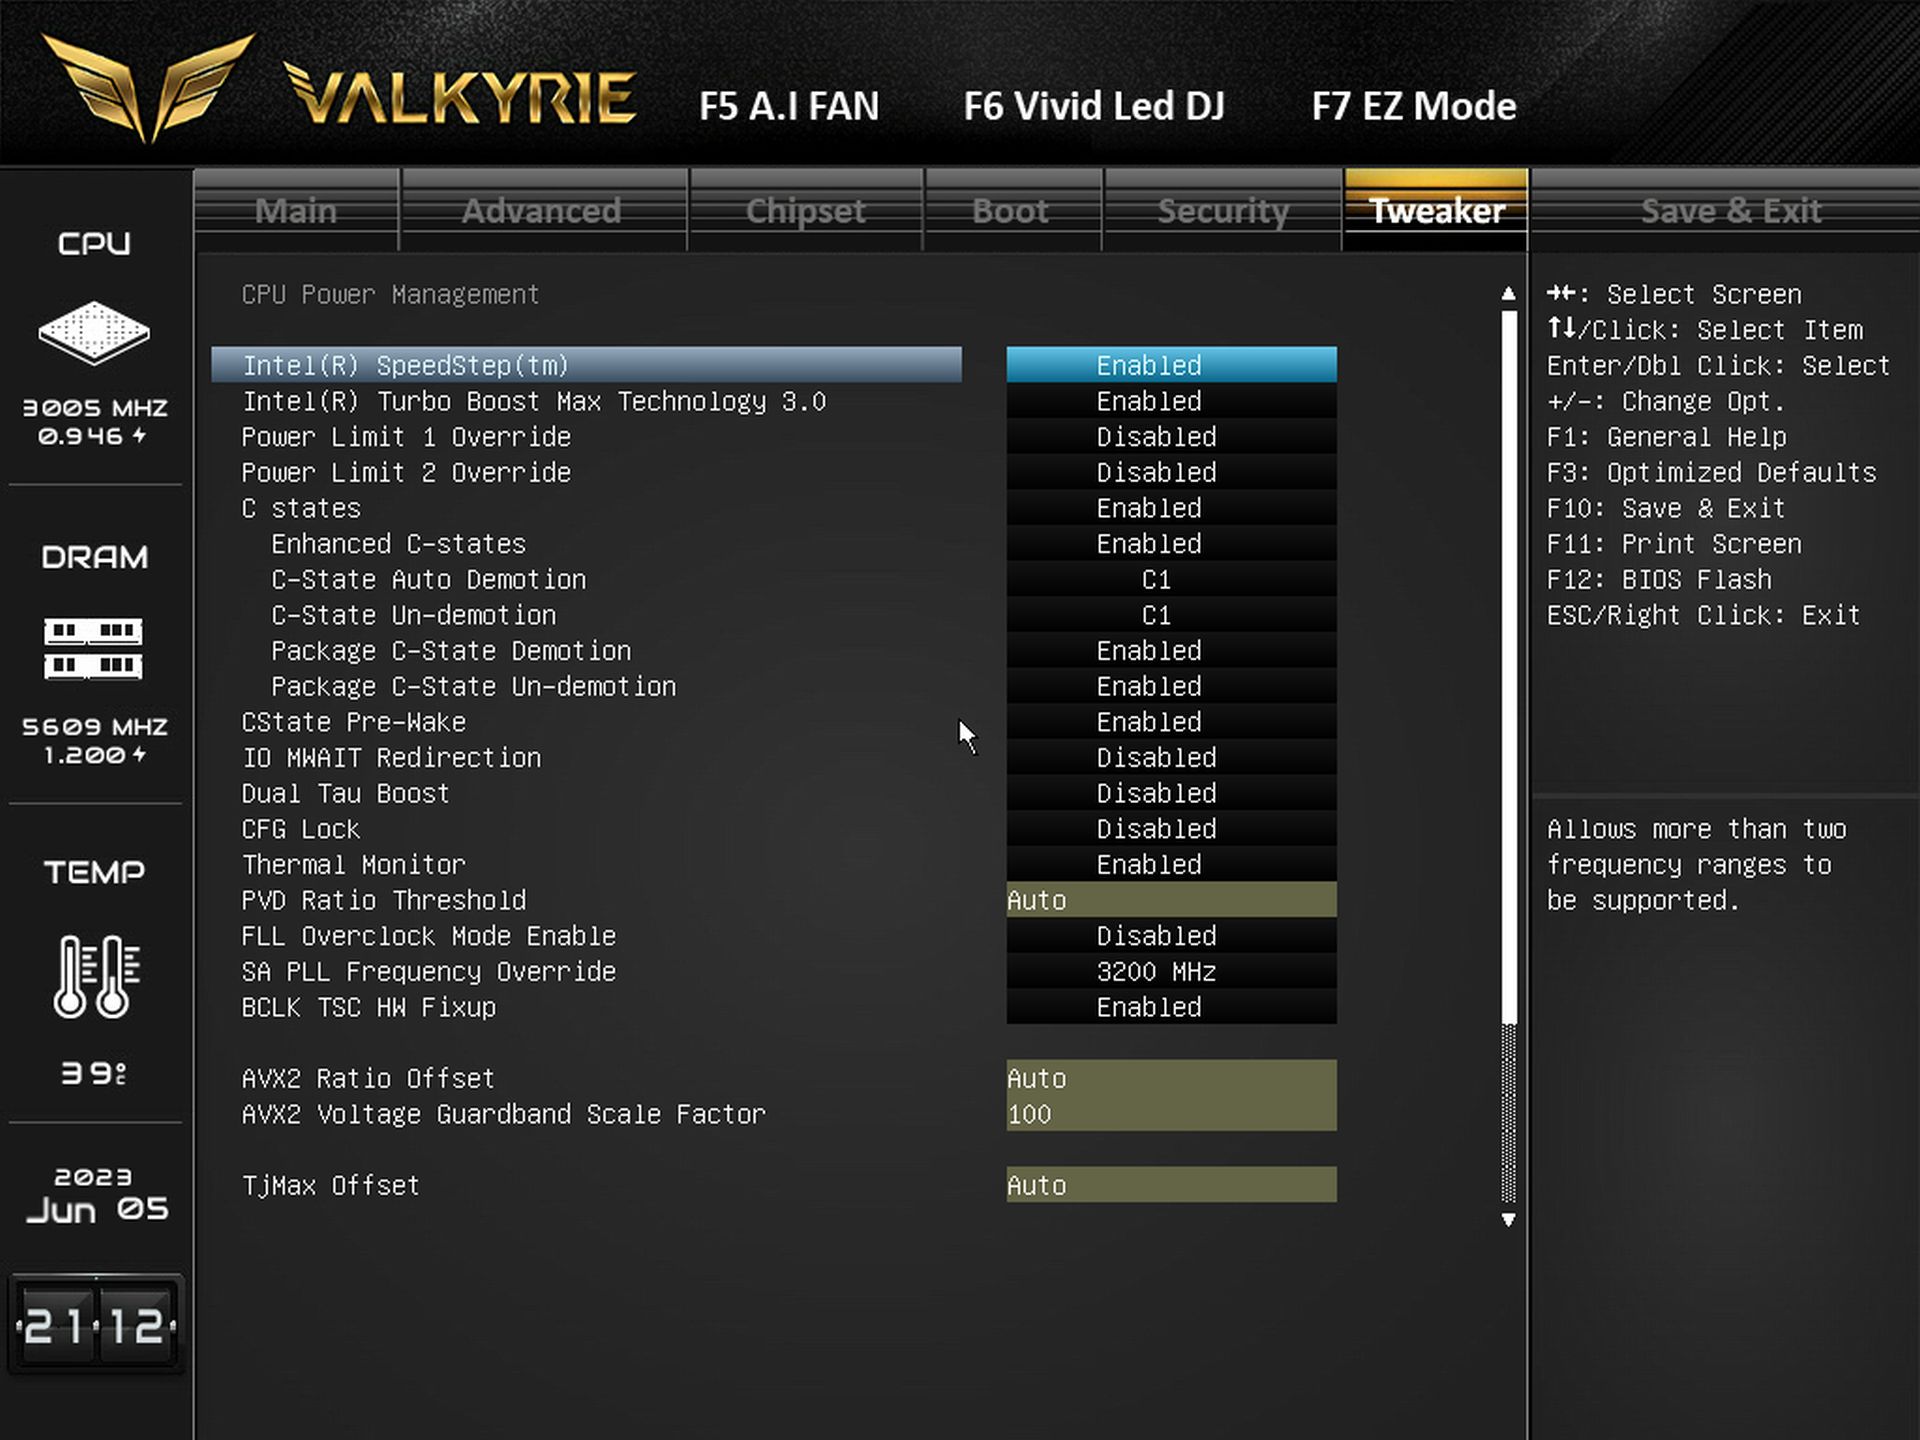
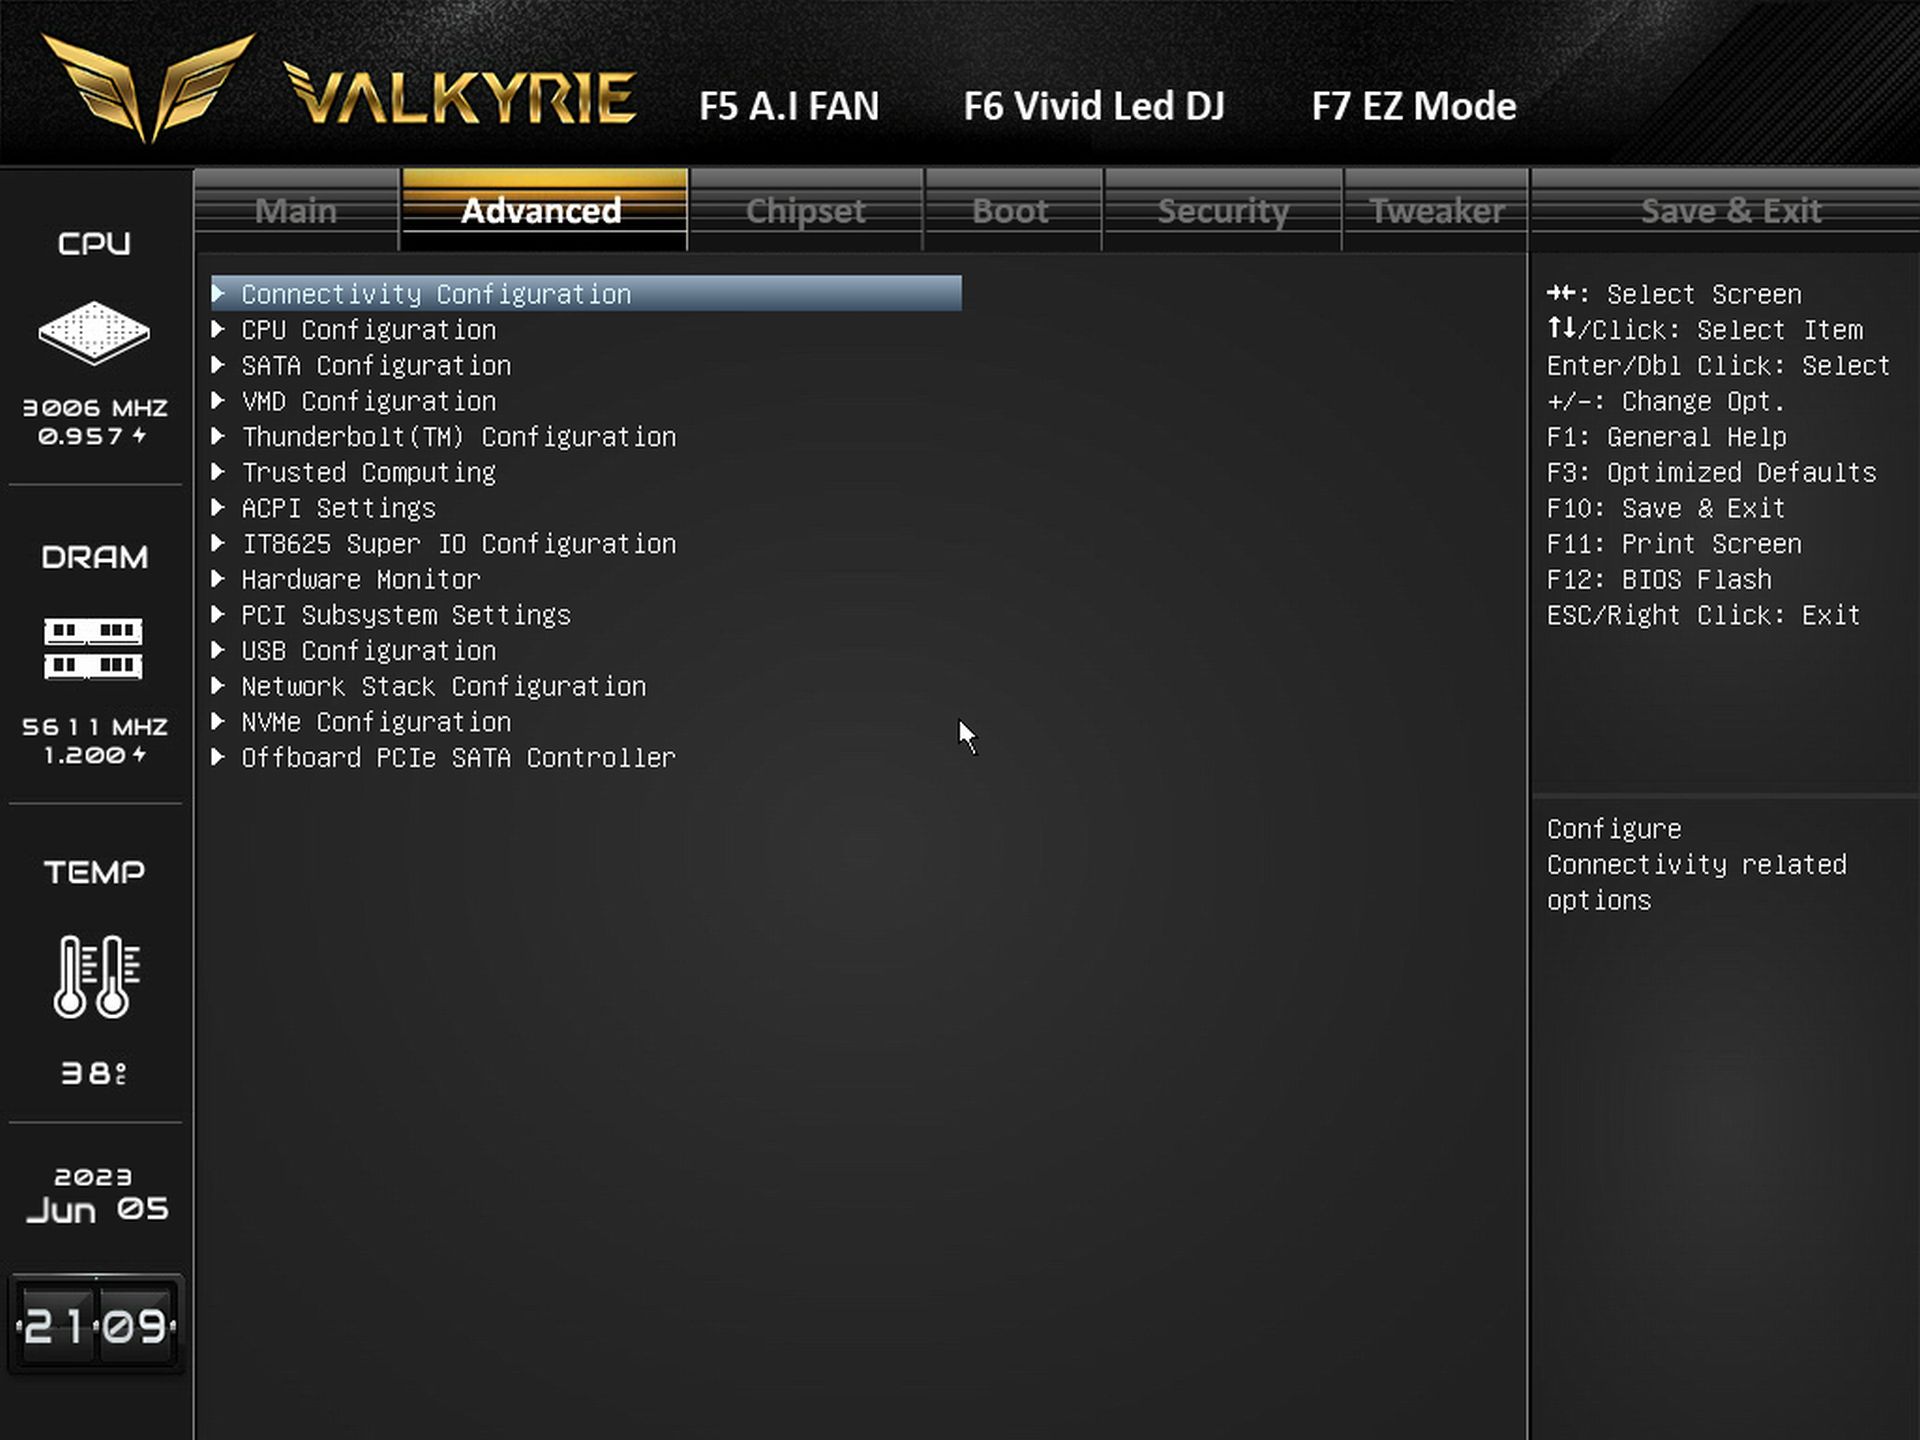
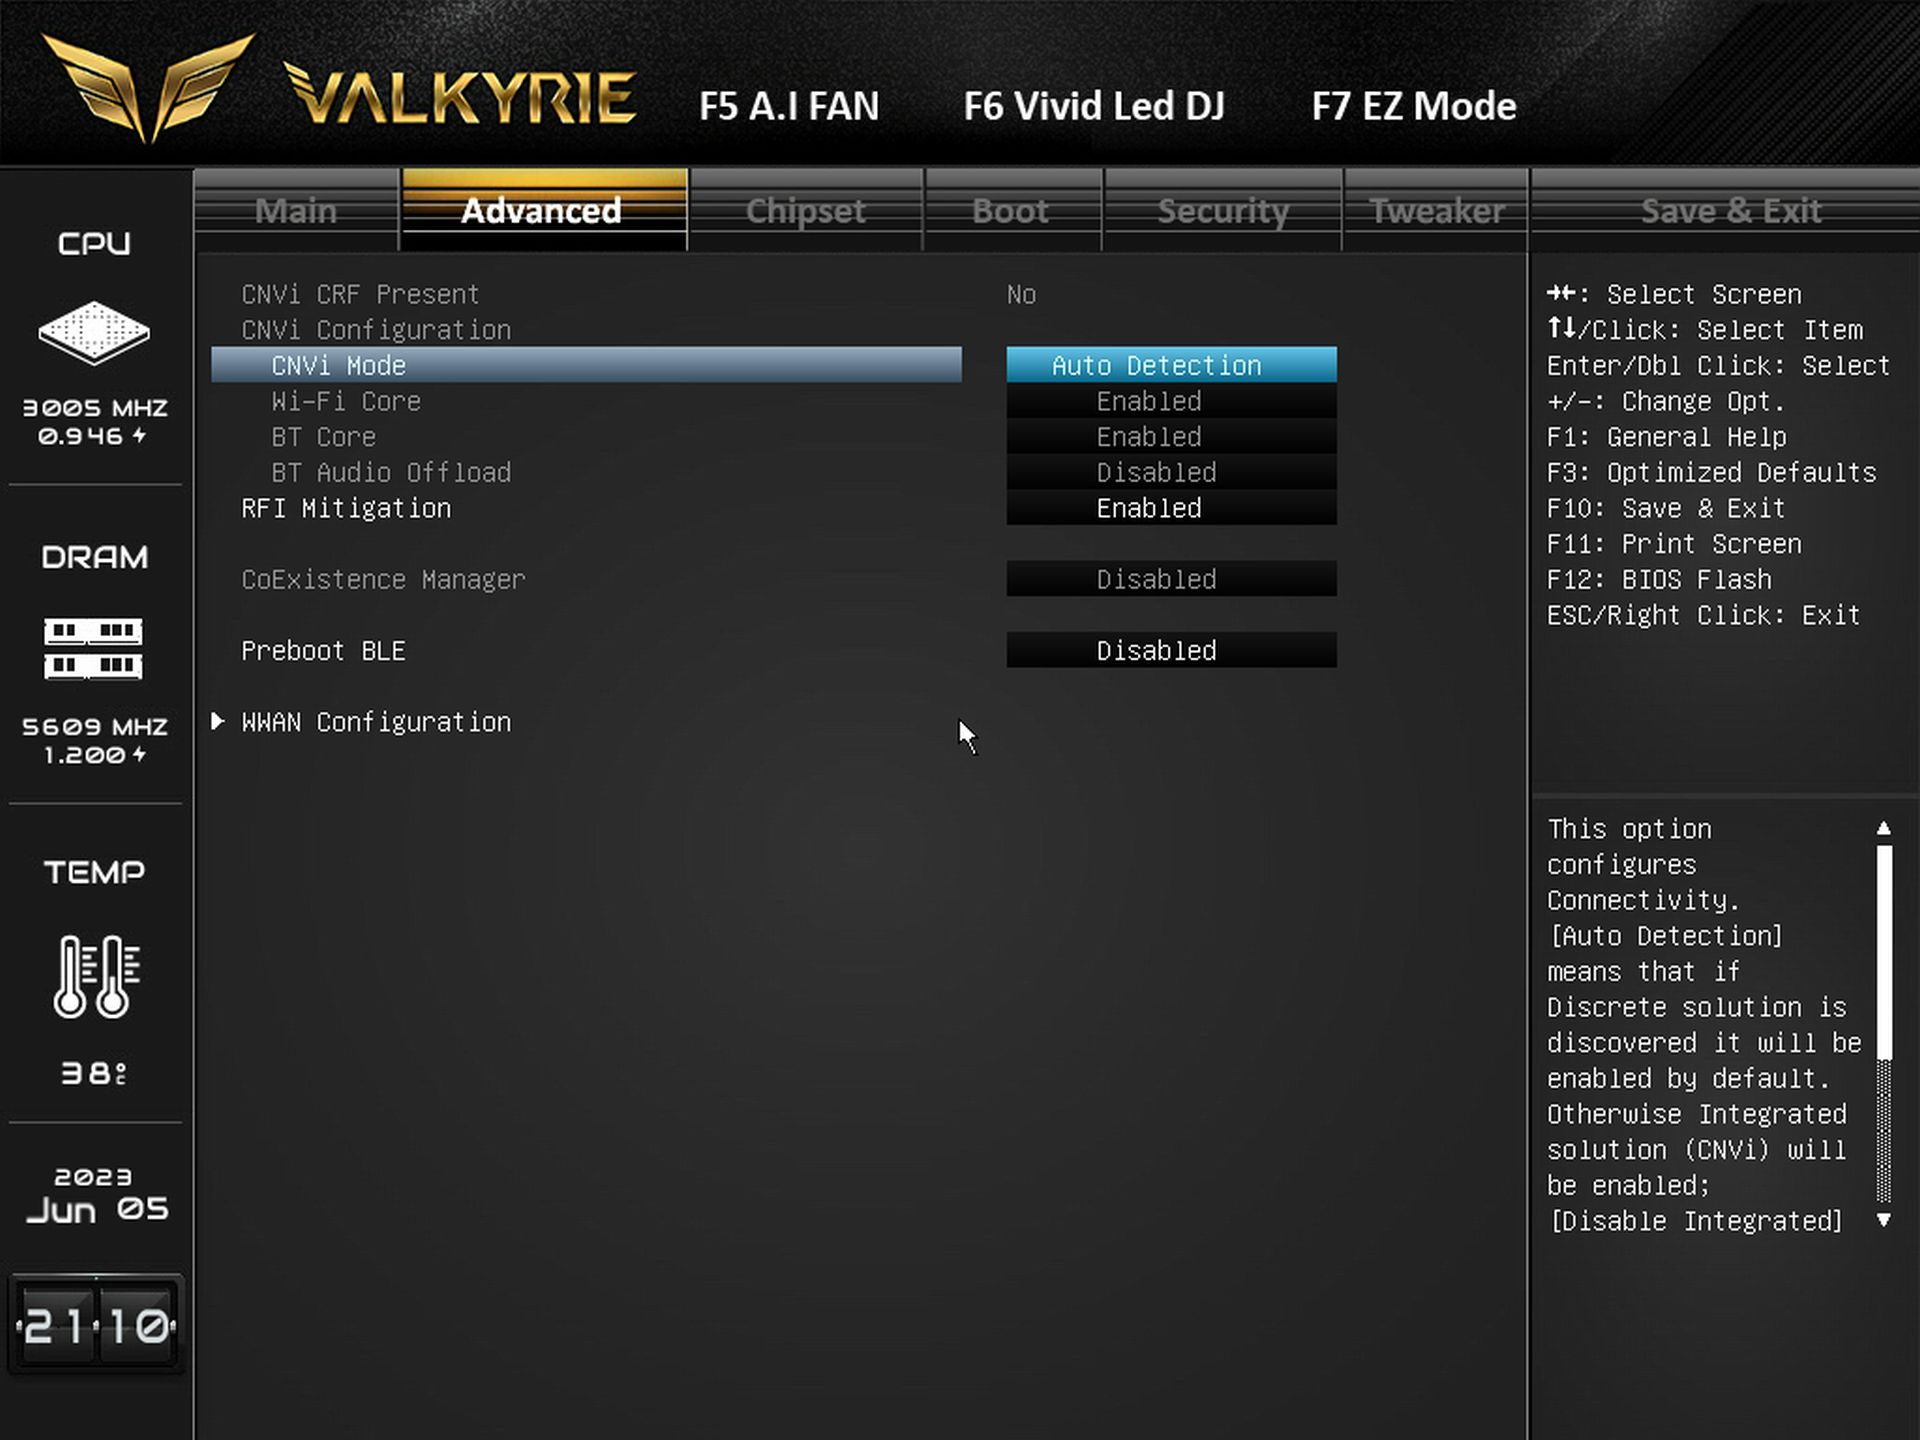
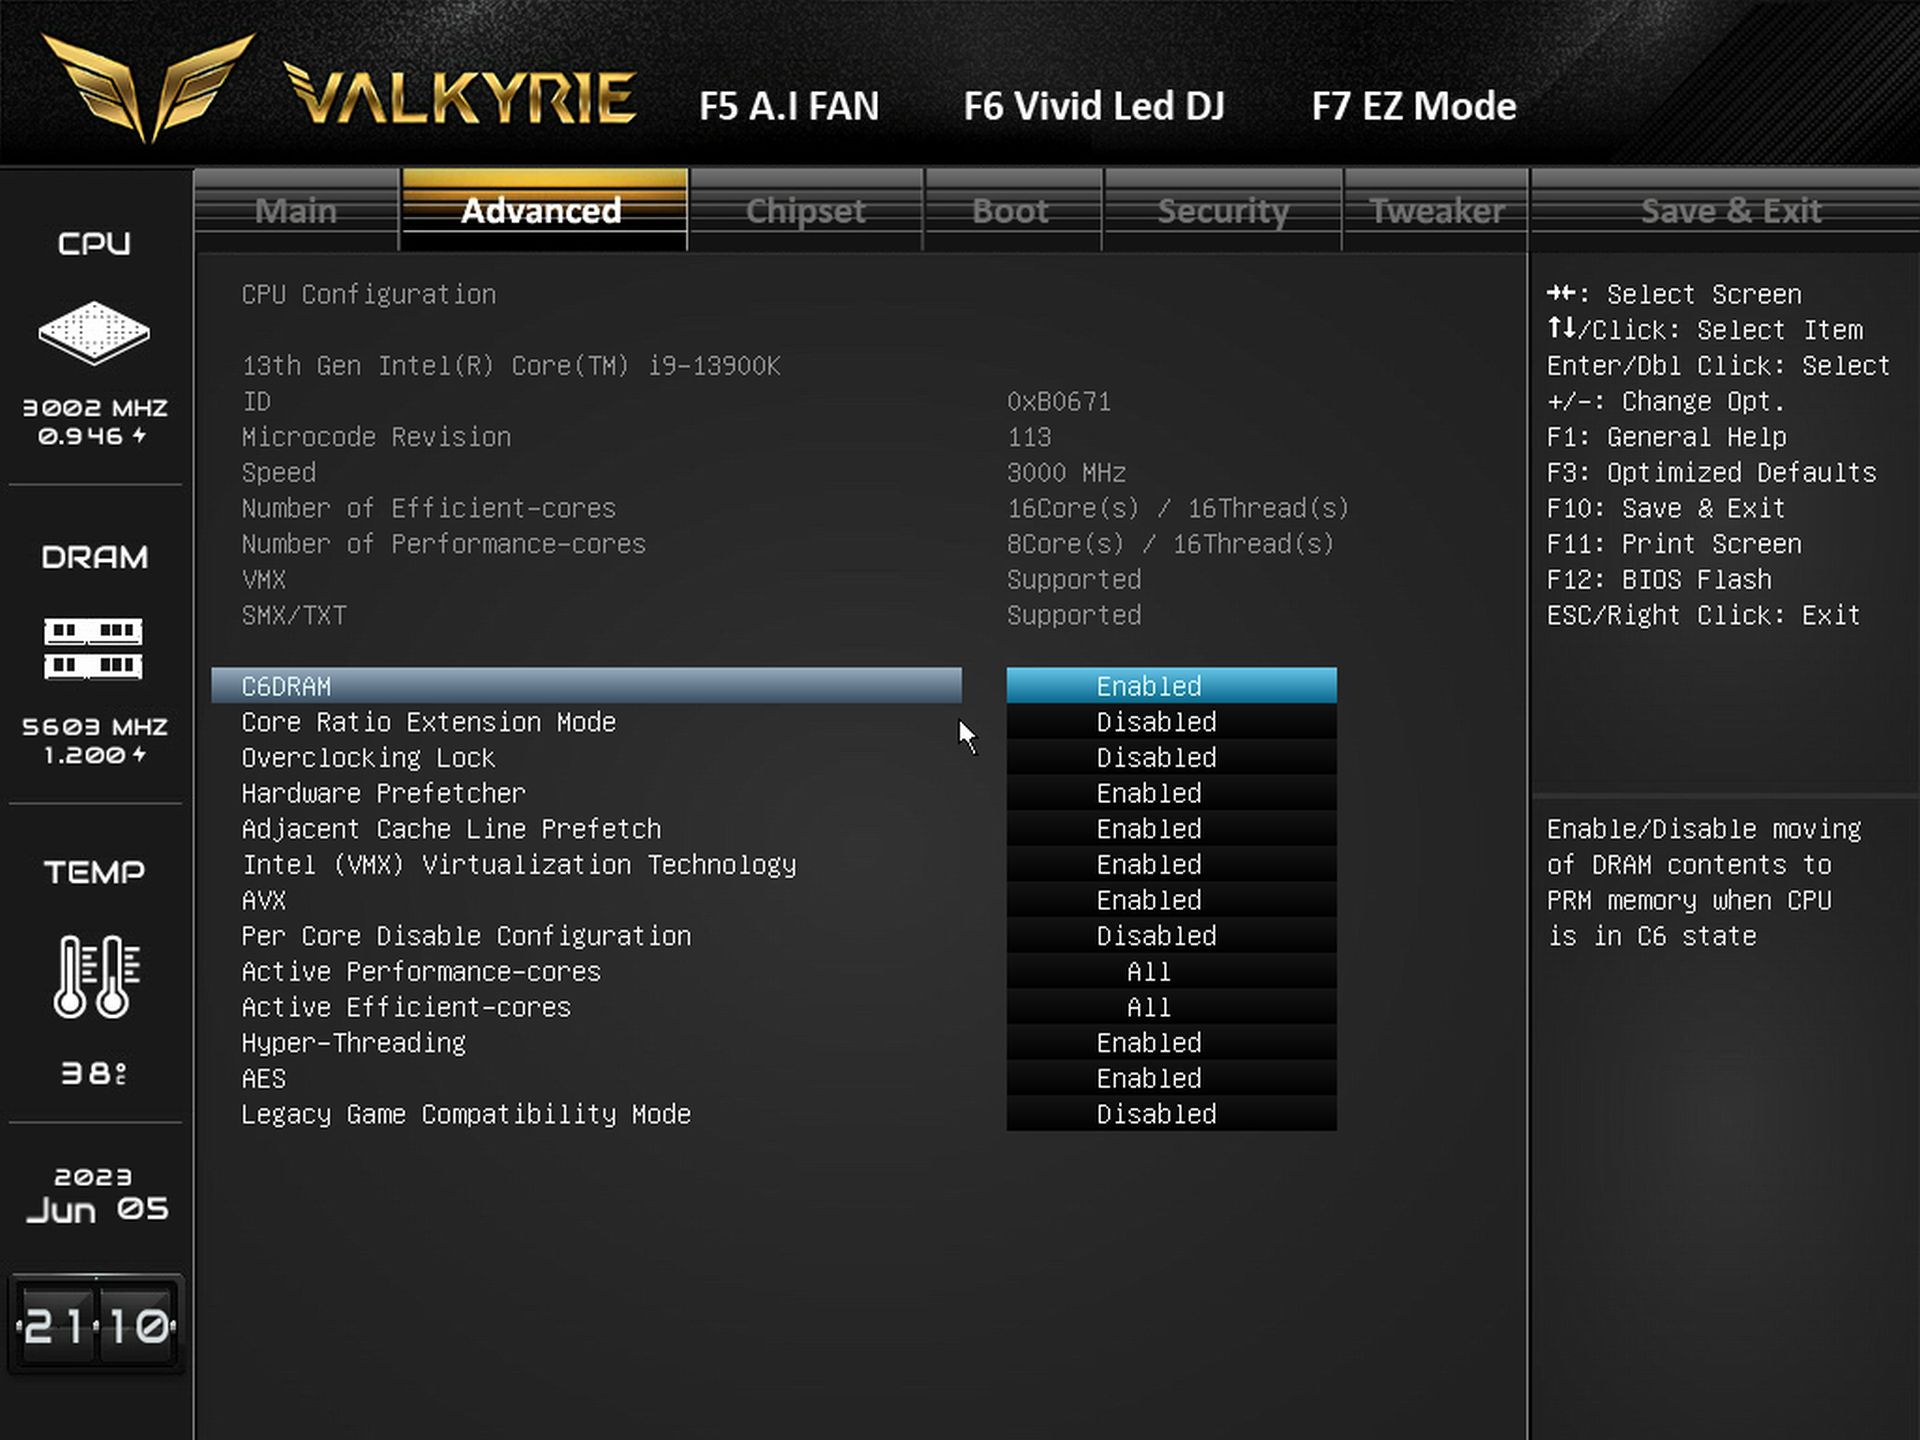
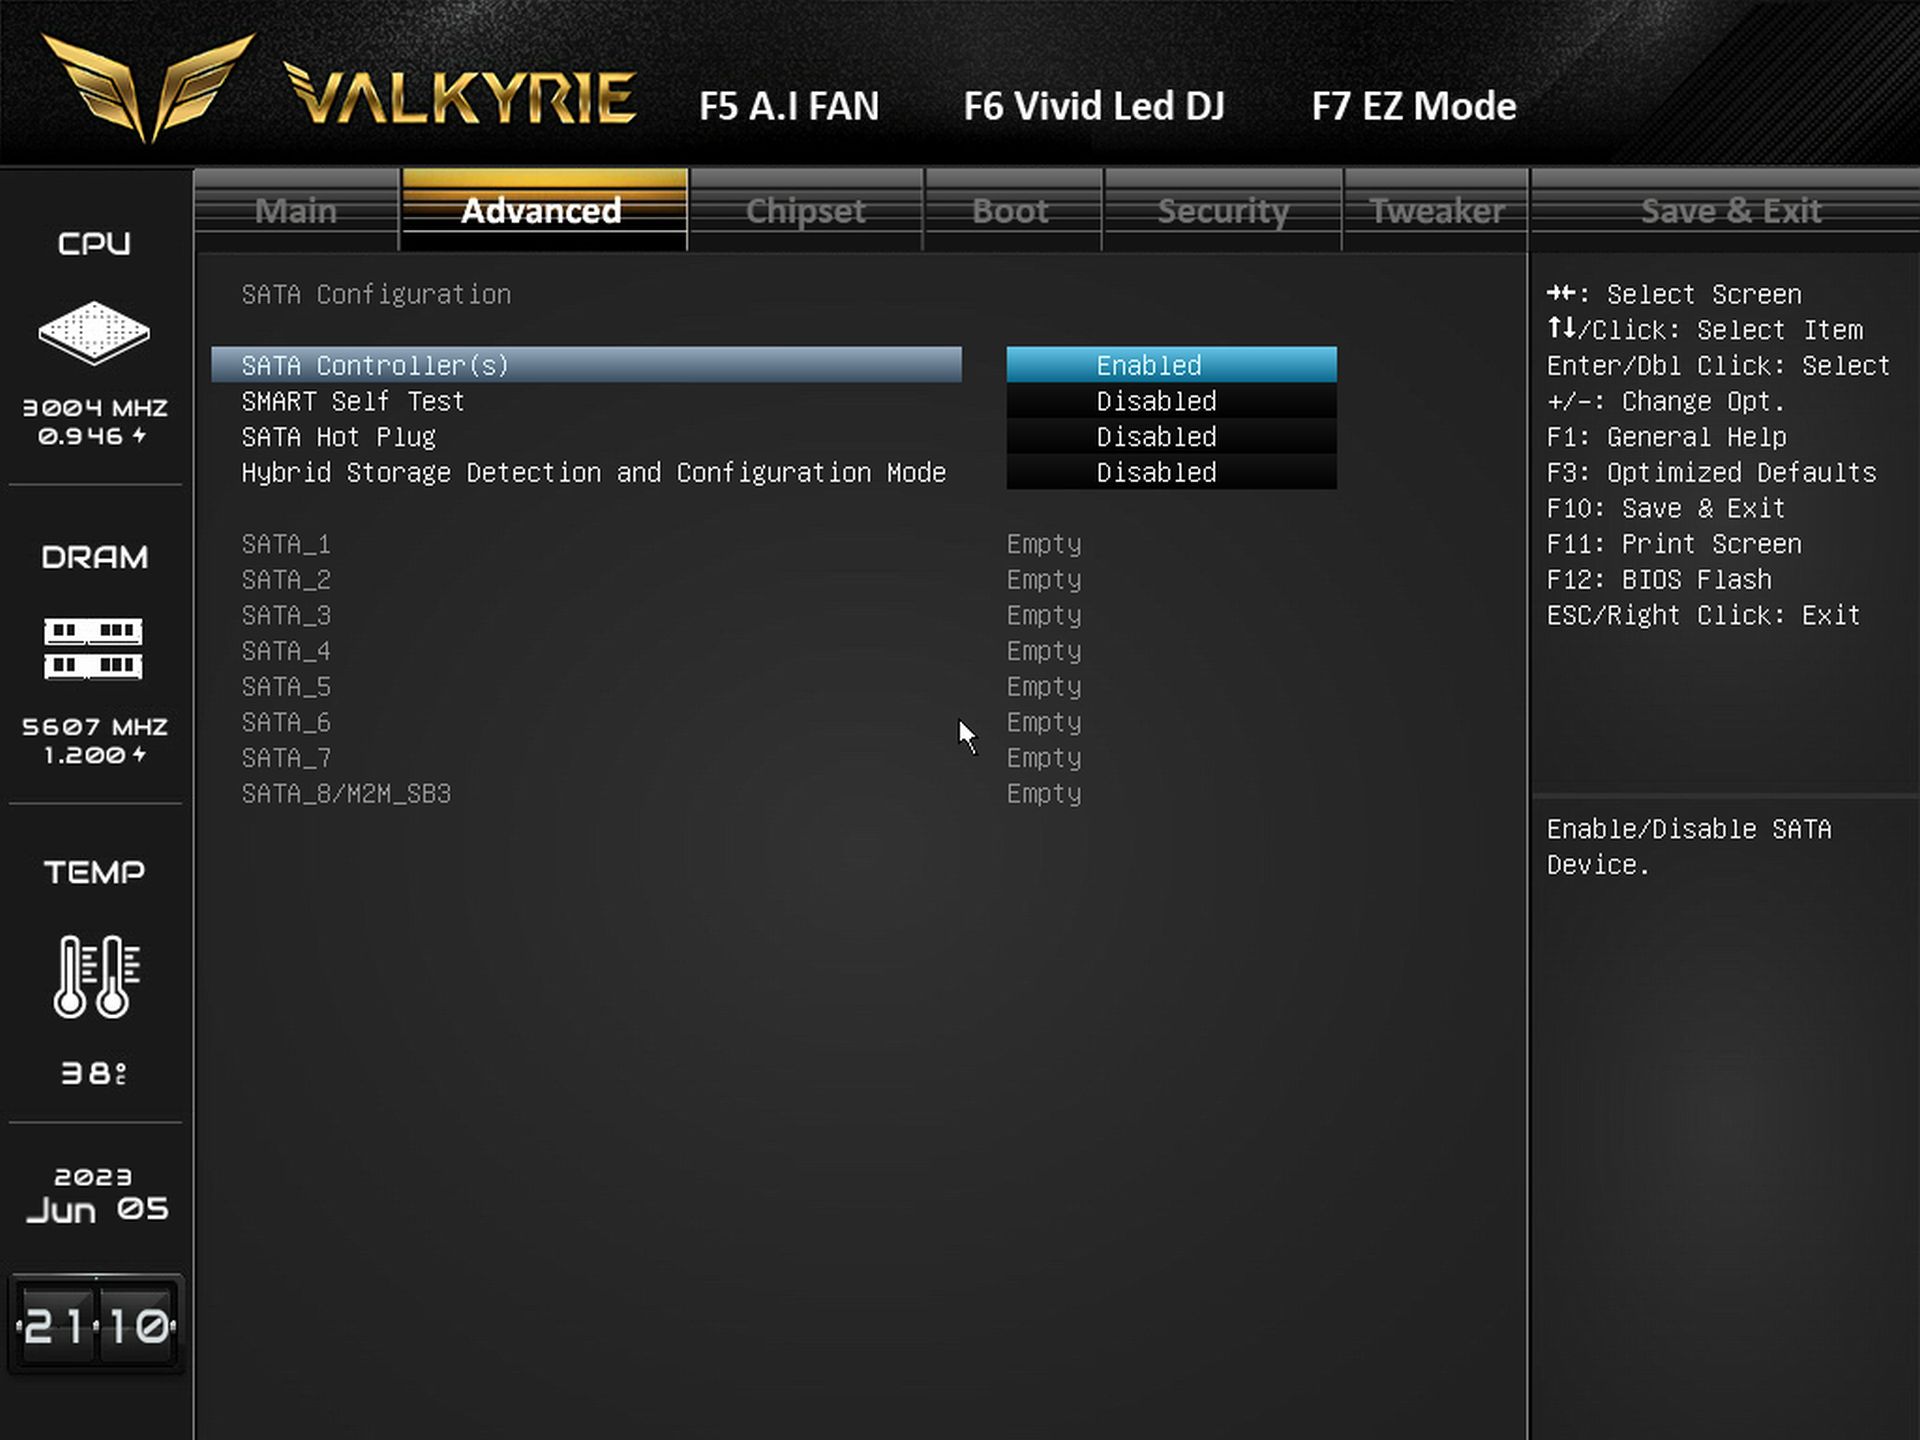
Biostar’s firmware on the Z790 boards, like the others, doesn’t receive a significant facelift outside of some options exclusive to Intelt’s latest CPU platform. There’s an EZ Mode and your more standard advanced mode with the different sections spanning the top. While it has many of the basics, the overclocking options are limited with regard to memory. If you’re into tweaking every little thing to extract every ounce of performance from your sticks, this isn’t the board that will do it. If you’re more of a set-EXPO/XMP-and-forget-it memory person, this isn’t a concern (assuming your memory is on the QVL list). Overall, we like the BIOS, but in terms of appearance and features, it just isn’t up to the level of its competition.

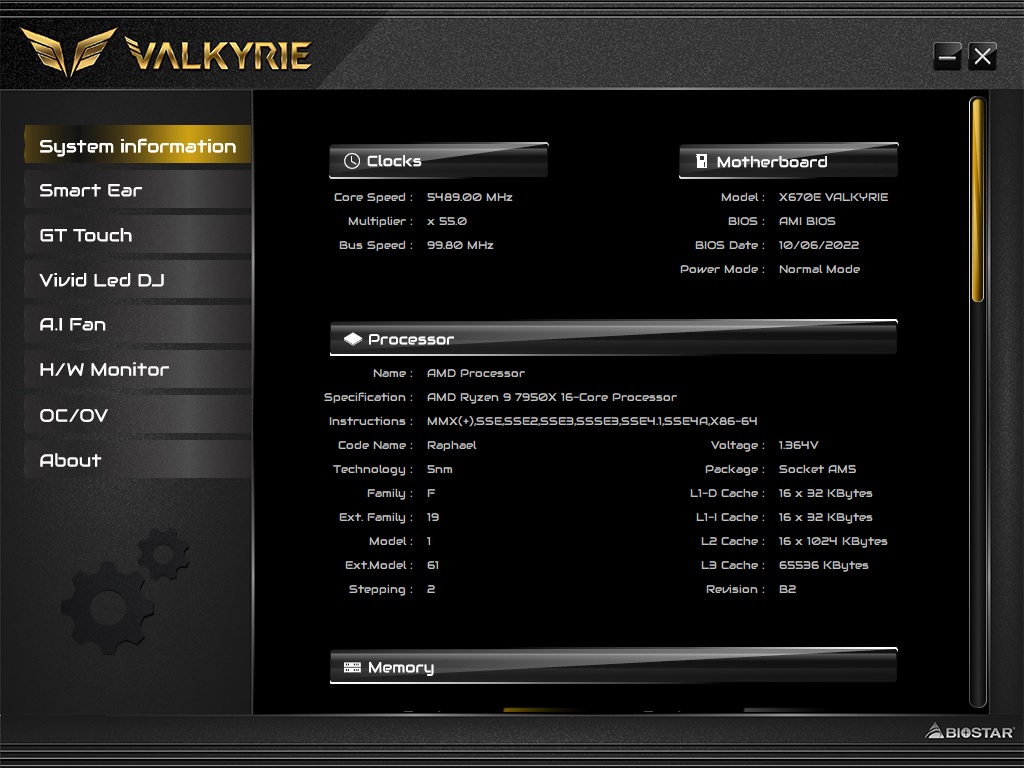
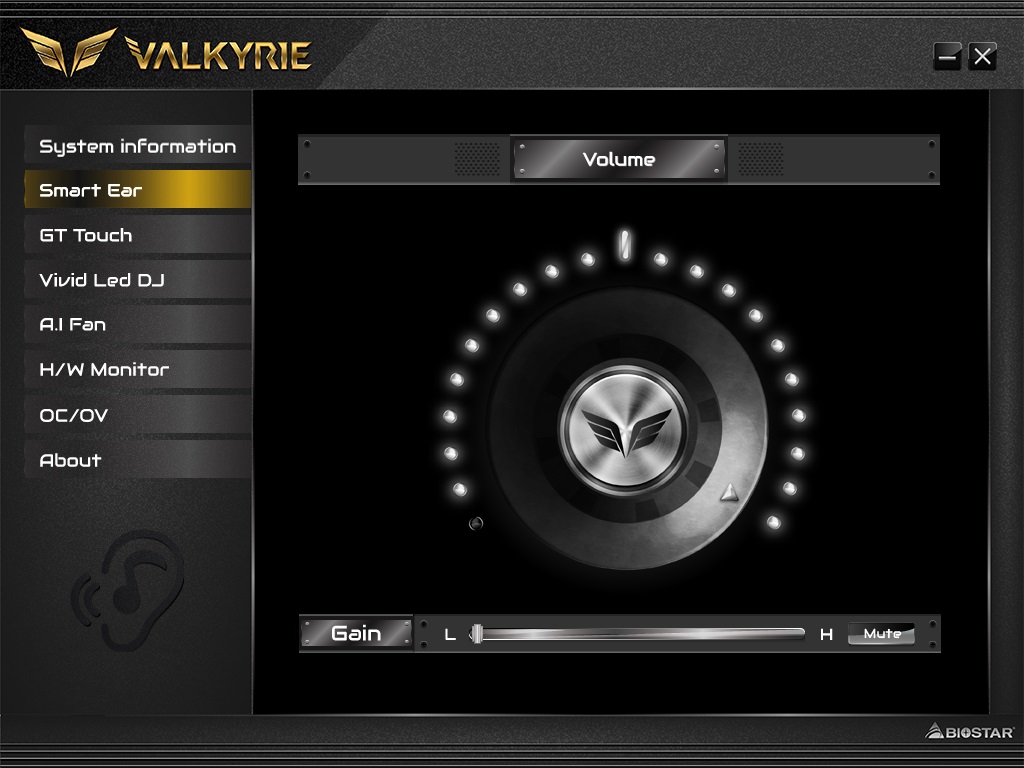
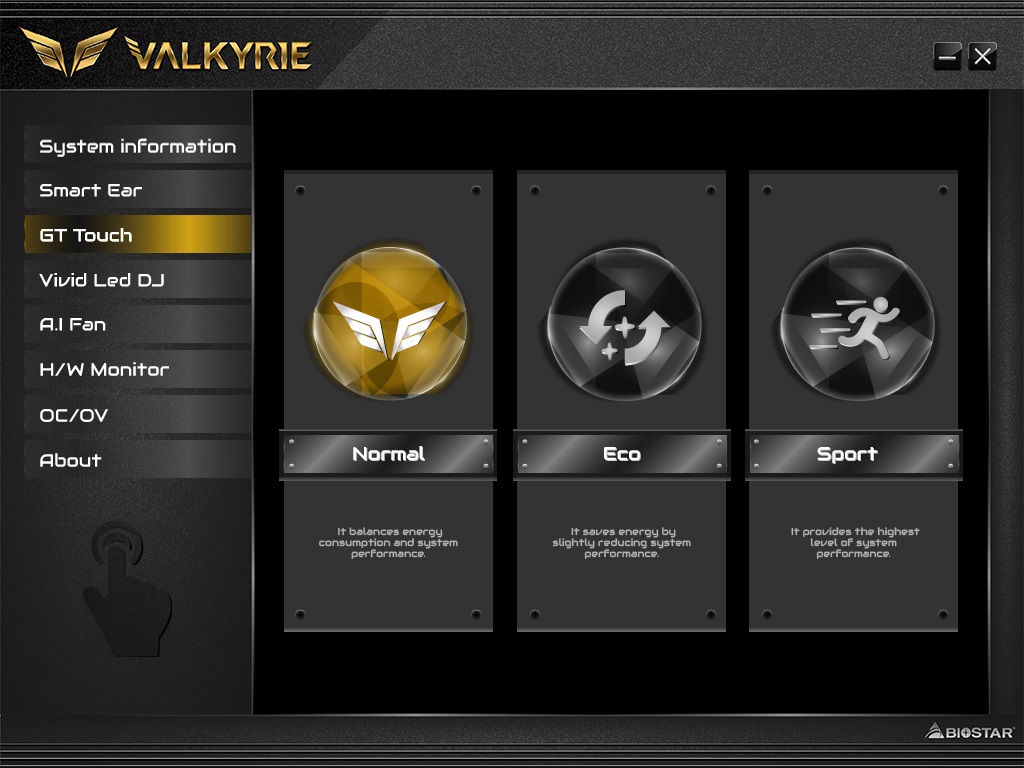
Software
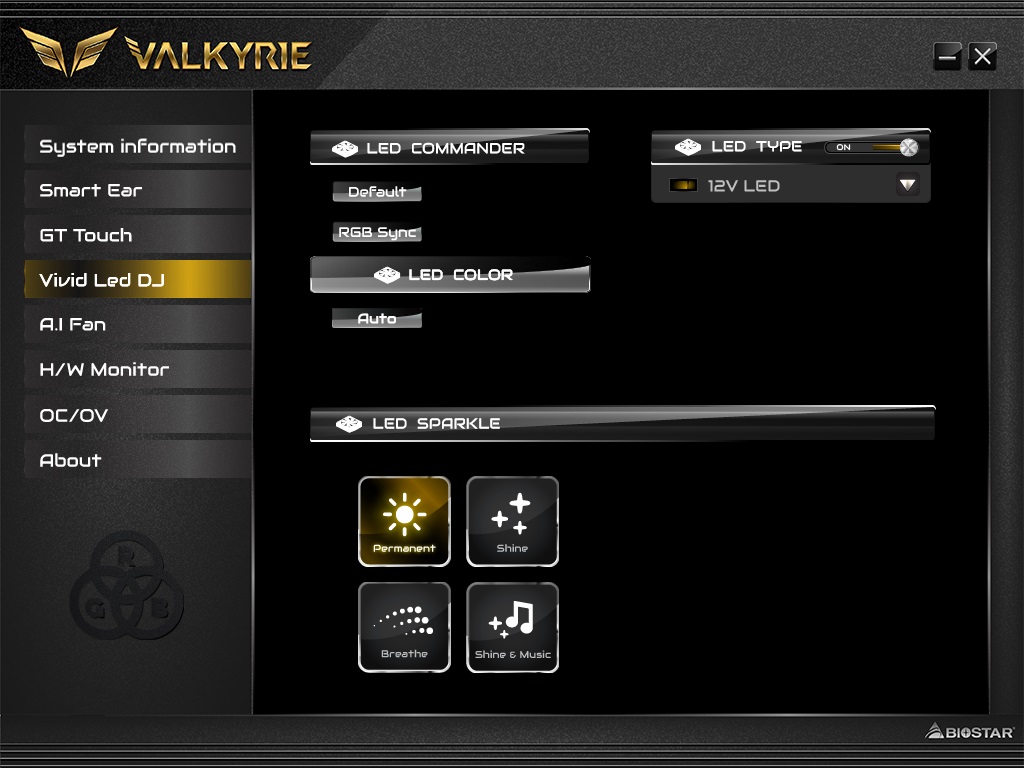
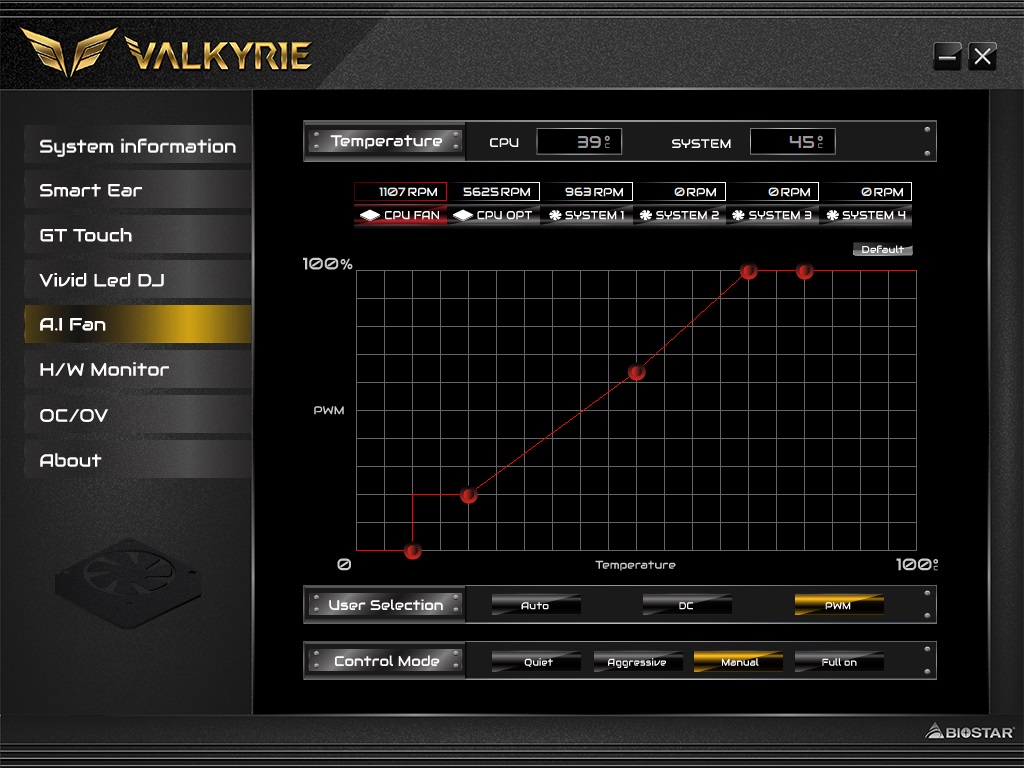
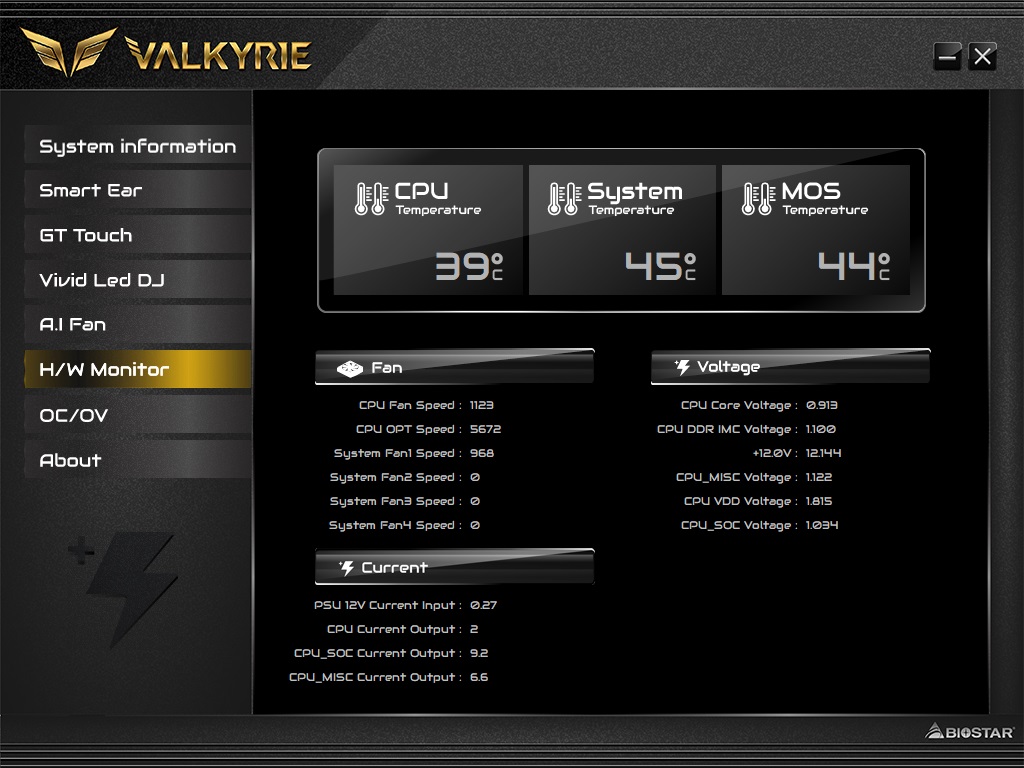
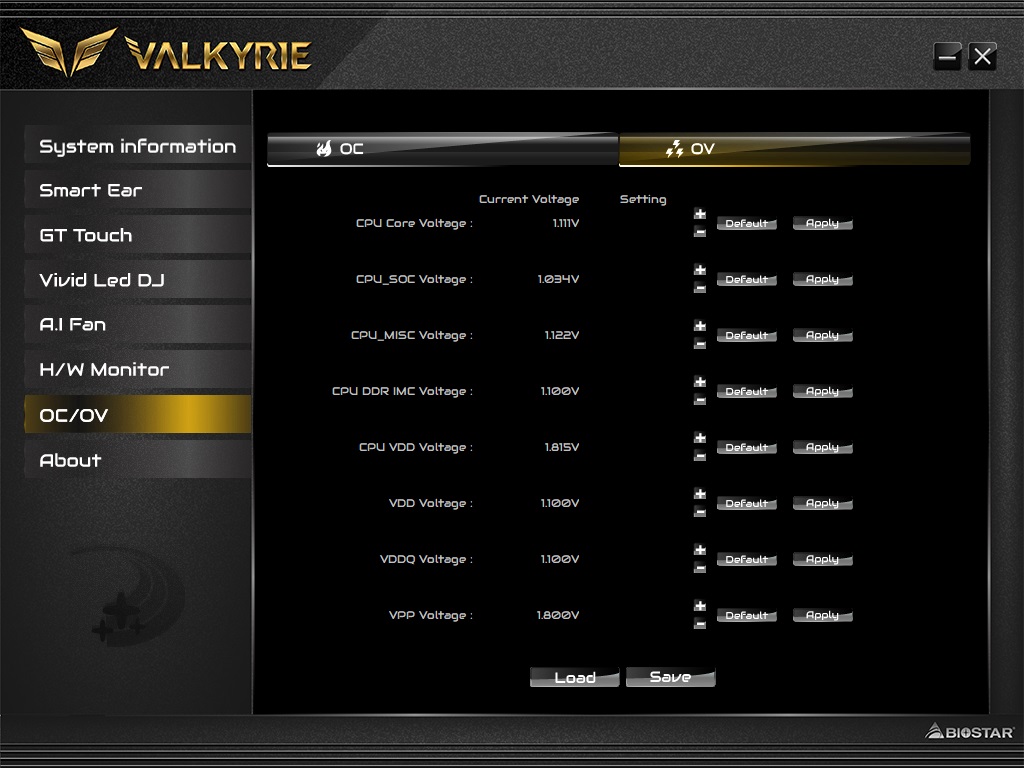
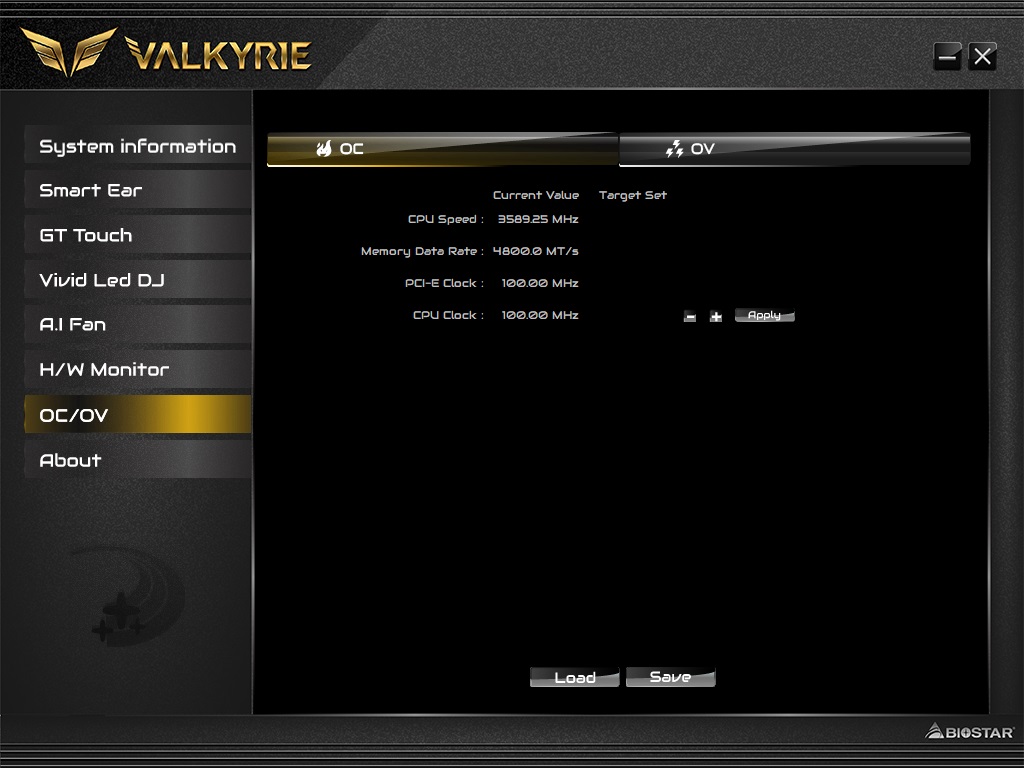
For software, Biostar has the Aurora suite that combines various functionality in one application. You’ll find audio functionality (volume control - Smart Ear), RGB (Vivid LED DJ), fan control (AI Fan), a hardware monitor, and overclocking functions in the OC/OV section. Everything worked as described. But, overclocking is limited to BCLK adjustment and voltage (no CPU multiplier adjustments). Overall, we like the Aorura application and hope for additional features/functionality to be added in new revisions.
Test System / Comparison Products
We’ve updated our test system to Windows 11 64-bit OS with all updates applied. We kept the same Asus TUF RTX 3070 video card from our previous testing platforms but updated the driver. Additionally, we updated to F1 22 in our games suite and kept Far Cry 6. We use the latest non-beta motherboard BIOS available to the public unless otherwise noted. The hardware we used is as follows:
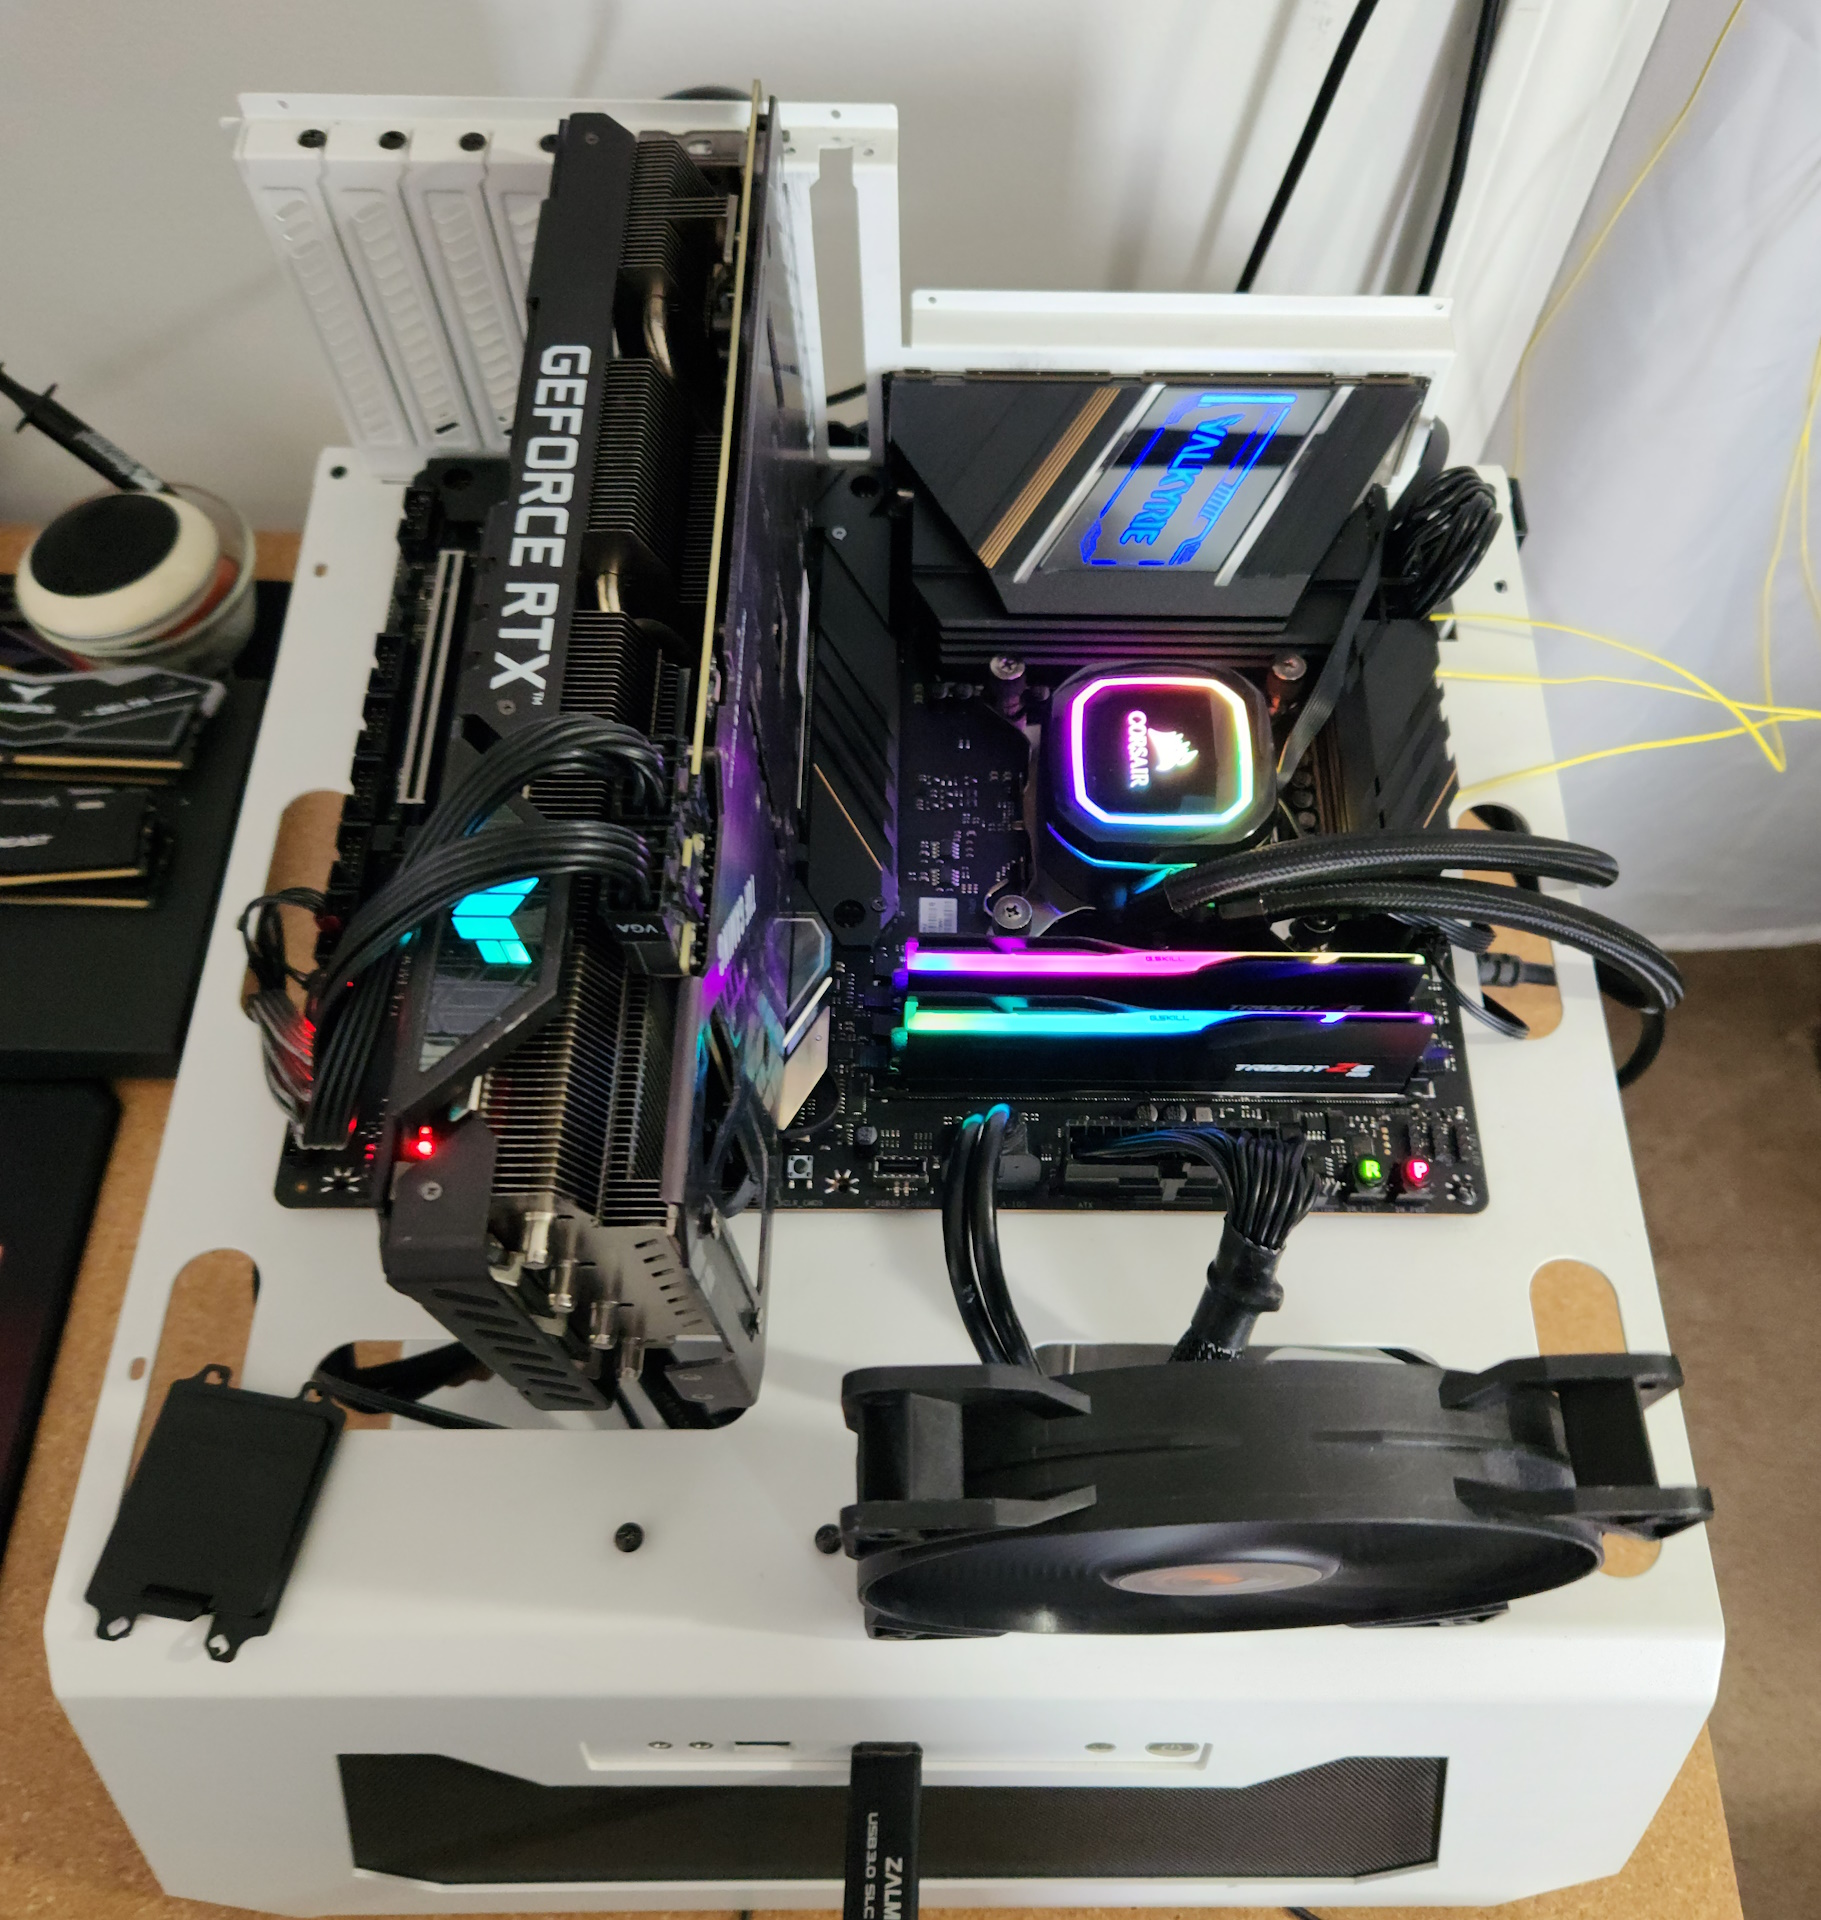
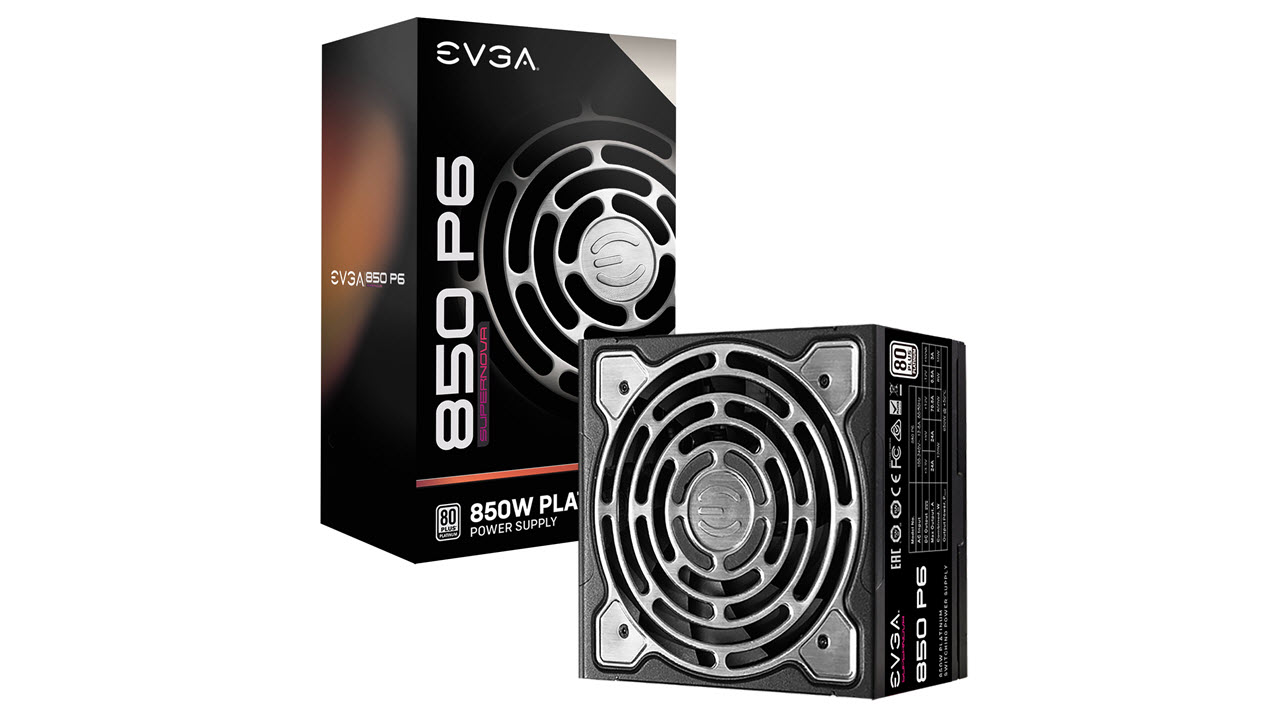
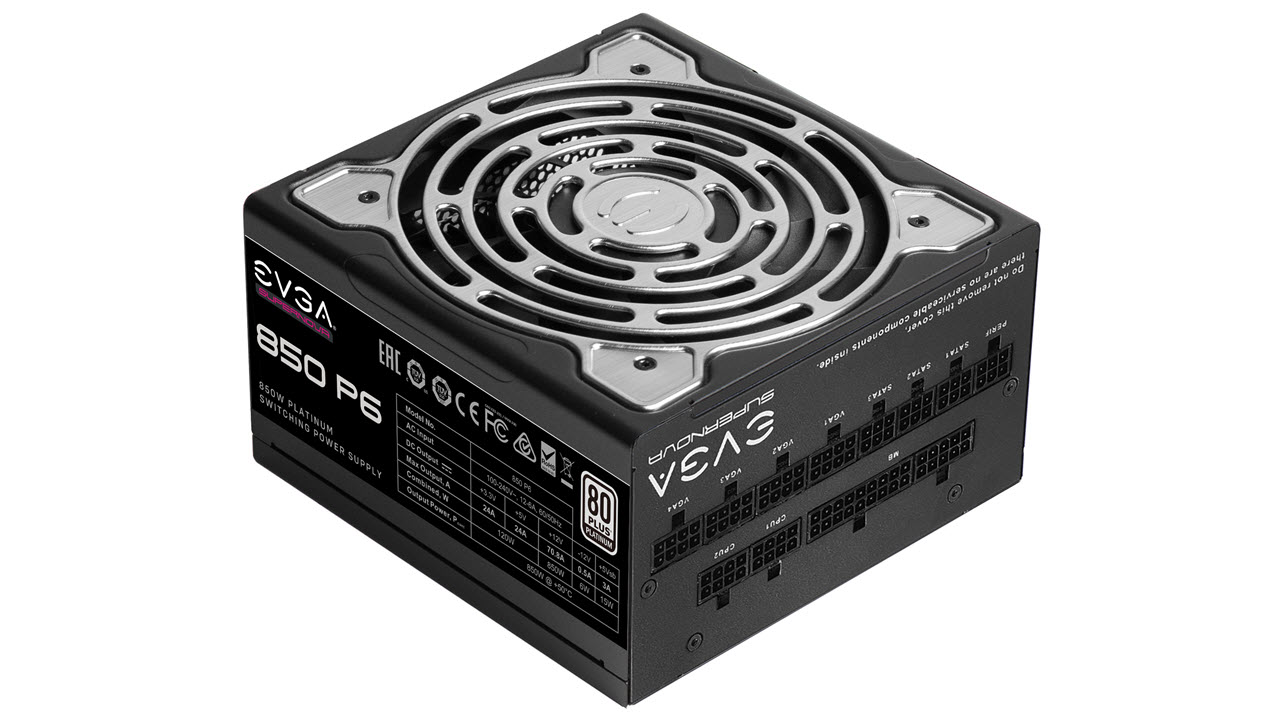
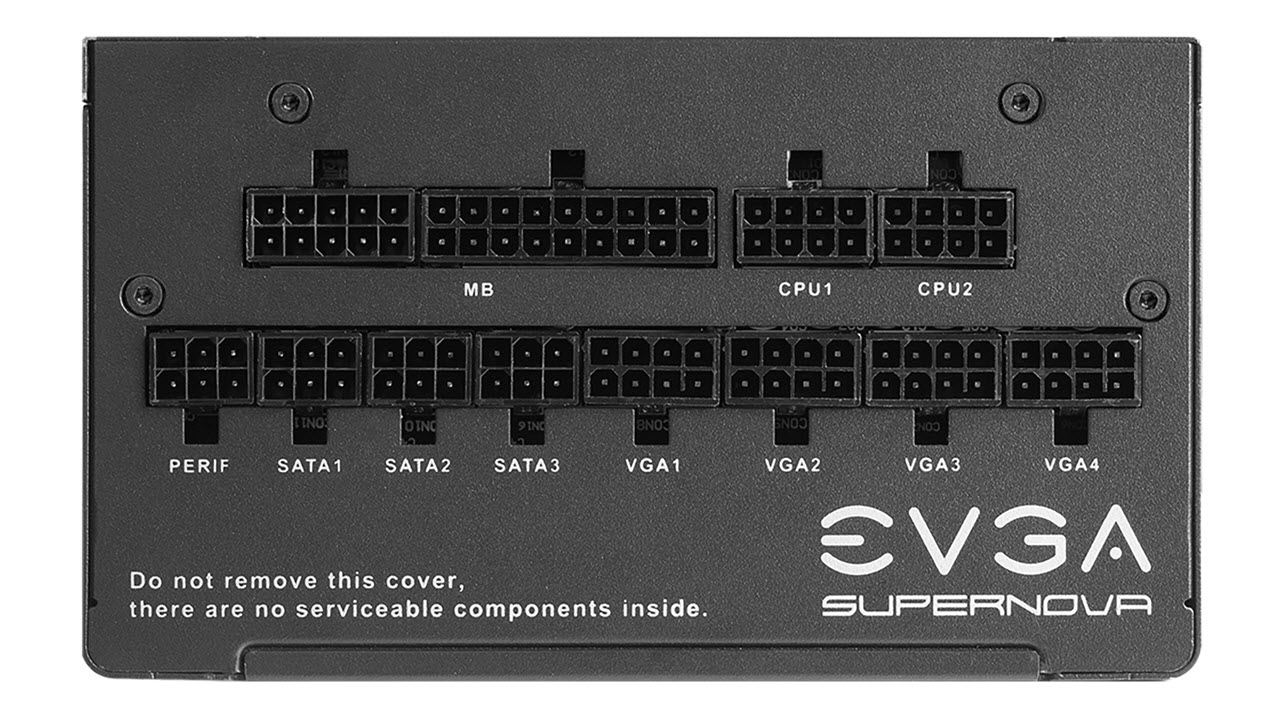
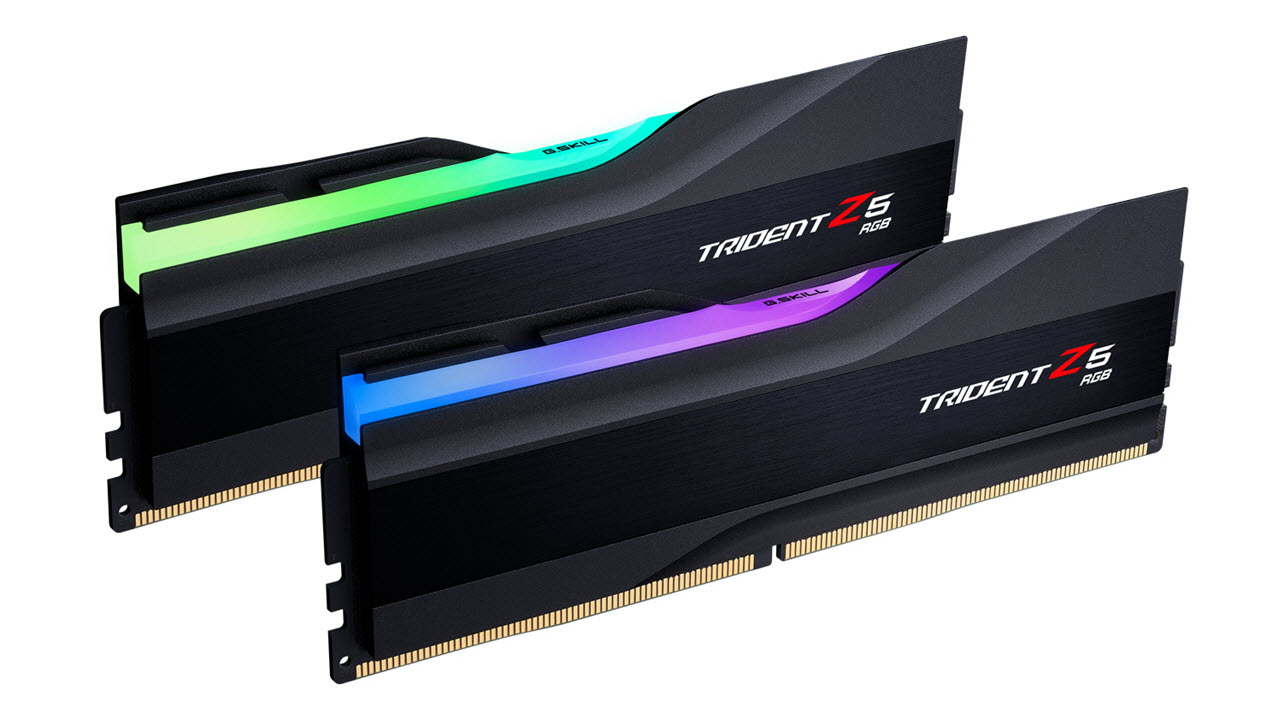
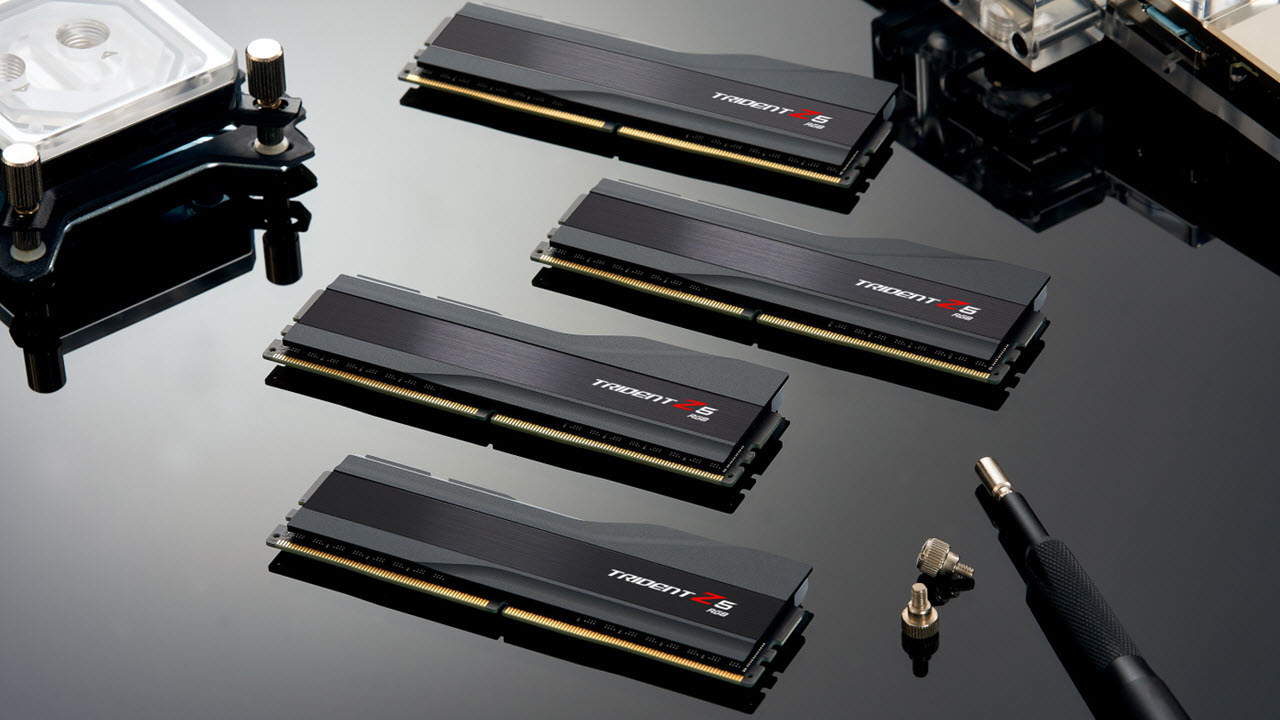
EVGA supplied our Supernova 850W P6 power supply (appropriately sized and more efficient than the 1.2KW monster we used previously) for our test systems, and G.Skill sent us a DDR5-5600 (F5-5600U3636C16GX2-TZ5RK) memory kit for testing.
Benchmark Settings
MORE: Best Motherboards
MORE: How To Choose A Motherboard
MORE: All Motherboard Content
Benchmark Results
Our standard benchmarks and power tests are performed using the CPU’s stock frequencies (including any default boost/turbo), with all power-saving features enabled. We set optimized defaults in the BIOS and the memory by enabling the XMP profile. For this baseline testing, the Windows power scheme is set to Balanced (default) so the PC idles appropriately.
Synthetic Benchmarks
Synthetics provide a great way to determine how a board runs, as identical settings should produce similar performance results. Turbo boost wattage and advanced memory timings are places where motherboard makers can still optimize for either stability or performance, though, and those settings can impact some testing.
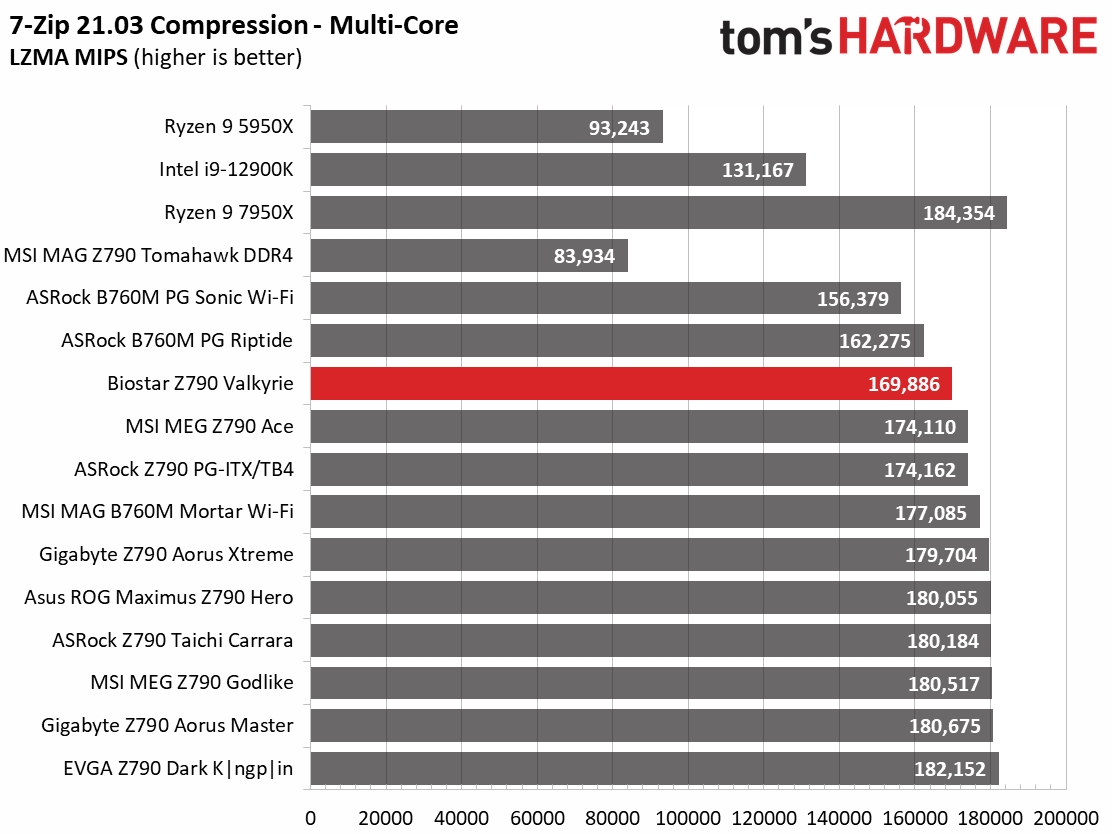
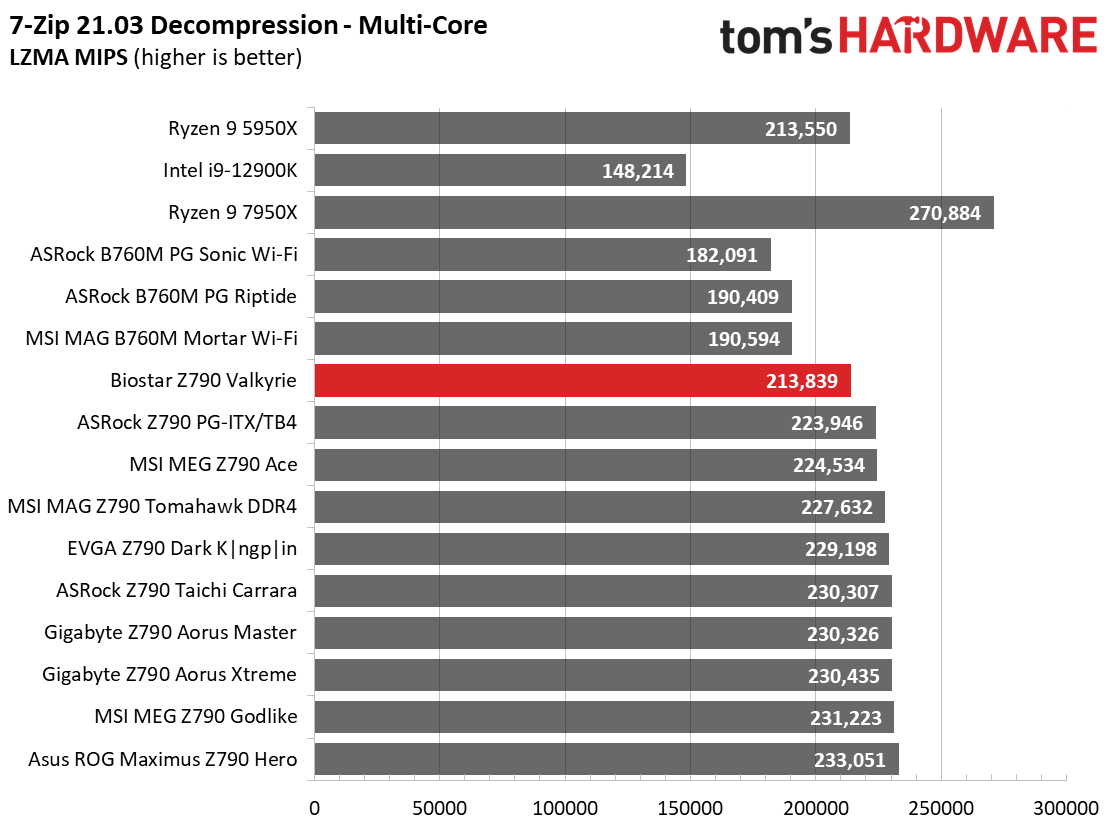
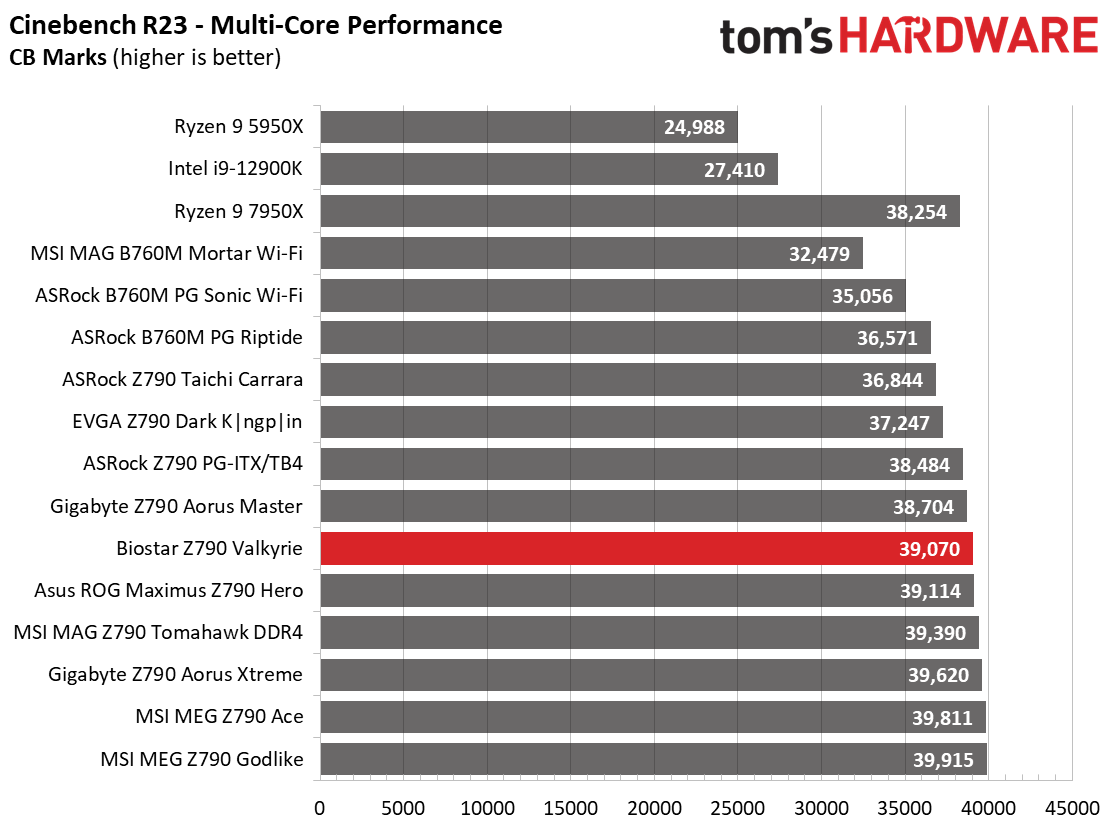
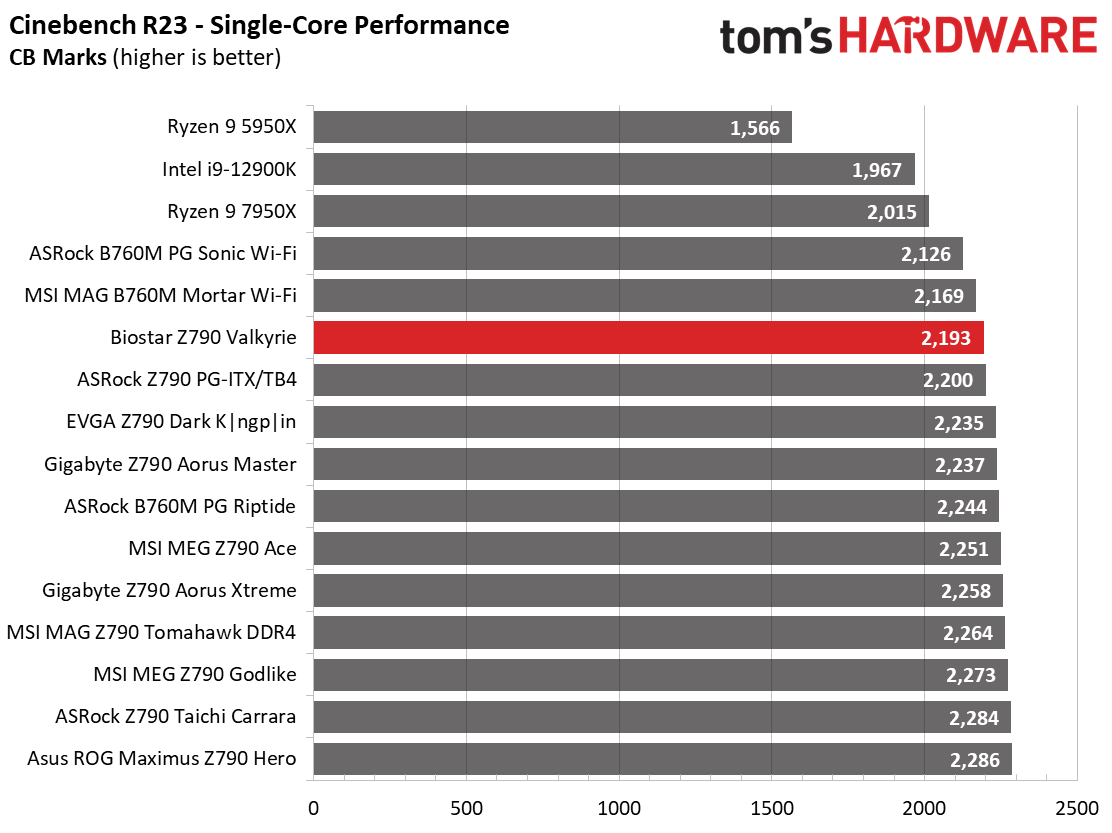
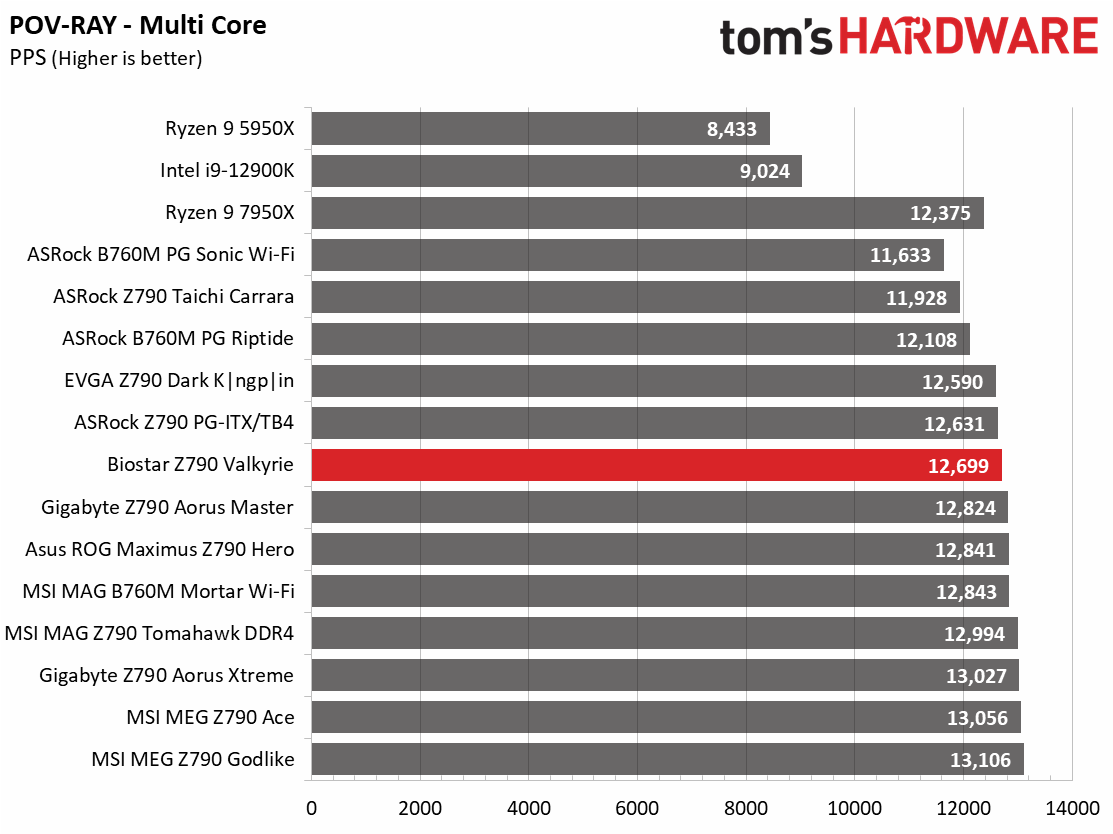
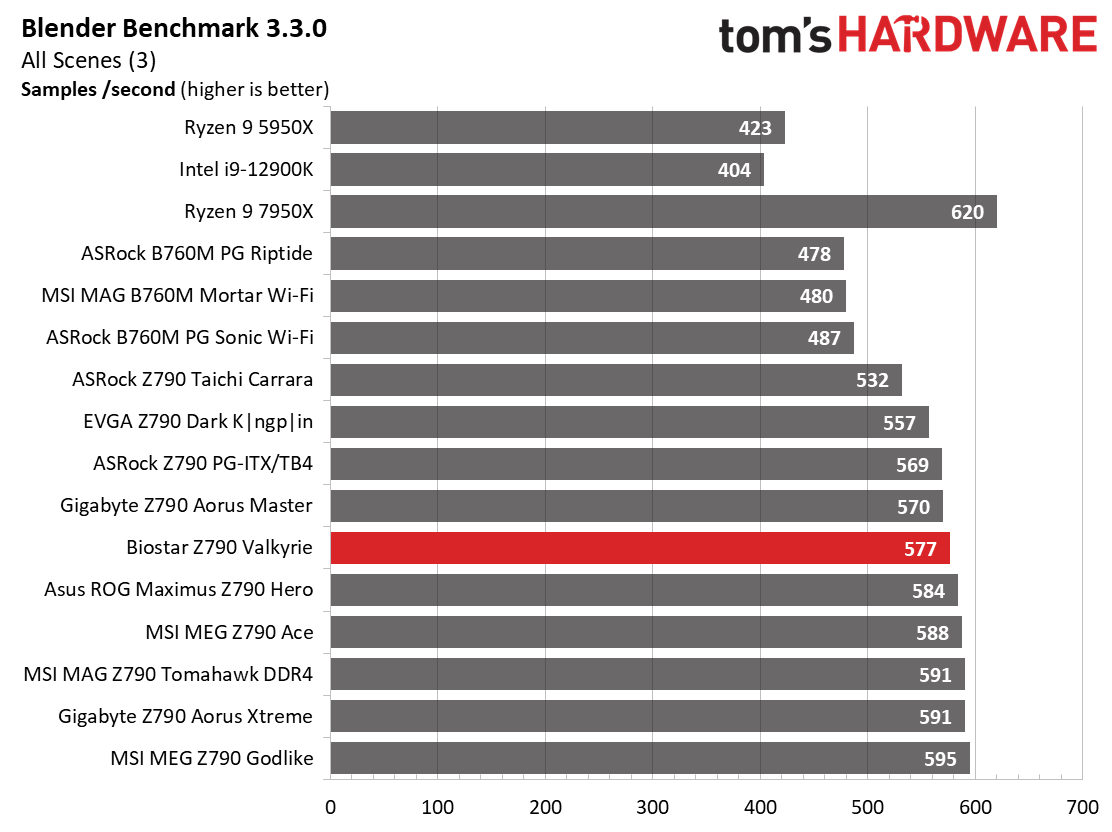
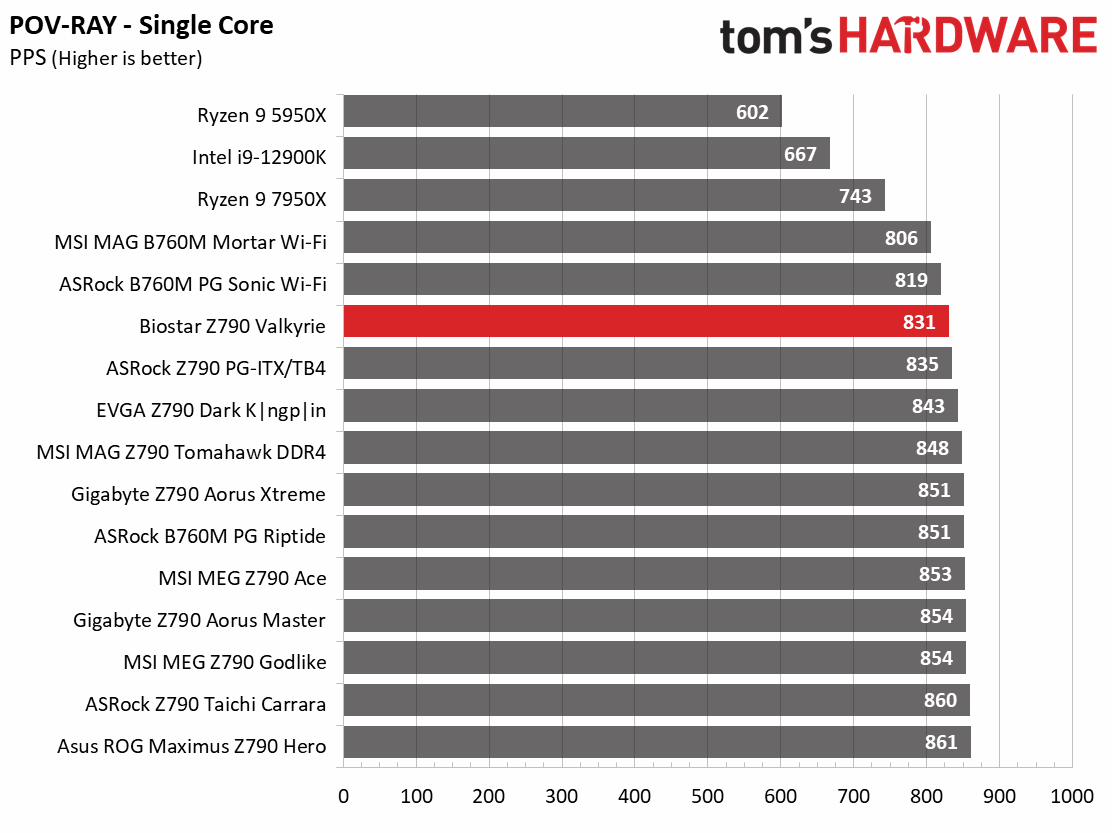


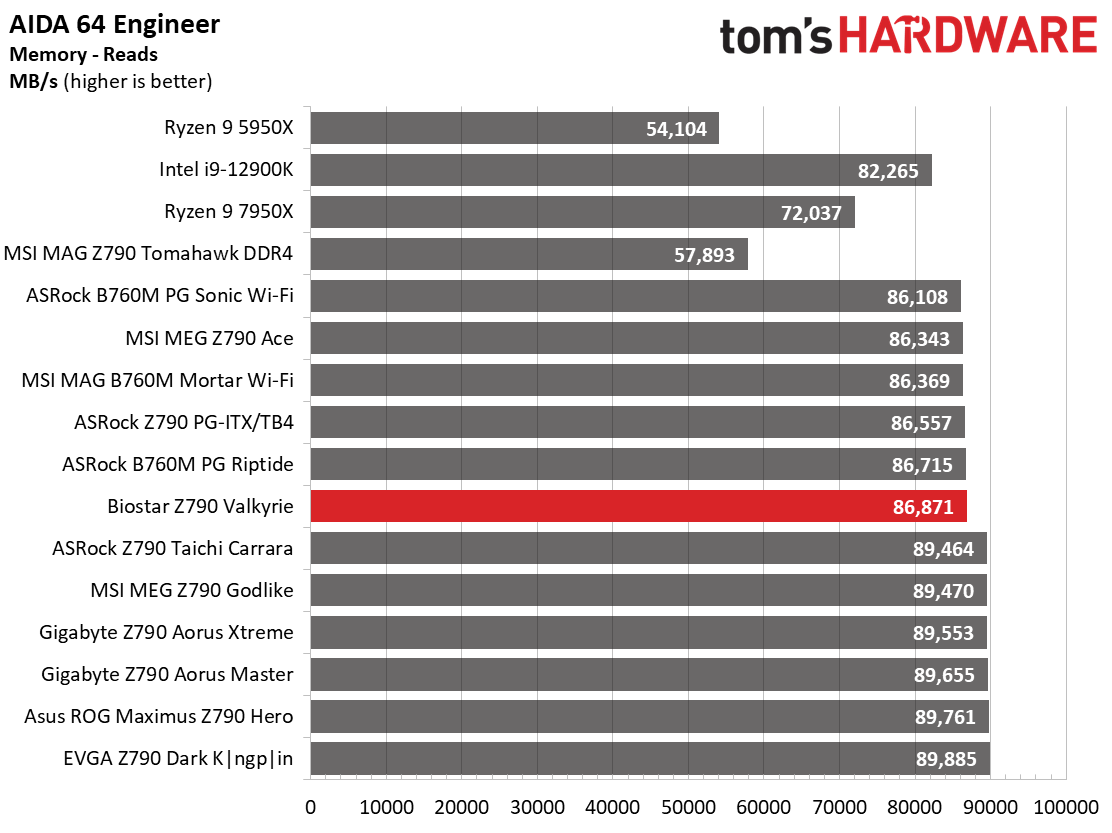
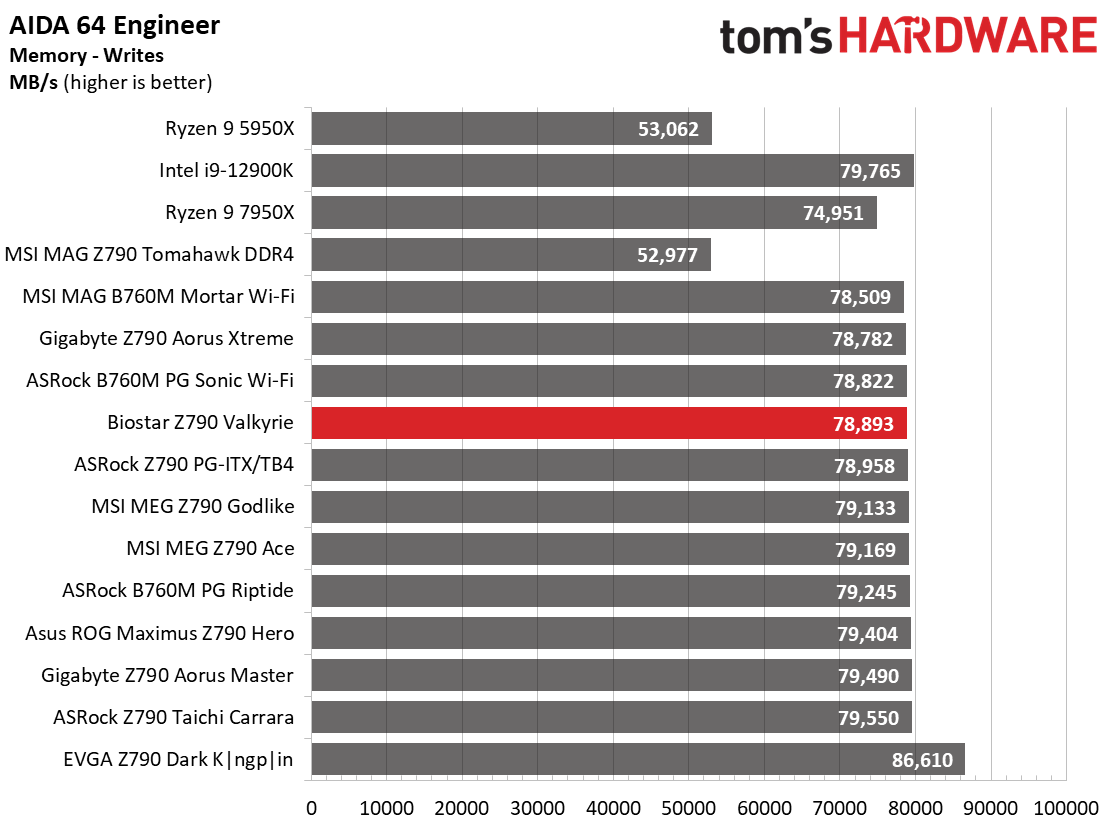
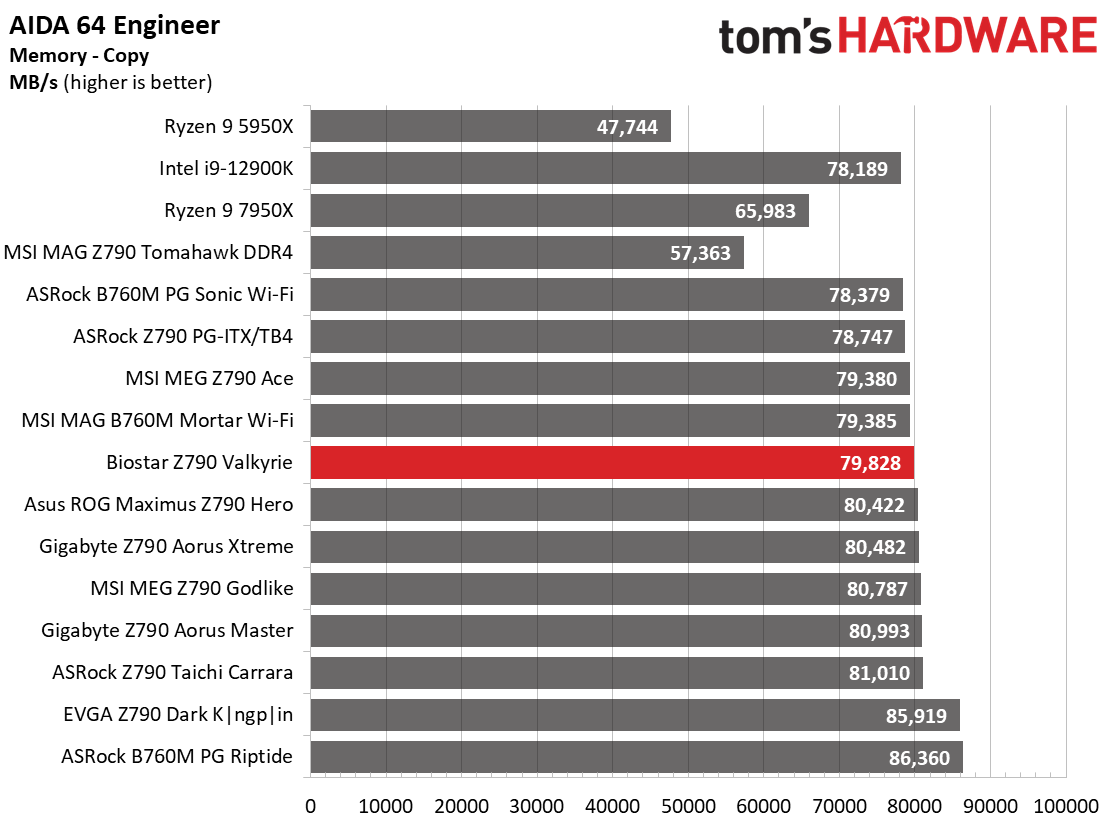
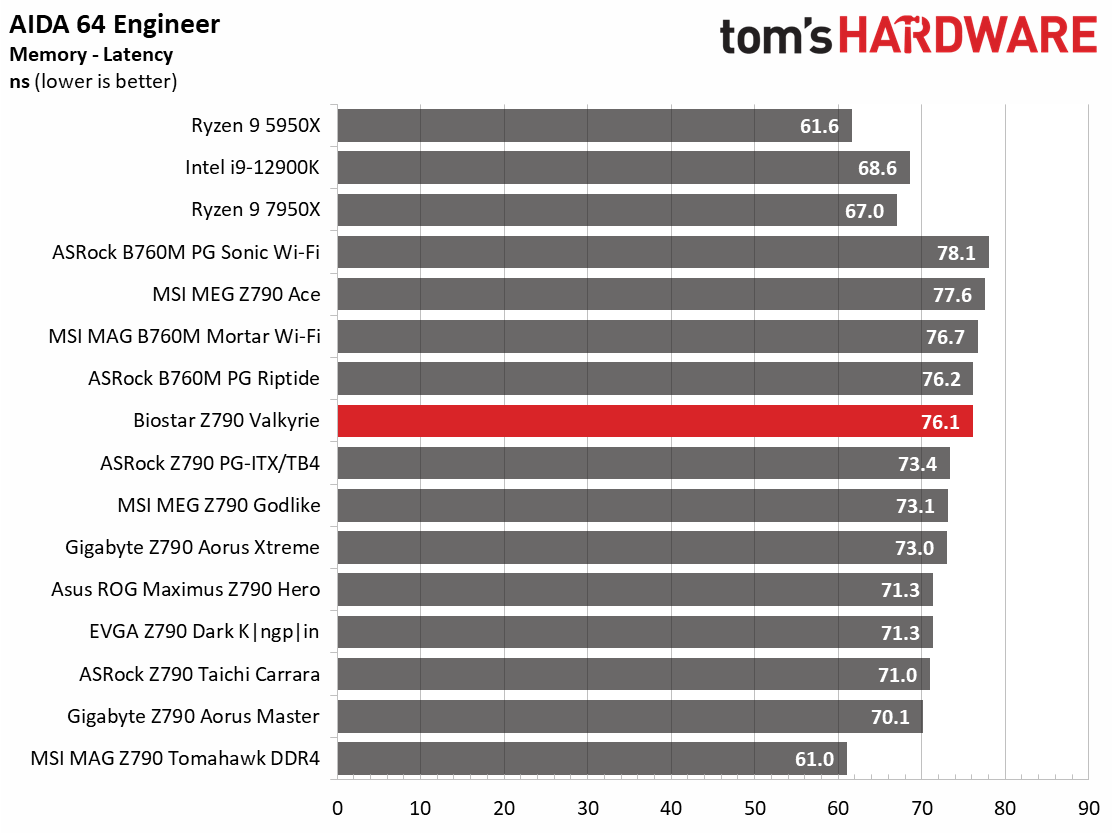
In our synthetic tests, our Z790 Valkyrie was average to below average, depending on the test. In all, it sits between the intel spec and other high-end boards where (at least) the PL1 limit is increased to maintain clocks. Like most boards, ours is plagued with thermal throttling in some tests, affecting the scores. The difference isn’t too significant, but it’s not one of the higher-performing boards we’ve tested.
Timed Applications
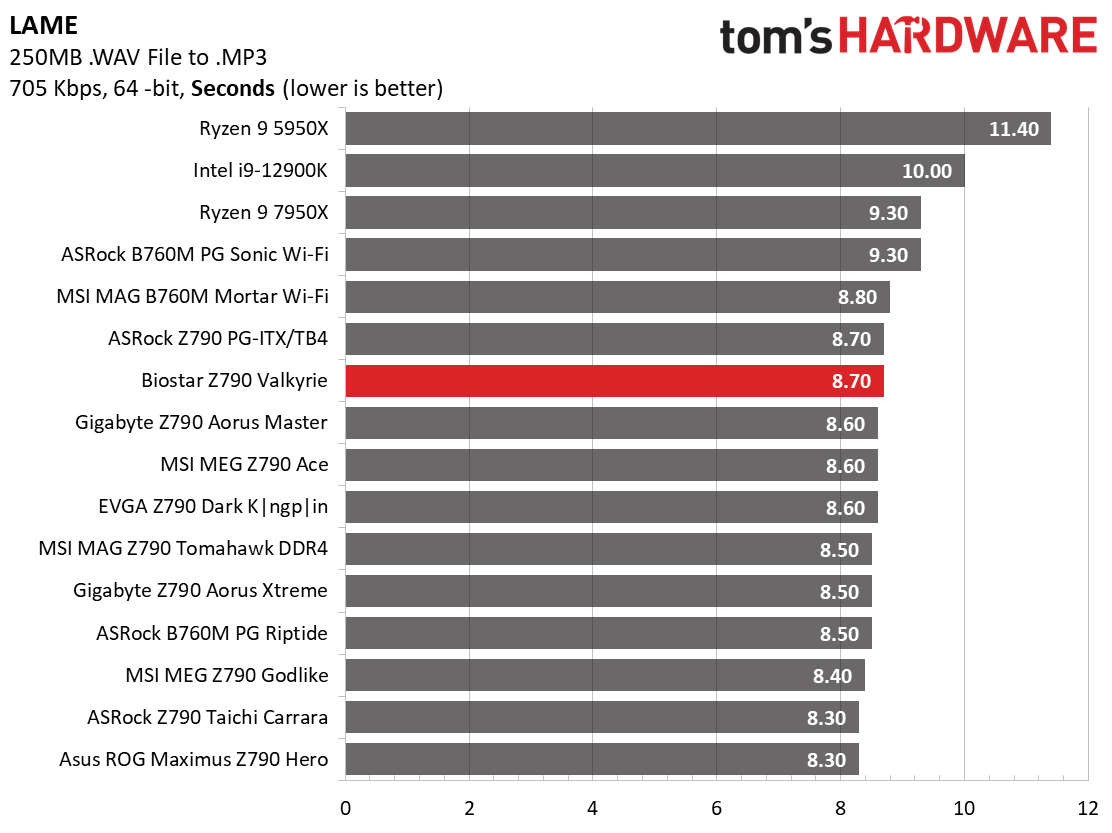
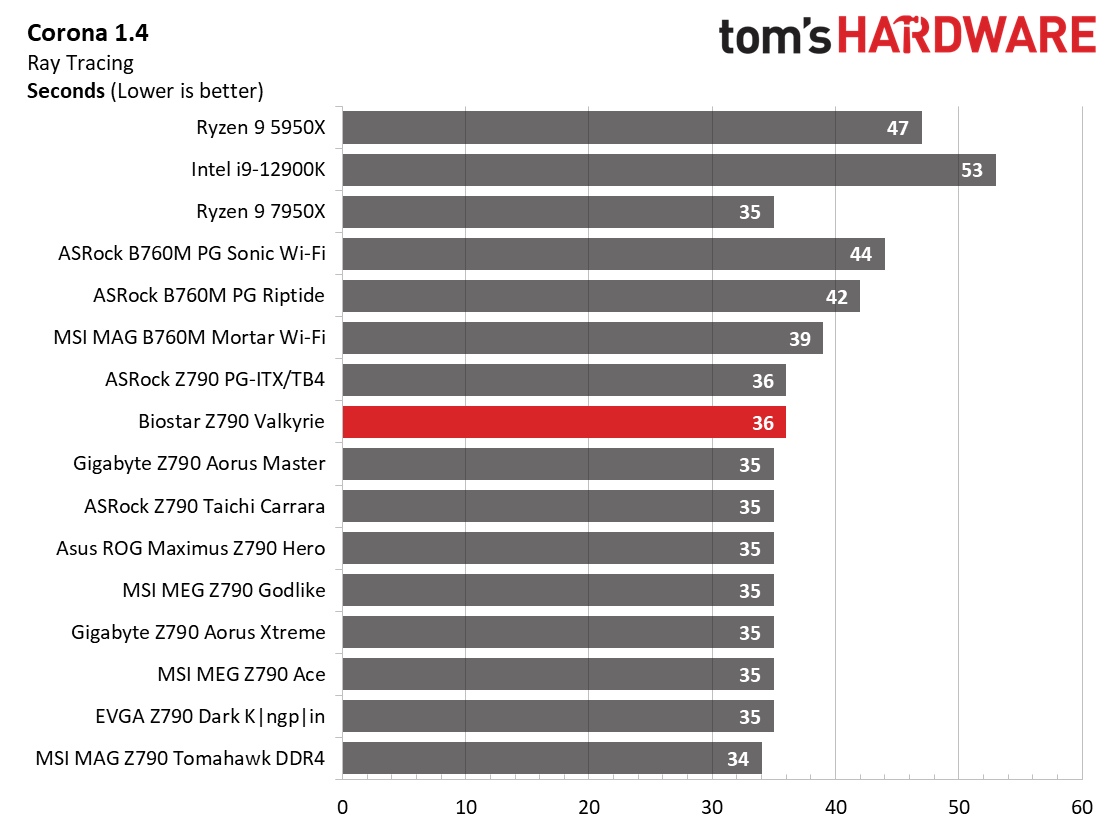
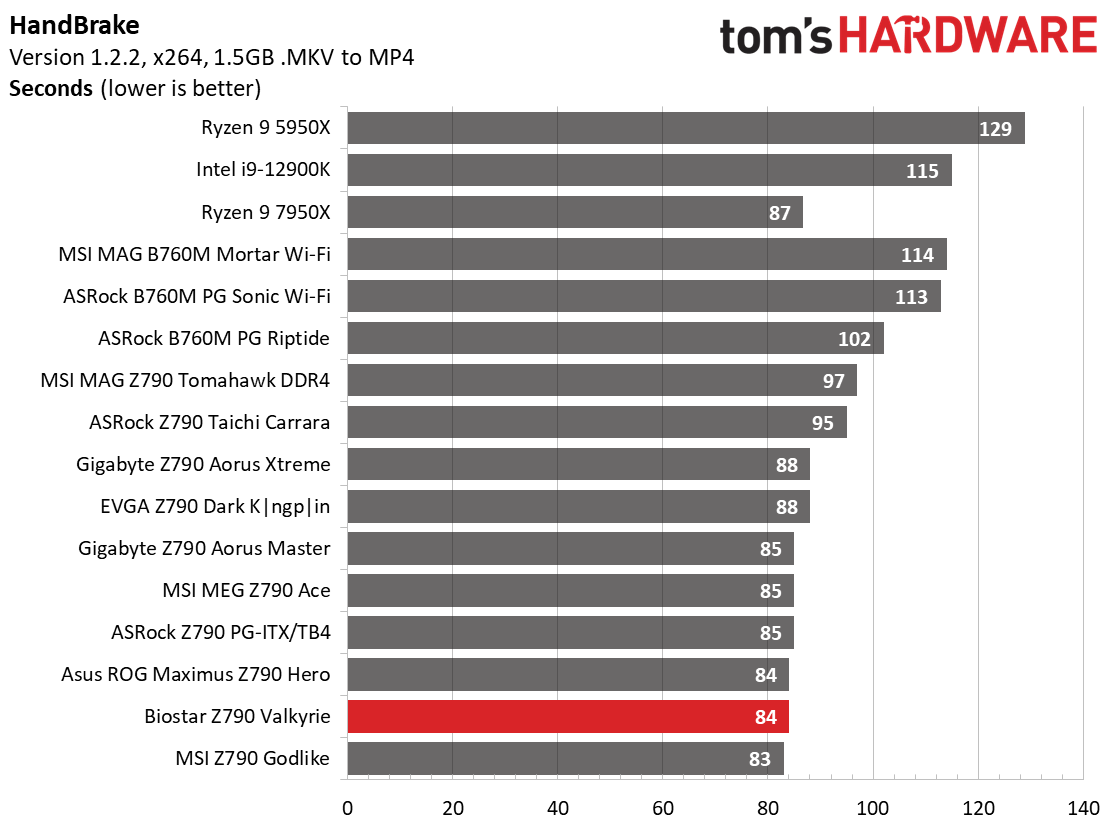
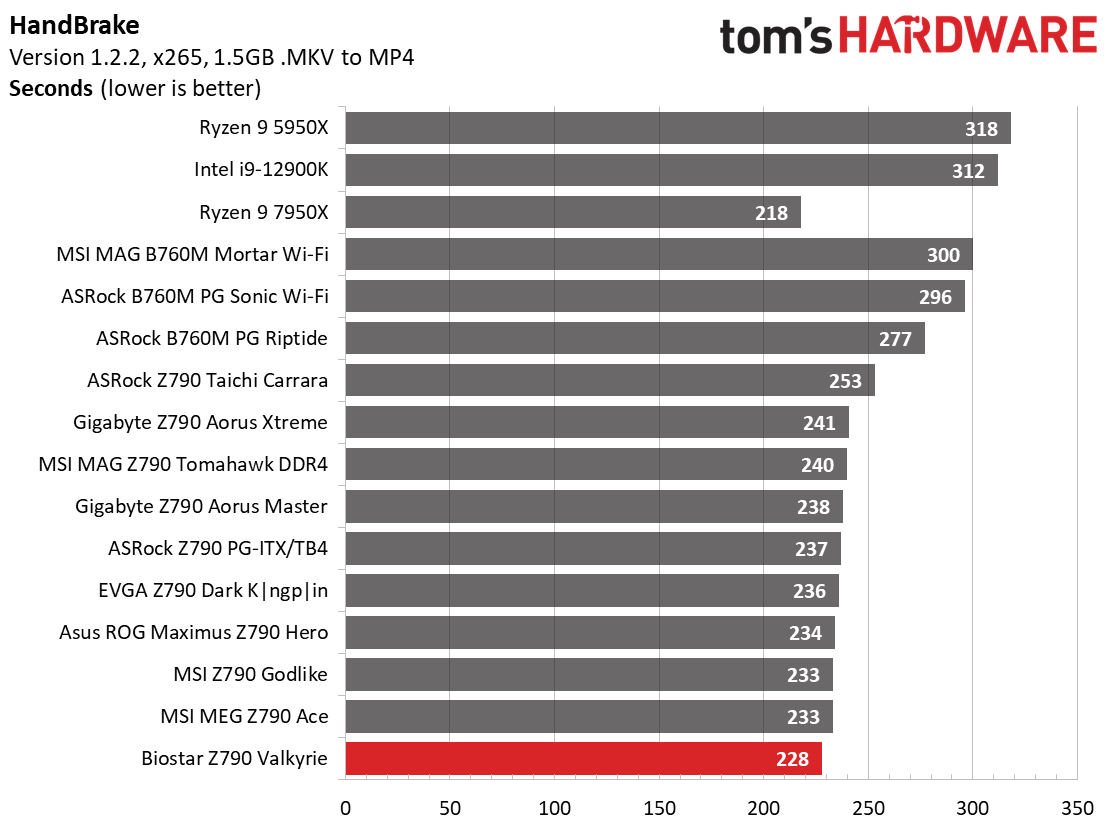
When looking at our timed applications, the LAME and Corona results were both slower than average. Meanwhile, both Handbrake tests were some of the fastest we’ve seen.
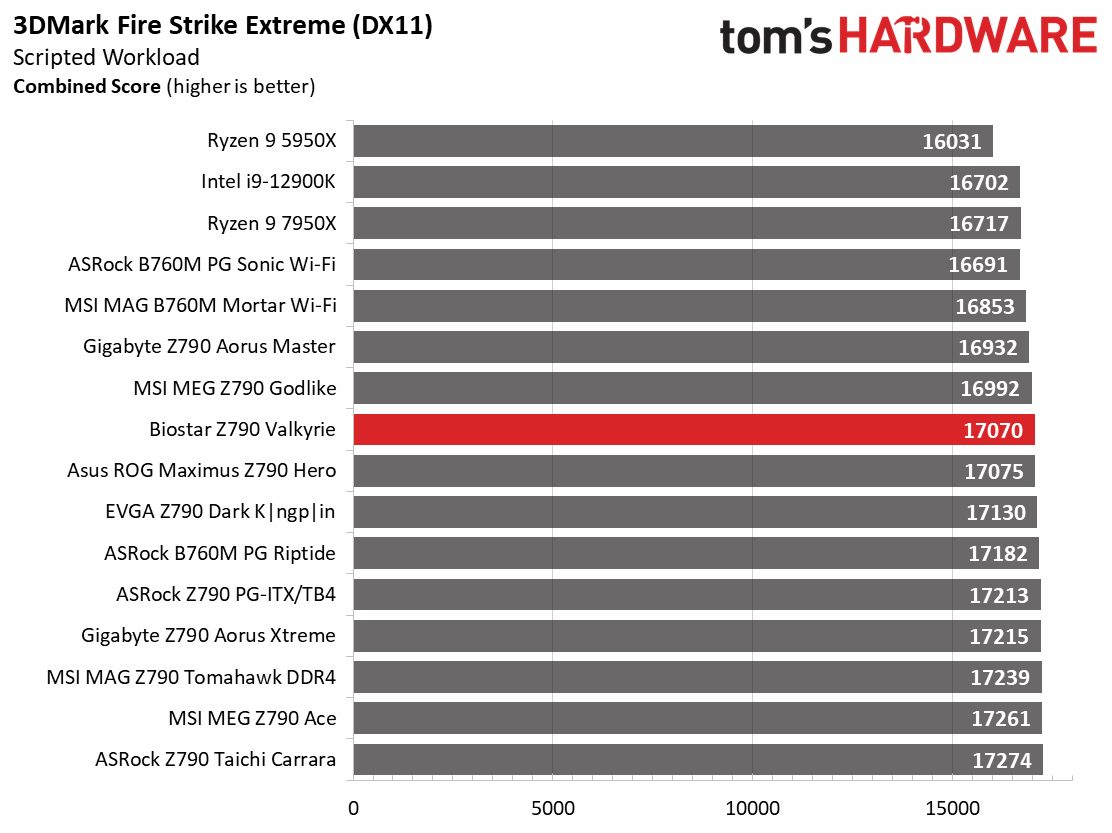
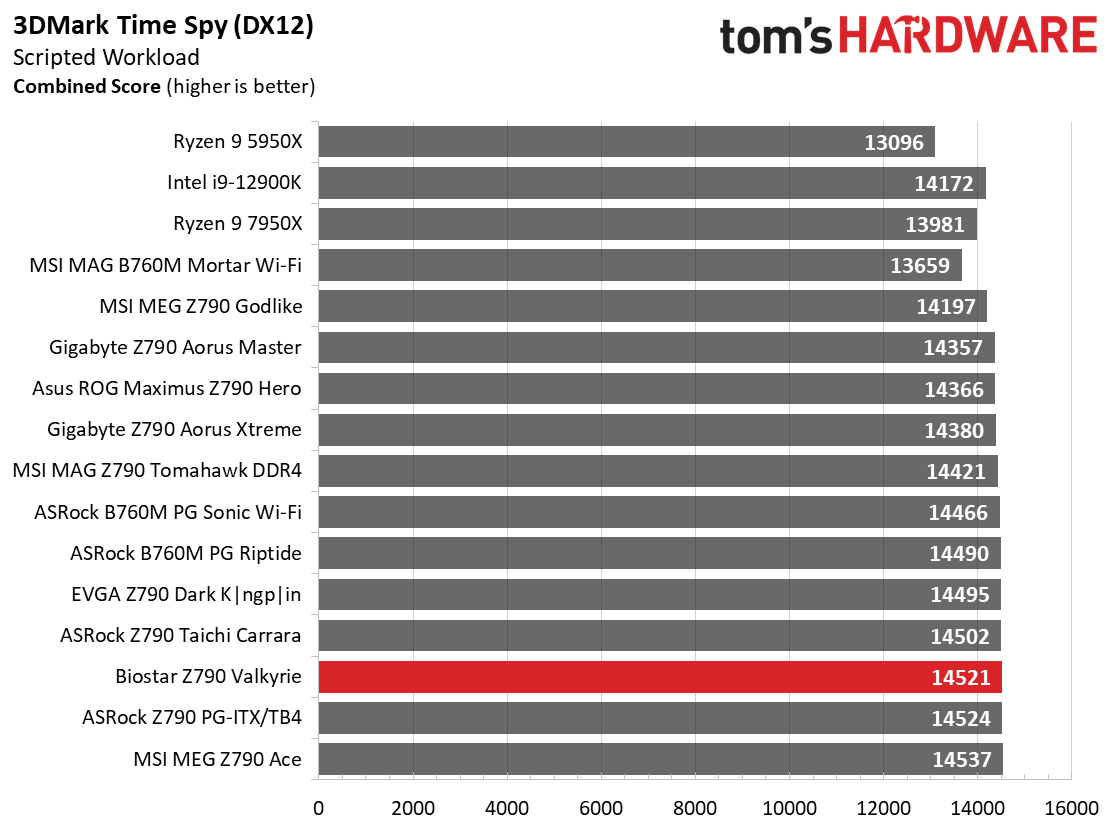
3D Games and 3DMark
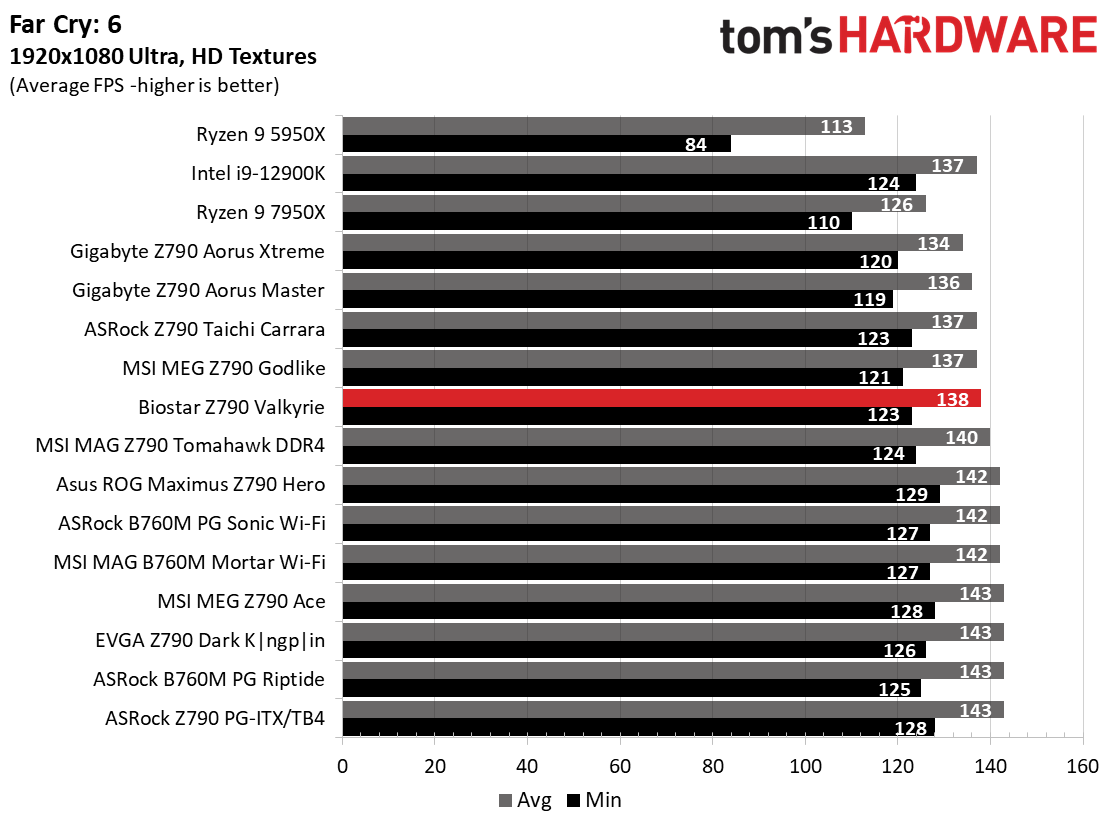
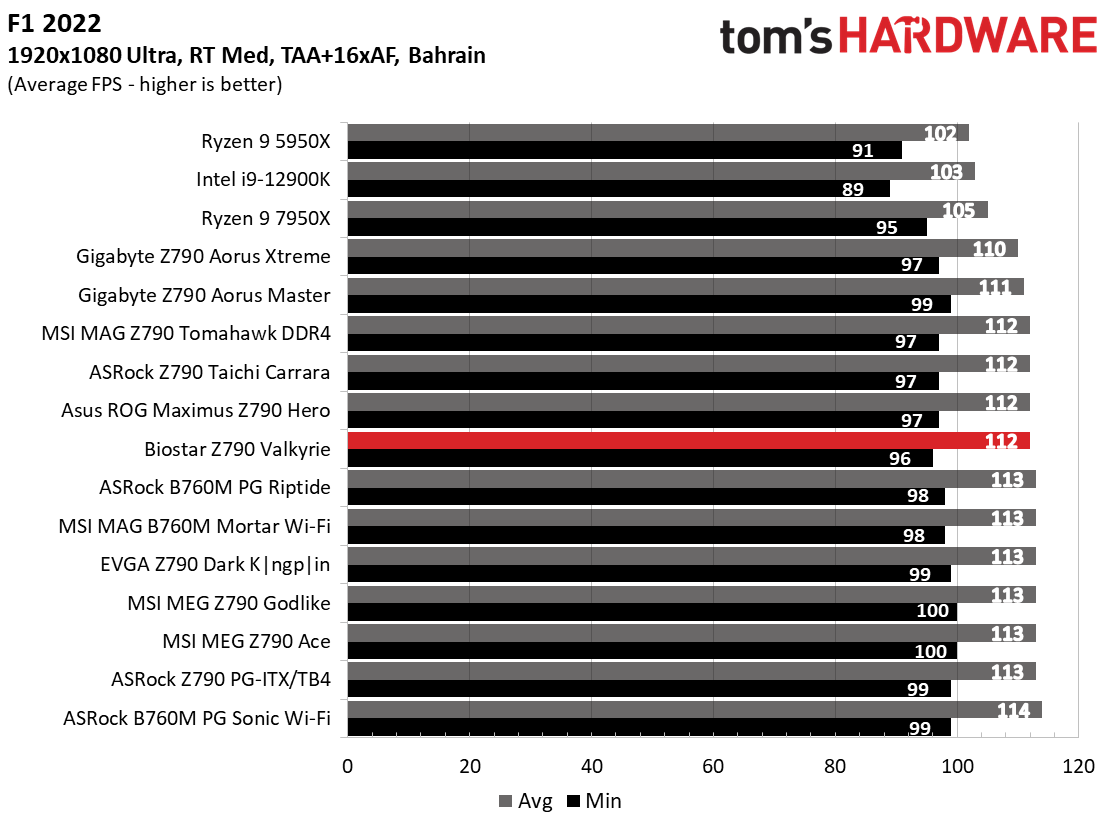
Starting with the launch of Zen 4, we’ve updated one of our games, F1 21, to the latest version, F1 22. We're keeping Far Cry 6. We run the games at 1920 x 1080 resolution using the Ultra preset (details listed above). As the resolution goes up, the CPU tends to have less impact. The goal with these settings is to determine if there are differences in performance at the most commonly used (and CPU/system bound) resolution with settings most people use or strive for (Ultra). We expect the difference between boards in these tests to be minor, with most differences falling within the margin of error. We’ve also added a minimum FPS value, as this affects your gameplay and immersion experience.
Starting with the UL’s 3DMark tests, our board mixed right in with the rest. In games, it was average in F1 2022, and just slightly below average in Far Cry: 6. That said, you wouldn’t notice a difference between this and the fastest results unless you had a frame counter on the screen anyway. It’s a perfectly competent gamer.
Power Consumption / VRM Temperatures
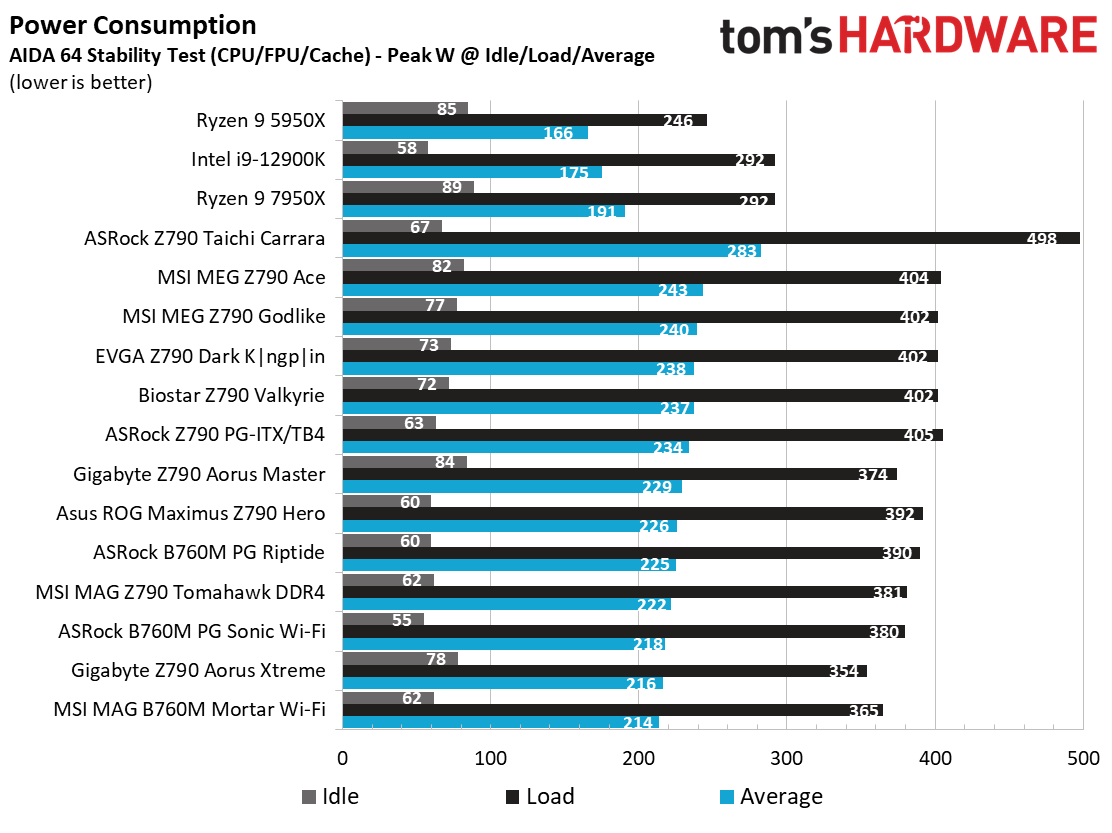
We used AIDA64’s System Stability Test with Stress CPU, FPU, Cache and Memory enabled for power testing, using the peak power consumption value. The wattage reading is from the wall via a Kill-A-Watt meter to capture the entire PC (minus the monitor). The only variable that changes is the motherboard; all other parts remain the same.
Power consumption on the Z790 Valkyrie was just below average, using a bit more power than most of our boards. It averaged 72 Watts at idle and peaked at 402W during the stress-test load before it thermally throttled and used less power (from around 253 to 230W on the CPU itself).
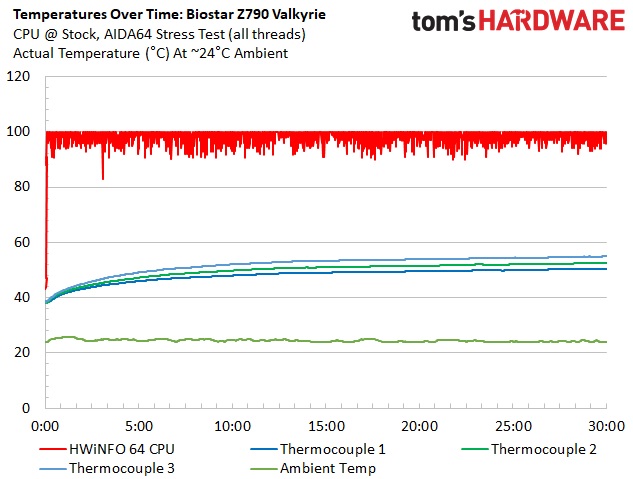
VRM temperatures on the Valkyrie was also well within specification. At stock, temperatures, according to our sensors (the board doesn’t have an internal VRM sensor), were well within the operating parameters of the premium 105A SPS MOSFETs at stock settings and while overclocked. At idle, they sat close to 40 degrees Celsius, while it peaked around 54 degrees Celsius under load. There’s nothing to be concerned with regarding the power delivery or its cooling, as your CPU temperatures limit you before the VRMs get in the way.
Overclocking
When overclocking, we aim to increase the power and add stress to the VRMs. We do so by increasing the clock speed and voltage until we’re at the thermal threshold for the processor during stress testing. However, where these CPUs are allowed to run with ‘boost’ speeds, those speeds are closer to the limit than ever before.
With our Core i9-13900K, the approach was a bit different. We had to lower the voltage from what was recorded during stress tests to overclock our chip. We increased the clock speeds of the “P” and “E” cores by 100 and 200 MHz, respectively, over the turbo boost and limited by our cooling. We ended up with 5.6 GHz P-core and 4.5 GHz E-core clocks using about 1.34V (from DMM). Temperatures peak at or just under the throttling point with this configuration. And as we’ve noted elsewhere, this is the intended performance for Intel’s flagship CPU.
Overclocking our processor proved as easy as most other Z790 boards. We set the Vcore to Override input 1.35V with LLC on Auto, and off we went. There wasn’t any appreciable vdroop, and testing went well. The VRMs stayed well within spec, and we were stable throughout our 30-minute test.
Regarding memory, our 5600 and 6000 kits worked out of the box without issue. Compared to the X670E we looked at a few months ago, this is great news but also expected since this review is several months past the release date, so the platform and BIOS has had time to mature. Overall, we didn’t run into any concerns when overclocking. Still, again, if you aim to run the fastest memory and/or tweak secondary and tertiary memory timings, there are better-equipped options.
Bottom Line
The Biostar Z790 Valkyrie is a well-equipped board in the premium mid-range segment. While it doesn’t include 40 Gbps ports, it’s got everything else the platform offers, including PCIe 5.0 slots and a PCIe 5.0 M.2 socket. Outside of that, it comes with one of the more robust VRMs we’ve seen, even when compared to halo-type boards. You’re limited by cooling far before the power delivery hinders overclocking. Performance was underwhelming across most tests, running slightly slower than average in most, but the board proved to be a capable gaming machine.
Biostar’s MSRP for our board is somewhere around $450. However, you’ll find it online in the US for well over $600, which pushes it into even tougher territory. Around the $500 price point, each partner has an option. There’s the MSI’s MPG Z790 Carbon Wi-Fi ($449.99), Asus’ ROG Strix Z790-E Gaming Wi-Fi ($489.99), Gigabyte has its Z790 Aorus Master ($489.99), and the ASRock Z790 Taichi is $499.99. All of these boards offer robust power delivery, fast memory support, up to five M.2 sockets, and a premium appearance. If you need 40 Gbps ports, the Taichi is the only one of the group with that native functionality. All of the compeitng BIOSes are more refined than Biostar’s as well.
Assuming you can find the Z790 Valkyrie around the $450 MSRP, it’s a valid option in this space. But if it costs more than $500, it’s not worth it. We’ve seen some improvements over time with Biostar, but in order to compete with the major motherboard players and justify a high price, some things need to change. A more modern BIOS layout and better physical appearance (read: one that looks as good versus its direct competitors) are key, as we’re good with the specifications. As it stands, there are better-equipped and arguably more attractive options available at lower prices than what this board is selling for in the US.
MORE: Best Motherboards
MORE: How To Choose A Motherboard
MORE: All Motherboard Content