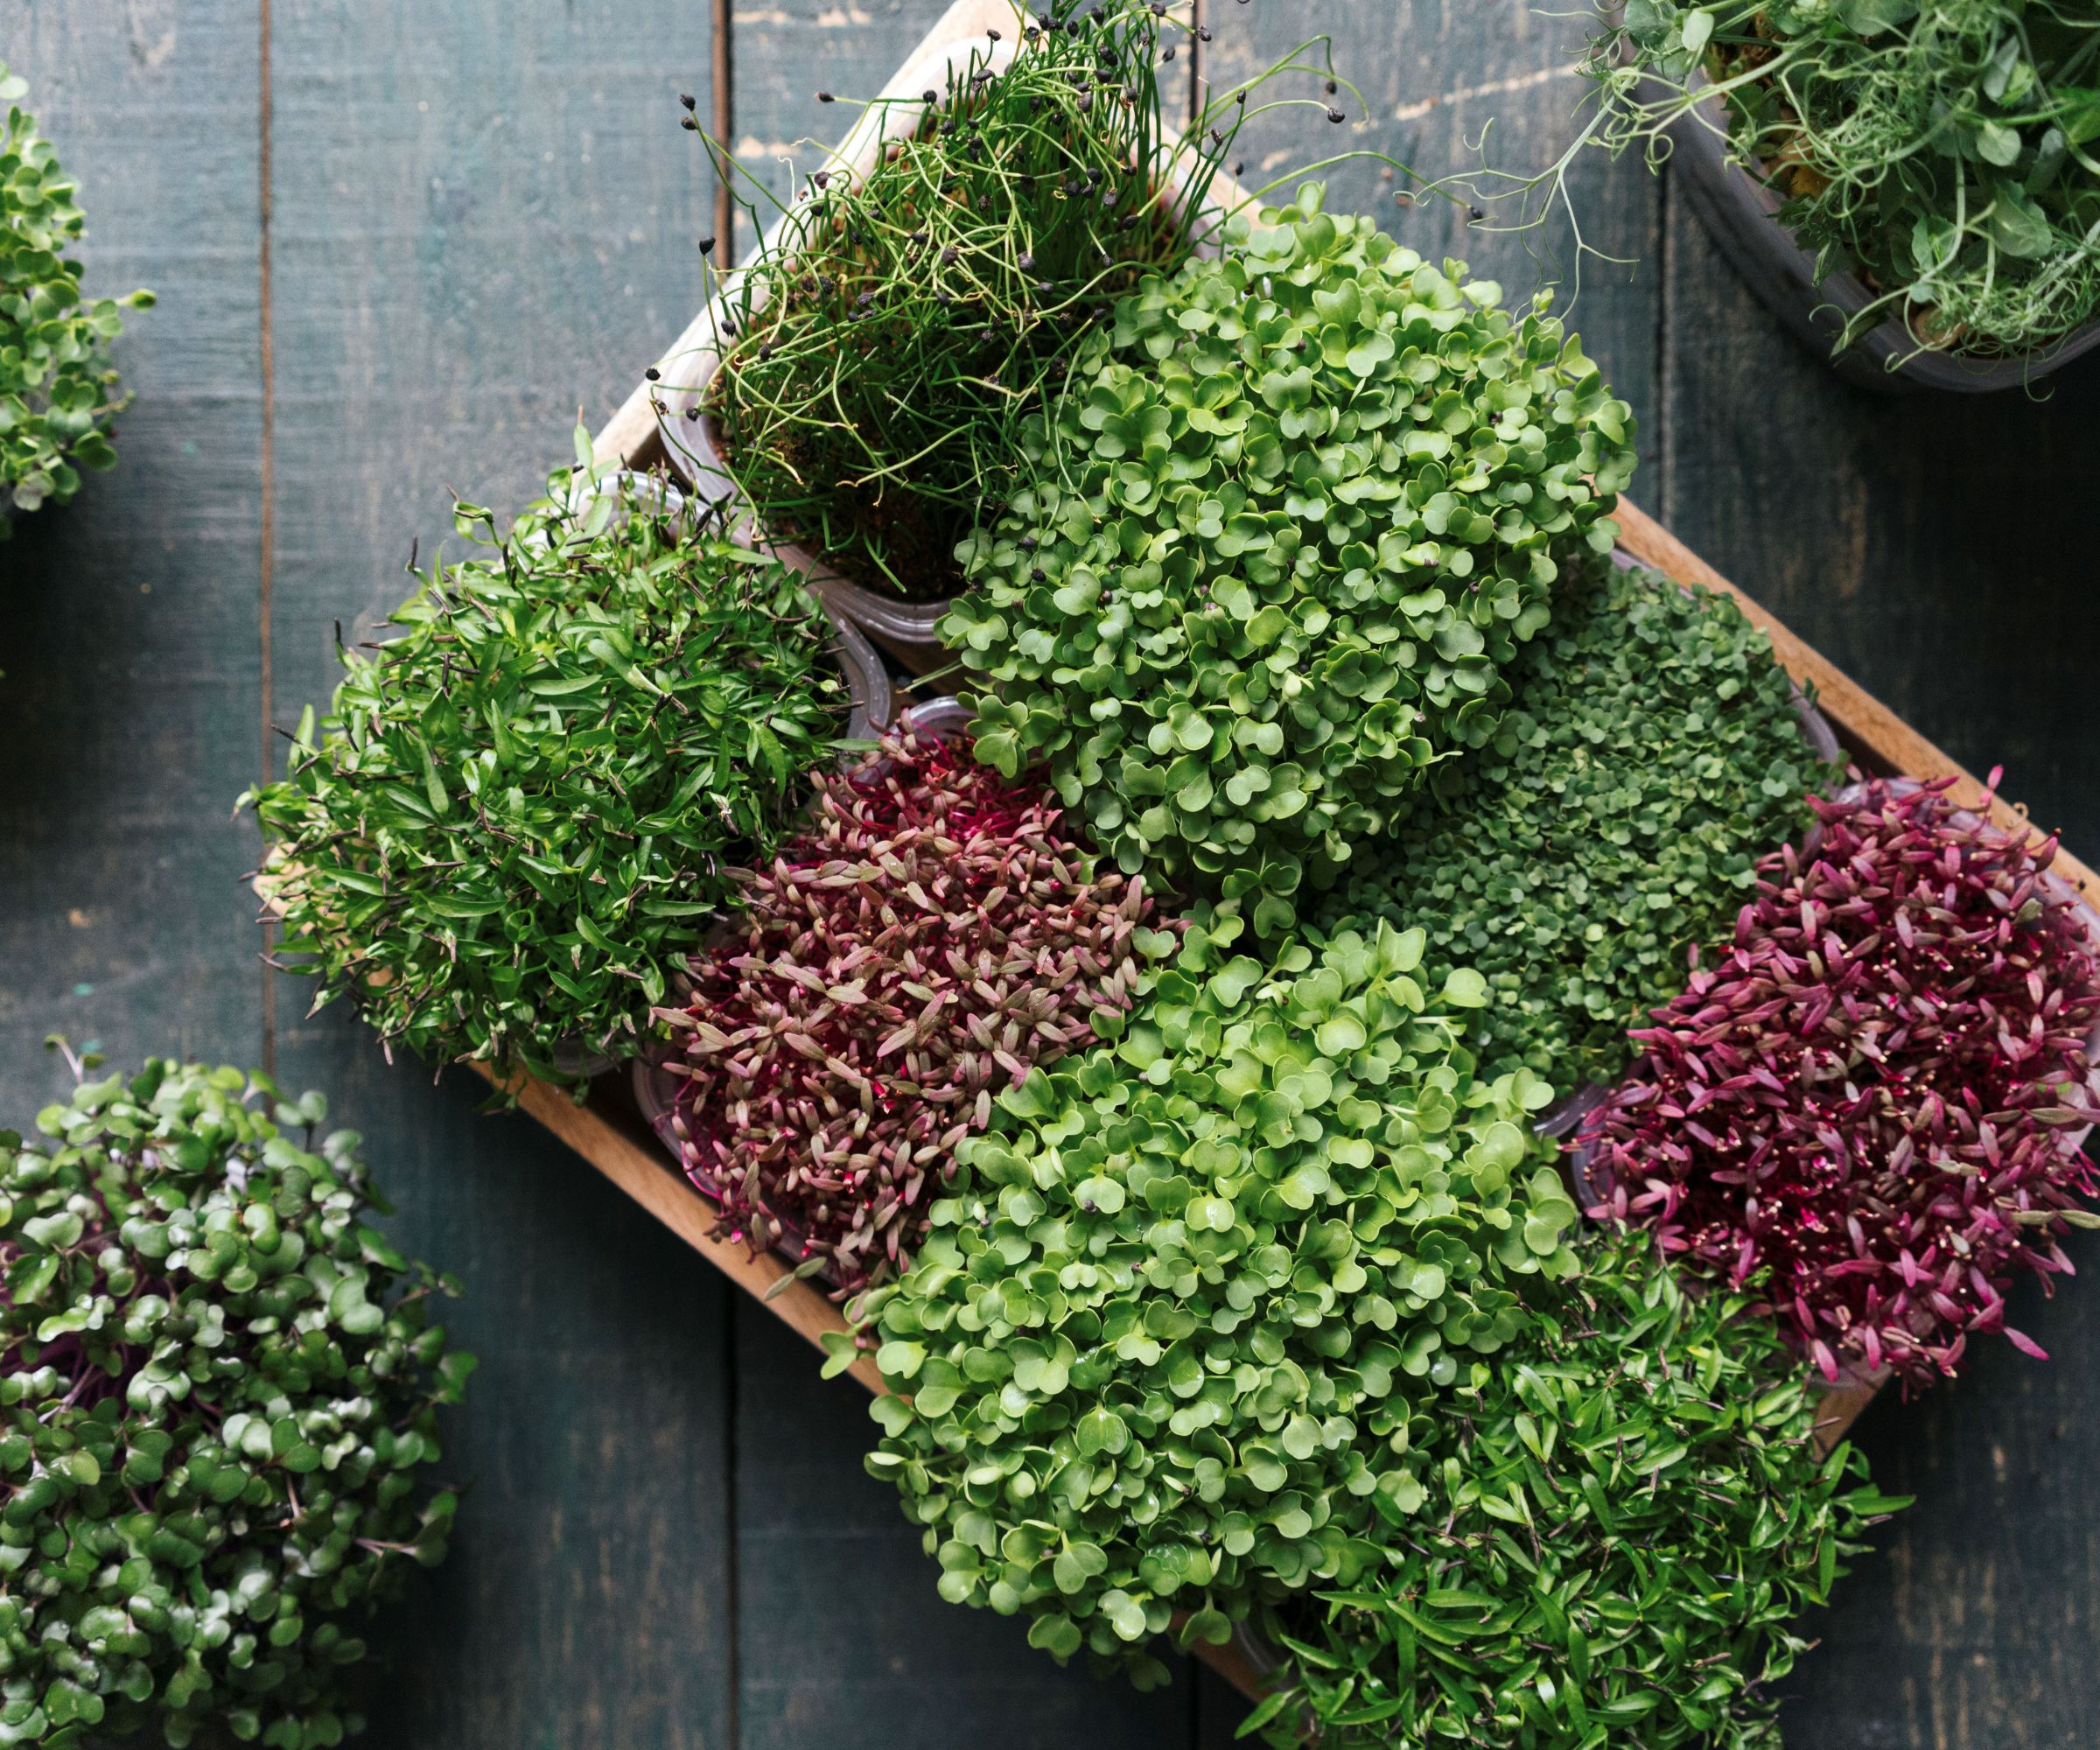
Chefs in top restaurants have long been a fan of the the best microgreens, with their interesting tastes and visual appeal. But you don’t have to wait until you can eat out somewhere fancy; the beauty of growing your own microgreens is that you can experiment with different seeds, find your favorite and go on your very own culinary adventure.
Learning how to grow microgreens is a fun and easy windowsill gardening project. With very little equipment, it’s possible to grow a variety of leafy greens, herbs and salads at home, that will be ready to harvest in as little as a week. These tiny versions of the full-sized plants we usually eat, can be snipped and added raw to salads, soups, stews, sandwiches, and smoothies burst of flavor and pop of dazzling color.
Trying out a variety of microgreens and using them in your cooking couldn’t be simpler. All you need is a container to use as a seed tray, some compost, a mister and a sunny windowsill.
These are the best microgreens to grow indoors in your kitchen
The leaves of microgreens may be small, but they are packed full of nutrients. It may come as a surprise to some that these seedling versions contain all the same vitamins and minerals as the fully-grown plants.
'It is important to provide good levels of warmth and light to the microgreens to get a strong level of germination and prevent the seedlings getting too leggy,' says Drew Swainston, content editor at Homes & Gardens and expert kitchen gardener. 'Heating mats, such as this one from Amazon, or grow lights may be required to get the conditions correct during the colder months, where the time to maturity will be much longer than during the summer without them.'
Can’t wait to get started with these miniature edibles to add to your indoor garden ideas? Here are some of the best microgreens to grow.
1. Sunflowers
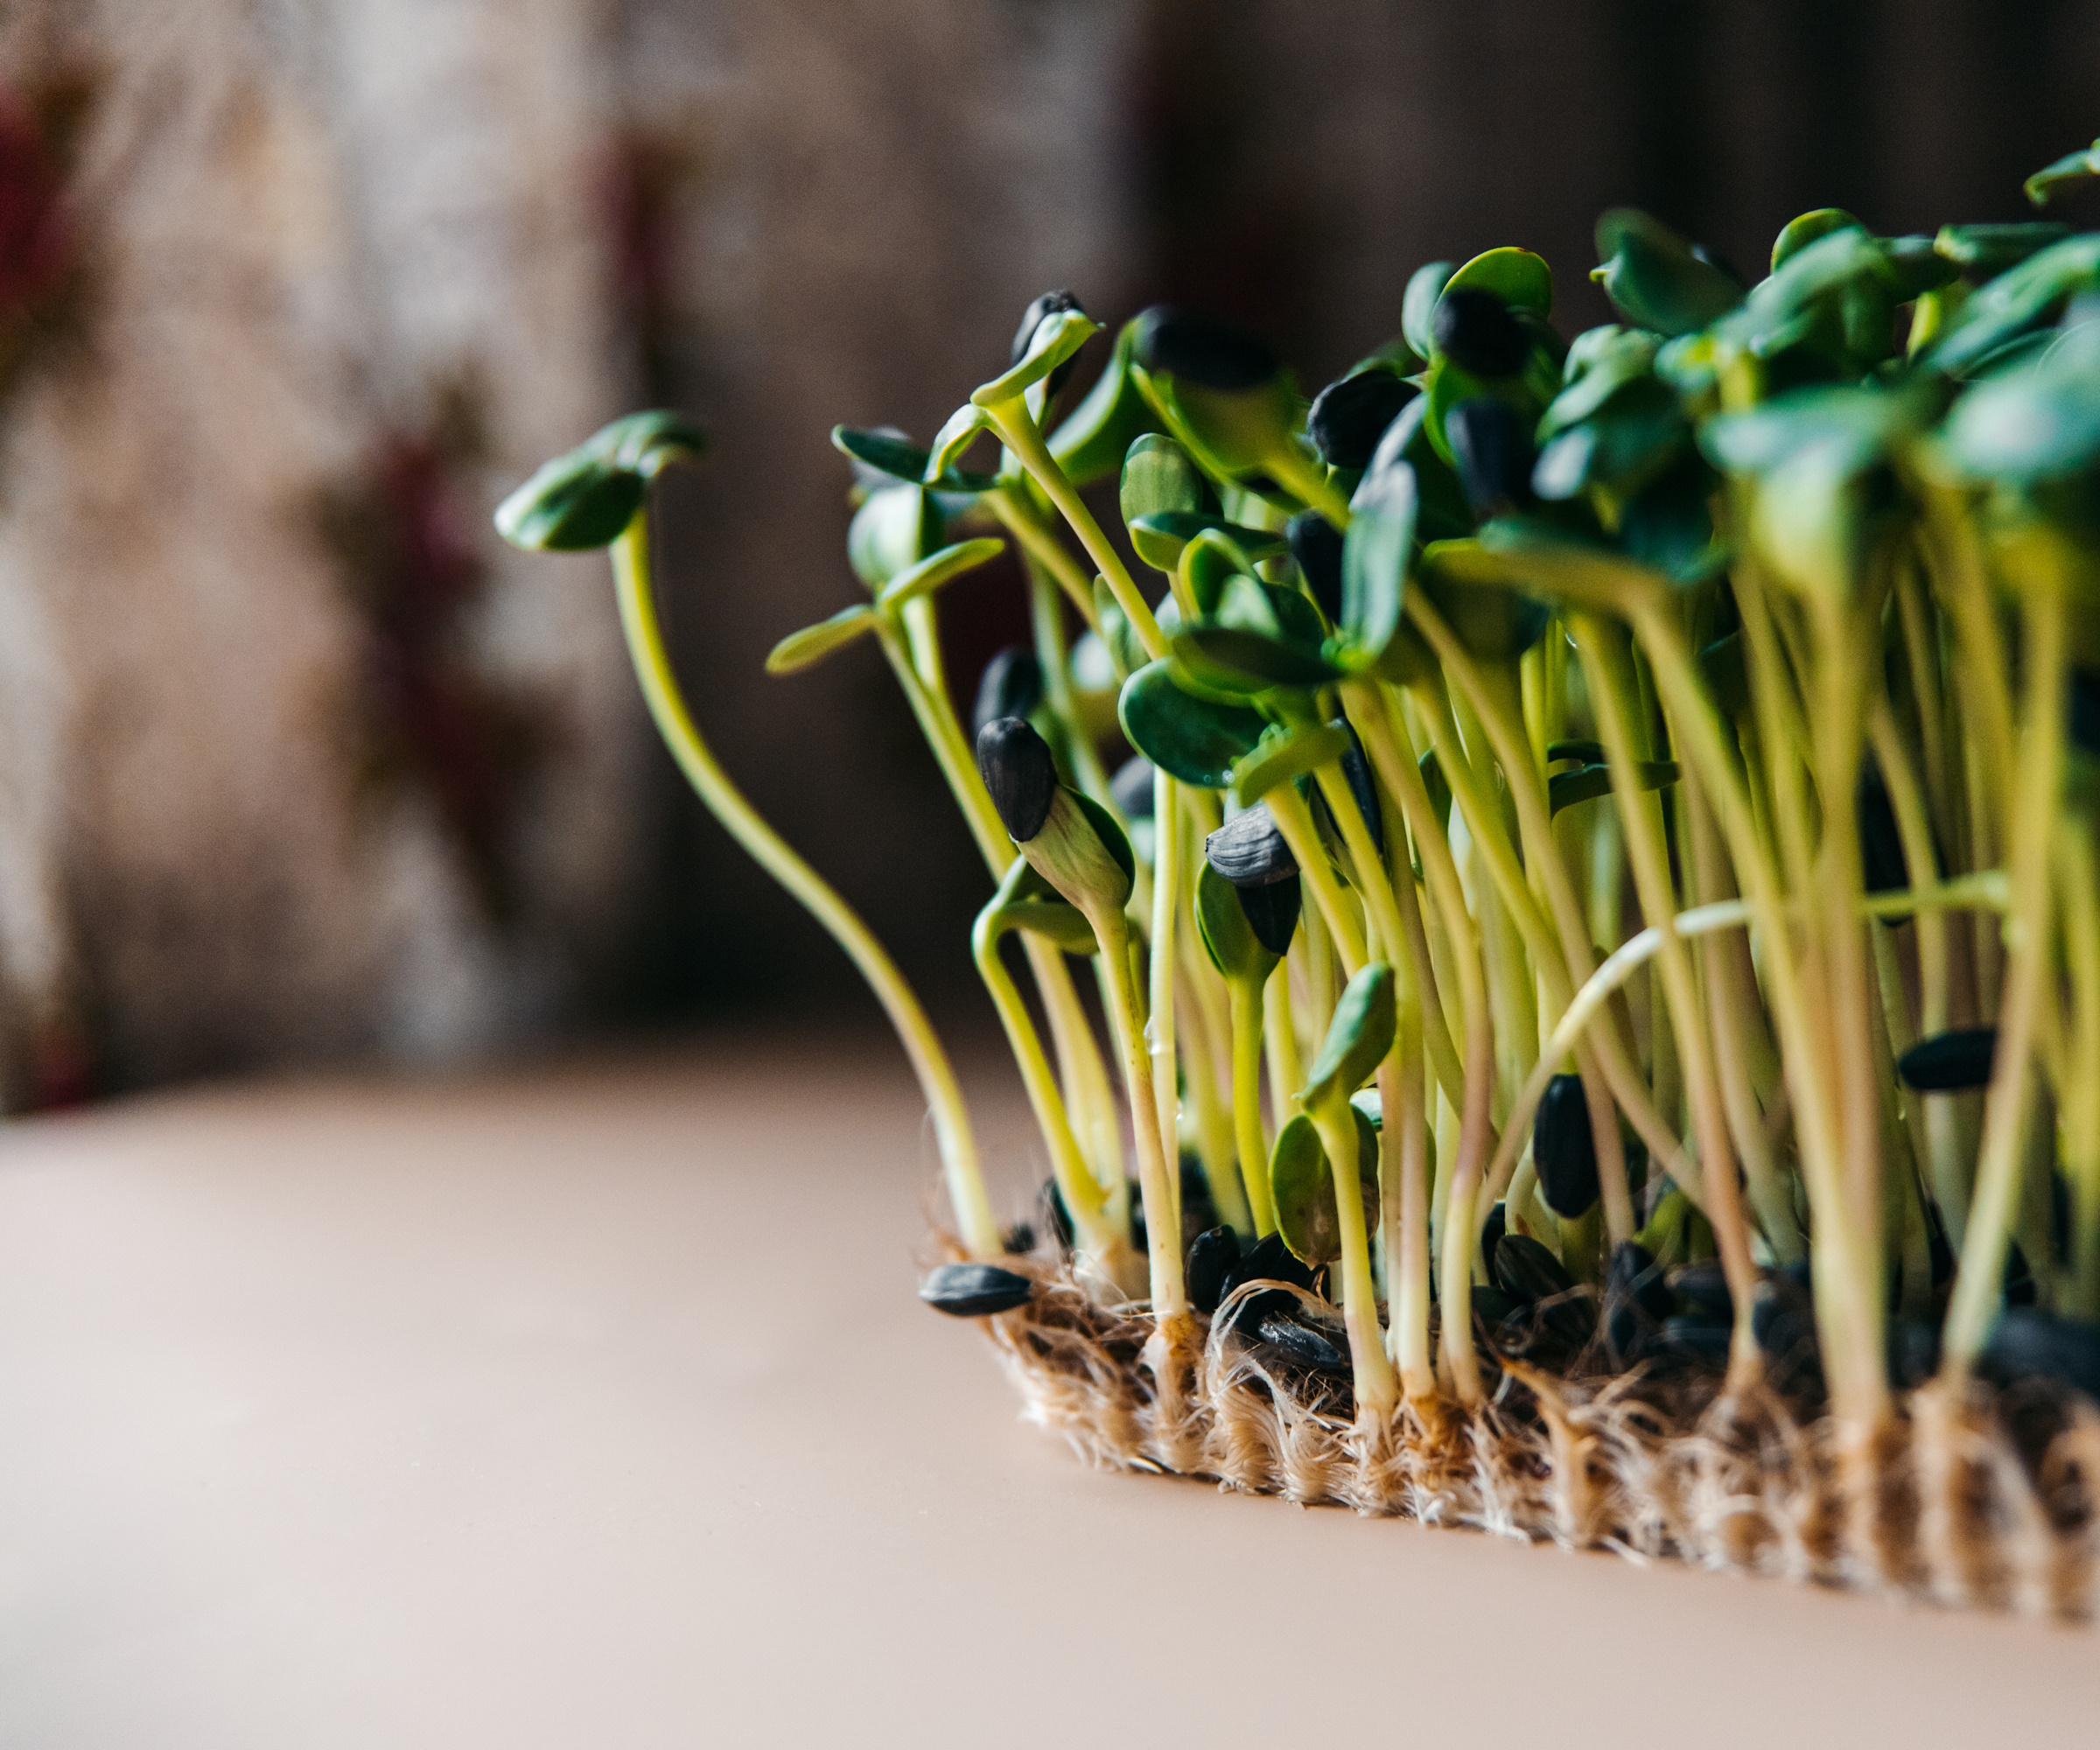
Some of the easiest and best microgreens to grow as part of your new indoor garden, sunflower microgreens are also super speedy. In the right conditions it can take less than a week until they are ready to harvest.
You can buy sunflower seeds cheaply from garden centers. Or better still, learn how to harvest sunflower seeds for free.
Soak them overnight before planting and make sure none of the seeds overlap when you sow them in the tray. These are robust little greens with a nutty flavor.
2. Radish
Radishes are another edible low maintenance indoor plant for the first-time microgreen gardener, as they are almost foolproof. Plus, they’ll add a hot peppery flavor sprinkled over a salad or stir-fry.
The seeds like to germinate in the dark, so cover the container over for the first three days after sowing, or until the majority have sprouted. The seeds are also very small, so you should be able to pack quite a few into a container.
Harvest your radish microgreens when they are about 2-3in (5–8cm) tall, when they still only have their first, round leaves. You can source radish seeds, such as this 'cherry bell' heirloom variety from Burpee.
Top tip from Nick Greens, an expert in indoor agriculture and microgreens: ‘The best times to harvest your microgreens are during the early morning or evening. If you harvest during these times, your microgreens are more likely to be fresh and healthy.’
3. Pea shoots
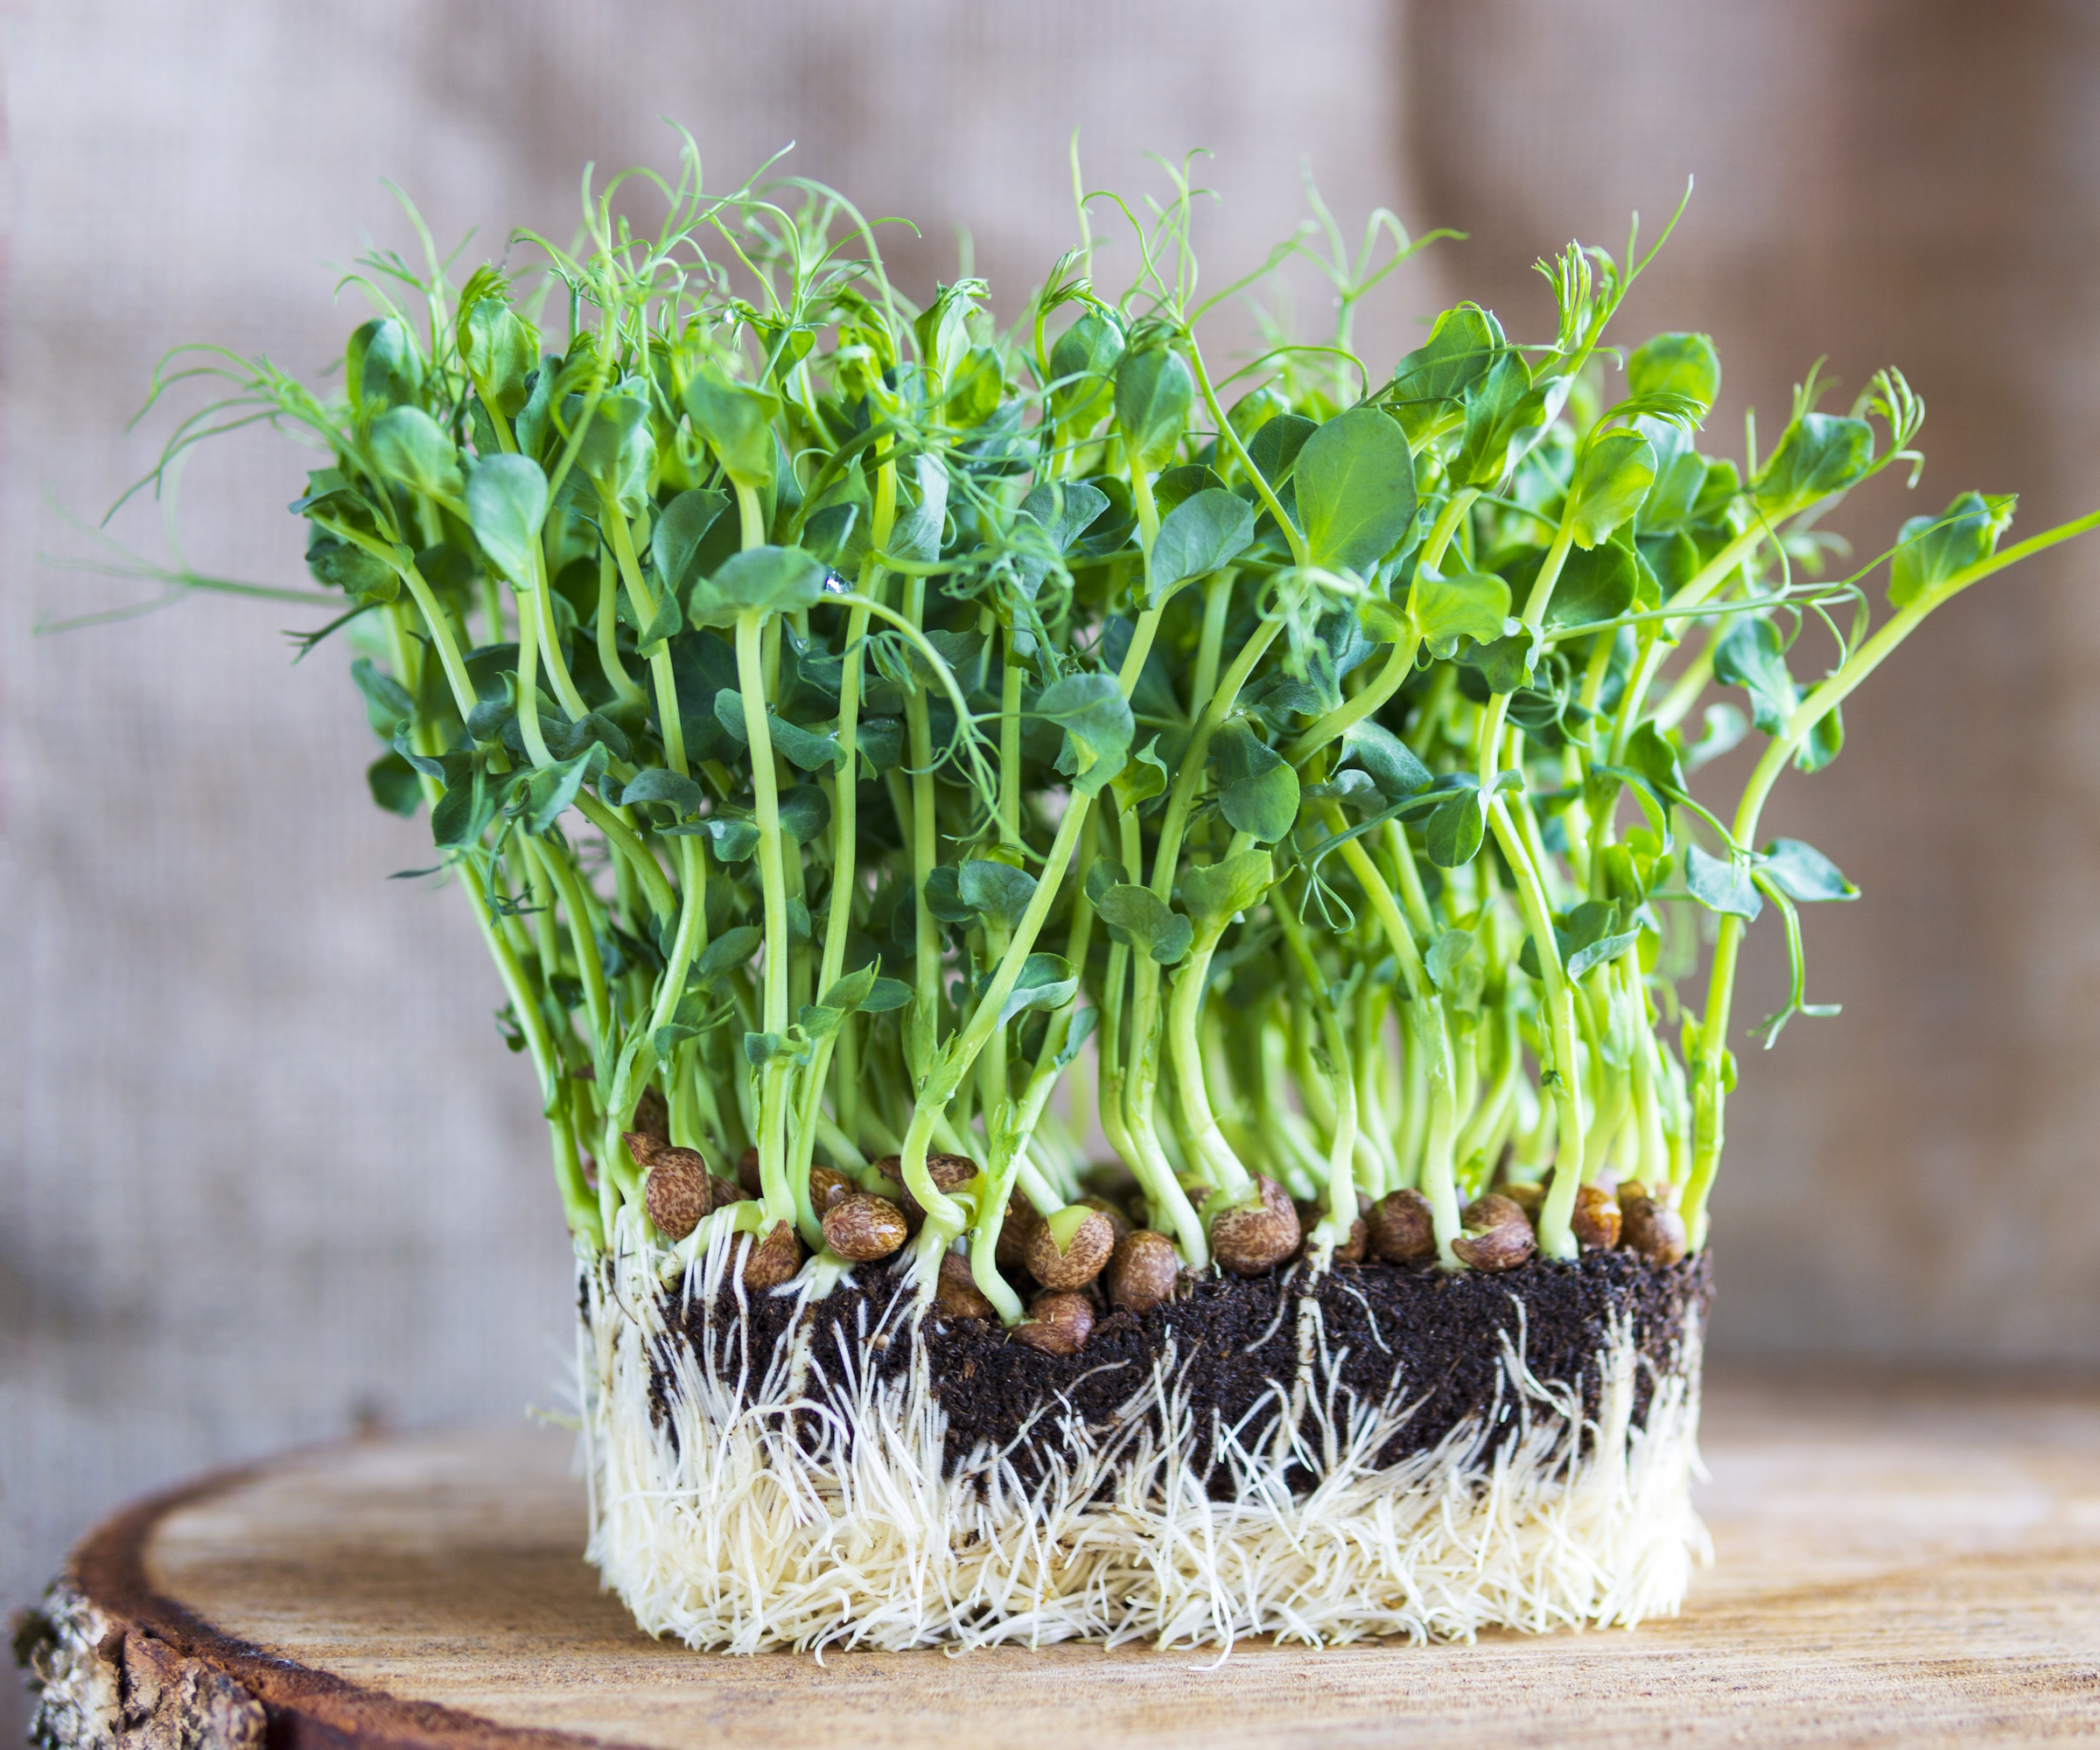
If you’ve learnt how to grow peas in the garden, you’ll know that you’ll be waiting around three months before you can start to enjoy the fruits of your labor. Not so with pea shoots, which have all the fresh pea flavor bursting from their tender green leaves, sometimes in less than two weeks.
As they are a large seed, soak before planting – they are very thirsty so you may need to refill the bowl. Sow them in a shallow tray with a little compost spread over the top.
Snip your first harvest when the plants are 3-4in tall and have their first true leaves. If you just take off the top leaves and leave the rest, within a few days you should get a second harvest.
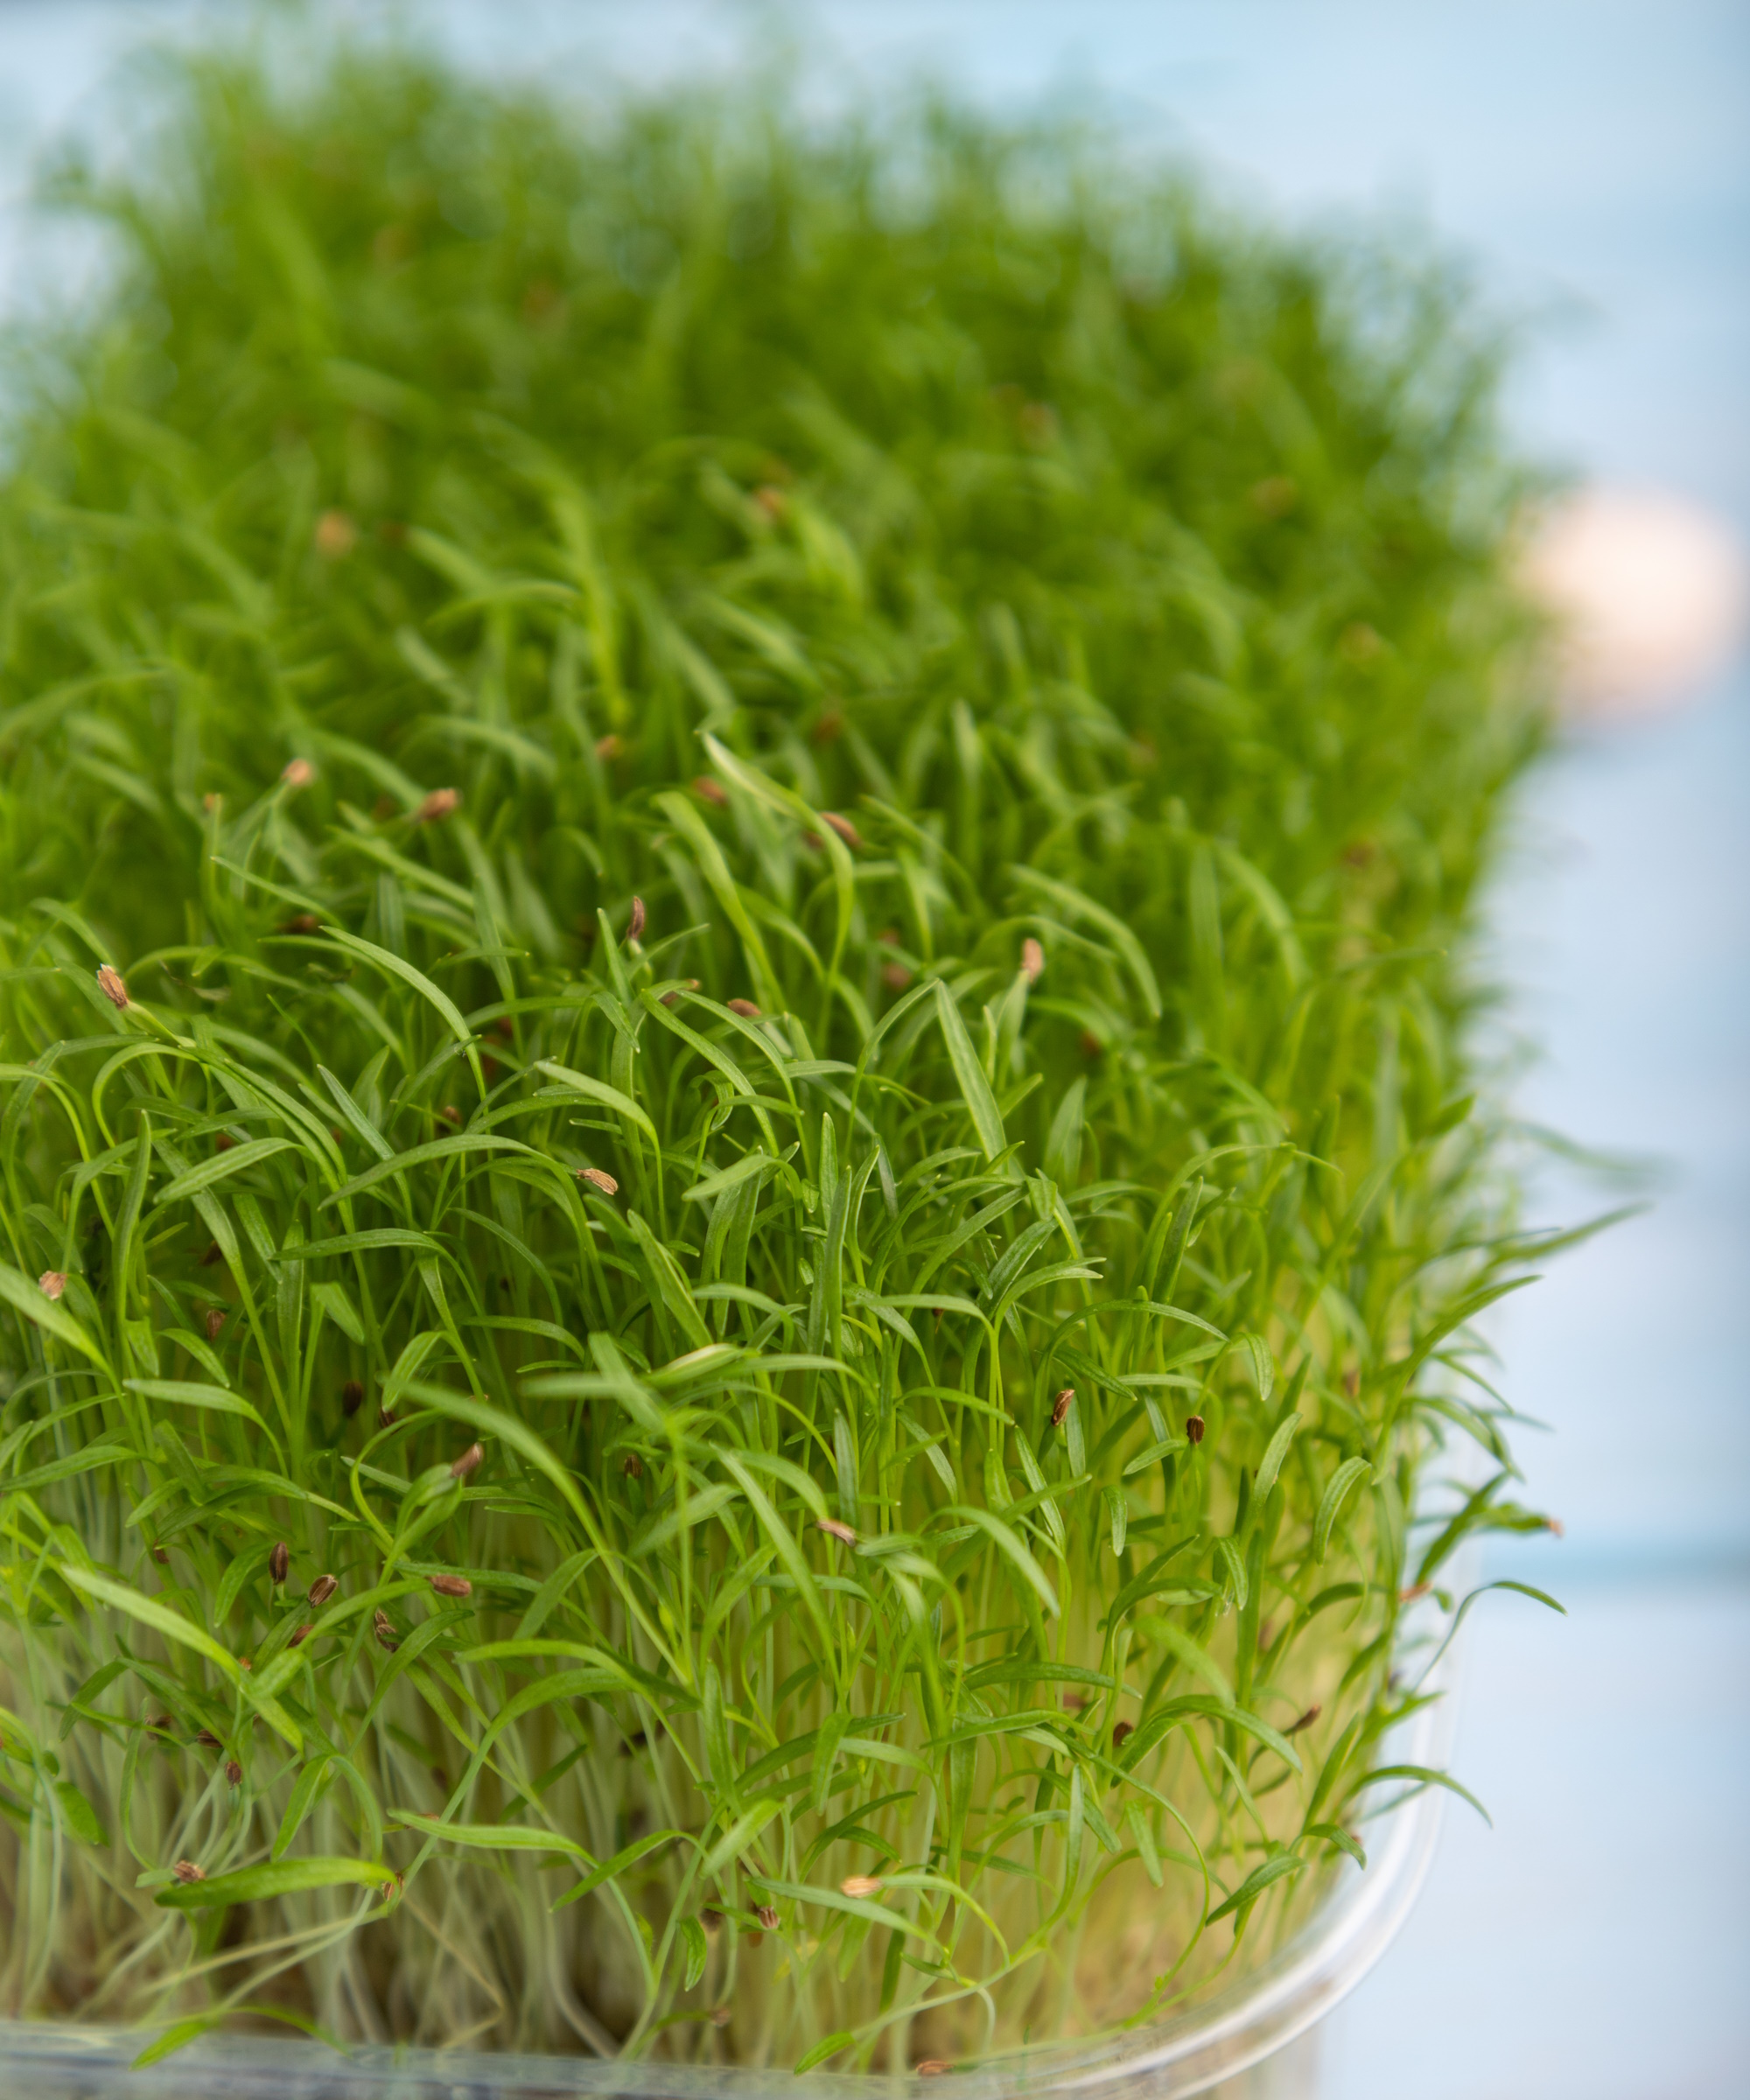
4. Wheatgrass
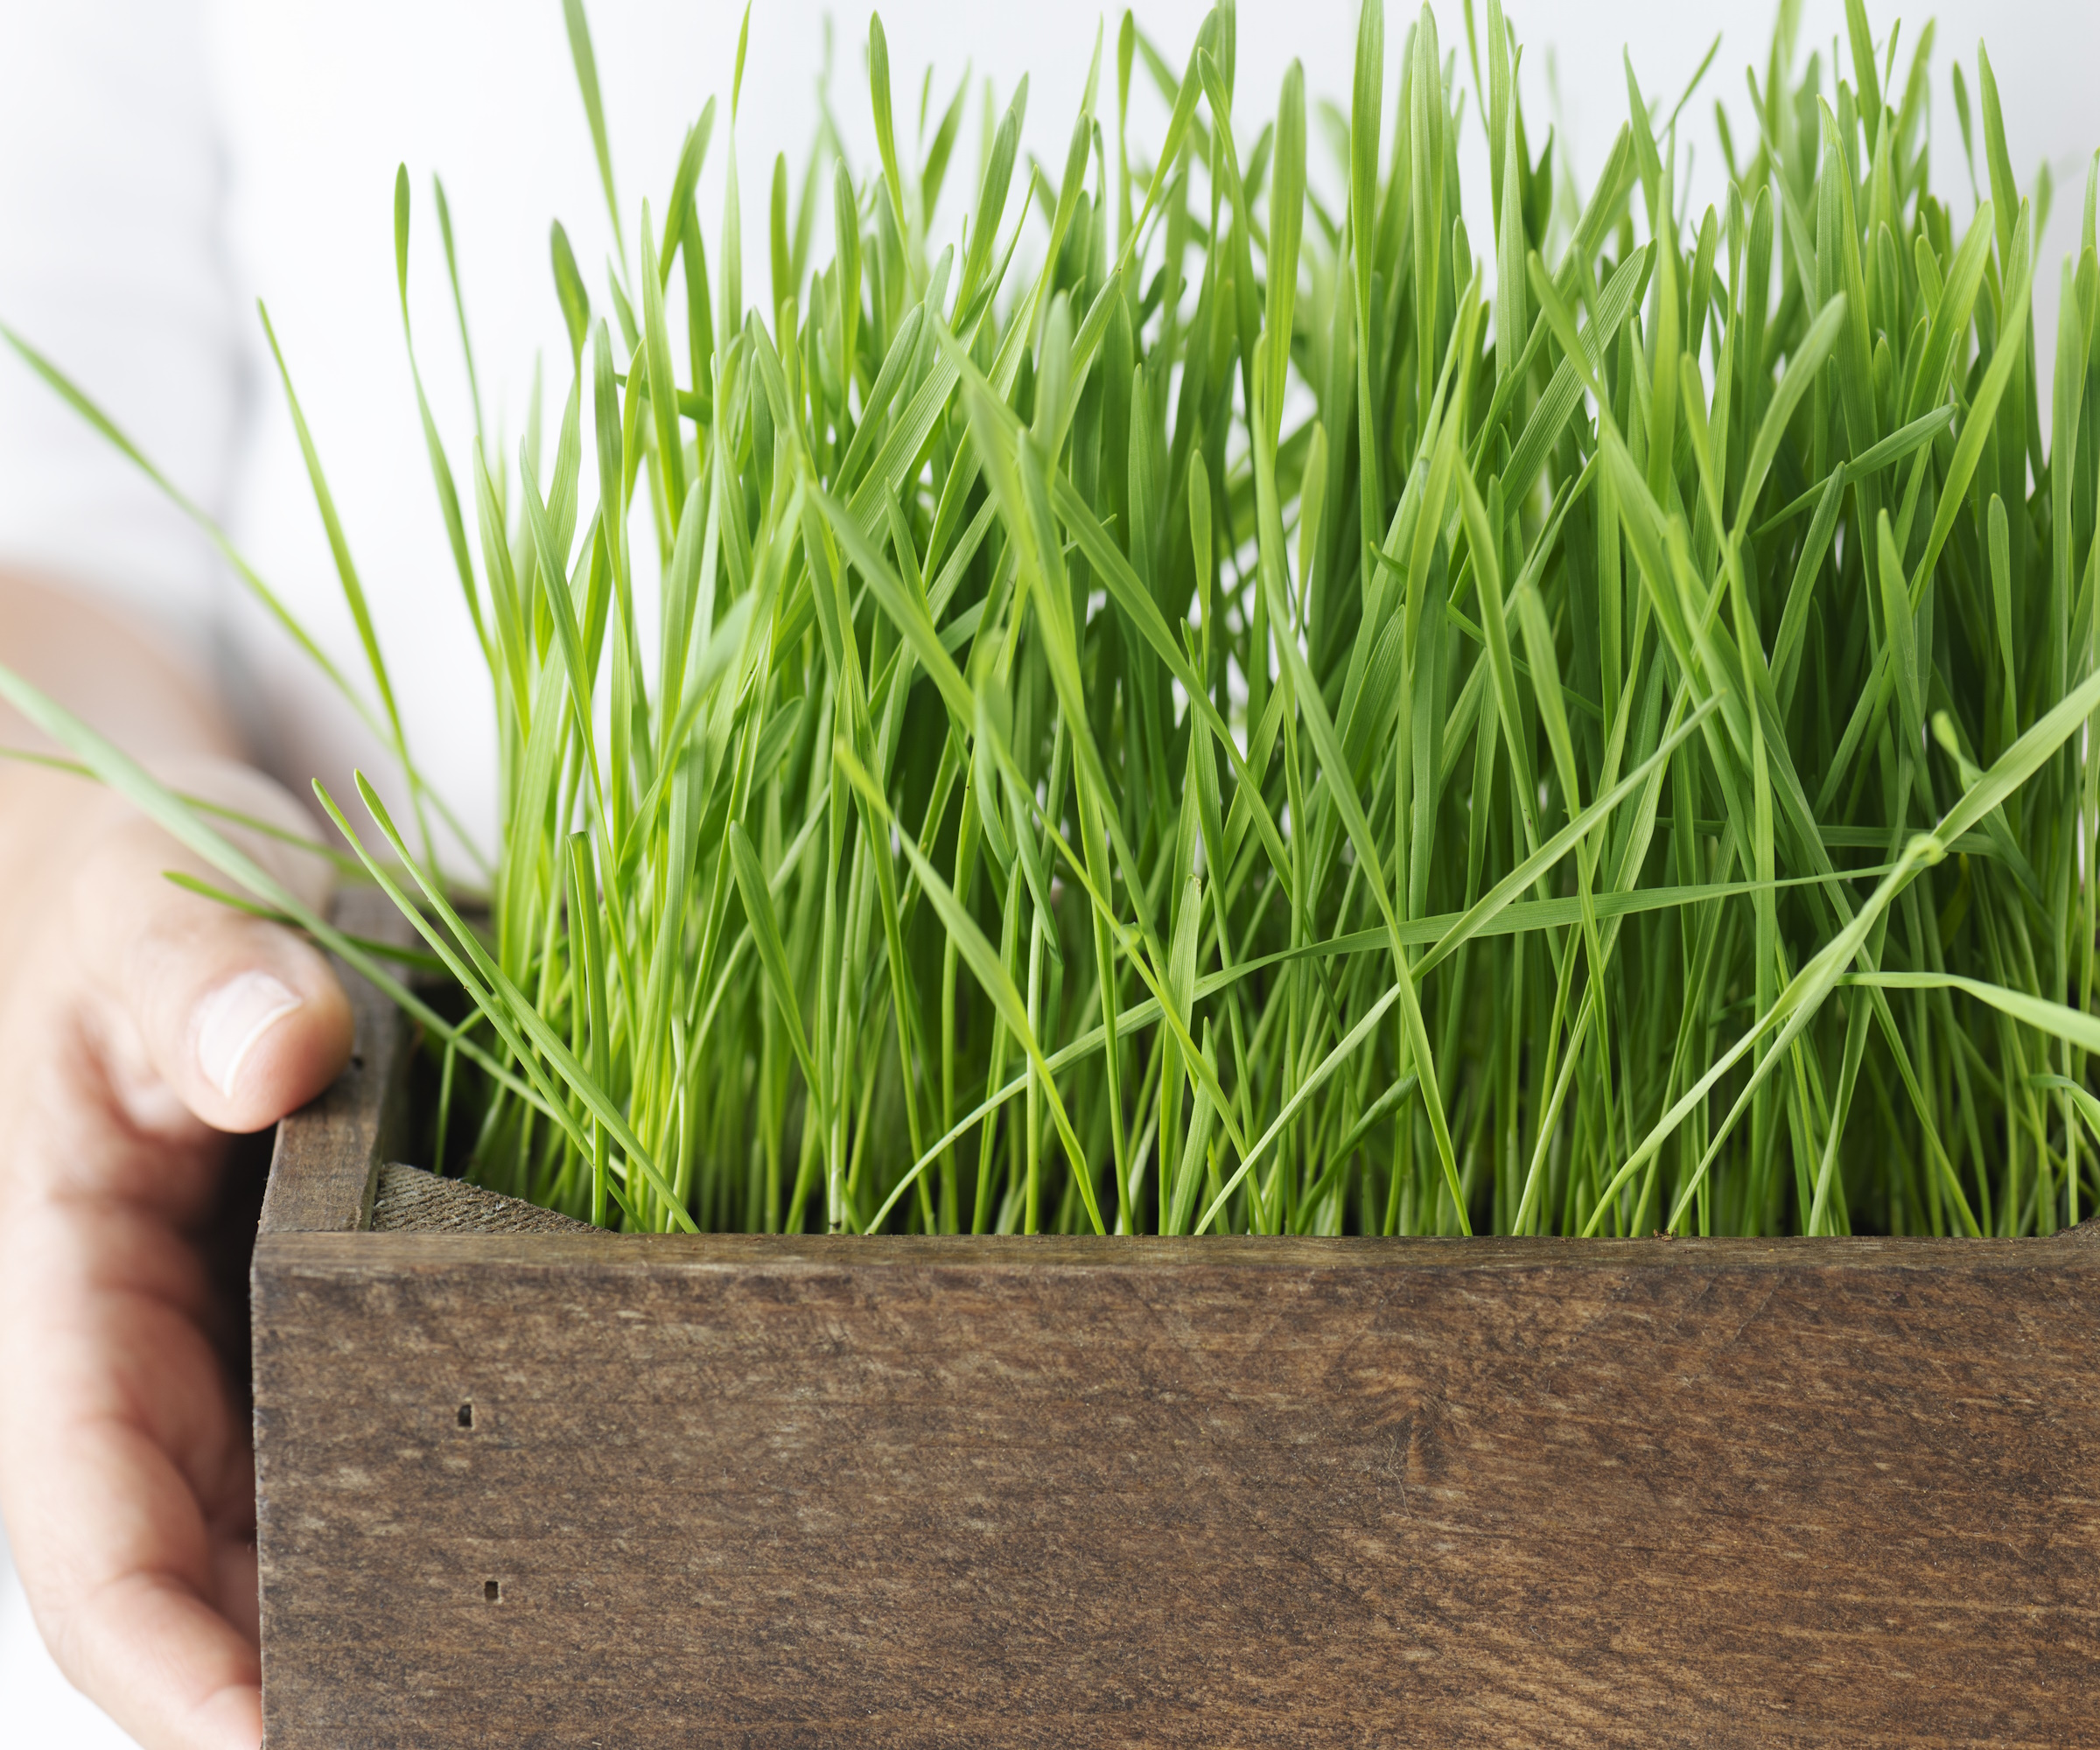
Wheatgrass has long been a darling of the world of natural health, and for good reason – it is packed full of vitamins A, C and E, as well as iron, magnesium and calcium. Rinse or soak the seeds as per the packet instructions. Sow on top of a shallow layer of compost and cover with a thin white cloth.
Keep this moist as you wait for the seeds to germinate and remove once they are poking their heads up. Make sure they are in a well-ventilated spot, e.g. as a kitchen plant, to avoid any mold growing around the base of the shoots.
They’ll get to 6in tall in a matter of days, when you can snip them off and throw a handful into your breakfast smoothie. You might want to start a new batch every few days to make sure you have a continuous supply of super-healthy wheatgrass.
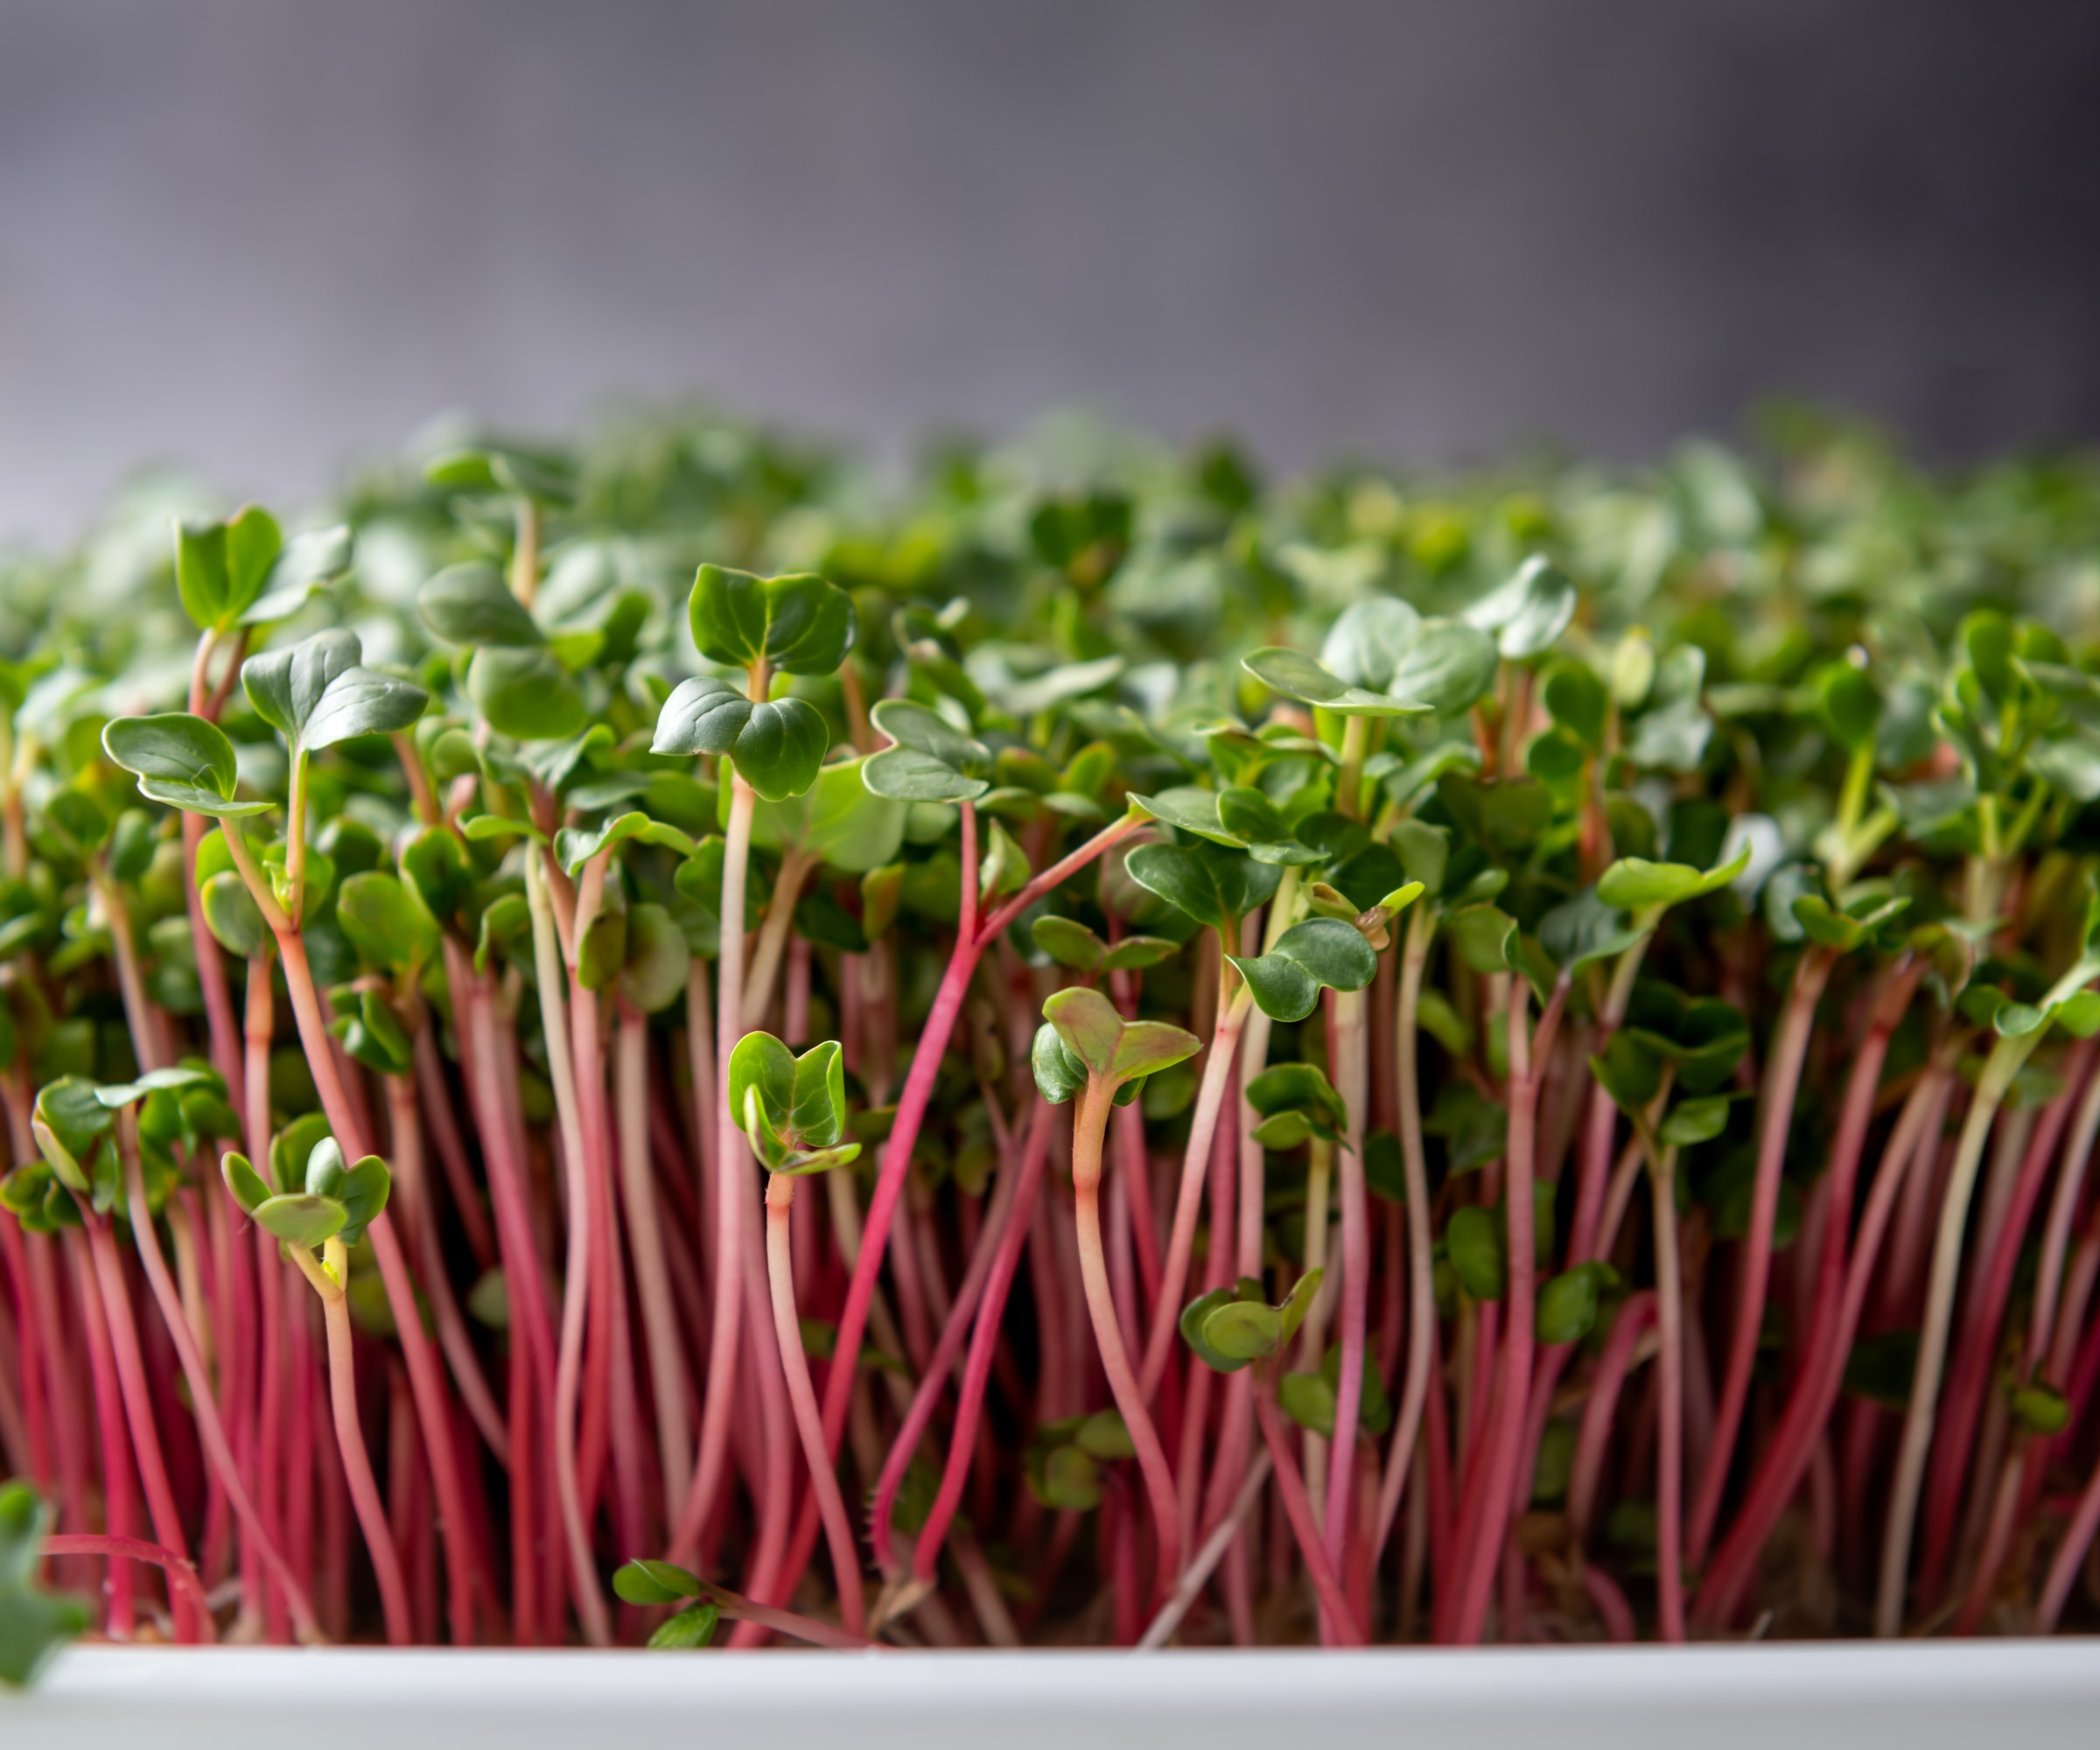
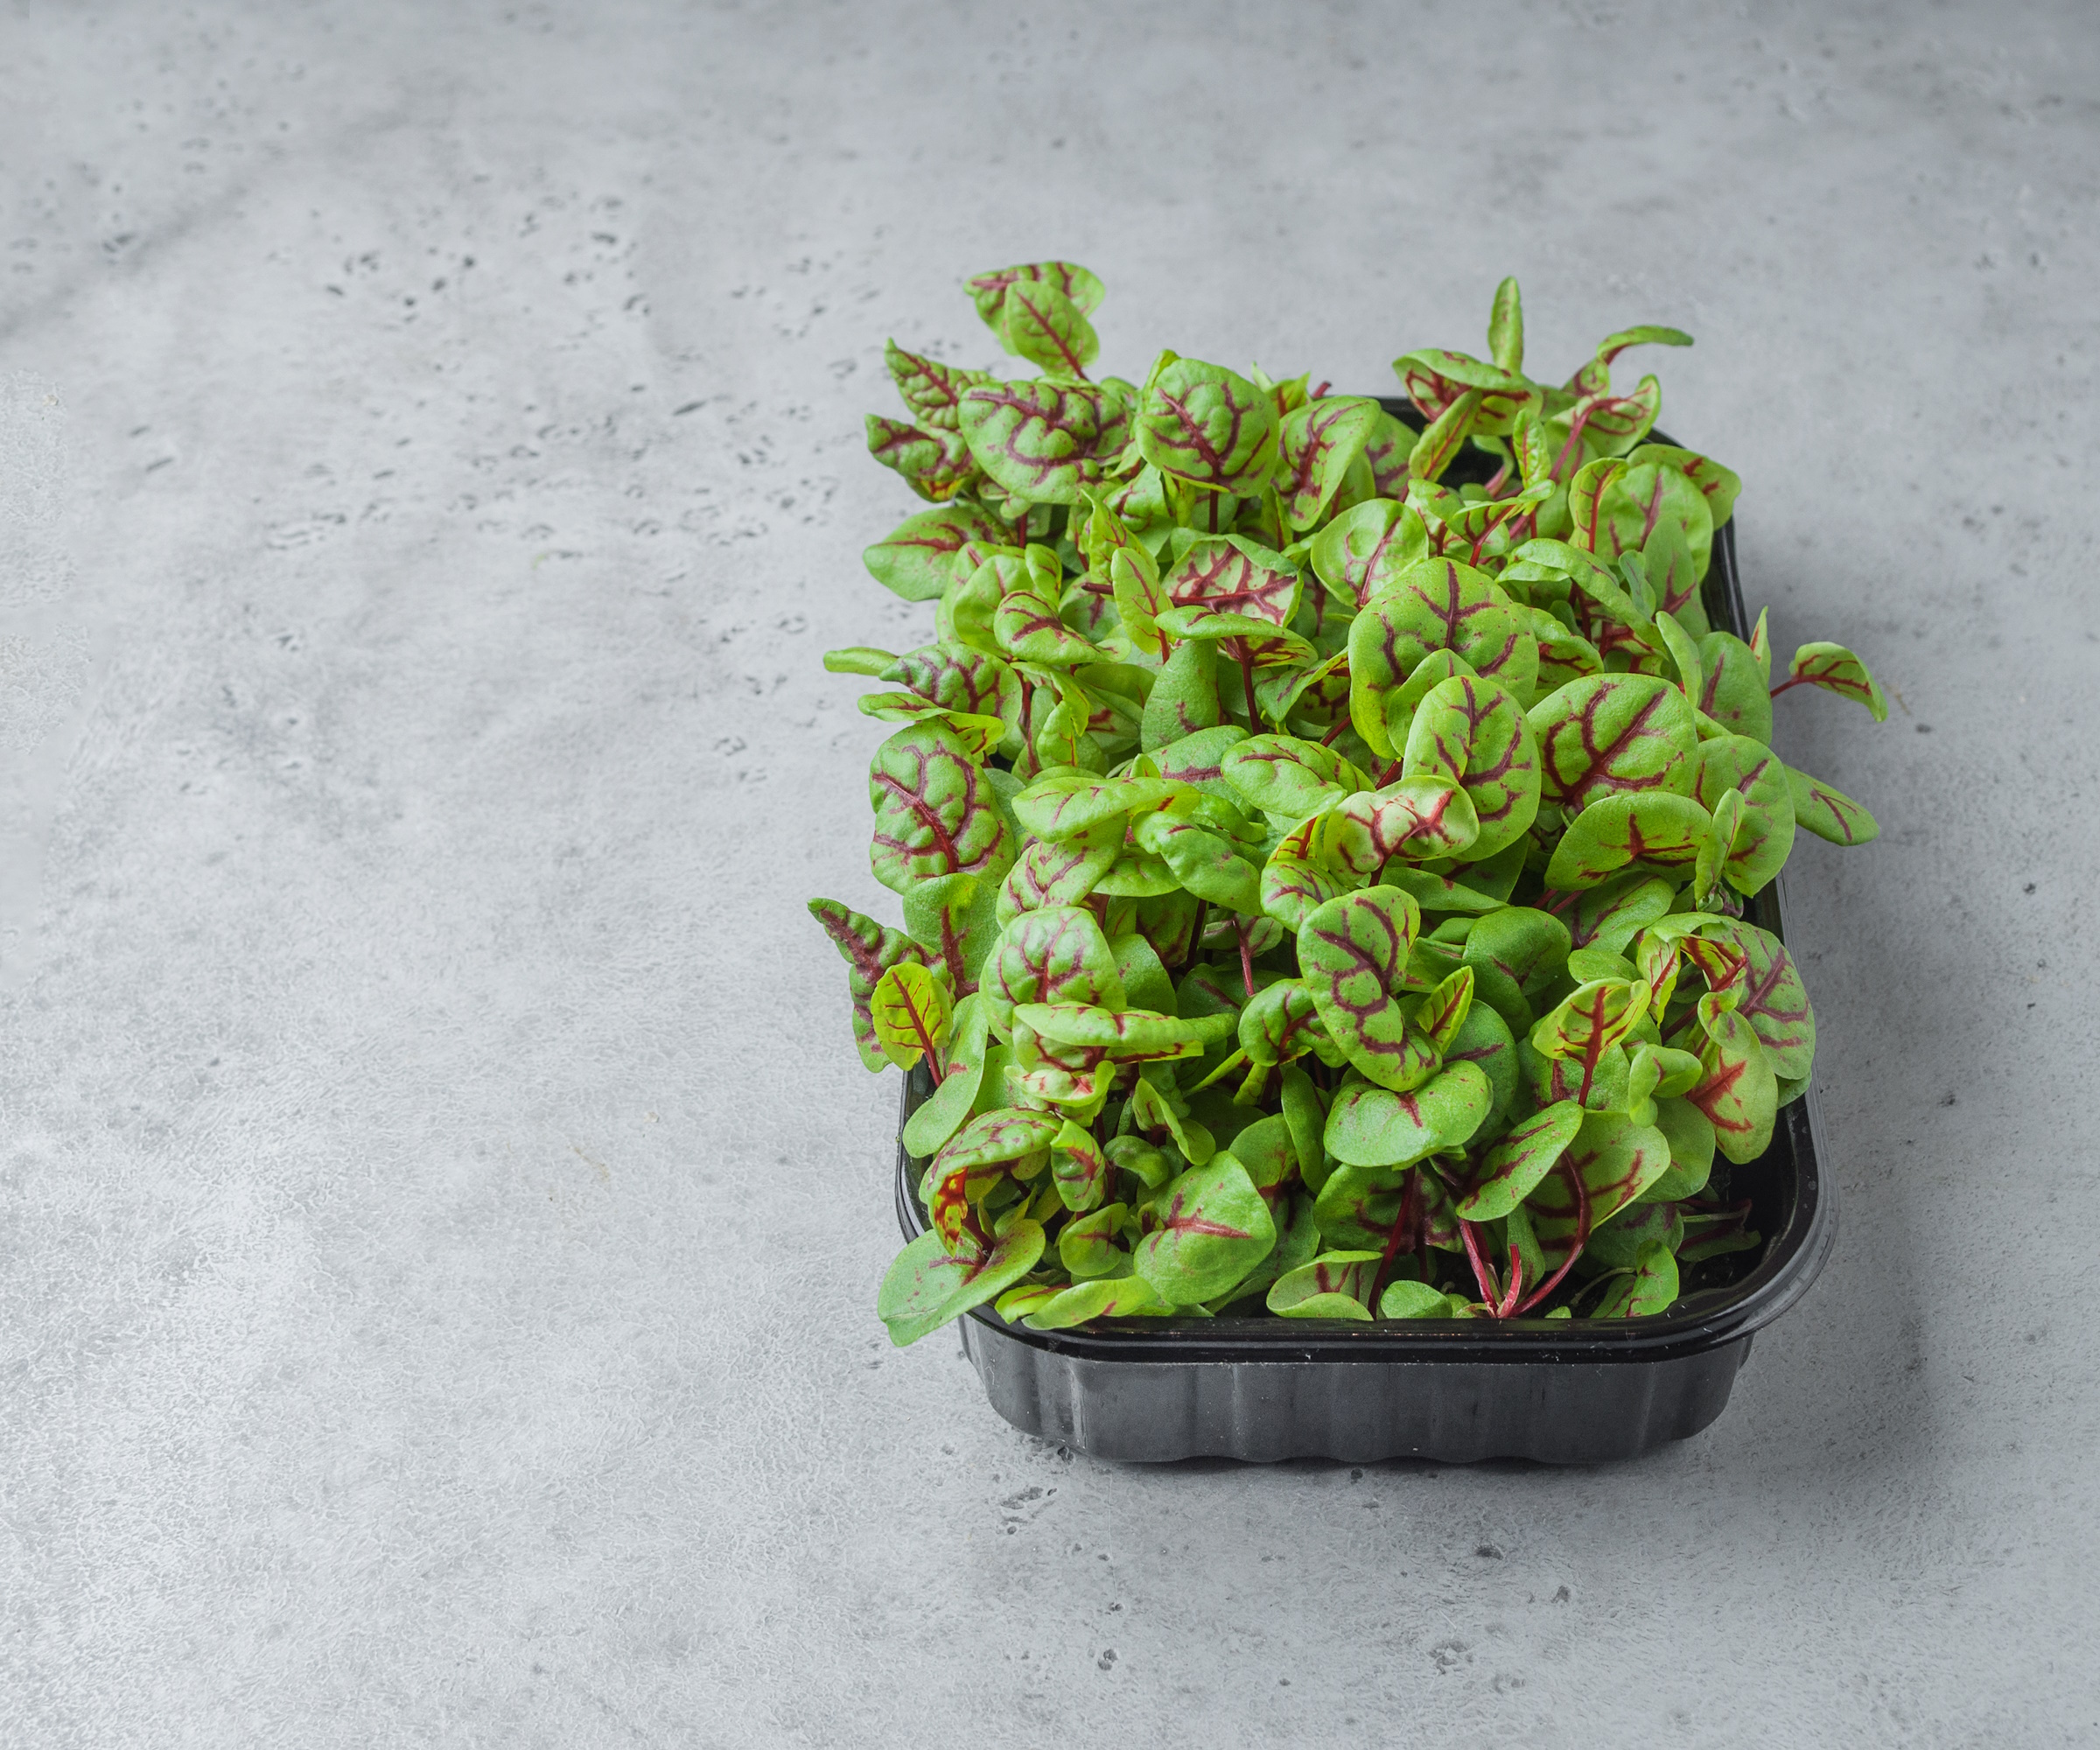
5. Beets

These little microgreens are particularly popular with chefs as their vibrant purple stems and green leaves make for the perfect tasty garnish for almost any savory dish.
When growing beetroot as one of the best microgreens, sprinkle the seeds liberally over the damp compost. Keep them in the dark for around five days until well and truly germinated. Just make sure the soil doesn’t dry out.
Don’t worry if they look a little squashed or yellow at first – they will soon be a glorious green once placed on a sunny windowsill. Harvest after 12-15 days and savor their fresh, earthy flavor.
6. Basil
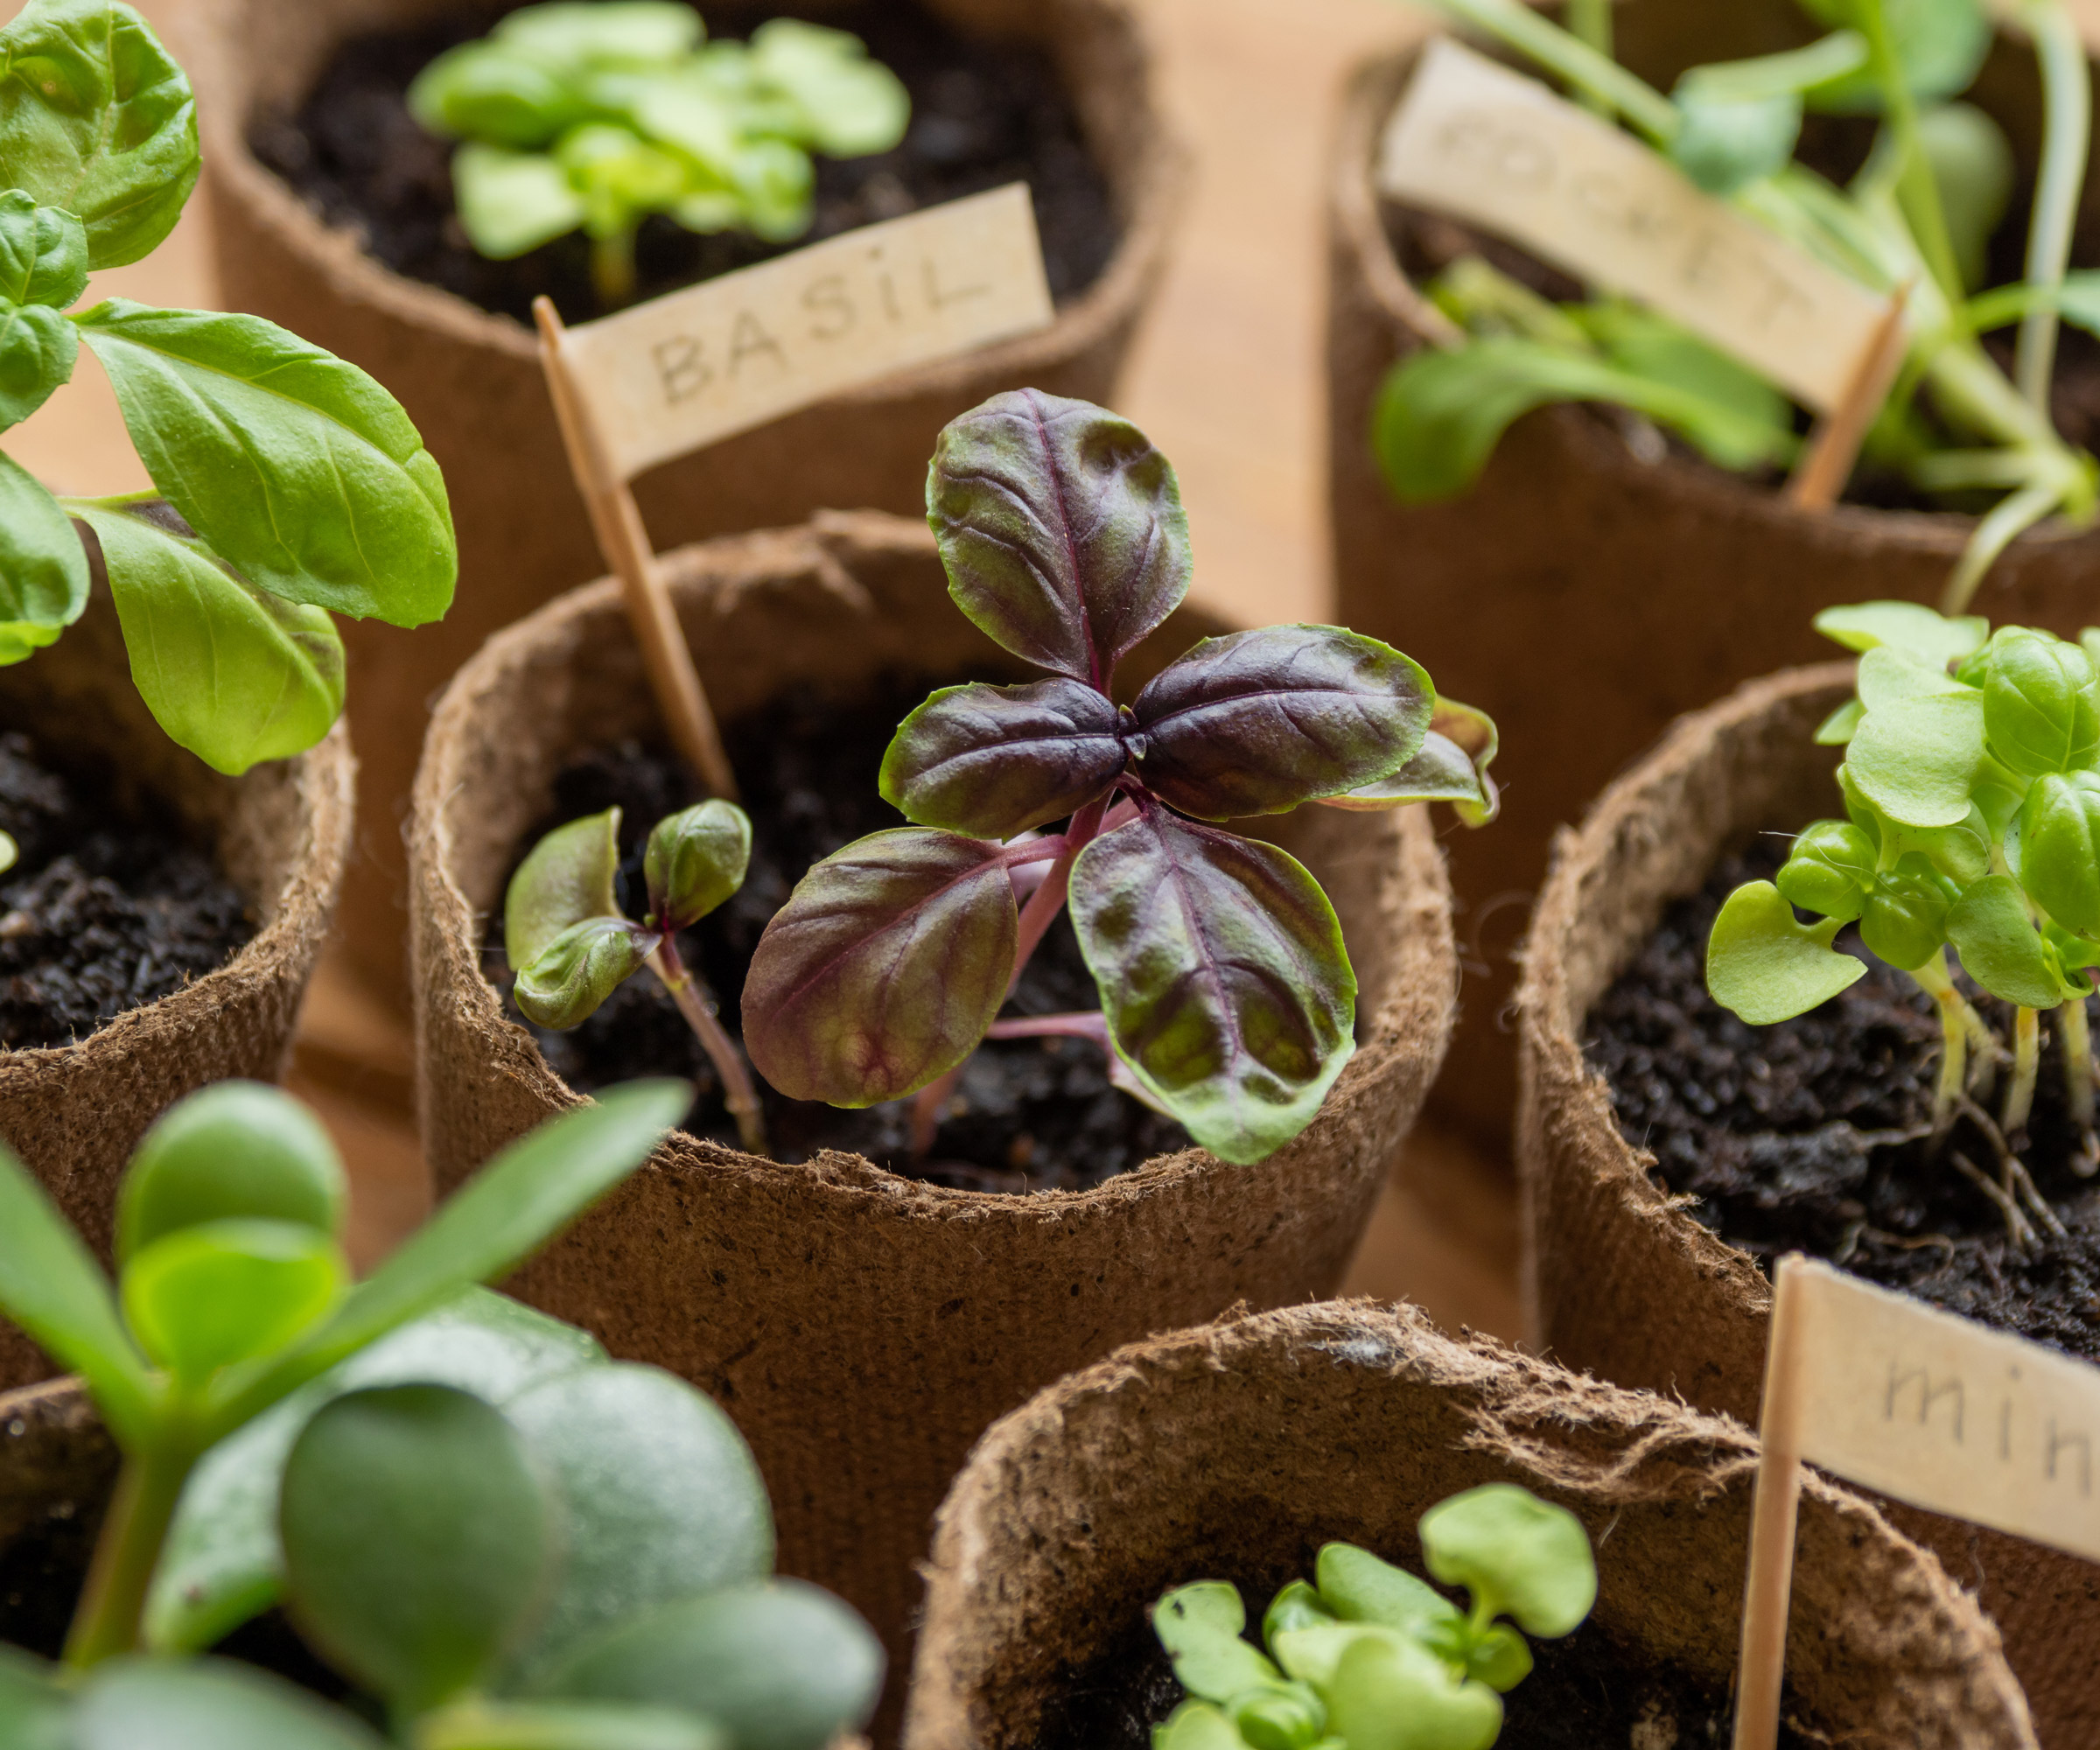
Compared to speedy sunflowers, growing basil microgreens takes time. However, if grown in a sunny spot, they should still be ready for harvest three weeks after germination.
As one of the best herbs to grow indoors there are lots of different types of basil – from the common sweet variety that most of us will be familiar with, to the spicy aniseed of Thai sweet basil and the clove taste of purple basil.
They can all be grown as microgreens and their flavors are the same as the grown-up plants too. Why not grow a variety and see which you like best? Trim the leaves just above the soil and sprinkle over a pizza or even add to homemade Vietnamese summer rolls.
7. Broccoli
If you spotted some of these guys growing in a container, their slightly odd leaves shaped like the number eight wouldn’t give away what they are. But the taste – earthy, mild and slightly bitter – is a lot like the broccoli we are used to eating.
Broccoli sprouts are easy to grow on a sunny windowsill and good for beginners. Once you’ve sown the seeds into damp compost and lightly covered with an extra sprinkle of soil, they should germinate quickly. When they have leaves they are ready to snip. Why not try them in an omelet or frittata, in place of spinach or herbs?
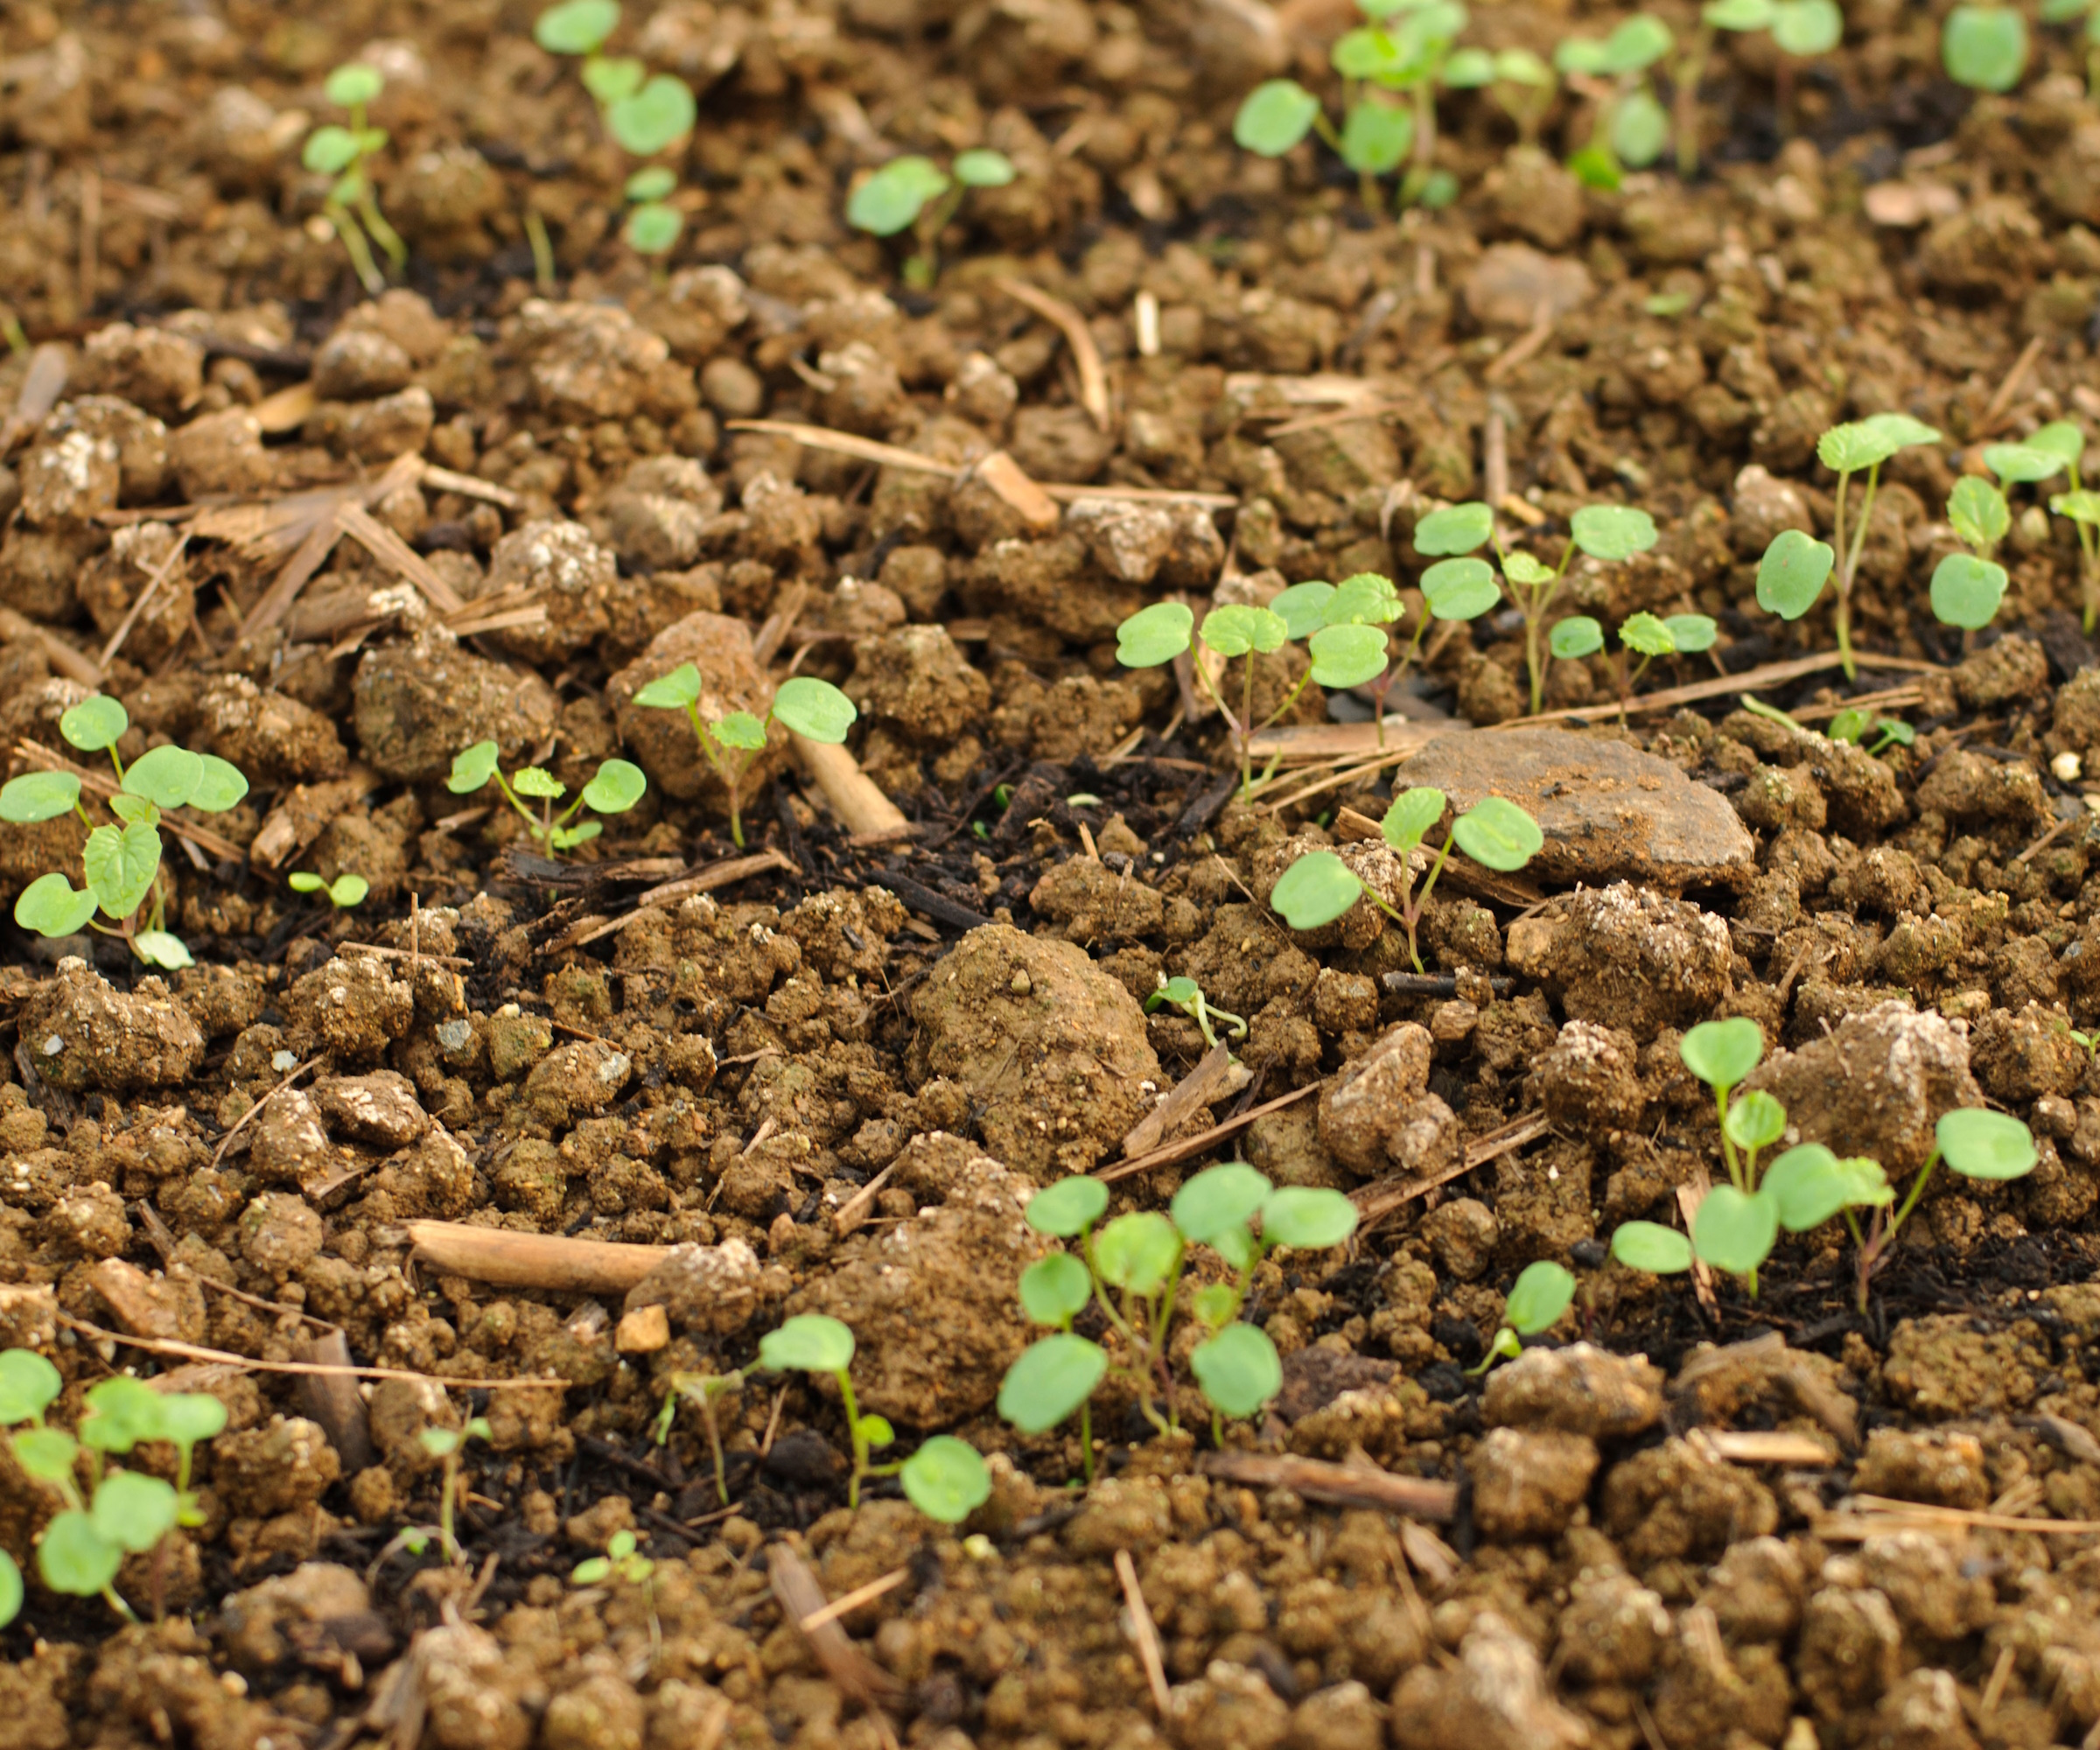
8. Arugula
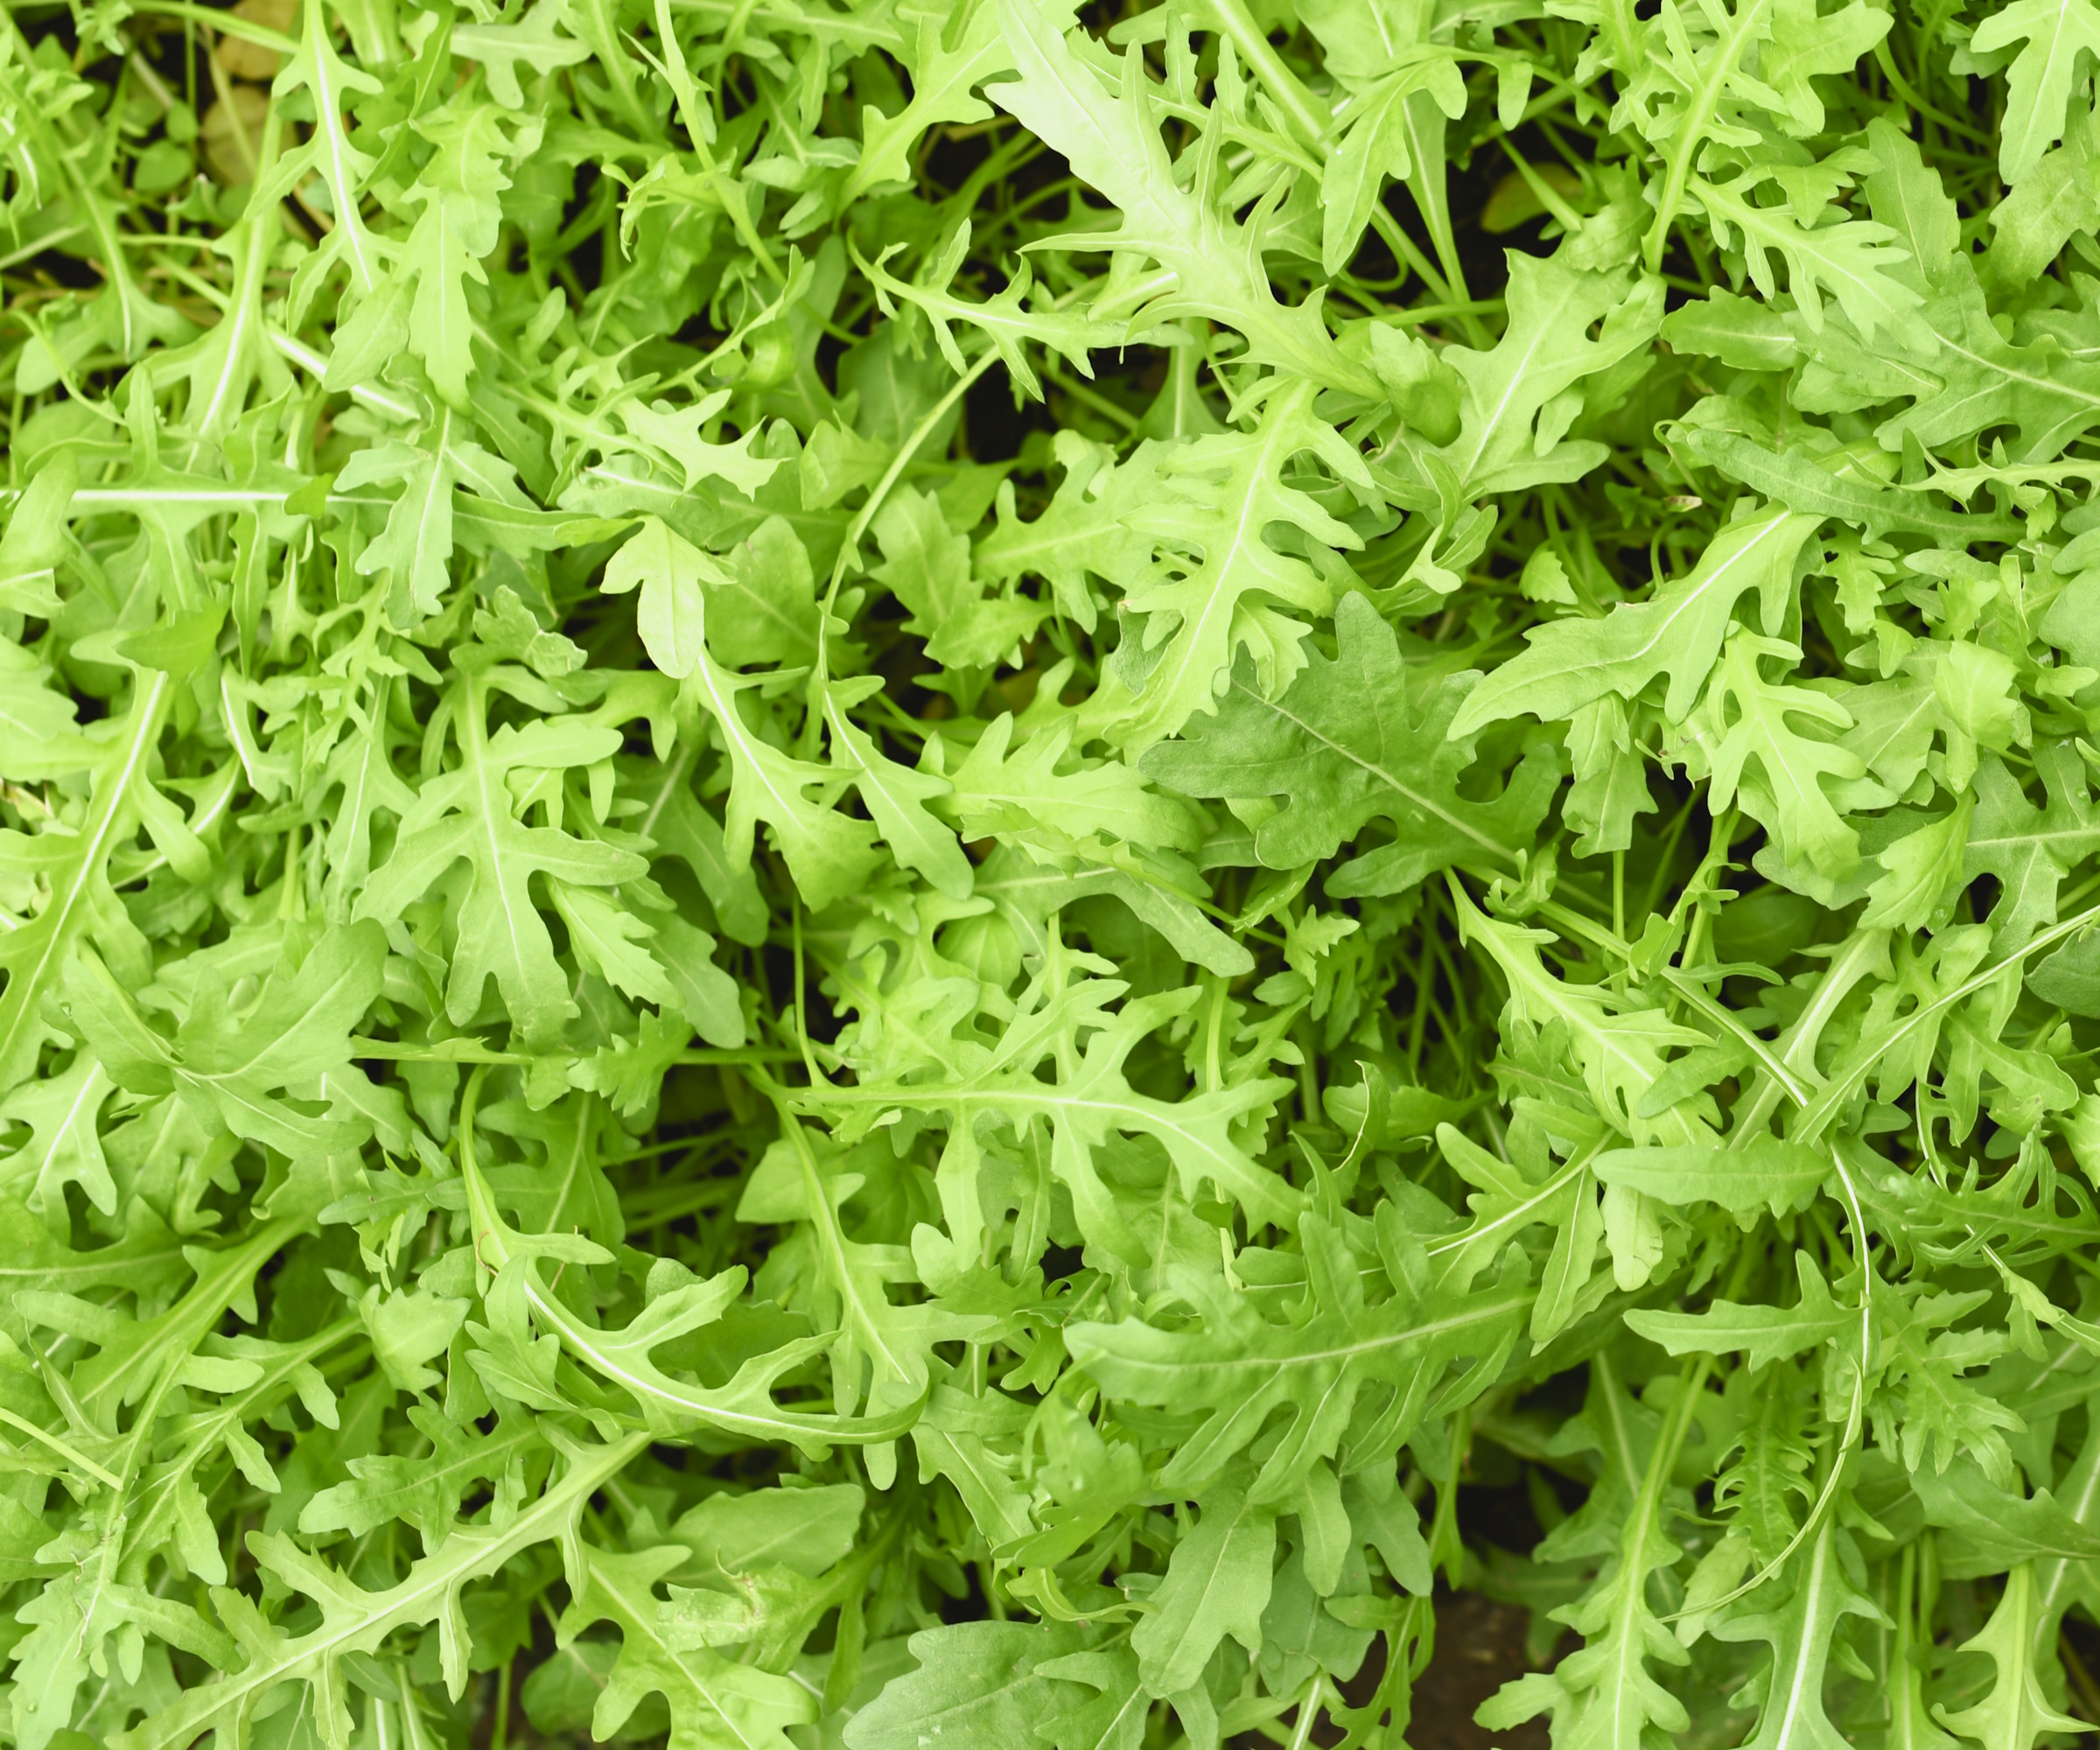
This is another microgreen that’s easy and speedy to grow, and it packs a flavor punch too. It’s a great way to use up seeds if you have an outdoor kitchen garden and you have an opened packet lurking in your seed stash. Make sure your compost is well moistened before you sow and lightly pat it down.
Arugula is one of the easiest vegetables to grow, but with such small seeds it can be handy to use an old herb shaker to help you to distribute them evenly over the surface of the soil.
Cover them with a lid and leave in the dark until the little seedlings start showing leaves – you’ll want to mist them occasionally, but you won’t need to water them until they are bigger.
Harvest when they are about 2-3in tall with a good crop of leaves. They are a great alternative to lettuce in a salad.
9. Rainbow chard
Outdoors, chard are a great small vegetable garden idea, but inside they can be grown at any time. All types of chard work well as a microgreen and look good growing in a container on the windowsill. Rainbow chard is a mix of different varieties in the same packet – as it grows, the stems will make it look like a tiny multi-colored forest. You can find Swiss chard seeds available to buy at Burpee.
Growing chard microgreens takes some patience and care – particularly with watering plants, as they are delicate and prone to collapse if drenched from above.
'It is best to water microgreens from below. This avoids bending the precious seedlings and also ensures that the soil all gets moist, rather than just the top few centimeters of the compost,' says Drew Swainston. 'Never let the trays of compost dry out and also avoid the trays sitting too soggy, as this can encourage fungus to grow on the surface and cause ‘damping off’ - where seedlings collapse and die.'
After sowing the seeds always cover with a light layer of soil and, as with arugula, put a lid over them to keep out the light until fully germinated.
Some professional growers use a tray that they lay directly onto the soil and weigh down for the first five days to establish stronger roots. You might be waiting 30 days until the seedlings start to crowd out of the pot and demand to be harvested. It’s worth it, though, as their sweet, earthy flavor will add something special to salads and sandwiches, or sprinkled over a risotto.
10. Carrot
These fluffy greens look adorable and taste mild, sweet, earthy and, well, just like carrots. They are at the more challenging end of microgreen gardening but the totally worth the effort.
First, their seeds are tiny, so spreading them across your freshly watered growing medium so they are densely packed but not overlapping, can be a challenge in itself. They will also need about 5-7 days to sit quietly in the dark to germinate.
Water your baby carrots by misting, or putting the tray in a shallow container with water and letting it soak up from underneath. As with all microgreens, try not to overwater or let the tray completely dry out.
When the first true leaves form you can get harvesting. You can leave them to grow a bit bigger if you like, just bear in mind that the stems will get tougher as they age.
11. Wasabi mustard greens
Ready for a real flavor experience? Grow some wasabi mustard microgreens on your windowsill and your cooking may never be the same again. These little guys, which are similar to cress, pack a punch, with a peppery, horseradish taste, but lacking the afterburn of wasabi paste (which is made from the rhizome of a different plant with a similar flavor).
Give them a few days of darkness to germinate and then remove the lid and harvest when they are around 2-3.5in tall.
FAQs
What vegetables can you grow as microgreens?
Most salad greens – like lettuce, arugula and spinach – work really well as microgreens, giving you a green pop of color, particularly in cooler months when not so much is growing outdoors.
Herbs are great too – try aromatic basil, citrussy dill, intense mustard or flavorful cilantro. Experiment with vegetables – broccoli, beets, cauliflower, cabbage and chard are all very popular. Or for something different, sunflower seeds, chia and buckwheat make for the best microgreens to grow too.
Also: peas, radishes, kohlrabi, flax, wheatgerm, cress, leek, sorrel, fennel, carrot, in fact almost any leafy vegetable can be grown as a microgreen. The main thing is to grow the greens you know you like the taste of as an adult plant. There’s no point growing fennel microgreens if the aniseed flavor puts you off.
But note that only seeds with edible leaves are suitable, for example rhubarb and tomato leaves are not safe for humans to eat.
What are the easiest microgreens to grow?
Pea shoots, sunflower seeds and radishes are among the easiest to grow for beginners. While some gardeners find carrot and sorrel to be trickier.
A good pair of scissors or snips, such as these from Amazon, are best to harvest microgreens. Pick them as required to get them at their freshest, and consider growing pea shoots and nasturtiums as you can get multiple harvests from one sowing.