There are a lot of Star Wars Jedi Survivor abilities, Force powers and gear you can get and I've listed the when and where of unlocking it all here. All of it is story locked and you can't not get it so there's no need to worry about missing out. However, there's one point where you have a choice of what to unlock next and generally, you'll want to get things sooner rather than later as almost every door you can't open, or puzzle you can't solve, can be fixed with the right gear when you get it.
There's a balance to progression in Star Wars Jedi Survivor because while you might want to explore some of its huge open worlds, you will hit wall that only progressing the story will fix. So here's where and when you can unlock all the Star Wars Jedi Survivor abilities, Force powers and gear you need to progress.
This is very much a targeted list of everything you can get and when, so if you want a more overall Star Wars Jedi Survivor walkthrough to guide you we can also help.
Star Wars Jedi Survivor ascension cable
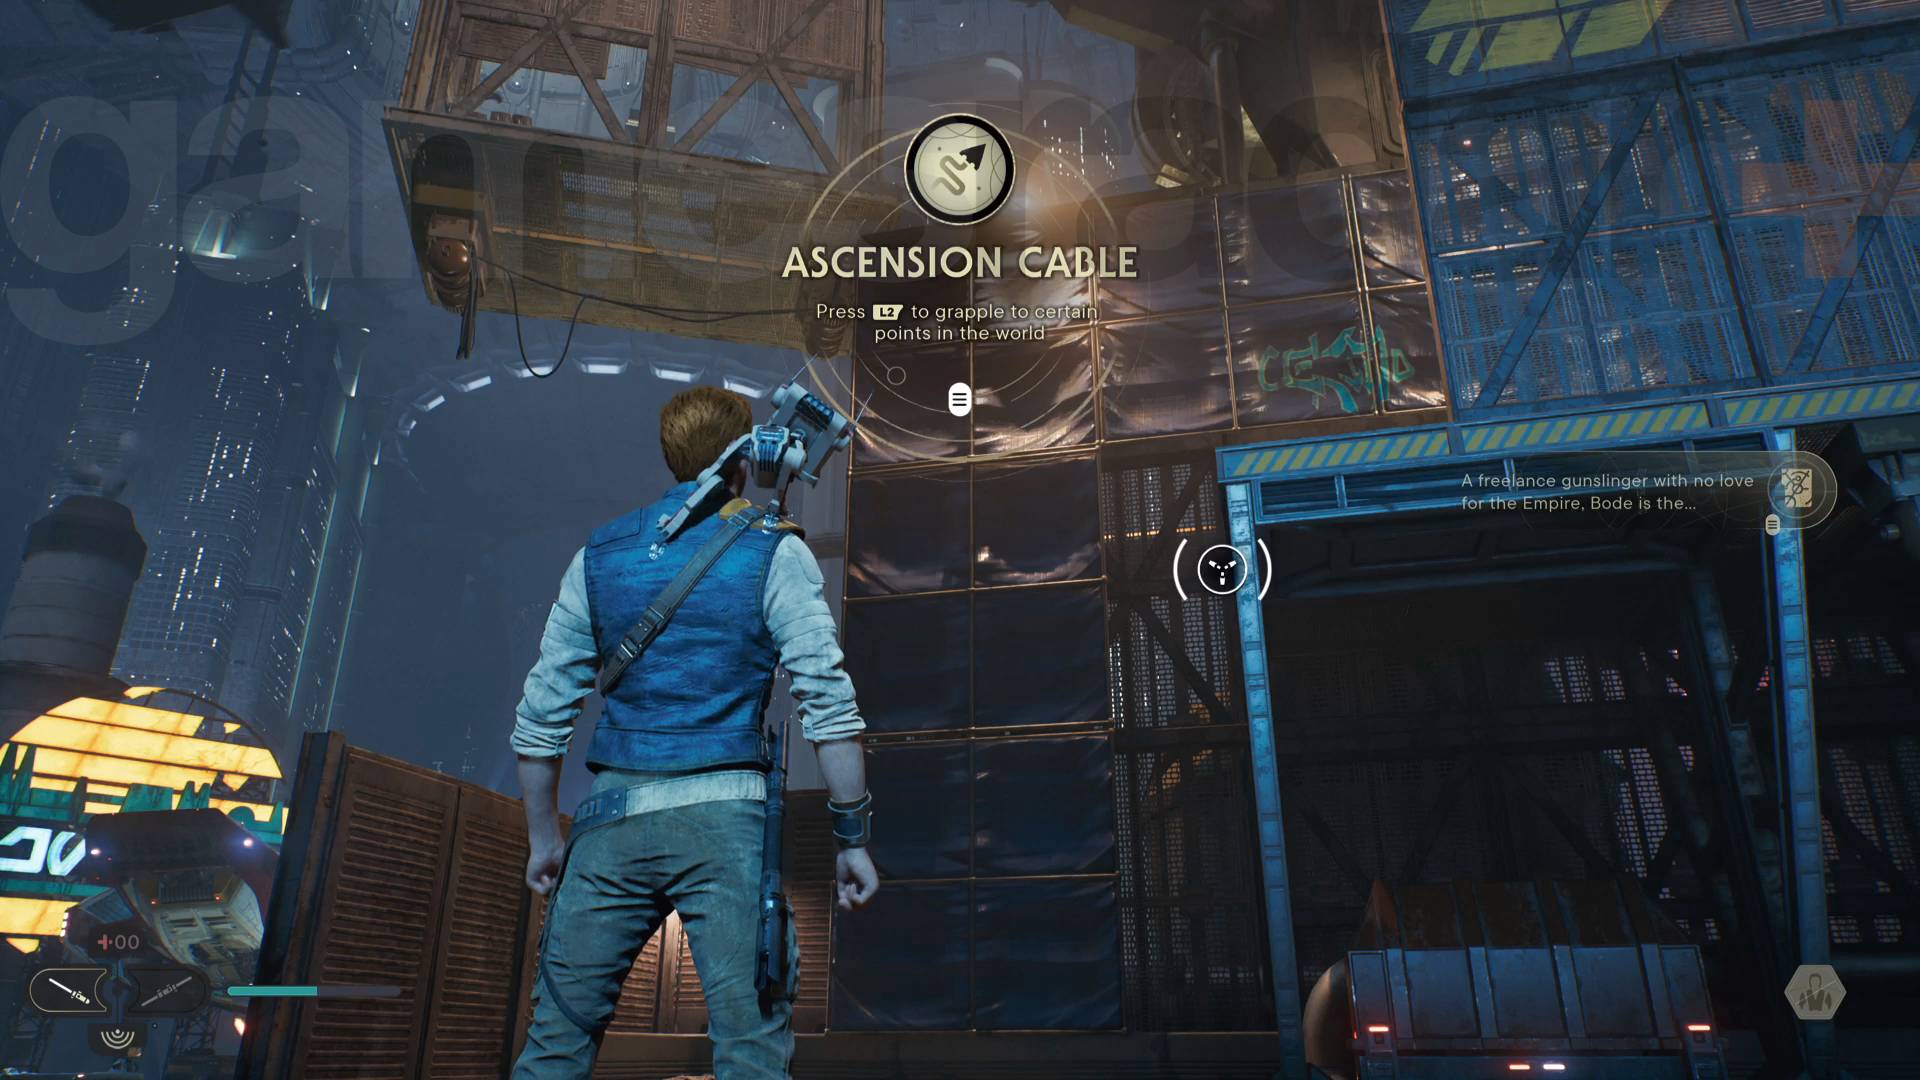
The ascension cable is basically a free get in the first hour or so of the game. It's essentially a grapple gun that can pull you up to special points you'll see marked with a circle - when that circle fills you can yank yourself up with L2/LT. It's a pretty essential tool for getting around, so you'll be using it a lot. Much later you'll get the upgraded ascension cable which can attach to the strange balloons you might have seen floating around.
Star Wars Jedi Survivor Confuse Force ability

The Star Wars Jedi Survivor Confuse Force ability is another power you'll get very early on in the first hour or so of the game. Using R1 + Circle/RB + B you'll be able to confuse a highlighted enemy into briefly fighting for you - very useful to help even the odds in a crowd. You'll also unlock a skill tree that will let you upgrade the amount of time it lasts, the damage confused enemies do and how many you can control.
Star Wars Jedi Survivor Gliding
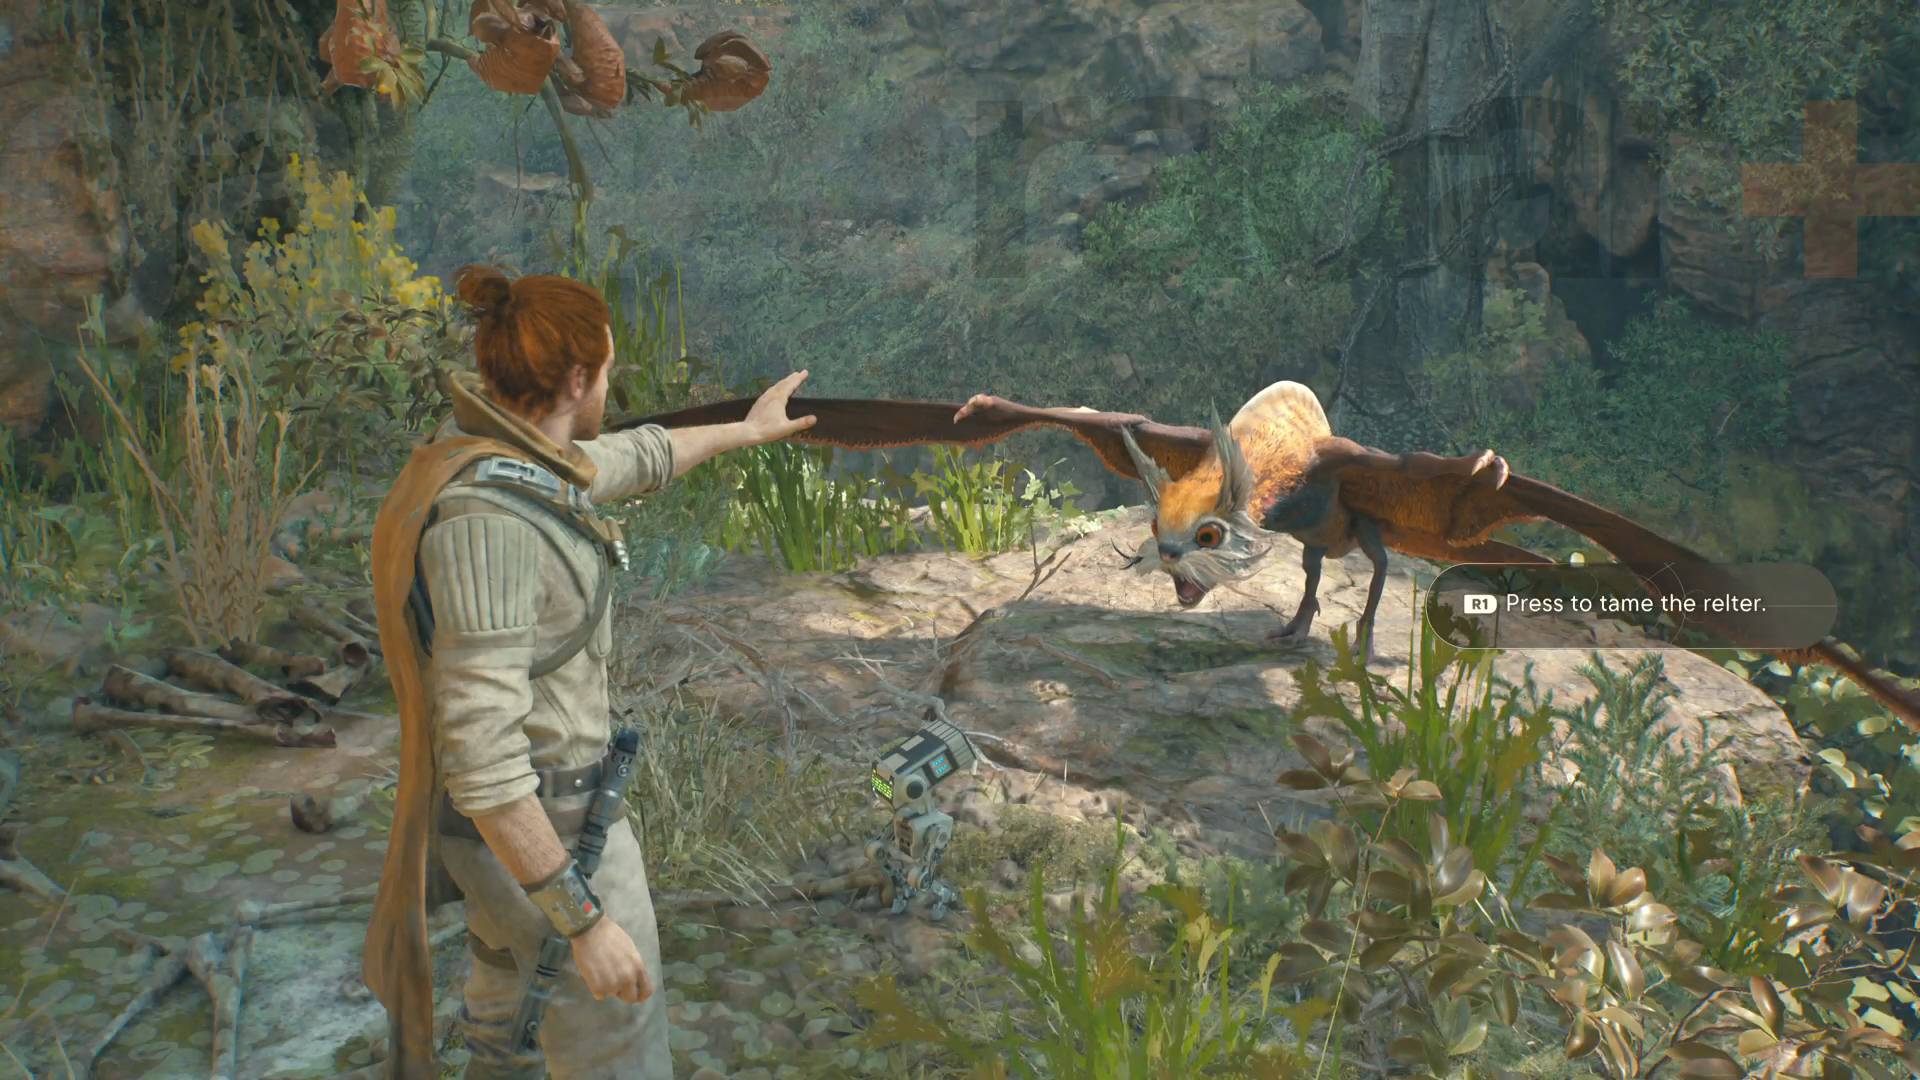
Gliding is actually unlocked as part of an extension to your Confuse ability while you're on the mission to reach the Forest Array. When you clear the first section with the energy beams, you'll move through a some cracks in the rock and eventually reach an area called the Bilemaw Den. You'll find a glowing Force upgrade here called Major Fauna, that will let you use Confuse on animals.
Initially you can use it on a Bilemaw you'll find shortly after, but if you continue on the Reach the Forest Array objective you'll eventually trigger a cutscene flashback with Cere who'll teach you that fighting isn't the only option and you'll be able to tame a nearby winged relter creature. From that point on, you can glide from any relter but only in certain spots - you can't call a relter to you to glide anywhere.
Star Wars Jedi Survivor ridable Nekko mounts
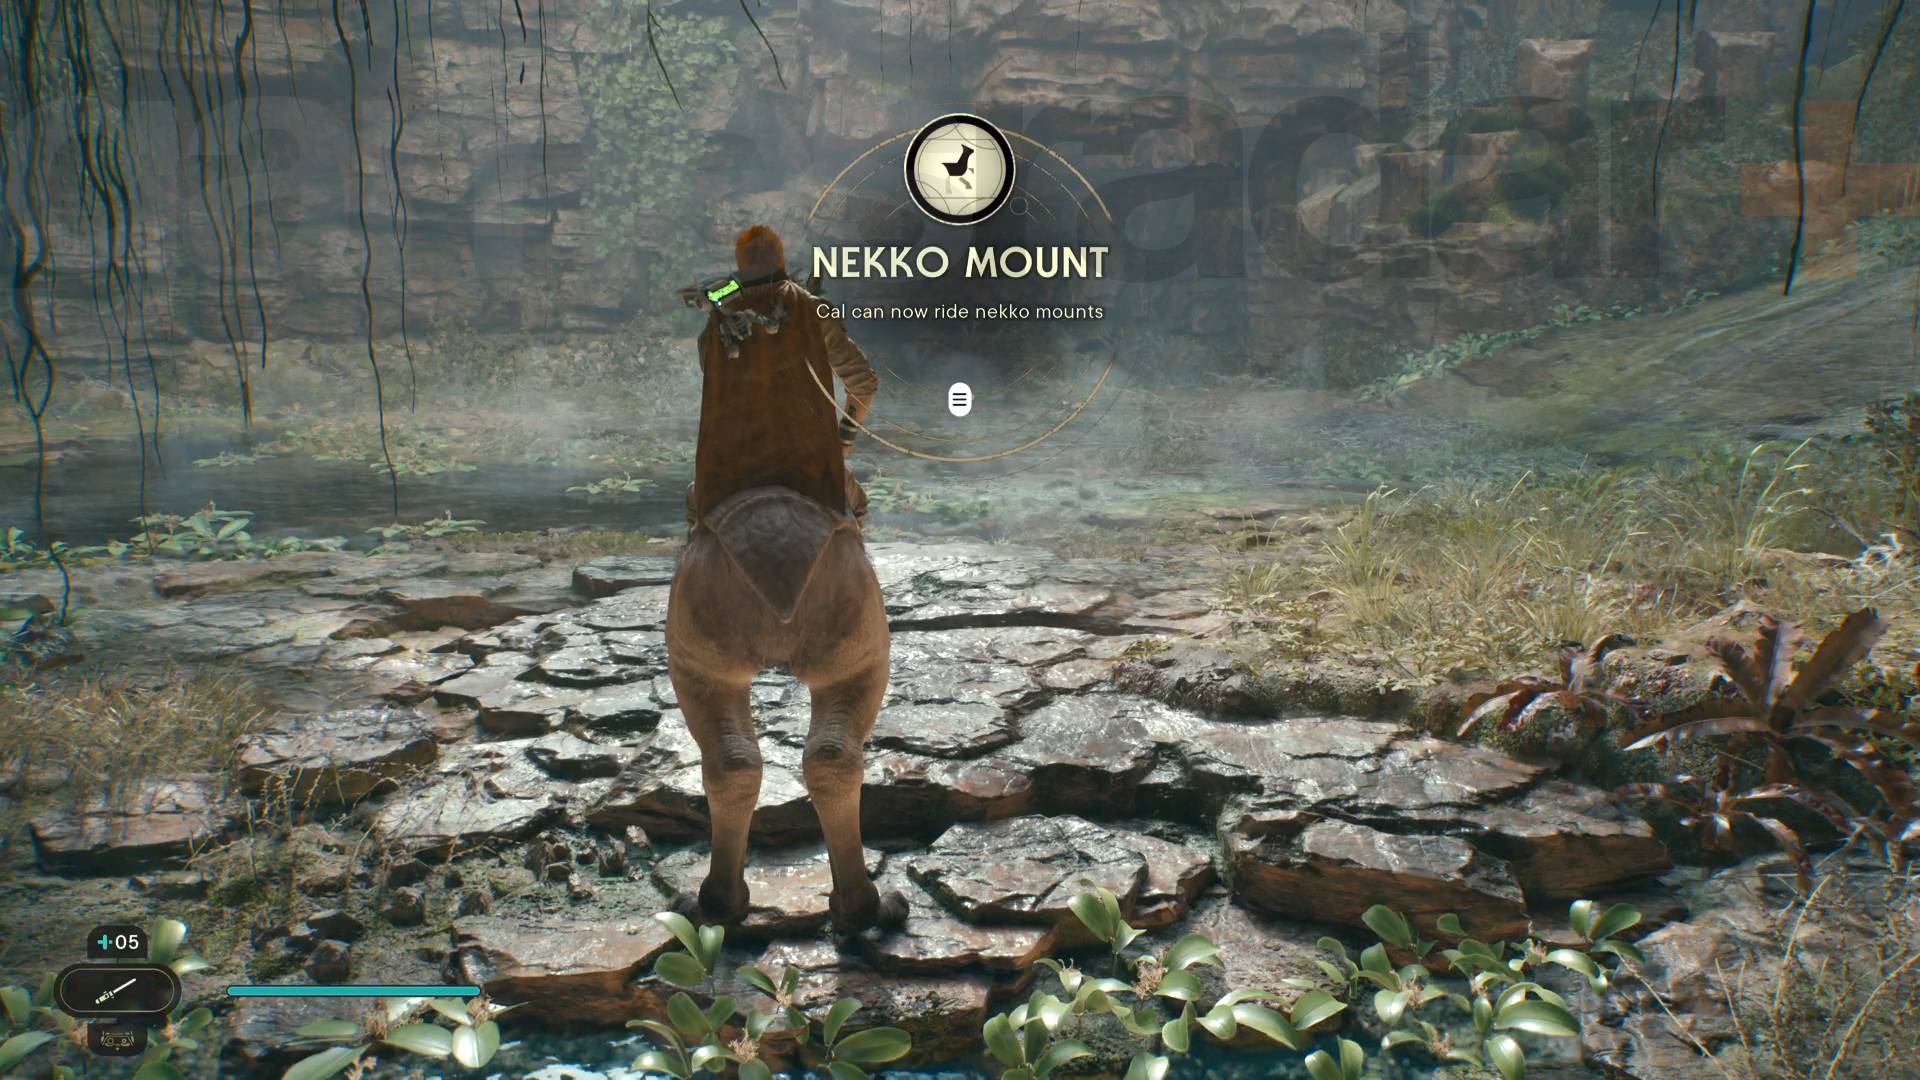
At the end of the Forest Array mission you'll have the objective to Leave the Forest Array. After sliding down a cable you'll end up in an area you can't leave, with Cal saying something about how you won't get up the watery slope without help. There will be a cave nearby with a bird-like Nekko you can ride using the Major Fauna Confusion upgrade you unlocked to access gliding. From this point on, if you're in an area where you can ride, you just have to tap R1/RB to call any nearby mount.
Star Wars Jedi Survivor lightsaber blaster stance
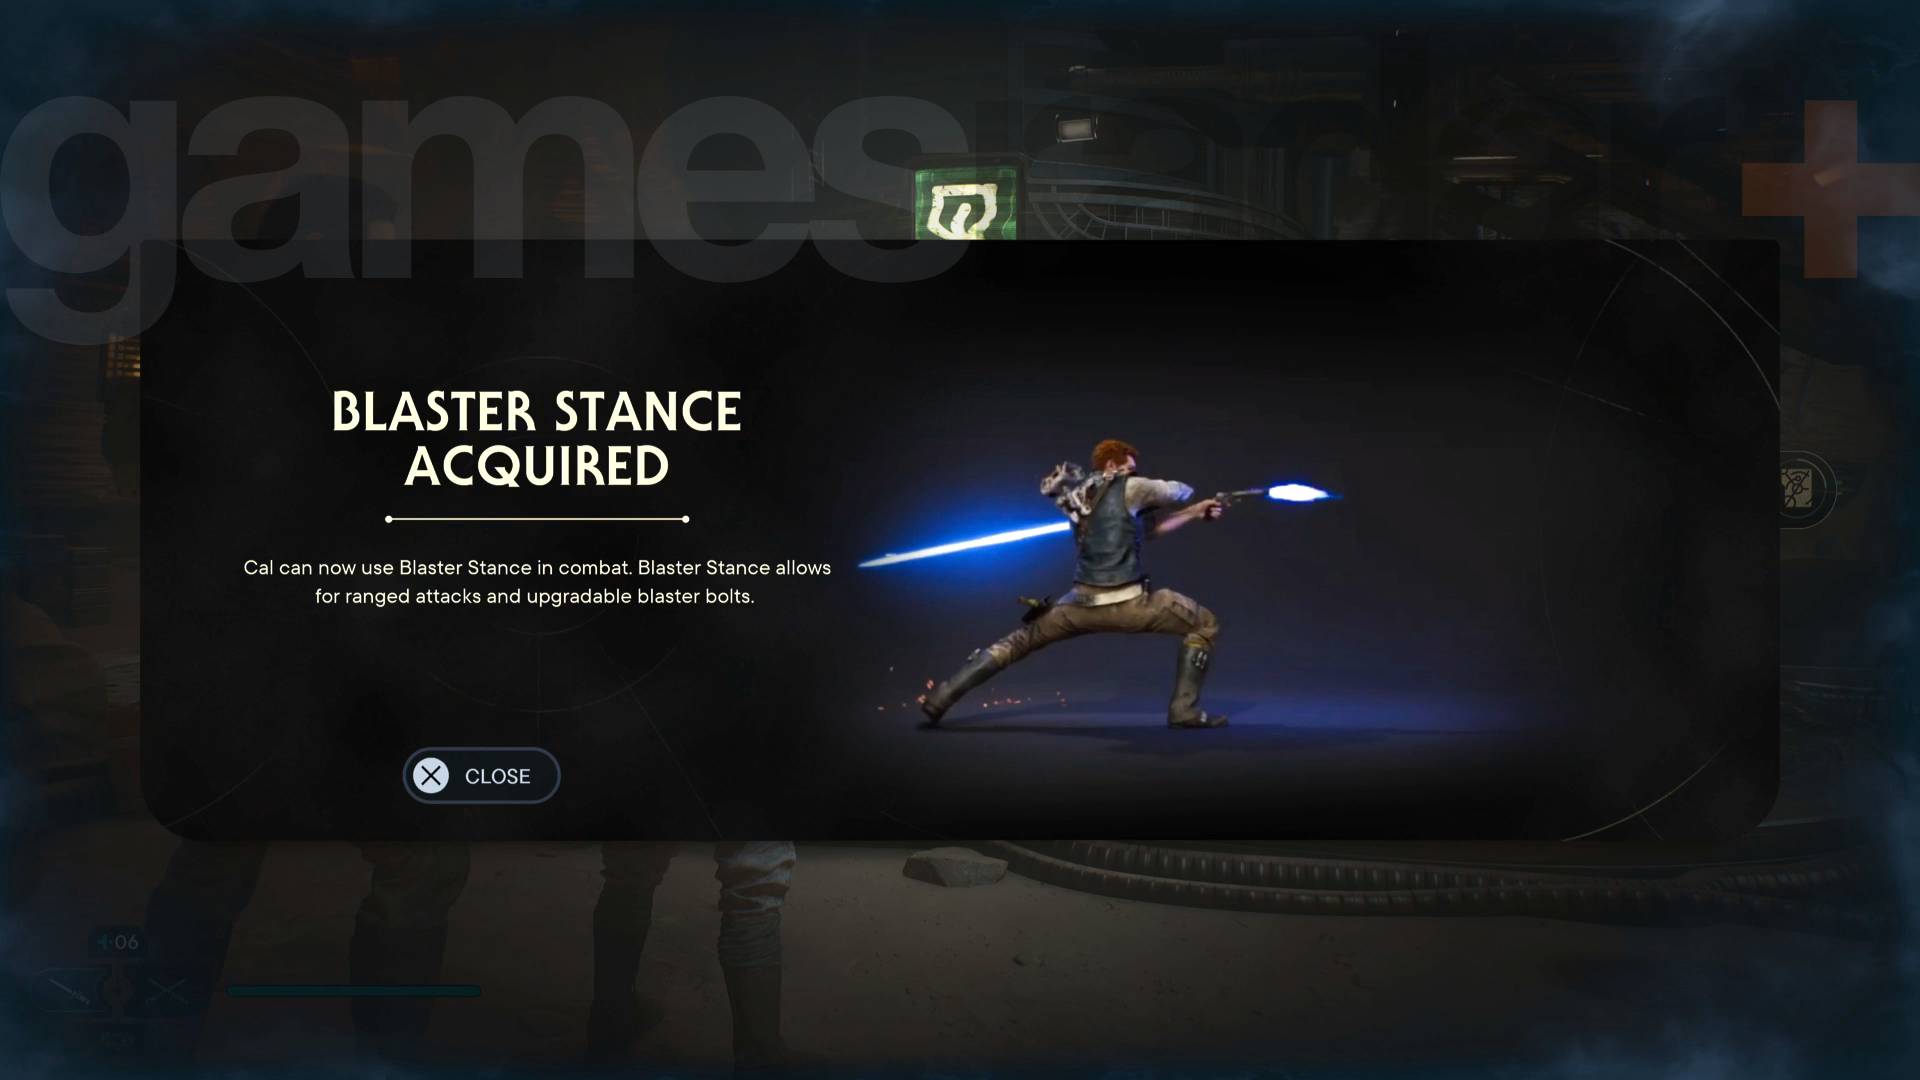
Blaster Stance is the first new Star Wars Jedi Survivor lightsaber stances you can unlock. You'll get it when you finish on Jedha for the first time and have to make the Star Wars Jedi Survivor Shattered Moon or Kobo choice - whatever you decide you'll get a blaster as you go to leave and unlock this new, ranged fighting style.
Star Wars Jedi Survivor Koboh matter sprayer
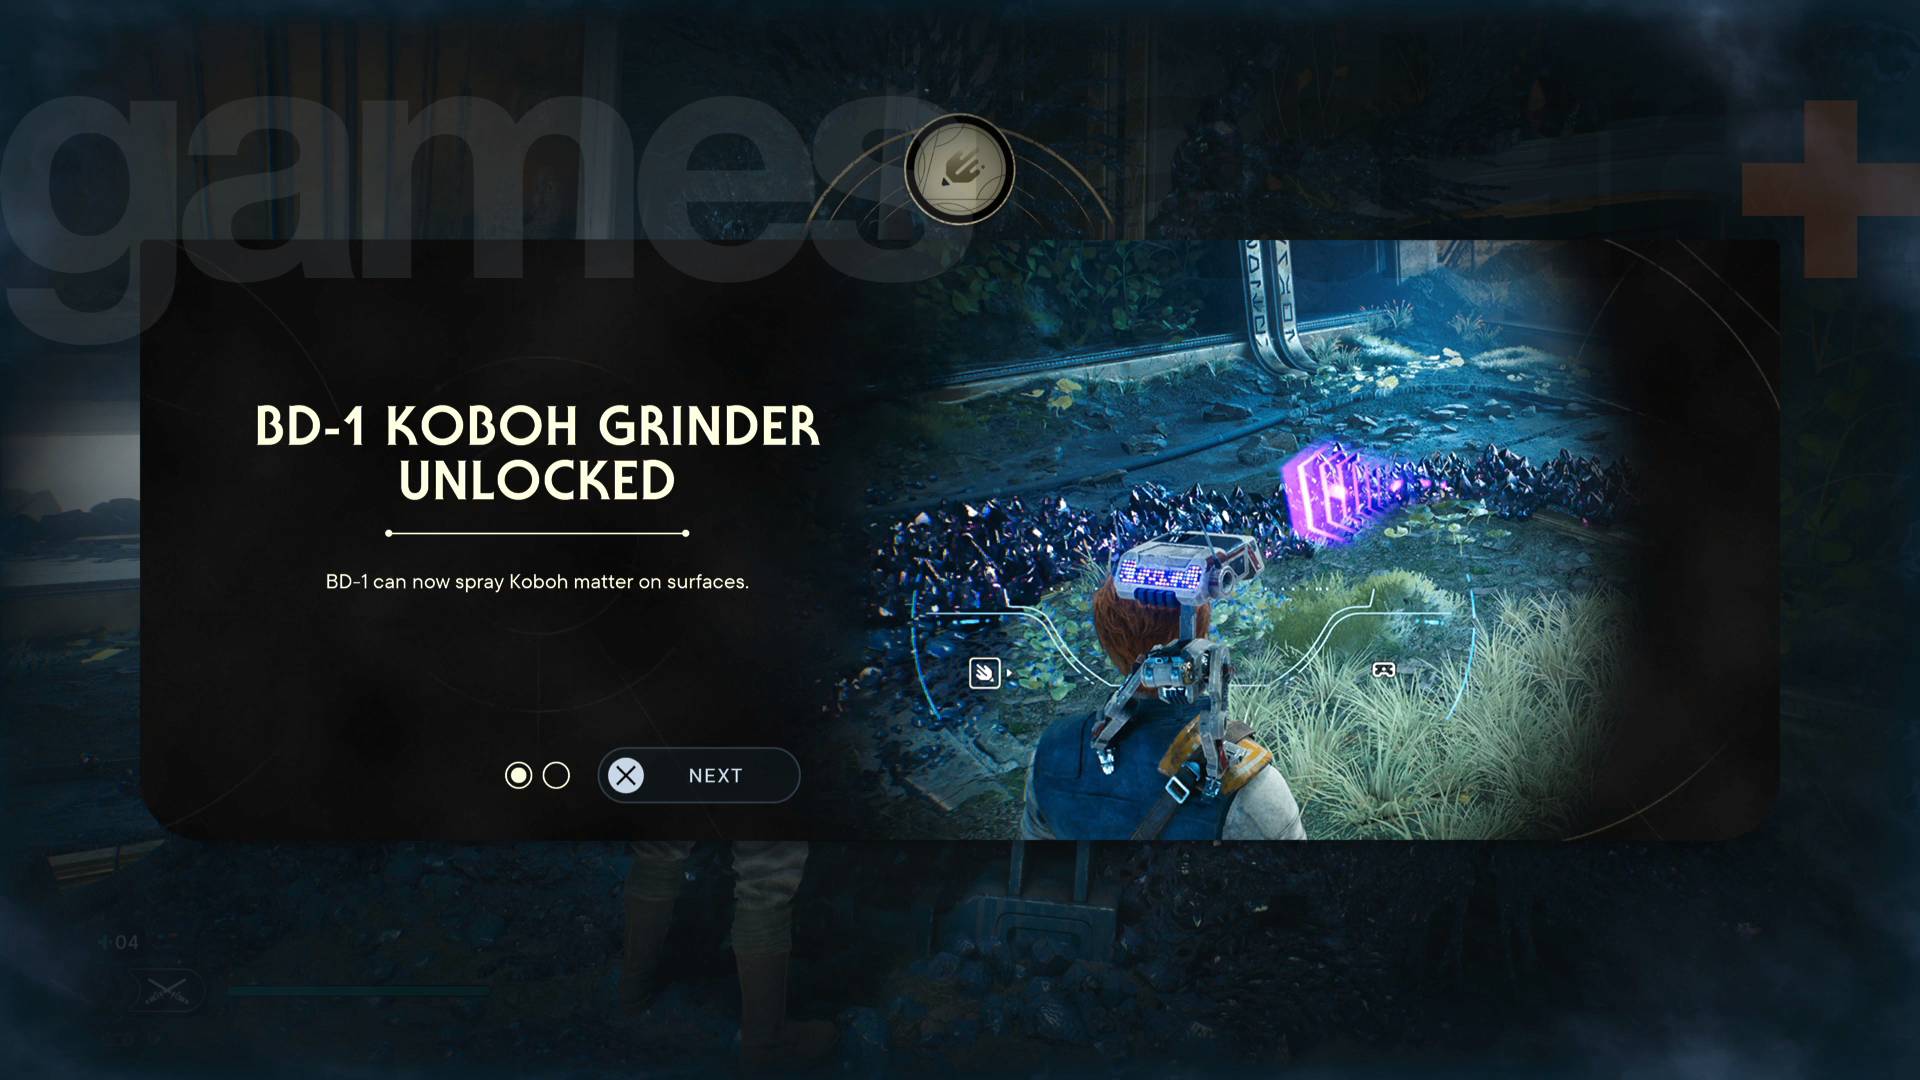
If you decide to go to Koboh first when the choice arrives, you'll eventually unlock the Koboh matter sprayer - the Koboh Grinder - for BD-1. This lets you clear those crystal growths that block the way by spraying a line of matter from energy beams to the blockage.
During the mission to Research Tanalorr on Koboh you'll be redirecting energy beams to access a series of chambers and clear the Koboh matter blocking your way as you use heat vents to glide around. Roughly half way through this section you'll unlock the Koboh matter sprayer to solve a puzzle.
Star Wars Jedi Survivor Crossguard lightsaber stance
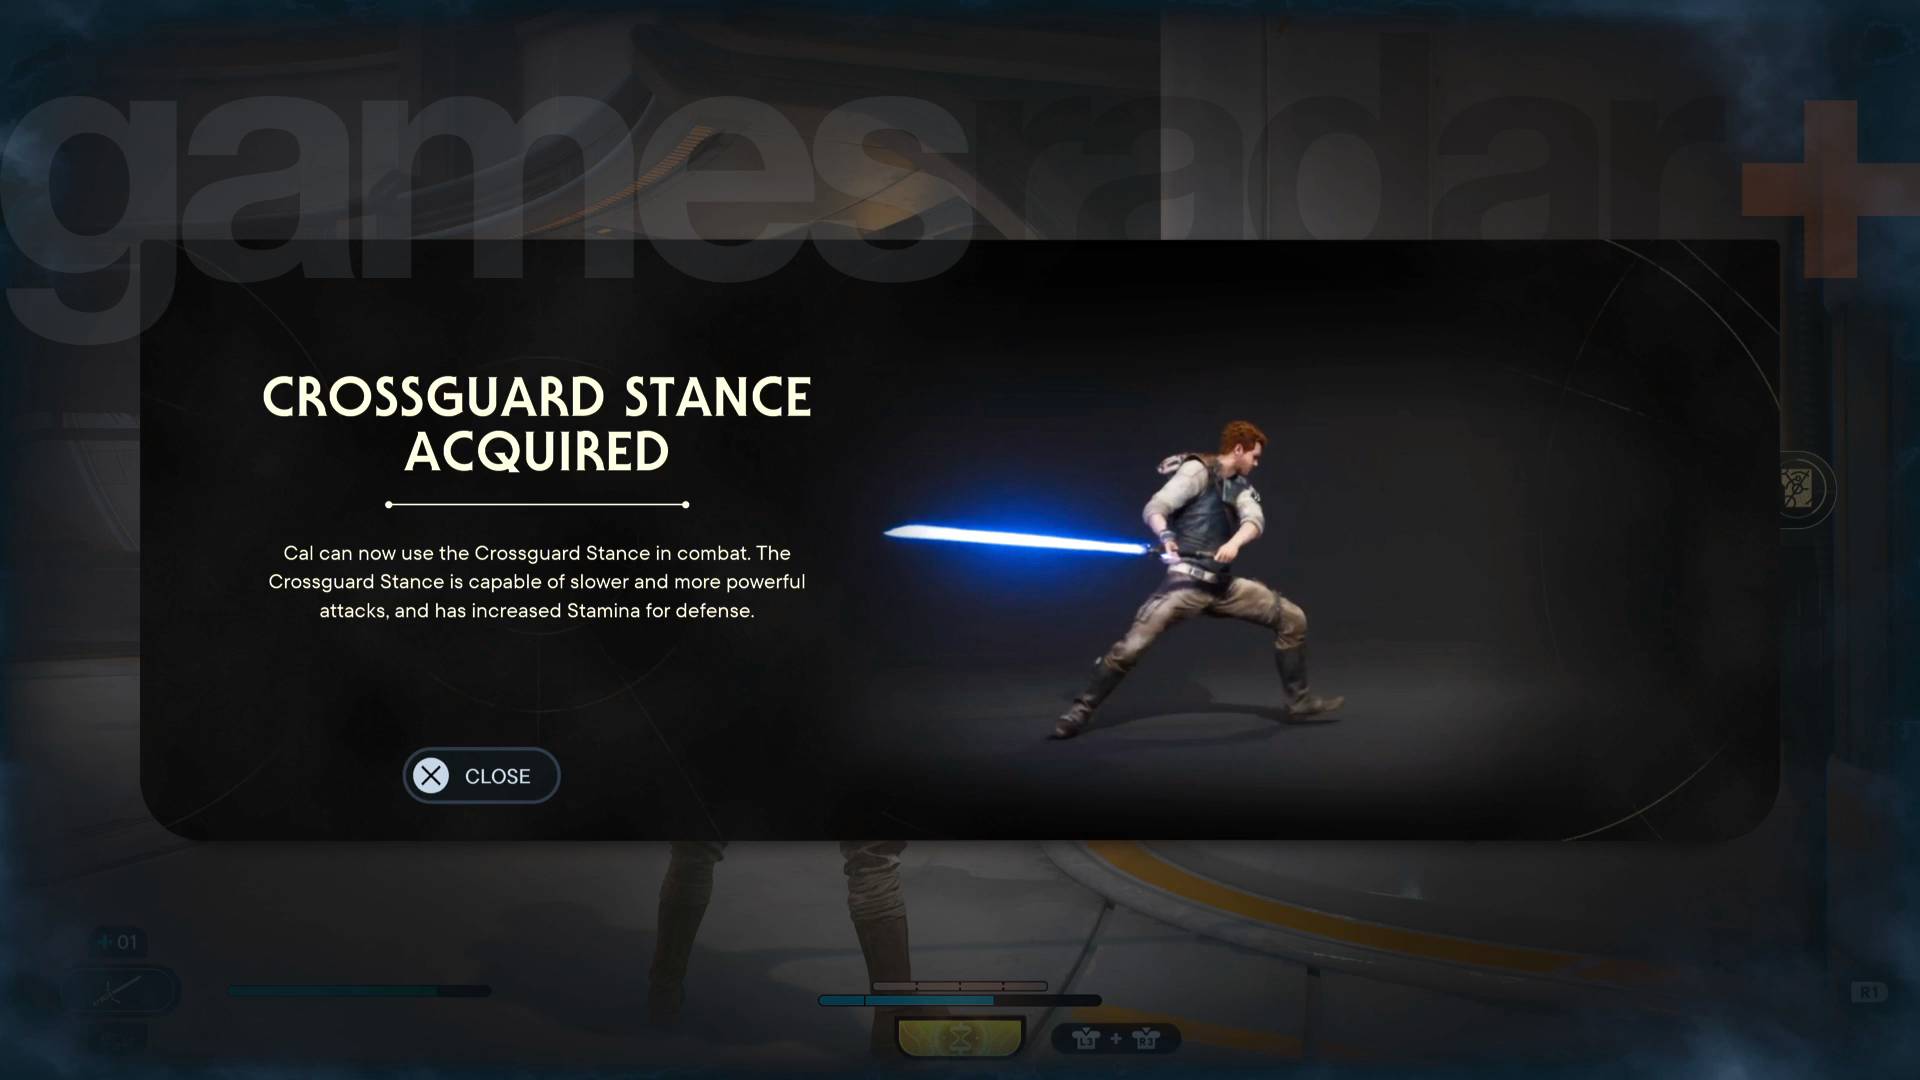
When you take on the Research Tanalorr on the Shattered Moon mission you'll unlock the Crossguard lightsaber stance at the end of it, after fighting a boss called Drya Thornne. The Crossguard stance is a slow, heavy form of combat that focuses on high damage and defence at the expense of speed. It's exactly the sort of thing you need when trying to beat something like tyhe Star Wars Jedi rancor.
Star Wars Jedi Survivor dash jump
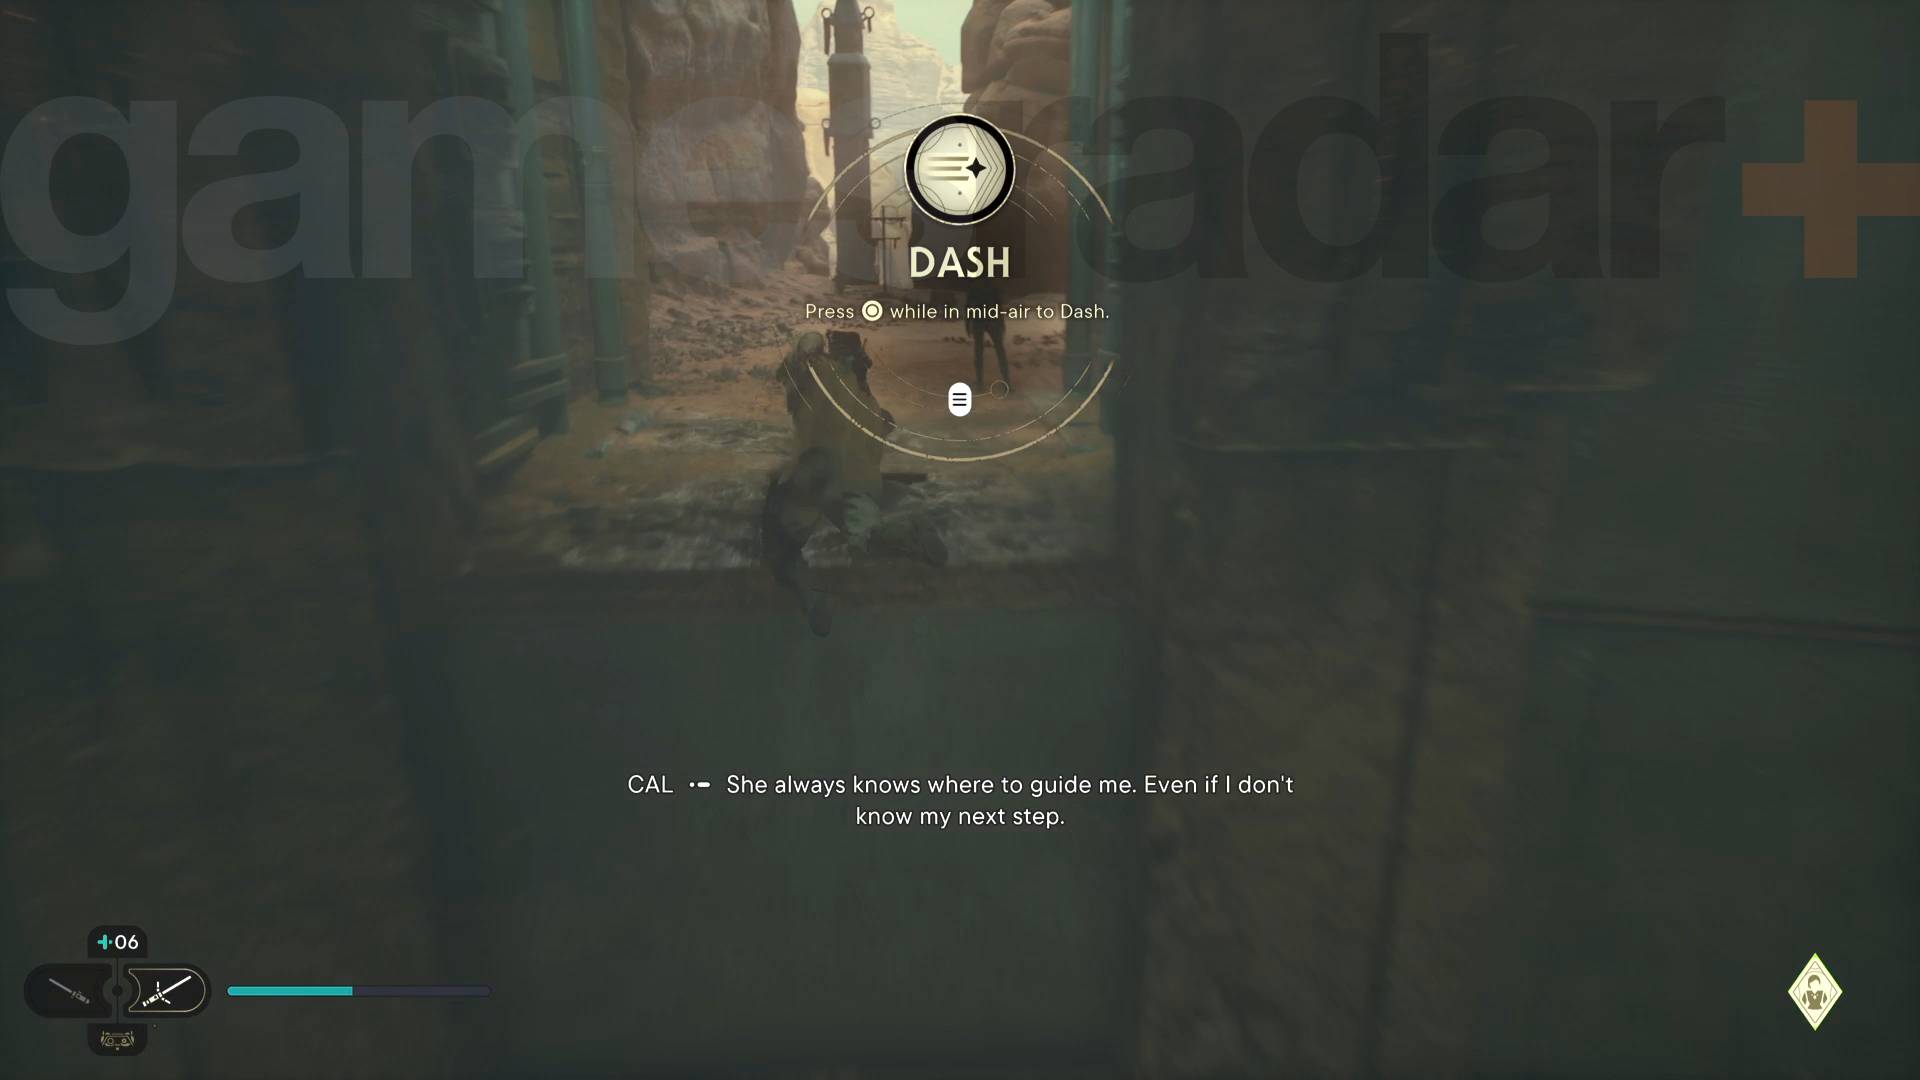
When you return to Jedha and undertake the mission Reach Pilgrim's Sanctuary you will eventually reach a chamber where the winds stop you jumping out. This will trigger another flashback cutscene with Cere that will then unlock the dash, letting you dart forward while jumping with a tap of Circle/B while you're in the air.
Star Wars Jedi Survivor Green laser barrier charm
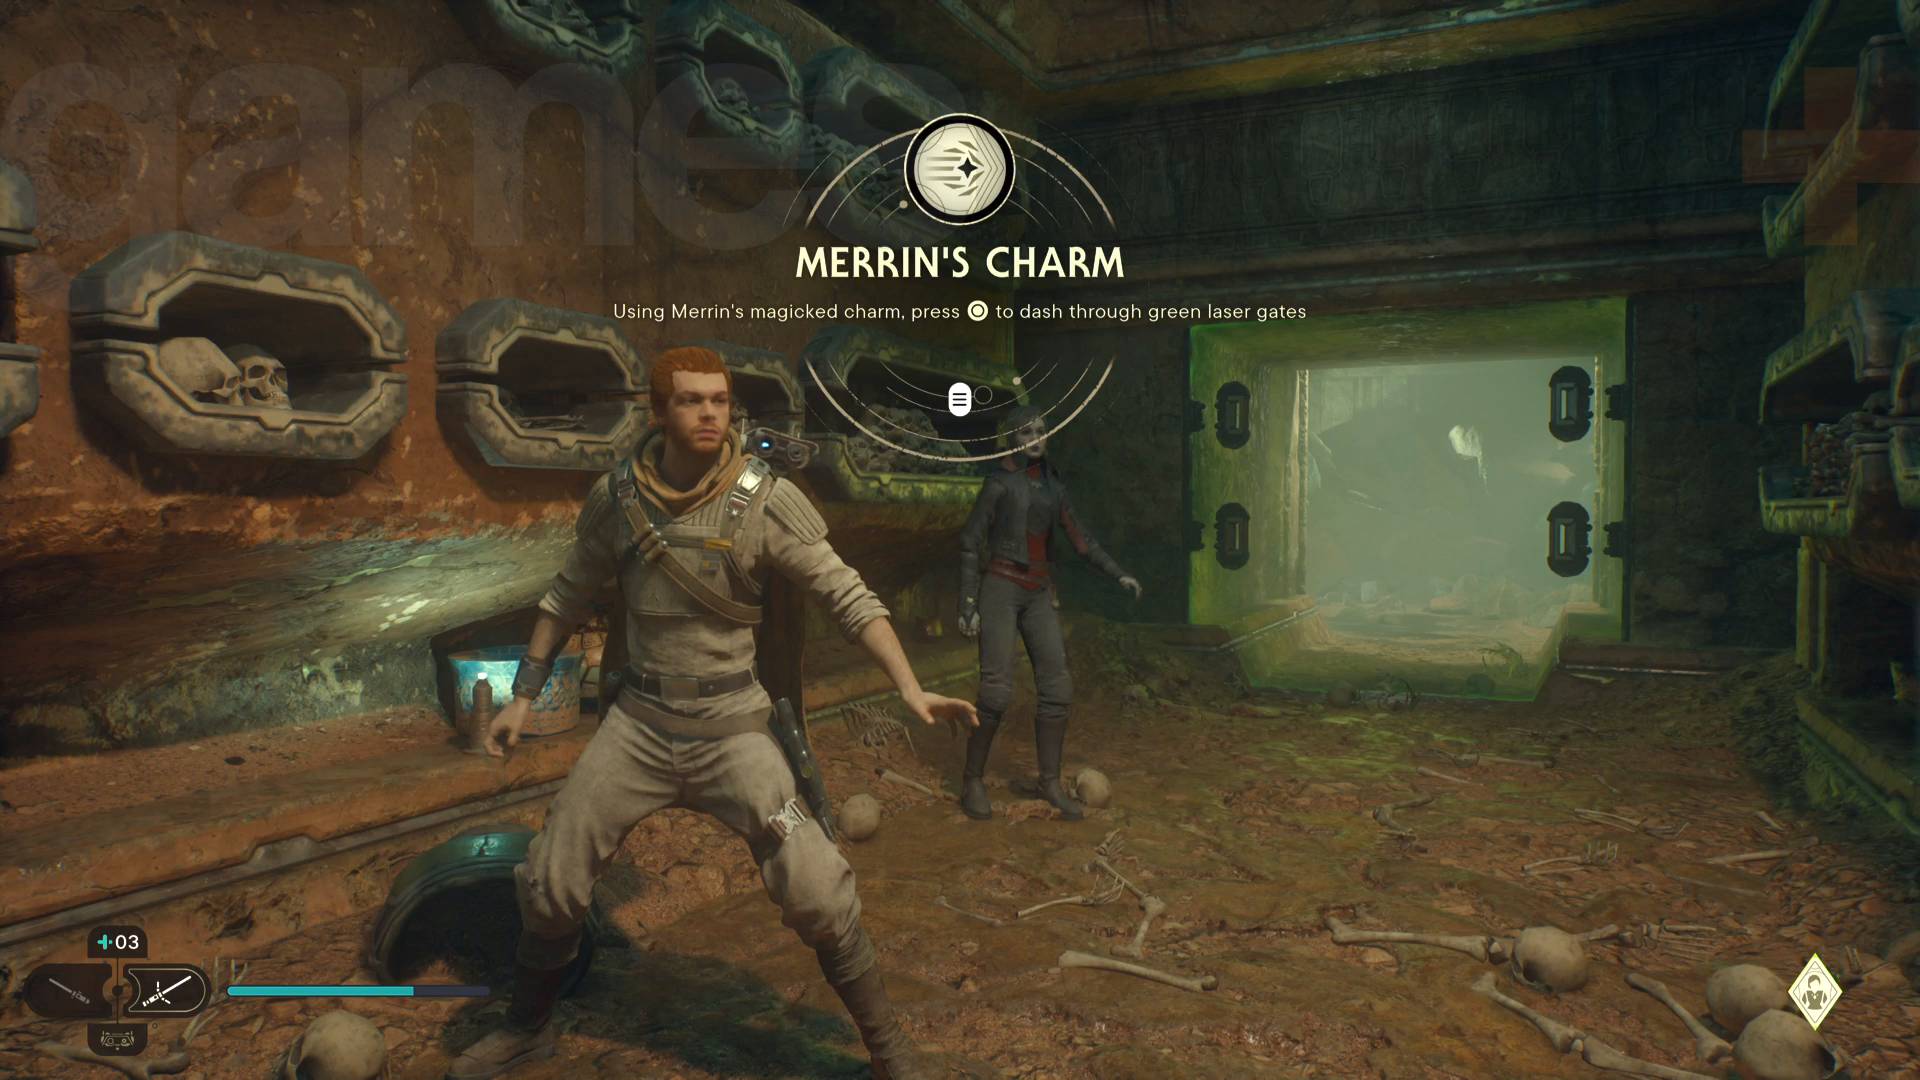
You'll have been seeing the Star Wars Jedi Survivor green laser barriers for a while before you unlock the ability to pass through them. We've more details in that guide but you'll receive the ability when you return to Jedha and start the objective Locate Brother Armias, that will start a big set piece mission that will get you a charm that will let you pass through the gates.
Star Wars Jedi Survivor Electro Dart

The Star Wars Jedi Survivor Electro Dart will let you open door and boxes by shooting the blue sparking cylinders. To get it you'll need to start the objective Search for the Compass on Koboh. However, when you return to Koboh you'll discover Zee has been kidnapped and begin the mission Rescue Zee from the Lucrehulk. This will take you to the Fogged Expanse area where you'll eventually come across a crashed Imperial shuttle and you can retrieve the Electro Dart from the wreckage.
Star Wars Jedi Survivor Lift and Slam Force ability
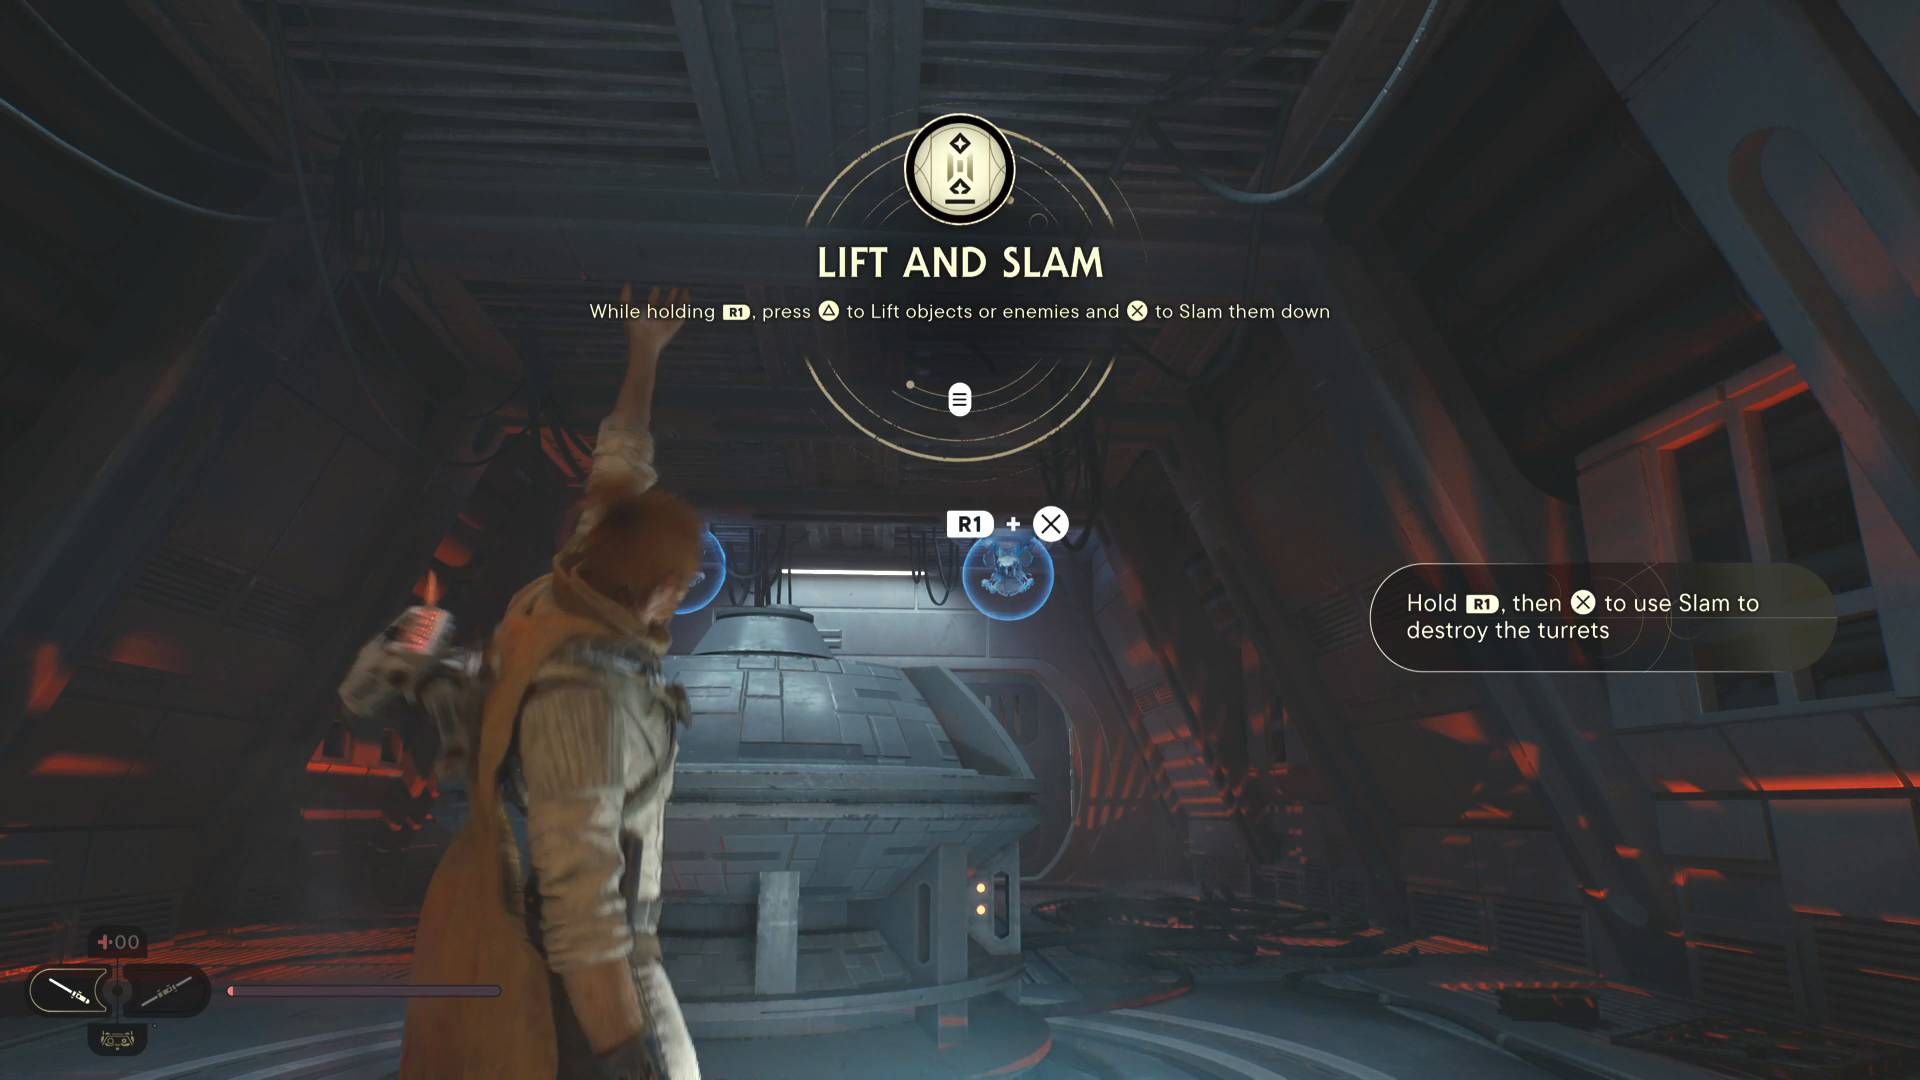
During the mission Rescue Zee from the Lucrehulk, you'll encounter Rayvis briefly inside the giant ship. Shortly after that, you'll be pinned down by two shielded turrets. This will trigger another Cere flashback where you'll learn the Lift and Slam Force abilities. This lets you raise things up using R1 + Triangle/RB + Y, or smash them down with R1+ X/RB + A. It'll let you access new areas by opening doors you couldn't before and moving panels to climb and wall run on.
Star Wars Jedi Survivor upgraded accession cable
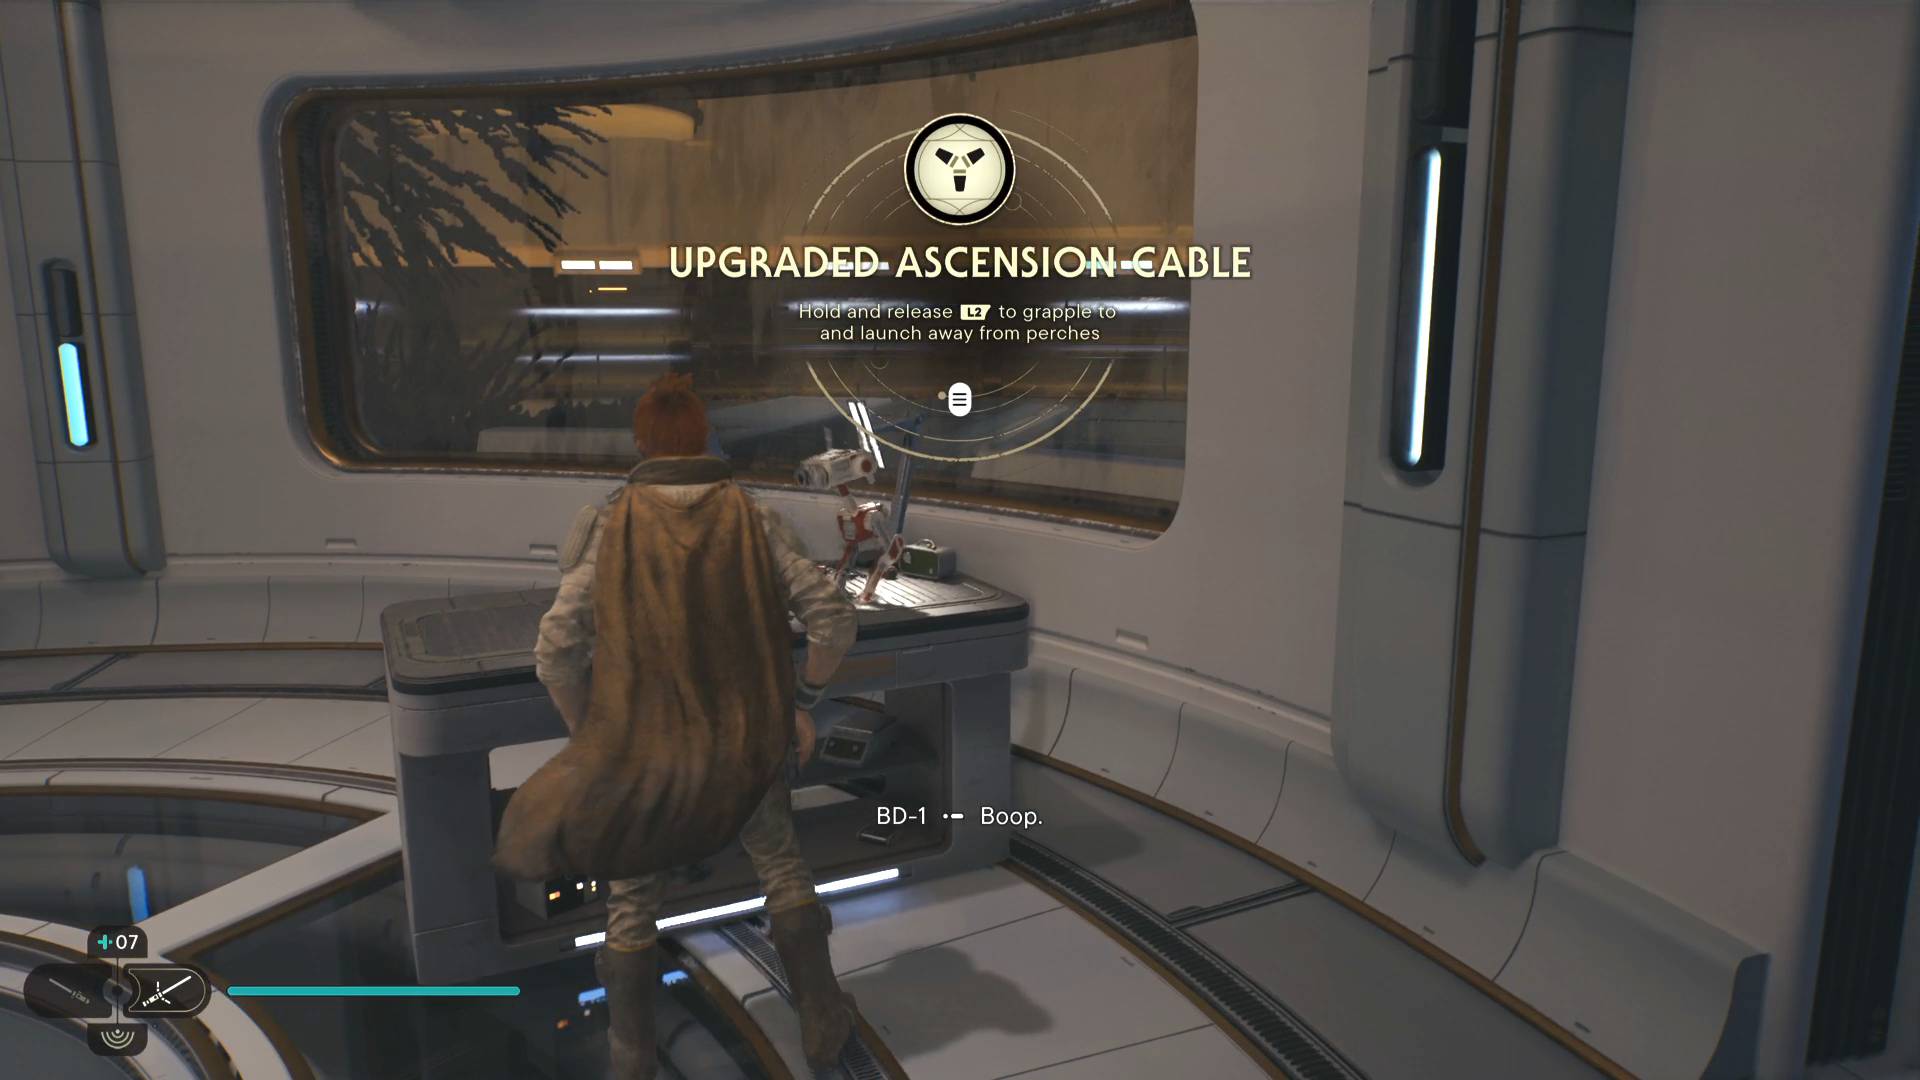
You unlock the upgraded ascension cable when you reach the mission to Locate Rayvis on the Shattered Moon. During this, you'll have the objective to Pursue Rayvis in the Republic Research Laboratory area. To reach him you'll eventually get the upgraded accession cable which will let you attach and leap from special perches, mostly on the balloons you'll have seen scattered around.