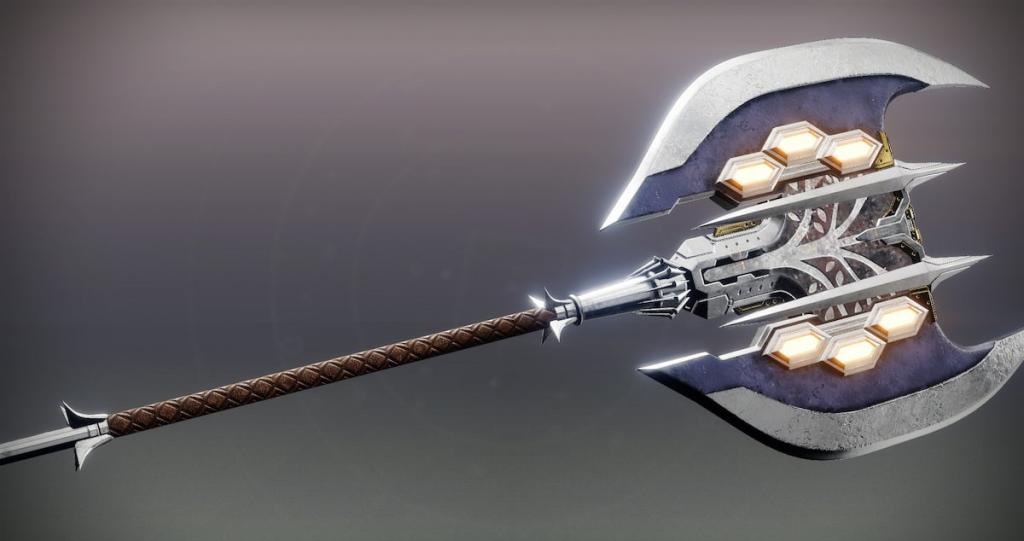
Destiny 2's Heliostat mission brings the Guardian to an old Warsat facility to foil the Conductor's plan. As usual, guardians can find a couple of secrets and collectibles hidden around the mission. Grabbing them lets you improve Wolfsbane, the game's first battleaxe (yes, the weapon does get more fun to use).
Heliostat's secrets include ways to improve Wolfsbane's Resurgence Directive intrinsic and to grab its four catalysts, which are needed to unleash the blade's full potential. Since it's a craftable weapon (a dying breed these days), you can also customize some parts to play to the axe's strengths.
We covered how to get Wolfsbane's catalysts and intrinsic upgrades in dedicated articles. Here's a breakdown of how to get all secrets in Heliostat, along with the recommended route to complete them in a single run.
Table of contents
All Wolfsbane catalyst locations
The Wolfsbane catalysts use a type of lock-and-key system, with data pads serving as the key to certain computer terminals in Heliostat. To unlock each catalyst, find the matching data pad and interact with the corresponding terminal. We highly recommend doing these in order, at the risk of your catalysts glitching out later.
| Catalyst effect | Data pad location | Terminal location |
|---|---|---|
Attrition Orbs |
At the beginning of the mission, after you summon the shielding Psion for the first time. The data pad is near the second nuclear core. | Next to the spot where you can summon the Psion for the second time. |
| Relentless Strikes | Immediately after dropping down the electrified elevator shaft. The data pad and terminal are hidden in secret rooms, which you can access by controlling the elevator with the hacking Psion. Press the left button to make the elevator go down, the rightmost one to find the data pad, and the one in the middle for the terminal. | In a hidden room after dropping past the elevator, accessible by hacking the middle symbol on the console. |
| Burning Ambition | In the puzzle room before the longer platforming section, interact with three computers to reboot the systems. The computers are spread out in a Y shape, with the "leg" coming from behind the beacon. After that, redo the security puzzle to unlock a room with the terminal. The data pad is on a walkway up top. | In a secret area below the main room in the Warsat cooling facility, after redoing the security puzzle. |
| Subroutine: ~Recursion | In one of the hallways with a gravlift override during the platforming section. The data pad is in a gap on the floor near an active reactor. Access it by taking the left path from the main room. | At the back of the other hallway with a gravlift override switch, just behind the player's entrance point. |
All Wolfsbane intrinsic upgrades
To upgrade Wolfsbane's intrinsic, you must use the axe to destroy nine Vex crystals located at key points of Heliostat. They're usually hidden in unlit nooks and crannies, which may be a giveaway. Here's a brief list of where to find each shape.
| Intrinsic Shape | Location | Intrinsic Upgrade |
|---|---|---|
| Diamond | In the first room full of water, immediately after destroying the four security nodes. Face the Quicksilver Psion and look behind you and to the left. | Resurgence Directive II |
| Diamond | Still in the first platforming part, on the last ledge in the following water-filled room. Find a door that sits above you with a lamp, then look for an unlit section on your left. Alternatively, jump to the ledge and look to the right. | Resurgence Directive II |
| Diamond | In the darker room, on a platform covered by a pipe. This is on the left of where you come in, though it's tricky to spot due to the angle. If you encountered the hacking Psion, you went too far. | Resurgence Directive II |
| Triangle | In the longer parkour section, just past the elevator on the right side. Find the ledge with two Goblins shooting at you, then look across from them. | Resurgence Directive III |
| Triangle | Still in the platforming section, not long after grabbing the other elevator, on top of a reactor. | Resurgence Directive III |
| Triangle | Also sitting on a reactor as you near the other end of the platforming section. Find it before making a long jump to a platform below and to the right of your path. | Resurgence Directive III |
| Square | At the end of the boss room, in the far left corner. | Resurgence Directive IV |
| Square | In the boss arena, in the first room with the hacker Psion. | Resurgence Directive IV |
| Square | Also in the boss section, on a railing to your left as you help the Quicksilver Psion break through the second blockage. | Resurgence Directive IV |
Recommended order for the Heliostat secrets
Based on our experience, here is the easiest order to grab all catalysts and intrinsics in a single run. Try to grab the catalysts in order, since not doing so might cause bugs.
- As soon as the mission begins, pick up the first data pad.
- Destroy the four security nodes and look for the first intrinsic upgrade in the labyrinthine section of the mission, with the murderous walls.
- Get past the elevator and grab the second data pad.
- During the final traversal area, look for the second intrinsic upgrade, as well as the third and fourth catalysts.
- Reach the boss room and destroy the symbols for the final intrinsic upgrade.
Even if you know where to look, grabbing all secrets in Heliostat requires at least two runs in total, since you need Wolfsbane before you can interact with the collectibles.
The post All Heliostat secrets and collectibles in Destiny 2 appeared first on Destructoid.