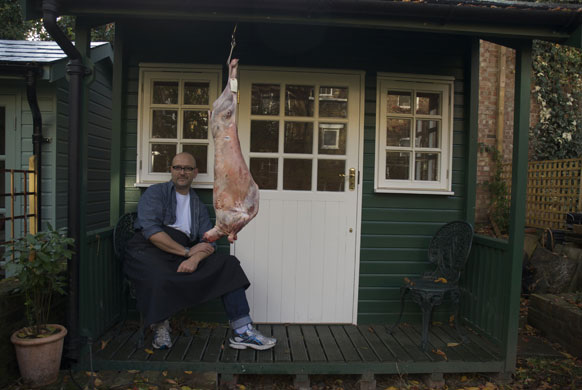
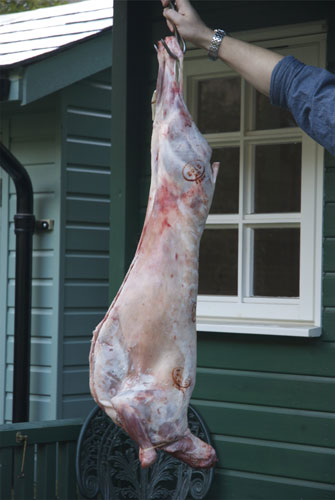
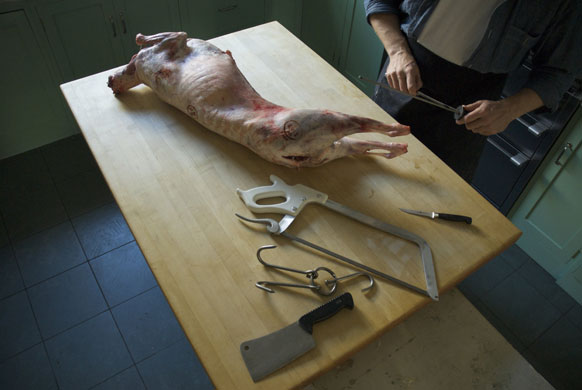
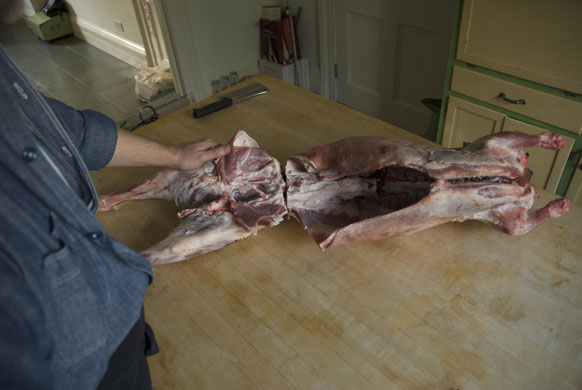
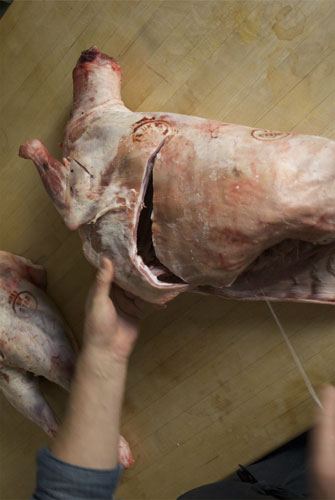
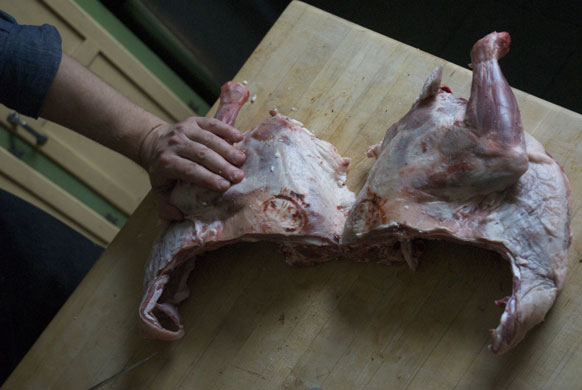
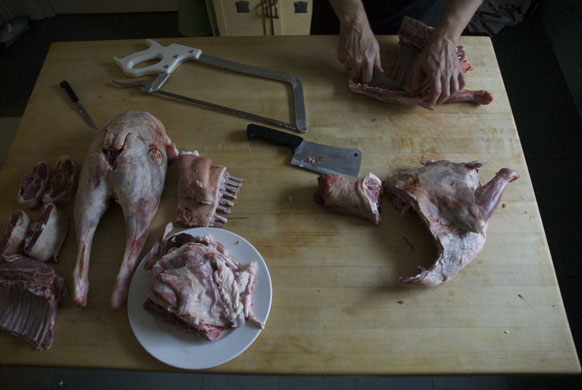
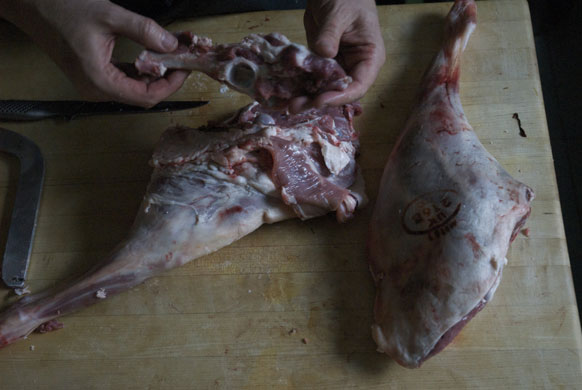
The carcass is probably too big for the fridge so it can be hung overnight somewhere cool and undercover. A shed is idealPhotograph: Bertie MillerThe complete lamb carcass. Head, feet, skin and viscera removed. The brown stamps are given after the meat clears inspection at the abattoirPhotograph: Bertie MillerThe carcass with butchery tools - regular boning knife and steel, smaller boning knife, meat saw, hooks and swivel and a cleaver. The saw is nice to have but you can easily do the job with a clean tenon saw from a tool shop. The hooks aren't essential but they cost a couple of quid at the butchers supply store and make handling a bit easierPhotograph: Bertie Miller
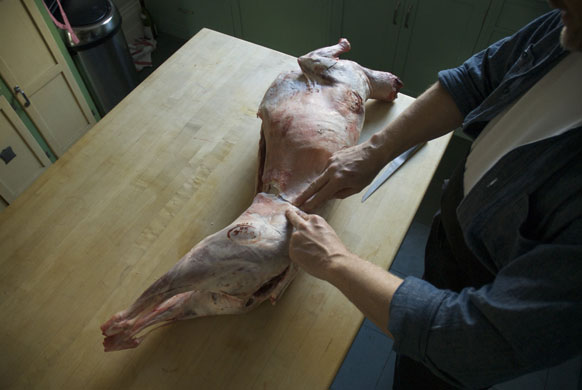
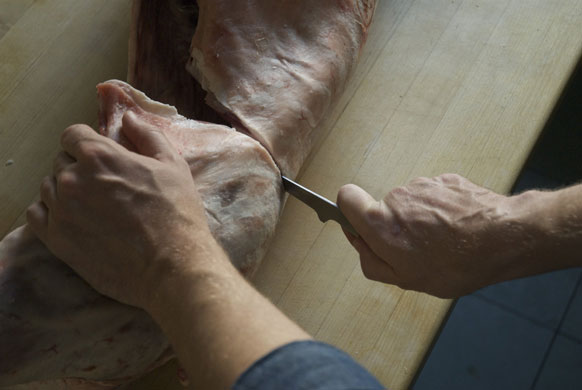
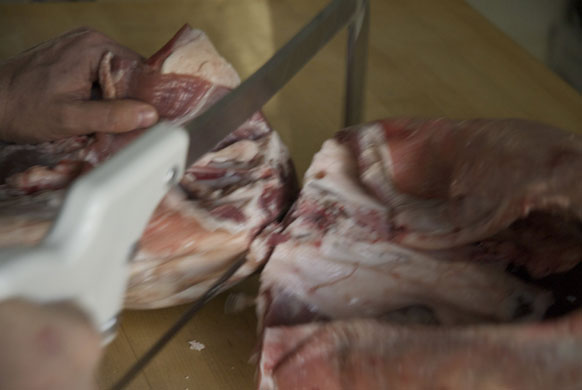
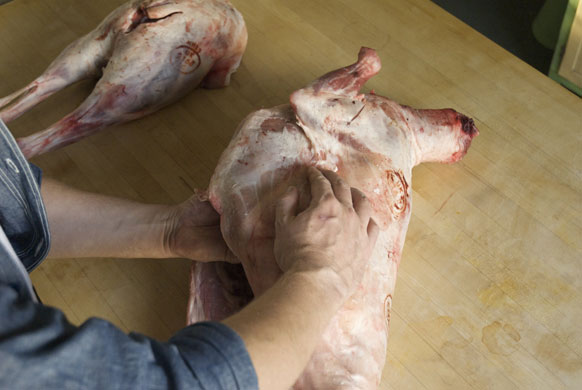
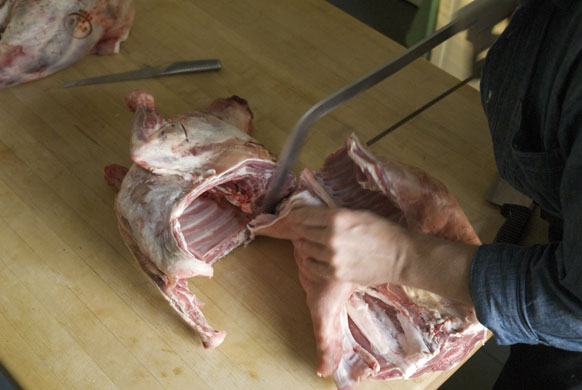
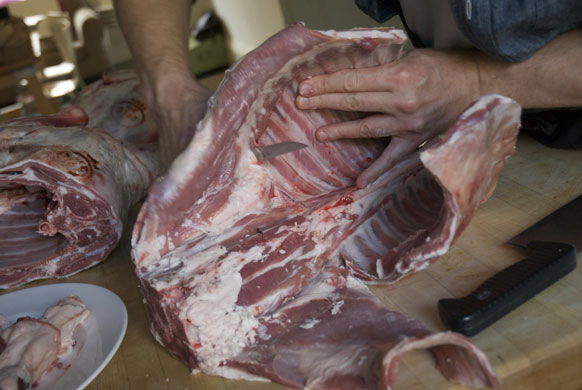
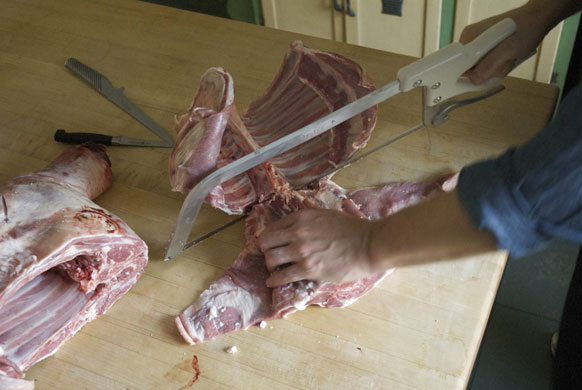
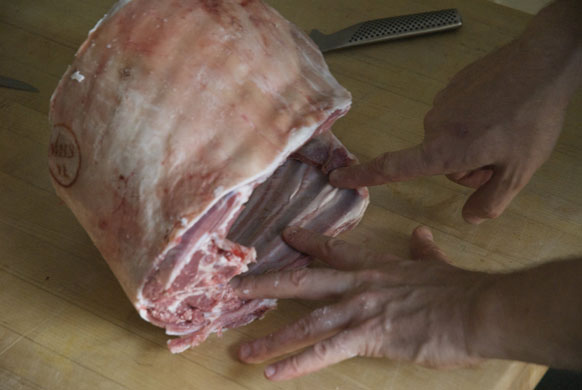
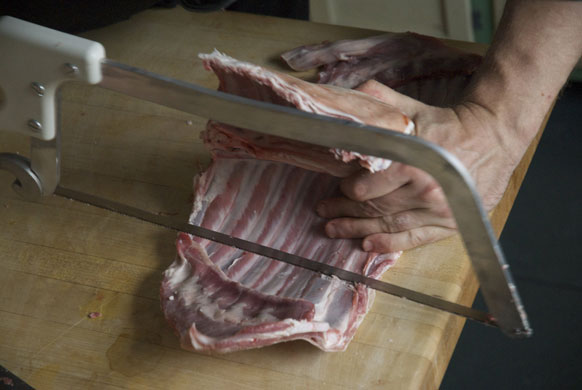
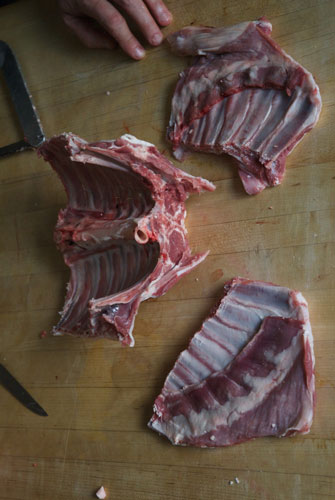
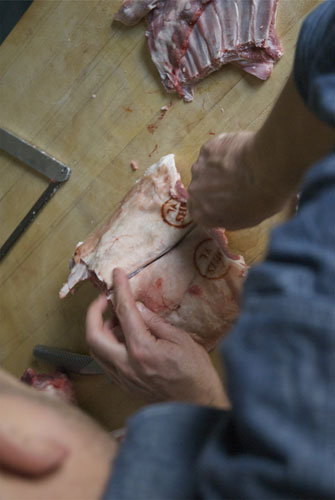
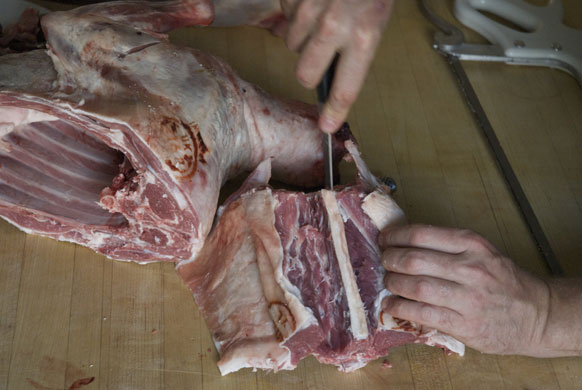
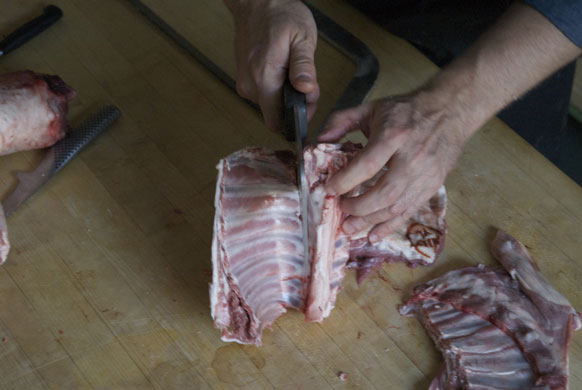
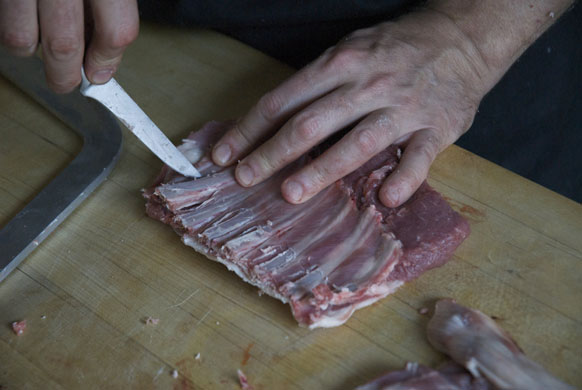
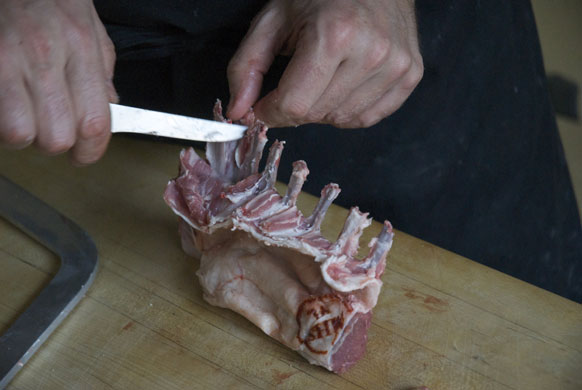
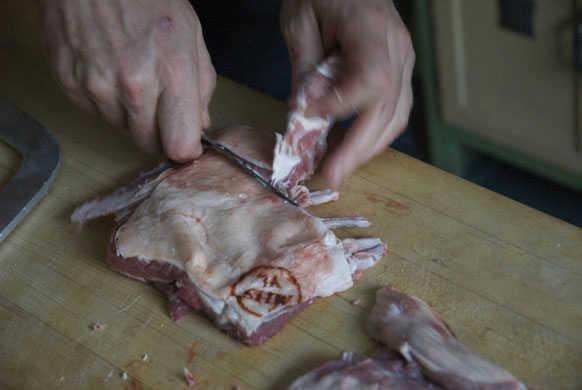
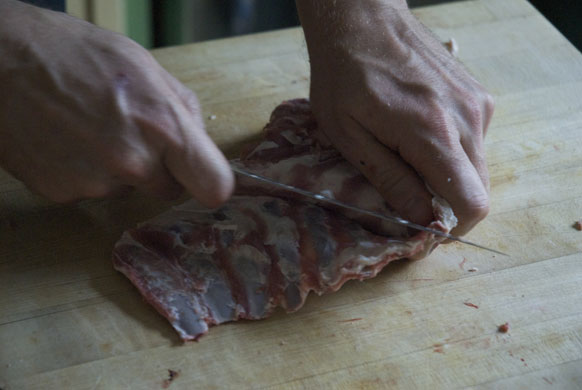
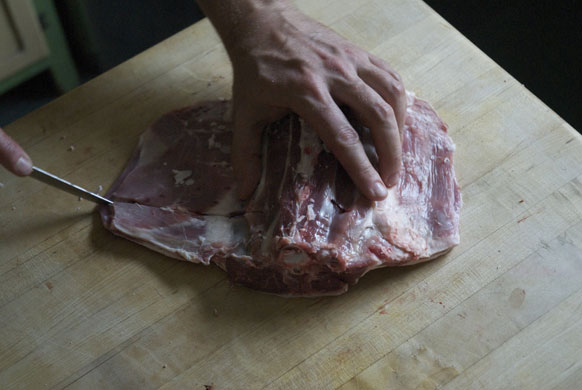
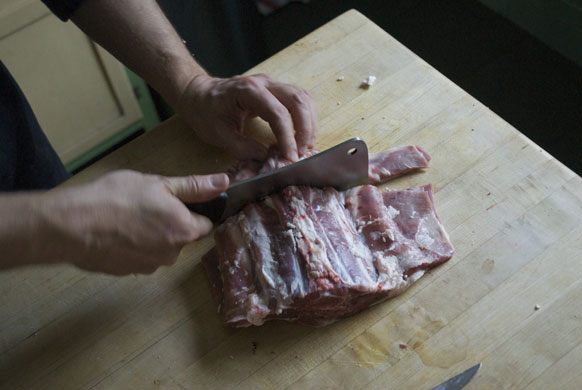
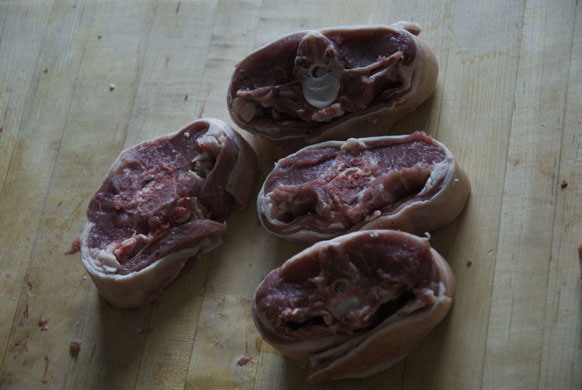
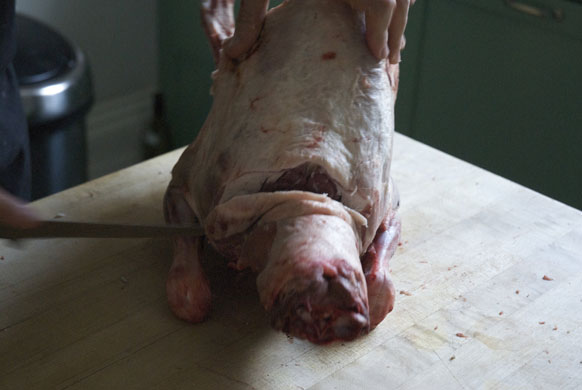
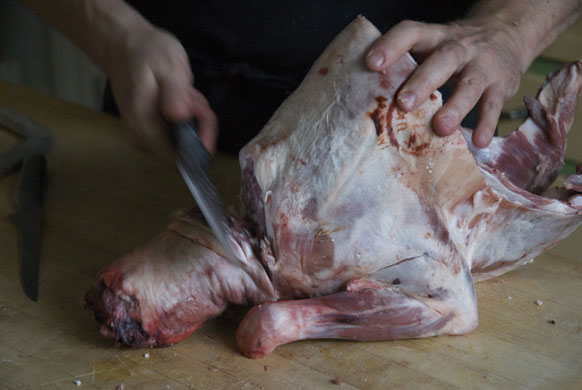
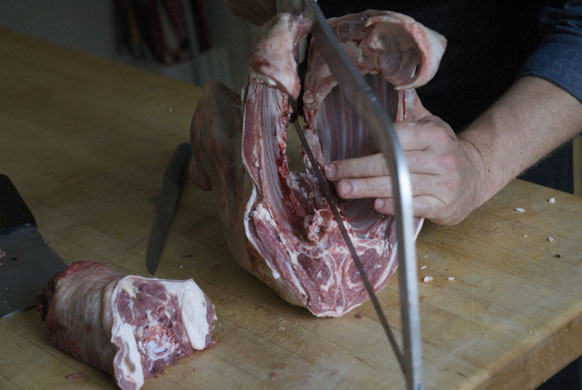
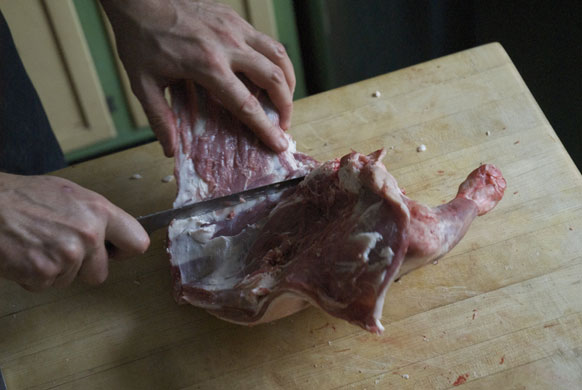
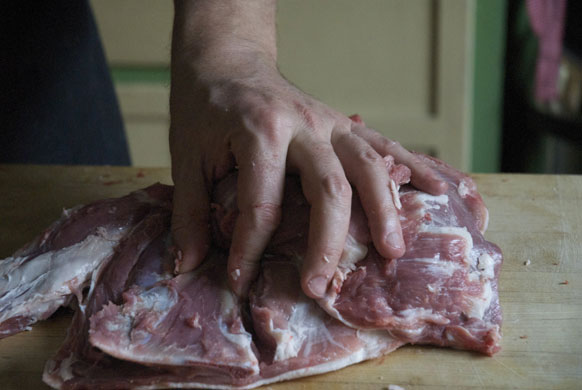
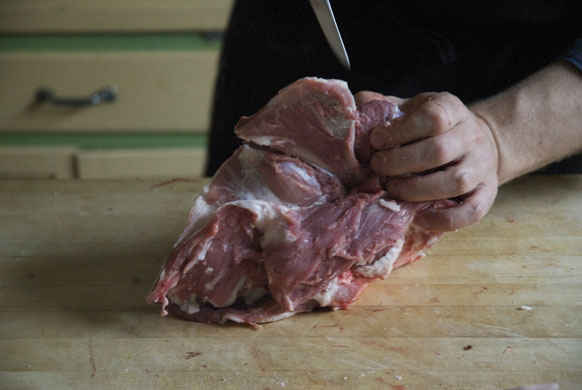
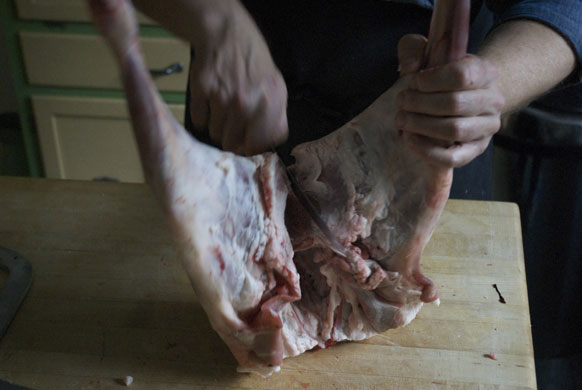
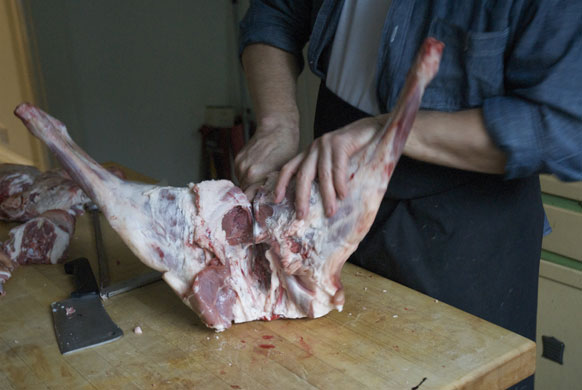
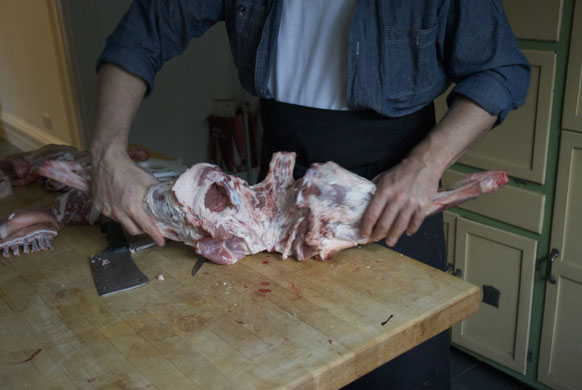
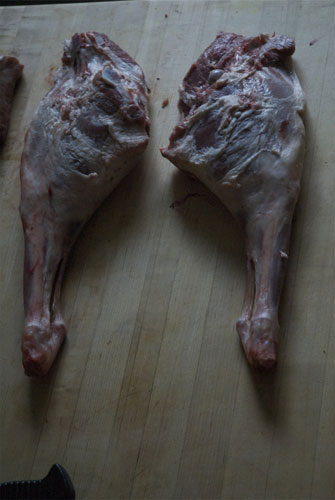
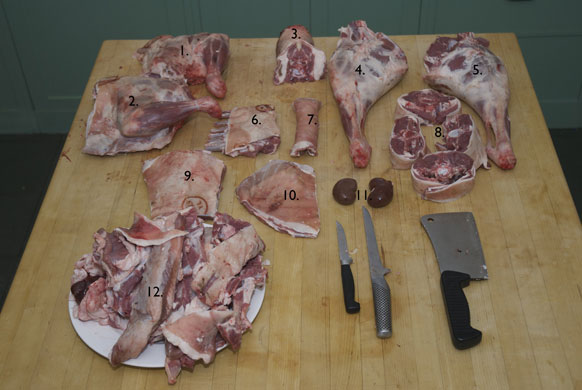
Find the top of the pelvic girdle by pushing with two fingers and mark with your knifePhotograph: Bertie MillerTake a line perpendicular to the spine and as close as possible to the top of the pelvis, slice neatly down through the side to the spinePhotograph: Bertie MillerYou should have clear space to saw where the spine meets the top of the pelvisPhotograph: Bertie MillerSaw or cut with the cleaverPhotograph: Bertie MillerWith one hand inside and one outside the ribcage, count off five ribs from the neck end and mark with your knifePhotograph: Bertie MillerFollowing the line between ribs five and six, cut down, away from the spine, turning towards the tail end at the bottomPhotograph: Bertie MillerHaving cut both sides, saw through the spinePhotograph: Bertie MillerDo the same thing at the back end of the ribs to separate the loin - cut from spine to belly behind the last rib...Photograph: Bertie Miller...and saw through the spinePhotograph: Bertie MillerLike so...Photograph: Bertie MillerGoing back up to the ribs, measure half way along the front rib with your fingerPhotograph: Bertie MillerSaw through the ribs on both sidesPhotograph: Bertie MillerLike so...Photograph: Bertie MillerUsing the boning knife, cut down one side of the pointy-up bits of the vertebrae. Let the knife do the work, sliding downwards then turning out. Stop when you can see or feel the point where the ribs attachPhotograph: Bertie MillerRepeat on the other sidePhotograph: Bertie MillerStand the double rack firmly on end and cut the ends of the ribs away from the spine with a few blows of the cleaver. The bones are soft... it's easier than it soundsPhotograph: Bertie MillerWorking from the inside, trim up the tips of the ribs on either side and use the knife to scrape through the membrane inside the ribs. Only do this to the last few centimetres of each ribPhotograph: Bertie MillerTurning back the meat outside the ribs, trim and scrape between them. This is called 'frenching'Photograph: Bertie MillerFinally, trim away the flap and tidy up the bone ends. Congratulations - you've made a rackPhotograph: Bertie MillerThe front rib plate you sawed off earlier can be trimmed from the bones and rolled or you can leave it all intact and slow cook it, spare-rib stylePhotograph: Bertie MillerBack to the loin. Trim off the ends around the point where the skin/meat ratio gets a bit pointlessPhotograph: Bertie MillerChoose the thickness of your chops and cut outwards from the spine. Try to choose a point where there's a convenient intravertebral joint. I failed dismally but as the bones are soft enough to use the cleaver, the only downside is a messy trim and maybe a bone chip or two. I'll do better next timePhotograph: Bertie MillerOnce you've cut, use the cleaver to go through the spinePhotograph: Bertie MillerFour 'Barnsley' chops. I'm not going to win any rosettes for butchery this time but they'll be excellent for the stew I have in mindPhotograph: Bertie MillerGoing back to the fore end, cut all round where the neck joins the body...Photograph: Bertie Miller...and use the cleaver to remove the neckPhotograph: Bertie MillerThe front end is dry, dark and looks a bit messy so I'll trim it up later. I had to promise this piece to my Mum as she has happy memories of stewed neck as a kid but can't get it from her butcherPhotograph: Bertie MillerSaw the fore portion in half, directly through the spinePhotograph: Bertie MillerLike soPhotograph: Bertie MillerQuick recap of where we've got to. From bottom left, a rack of ribs - un-frenched, four Barnsley chops, the back end and a frenched rack. The plate contains the trimmings, suet and kidneys. Bottom right is the neck and right fore section, at the top I'm cutting away the sternum through the soft ends of the long ribsPhotograph: Bertie MillerWorking from inside, get the knife behind the ribs - again, let the knife do the work, following the bones - trim back up towards the spine and remove ribs and vertebrae in one piecePhotograph: Bertie MillerFind the triangular shoulder blade and trim down either side and behind itPhotograph: Bertie MillerUse your fingers to work down around the bone until you find the ball and socket joint then cut through the tough tendons with the tip of your knife to free it. Look out for a raised 'rib' running down the back of the shoulder blade and try to avoid cutting out through the skin as you free it. I failedPhotograph: Bertie MillerThere you go... one boned shoulder. Not the easiest joint to handle but you've done it. Roll it, stuff it, tie it. You'll have worked out by now, exactly how full of connective tissue this jont is, so you'll be itching to slow roast or braise it. Good plan. If it's really messy, though, you can always cube it for stewPhotograph: Bertie MillerOn to the rump. Pointing the legs up in the air, cut down either side of the tailPhotograph: Bertie MillerUse a little pressure to pop the hip joints and your knife will find its own wayPhotograph: Bertie MillerLike soPhotograph: Bertie MillerThere. Don't they look lovely? If you're feeling rustic you can just go straight ahead and roast them as they are. But we're getting all cocky about our butchery skills now so let's clean them up a little. Trim any excess fat inside the thighsPhotograph: Bertie MillerFeel around with your fingers on the inside top of the joint and work your knife under and around the socket part of the pelvis. It's obvious and comes out cleanly. Again, use the knife tip to cut the tendons around the jointPhotograph: Bertie MillerThe leg on the right has been trimmed back to the ball joint, the left is intact. You can cut each leg down further into three separate pieces. Saw off the bottom of the leg just around the point it starts getting meaty then slice and saw straight across several inches higher up to produce a classic shank for slow cooking. The remaining piece can be cut in two to produce two separate leg joints which can be butterflied, rolled and stuffed or cubed for stewingPhotograph: Bertie MillerThe final cuts. 1. Boned shoulder 2. Unboned shoulder 3. Neck 4. Leg (hipbone still in) 5. Trimmed whole leg 6. Frenched rack 7. Boned and rolled breast 8. Loin or 'Barnsley' chops 9. Untrimmed rack 10. Unboned breast 11. Kidneys (trimmed and devilled on toast five minutes after this was taken) 12. Trimmings, about half of which became mince with the balance - mainly bone - going into the stock potPhotograph: Bertie Miller
Sign up to read this article
Read news from 100’s of titles, curated specifically for you.