Just because an item’s old doesn’t mean that it’s bad. Often, all it needs is a bit of elbow grease and TLC to make it shine again. When you uncover old furniture in the attic or come across a rare antique find while secondhand shopping, you can make it come back to life with a bit of ingenuity.
Our team at Bored Panda is featuring some of the most creative furniture flipping and makeover projects, as shared by the talented members of a few popular online communities. Scroll down to check out the cool photos and to get some incredible inspiration for your next big creative project.
#1 My Wife Has Had This Desk Since She Was A Kid. I Made It My Self-Isolation Project
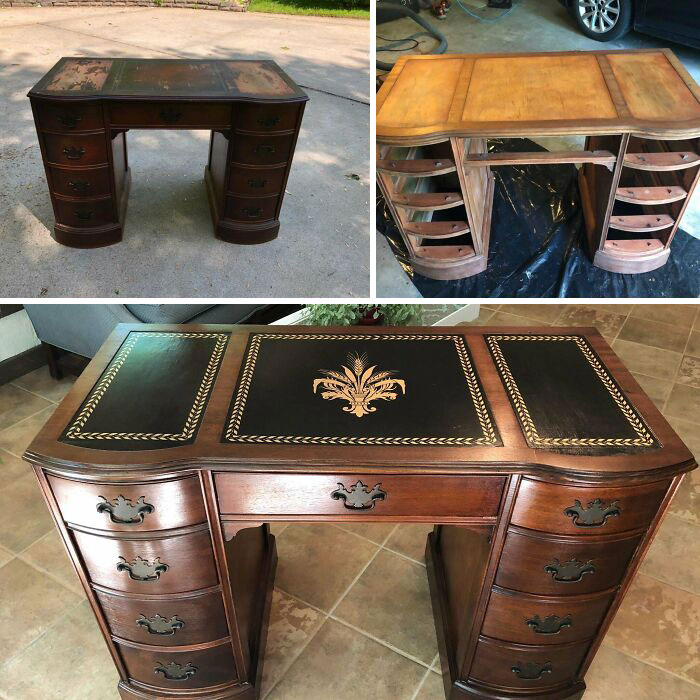
Image credits: Georgiegoodboy
#2 When My Nanna Died No One Wanted Her Bedside Table, Now They Are Suddenly Interested
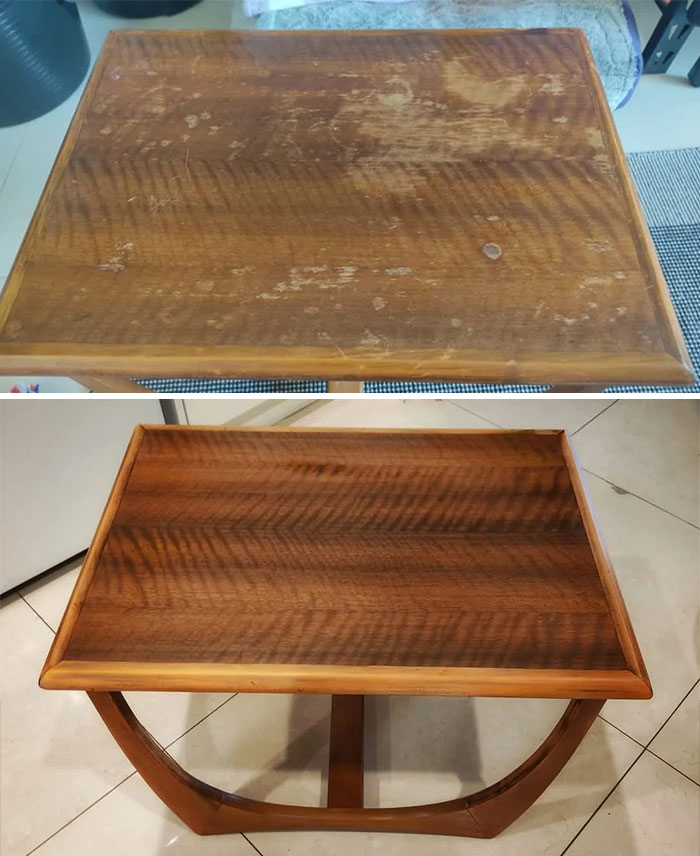
Image credits: rodgeramjit
#3 My Daughter Wanted A Sleeping Beauty Dresser
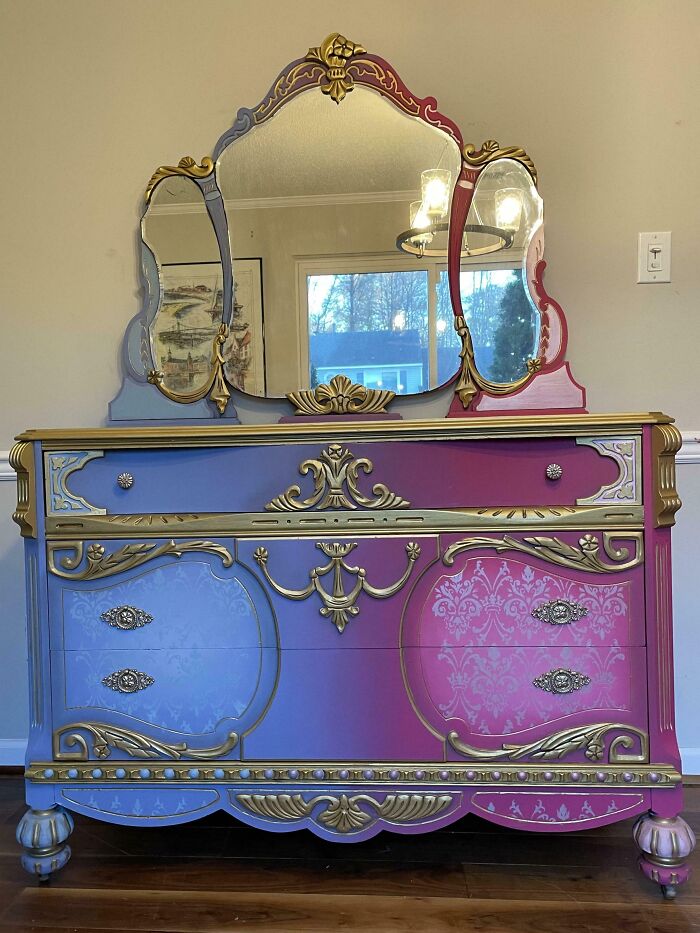
Image credits: Fox_hunt_1980
If you’re new to furniture restoration, flipping, painting, makeovers, upcycling, and the like, don’t worry. We’re all bad at doing new things at the very start. But the more practice you get, the better you become.
You can learn more quickly if you also combine this with proper research (books, articles, online tutorials, etc.), a big dollop of online inspiration, and a growth-oriented mindset.
#4 One Of My Favorite Pieces We Have Done
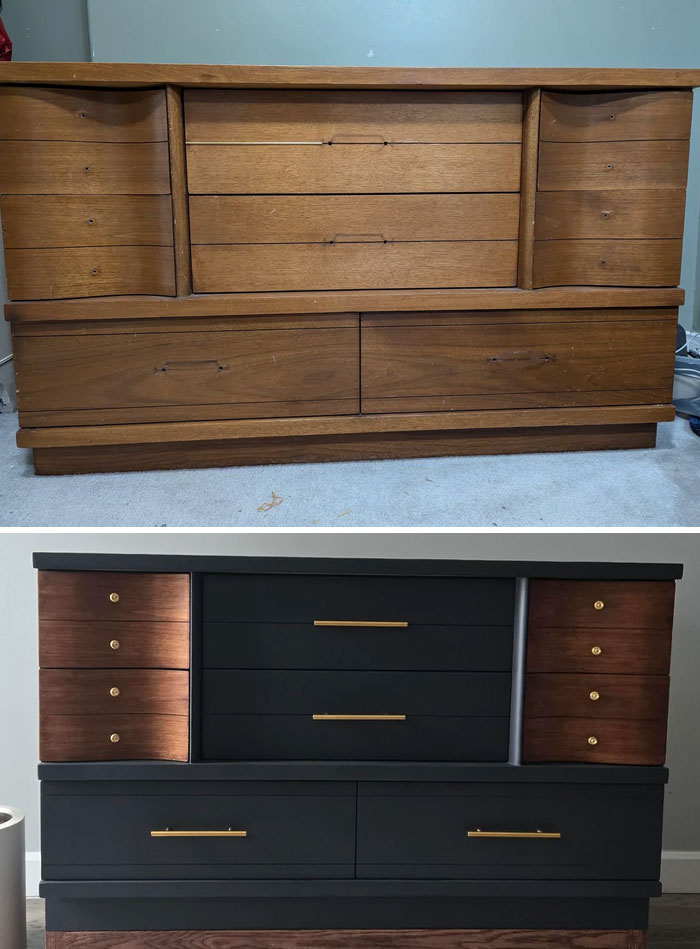
Image credits: Igotik
#5 Saved This Beauty From The Trash Can
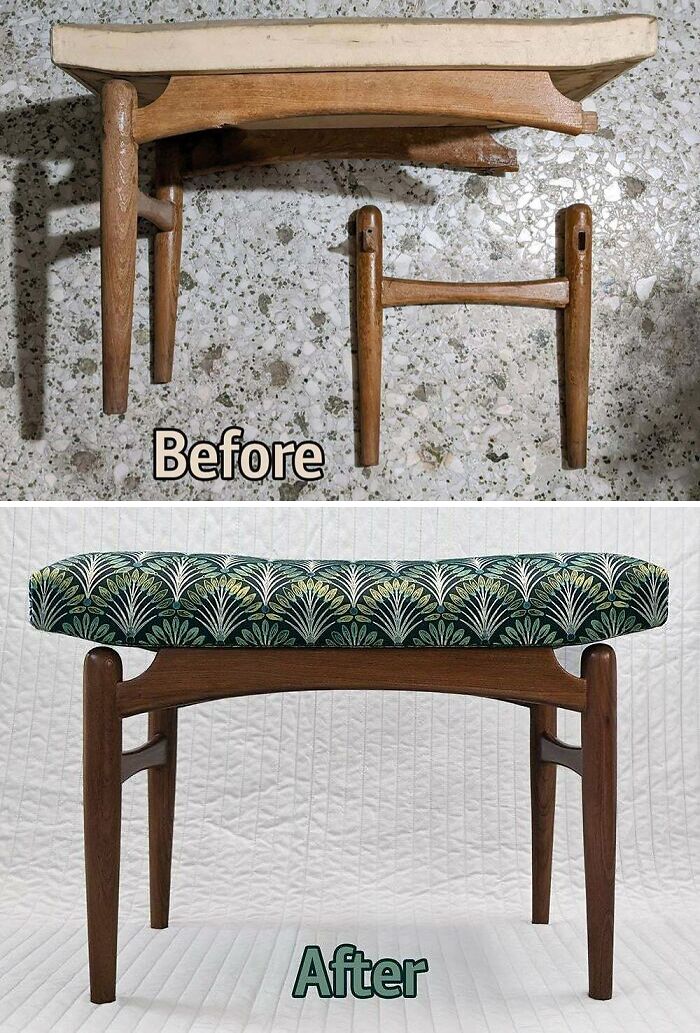
Image credits: Amenra138
#6 My Bedside Table Finally Got The Respect It Deserves
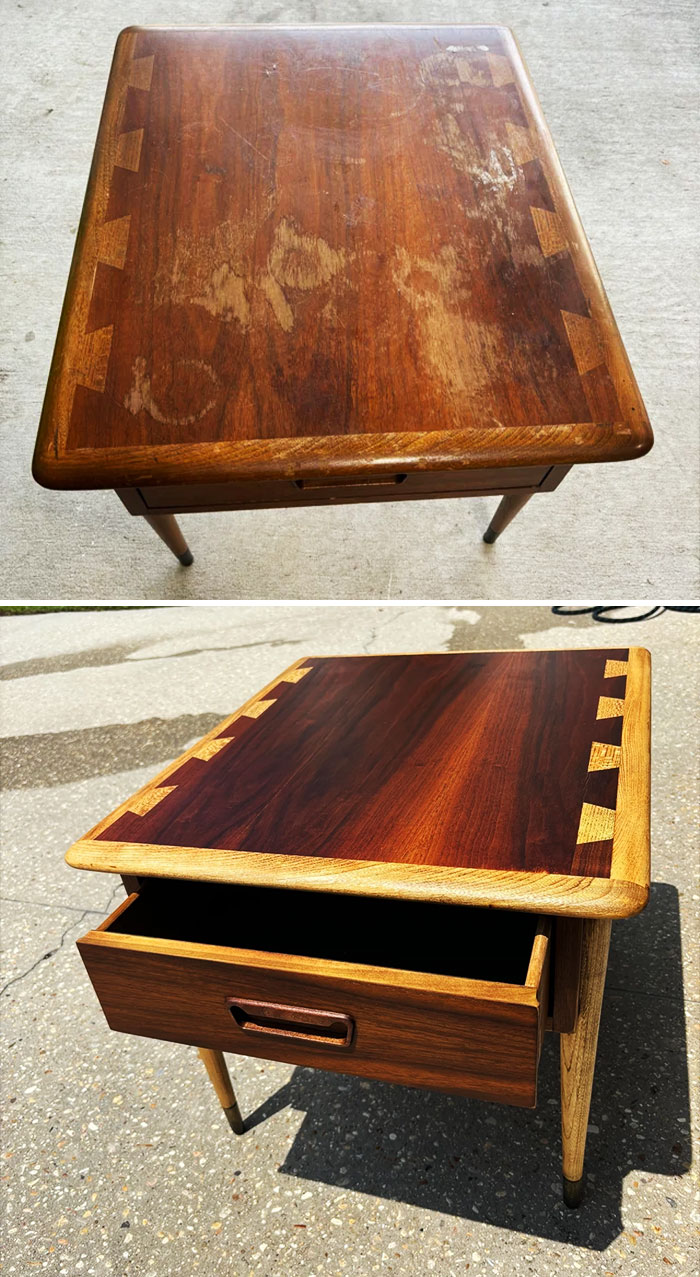
Image credits: Melodic_Local_4385
If you see your mistakes as opportunities to grow and improve, you’re going to have a much better time than if you let your perfectionism get the better of you. It’s inevitable that you’ll fail again (and again… and again) while you hone your restoration skills. This is something that you need to accept, no matter what new skill you’re learning.
Keep going for long enough and, at some point, things will click and you’ll feel proud of your accomplishments. However, you don’t need to be a grandmaster-level pro to feel good about your progress.
#7 Before & After: Mcm Hutch From Fb Marketplace
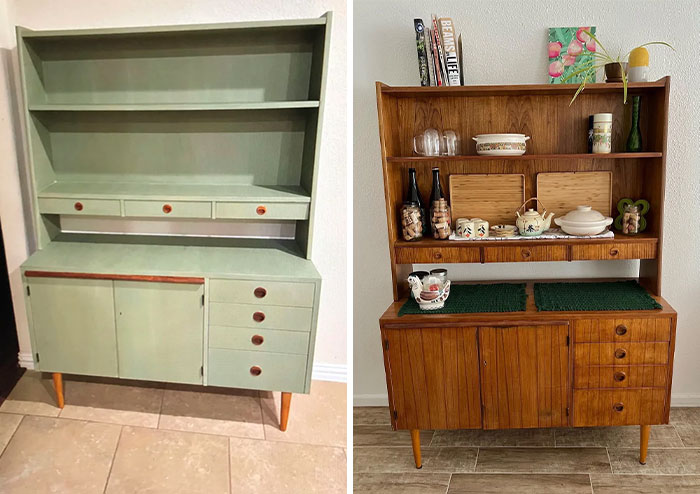
Image credits: WeilaArt
#8 Found On Facebook Marketplace For $15 And Refurbished As A Nightstand
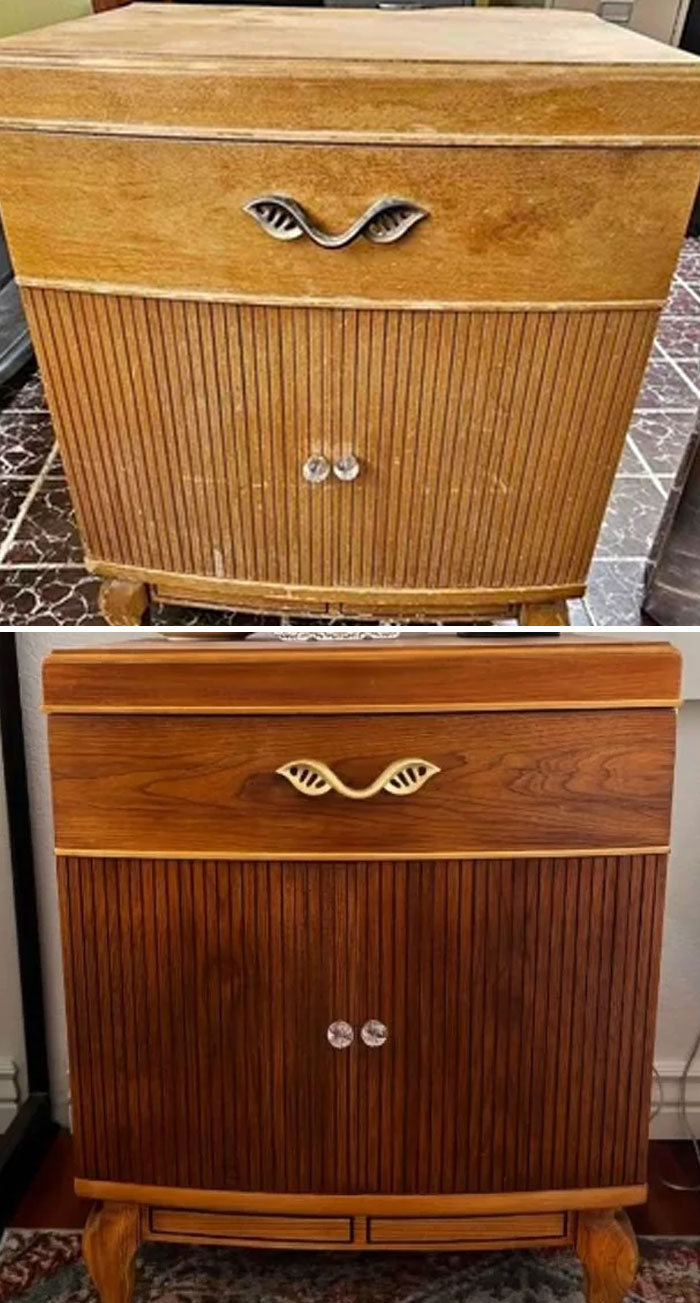
Image credits: trevorl56
#9 How’d I Do On My First Real Flip?
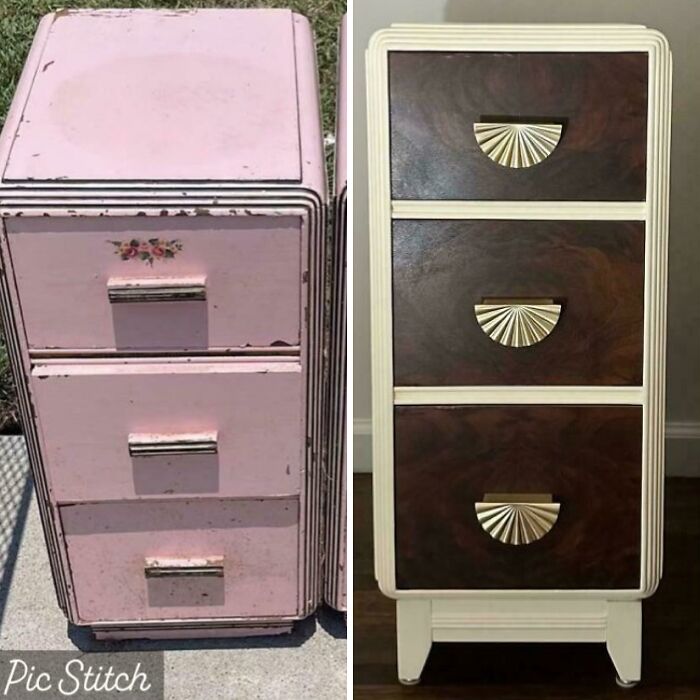
Image credits: DefectiveOblation
It’s a massive boon to feel supported by someone. So, think about joining a few online communities dedicated to furniture restoration, secondhand finds, or whatever other new hobby you’ve picked up.
Share your works-in-progress. Ask for feedback and tips. Genuinely engage with other people and show them that you’re curious about them and the hobby itself.
#10 Spinning Library Table!
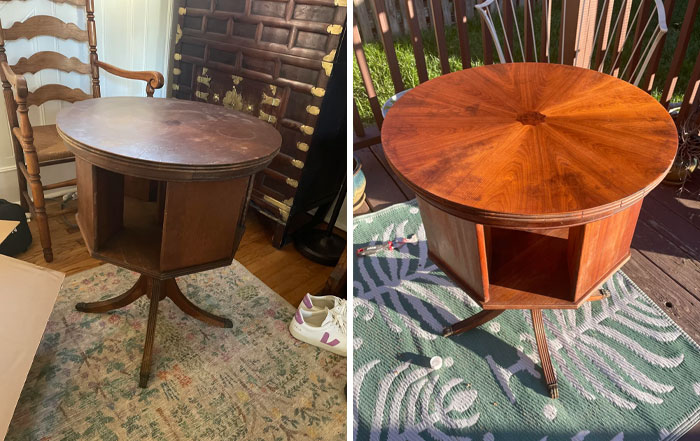
Image credits: mg2093
#11 1943 Waterfall Vanity Restore
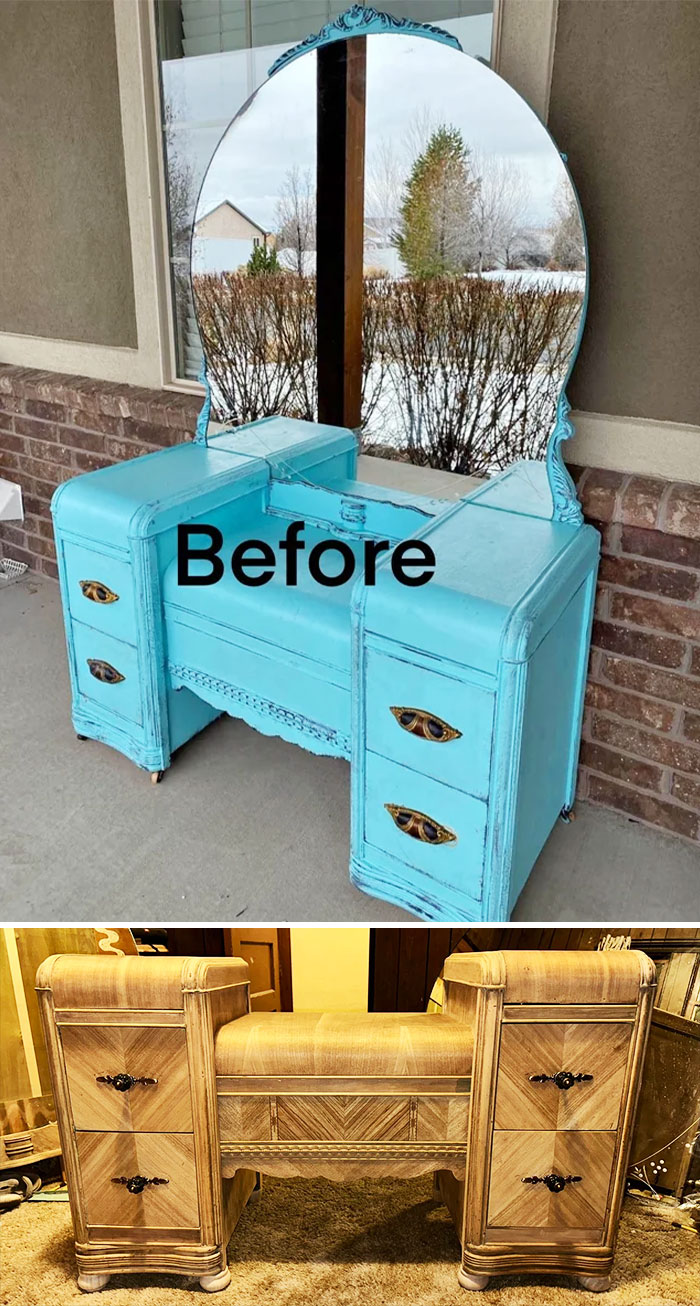
Image credits: Embarrassed_Worth543
#12 Old General Electric Am Radio Cabinet
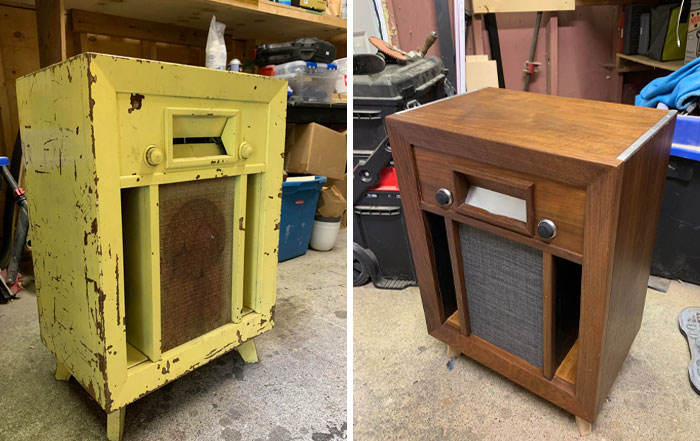
Image credits: Justin-Truedat
As per The New York Times, you actually may not need much to, for example, restore an old desk.
A “thorough wipe-down, a few touch-ups with stain, and a bit of wax to restore the original luster” may be more than enough. You don’t necessarily need to be particularly skilled. Nor do you need any super-specialized tools. What you do need, though, is time and patience!
#13 Before And After Of My Grandmother's Vintage Patio Sets!
Before was AWFUL. At least 25+ years of neglect. My parents kept them but they had been exposed to the elements for so, so, so long even after getting them. And then they were just left on my dad's porch like skeleton decor after they separated. Moved back home and decided it was time to save them.
They are covered in Rust-Oleum primer and it was multiple coats before the rust quit eating through. Once I knew that was good, I hand painted (never again) the glider and chairs set then spray painted the clam sets. (Tried to match the colors my parents like or this would have been a harvest/fall color vibe set.)
Very happy with the results. It's been a few months but they still feel like new and are the star of the porch.
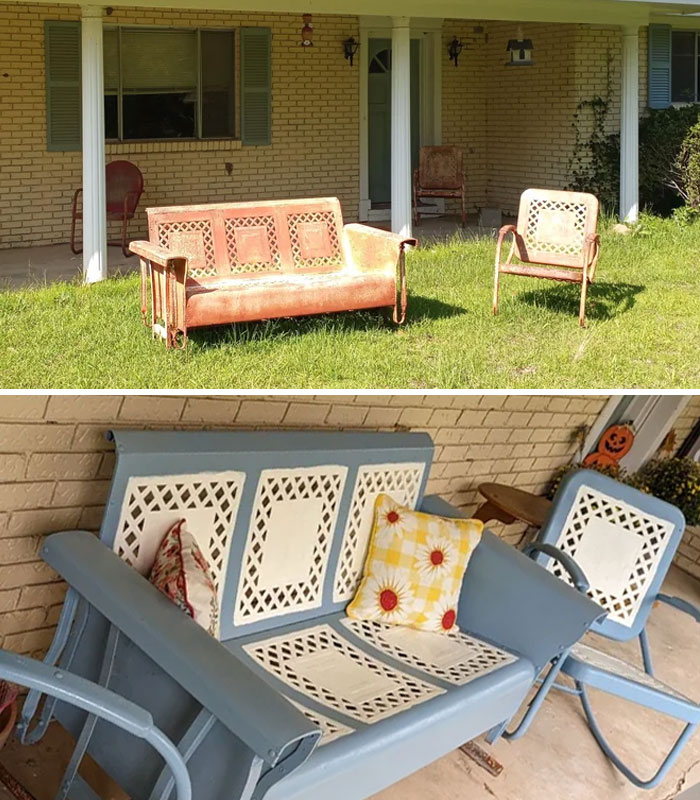
Image credits: MafiaMommaBruno
#14 Favorite Piece So Far!
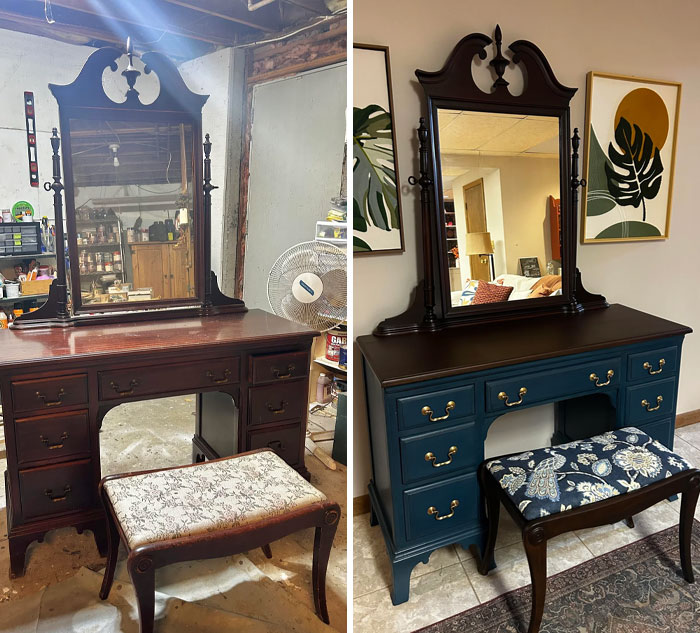
Image credits: TlyTlymama
#15 Old Chair I Found And Restored
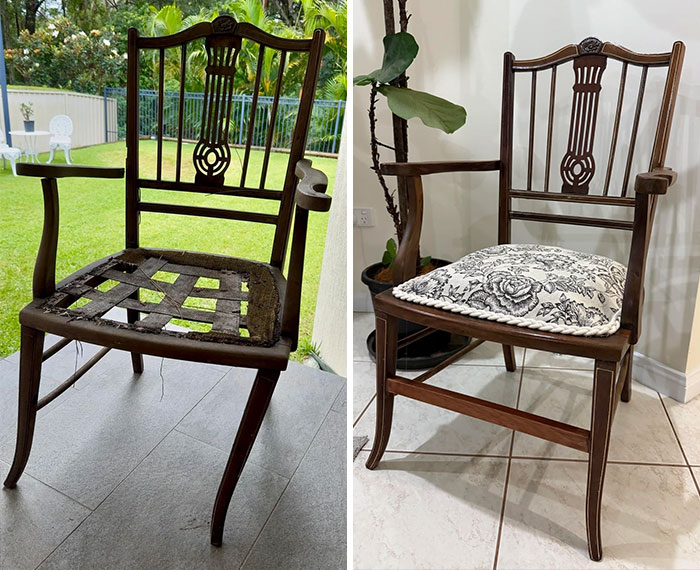
Image credits: our_past
According to The New York Times, there are four main stages to furniture restoration. These are:
- Cleaning, using microfiber towels, a putty knife, and a dental scraper or sharp stick
- Repairing, with wood filler, etc.
- Recoloring, using stain pens and dyes
- Refinishing, with sandpaper and wood conditioner
#16 Chair Restoration
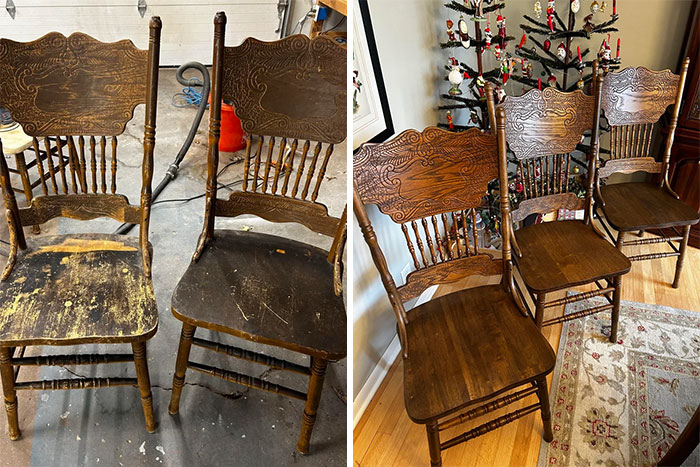
Image credits: sandpapergal
#17 Restored This Beauty Back To Its Glory. It’s Now A Staple In Our House
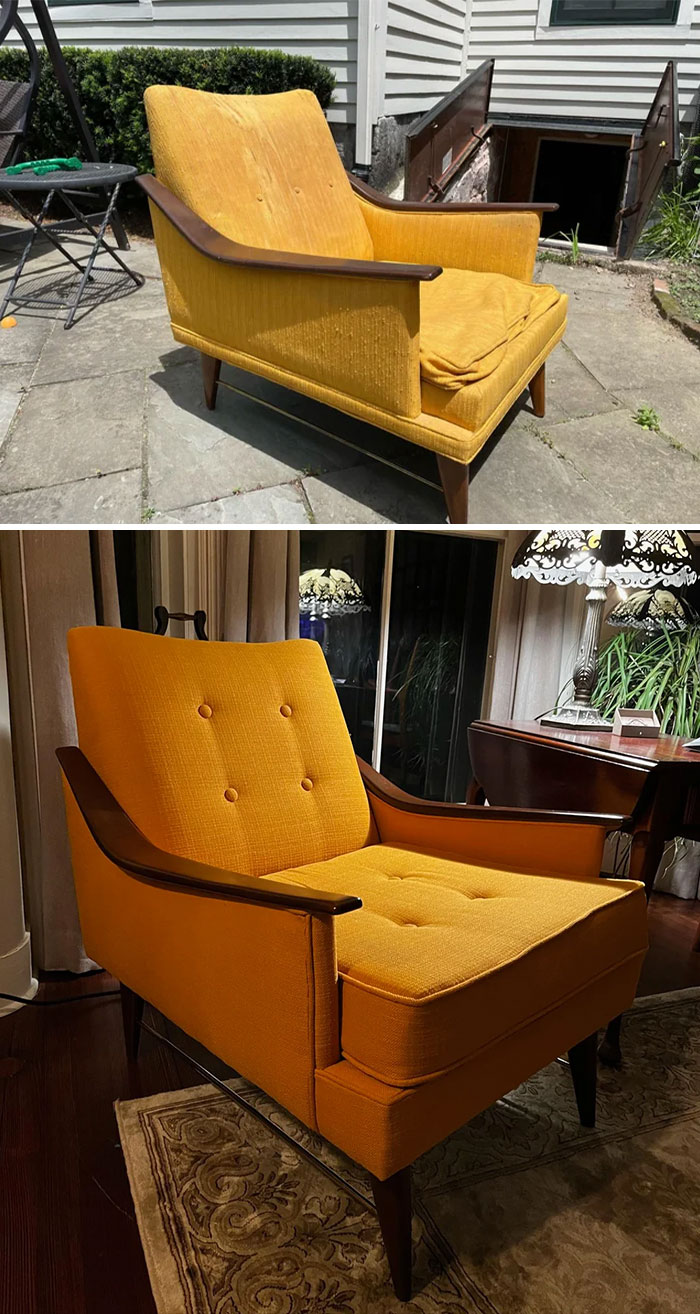
Image credits: Skyewanderers
#18 One Of My Favorite Restorations I’ve Done
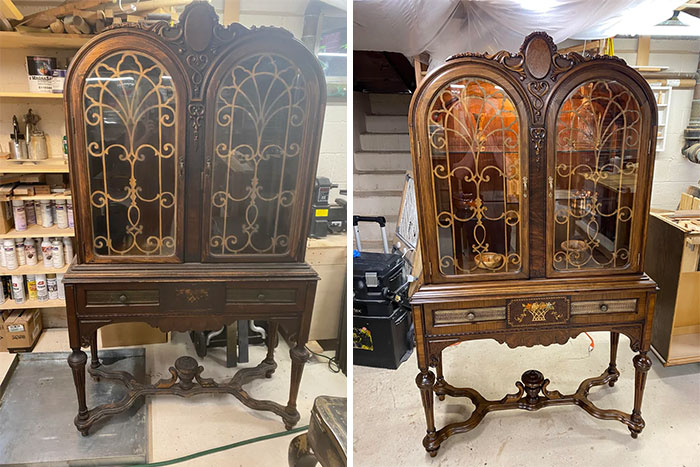
Image credits: cdev12399
“In fact, if there’s one lesson to keep top of mind during any restoration project, it’s that going too far is the fatal mistake. Old furniture is beautiful because it shows its age. Tabletops fade to gold in the sun. Chair arms darken where hands have touched them. My desk was originally a uniform amber tone; its rich patina came from decades of service in New York classrooms,” Tim Heffernan writes.
#19 I Want Some Praise LOL
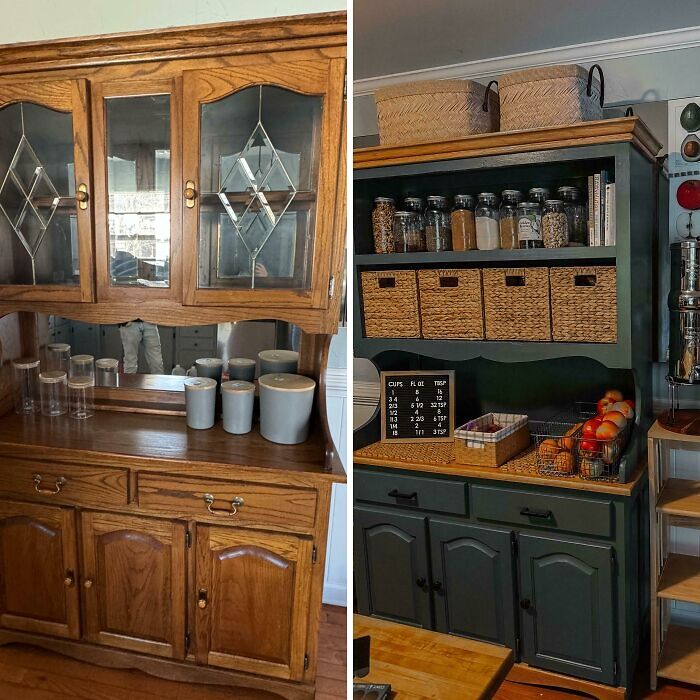
Image credits: Ok-Reply7282
#20 Purchased A Rusty Plant Stand At An Estate Sale Last Year And Gave It A Proper Glow Up
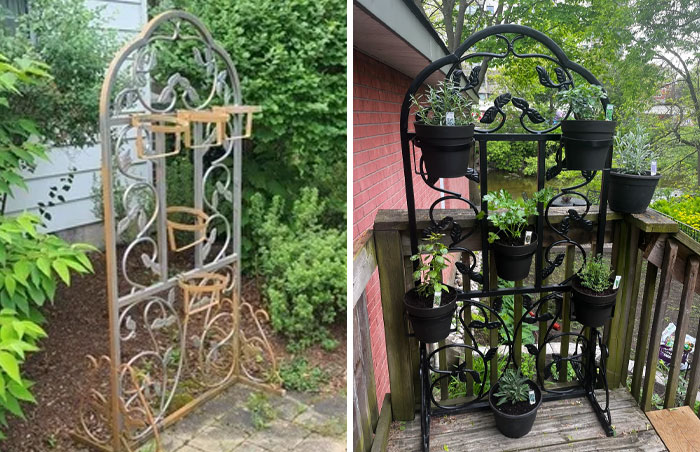
Image credits: Whalley-07
#21 Uncovering That Beauty Hiding Within
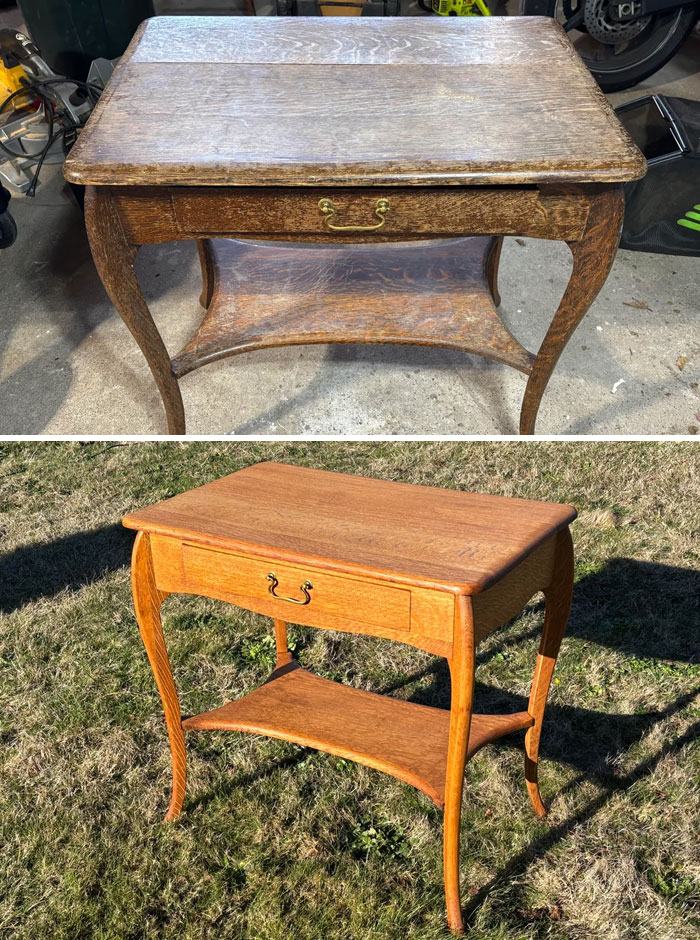
Image credits: DavyCrockPot19
Heffernan warns that doing too much can take away what makes your piece of furniture so uniquely wonderful in the first place.
“So I didn’t try to make the finish uniform again. I just harmonized its elements by hiding splotches and stains that jarred the eye. I think of it like tuning a piano: You’re not making the keys sound alike. You’re getting them to play together.”
#22 Goodwill MCM Dresser Makeover
I picked up this MCM dresser at my local Goodwill for 29.00. Other than typical wear and tear damage- scratches, chipped veneer and a failed finish- this dresser was in pretty good shape. I really wanted to restore it to its original glory, but I was stumped by the laminate top. It was faded in color and there is really no way to correct that issue. I knew that it would totally clash with the beautiful refinished walnut, so what could I do? As much as I wanted to keep things as OG as possible, I quickly, and somewhat sadly, realized that there would have to be paint involved. I restored most of the wood and painted the top, some trim and the base. What would you have done?
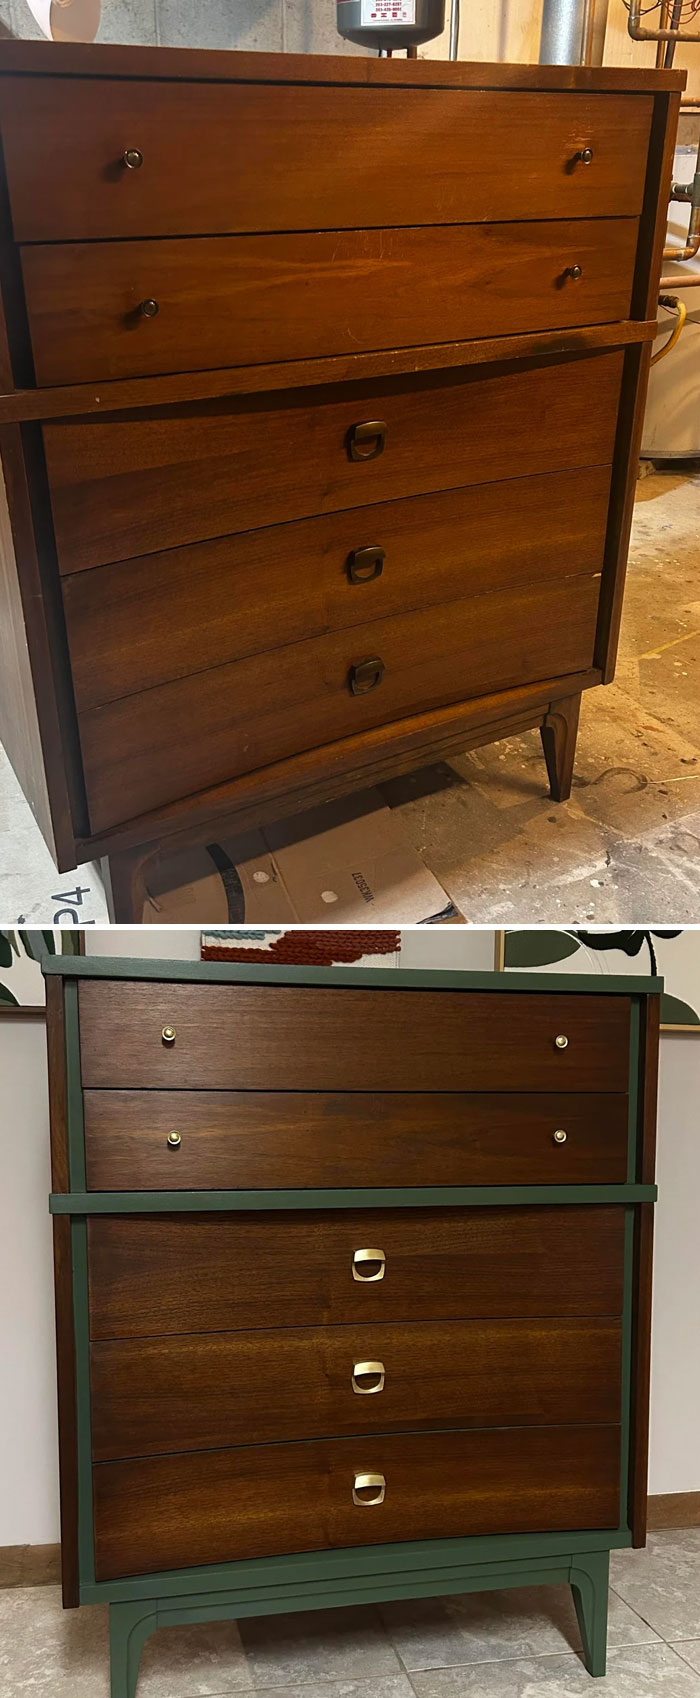
Image credits: TlyTlymama
#23 Desk Flip!

Image credits: purpmom
#24 Refurbished This Dresser
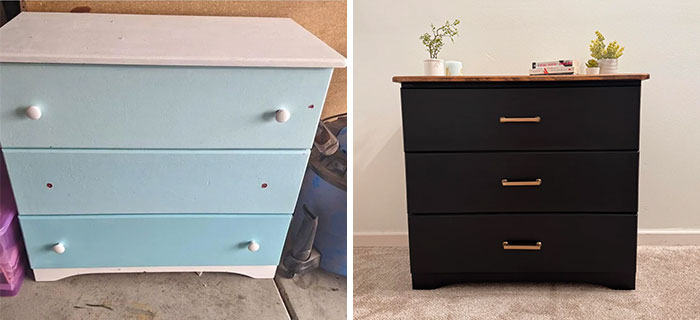
Image credits: Its_migi
Broadly speaking, you want to avoid using oil soap to clean your furniture. That’s because it can leave a greasy-looking residue. What’s more, some aerosols can leave a silicone residue as well. Keep things simple. Use a dry rag, followed by a damp one, to thoroughly remove the dirt from your piece of furniture. Use a knife to remove things like paint drips, sticky tape, or wax. Meanwhile, a dental scraper makes it much easier to get all the dirt out of the cracks and holes.
#25 $3 At The Thrift Store: Before And After
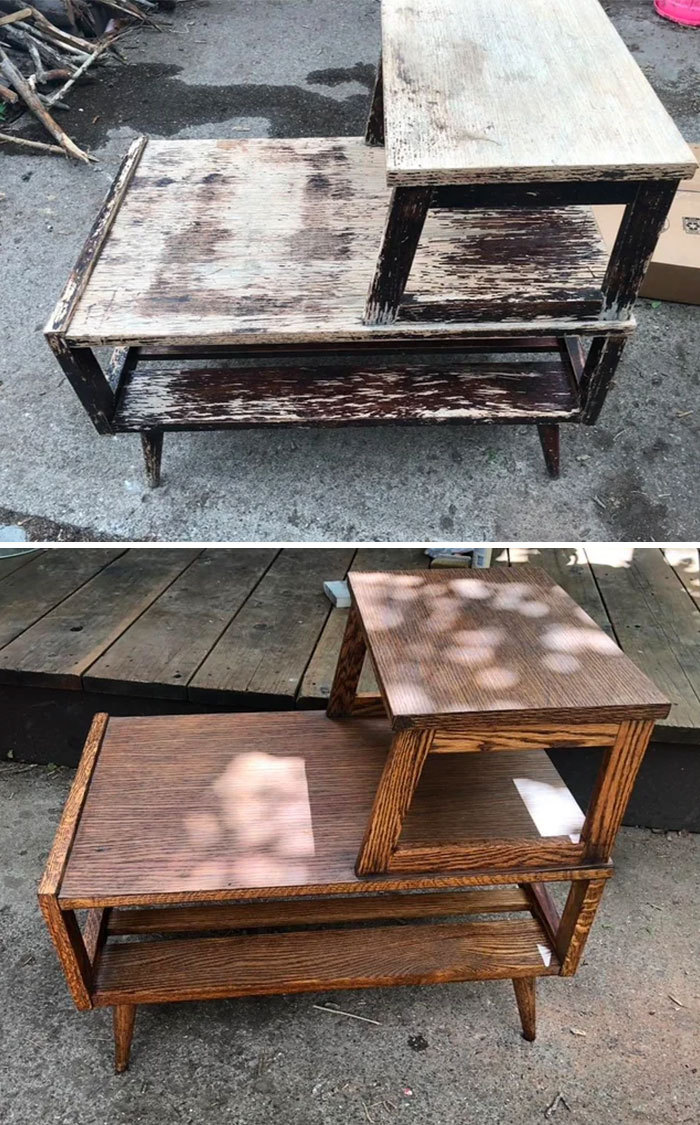
Image credits: sassubear
#26 Gossip Bench
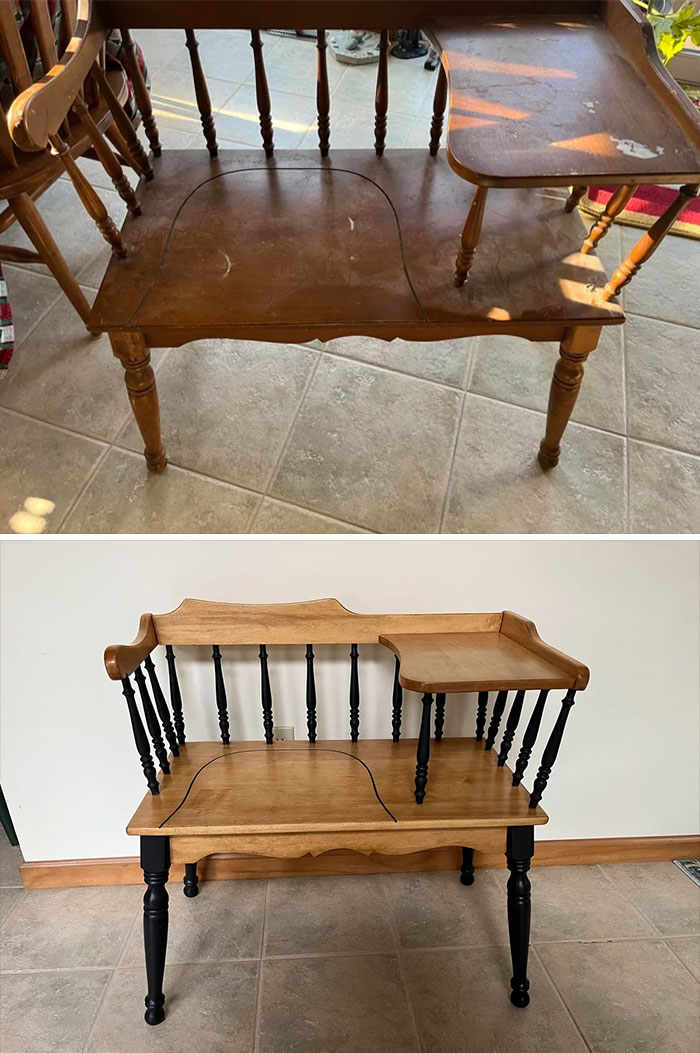
Image credits: SusanSickles
#27 Updated A Piece From My Late Grandmother. Wish She Could See It In Our House Being Loved
This took months and I may get hate for painting it, but I'm no professional & this looks so much better in our house vs a landfill.

Image credits: dejavu1251
If you need to repair the wood, use some filler. As for recoloring the item, you can use stain pens to hide scratches and recreate wood grain patterns and the like. Finish things up with a coat of wood conditioner to give your furniture a protective layer that shines. That’s the general gist of it.
#28 Before And After Of My Latest Flip
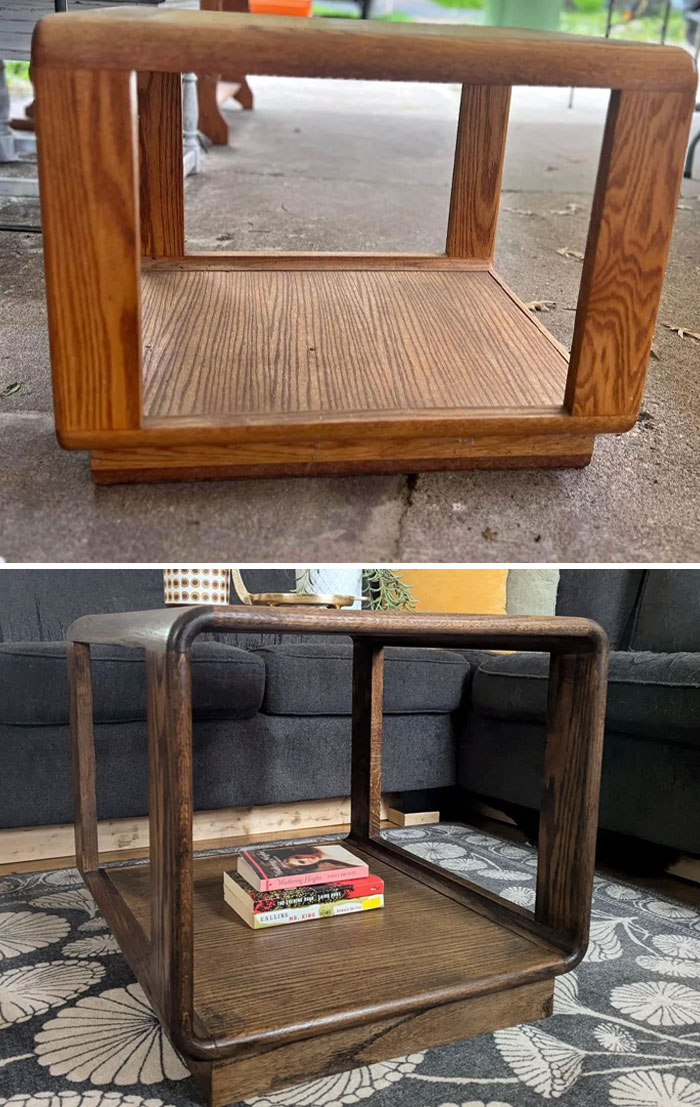
Image credits: FootParmesan
#29 My Favorite Before And After Flip I’ve Done!
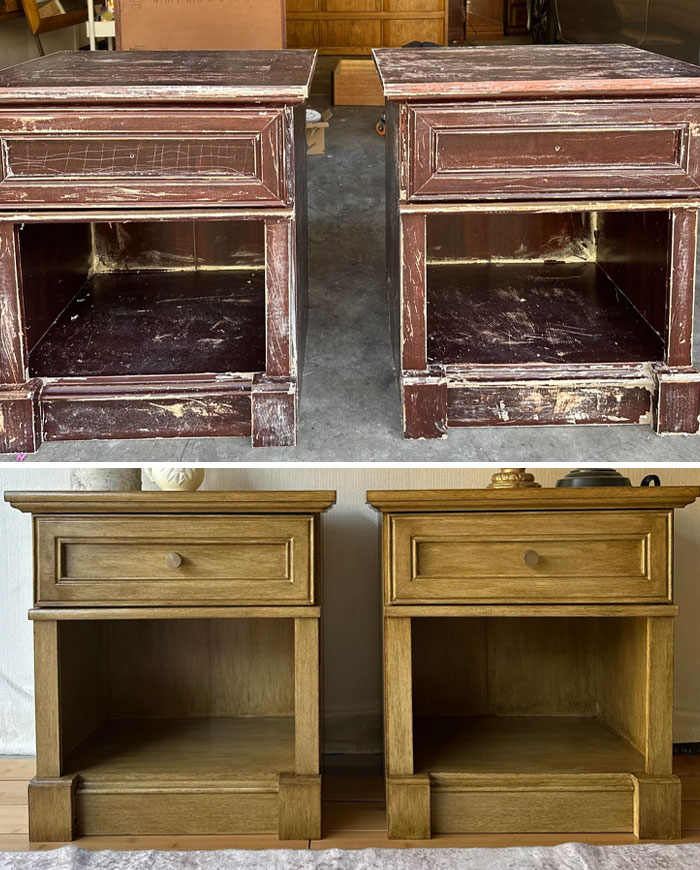
Image credits: aap1997
#30 First Flip ~ I Am Now Addicted
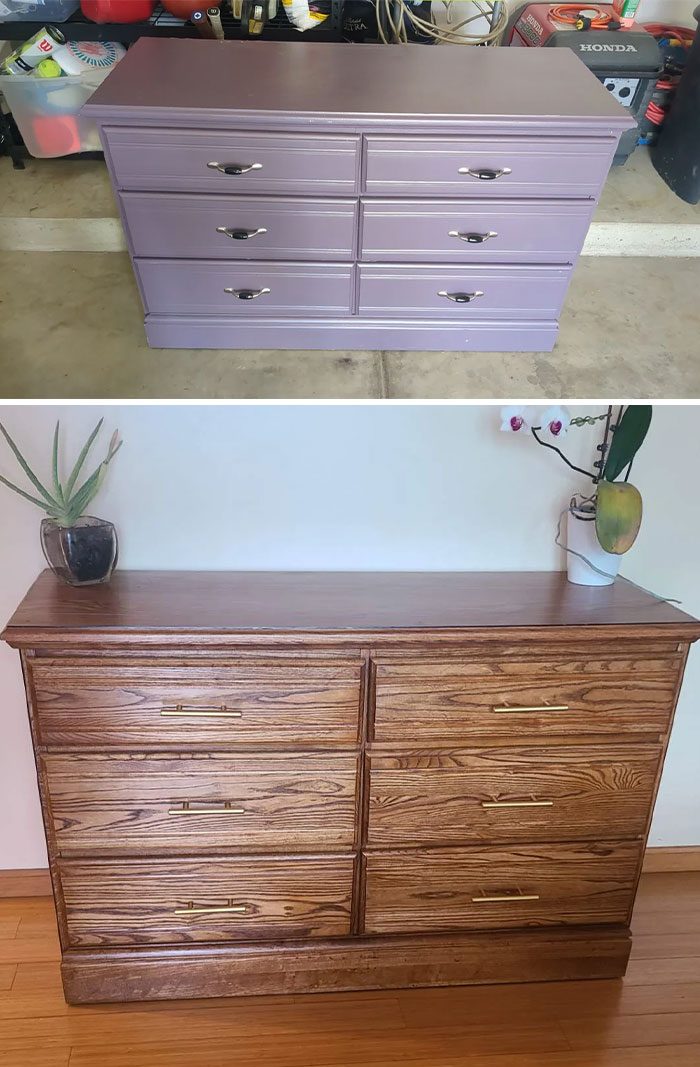
Image credits: Feisty-Context-5807
Which of these before-and-after pics impressed you the most? Which of these pieces of furniture would you love to bring into your own home, Pandas? Have you ever restored, refurbished, or refinished something before? How did that go?
What’s the coolest secondhand item you’ve recently found? We’d love to hear from you. You can share your thoughts and experiences in the comments below.
#31 Facelift For A Lane Acclaim Guitar Pick Table! ❤️

Image credits: Marvel-ous_gal311
#32 Before And After. First Flip 👍
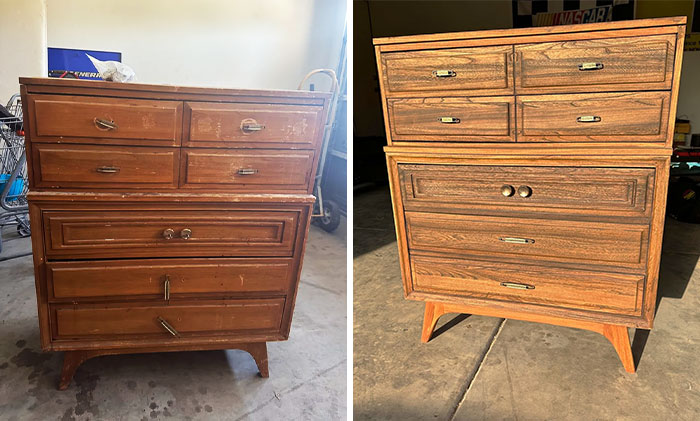
Image credits: Old-Froyo-131
#33 Vintage 1940s* Desk Is Finally Finished!🥰
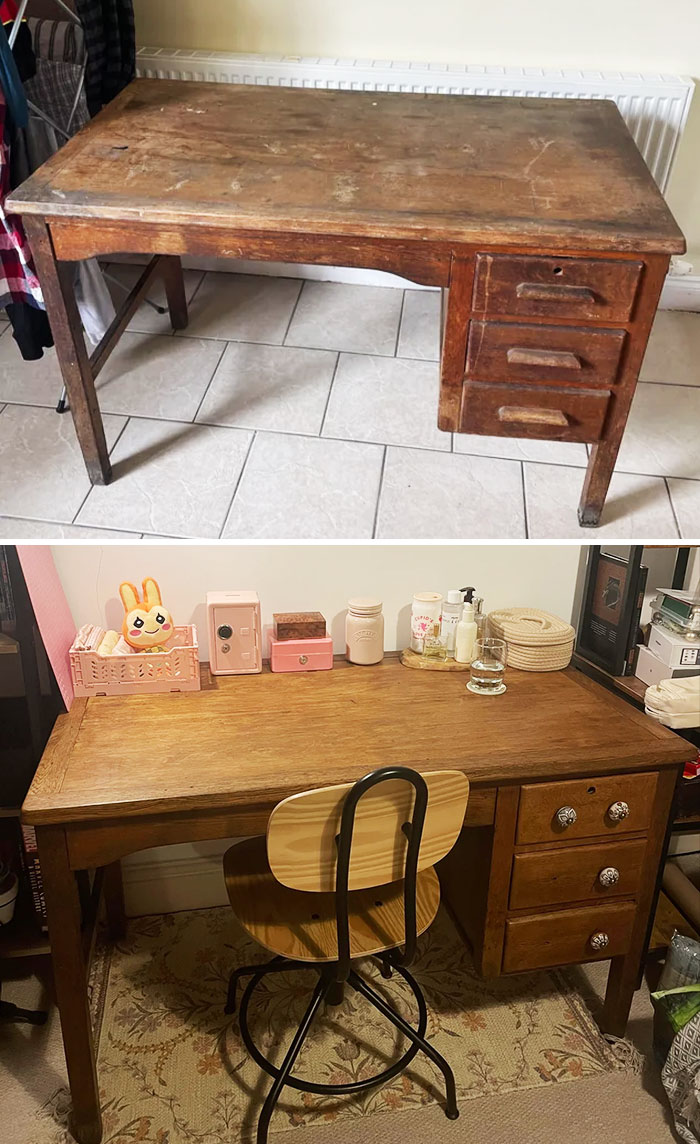
Image credits: Outside_Local_6075
#34 My First Ever Flip

Image credits: Sensitive_Basis3963
#35 Puppy Supply Station
So far, I have only done pieces for myself and not to sell...probably a good thing as I made a few mistakes on this one. I think I'm just about ready to try doing a piece to sell, though.
Started with a $20 solid wood cupboard from Marketplace, repainted light grey and dark grey (looks black and white in the pic). Replaced hardware and added matching hooks on the side for leashes and other gear. Finished it off with a silicone mat to protect the top.
The wallpaper on the door and drawer faces was a last-minute addition, I didn't sand them enough and after painting, a ton of dings and gouges were evident. I'm happy the way it turned out, though!
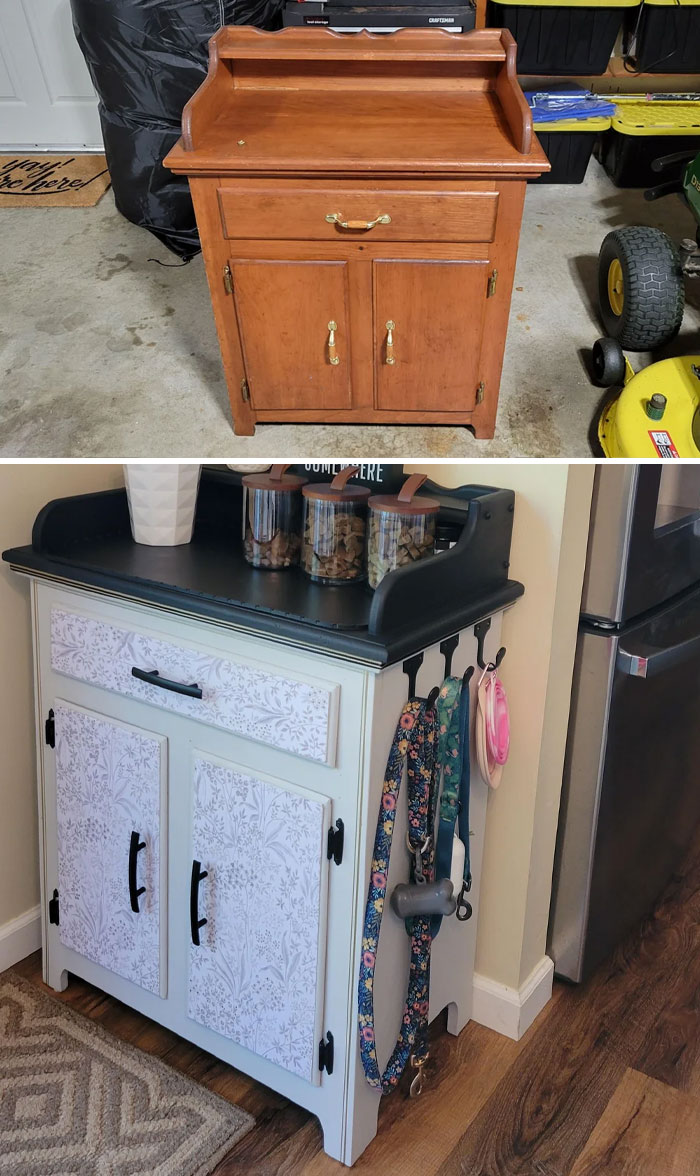
Image credits: hugh_jass_719
#36 It Took 3 Months And A Few Shed Tears, But I Finally Finished Restoring This Huge Swivel Coffee Table
When I spotted this massive 80s-ish swivel coffee table for $40 at ReStore, I really had to convince my spouse that I had a vision, and promised that it would look wicked cool. We were about to move into a much bigger house with a large living room, and I knew this would be awesome in the space. I always dreamed of having a house with a conversation pit-style living room, so this was just the funky piece I needed.
The paint job was yellowed, scratched up, and fairly ugly. I spent a few weeks mulling over a colorblock style with a different rich color on each of the three major pieces, but landed on a simple off white.
We sanded it all down and disassembled the whole piece. The biggest surprise was discovering that the table was so heavy because it's FULL of like 50lbs of sand in the base. We picked out Rust-Oleum Heirloom White spray paint and went to town. If I was going to do this again, I would definitely get rollout paint and not use spray paint. It took a long time to get it smooth and full covered.
A big point of distress was when we went to spray the clear gloss coat. I'd let the color paint dry for 3 weeks, and when I sprayed the gloss, the entire color layer had a bad reaction and shriveled up. This was the source of some major tears, but I sanded the top layer down again and did another layer of color to fix it.
I waited a month to figure out what kind of top coat to pivot to, and ended up going with a high class polyurethane. This was super easy and a way better choice. It took about 2 days to do 4 layers.
Putting the table back together was awesome and filling it back up with sand was a relief. I did cry again at this point out of sheer elation at how amazing it looked, and the fact that it was exactly how I had envisioned. This was such a hard project labor-wise, and I feel super fulfilled and validated by the result.
We finished it the night before our housewarming party and we got so many compliments on it. It's a wild statement piece and looks really unique in the space. It almost looks like, gravitationally impossible, it seriously rules.
This is my favorite piece I own now. My friend got me a huge decorative vintage ashtray to complete the vibe, and it looks perfect! I am so stoked on it and hope y'all like it!
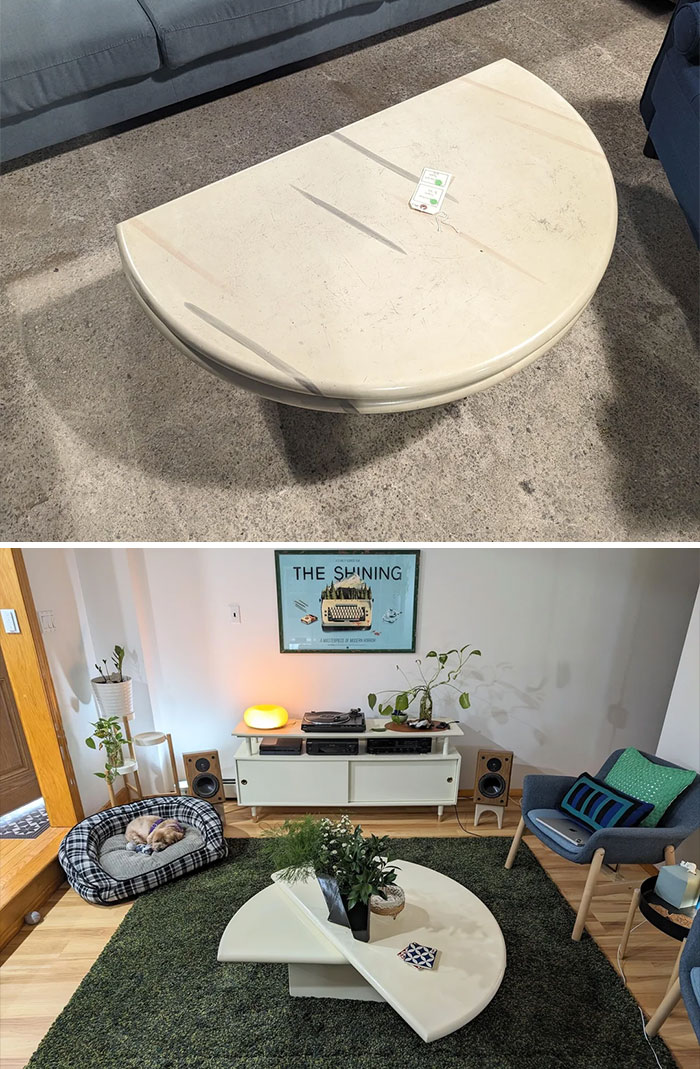
Image credits: HorseGirl666
#37 Birthday Gift Small Refinish ❤️
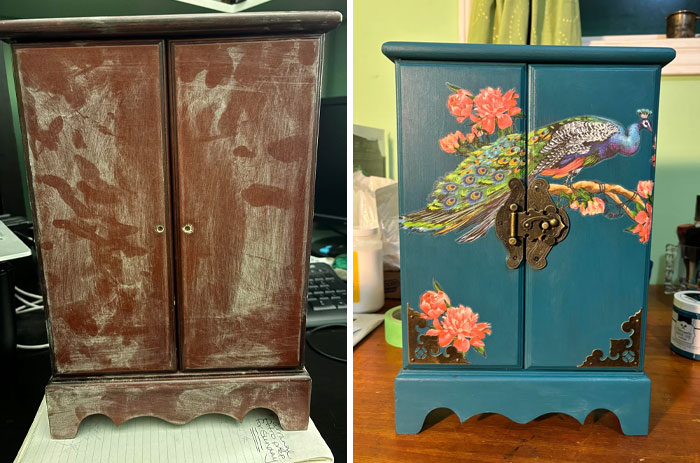
Image credits: 2sad2process
#38 Just Finished This! Very Happy With The Result
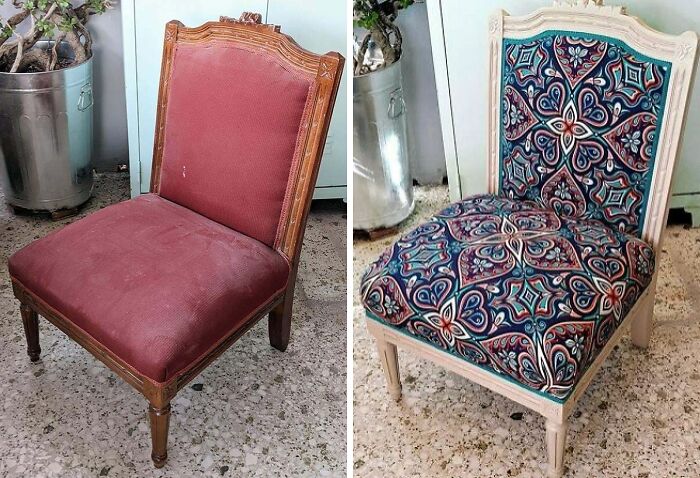
Image credits: Amenra138
#39 My First Flip
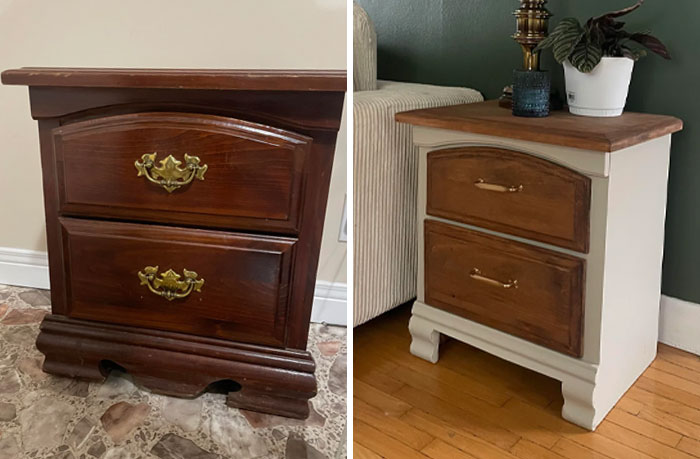
Image credits: GuiltyAd1498
#40 Restored This Table Found In Our Recently Purchased 1922 House!
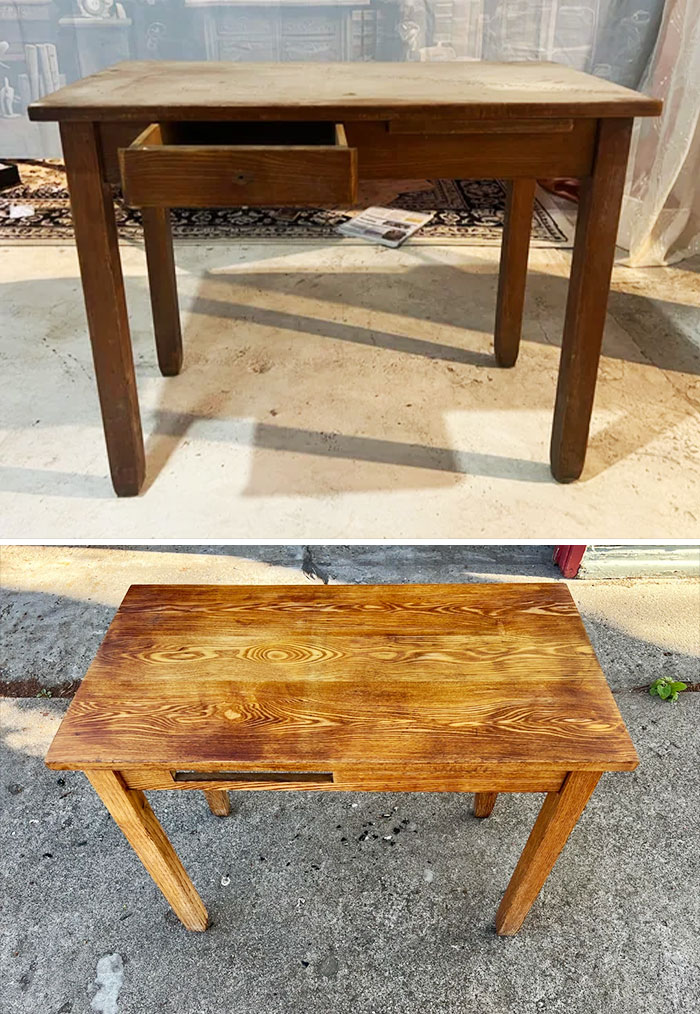
Image credits: lithigos