In this tutorial, I’ll examine the generative AI tools in Photoshop and on the Firefly website. I'll see how you can use these tools to modify your photos or existing images or to create entirely new images.
Adobe's AI model is less controversial than models like Midjourney or Stable Diffusion because of the way the system was trained. Adobe Firefly, and so the AI tools in Photoshop, have been trained on Adobe stock footage, and even though there has been some controversy around the way that this was announced to the Adobe stock footage contributors, they were only told after the model had been trained and Firefly was out, Adobe aims to make a fairer AI model with compensation for the training data contributors.
One area where I found Adobe's AI model to be lacking, compared to other tools, was in creative control over what you're getting out. I've been experimenting with live use of Photoshop with Krea.ai for a more creative approach to compensate. However, recent Adobe updates, especially Structure Reference, have made Photoshop and Firefly much easier to shape and control the images created using generative AI.
Below I share some of my tips for making better images using Photoshop's AI tools. These workflows are designed to enhance the creative process and not replace it, as I believe AI could be an artist's ally.
01. Using Generative Fill
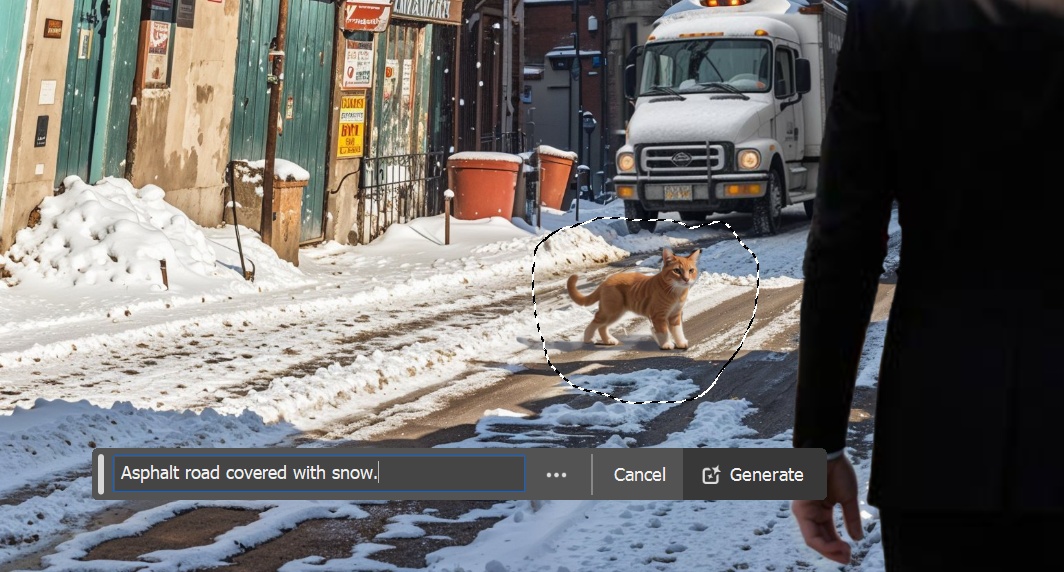
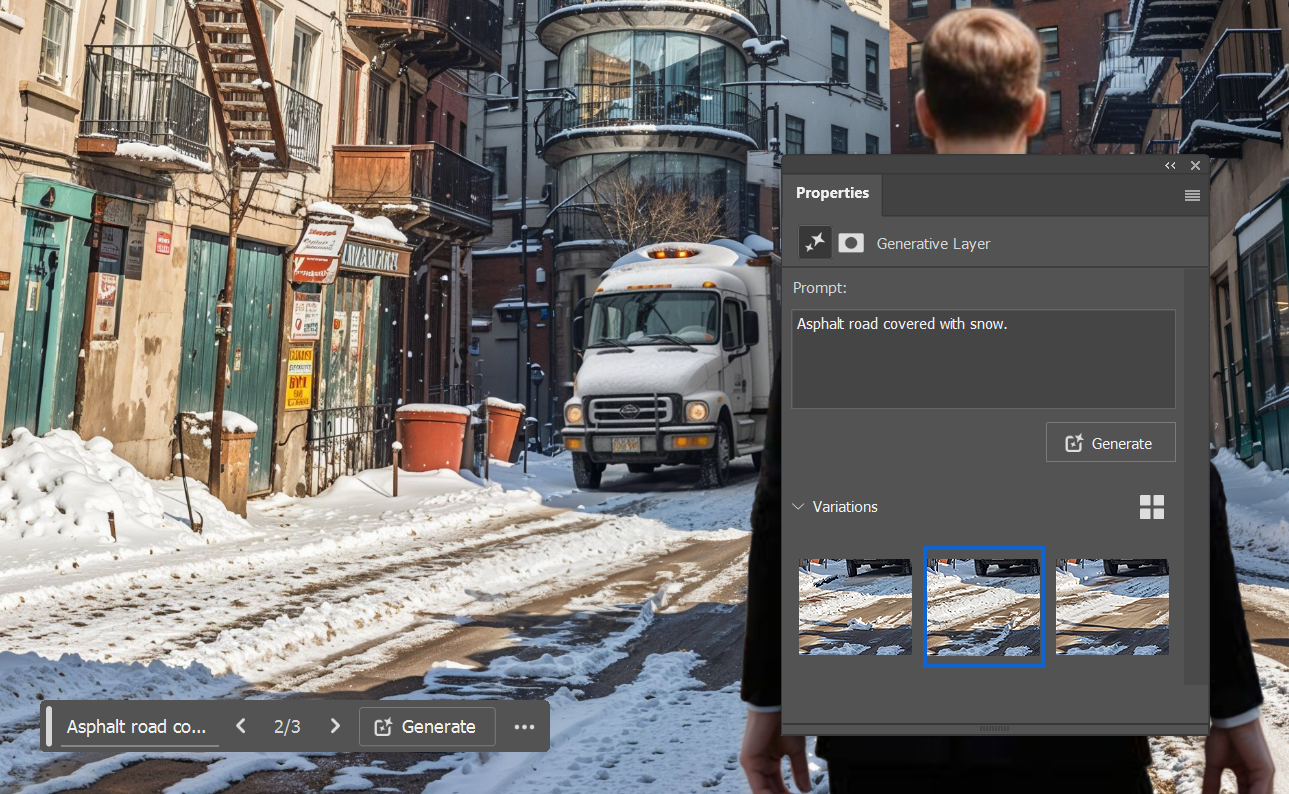
One of the most basic usages of generative AI in Photoshop is the Generative Fill functionality. Make a selection of anything in your image, select Generative Fill in the contextual toolbar, enter a fitting prompt to steer the process in the right direction, or leave empty to let the system itself try and make sense of the source image.
Pressing Generate starts the process, and you’ll be presented with three variations that you can choose from. If none of them work, re-generate and get three more. Once you’ve settled on one, it’ll appear as a layer with a mask in your layer stack for easy refinement.
02. Getting creative with Generative Fill
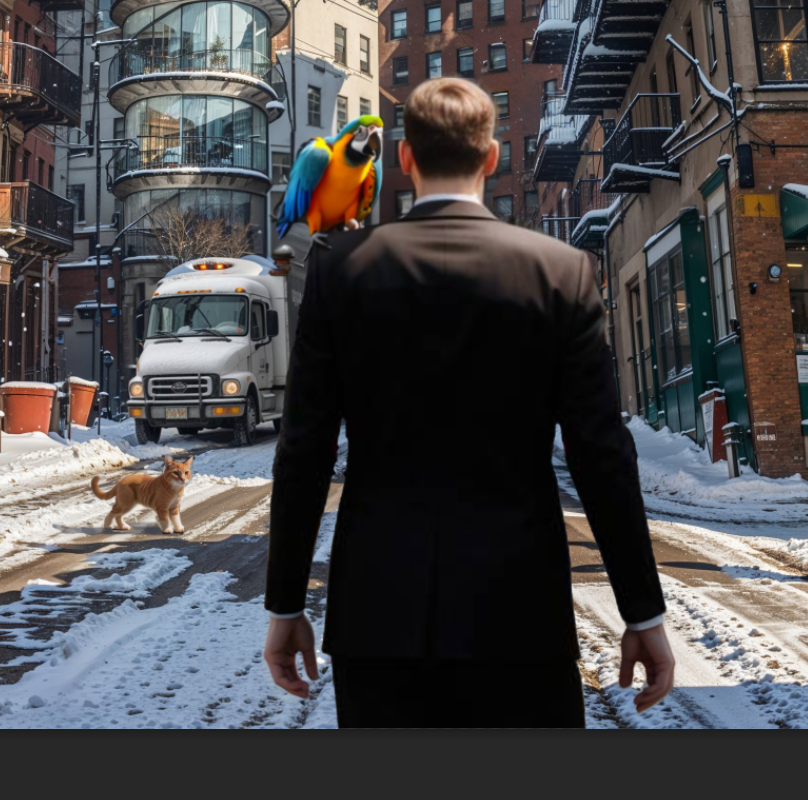
Generative Fill is not limited to filling out small areas of your image. You can get as creative as you want here and generate anything from a parrot on the shoulder of a character in your image to a mountain inside a glass ball.
You can also use Generative Fill on a completely empty canvas, but in general, the quality seems to be lower here than if you generate new images with the Firefly web interface.
03. Fixing inconsistencies with AI
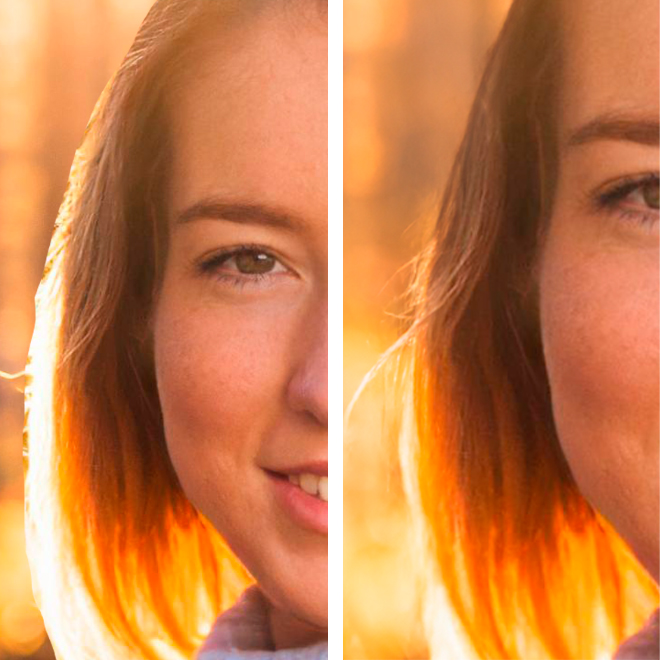
Another really useful way to use Generative Fill is to fix inconsistencies. It could be areas that are missing pieces, elements of low quality, or as I’m demonstrating here, rough selection edges.
In my example, I’ve made a simple cutout of a character and pasted it on a background. This leaves an ugly, sharp border on the hair of the character. By making a selection around the edge of the hair, using the prompt 'Hair on a windy day,' and filling it using Generative Fill, Photoshop smooths out the transition and makes it look much more natural and convincing.
04. Using Generative Expand
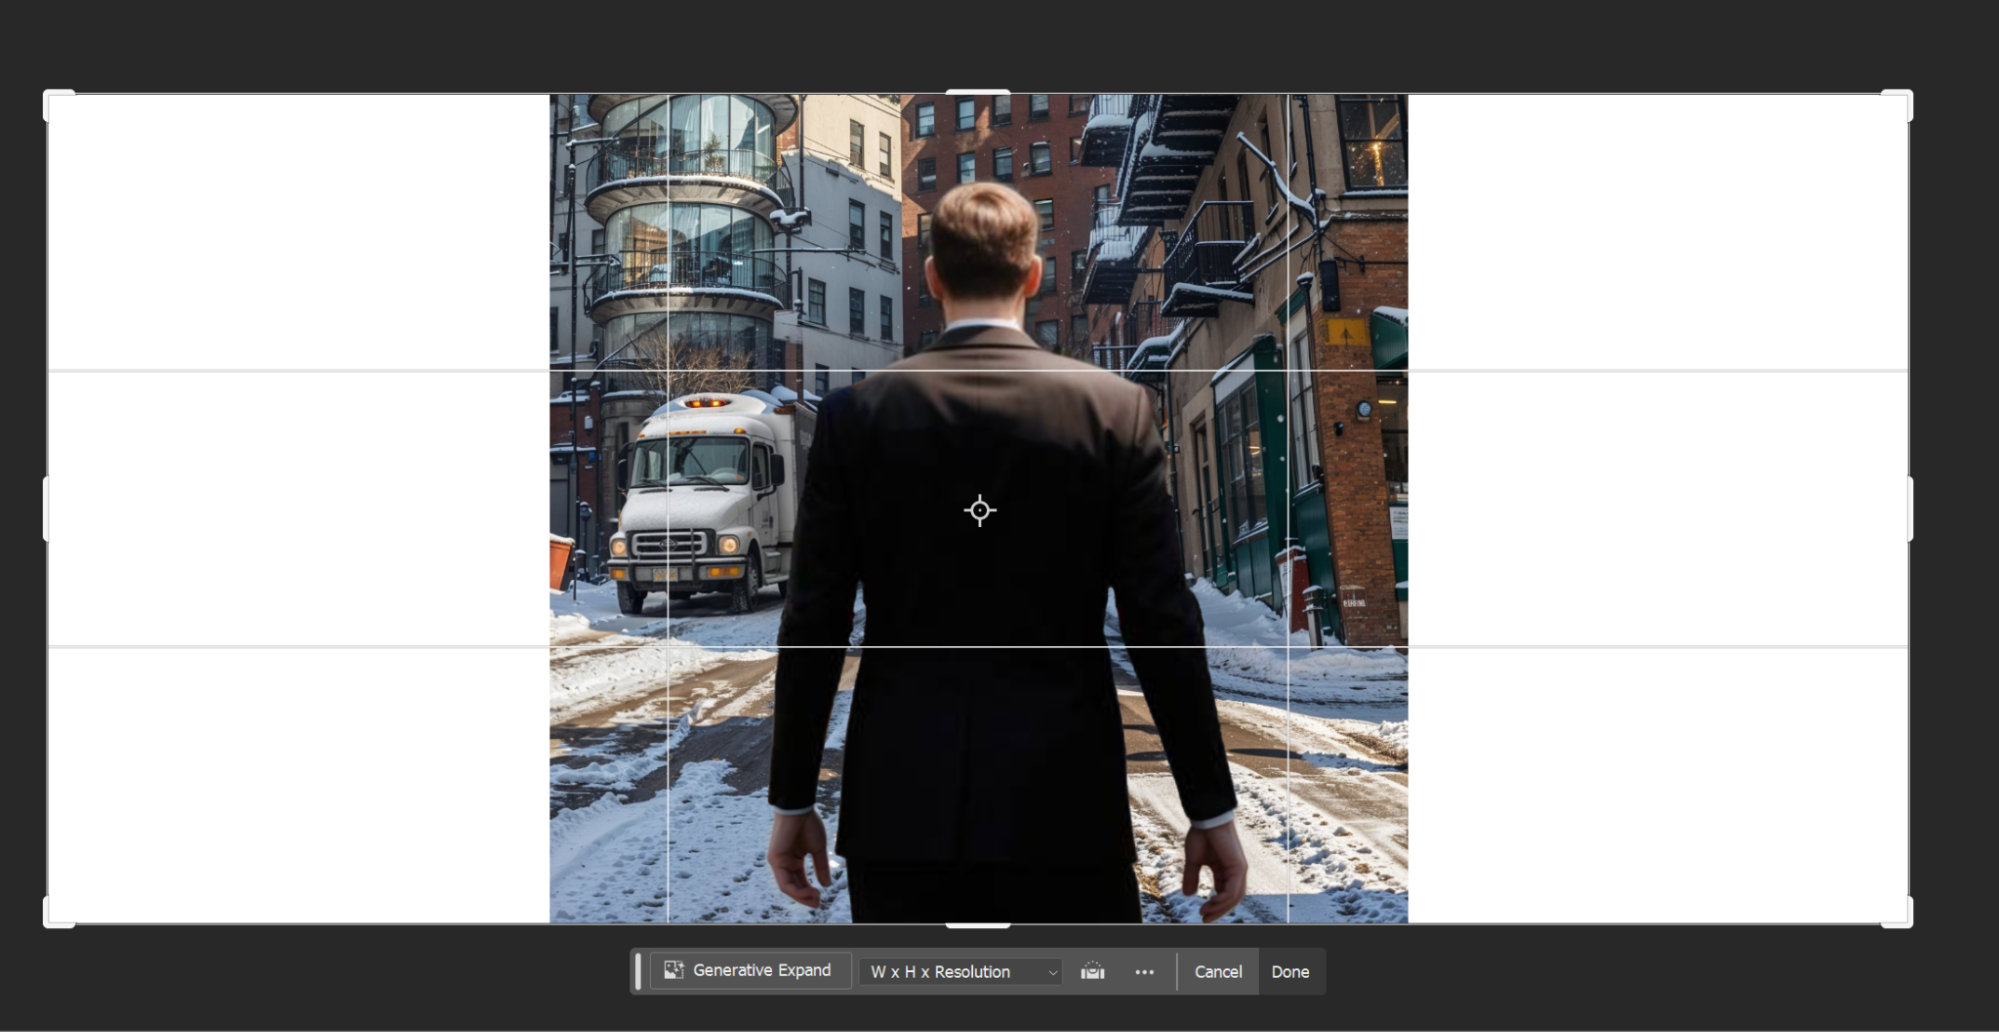
Generative Expand is the evolved version of the Photoshop's Cropping tool, and it’s very powerful, not only for expanding the format of your photos but also for more stylised work.
The results aren’t always perfect in themselves, but combining it with Generative Fill or the Remove tool often allows you to use the resulting generated image without too much manual work. As with Generative Fill, you can work with or without a prompt.
05. Fixing details with the Remove tool

The Remove tool is probably the most straightforward to use tool in the palette of new generative AI-assisted tools in Photoshop. It’s like using the Spot Healing Brush tool, but it can more effectively reconstruct the removed area of your image, with more coherent results that take the surrounding image into consideration.
You’ll often find that you need to brush over an area of your image multiple times before the results is as you’d expect, especially for more complex removals.
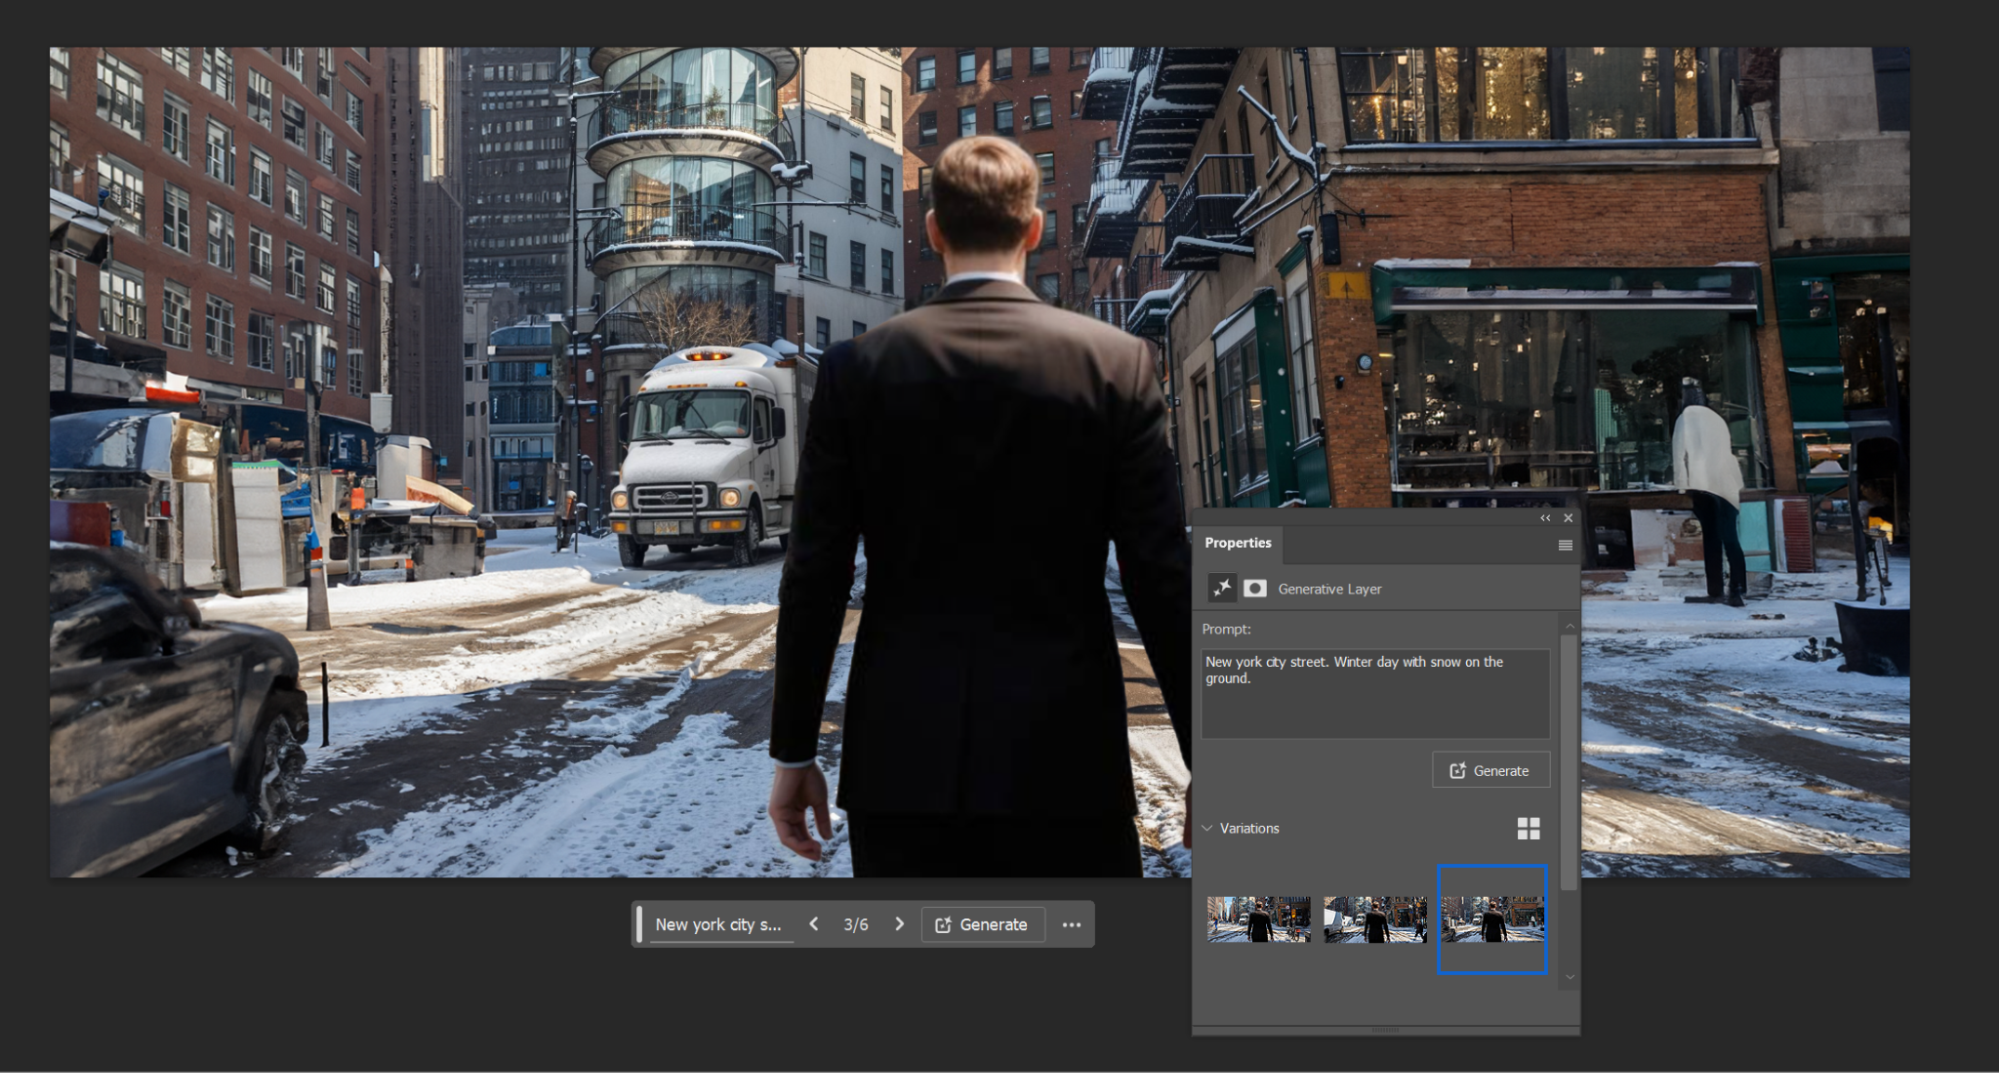
06. Restyling an image

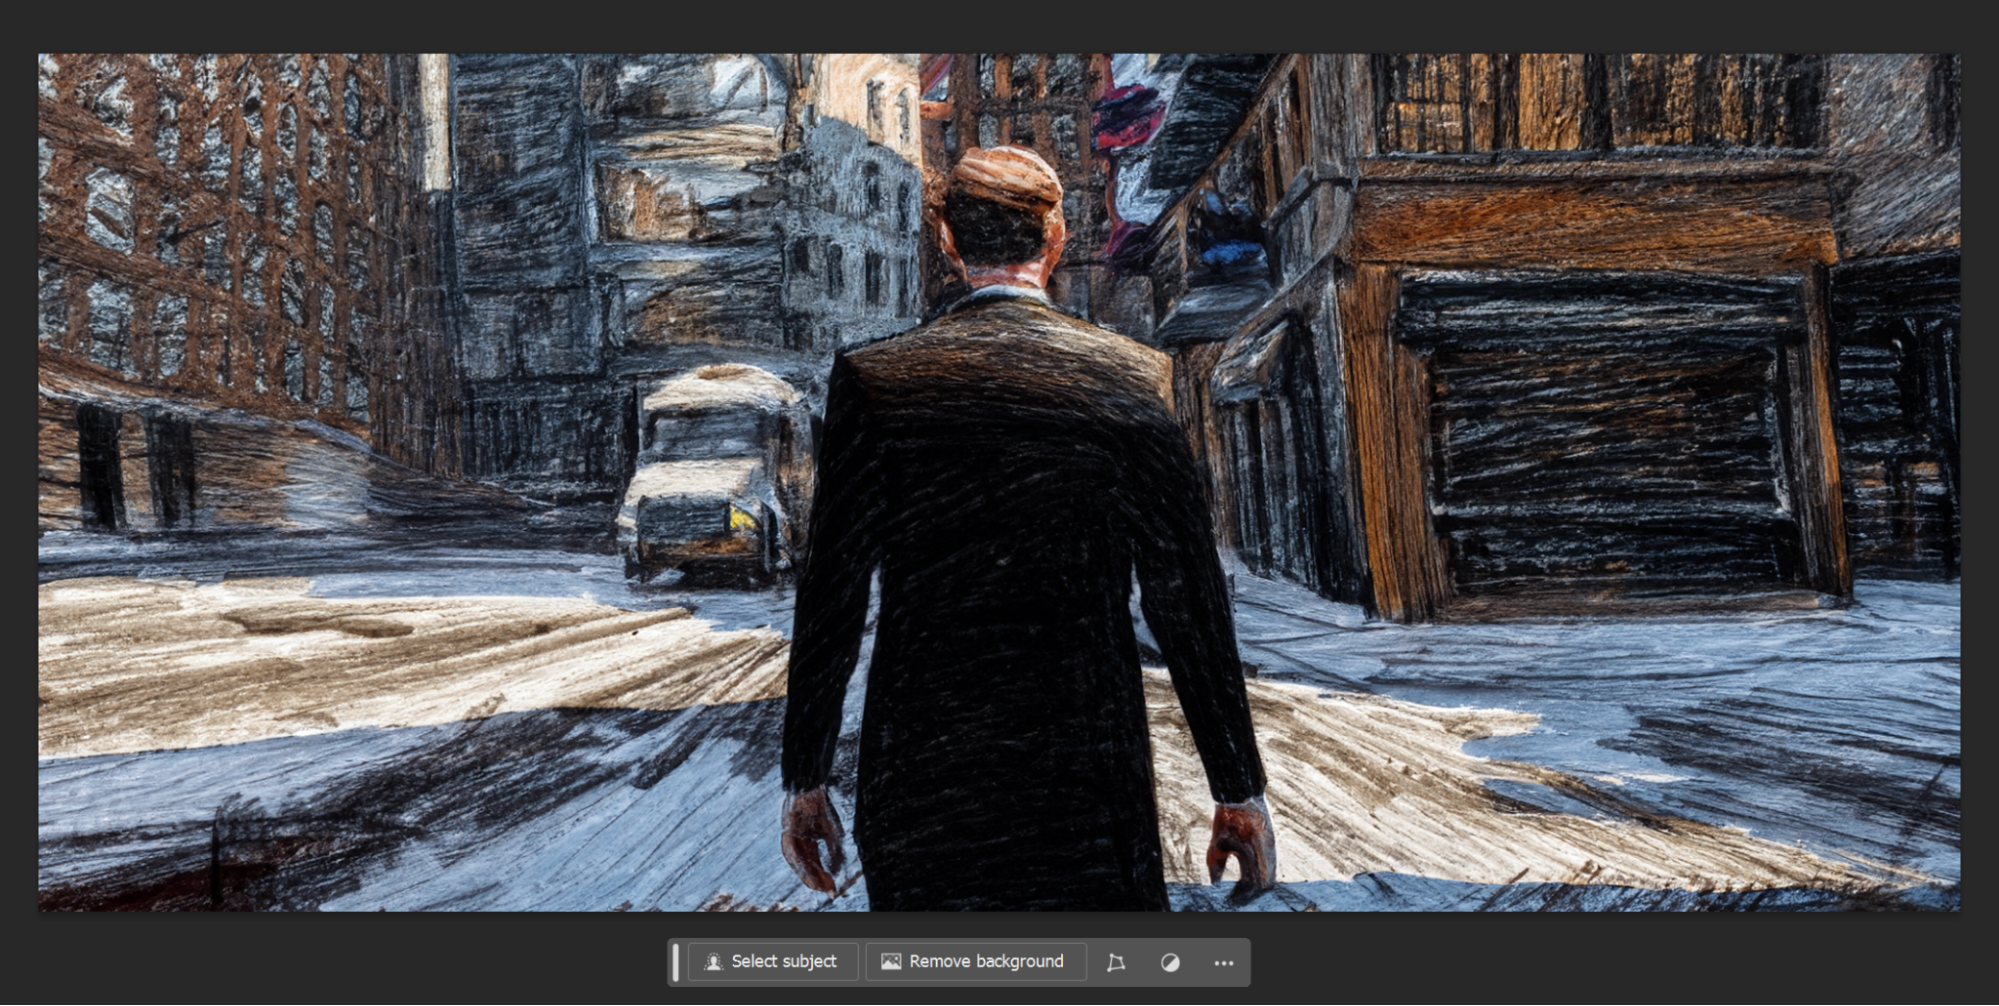
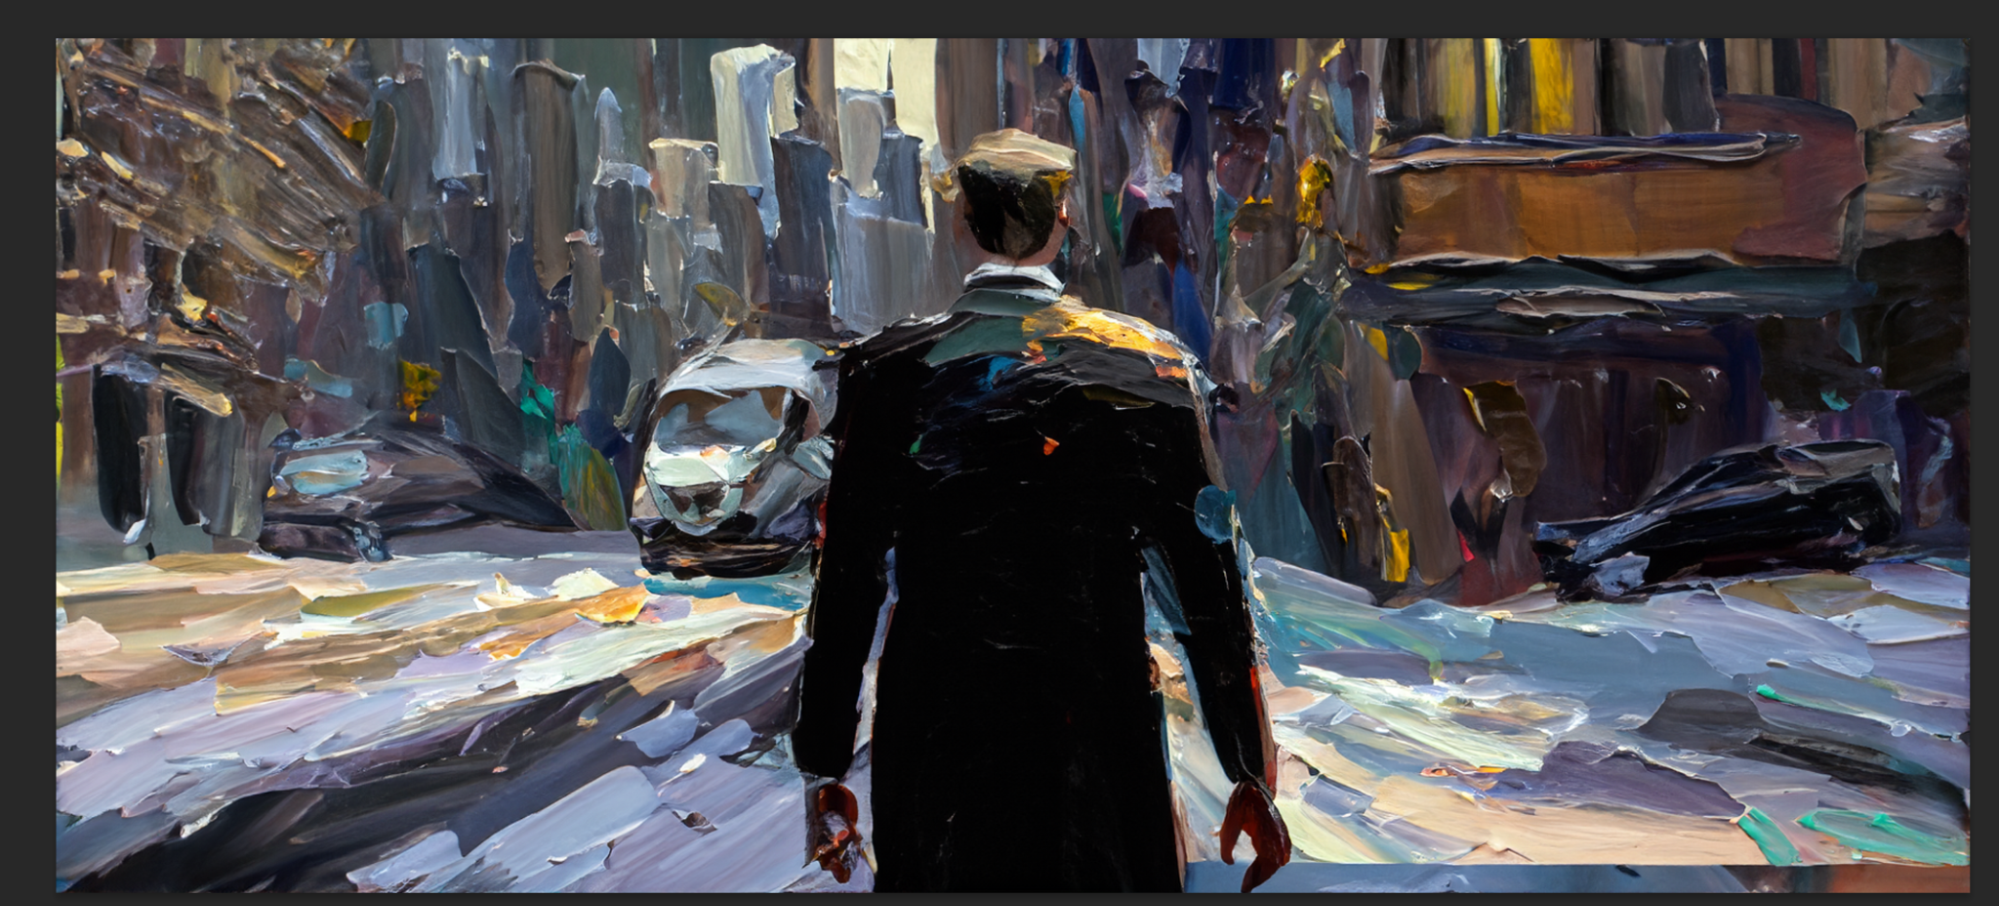
A lesser-known use of Generative Fill in Photoshop is the ability to completely restyle parts of or the whole image you’re working on. To do so, enter Quick Mask mode, shortcut (Q) on your keyboard. Pick a roughly 50% black / grey and fill the mask.
Now exit Quick Mask again, and you’ll now have a Transparent selection of your image. Now, select Generative Fill and write the style you want to transform your image into. Try Pencil Drawing as an example or come up with your own prompts.
07. Using Firefly's Structure Reference
A new and exciting addition to the Firefly (Adobe's online AI toolset) is Structure Reference. This enables you to define an underlying structure for a generated image.
This has been possible with other generative AI tools like Stable Diffusion through the use of Controlnet. Structure Reference offers a stronger sense of control over the generative process, which is very important if gen AI is to be a strong creative ally for artists.
Structure Reference works with any type of image, but a very strong sense of structure in your source image makes it easier for Firefly to understand what it’s dealing with.
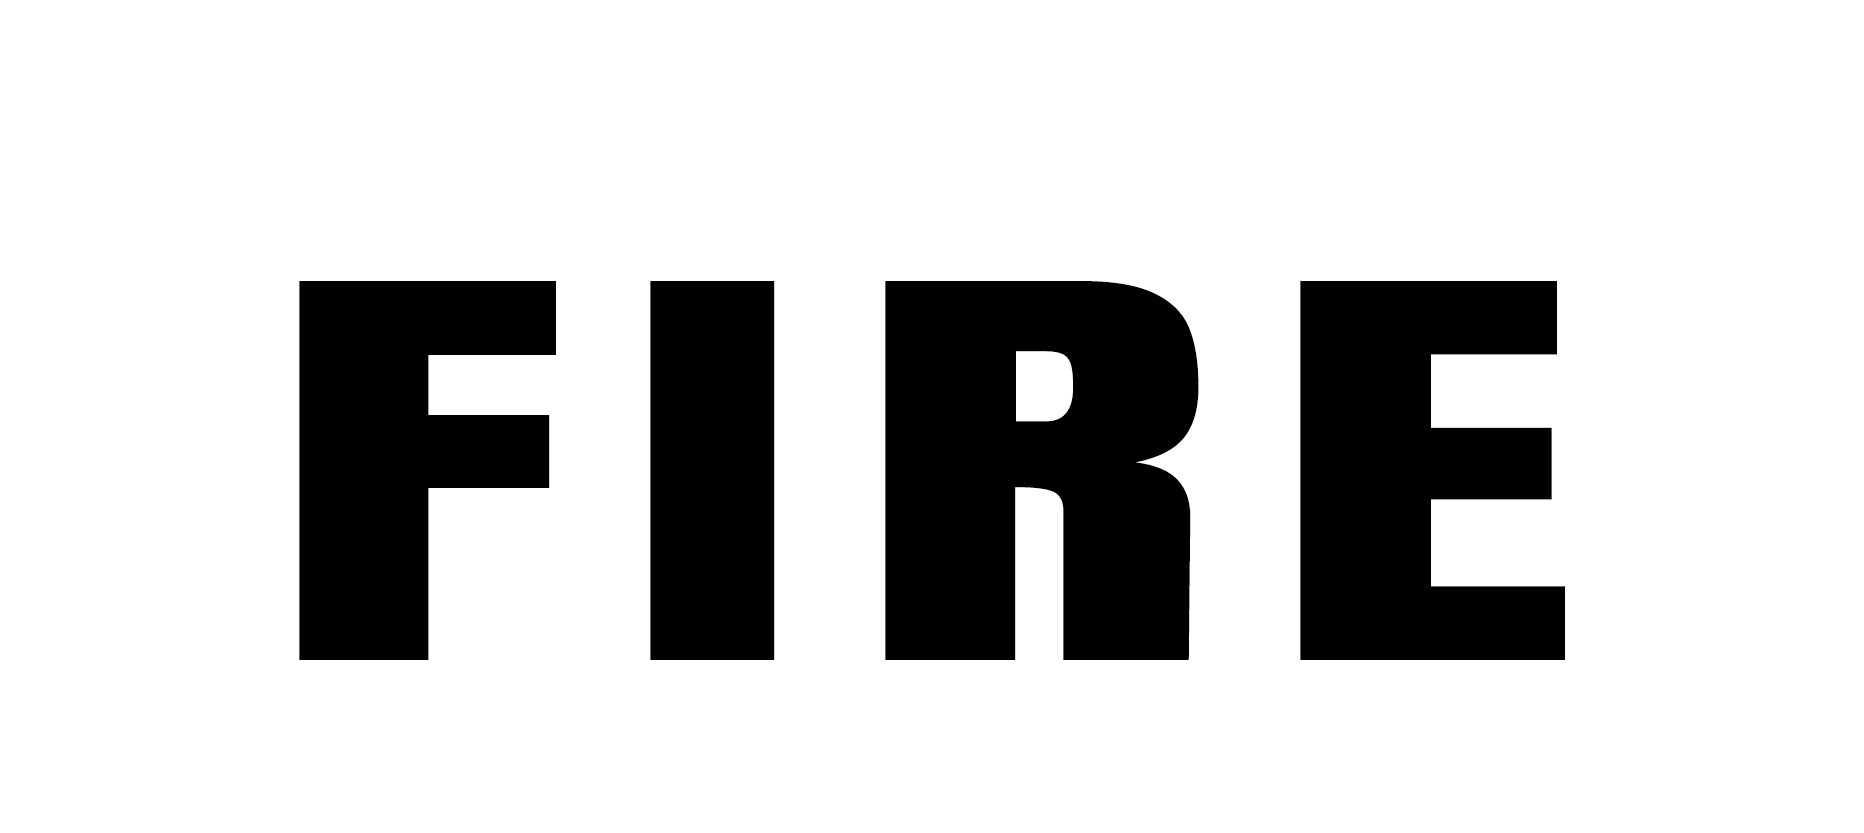
Start by making a simple template like the one in the example above, and below I'll show how Structure Reference can be used to develop it into something else…
08. Refining Structure Reference


Let’s generate an image based on my Fire template. Select Structure Reference in Firefly and upload your image. In this case, we want the fire effect to look like real fire, so we change the content type from Art to Photo.
Play around with any of the settings here, as there are many different options for steering your generation in the right direction. For example, I write "Fiery letters, fire, flames, hot, realistic".
Start the generation, and you’ll get four variants after a short while. Try out various prompts to see how powerful this technique is using your own art.
If you want to try these tools for yourself, Adobe Firefly is free to use online while the features are in Adobe Photoshop 2024. Why not upgrade your kit too? Read our guides to the best drawing tablets and the best Apple Pencil alternatives.