When creating your own cosplay props, costumes, and accessories, a 3D pen is an excellent tool to have. I had no idea how useful a 3D pen could be until I started making cosplay masks and helmets using one of the best 3D printers on the market – the Bambu Lab X1 Carbon.
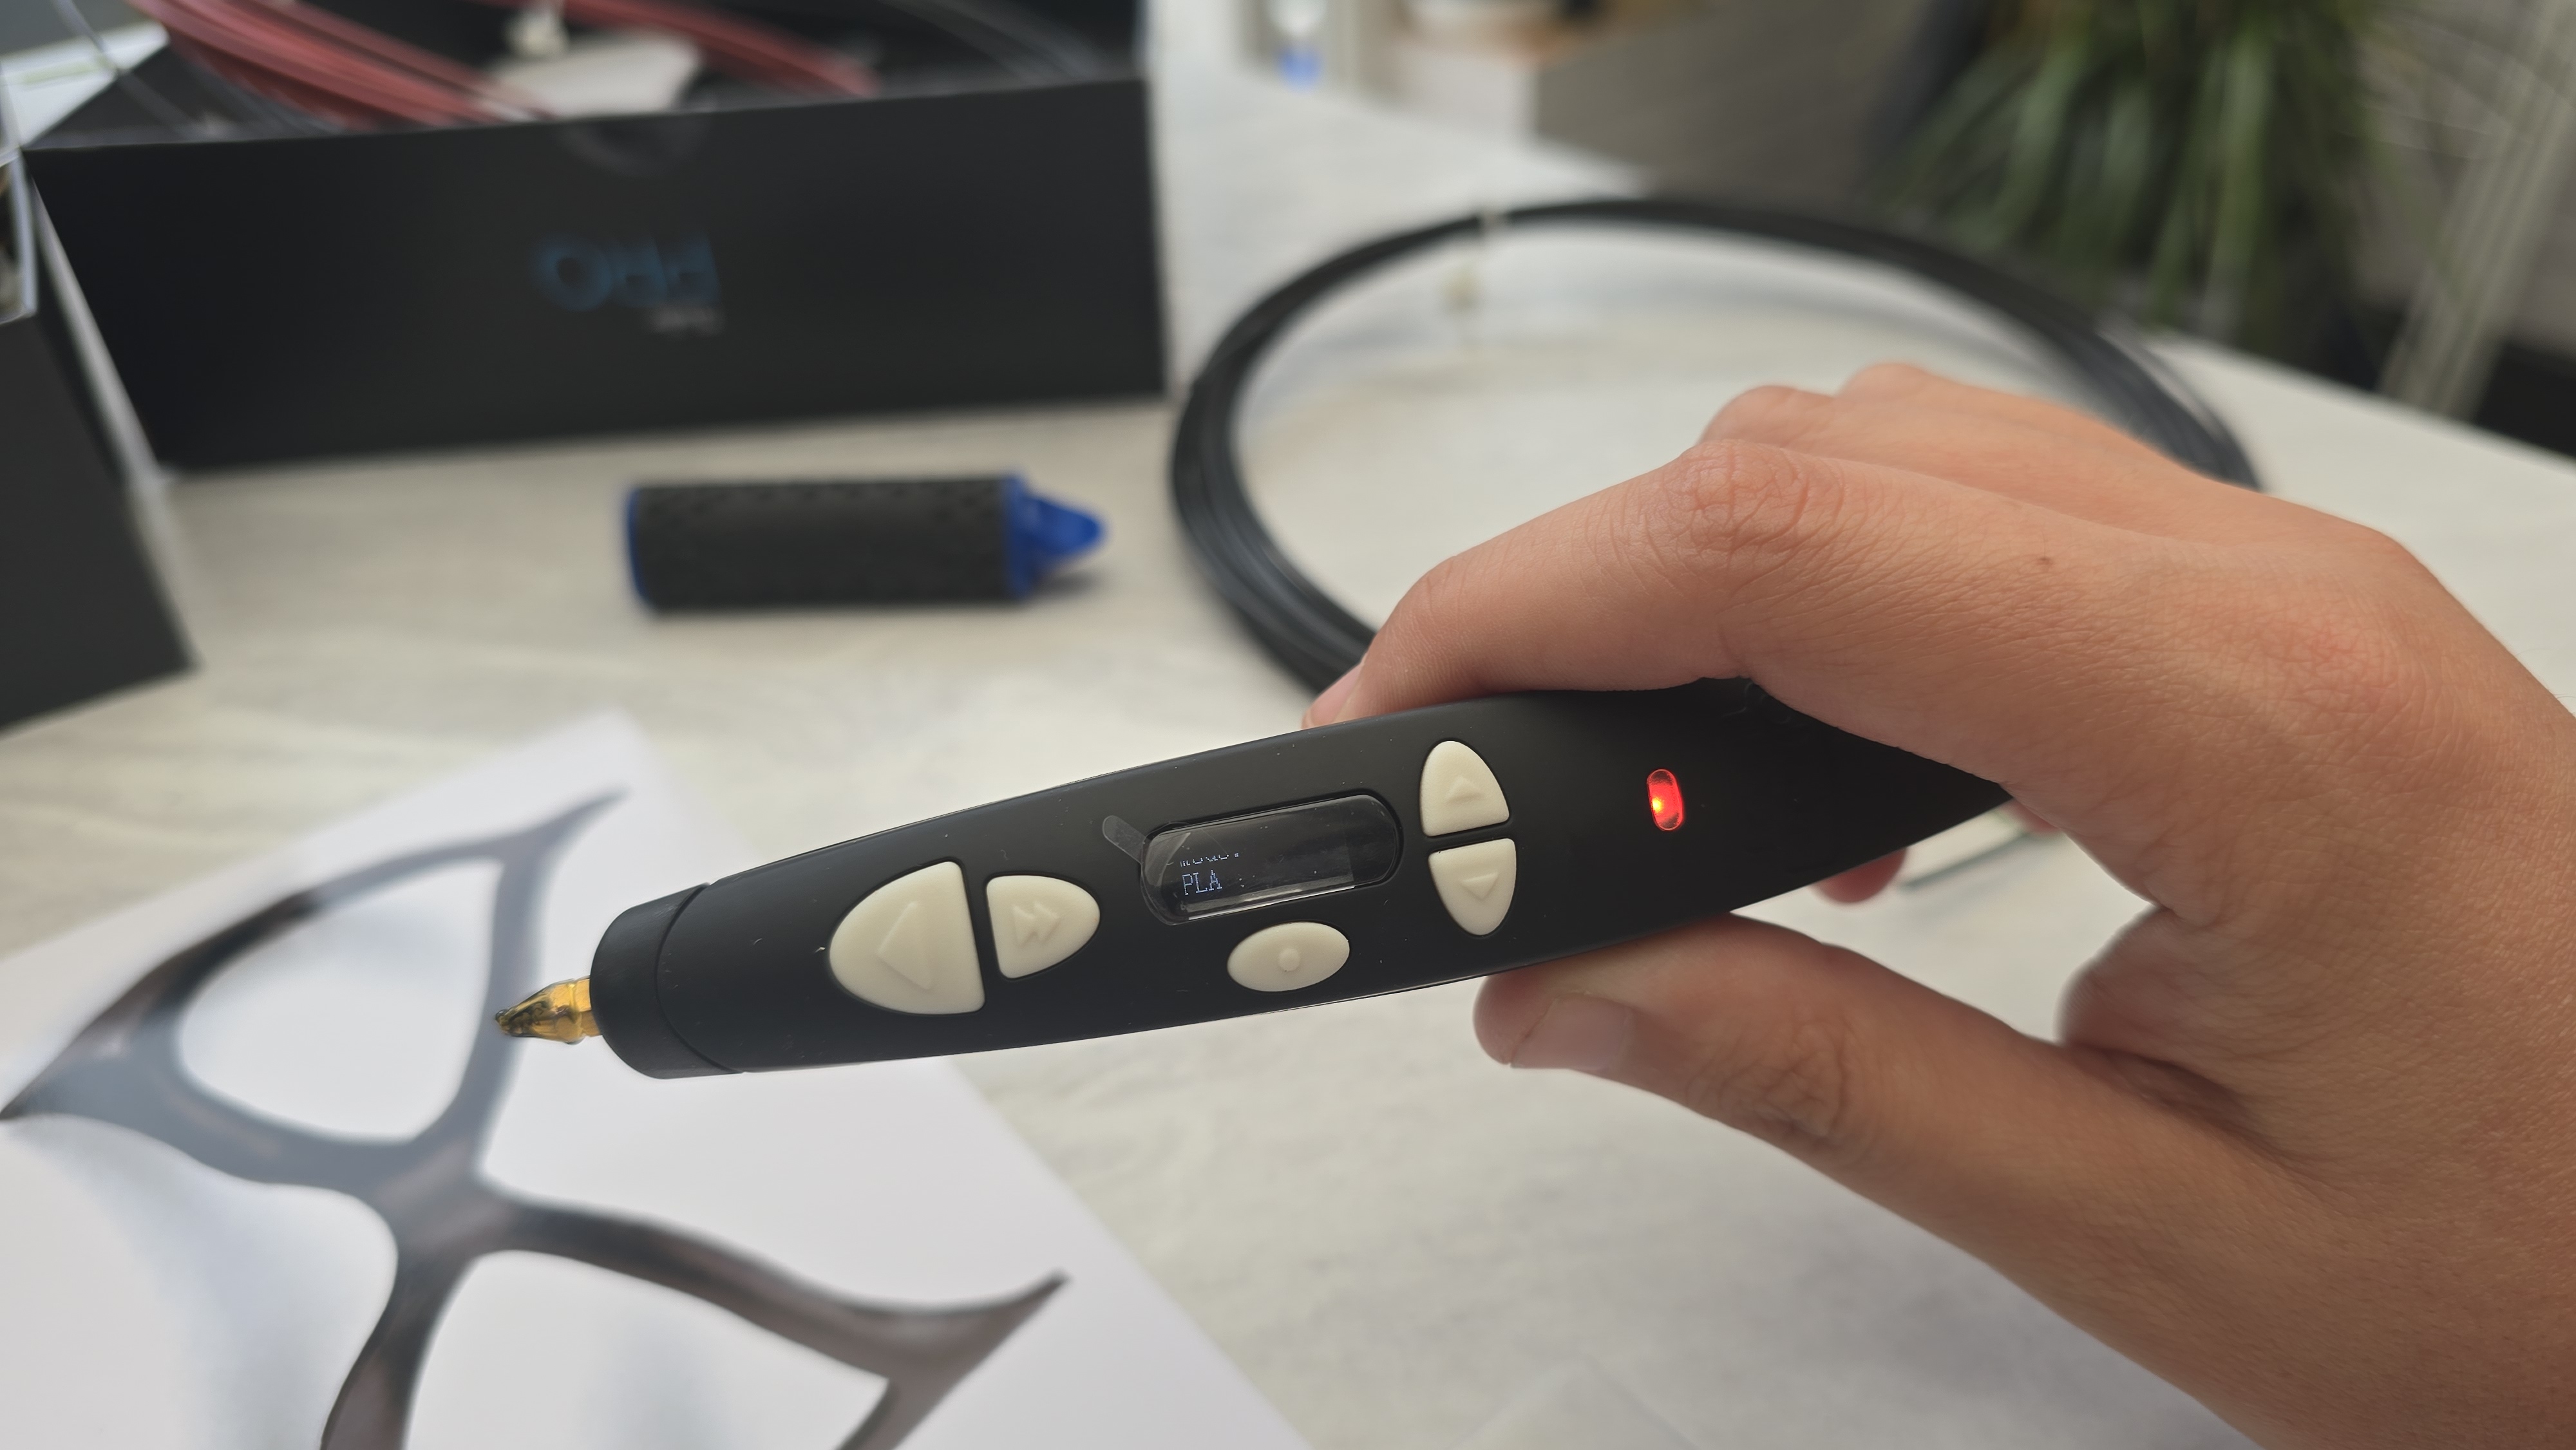
Having tested a handful of some of the best 3D pens, I think these creative tools are hugely overlooked. Plenty of consumers believe that 3D pens are only for kids (thanks to poor marketing), and can't seem to grasp the concept of how a 3D pen might be used for bigger projects. For example, the 3Doodler PRO 3D pen is intended for professionals, and after using it for the past month, I really think this 3D pen is a must-have tool for cosplayers and crafters.
I spoke with the CTO and Co-Founder of 3Doodler, Maxwell (Max) Bogue, who shared that "3D printing pens can be a game-changer for the cosplay community. From creating accessories and weapons to constructing entire outfits, the possibilities are vast. The 3Doodler pen can also be used as a welding tool for fabric, offering an alternative to traditional sewing methods."
I'm going to be running through 5 ways that a 3D pen can be used specifically for cosplay crafting, and sharing my experience using the professional-grade 3Doodler PRO 3D pen (thankfully, this one hasn't caught fire yet).
1. Filling in webbing
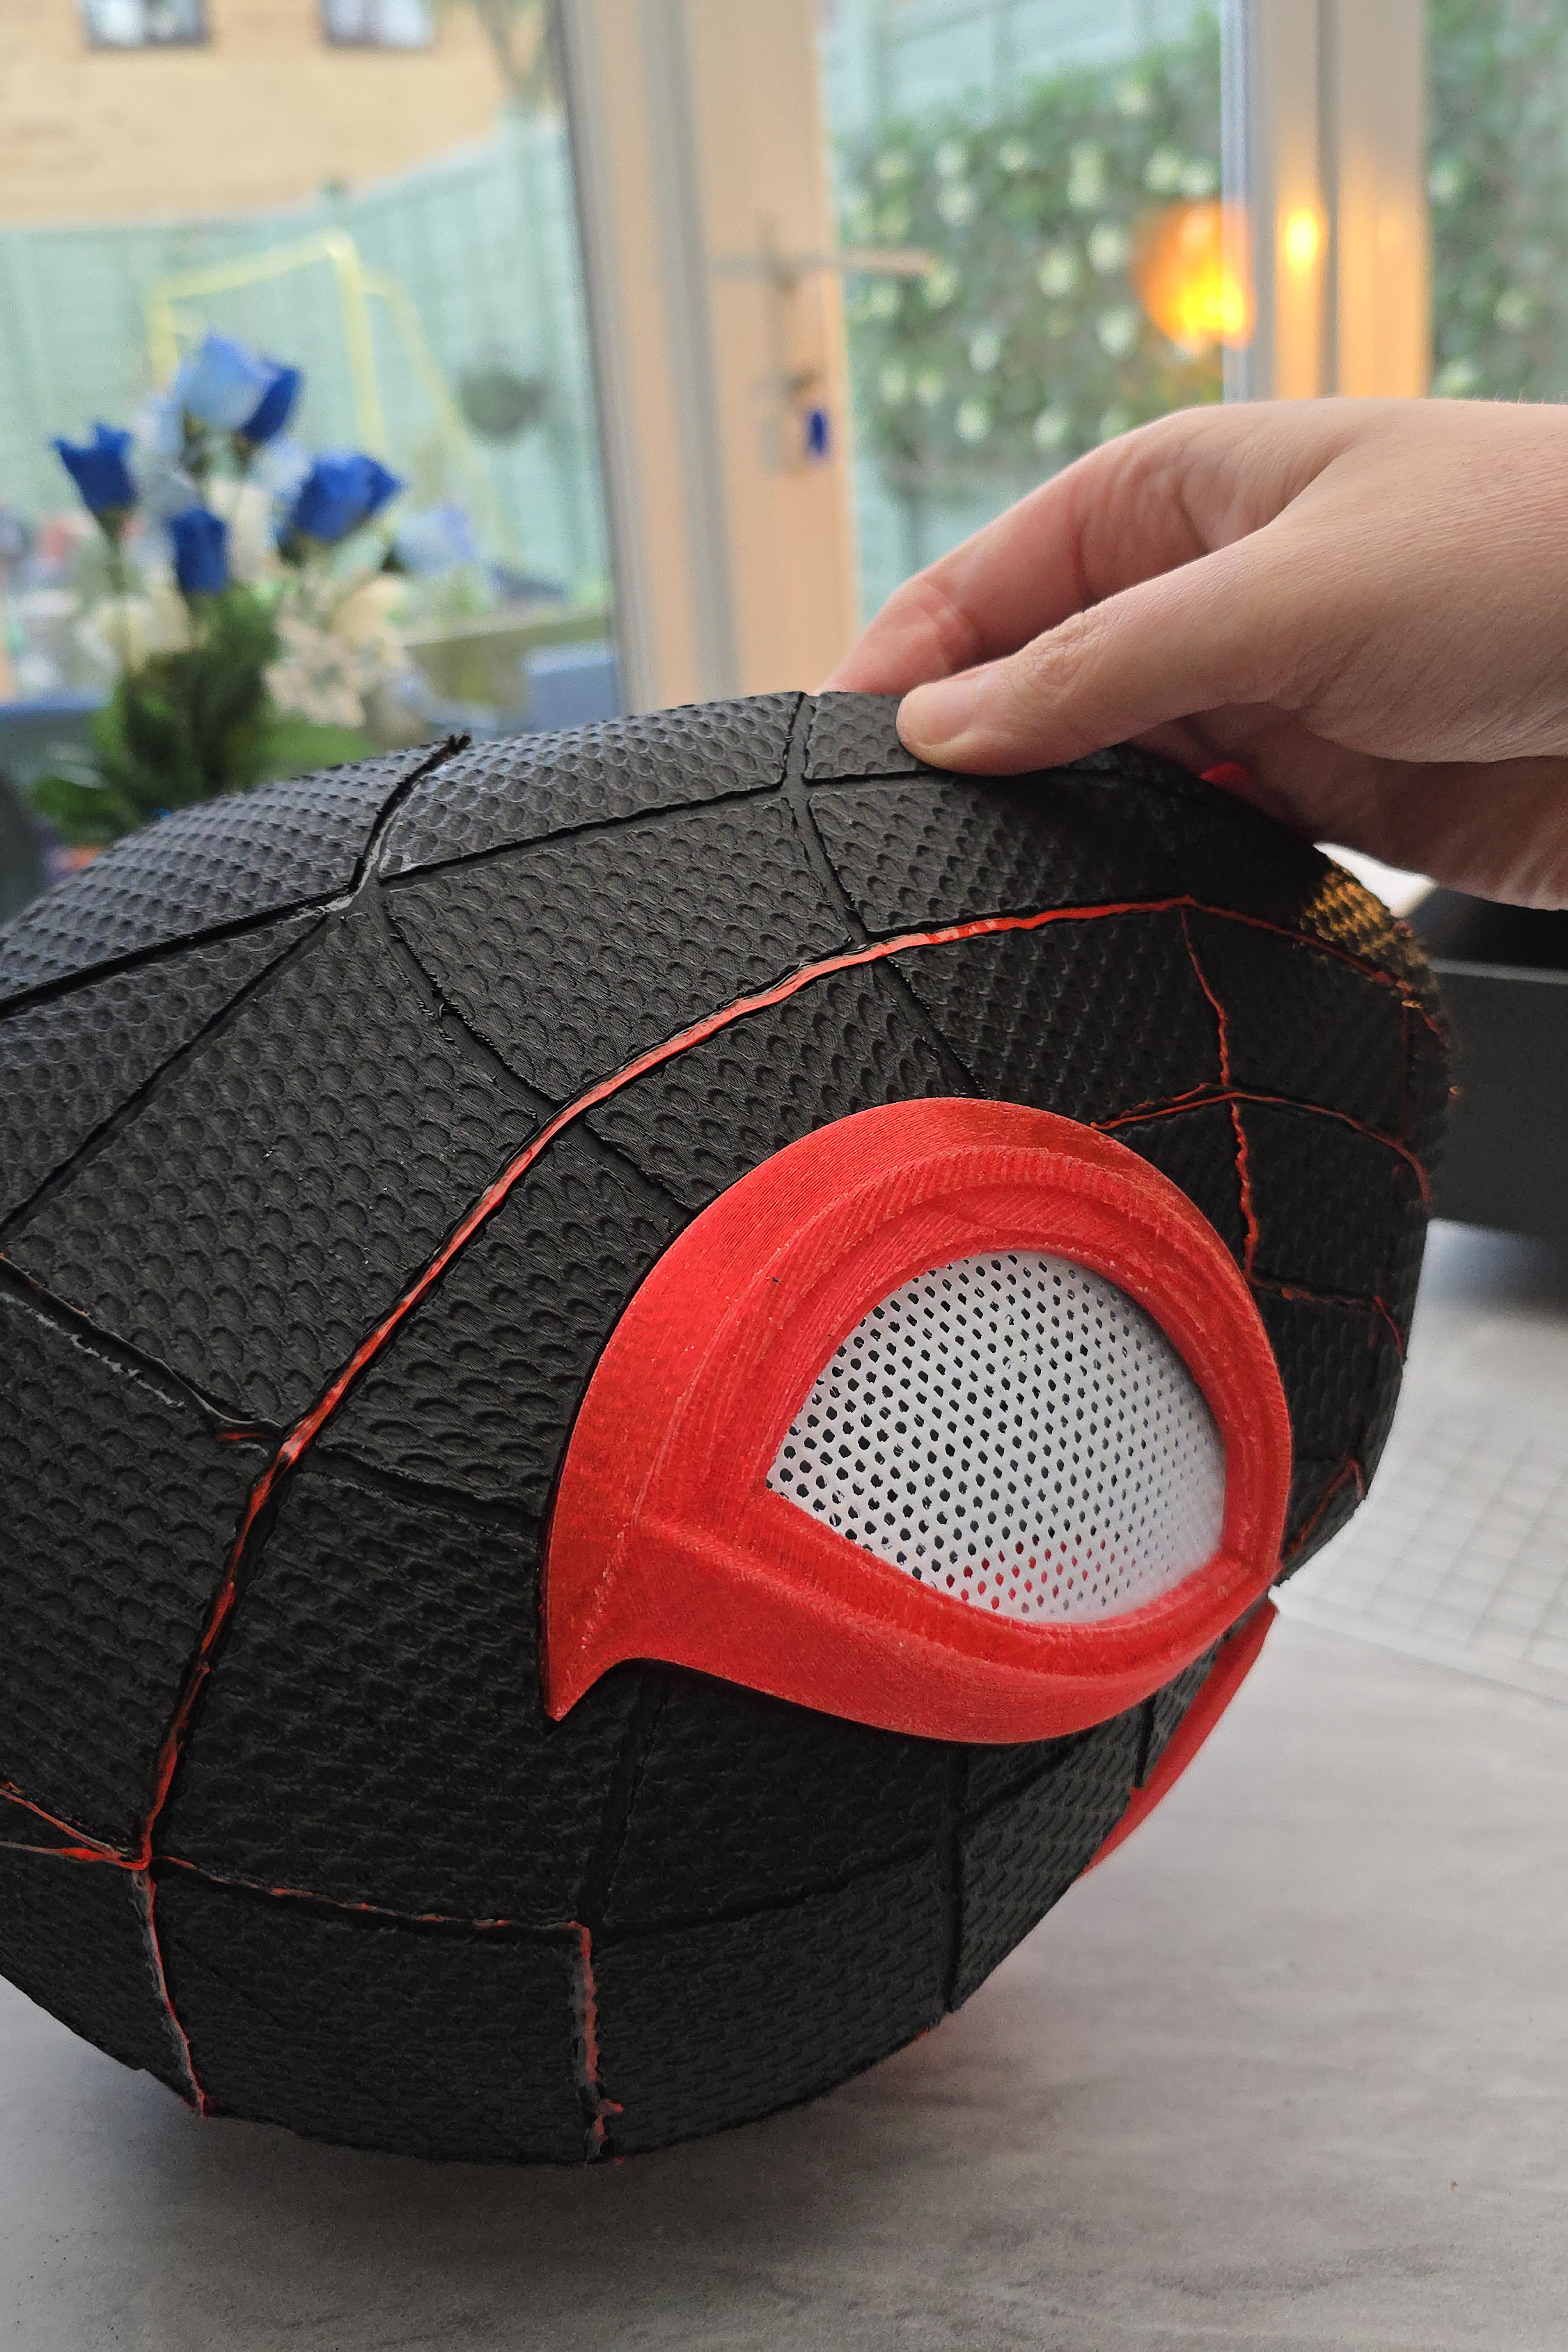
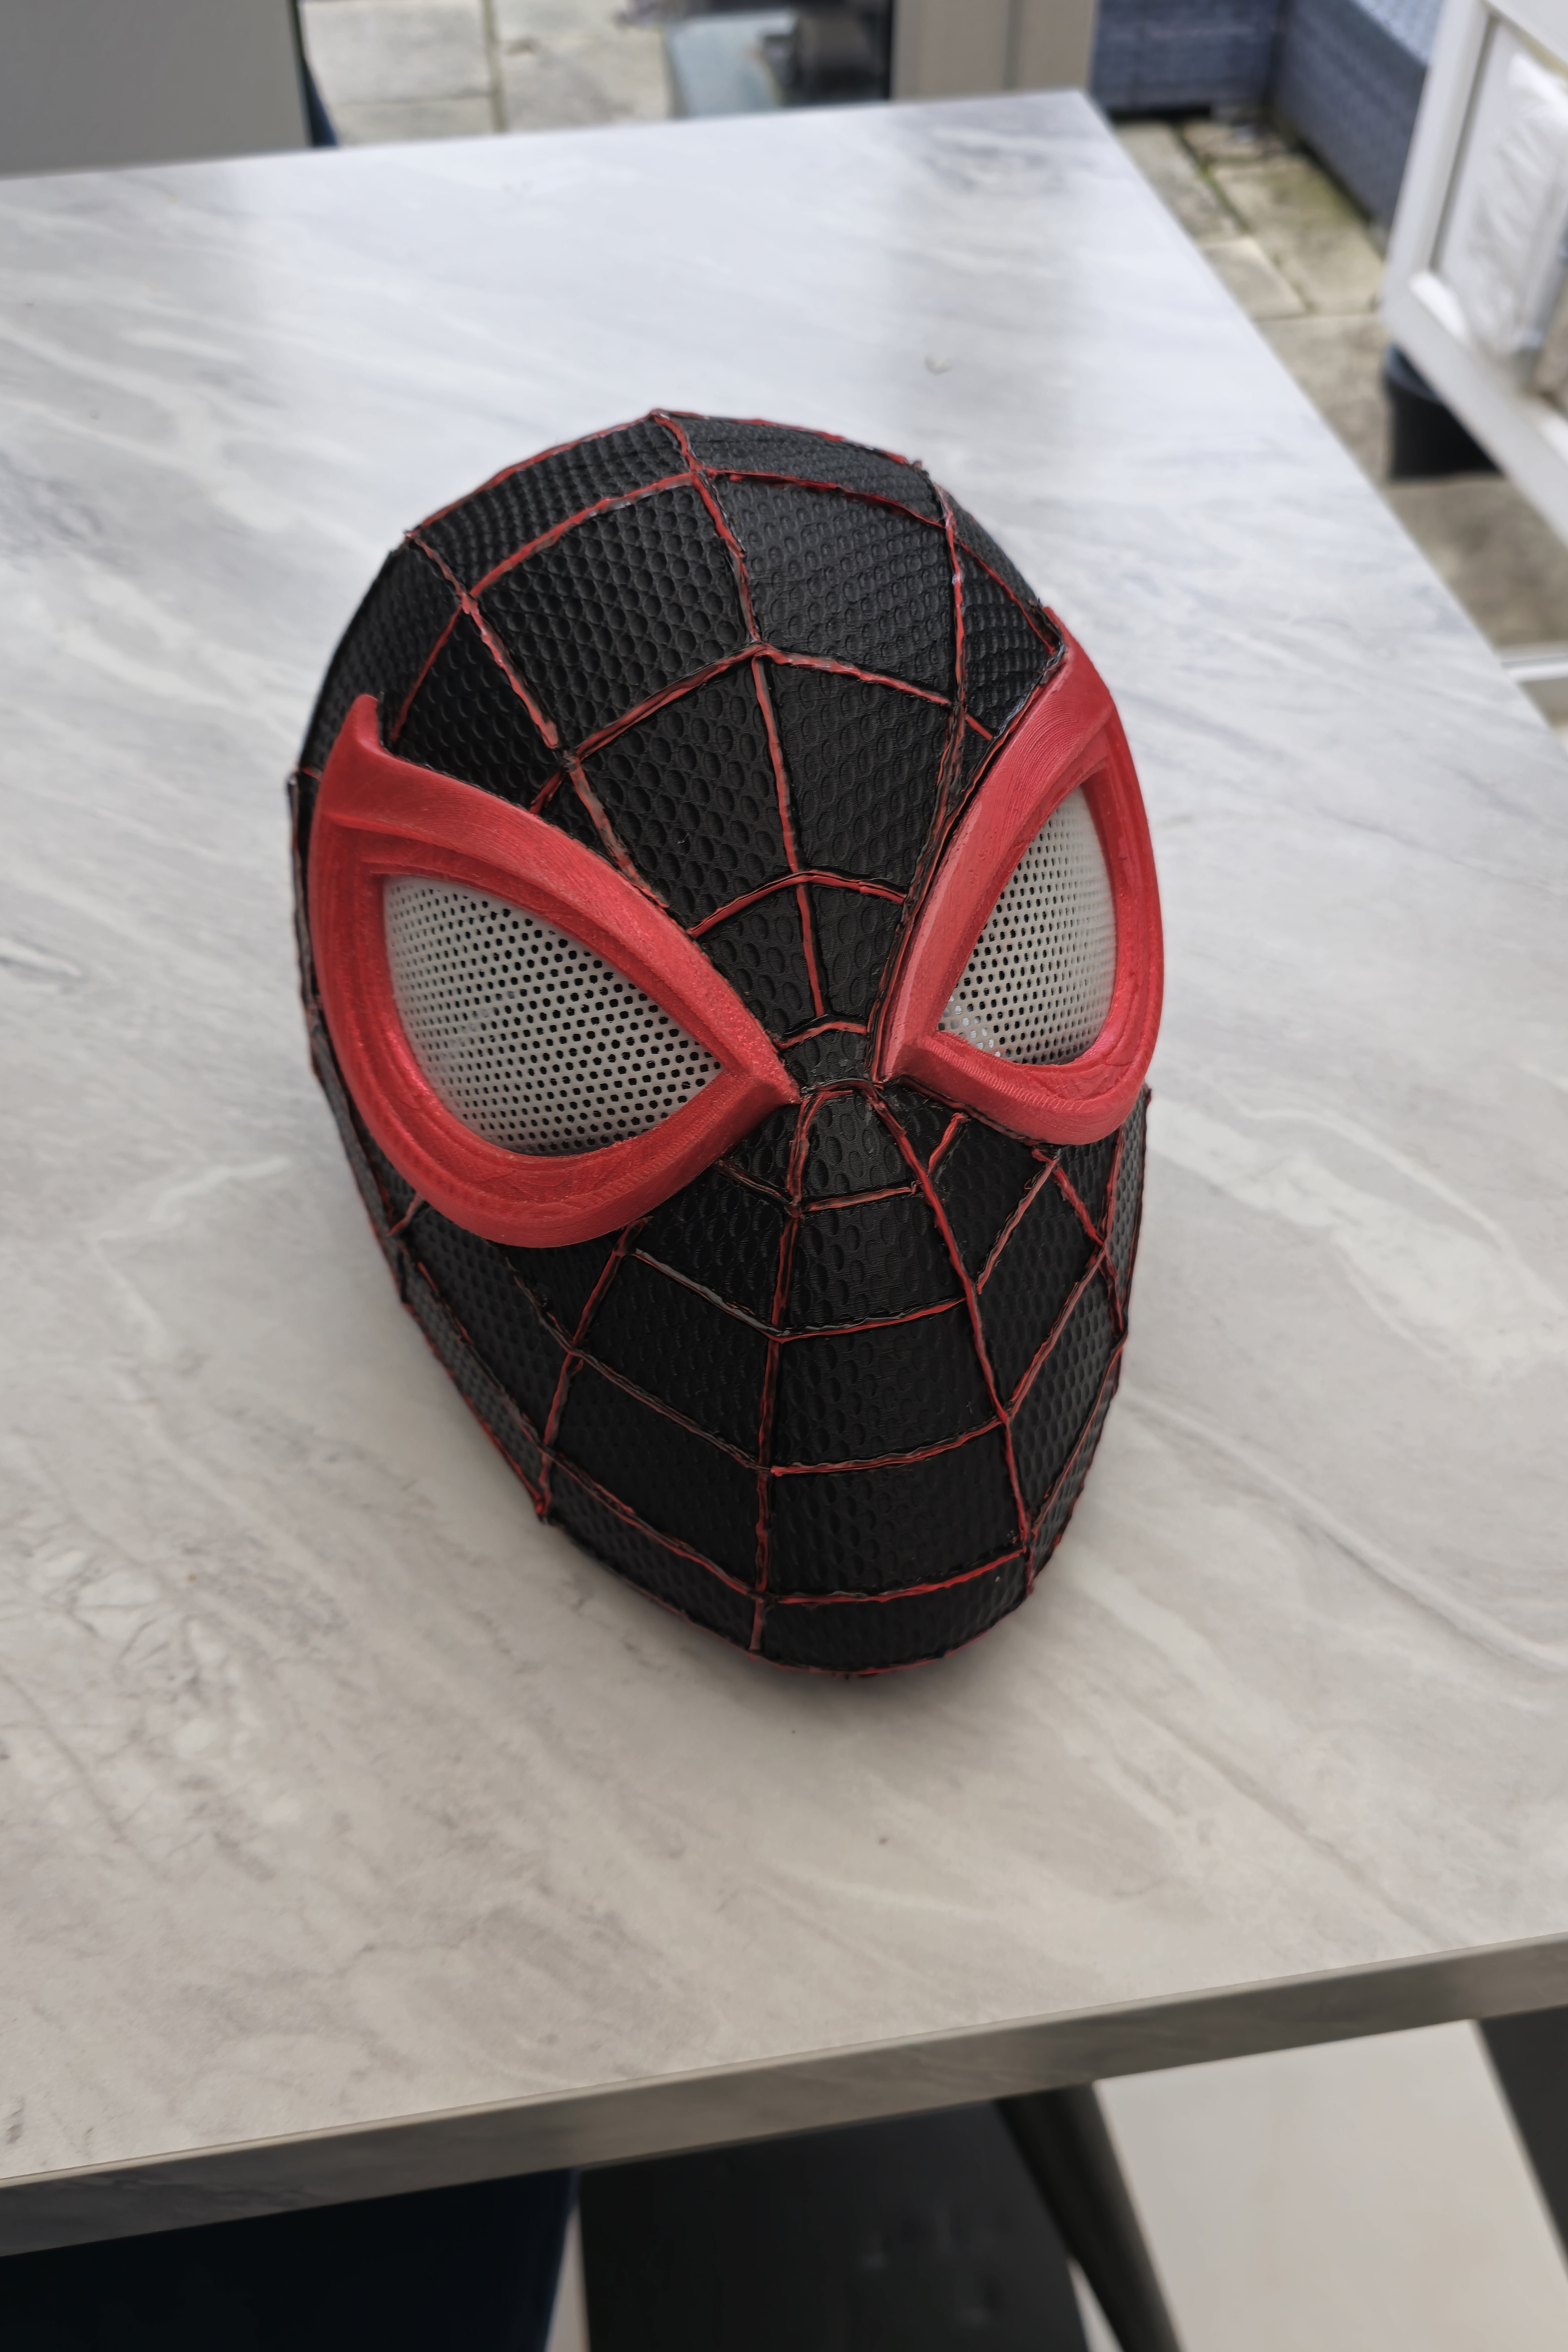
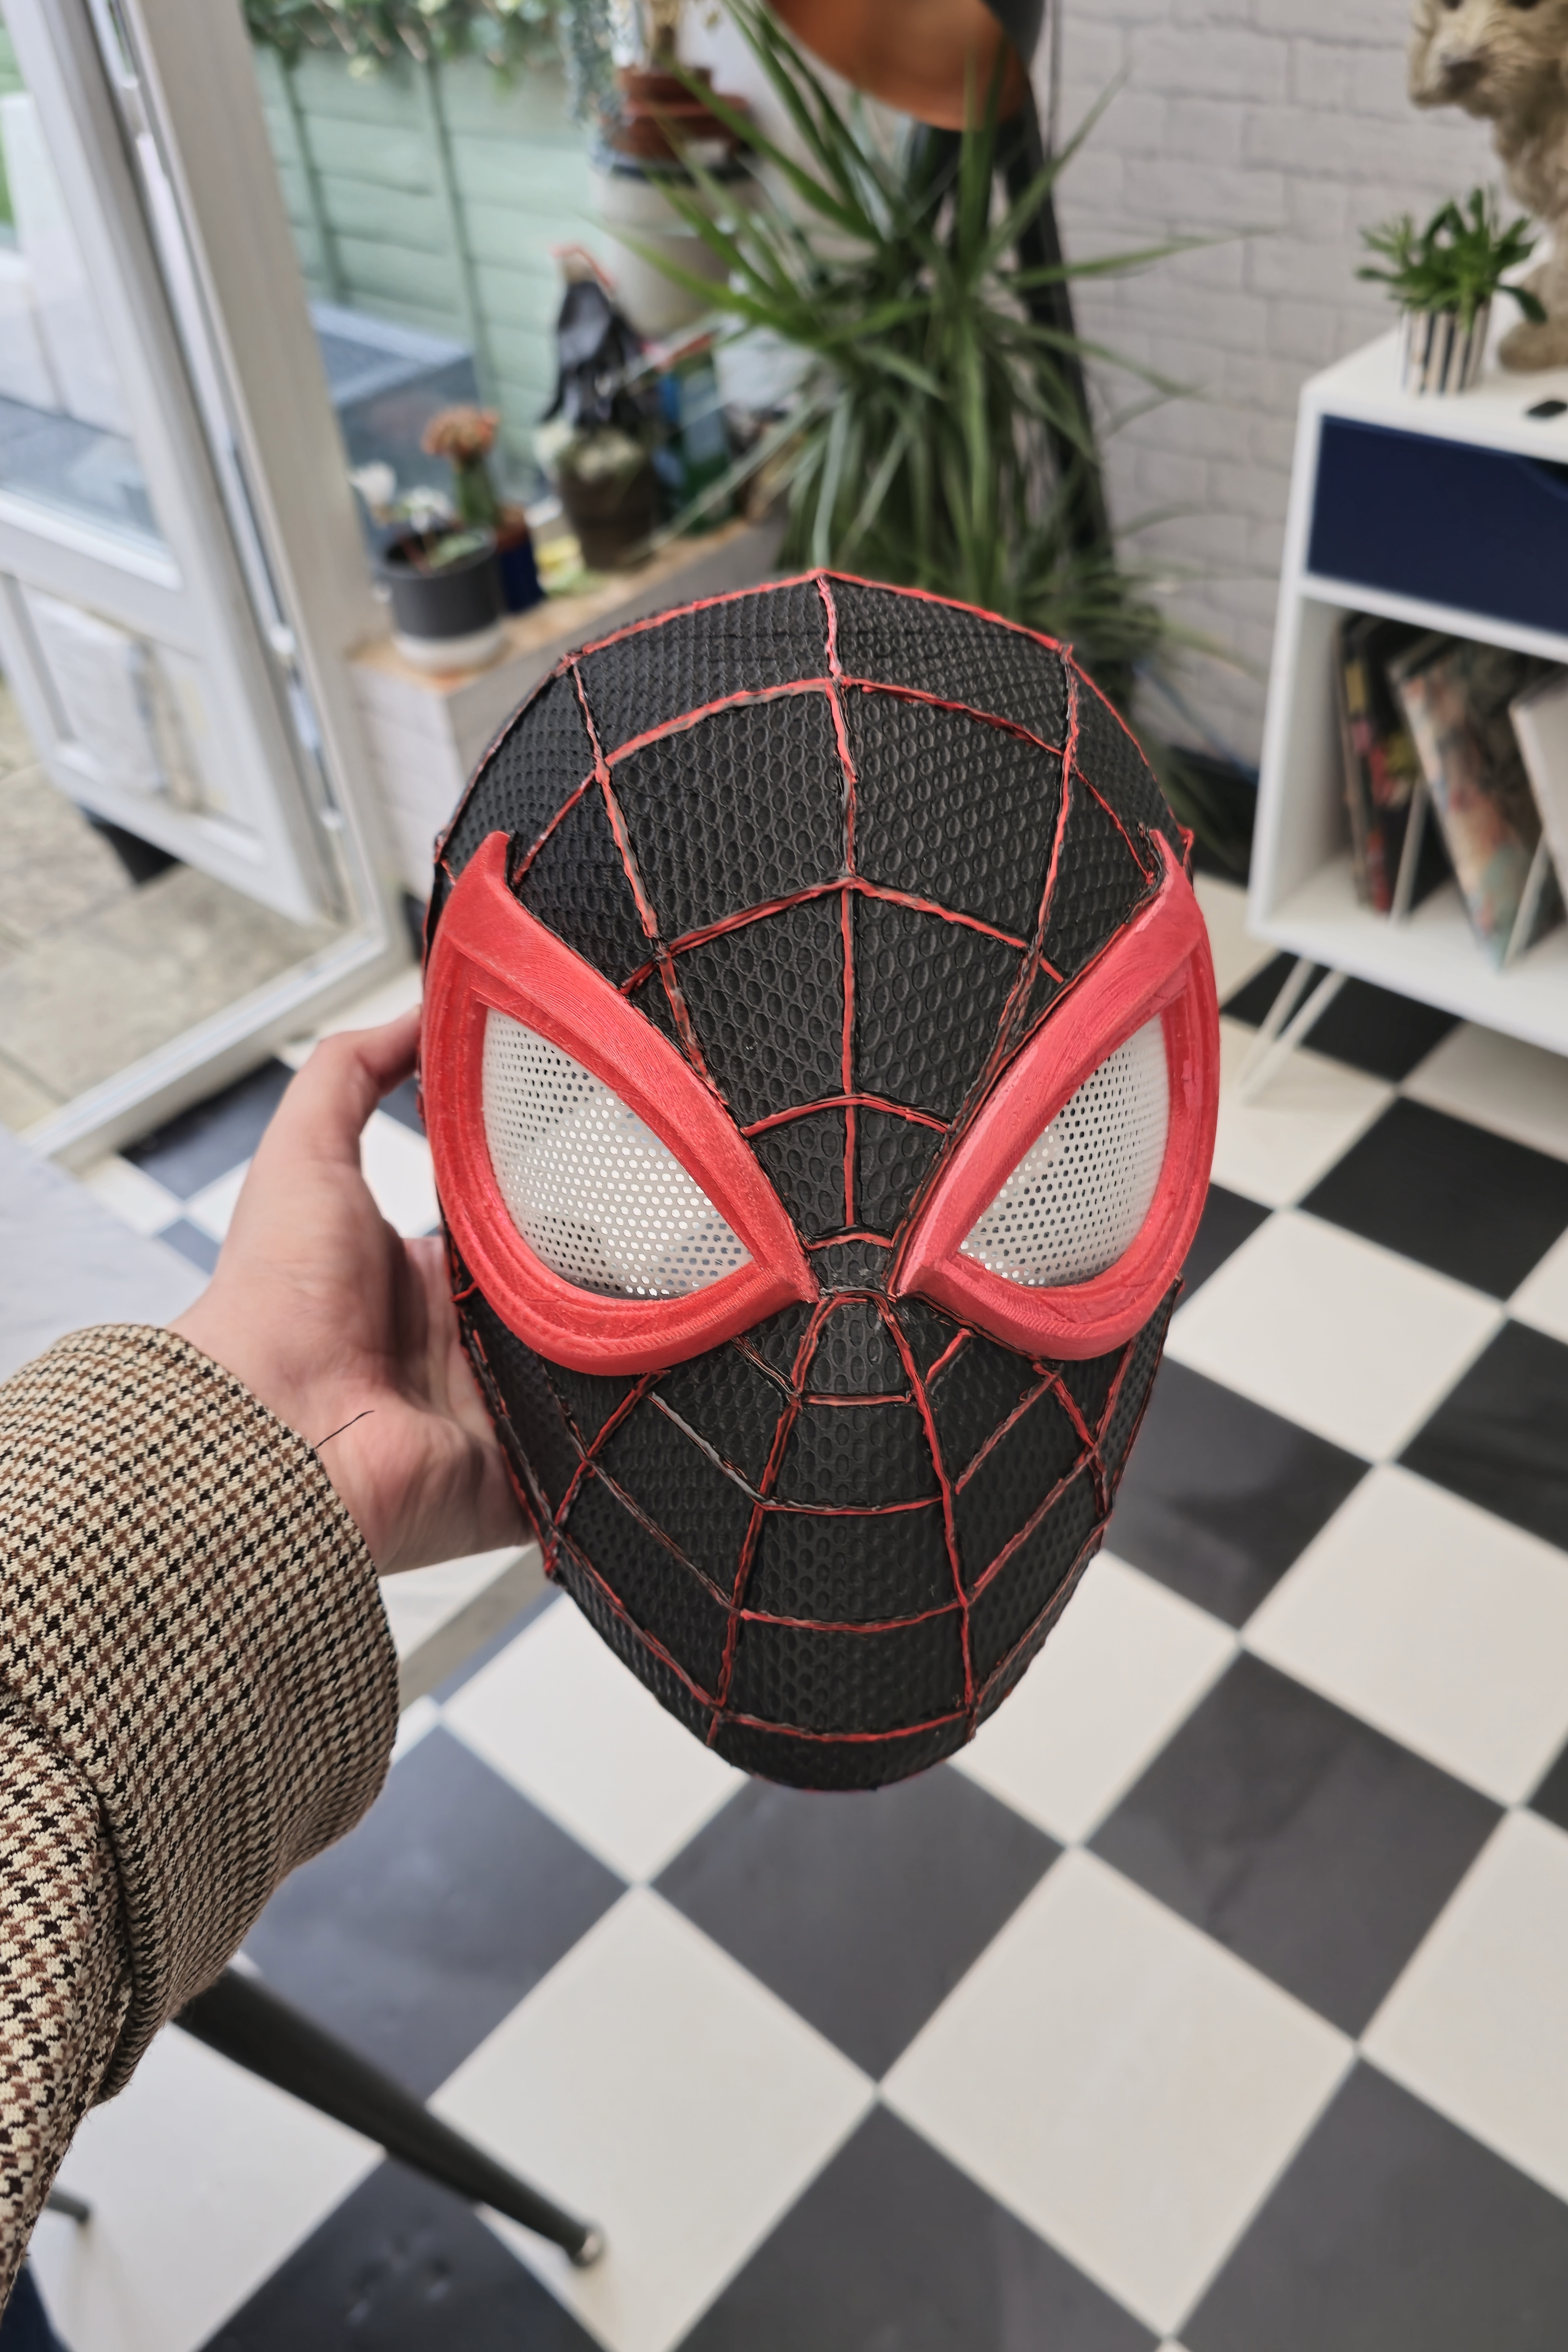
The first use I found for a 3D pen when it comes to cosplay was filling in the webbing gaps on Spider-Man helmets. This method is a little unconventional, given that creators usually opt for a simple black marker pen to get between these gaps. But I thought using a 3D pen just might add some texture to the Miles Morales helmet I was working on, and help it to stand out from the usual clean and polished Spidey masks that you often see (check out my guide on how to measure your head for cosplay if you're 3D printing masks and helmets).
Everything was going well using the 3Doodler PRO pen, although with it being early days since I started using these tools, my lines were still a little shaky, and I quickly found that you need a very still hand to master this practice.
I ended up removing several pieces of webbing using scissors and starting over in certain areas as I wasn't happy that some sections looked wobblier than others, but overall, I think this 3D pen webbing really makes the helmet stand out.
If you're working with a single-colour printed model and you're looking to rough it up a little with some weathering, then a 3D pen is excellent for adding scars, scratches, indents, and other imperfections to your cosplay mask. If you don't have the right colour filament for this, you can always add detail in the areas you want it and then spray-paint the entire model afterwards for the full effect.
While I think this Miles Morales helmet (file by Budwin 3D via MakerWorld) looks pretty cool, I definitely want to get in some more practice and get cleaner lines using a 3D pen before I give this a second attempt. In any case, it's definitely better than using an AMS (automated material system) for filling the webbing, that's for sure.
2. Patching up prints
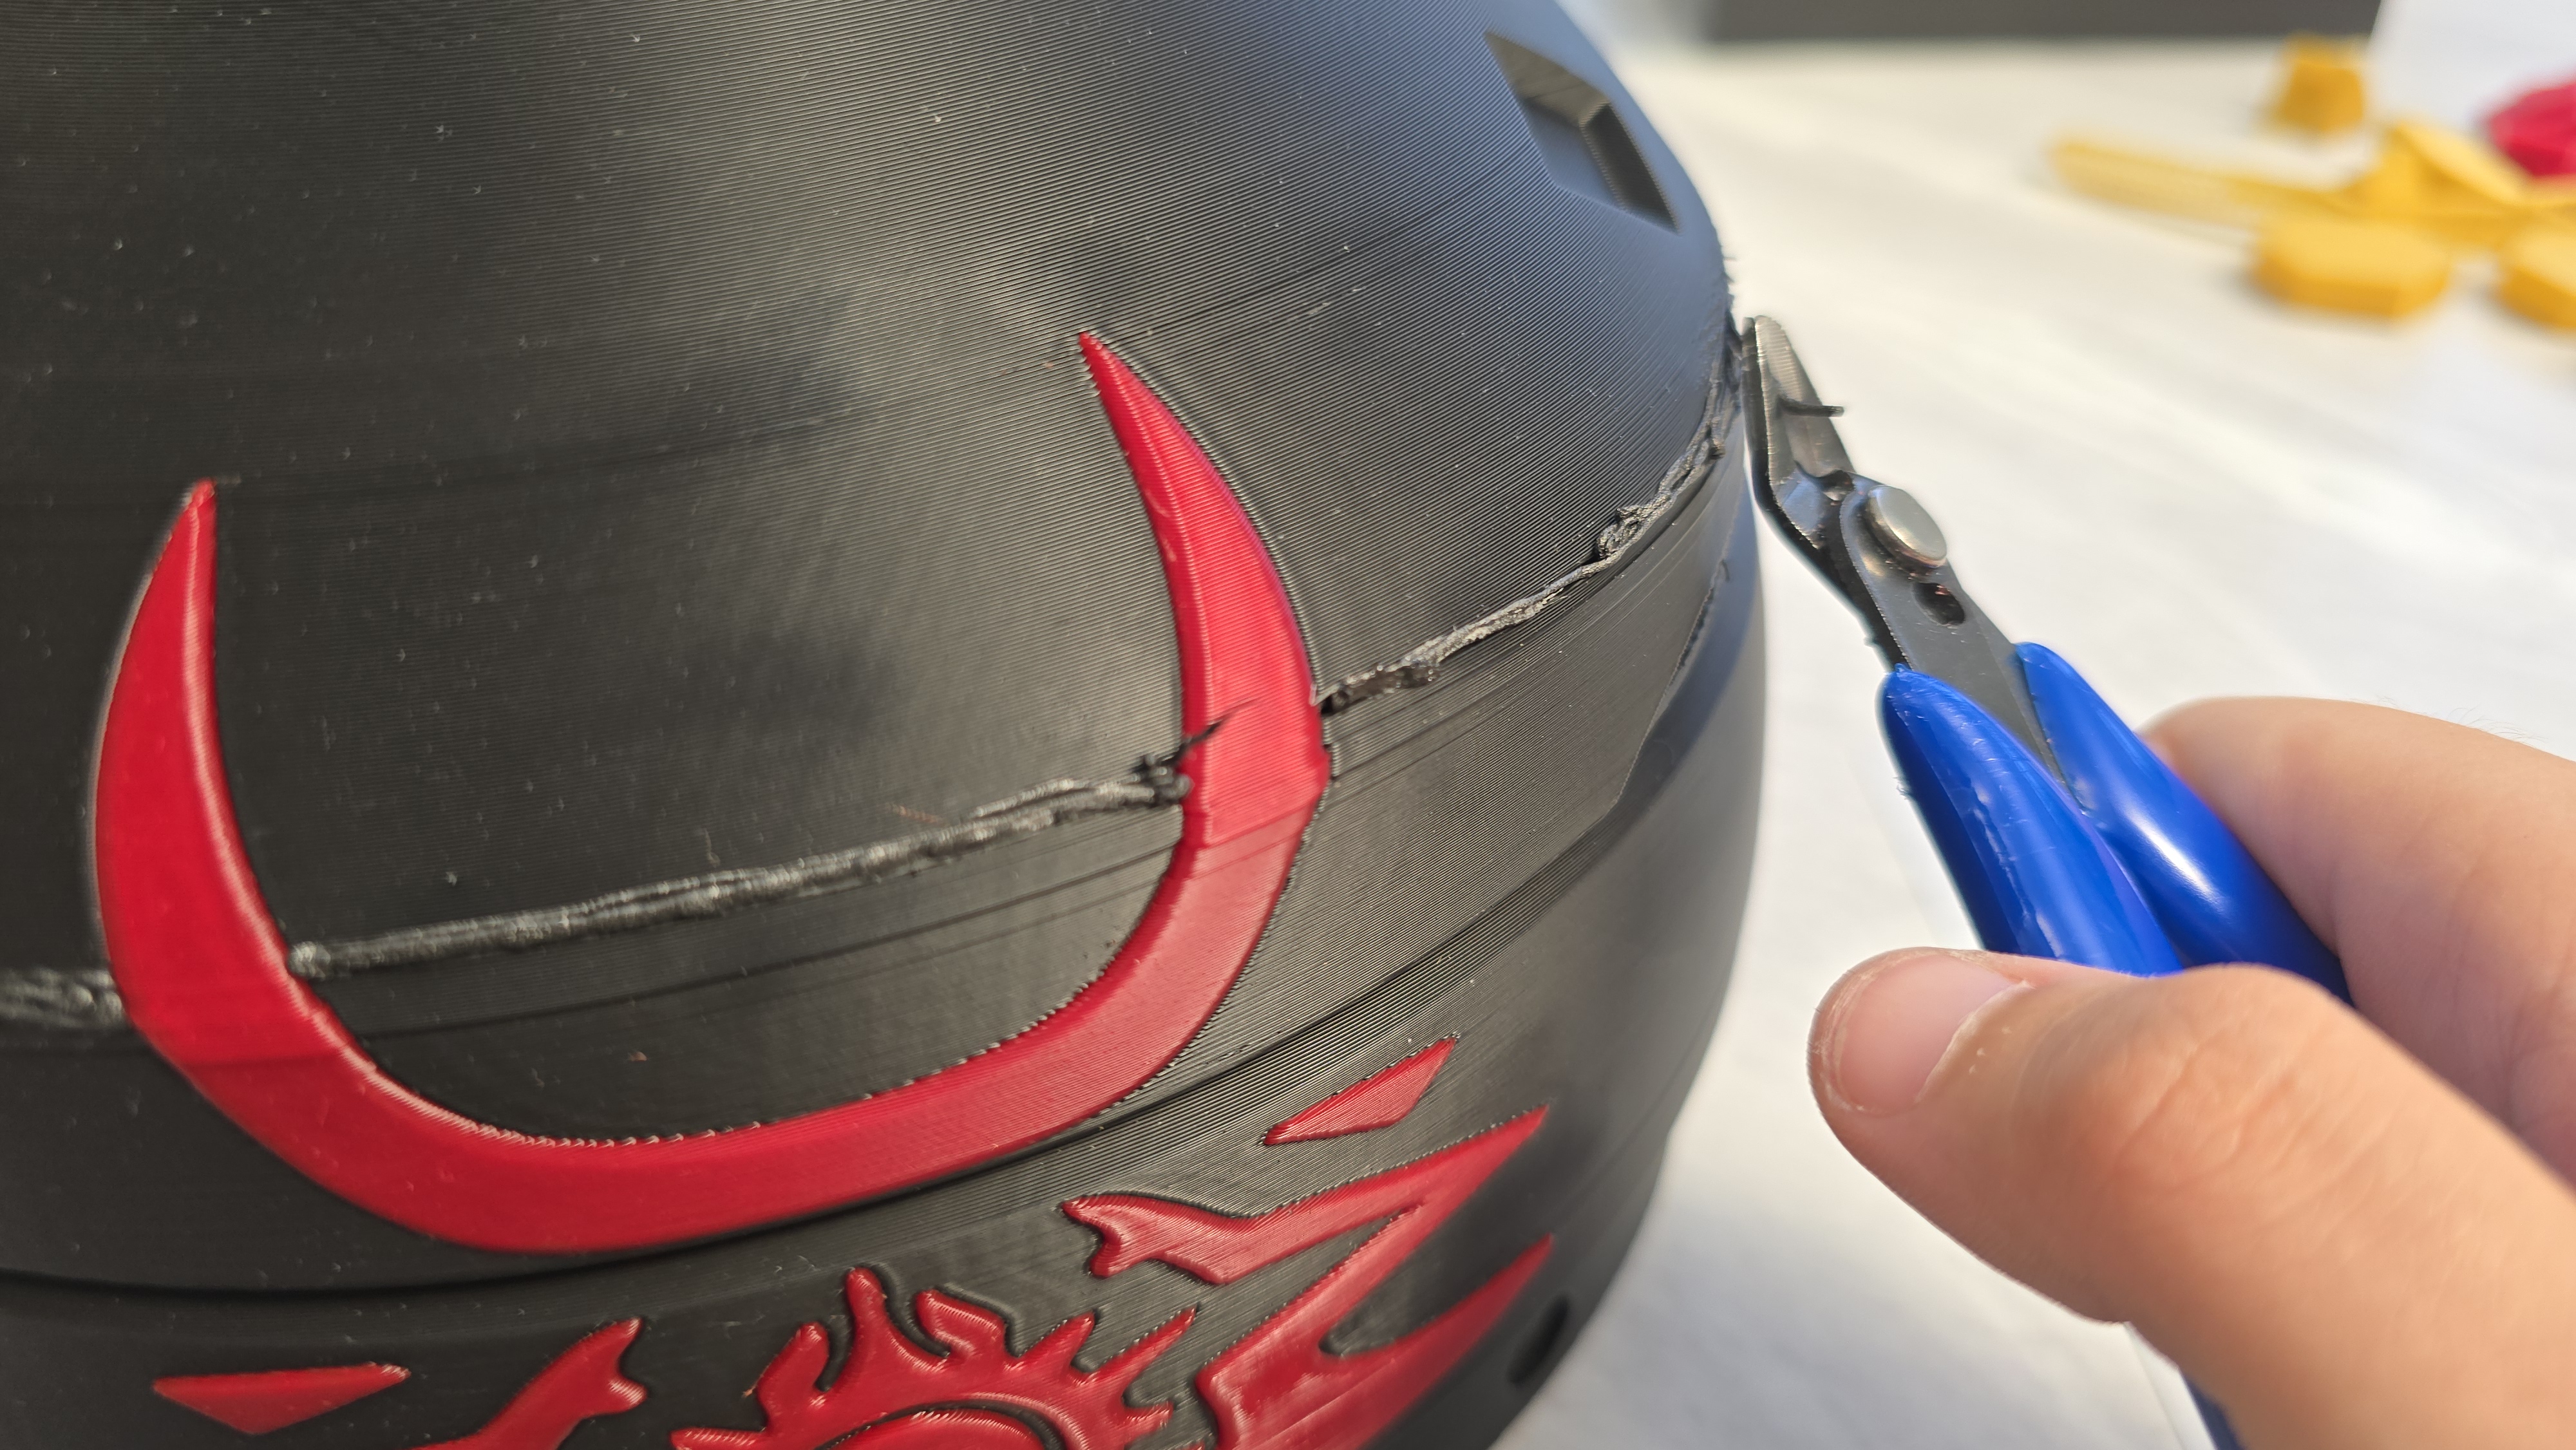
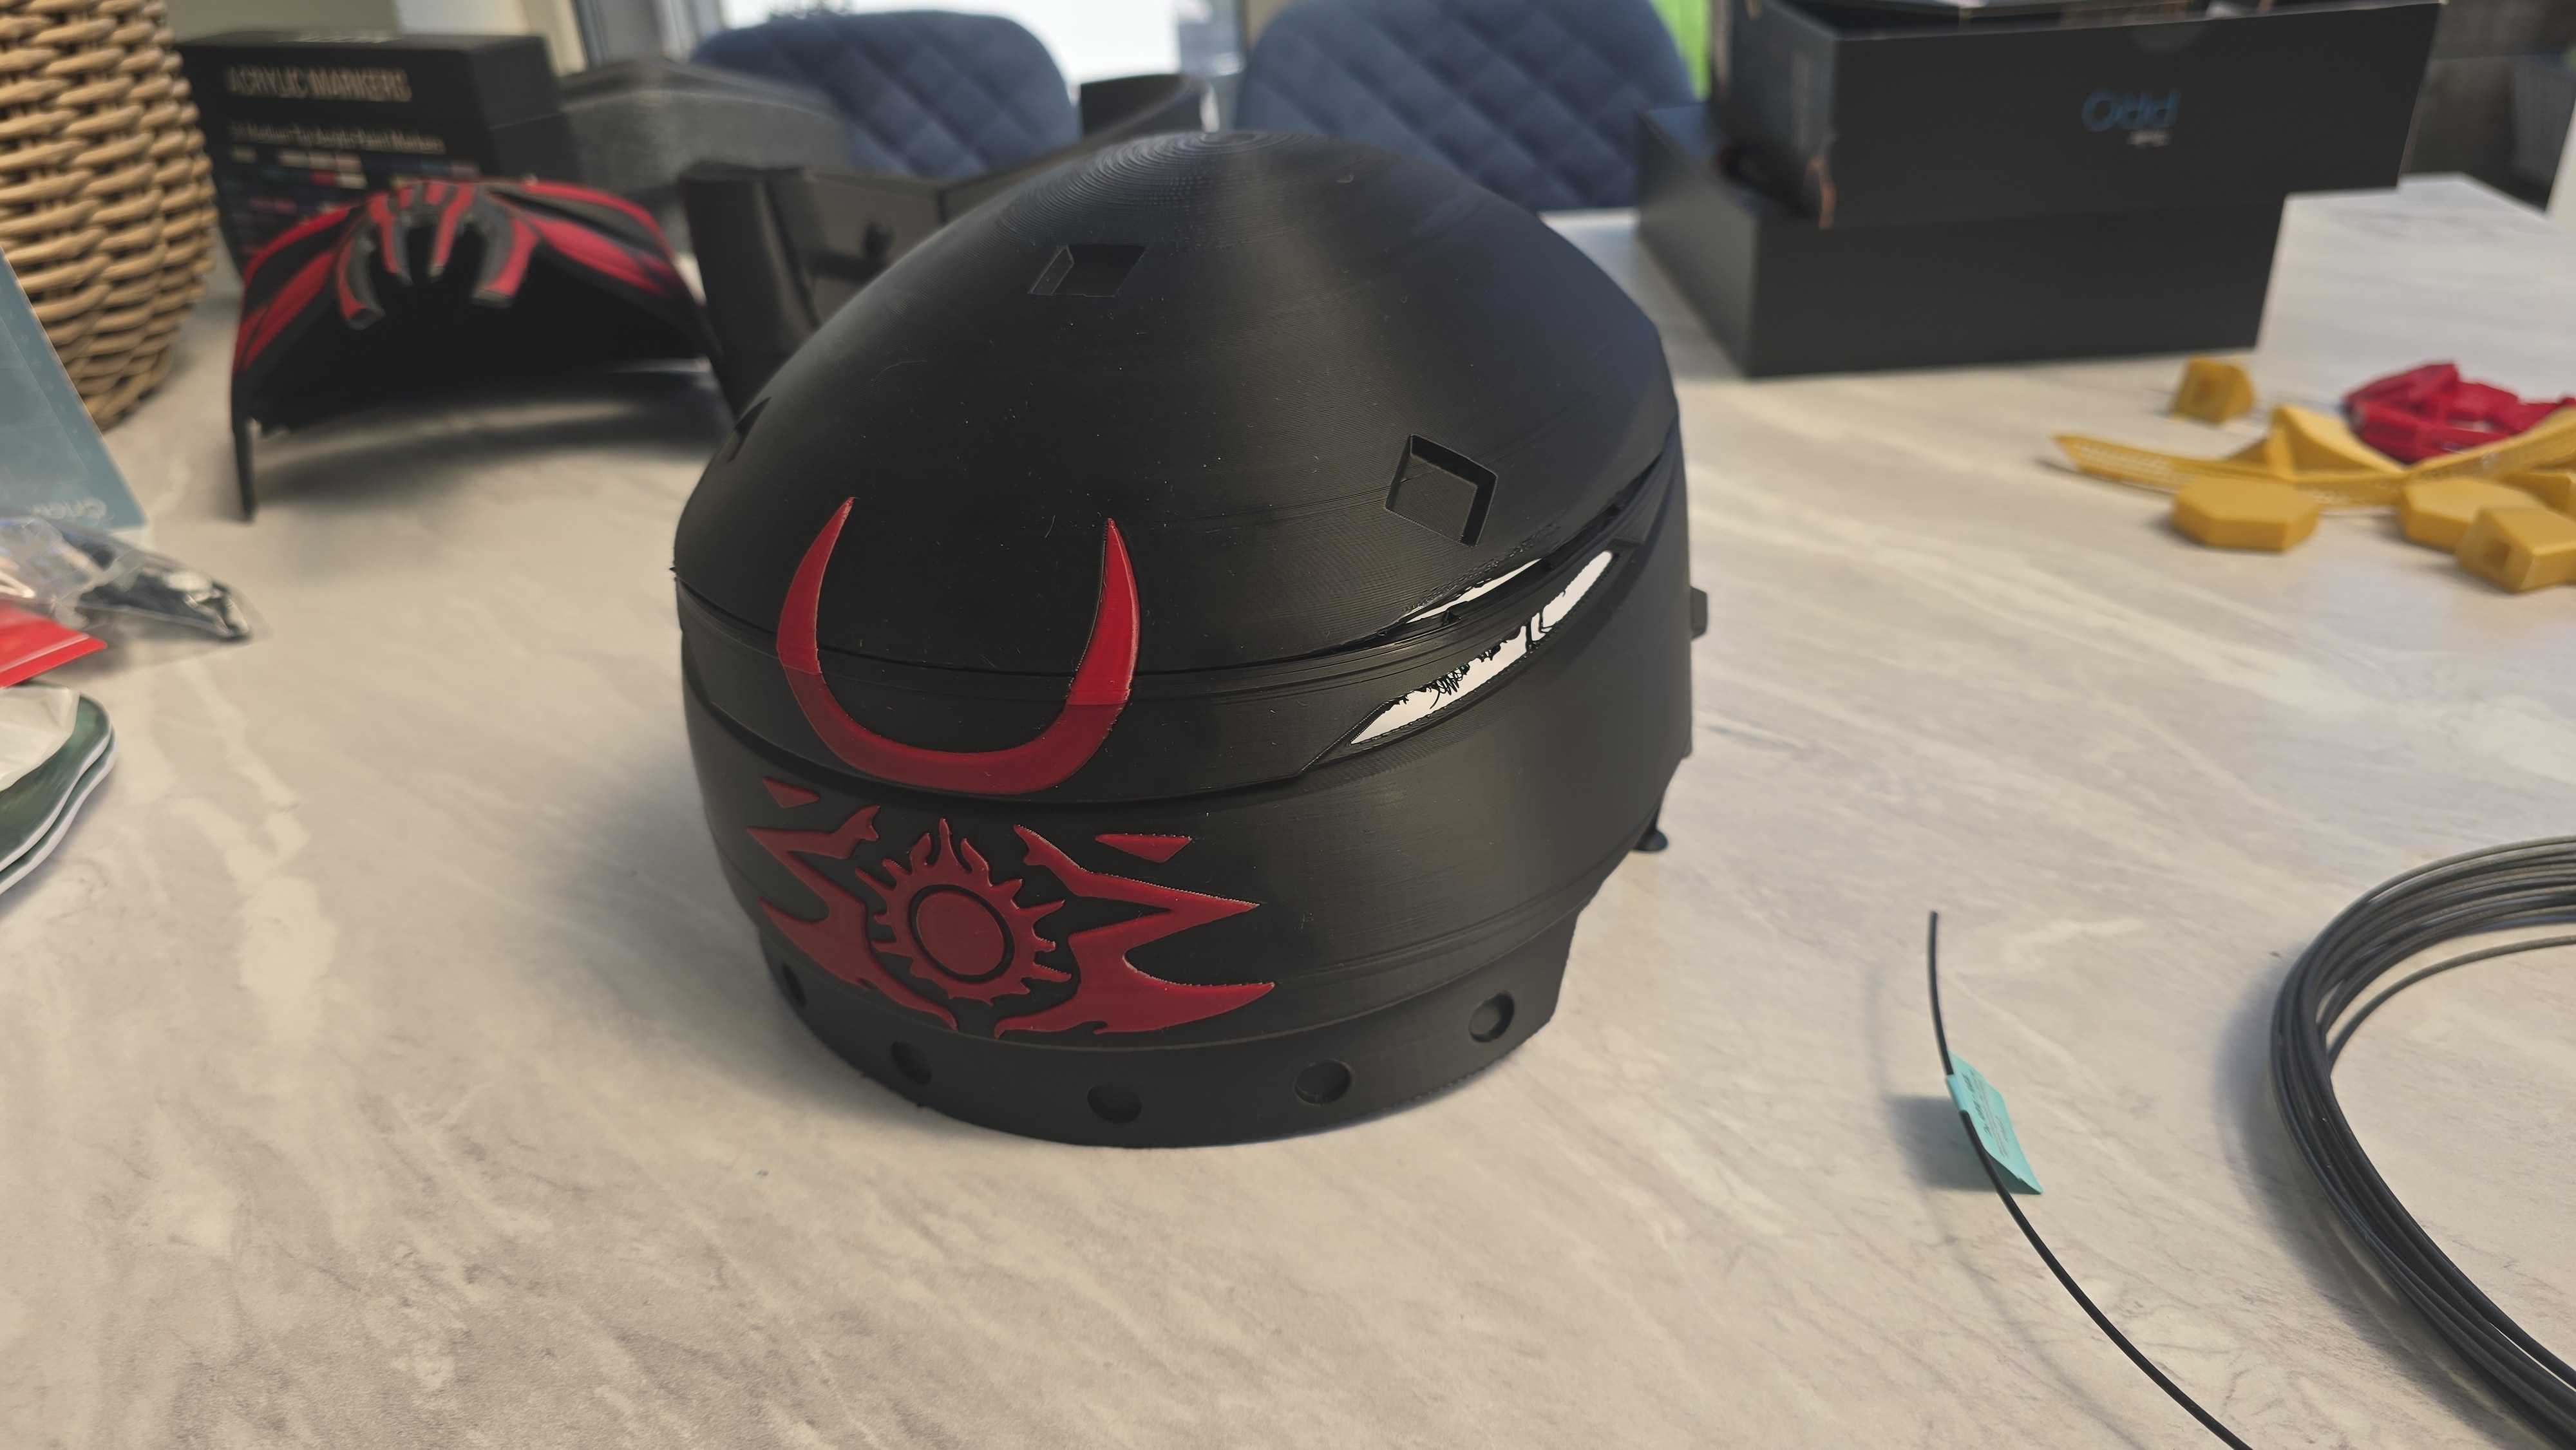
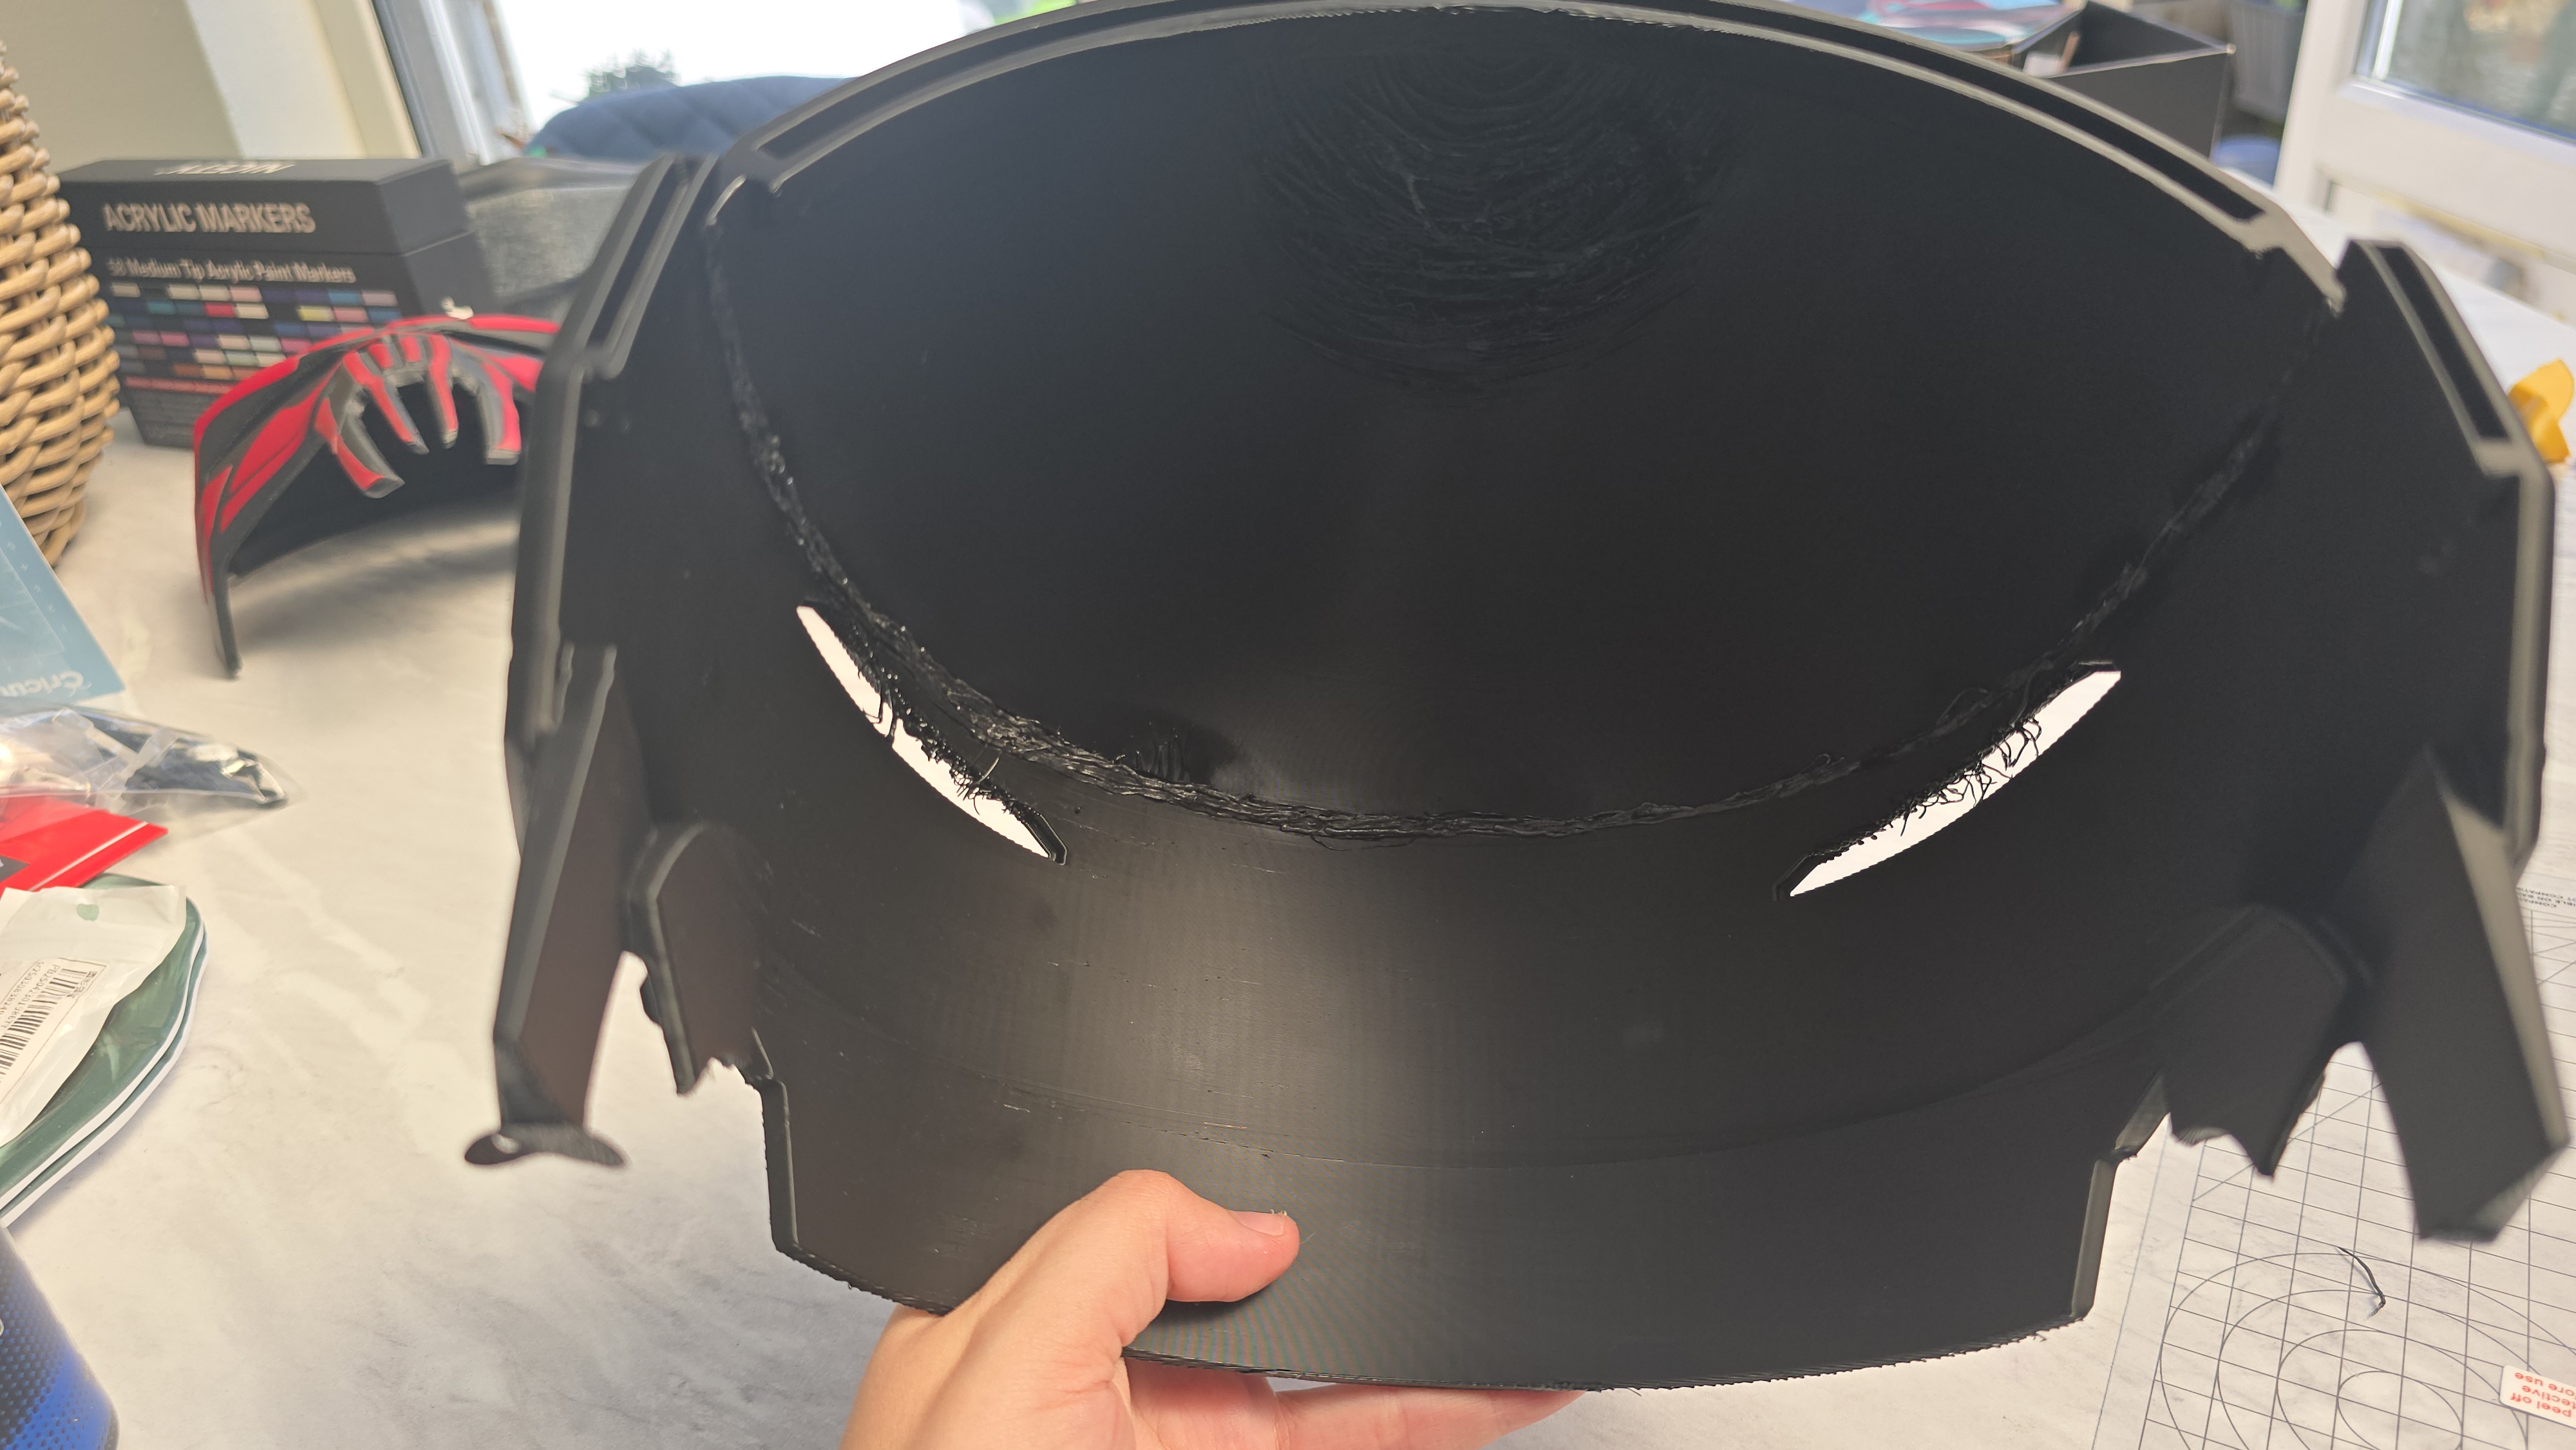
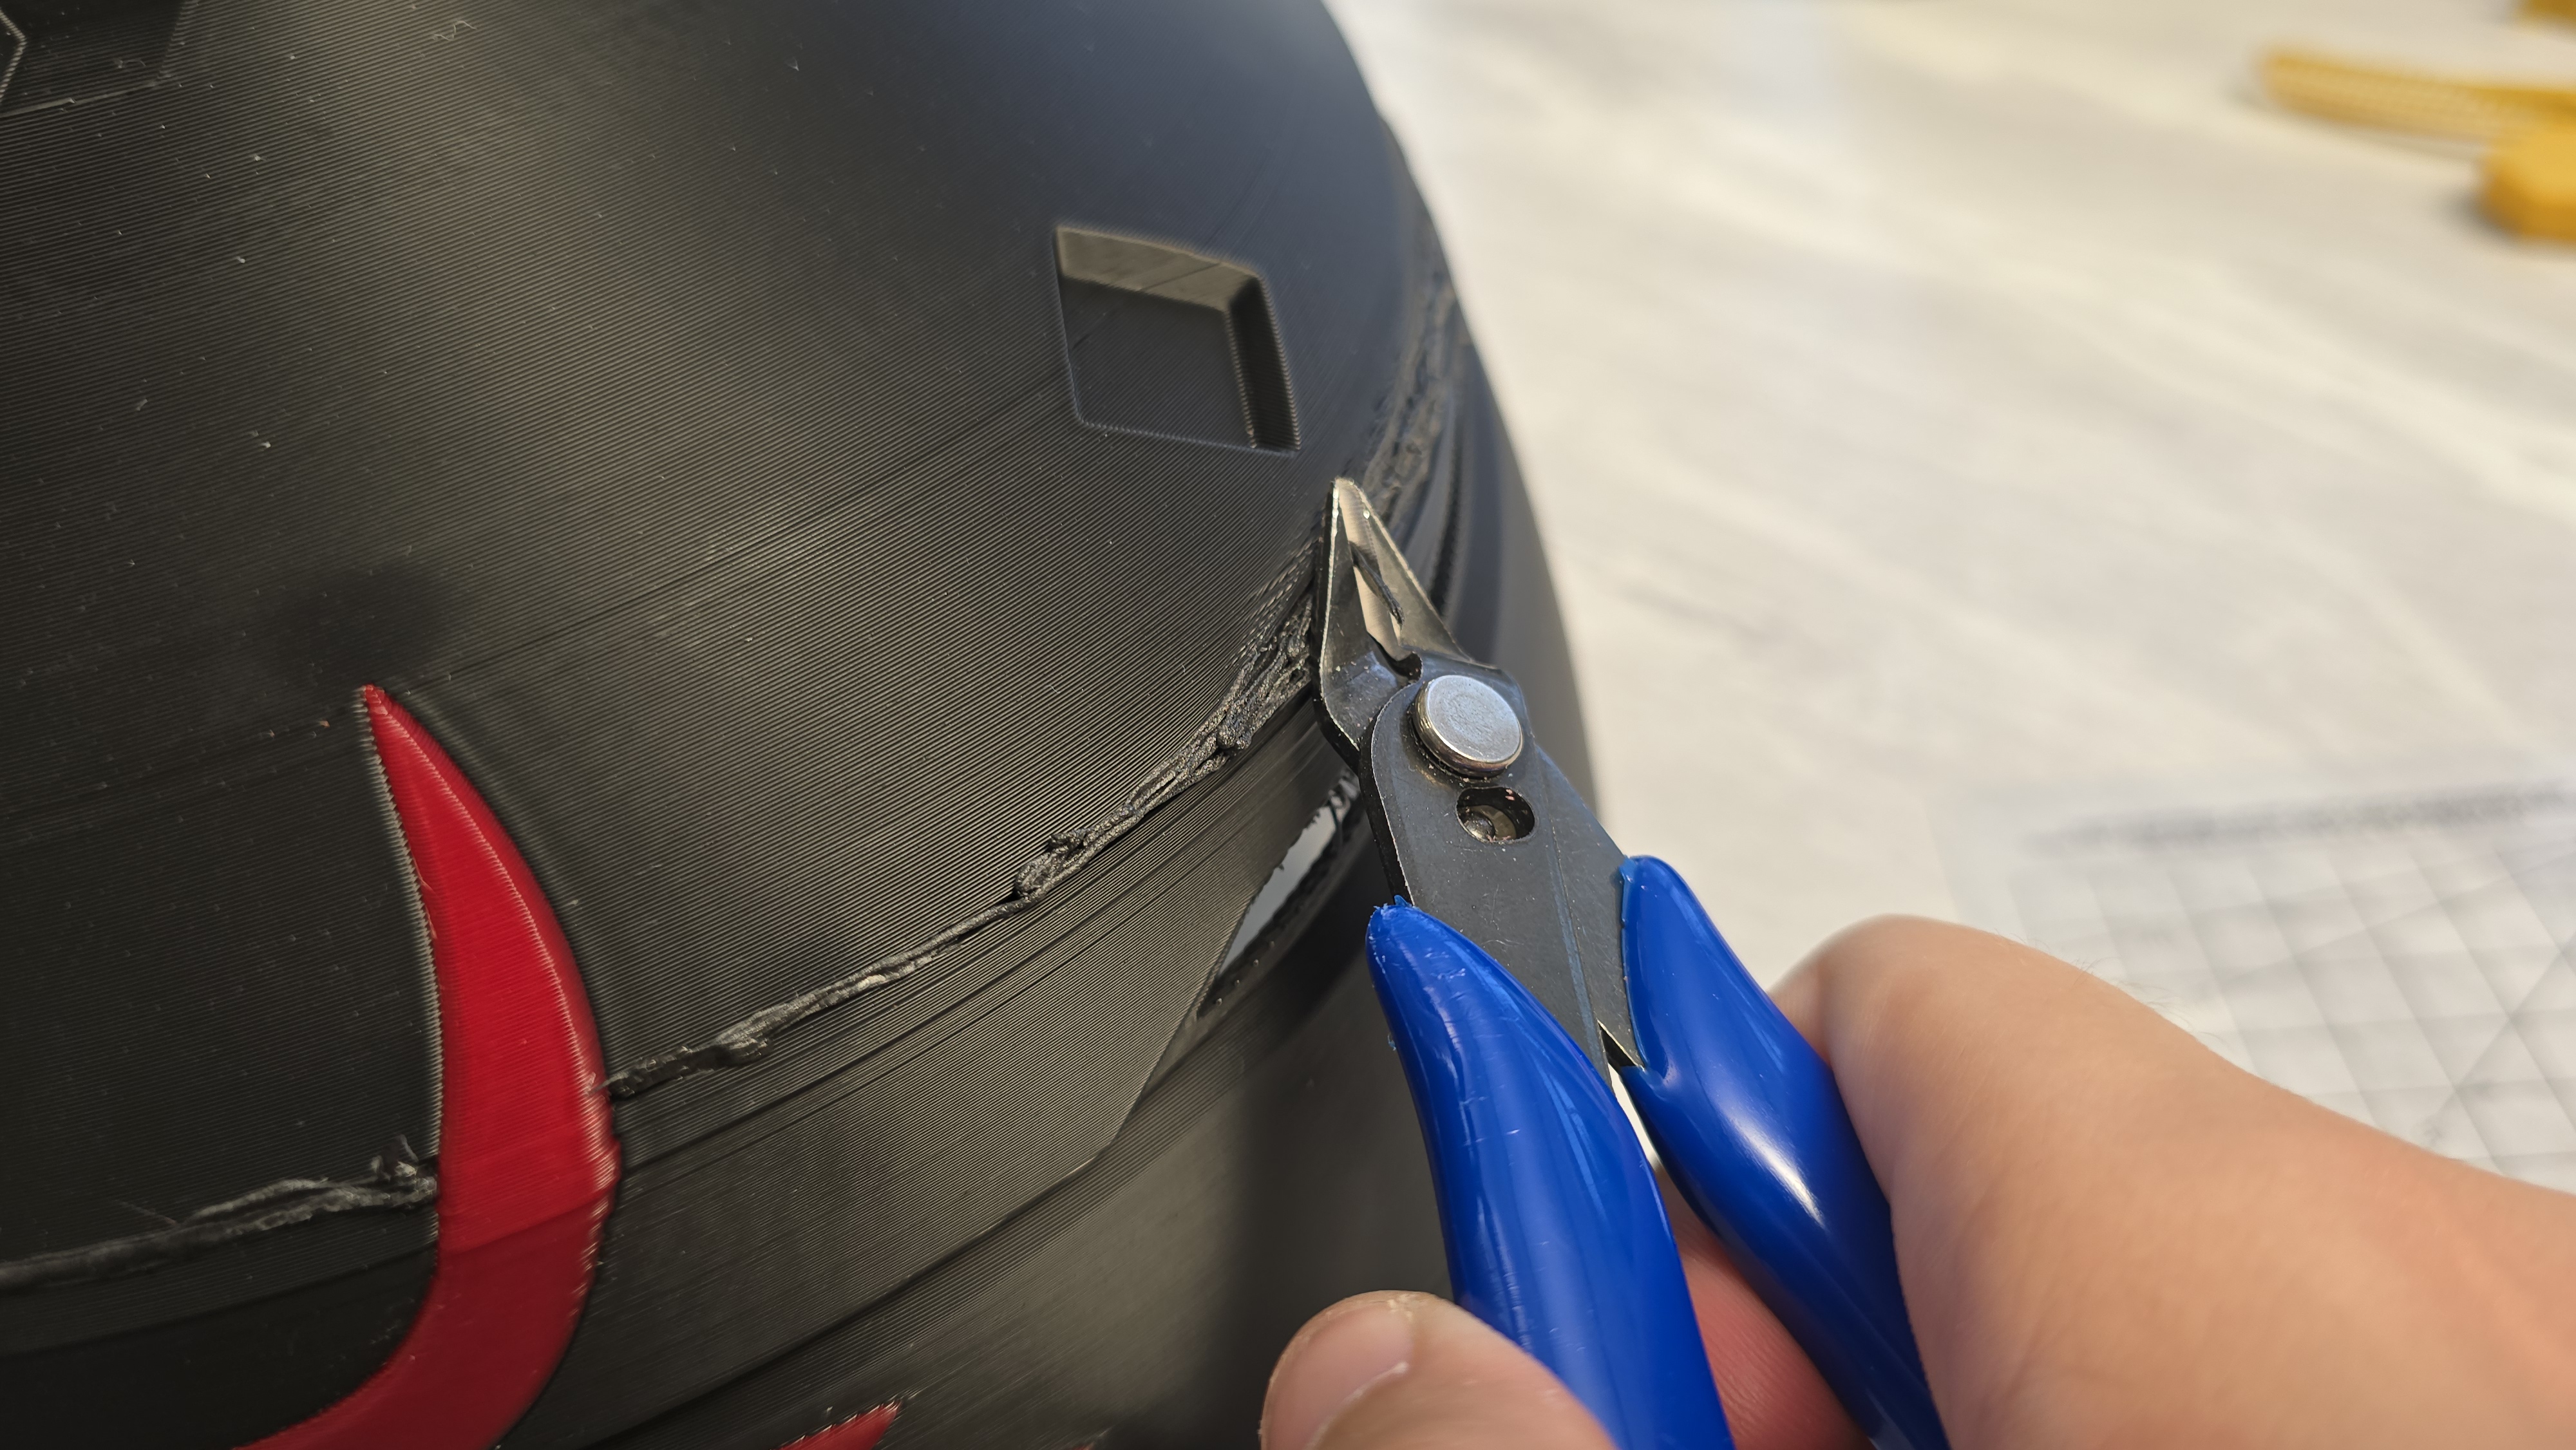
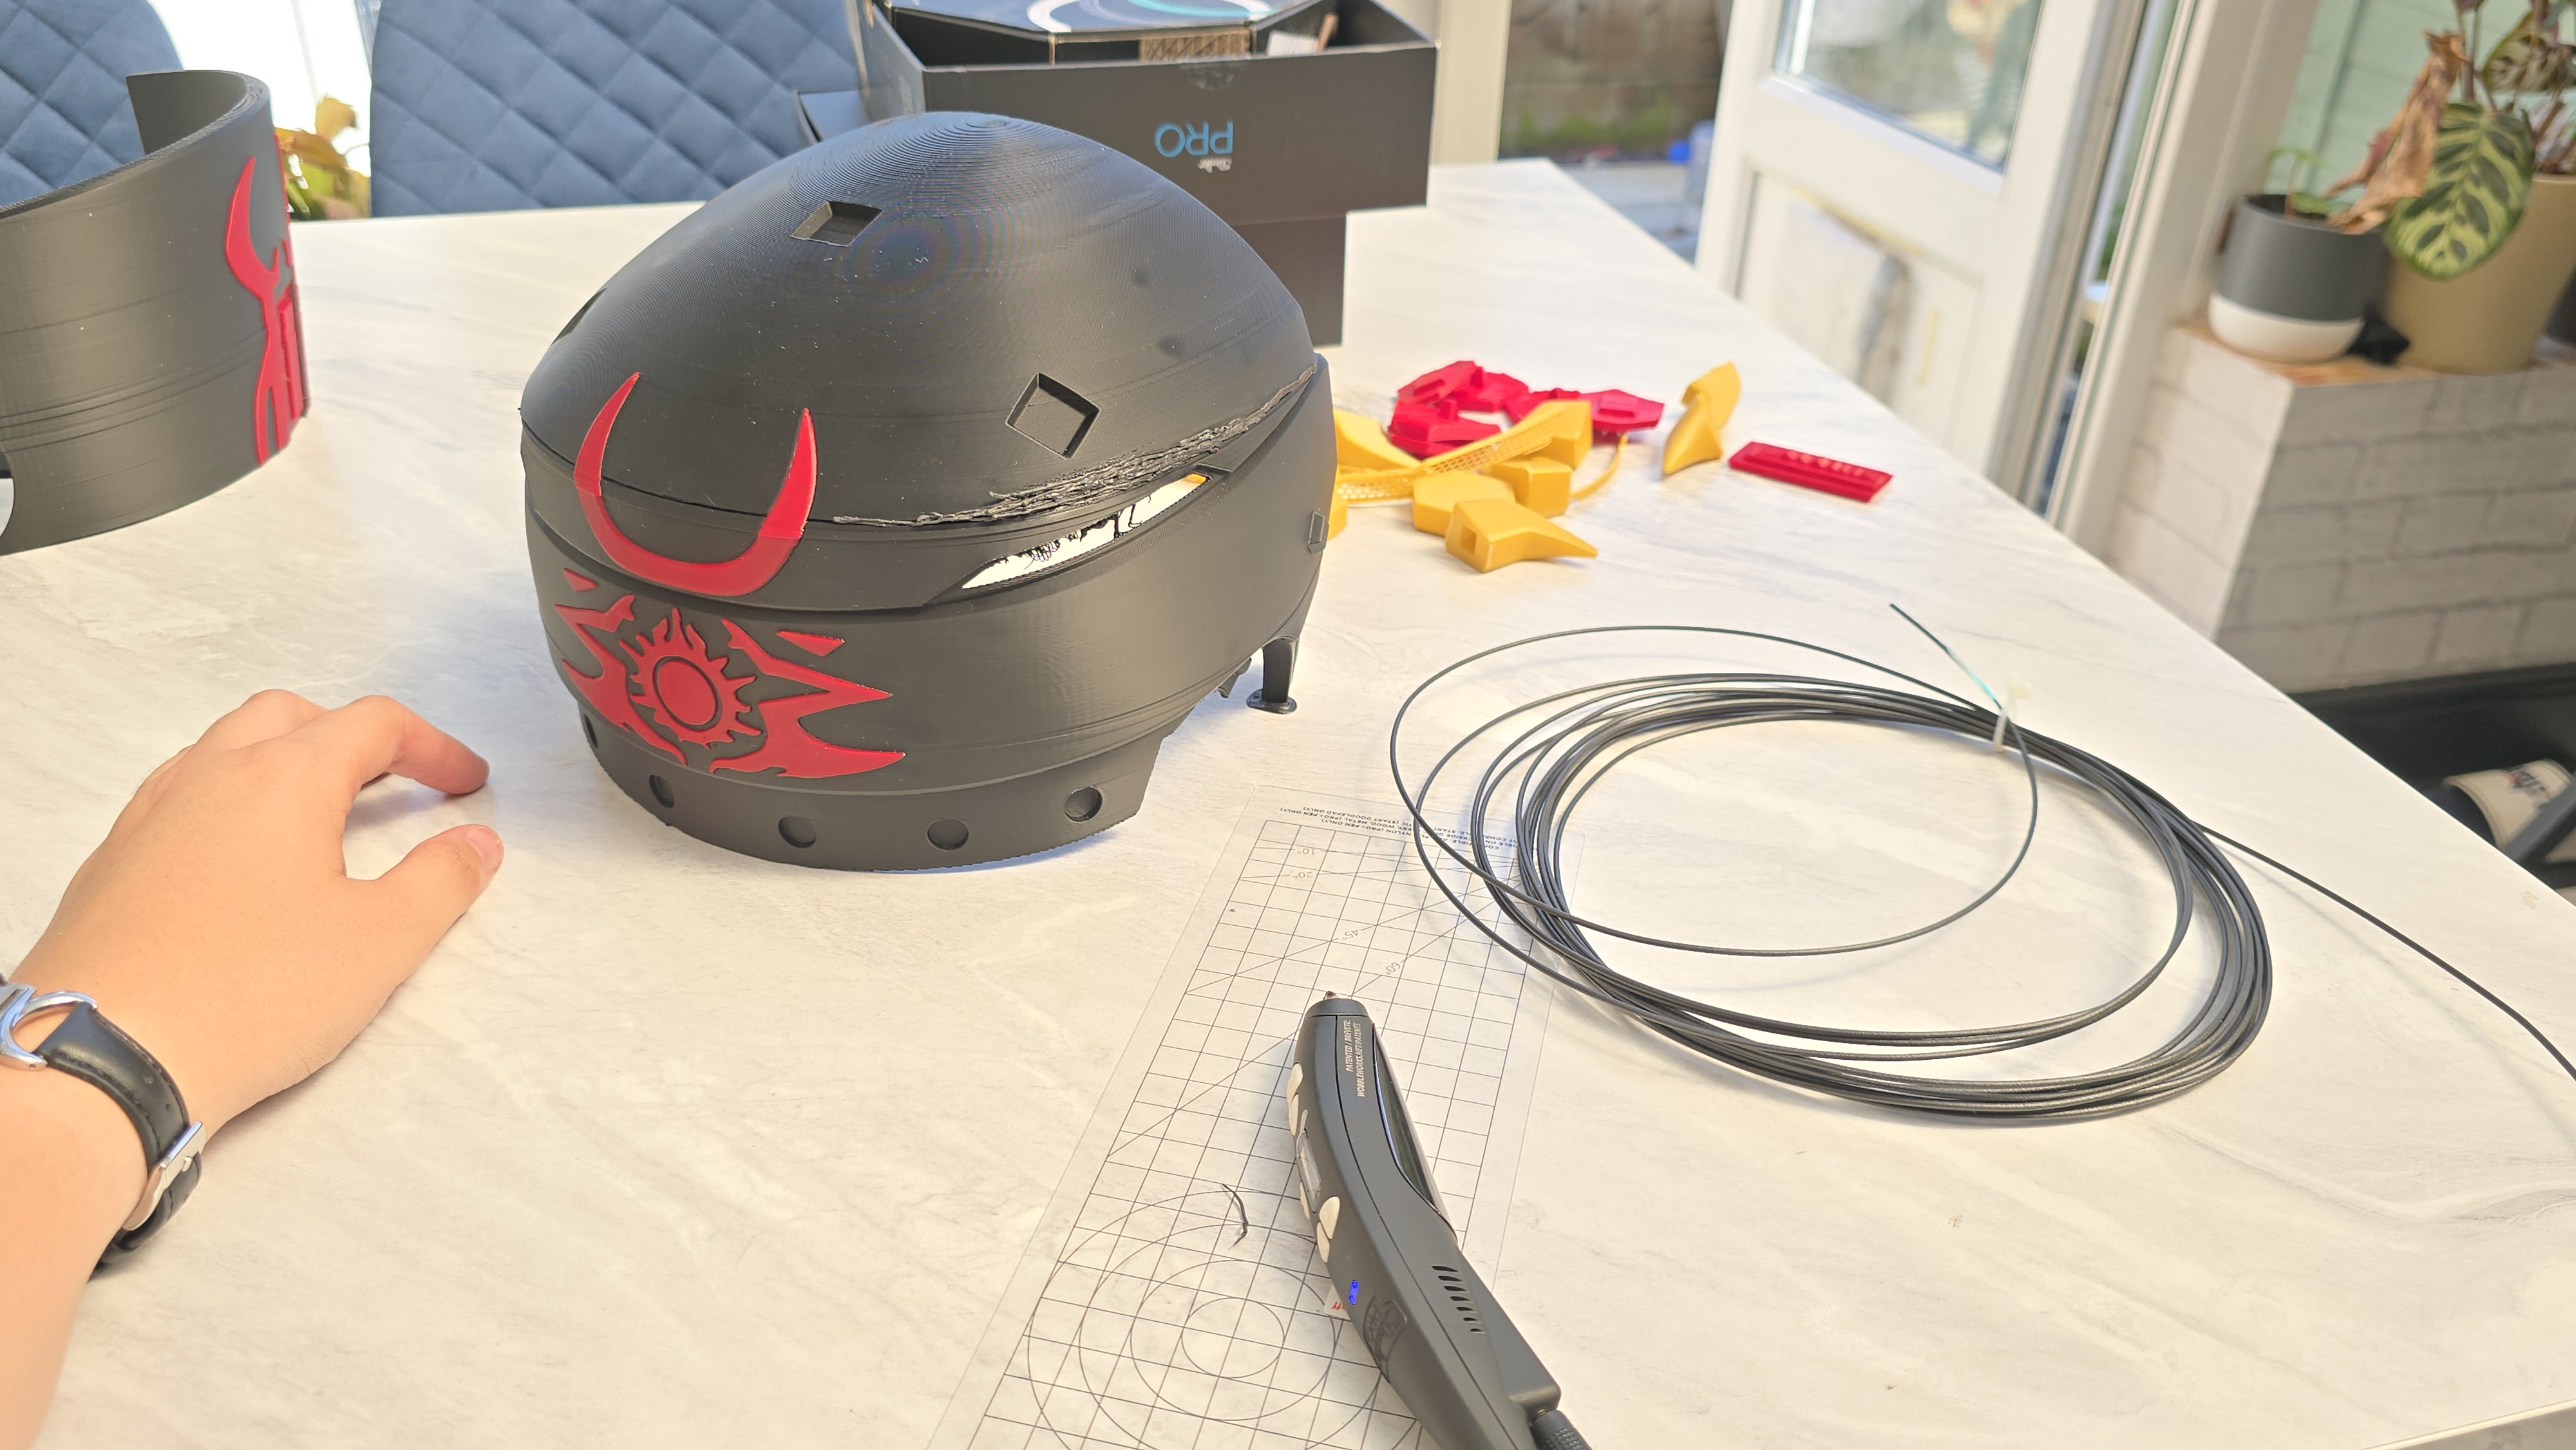
The CTO of 3Doodler, Max, explained to me that a 3D pen can also be an excellent tool for welding together pieces of fabric, as well as 3D printed models. This knowlege saved my ass when a 3D printed Darth Maul helmet that I had been working on printed with two very large holes in where they shouldn't be. At first, I was devastated that a 20-something-hour print would be going to waste, but then I remembered that I had a 3D pen.
This method will take some patience, but if done correctly, not only can this save any of your failed prints by adding more filament into the places it should already be, but it's a lot sturdier than using an adhesive like super glue or a hot glue gun – as you're essentially welding printed plastic together using more printed plastic.
To fix my Lord Darth Maul helmet (file by Yosh Studios via Patreon), I could have opted for the same black SUNLU PLA filament that I already used to print the helmet, but instead, I chose to use a carbon fibre CF10 material with my 3D pen for that added durability and to ensure that the helmet wouldn't be falling apart anytime soon.
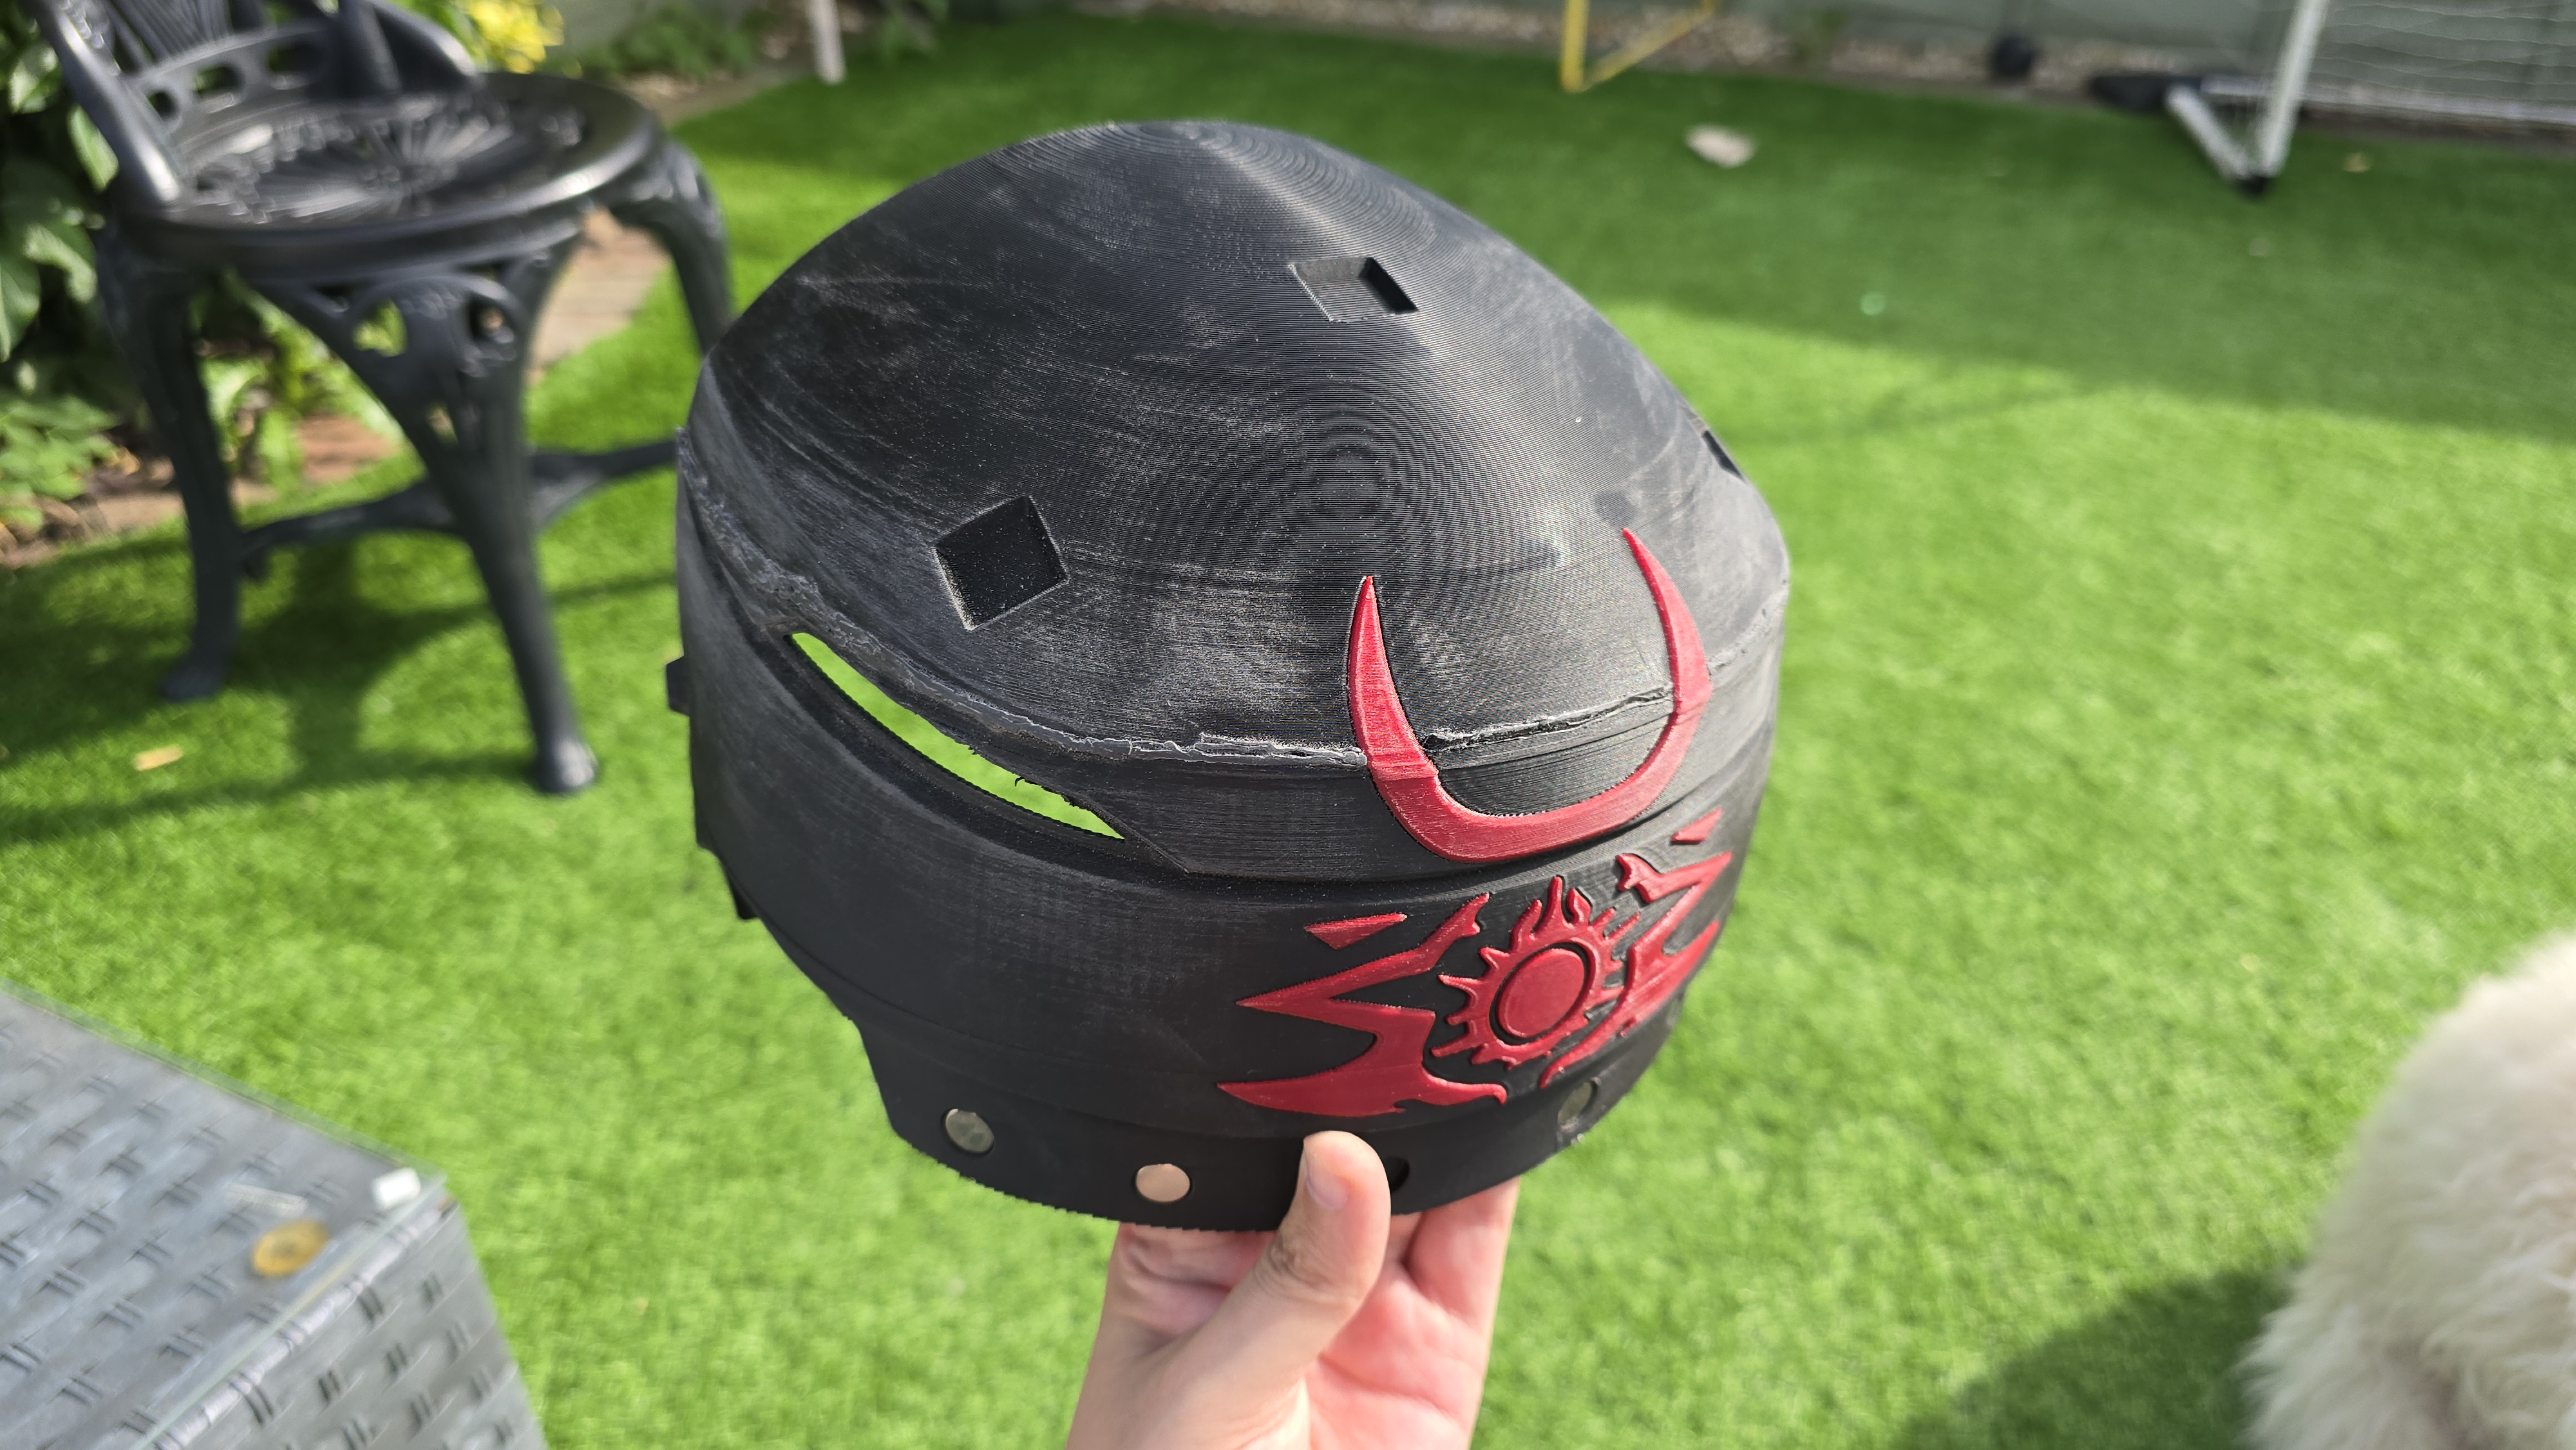
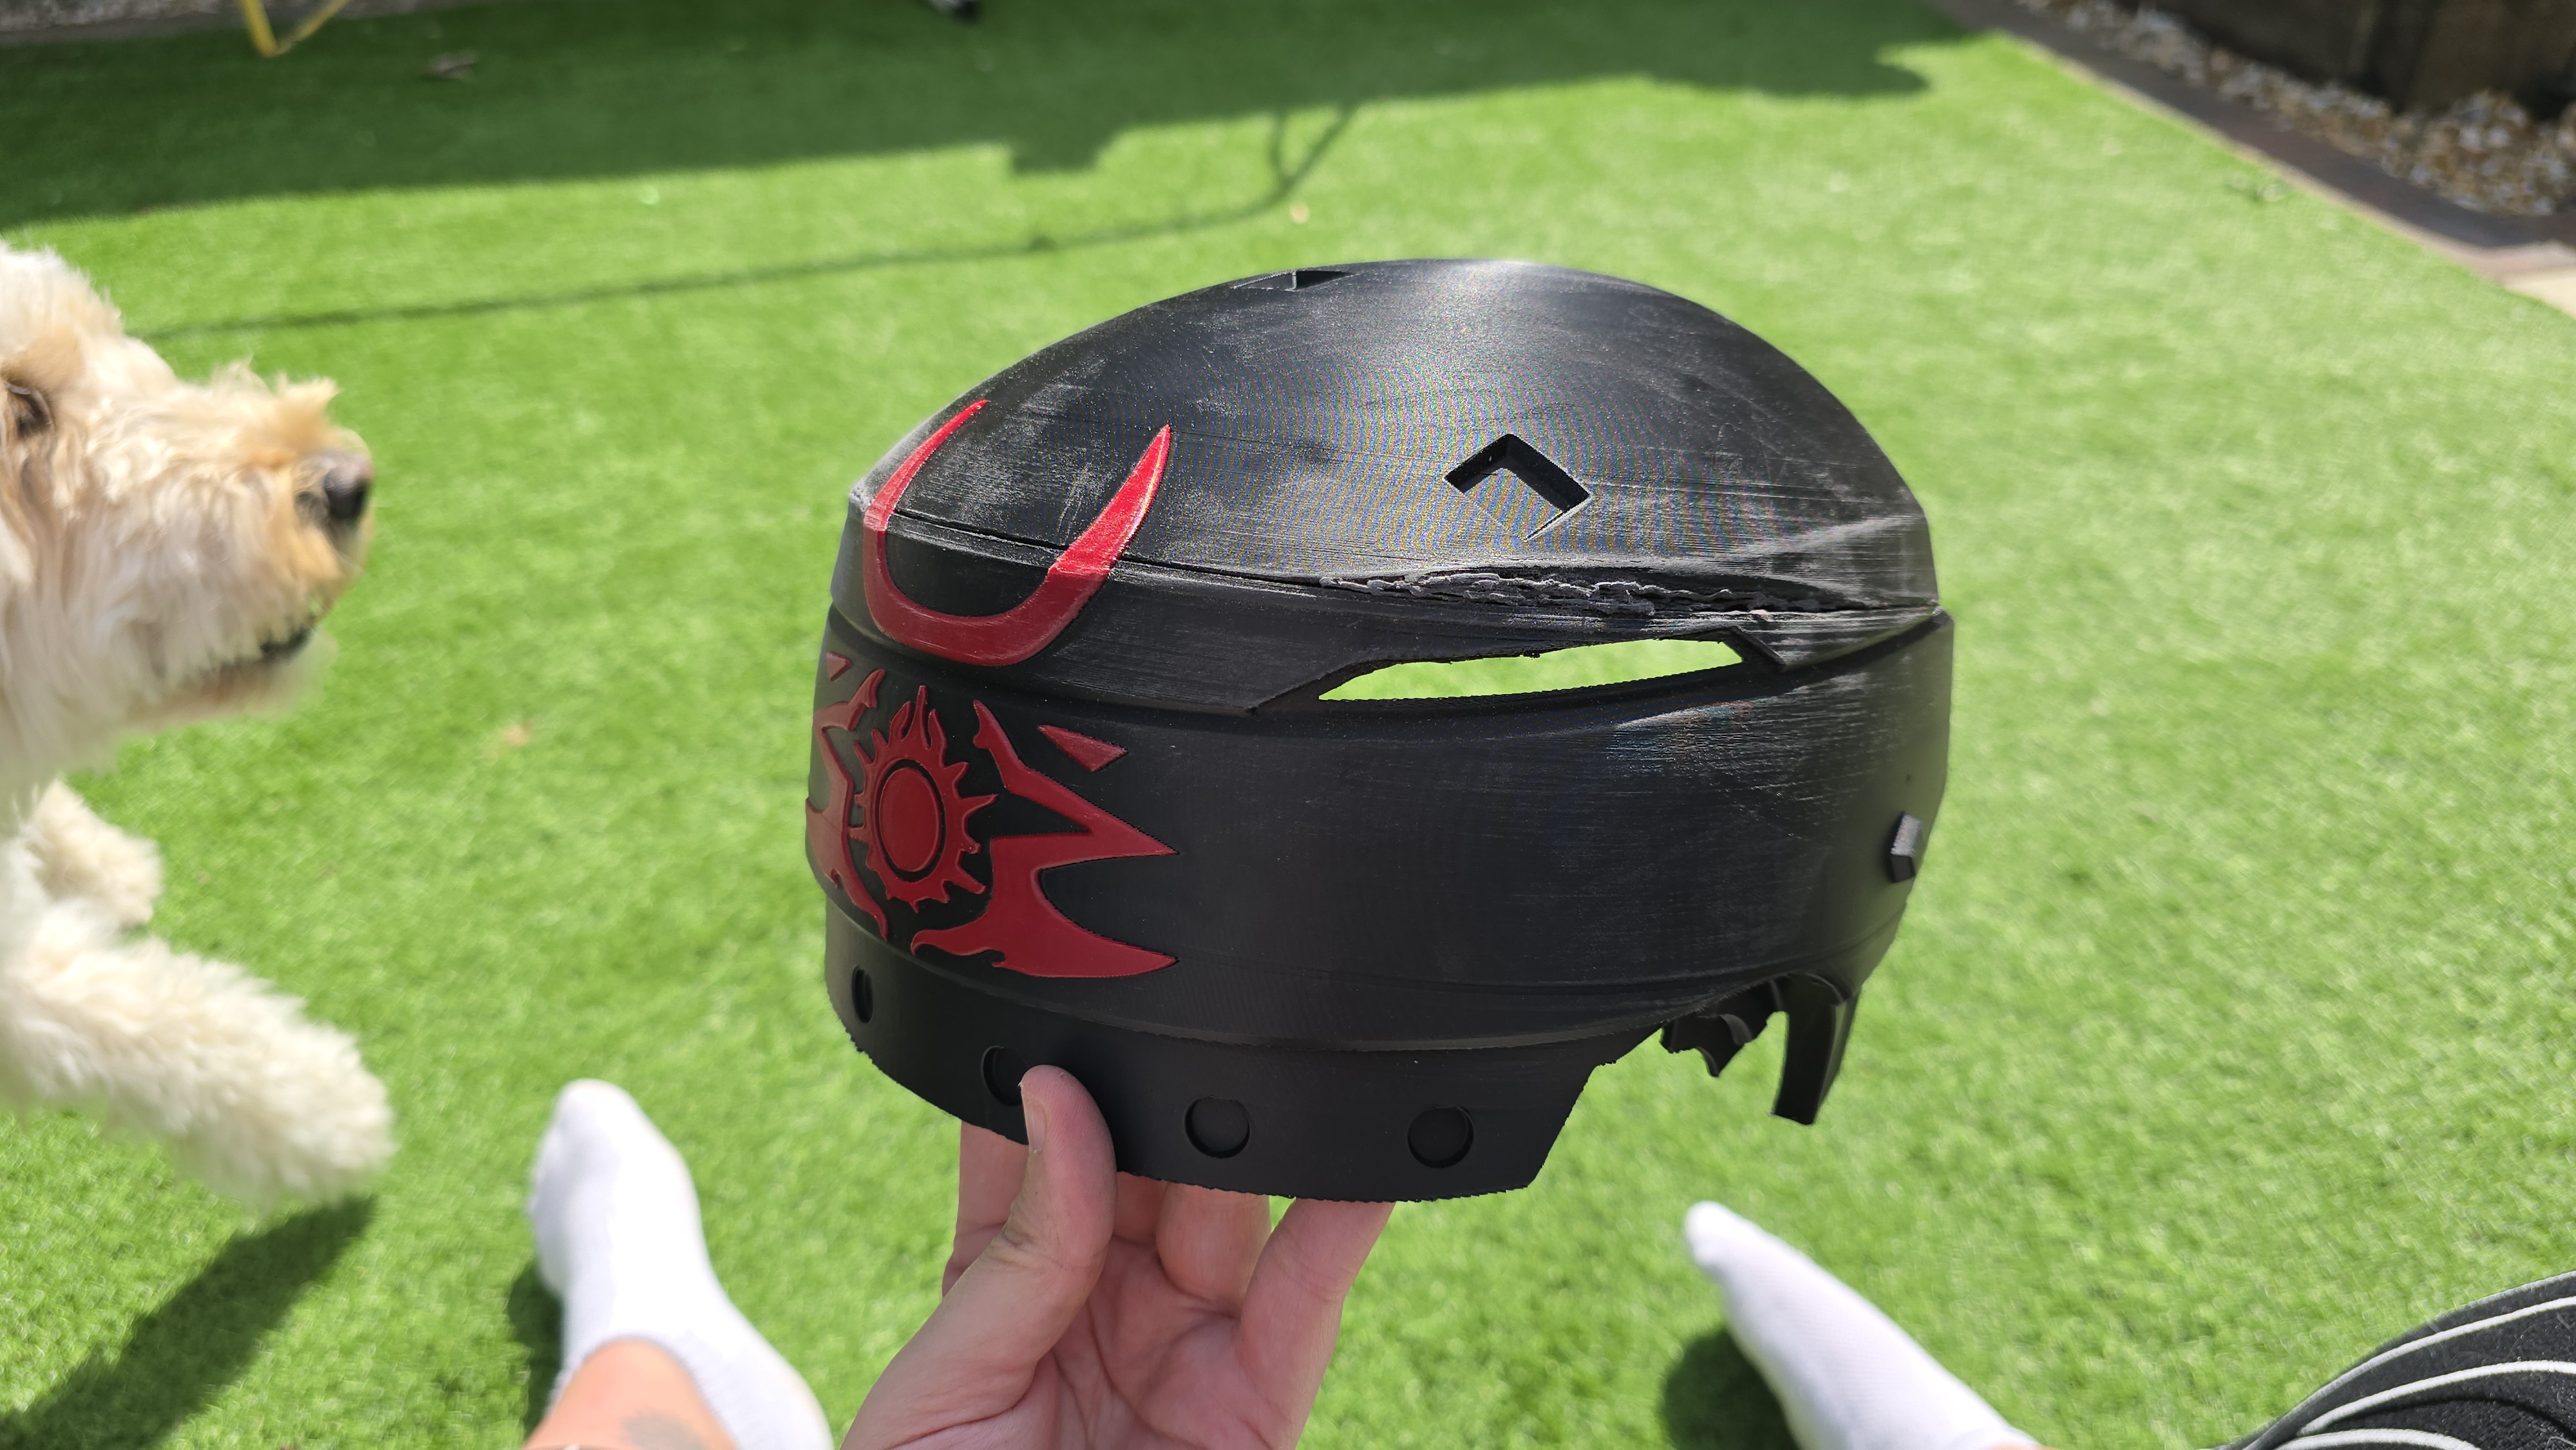
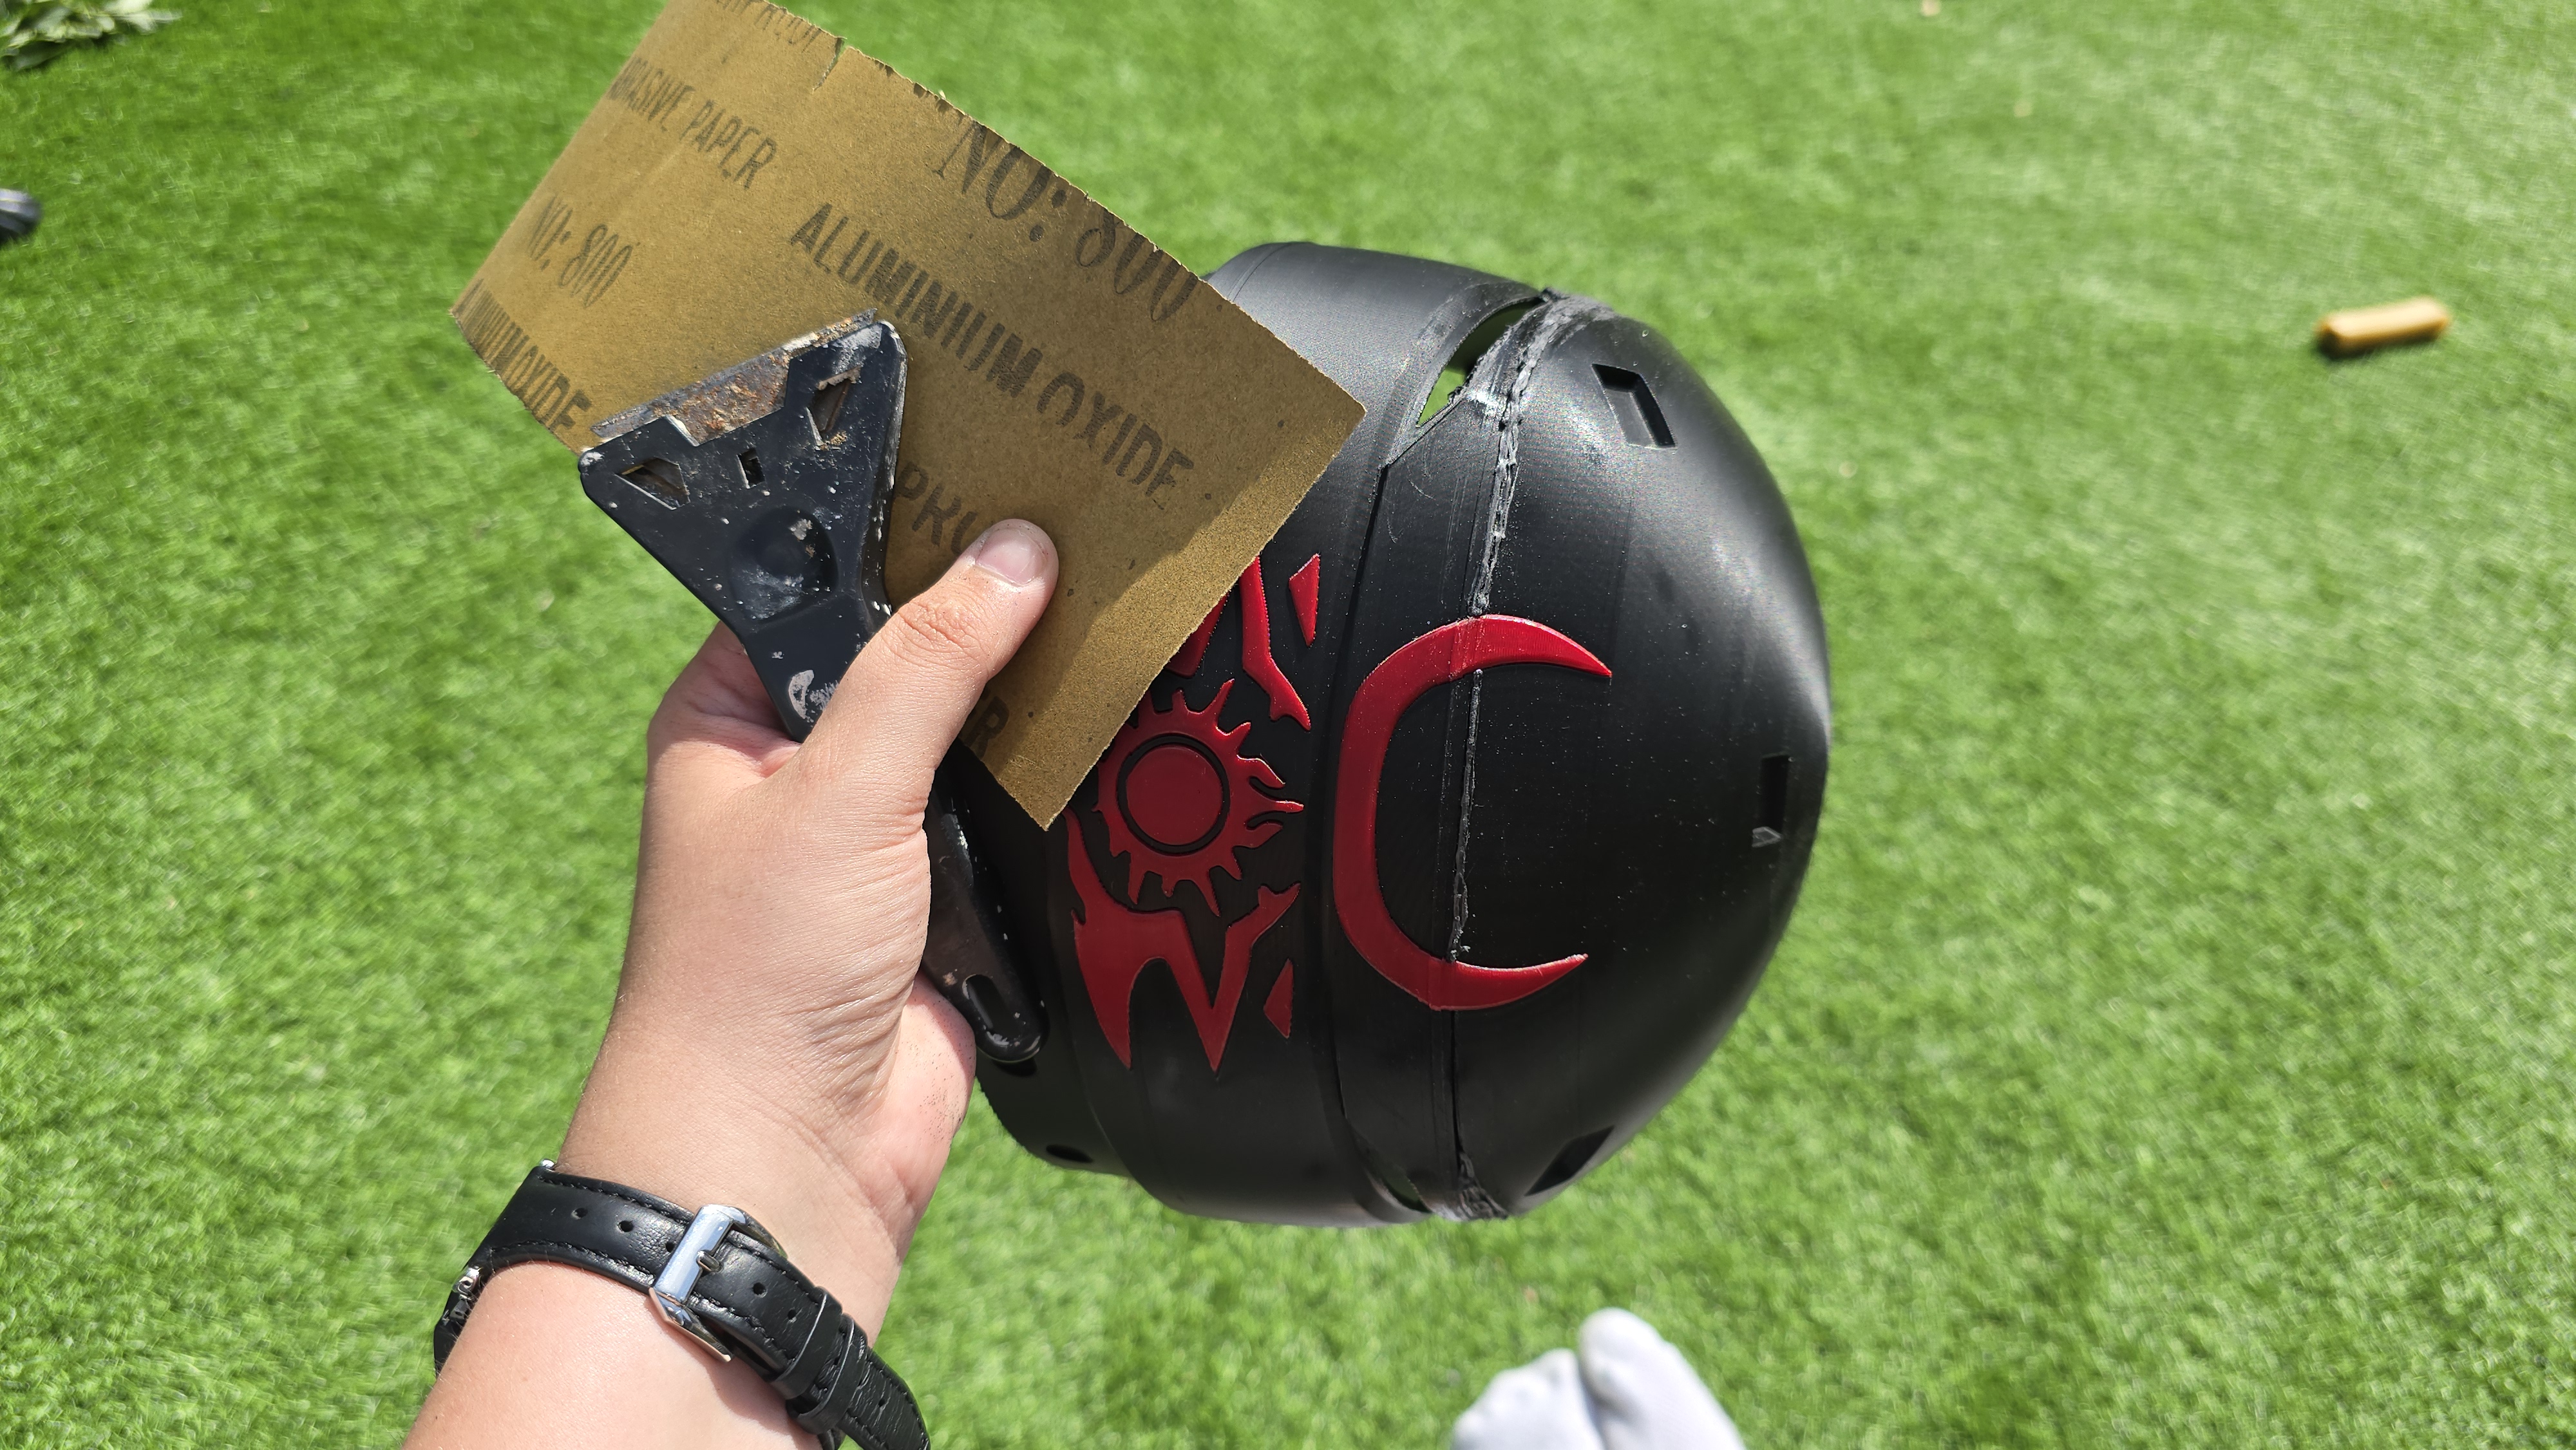
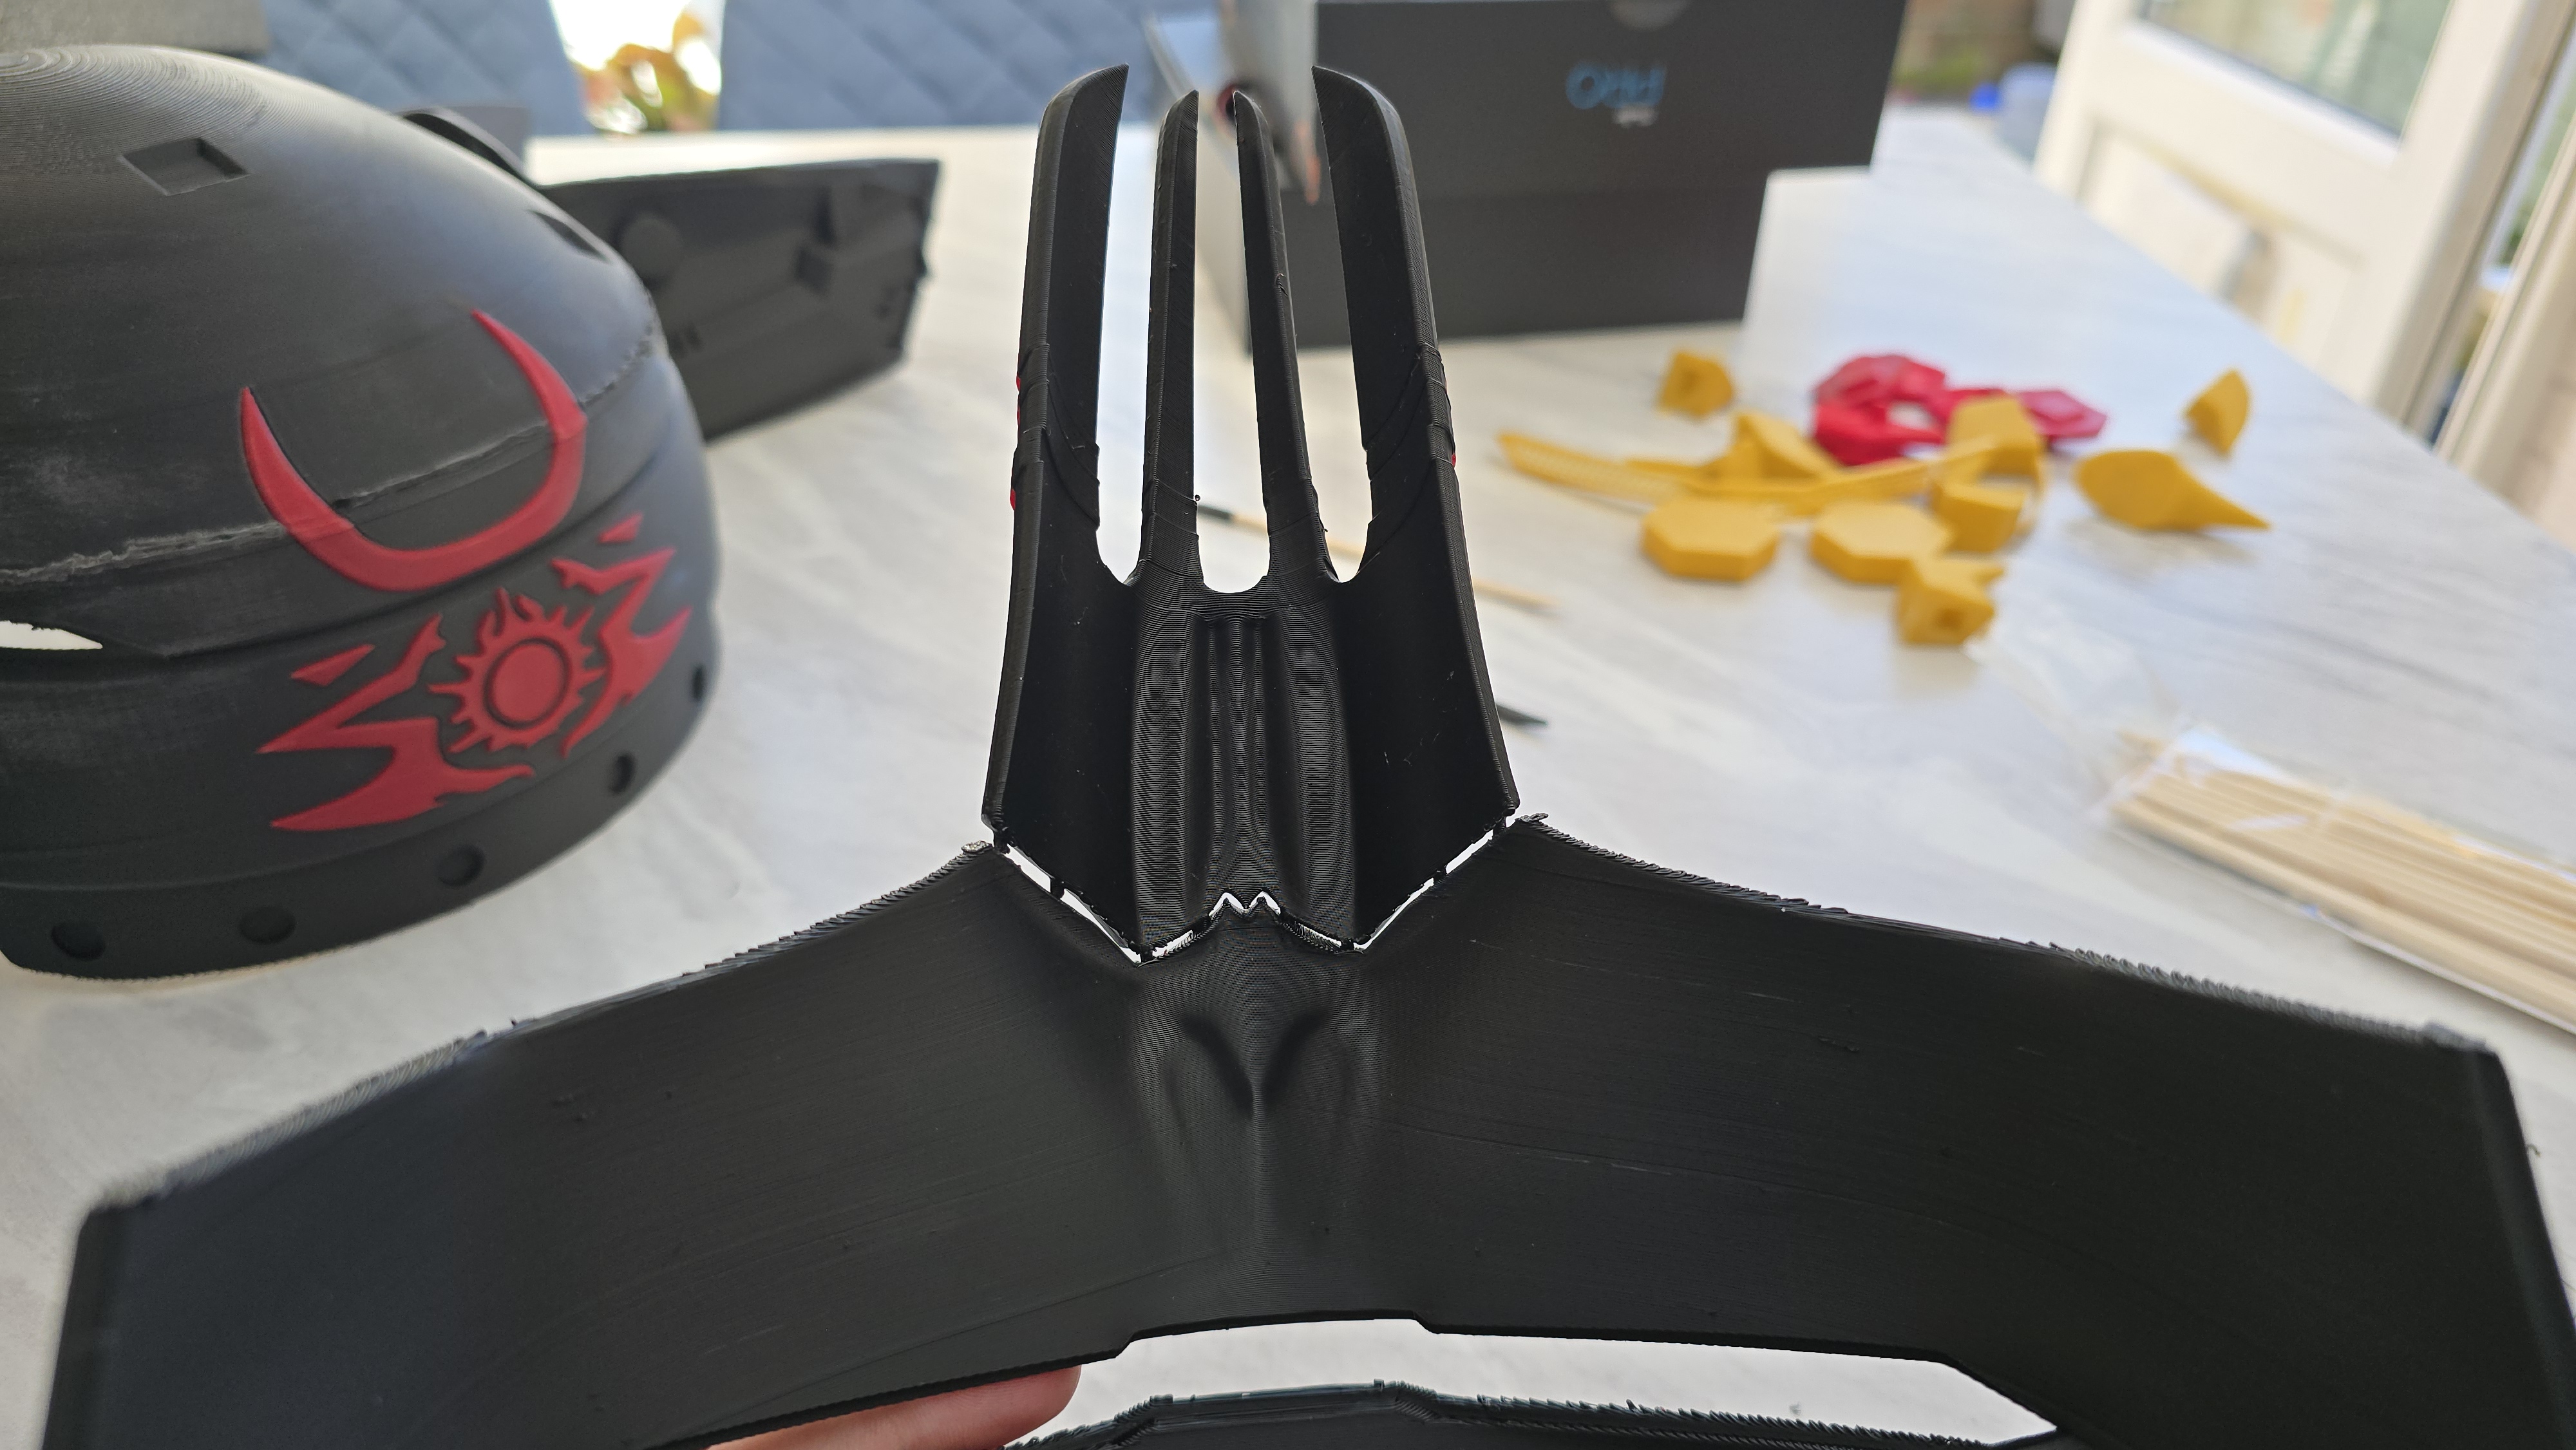
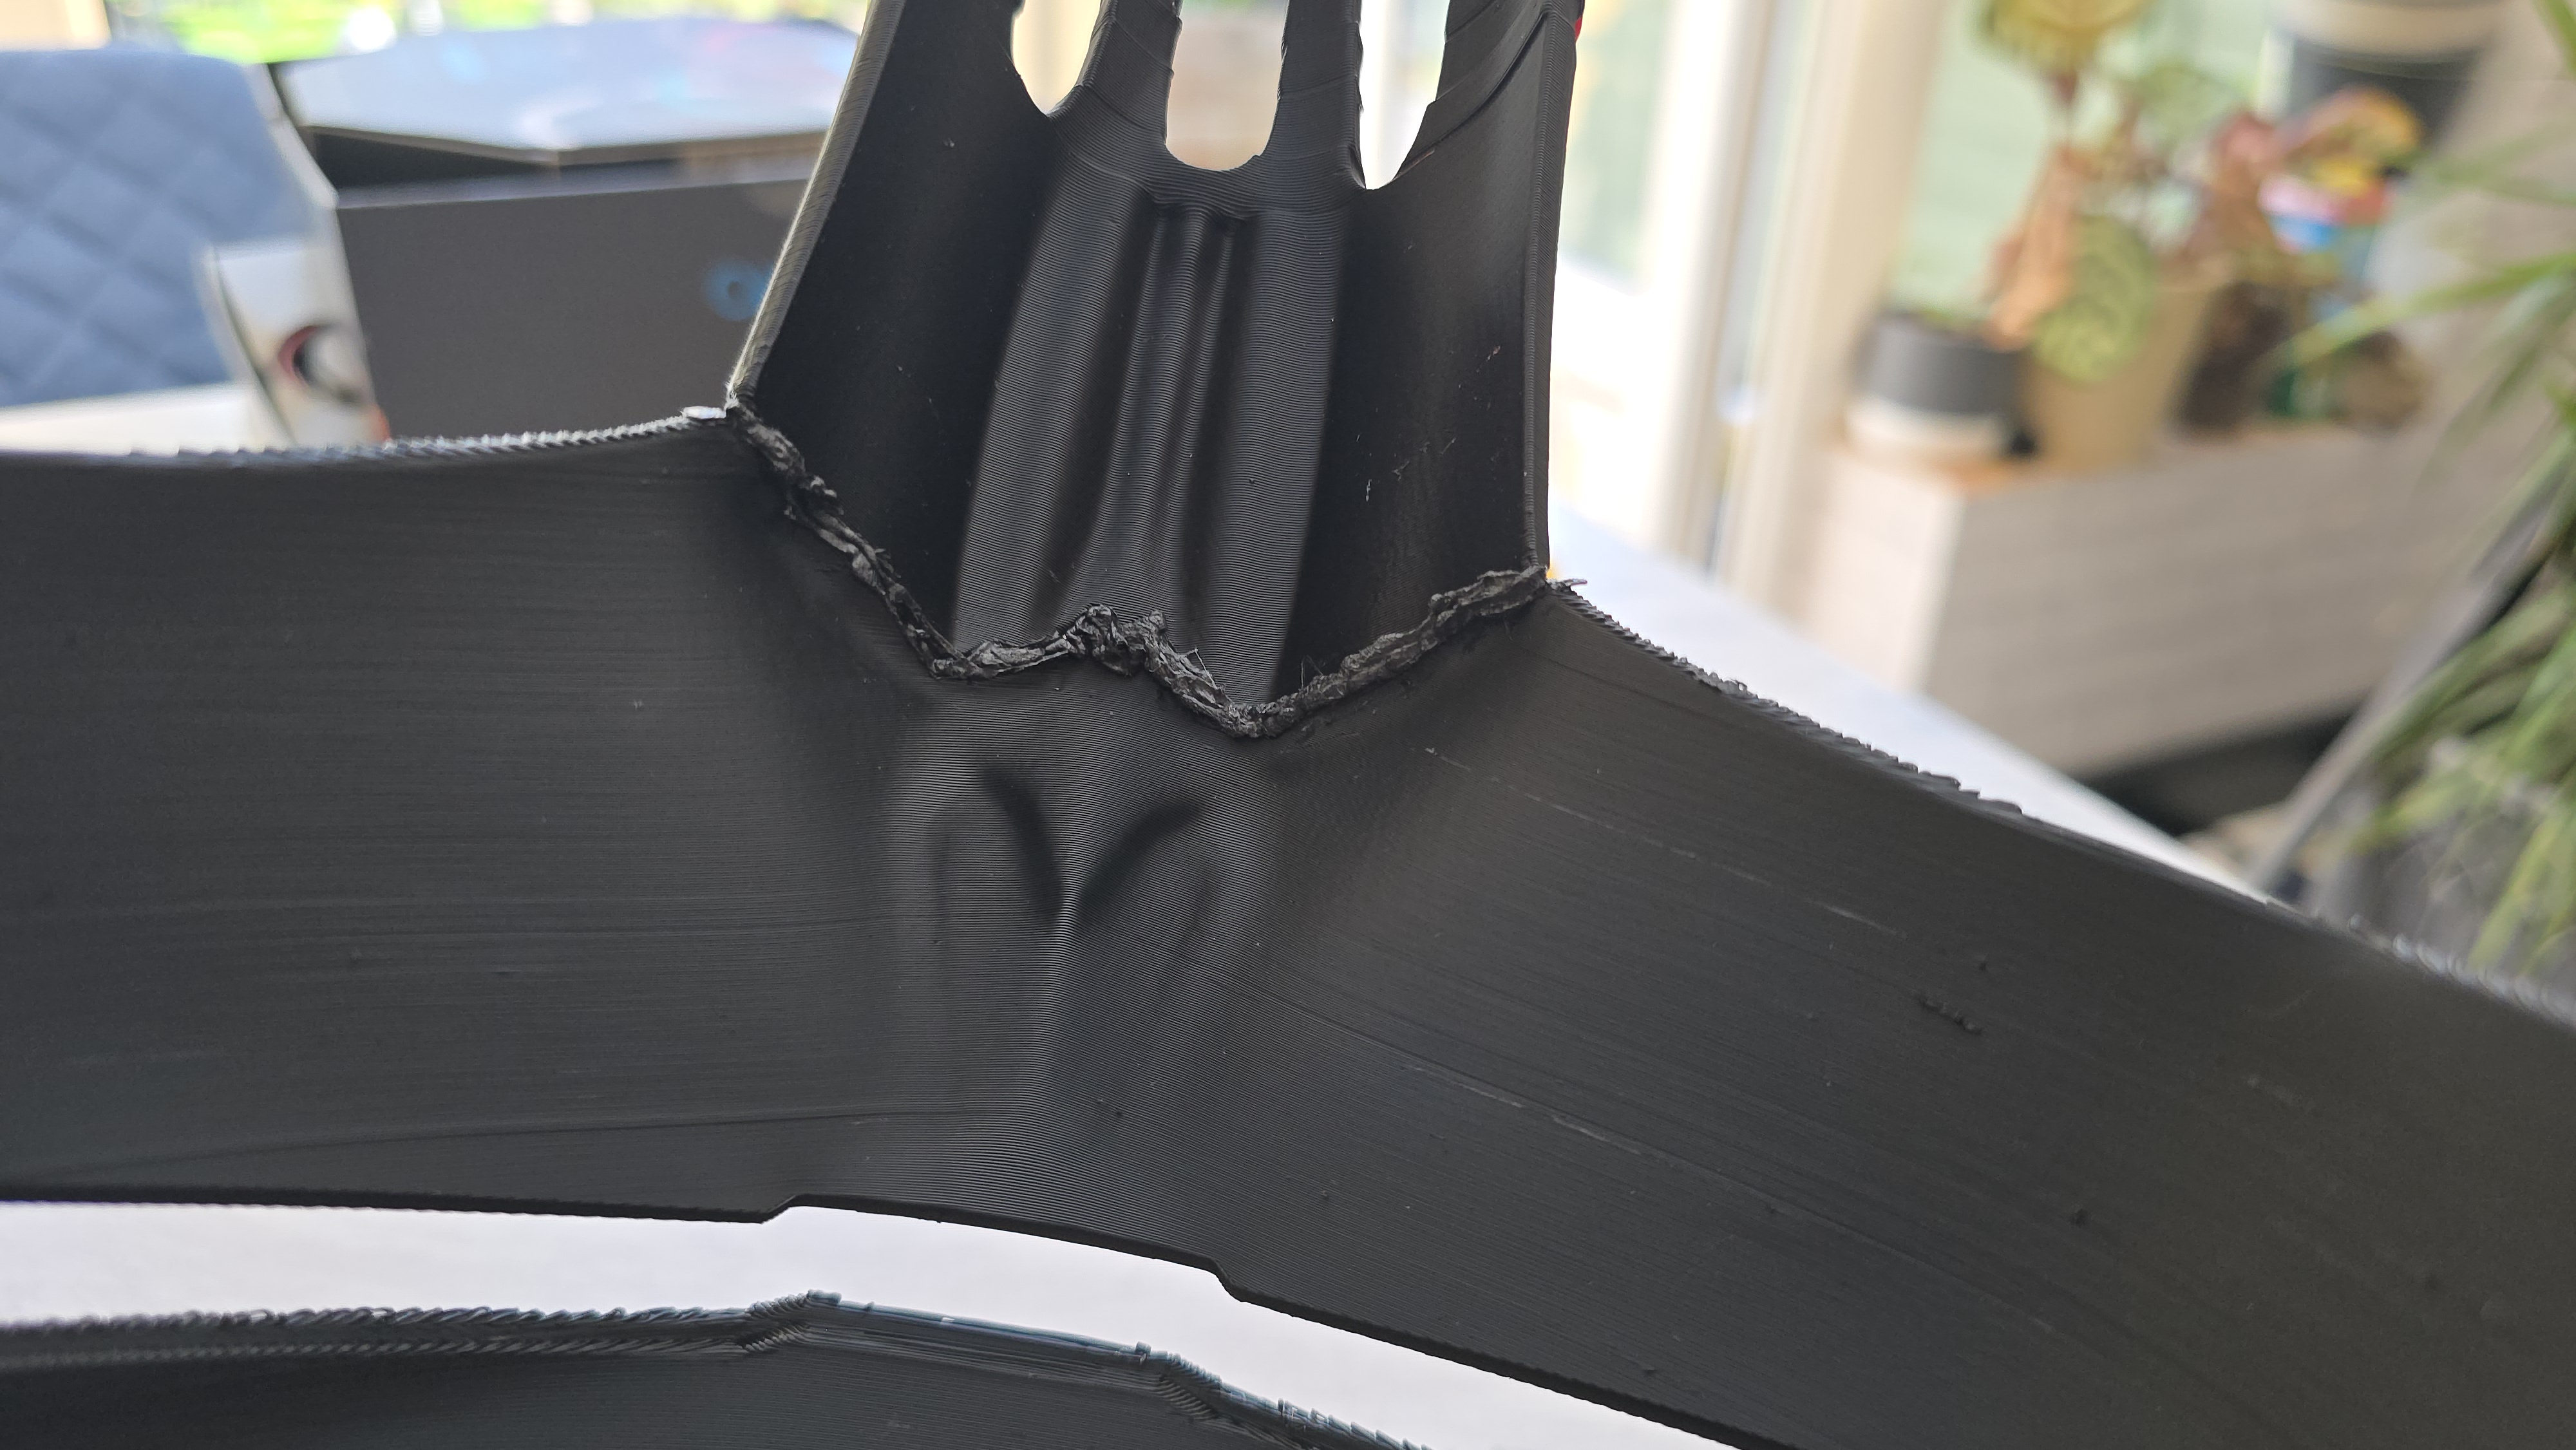
Sure, this filament was a slightly different shade to the black PLA used originally, and this made it stand out a lot more when bridging gaps on the helmet BUT I had planned to sand the helmet down anyway which removes a lot of the plastic pigment in the process, so I chose quality over aesthetic in this scenario.
I was also pretty glad that the printed part I was working on was actually the back of the helmet, so not as big of a deal had the front part of the mask printed poorly. All I really needed was for the part to stay in one piece, and I couldn't have done this without the 3Doodler PRO pen.
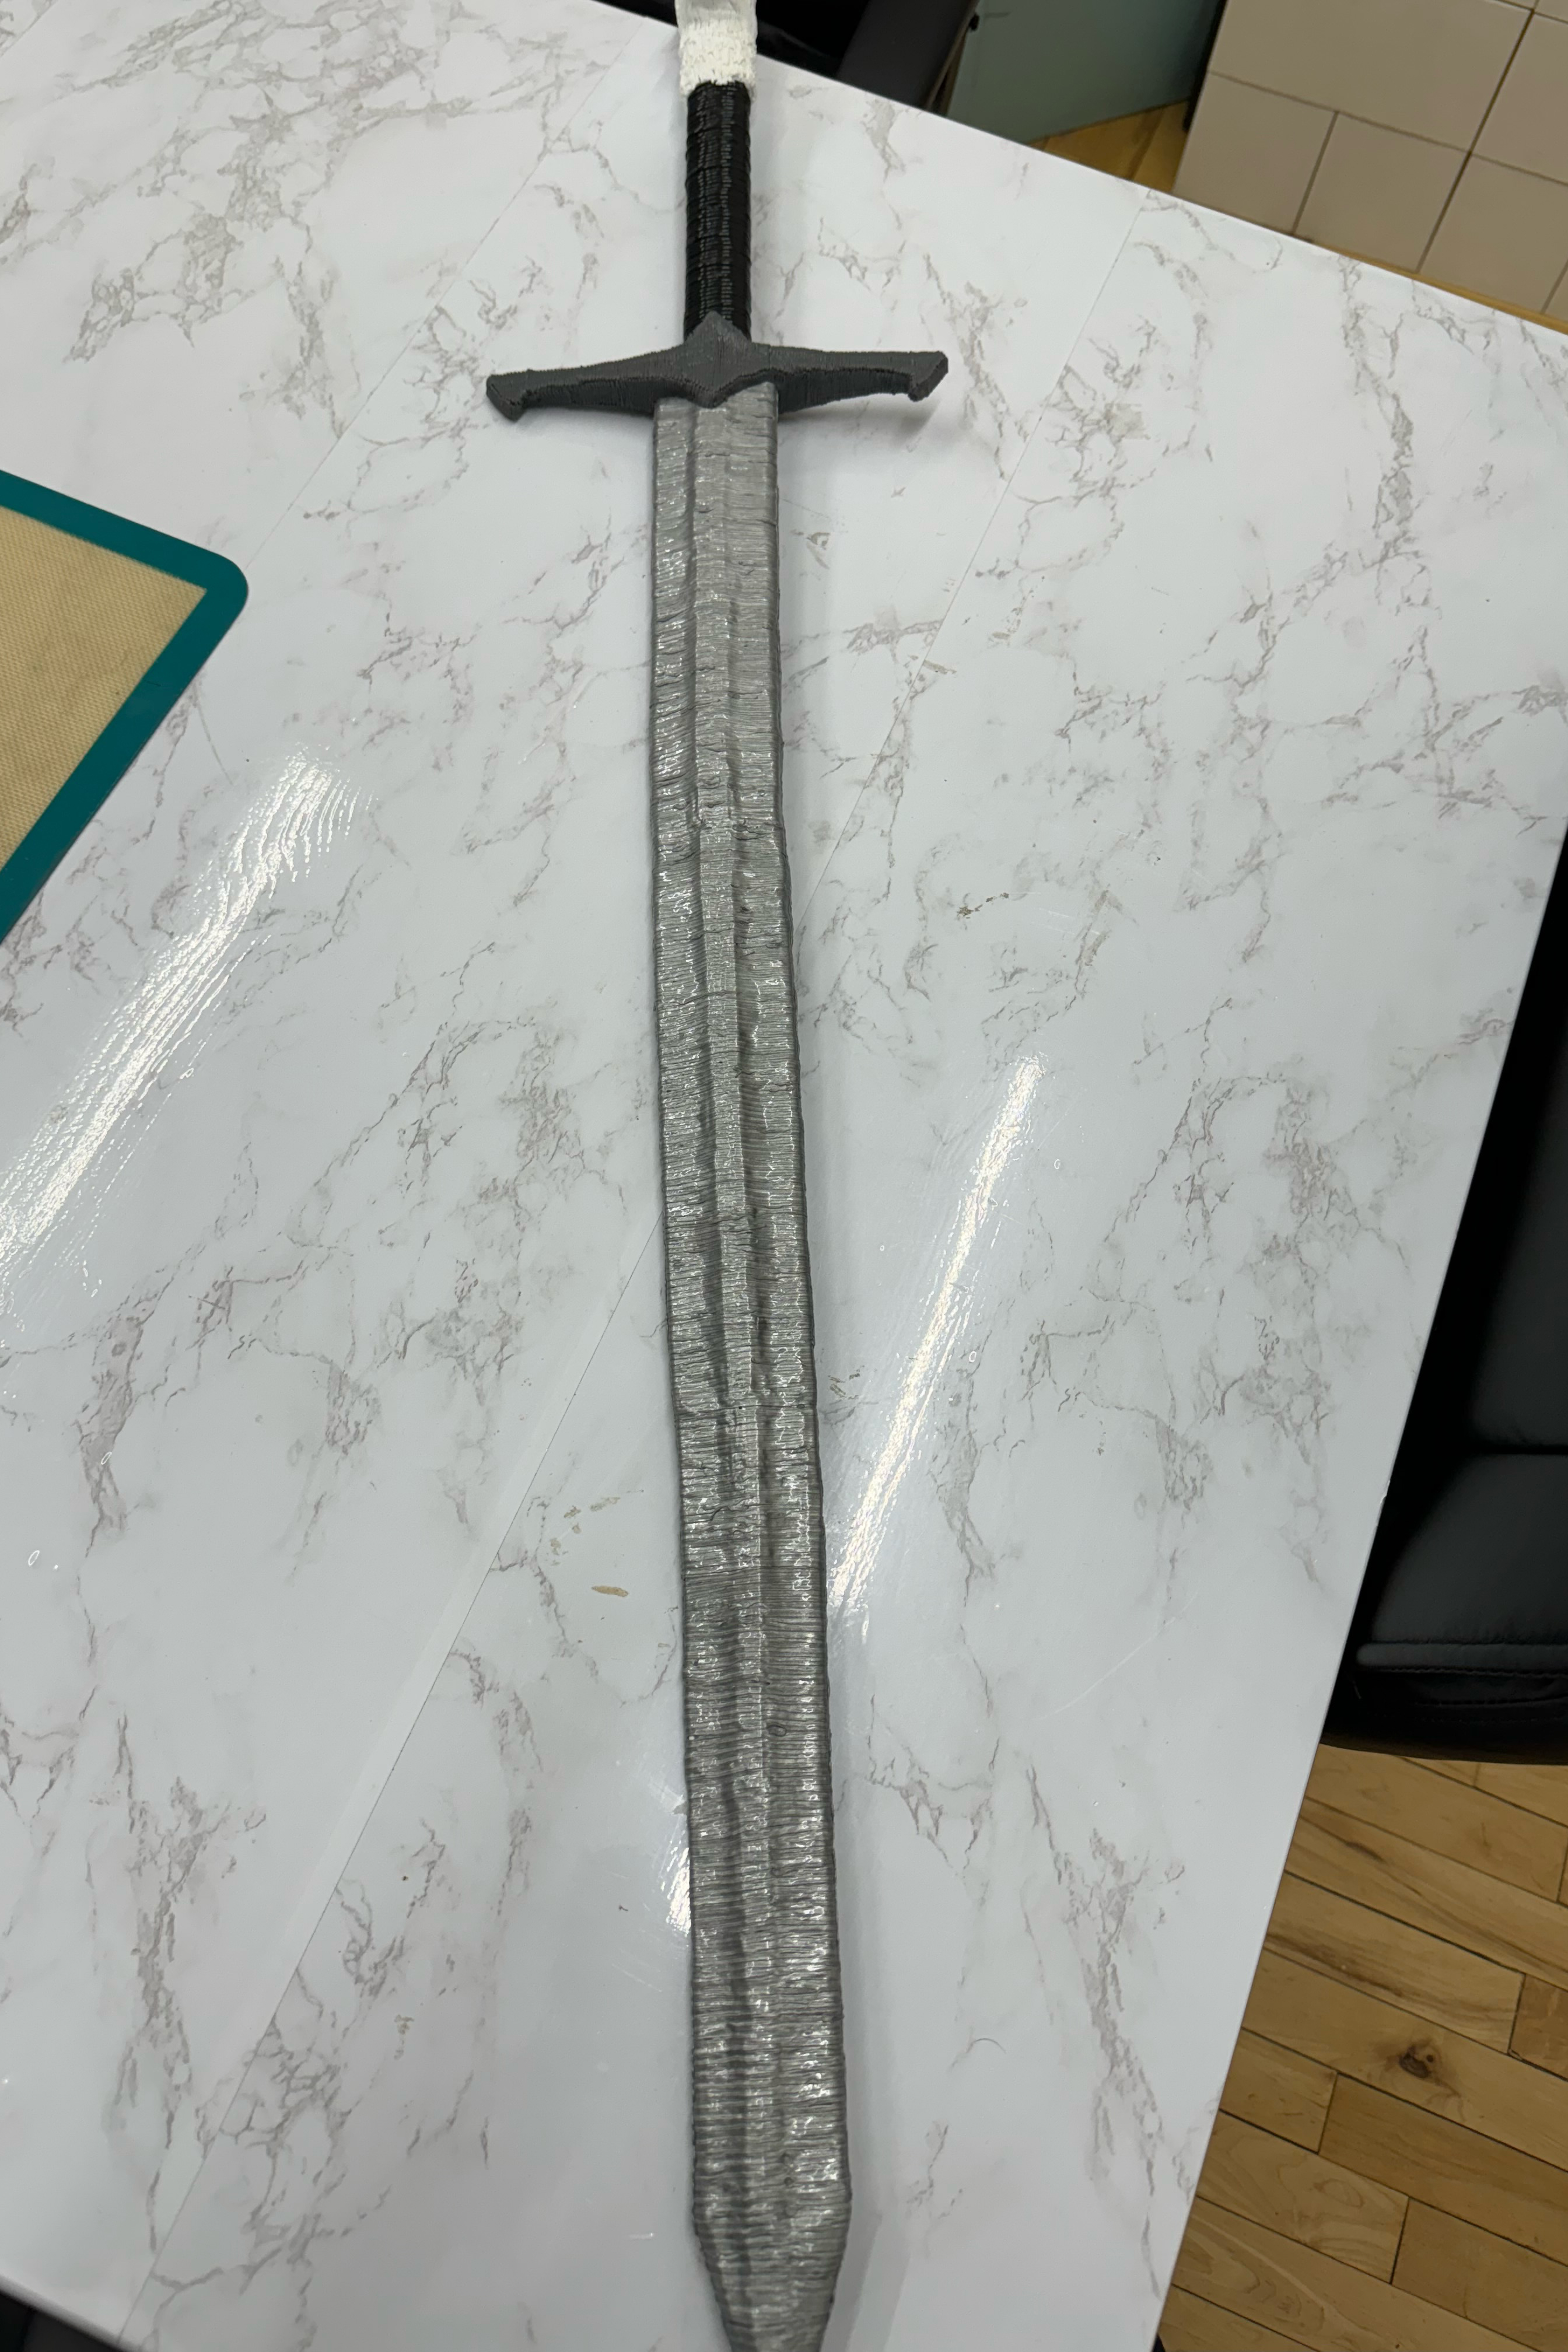
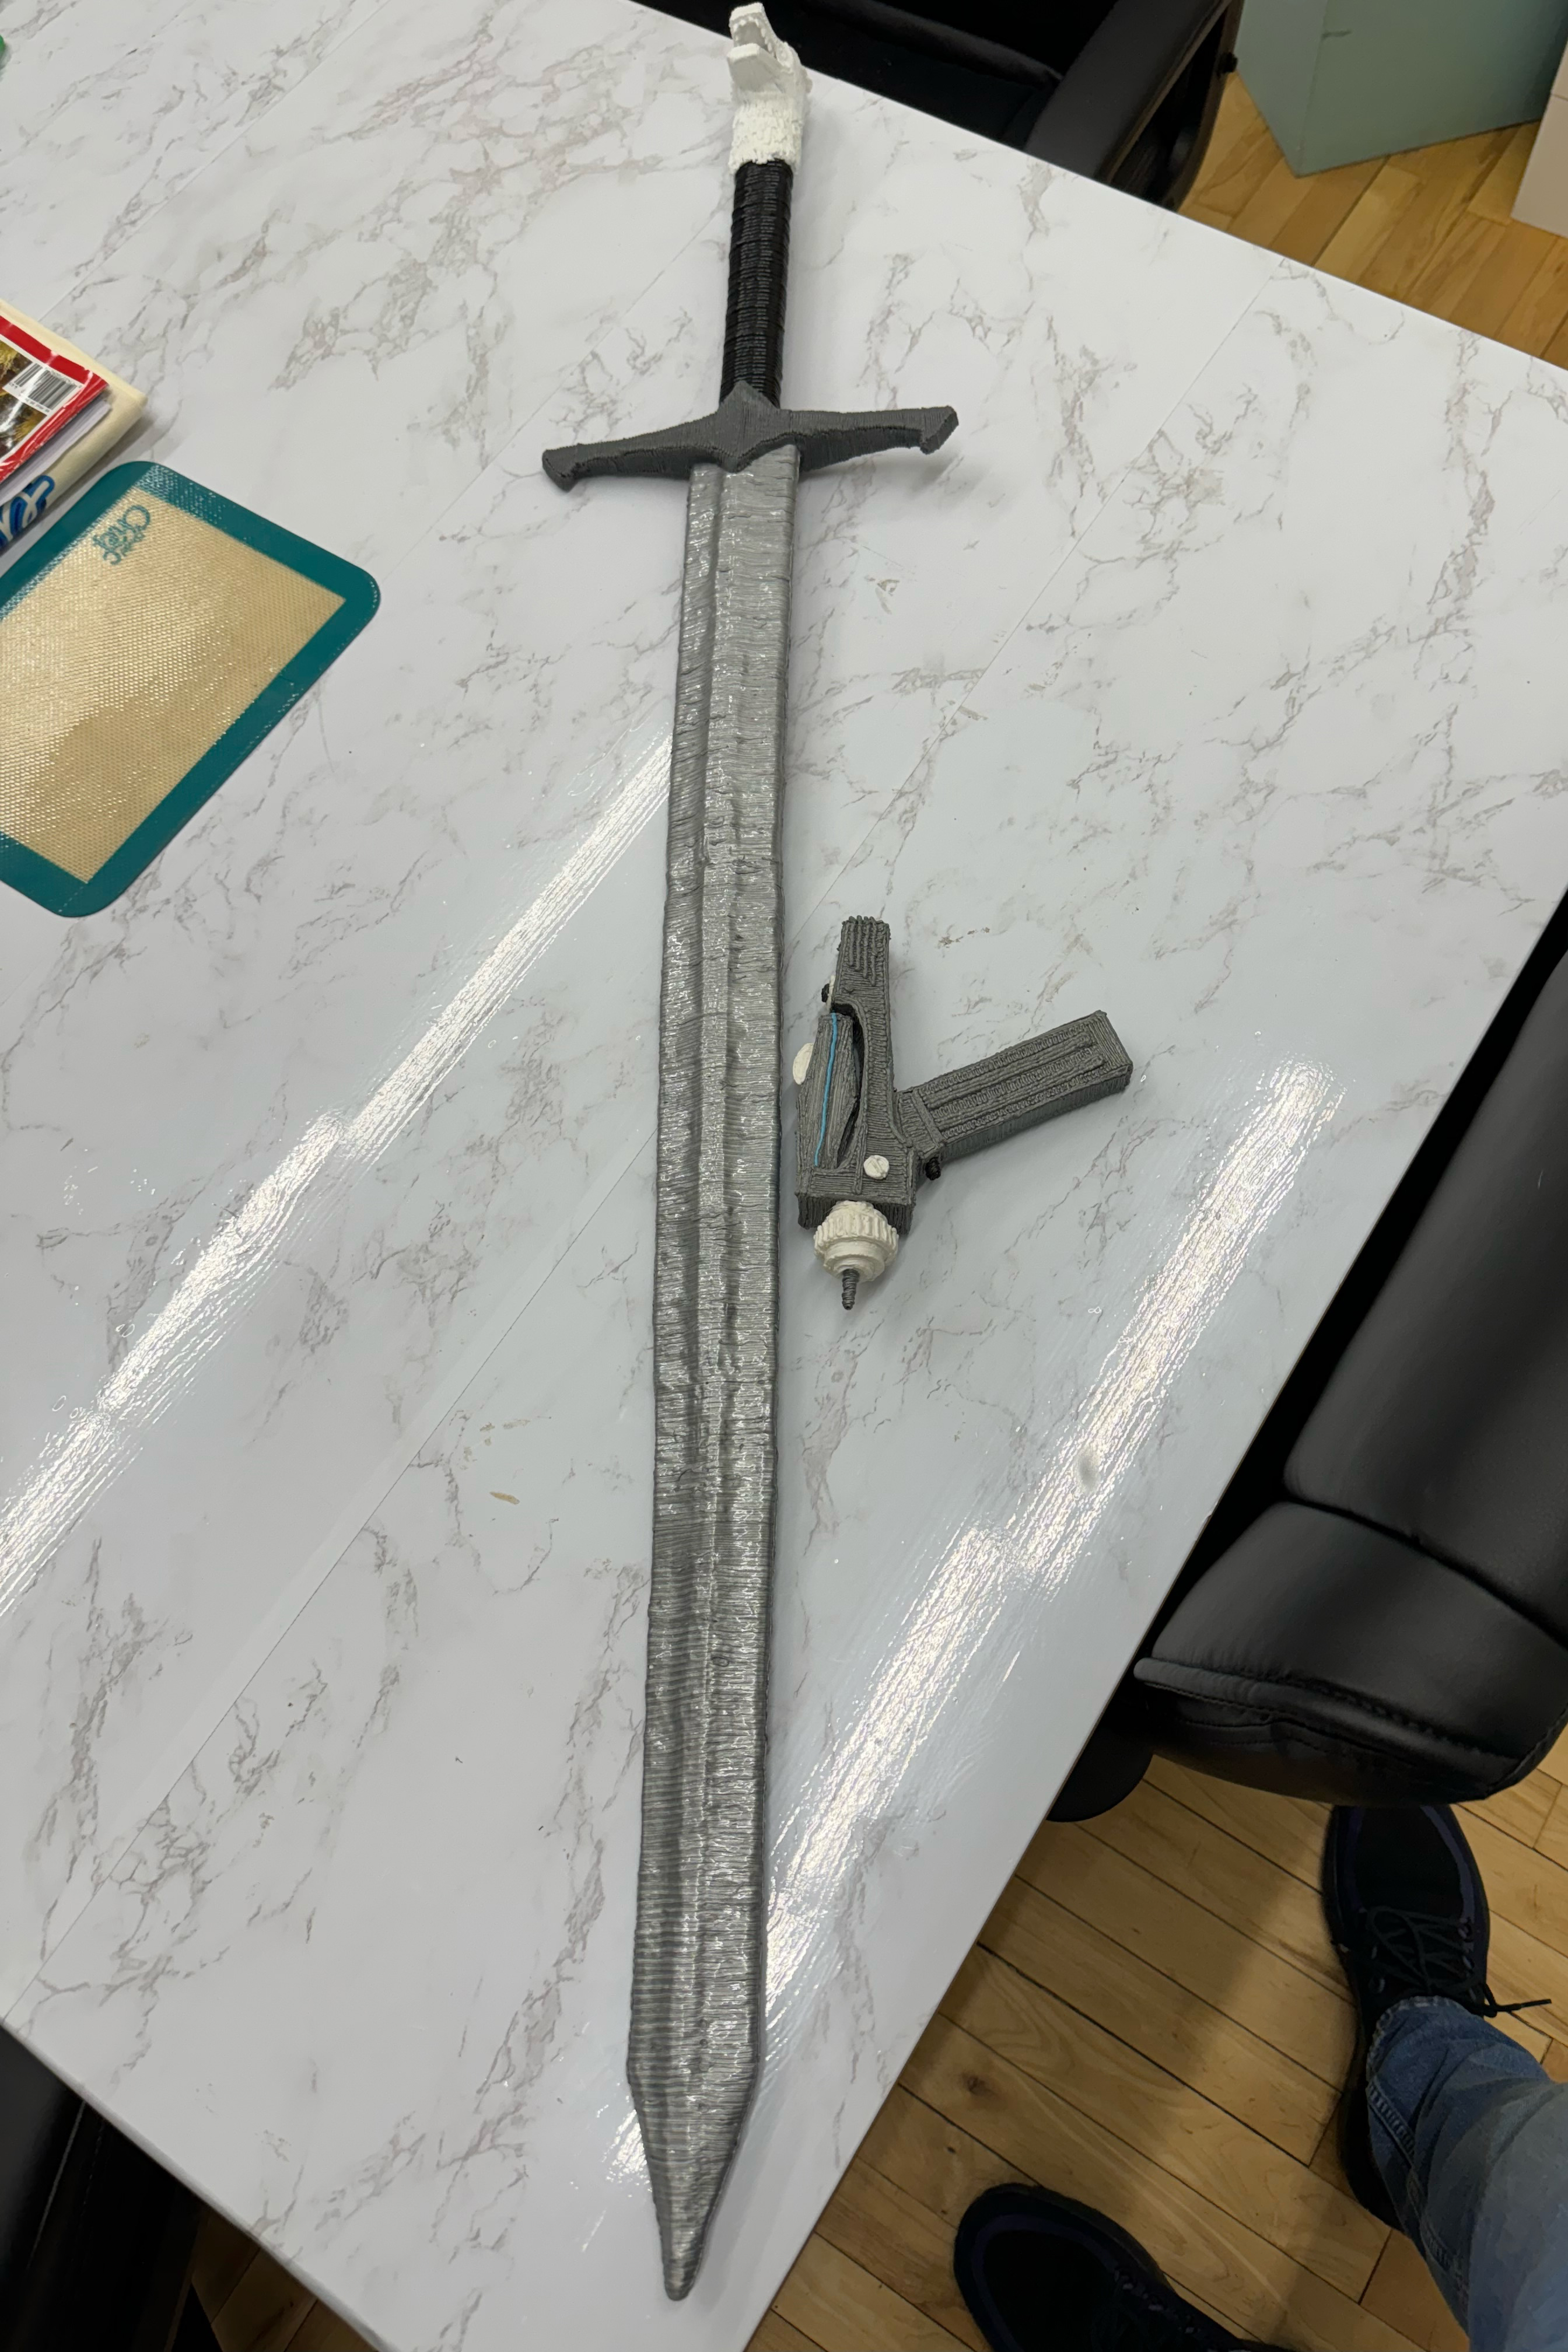
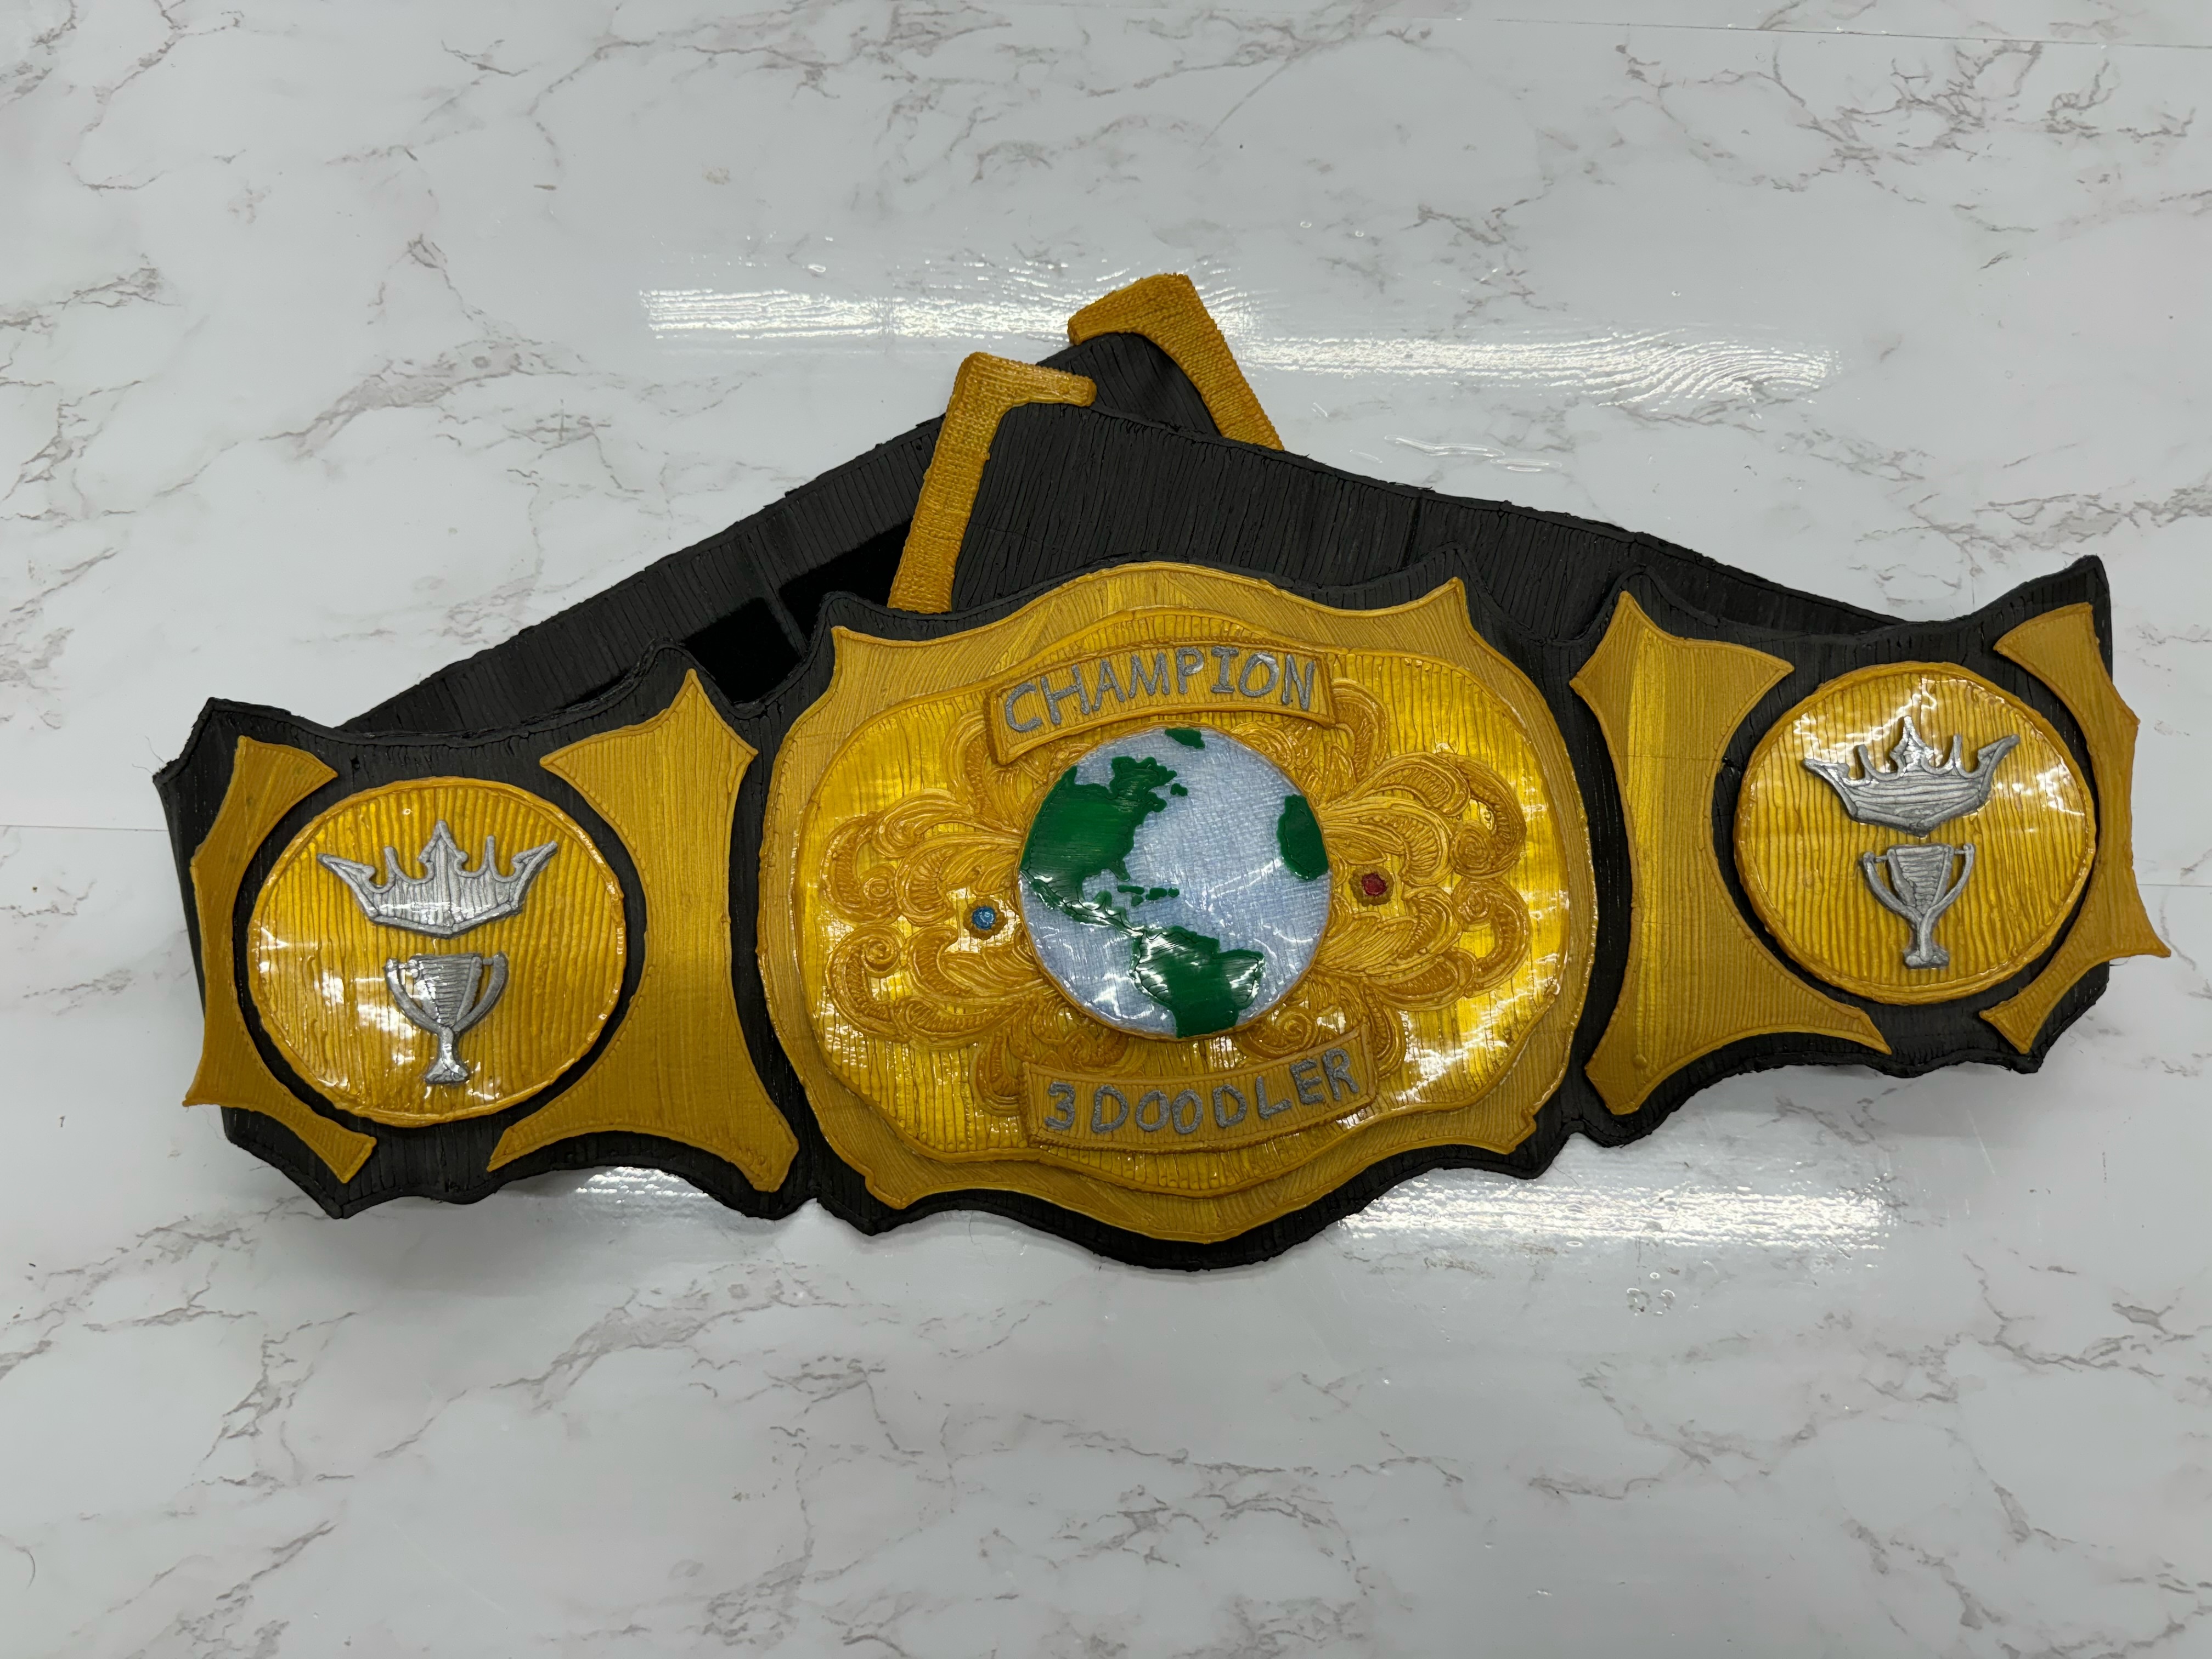
3. Creating props from scratch
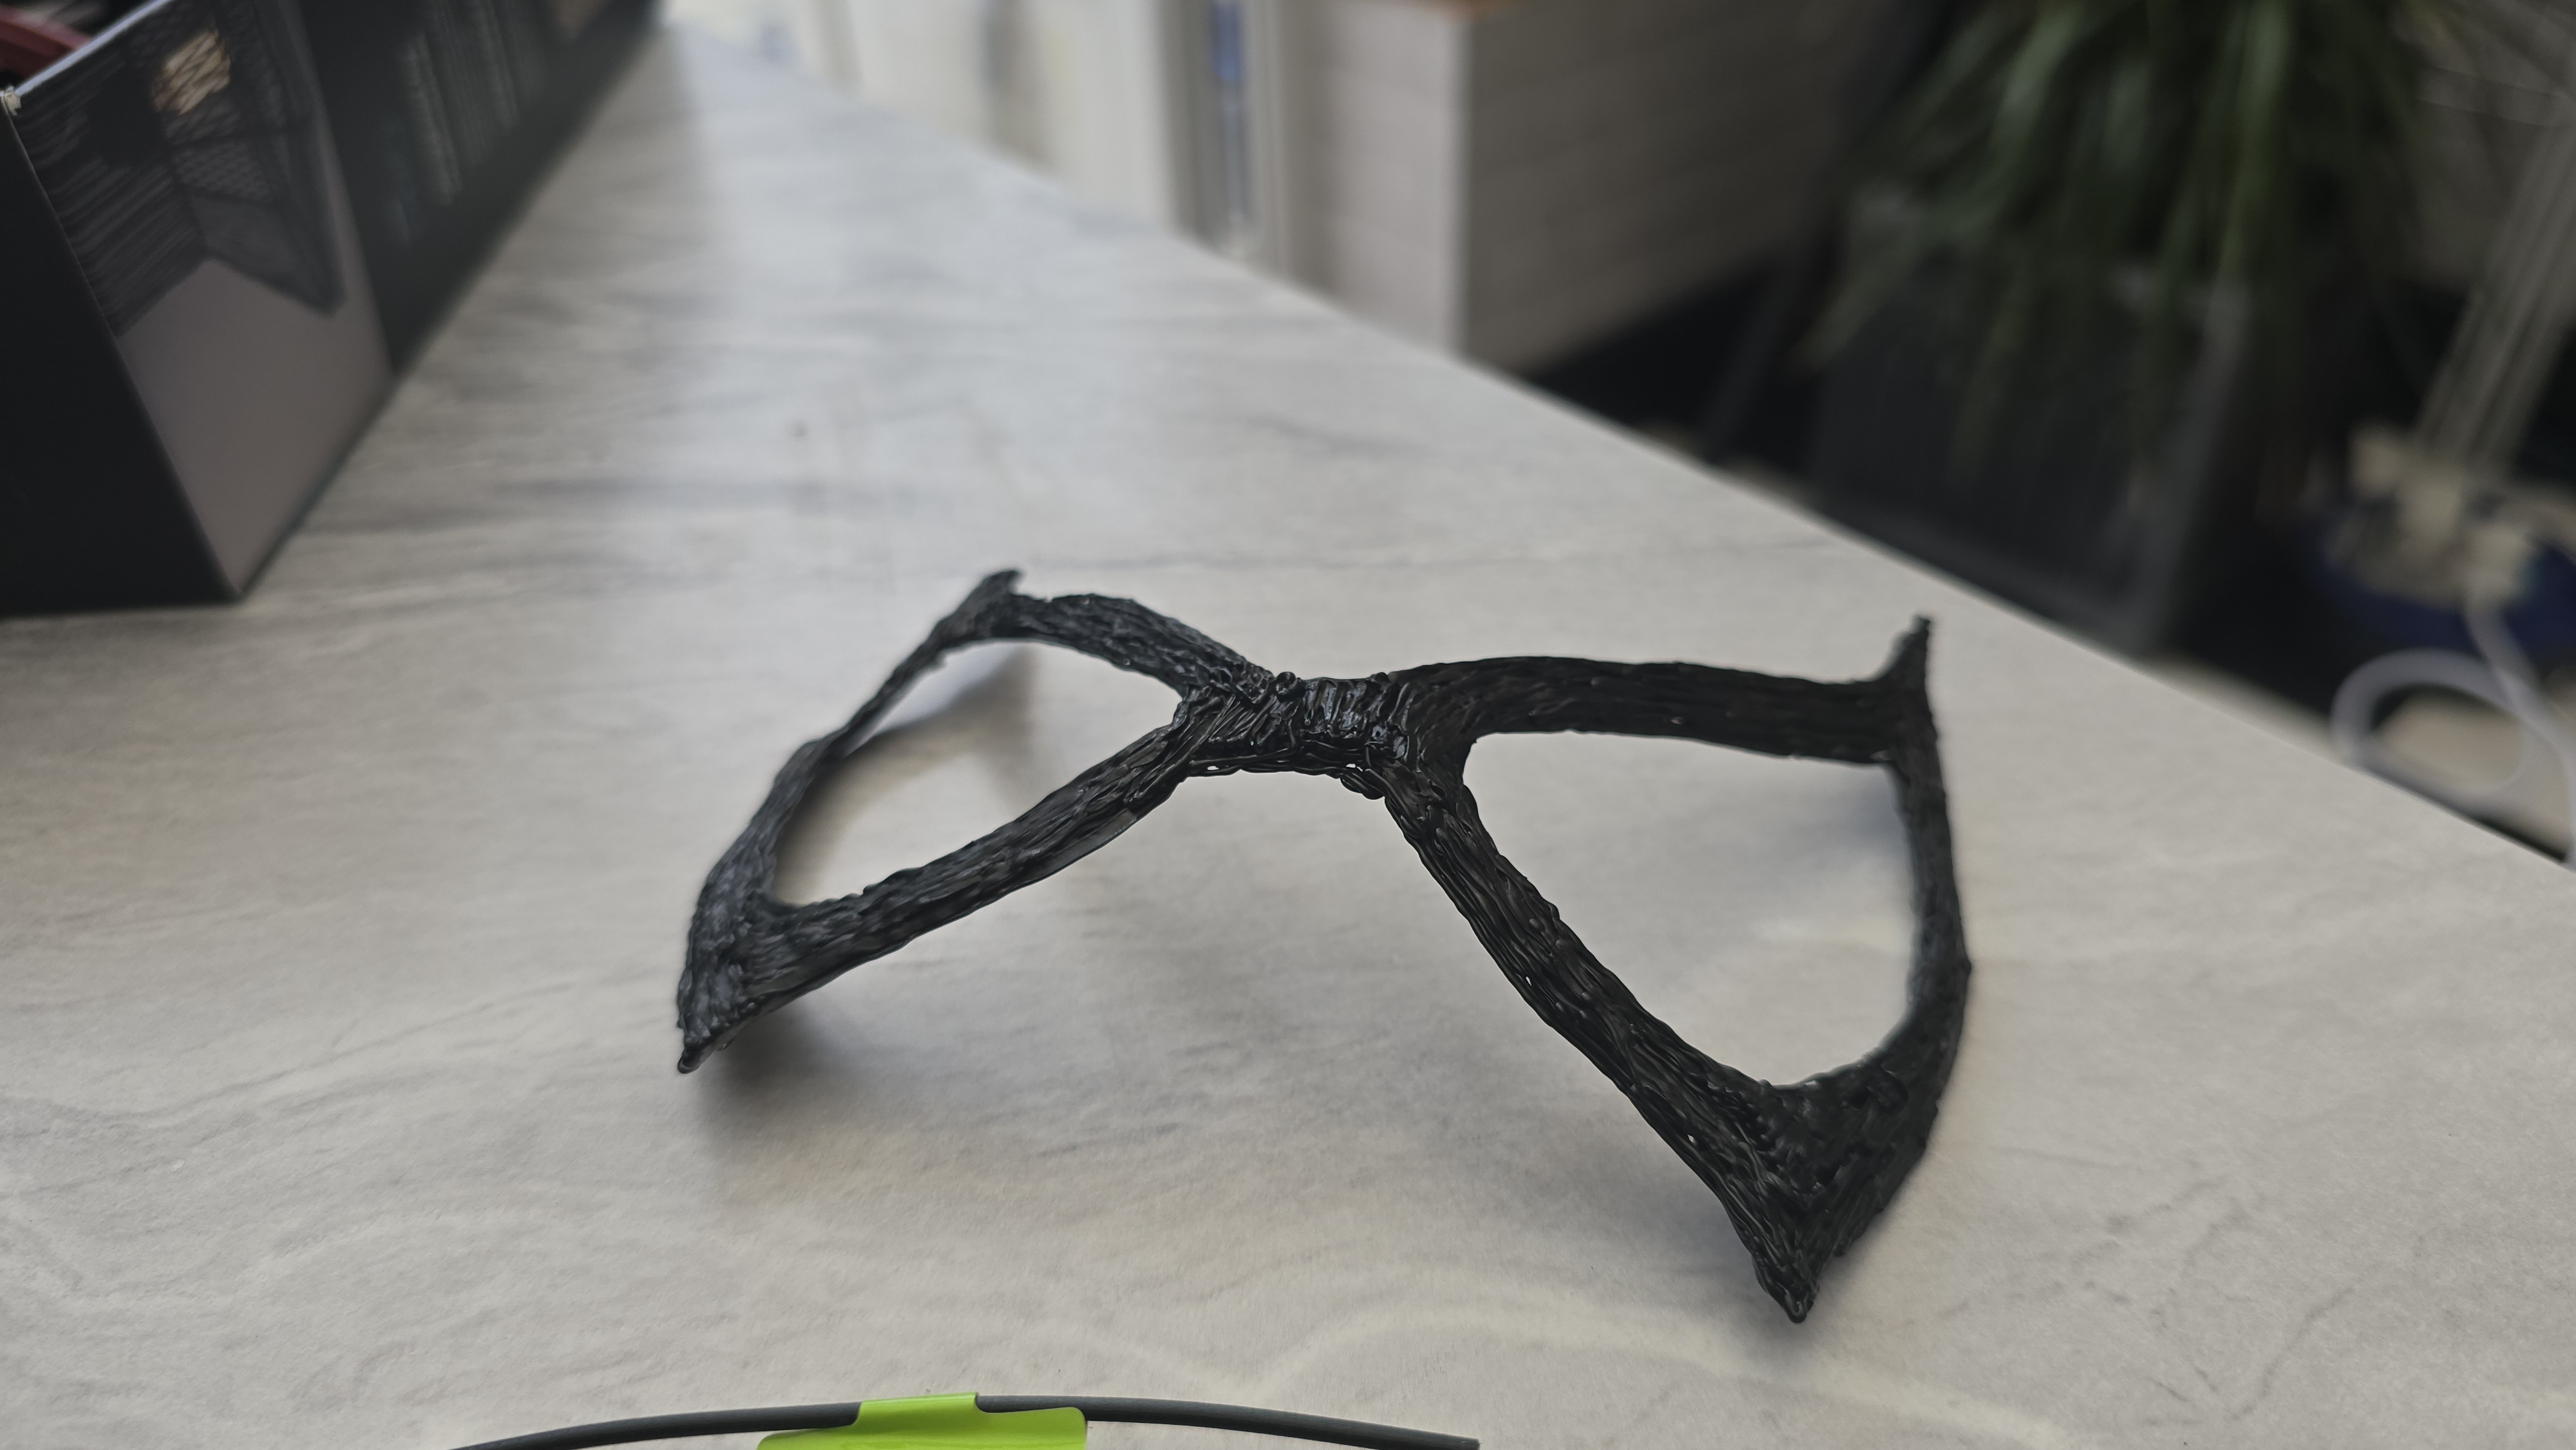
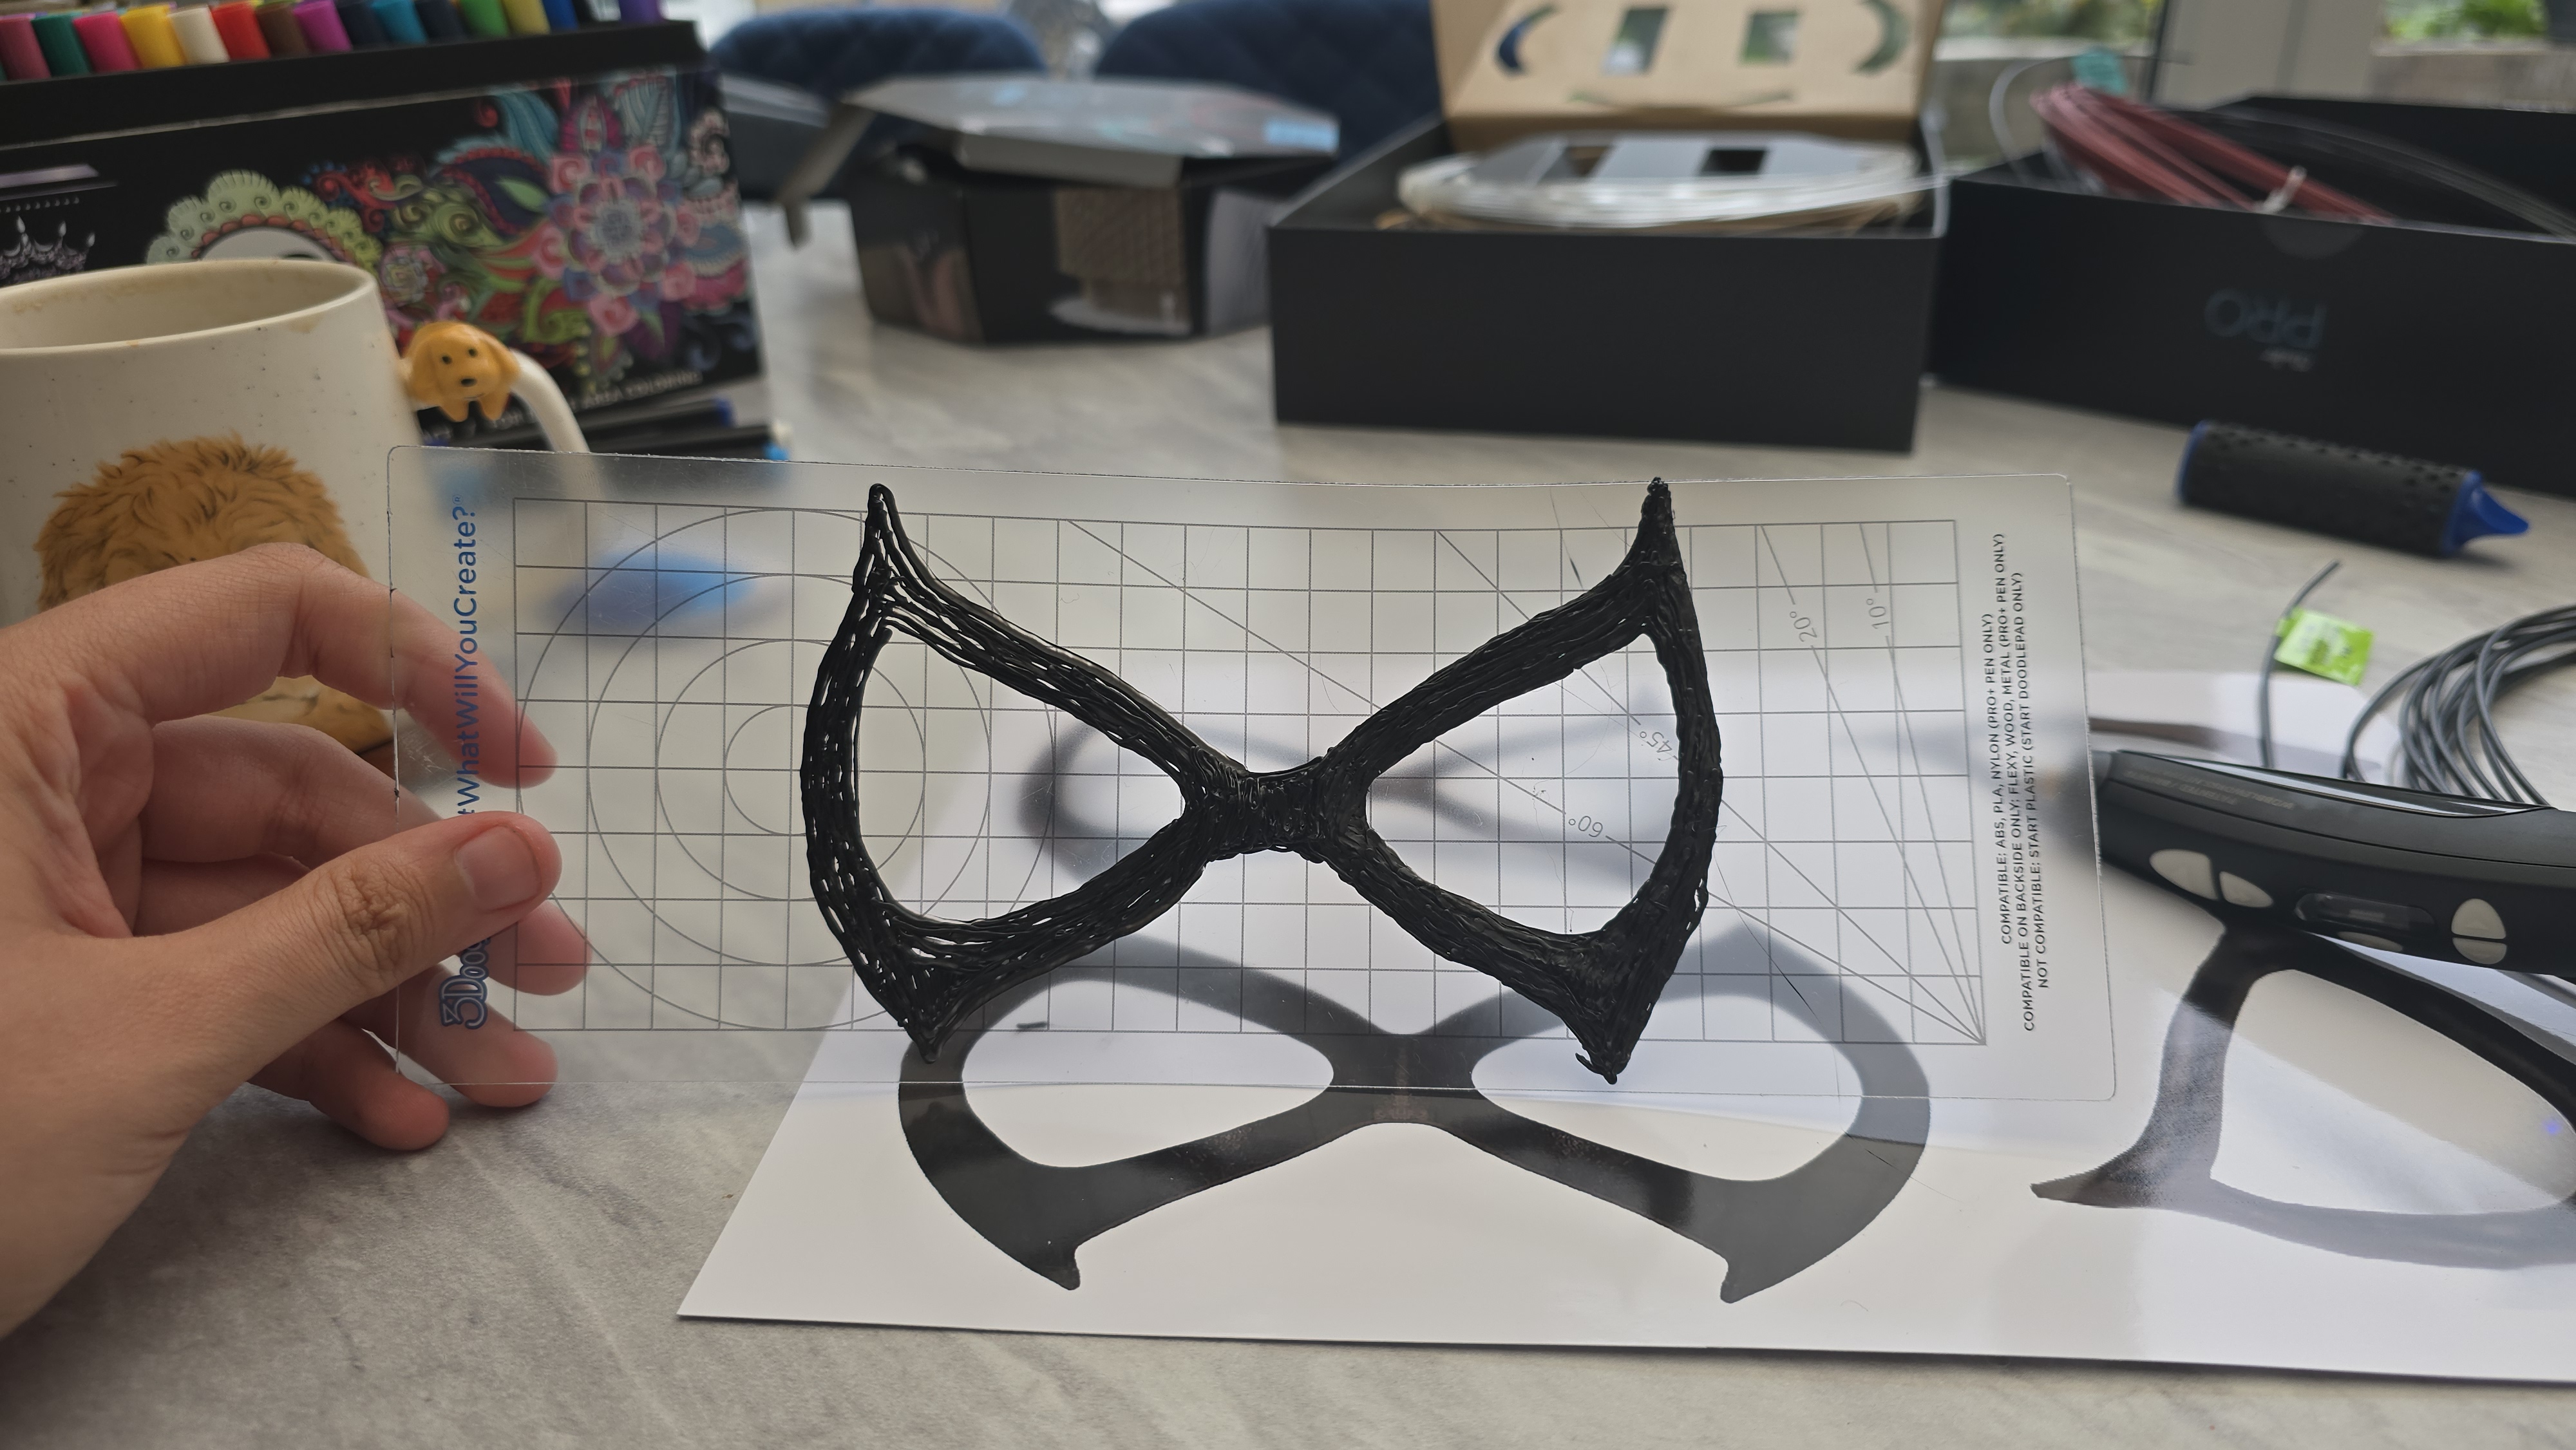
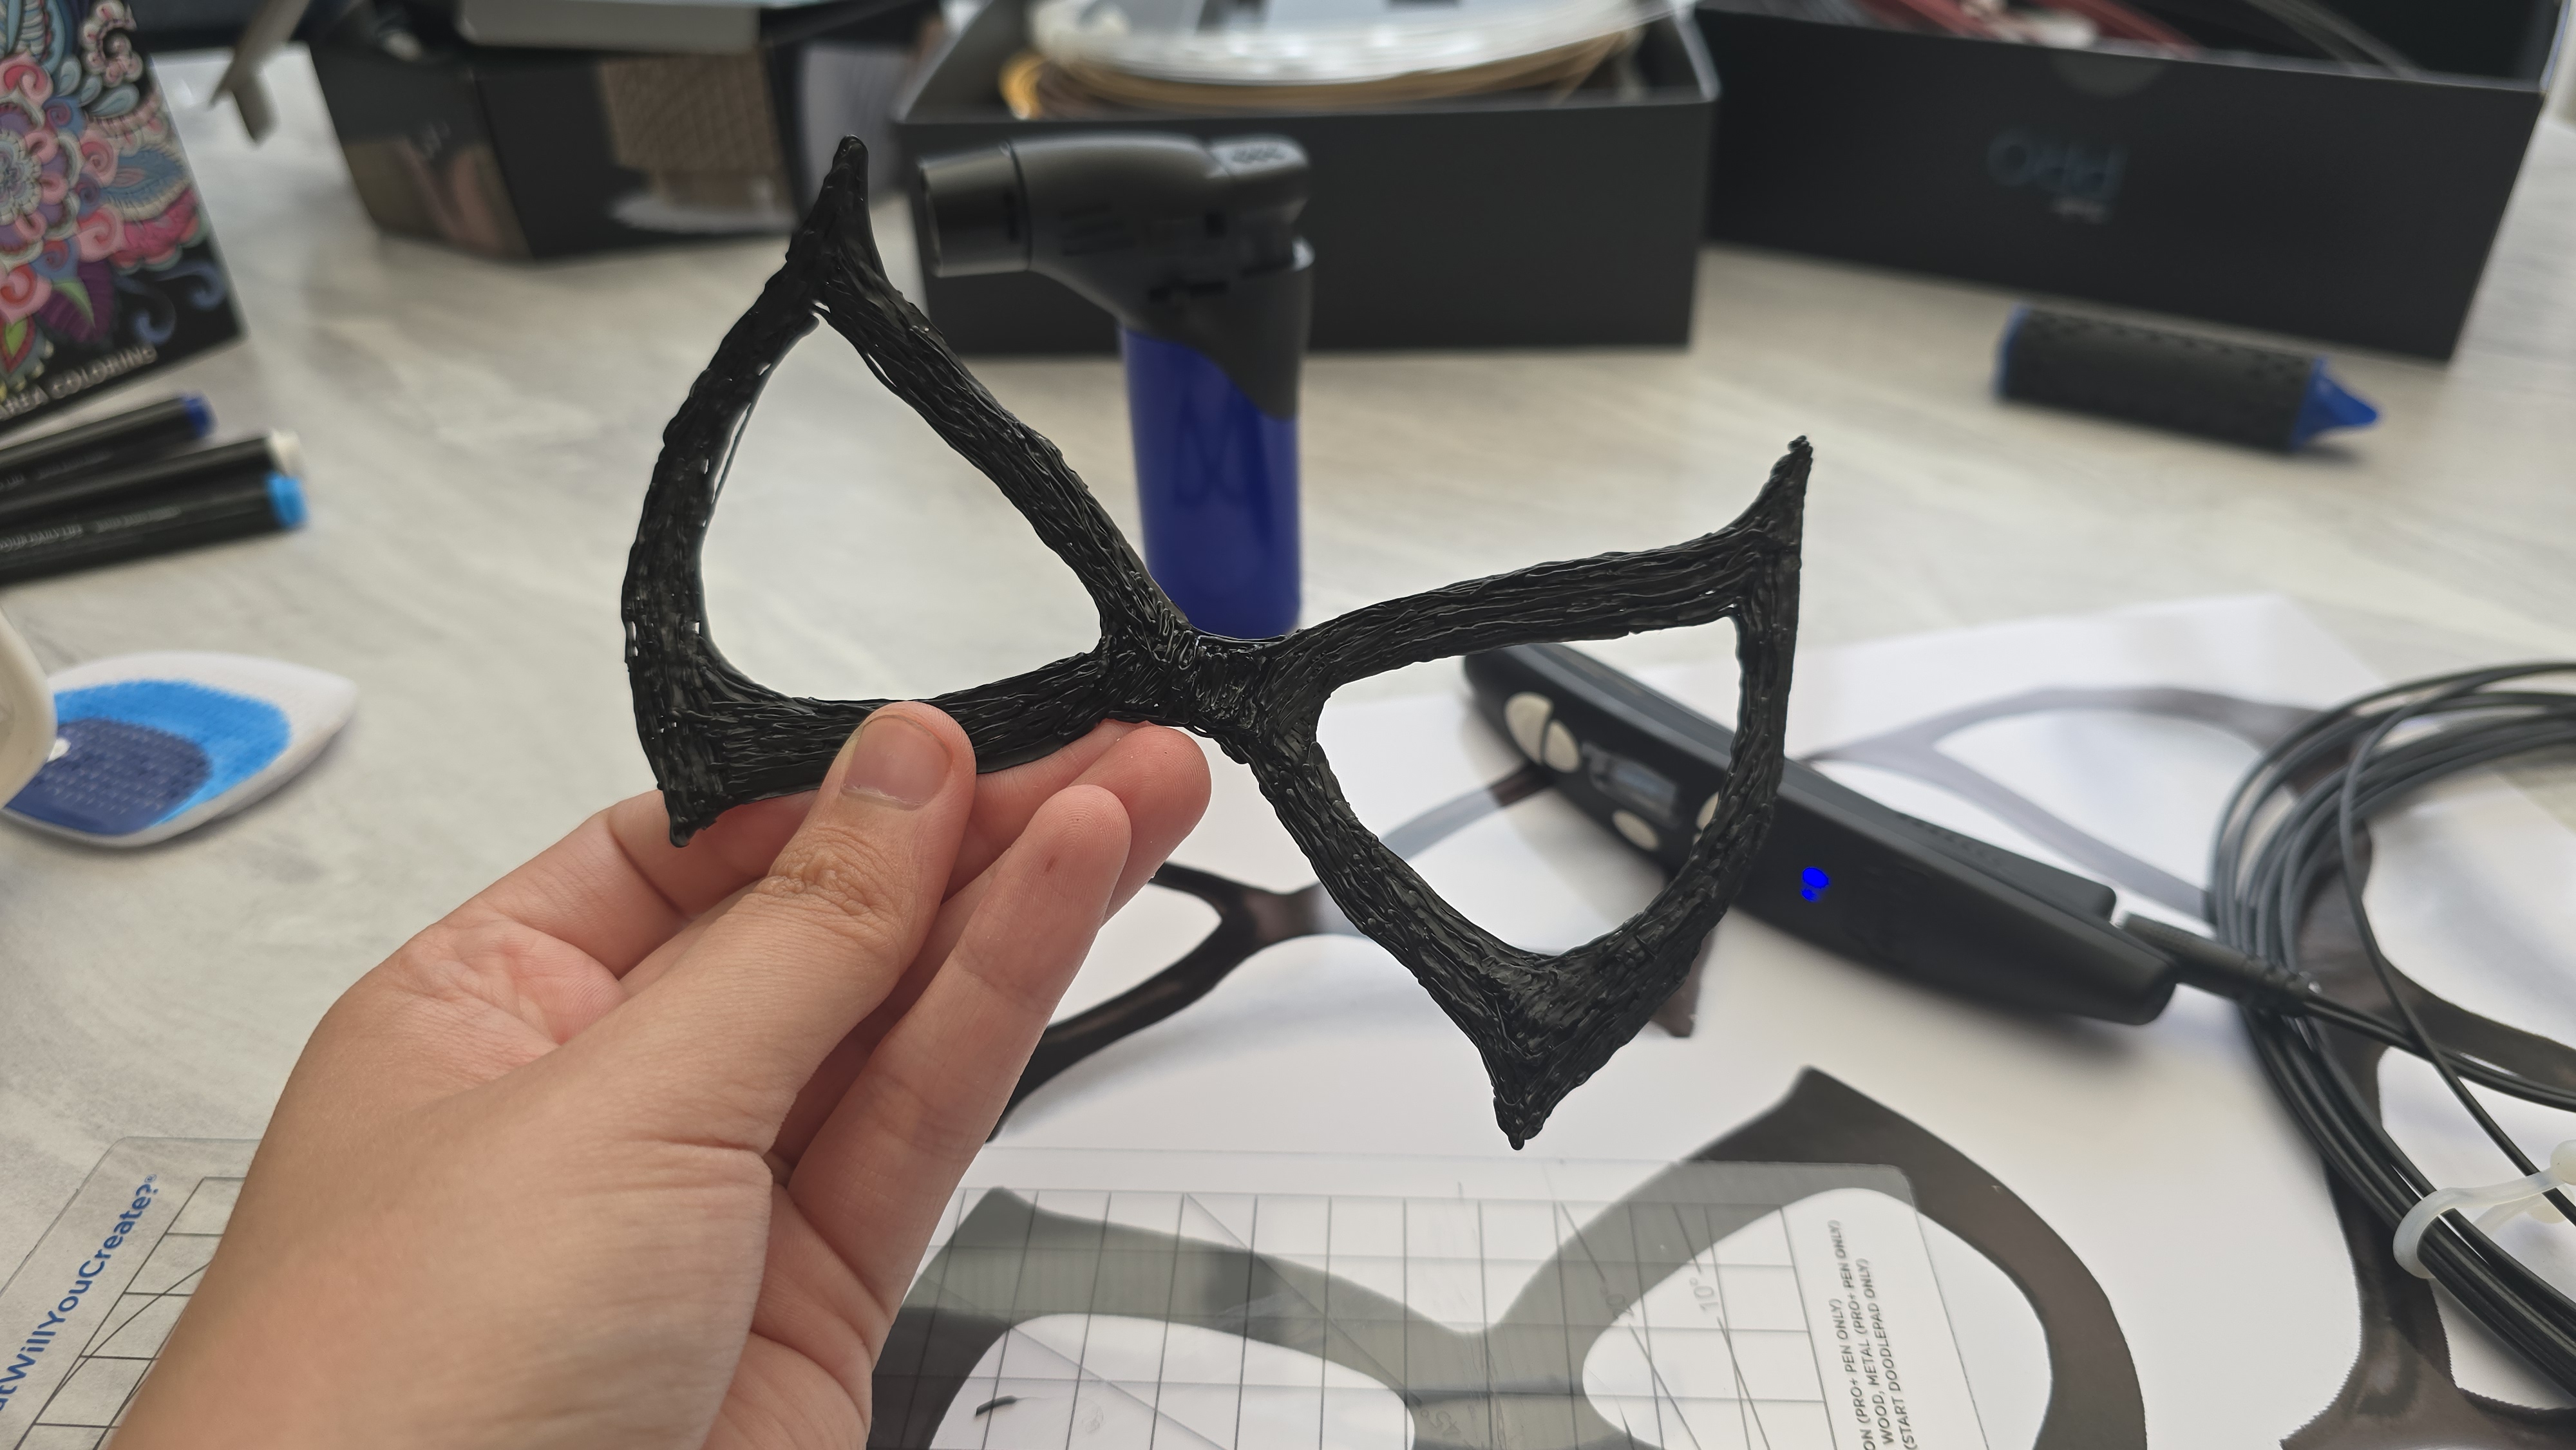
A 3D pen is ideal for creating smaller cosplay props and accessories such as belt buckles, eye masks, jewellery, eye mesh, scales and spikes, plus you can also use it as an embellishment tool in some cases for adding delicate details to armour and helmets.
According to 3Doodler, its Bronze and Copper 3D pen filaments are perfect for creating metallic accents in 3D printed cosplay designs. You can also add a realistic feel to jewellery, thanks to the rich, metallic finish of these materials that makes them ideal for high-detail work.
If you're thinking bigger, you can absolutely use a 3D pen to create larger props from scratch, too. Just keep in mind that this could be a very long and tedious process, and may not provide the same smooth finish that you get from using a 3D printer for larger-scale helmets and props.
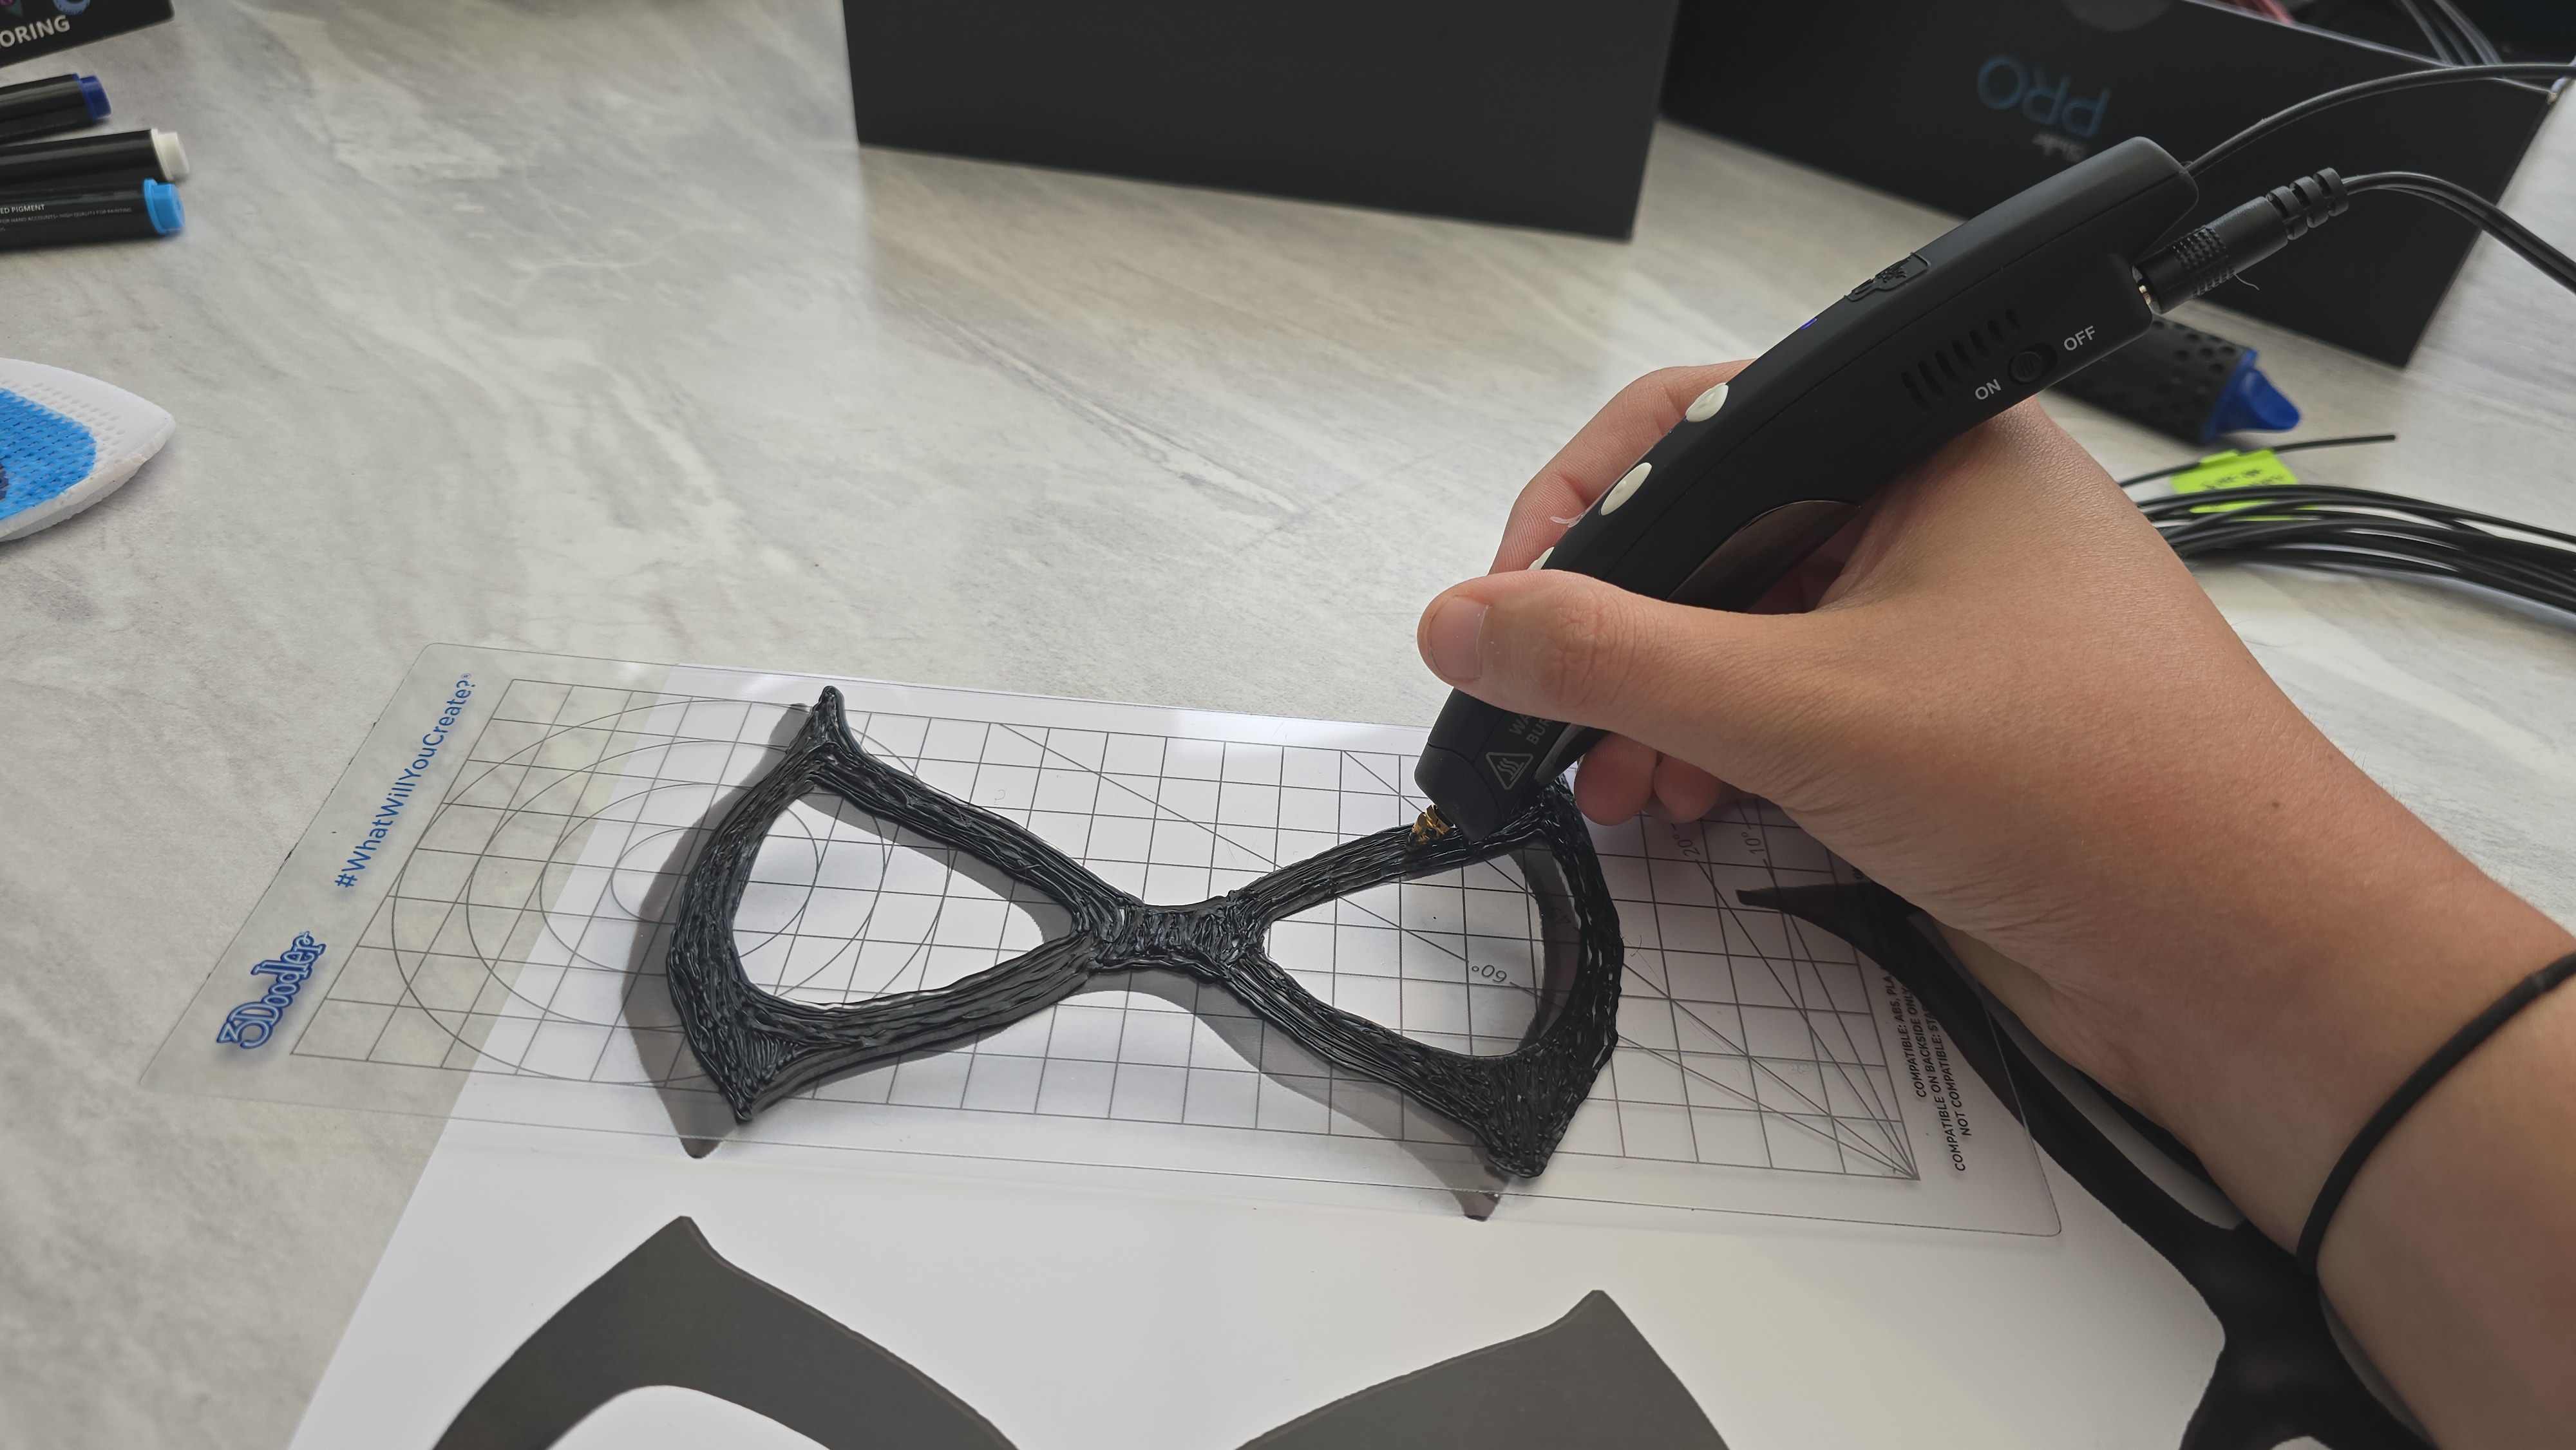


The beauty of a 3D pen is that the power is really in your hands, and you can direct the filament to go wherever you like, in any shape you like. You don't get that level of creativity or independence from using a 3D printer, which is why I think for smaller pieces, a 3D pen is a must.
I used the 3Doodler PRO to create a Black Cat eye mask for a cosplay I have in the works, and it came out pretty cool if I do say so. There's no way I could have done this without using a template to scale, and a neat trick is that if you gently heat up the mask using a heat gun after you're done printing, you can carefully bend it slightly to fit your face shape better.
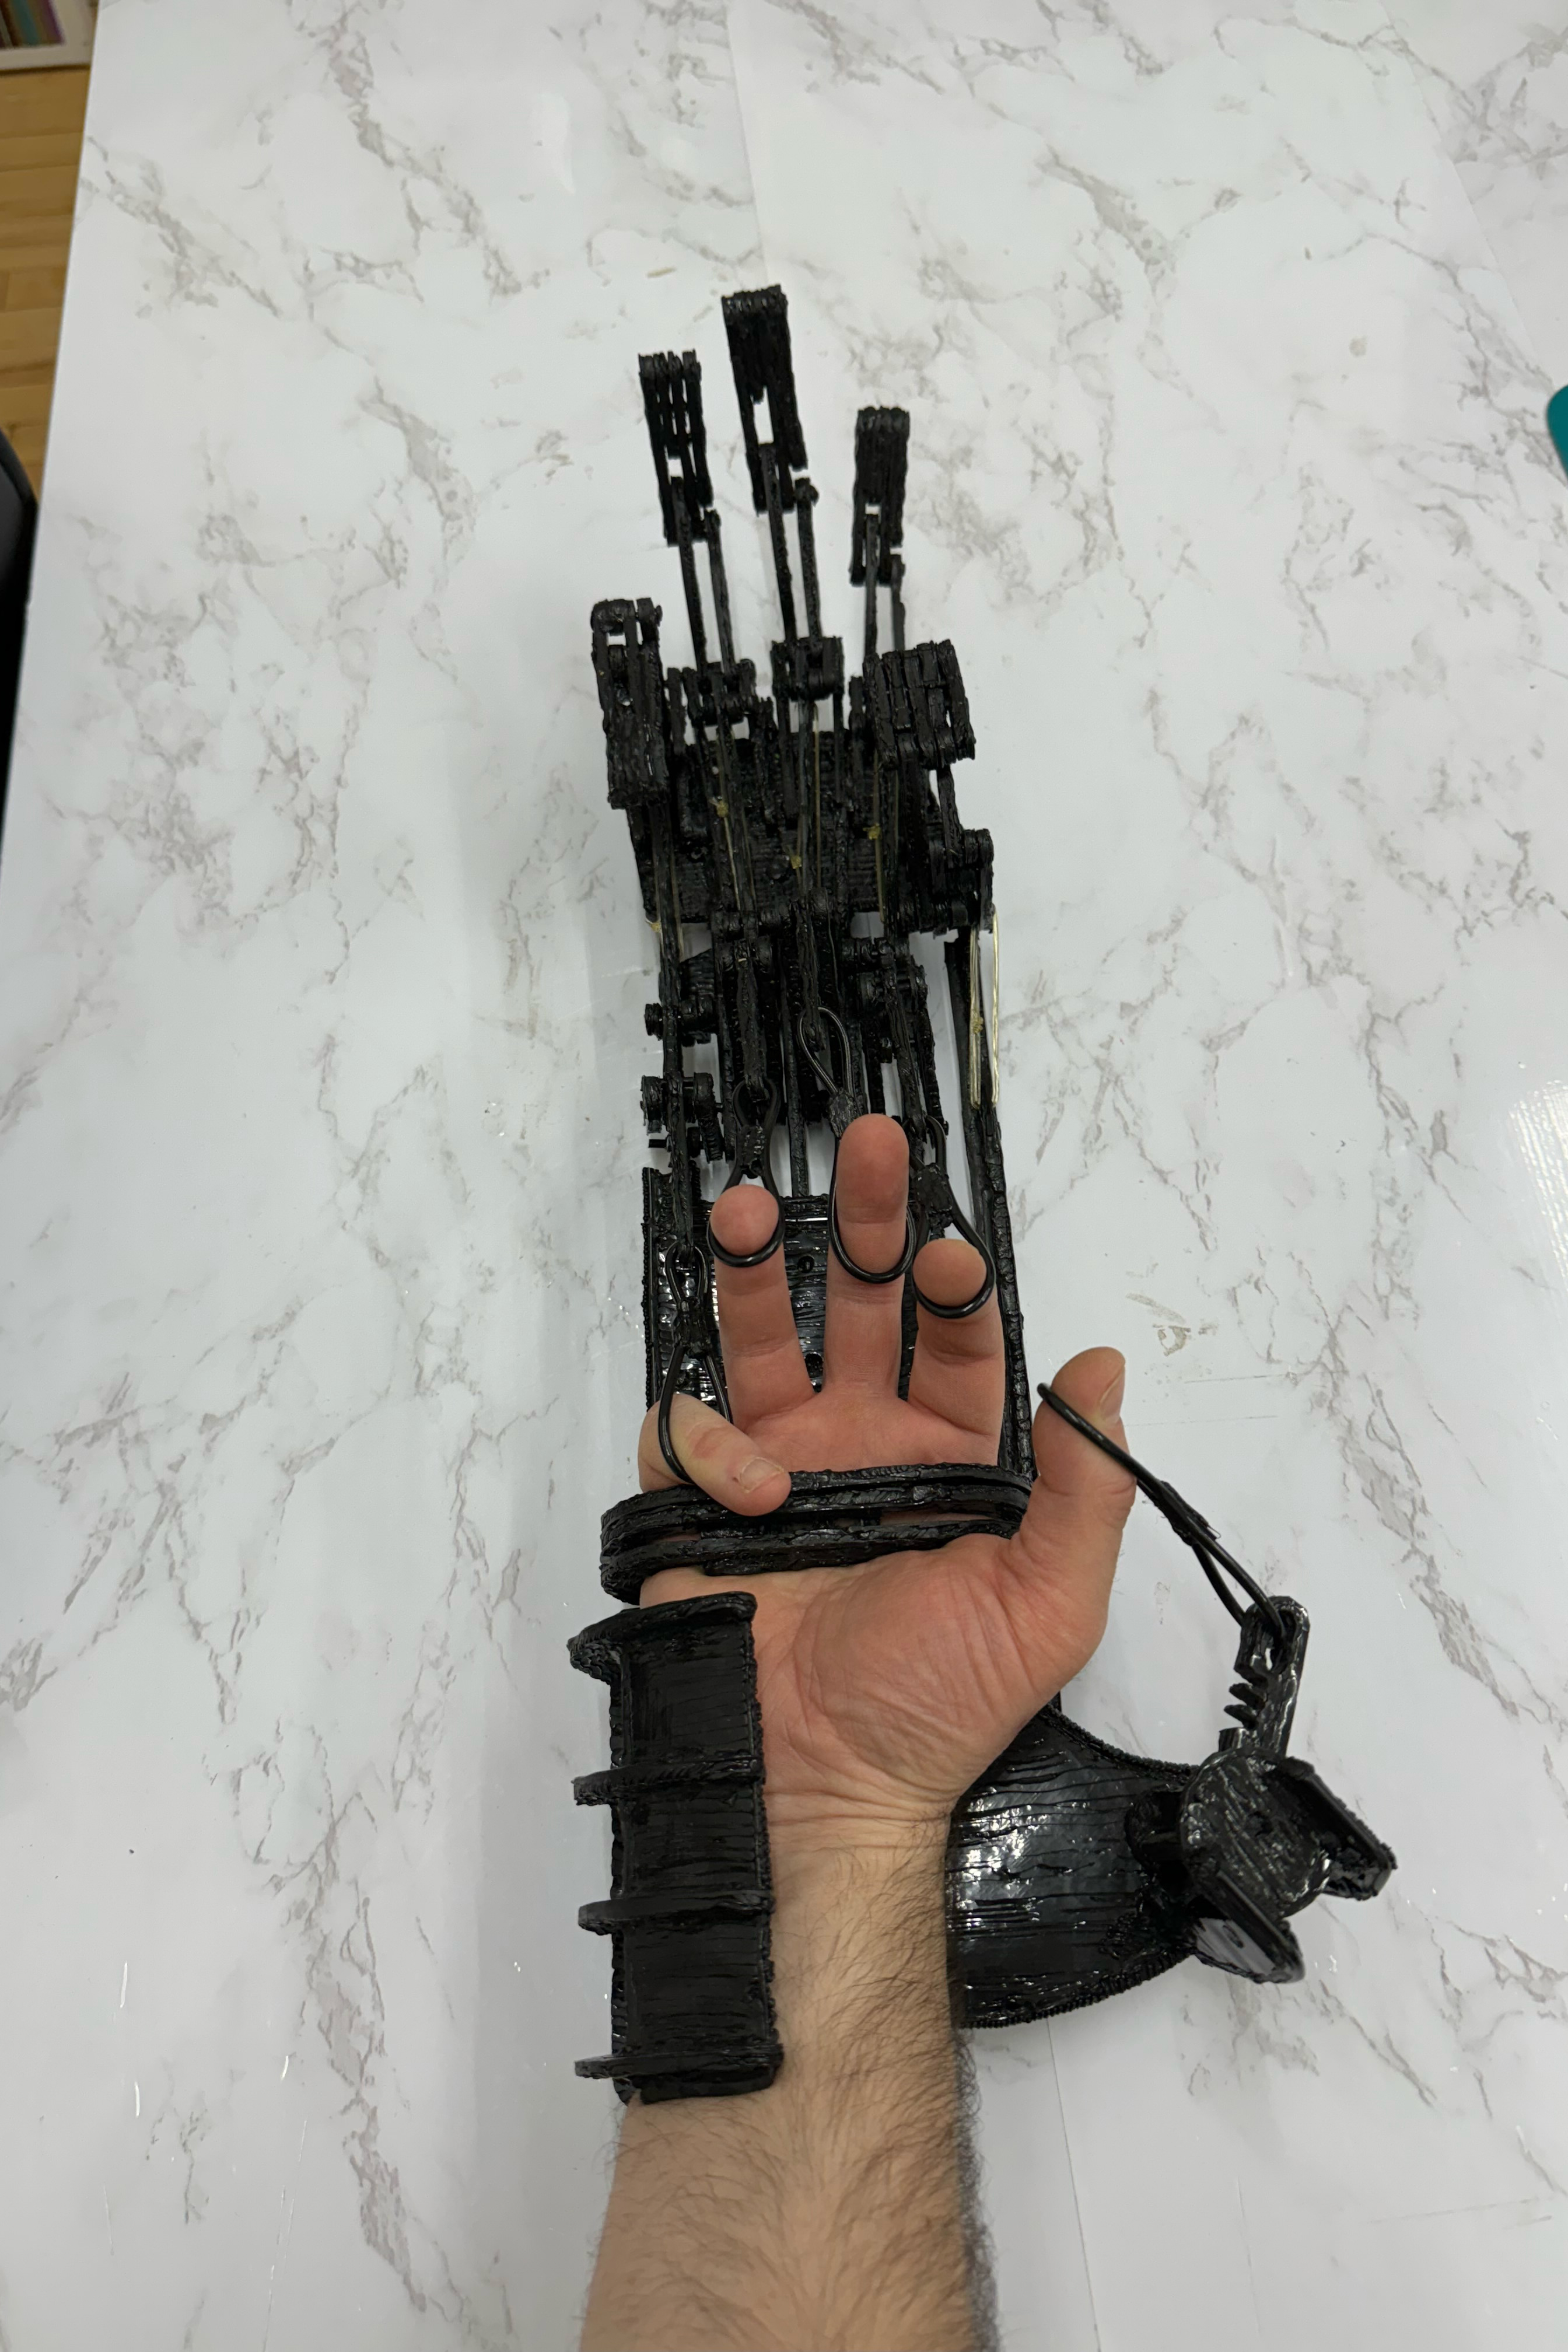
4. Securing and hiding magnets
Let's say that you want to discreetly attach something to your costume. Perhaps it's a sword piercing your armour, or perhaps you've crafted a shoulder buddy that you want to sit firmly in place for the duration of the convention. Using a 3D pen, you can securely hide magnets pretty much anywhere you like throughout your costume – and create handy little pockets and pouches for storing items without affecting the overall aesthetic of your cosplay.
When working with fabric, super glue and other types of adhesive aren't always the best option for securing magnets to clothes. With a 3D pen, you have the ability to weld a magnet to your material, and it's not only secure but potentially removable in the future, should you decide that you want to change its placement.
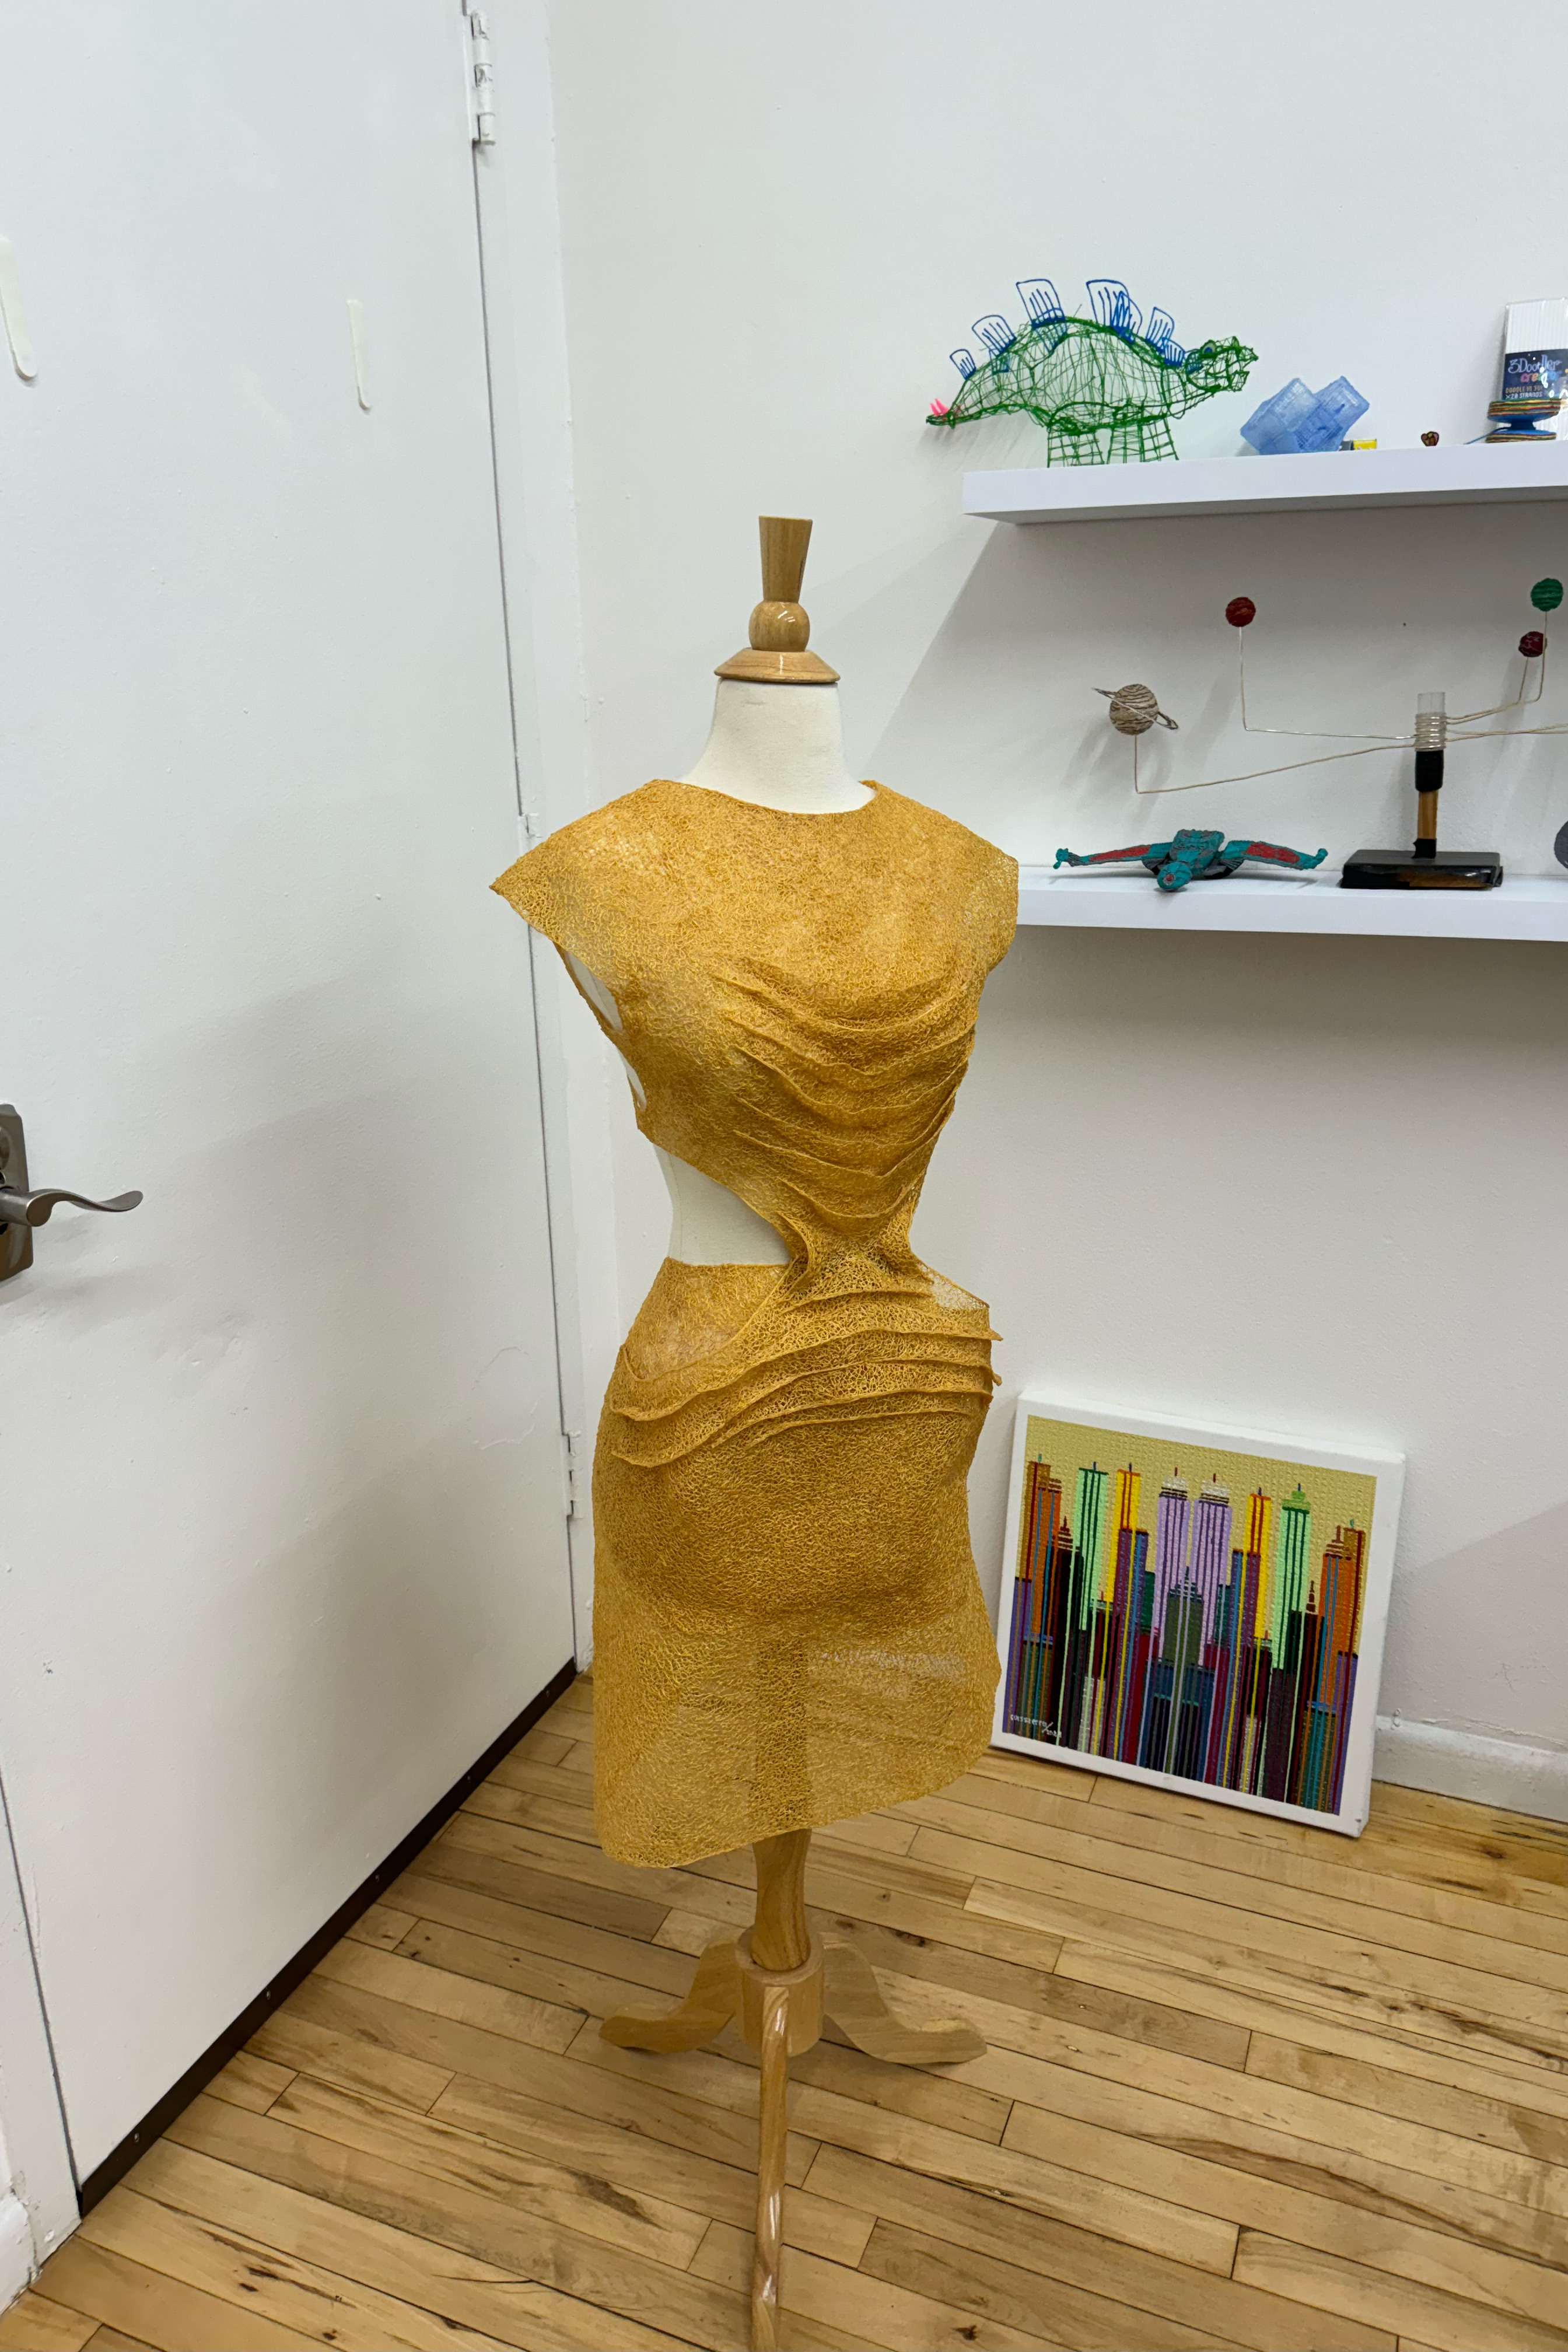
5. Adding detail to clothes and creating chain
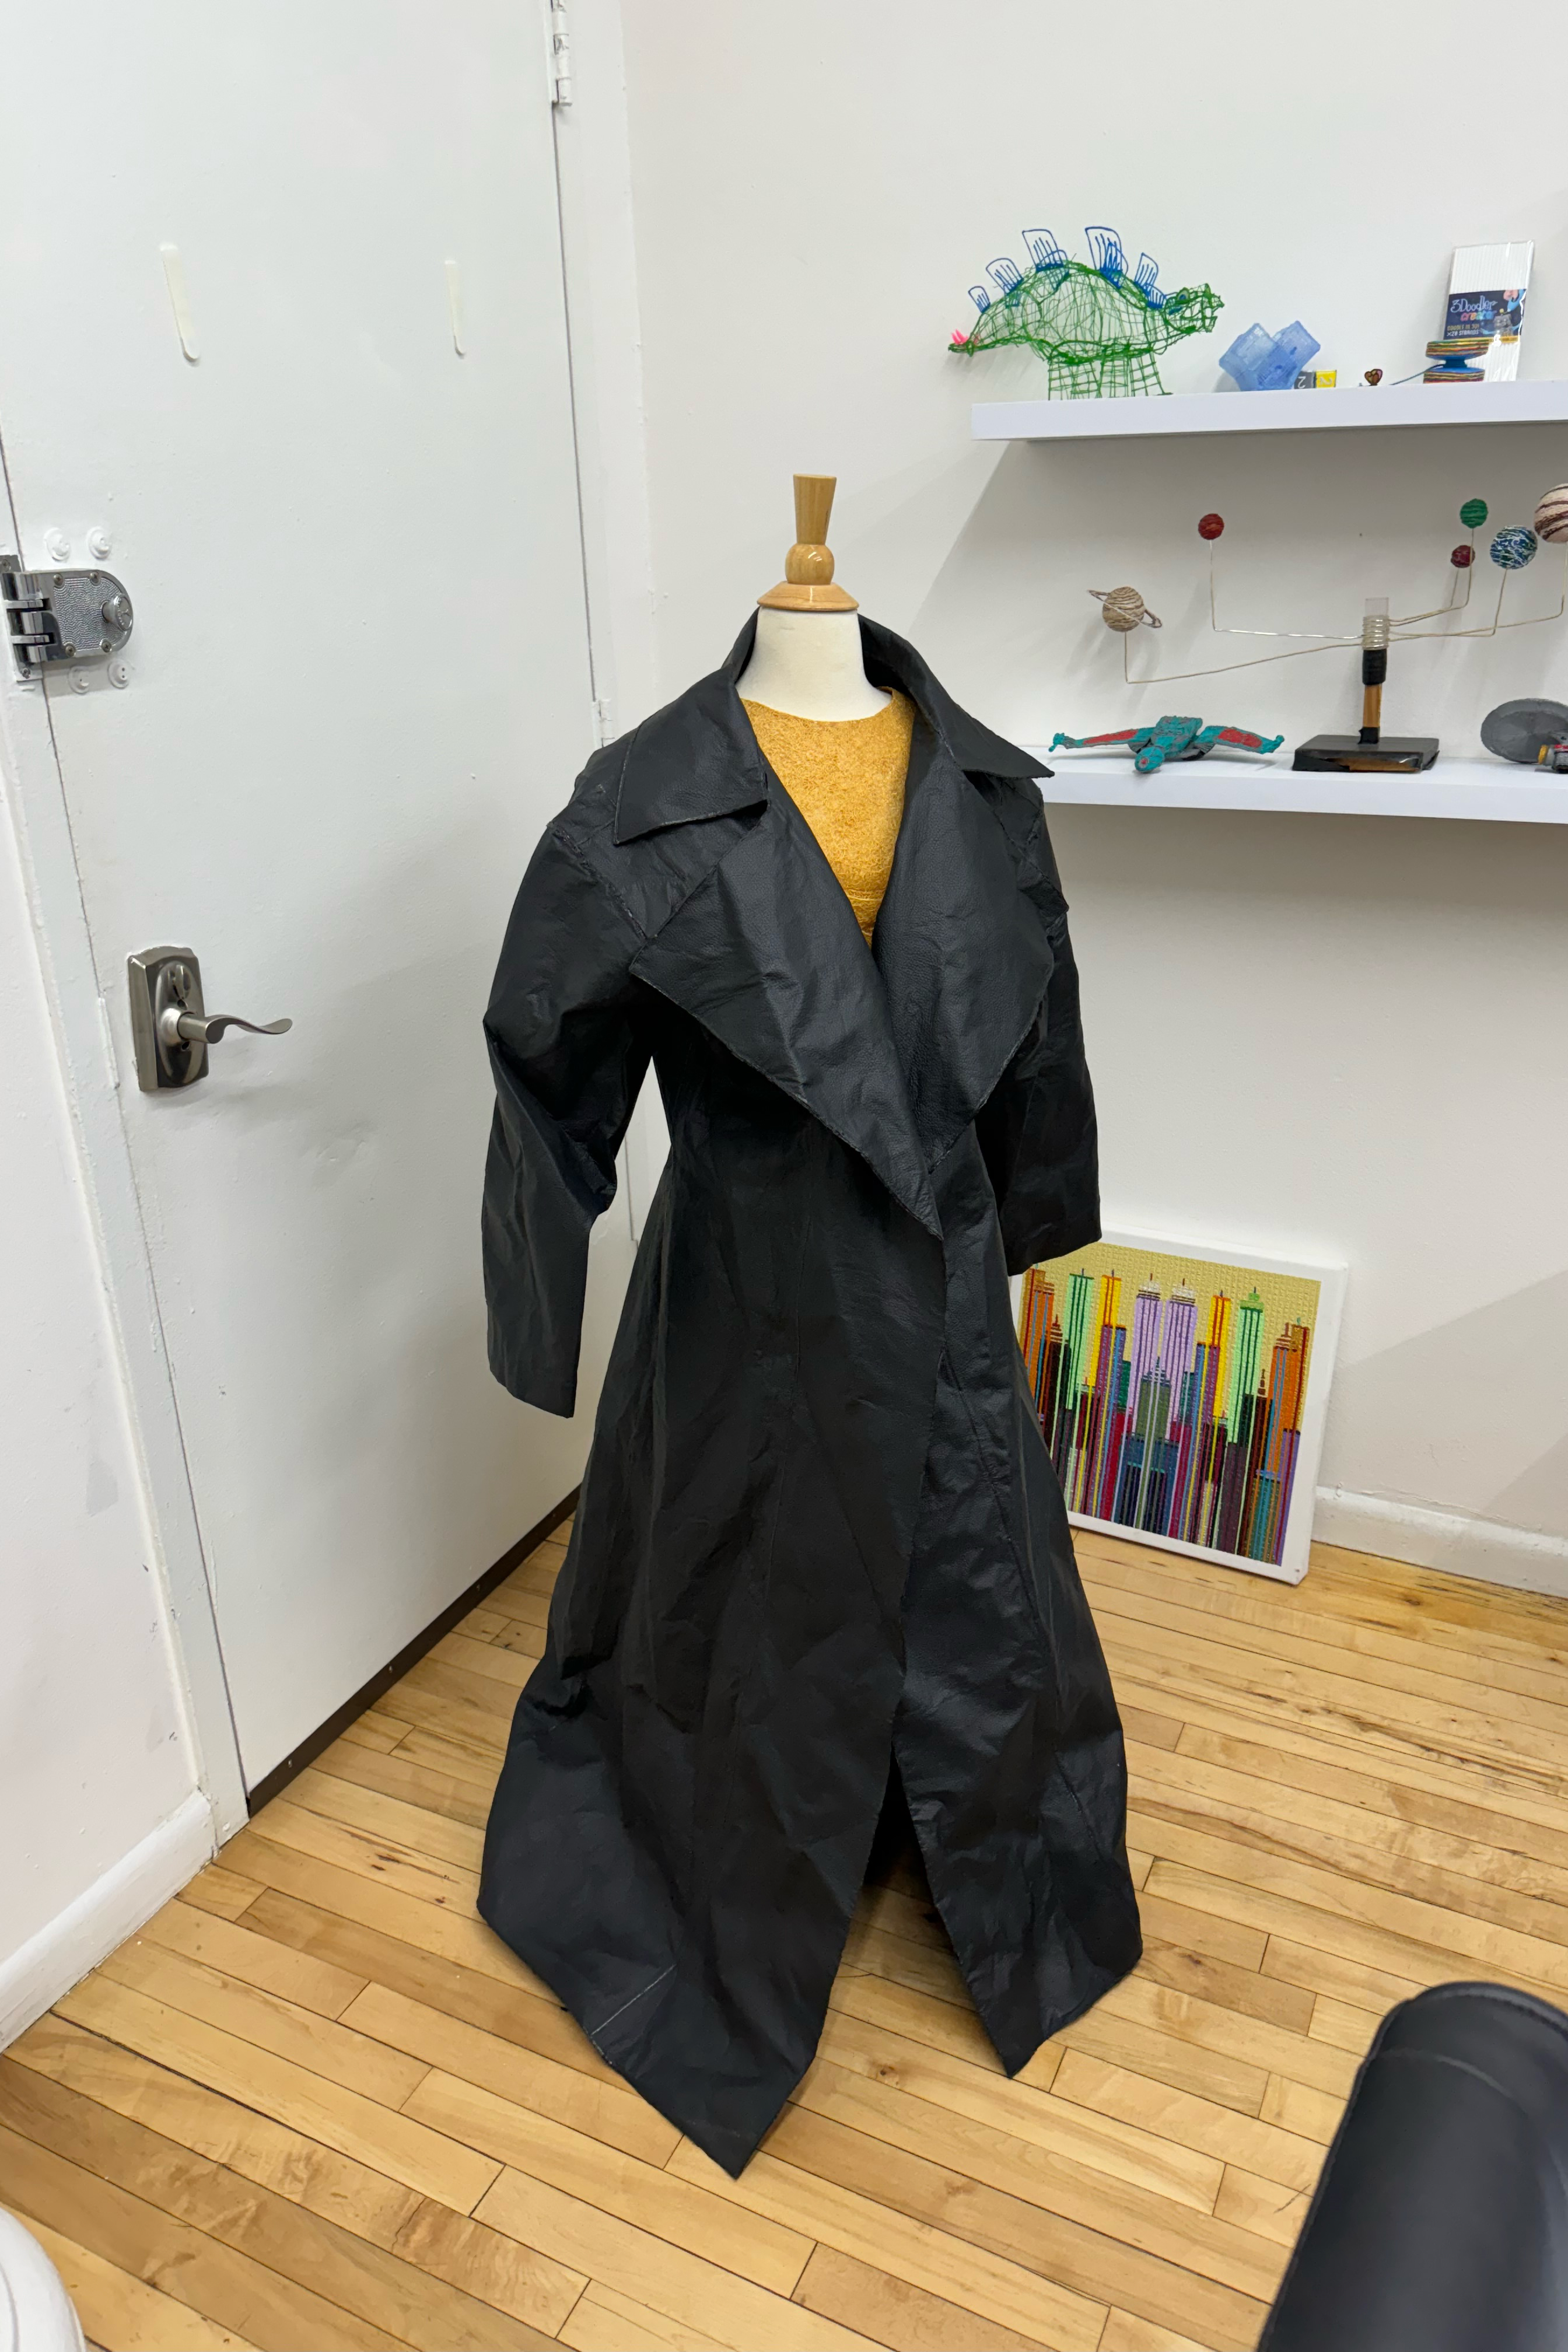
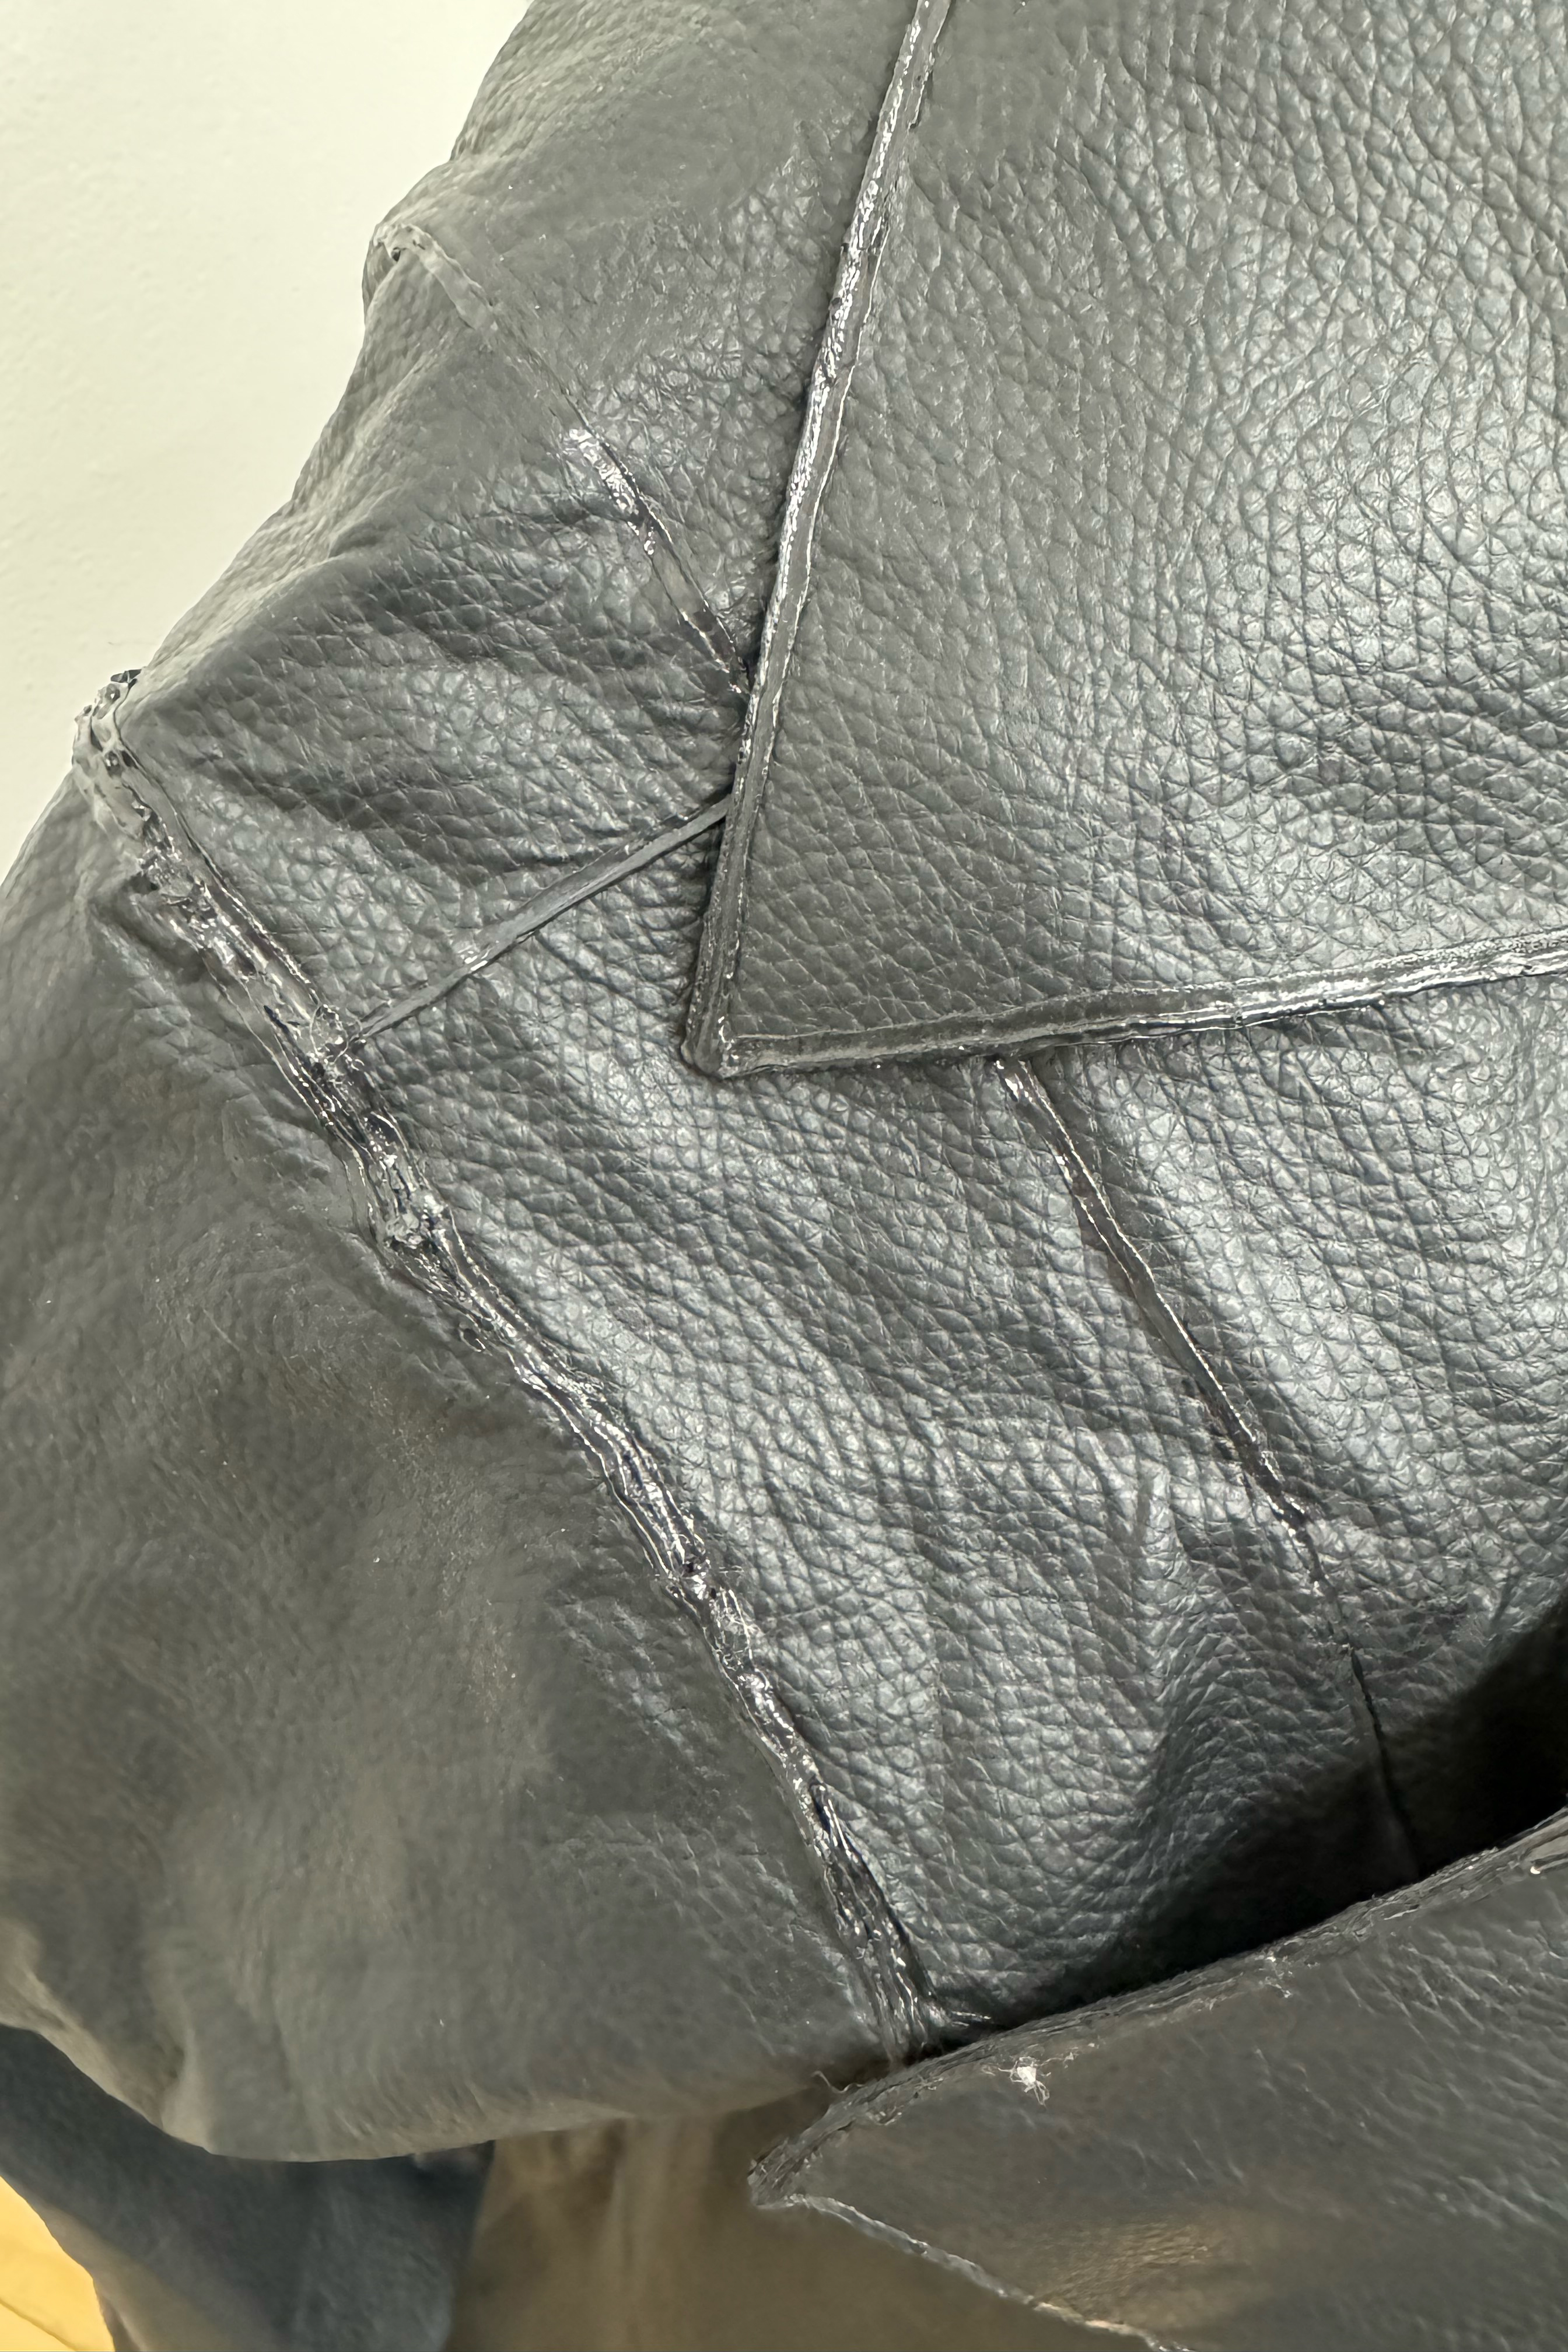
The potential of a 3D pen for creating wearable items is limitless. If you have the time and patience, there's nothing stopping you from fabricating entire garments from scratch, adding embellishments to existing materials, welding fabric together (if you don't already have a sewing machine lying around, and you can even create elements such as chain for that extra finish.
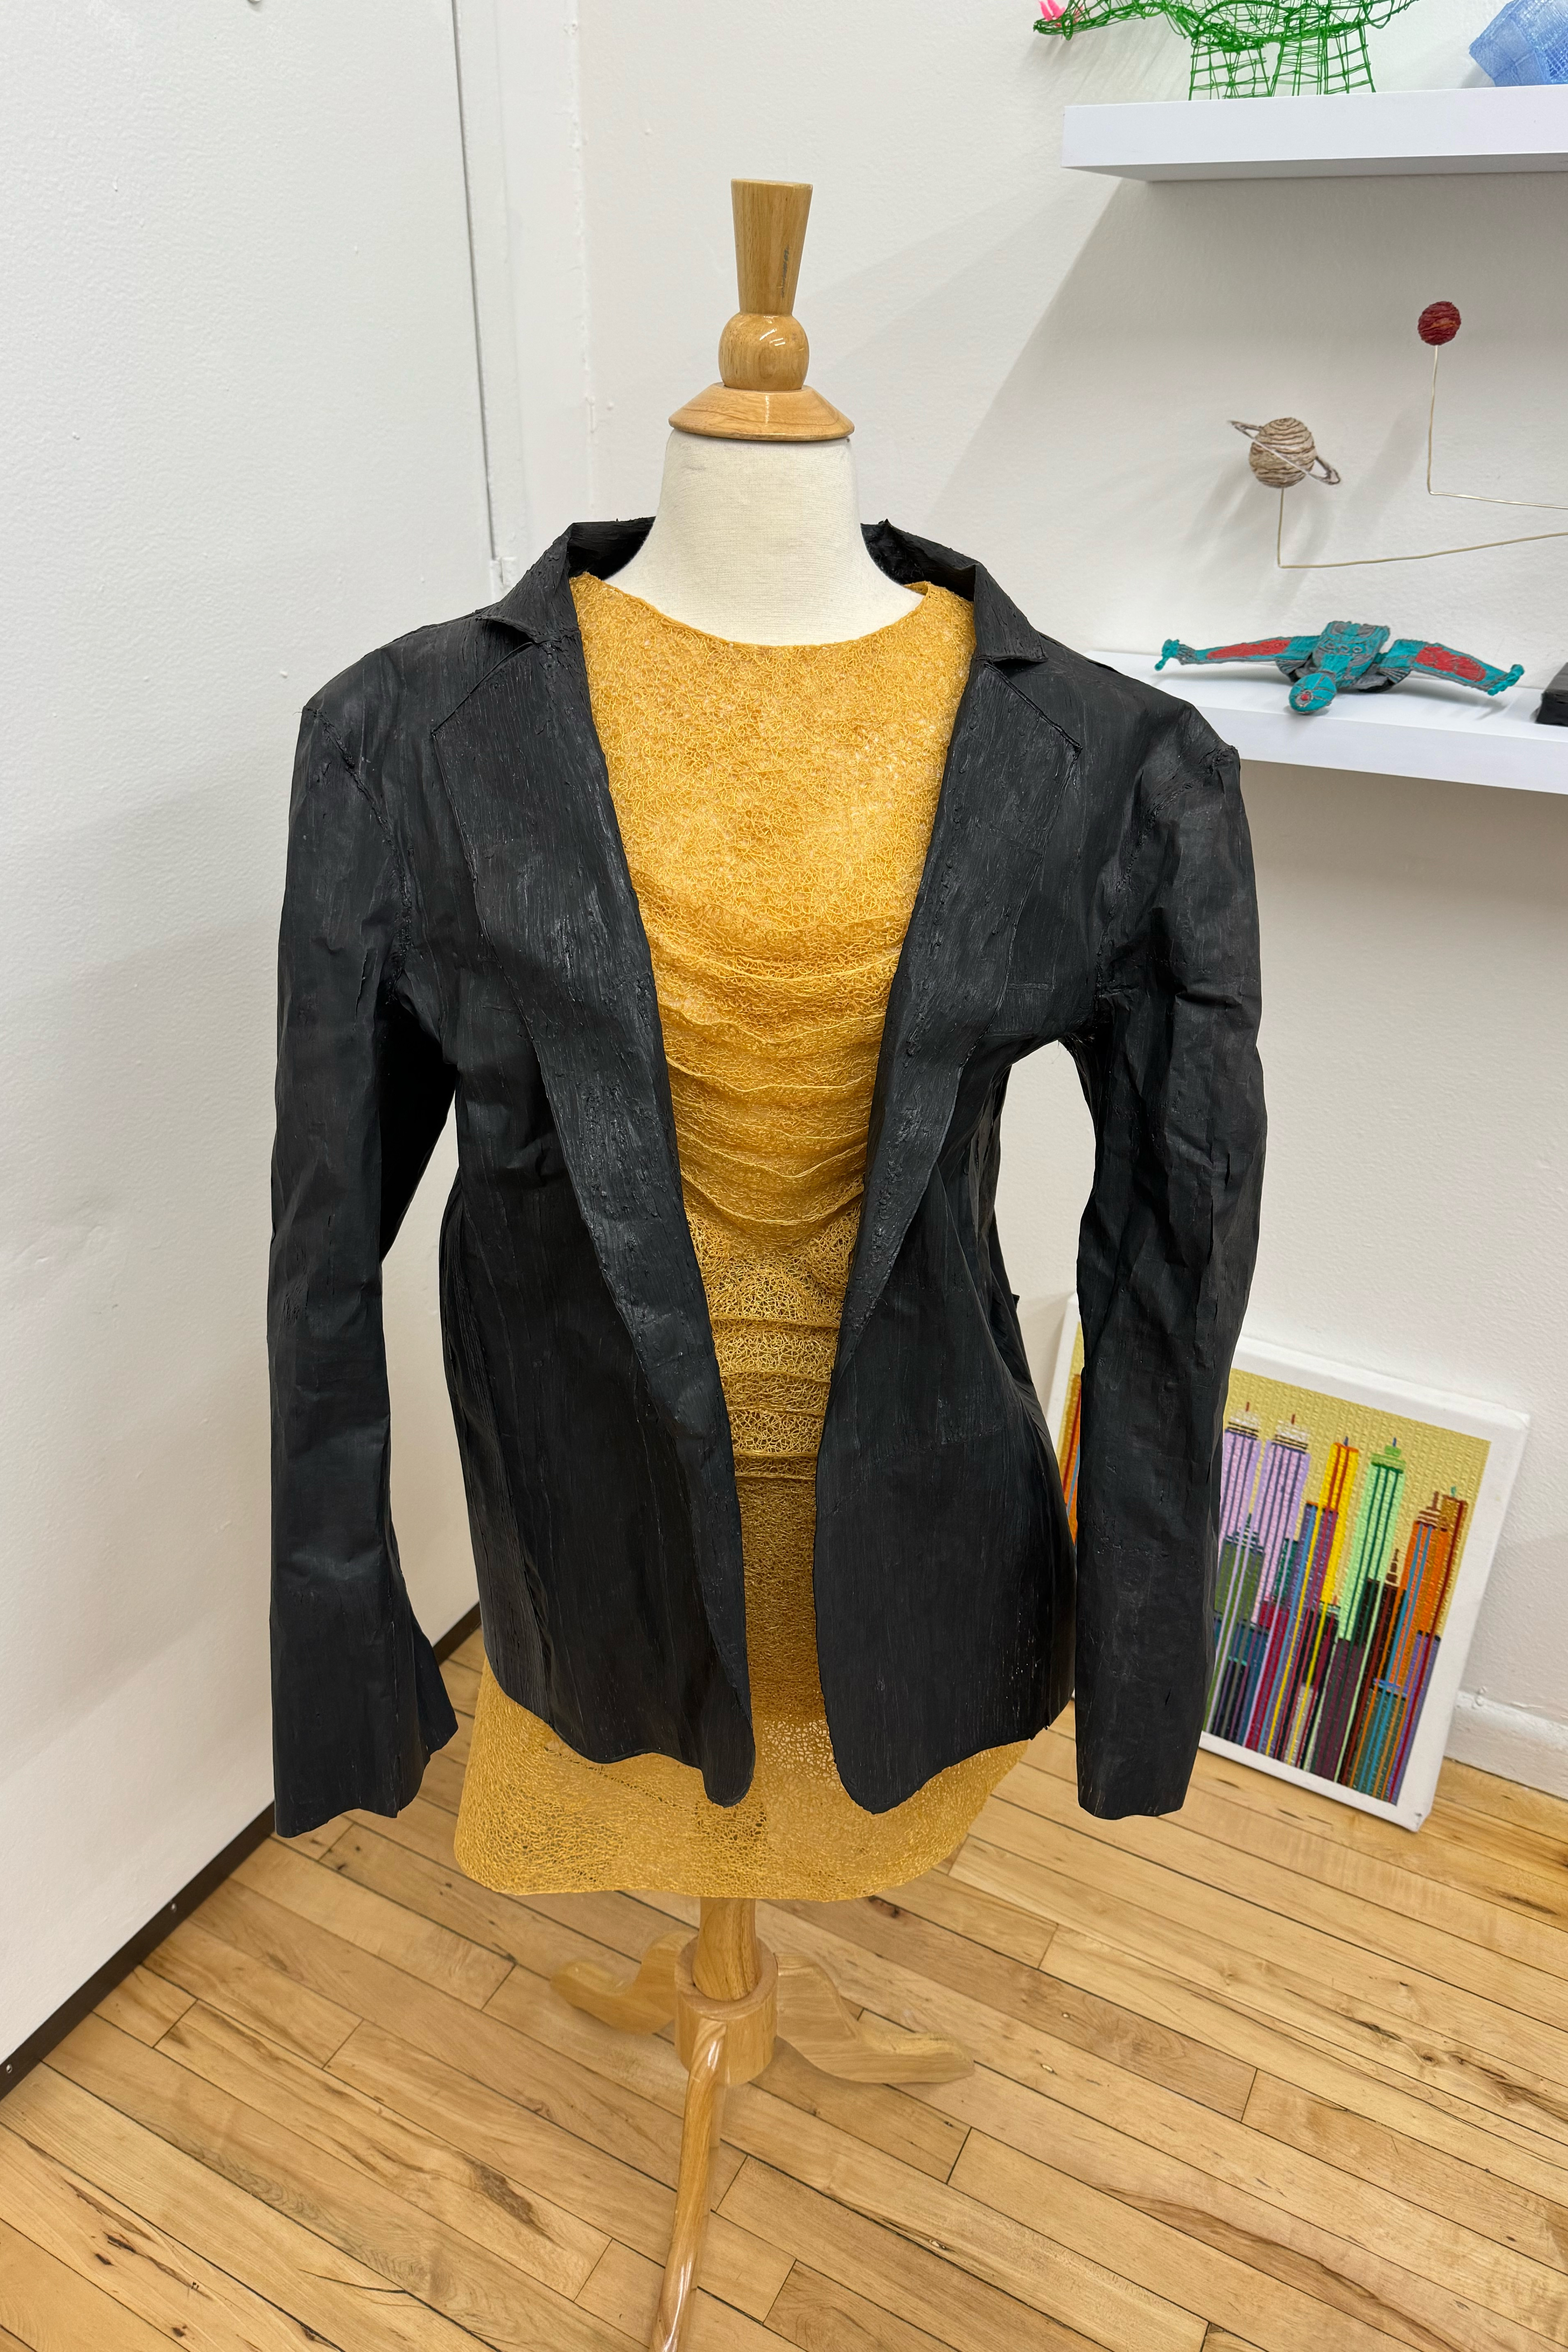
Max from 3Doodler has shared some incredible images with me below showcasing weapons, accessories, and clothing made using 3Doodler’s pens.
"In some of my past projects, I’ve created two jackets: one entirely made from TPU/FLEXY and another where pleather was welded together using TPU. This demonstrates how versatile 3D printing can be for cosplay applications.”


Take a look at today’s best deals on 3Doodler pens and refill filaments in your region using our clever deals widget. It updates 24/7, so keep checking back for the best prices.
FAQS
What materials can you use with a 3D pen?
3D pens are intended to work with 3D printing filament materials, including PLA, ABS, PETG, PHA, etc, but unlike a traditional 3D printer, some 3D pens also have the added advantage of being compatible with materials like wood, copper, and brass for a truly unique project.
Be sure to double-check which materials your specific 3D pen is compatible with (it should say in the included manual with the device), as not all 3D pens are the same. In some cases, you can use the same 1.75mm filament as your 3D printer with your 3D pen for consistency; however, there will be a risk with this, especially if the material hasn't been manufactured by the same brand as your 3D pen, so keep this in mind.
Should I use a stencil for 3D pen artwork?
If you're new to using a 3D pen, then it's definitely a good idea to start off using stencils to get the hang of how your 3D pen works. Even simple shapes such as a circle or square can be really difficult to draw at first, while you get used to the power and speed of your 3D pen.
I found that it was tricky to draw a perfect circle without using a stencil, and doing so helped me to learn that stencils are essential sometimes for avoiding wobbly lines and trying to craft the perfect model.
Are 3D pens beginner-friendly?
Yes, absolutely! Learning to use a 3D pen can take just a few minutes, though you will need practice and a fair amount of patience to learn how your 3D pen works. On some 3D pen models you'll find that there are dials to control settings like the speed and flow of the material, and getting to grips with this is essential to mastering a 3D pen.
3D pens are so beginner-friendly and safe to use that they're often marketed for children, though keep in mind that you should never leave a child unattended with a 3D pen no matter how safe it might seem.