Home decorator and content creator Leah Hodson is one of Ideal Home's new Open House contributors, sharing her thoughts on overhauling a home with clever DIY and decorating tricks. See the rest of her articles here.
We all own at least one thing from IKEA - whether it’s a PAX wardrobe, their £1.50 doormat, or one of their chopping boards. I really love a little wander around IKEA on weekends, and I’ve always failed to walk out empty handed! Their designs are simple and affordable, but you don’t have to settle for basic.
IKEA hacks are my favourite DIYs to date. I absolutely love taking a simple product from IKEA and creating something completely new from it. Most of my IKEA hacks are large furniture hacks (stay tuned for more), but today I’m going to share 3 really easy ideas that can be completed this weekend.
1. Revamp a picture frame
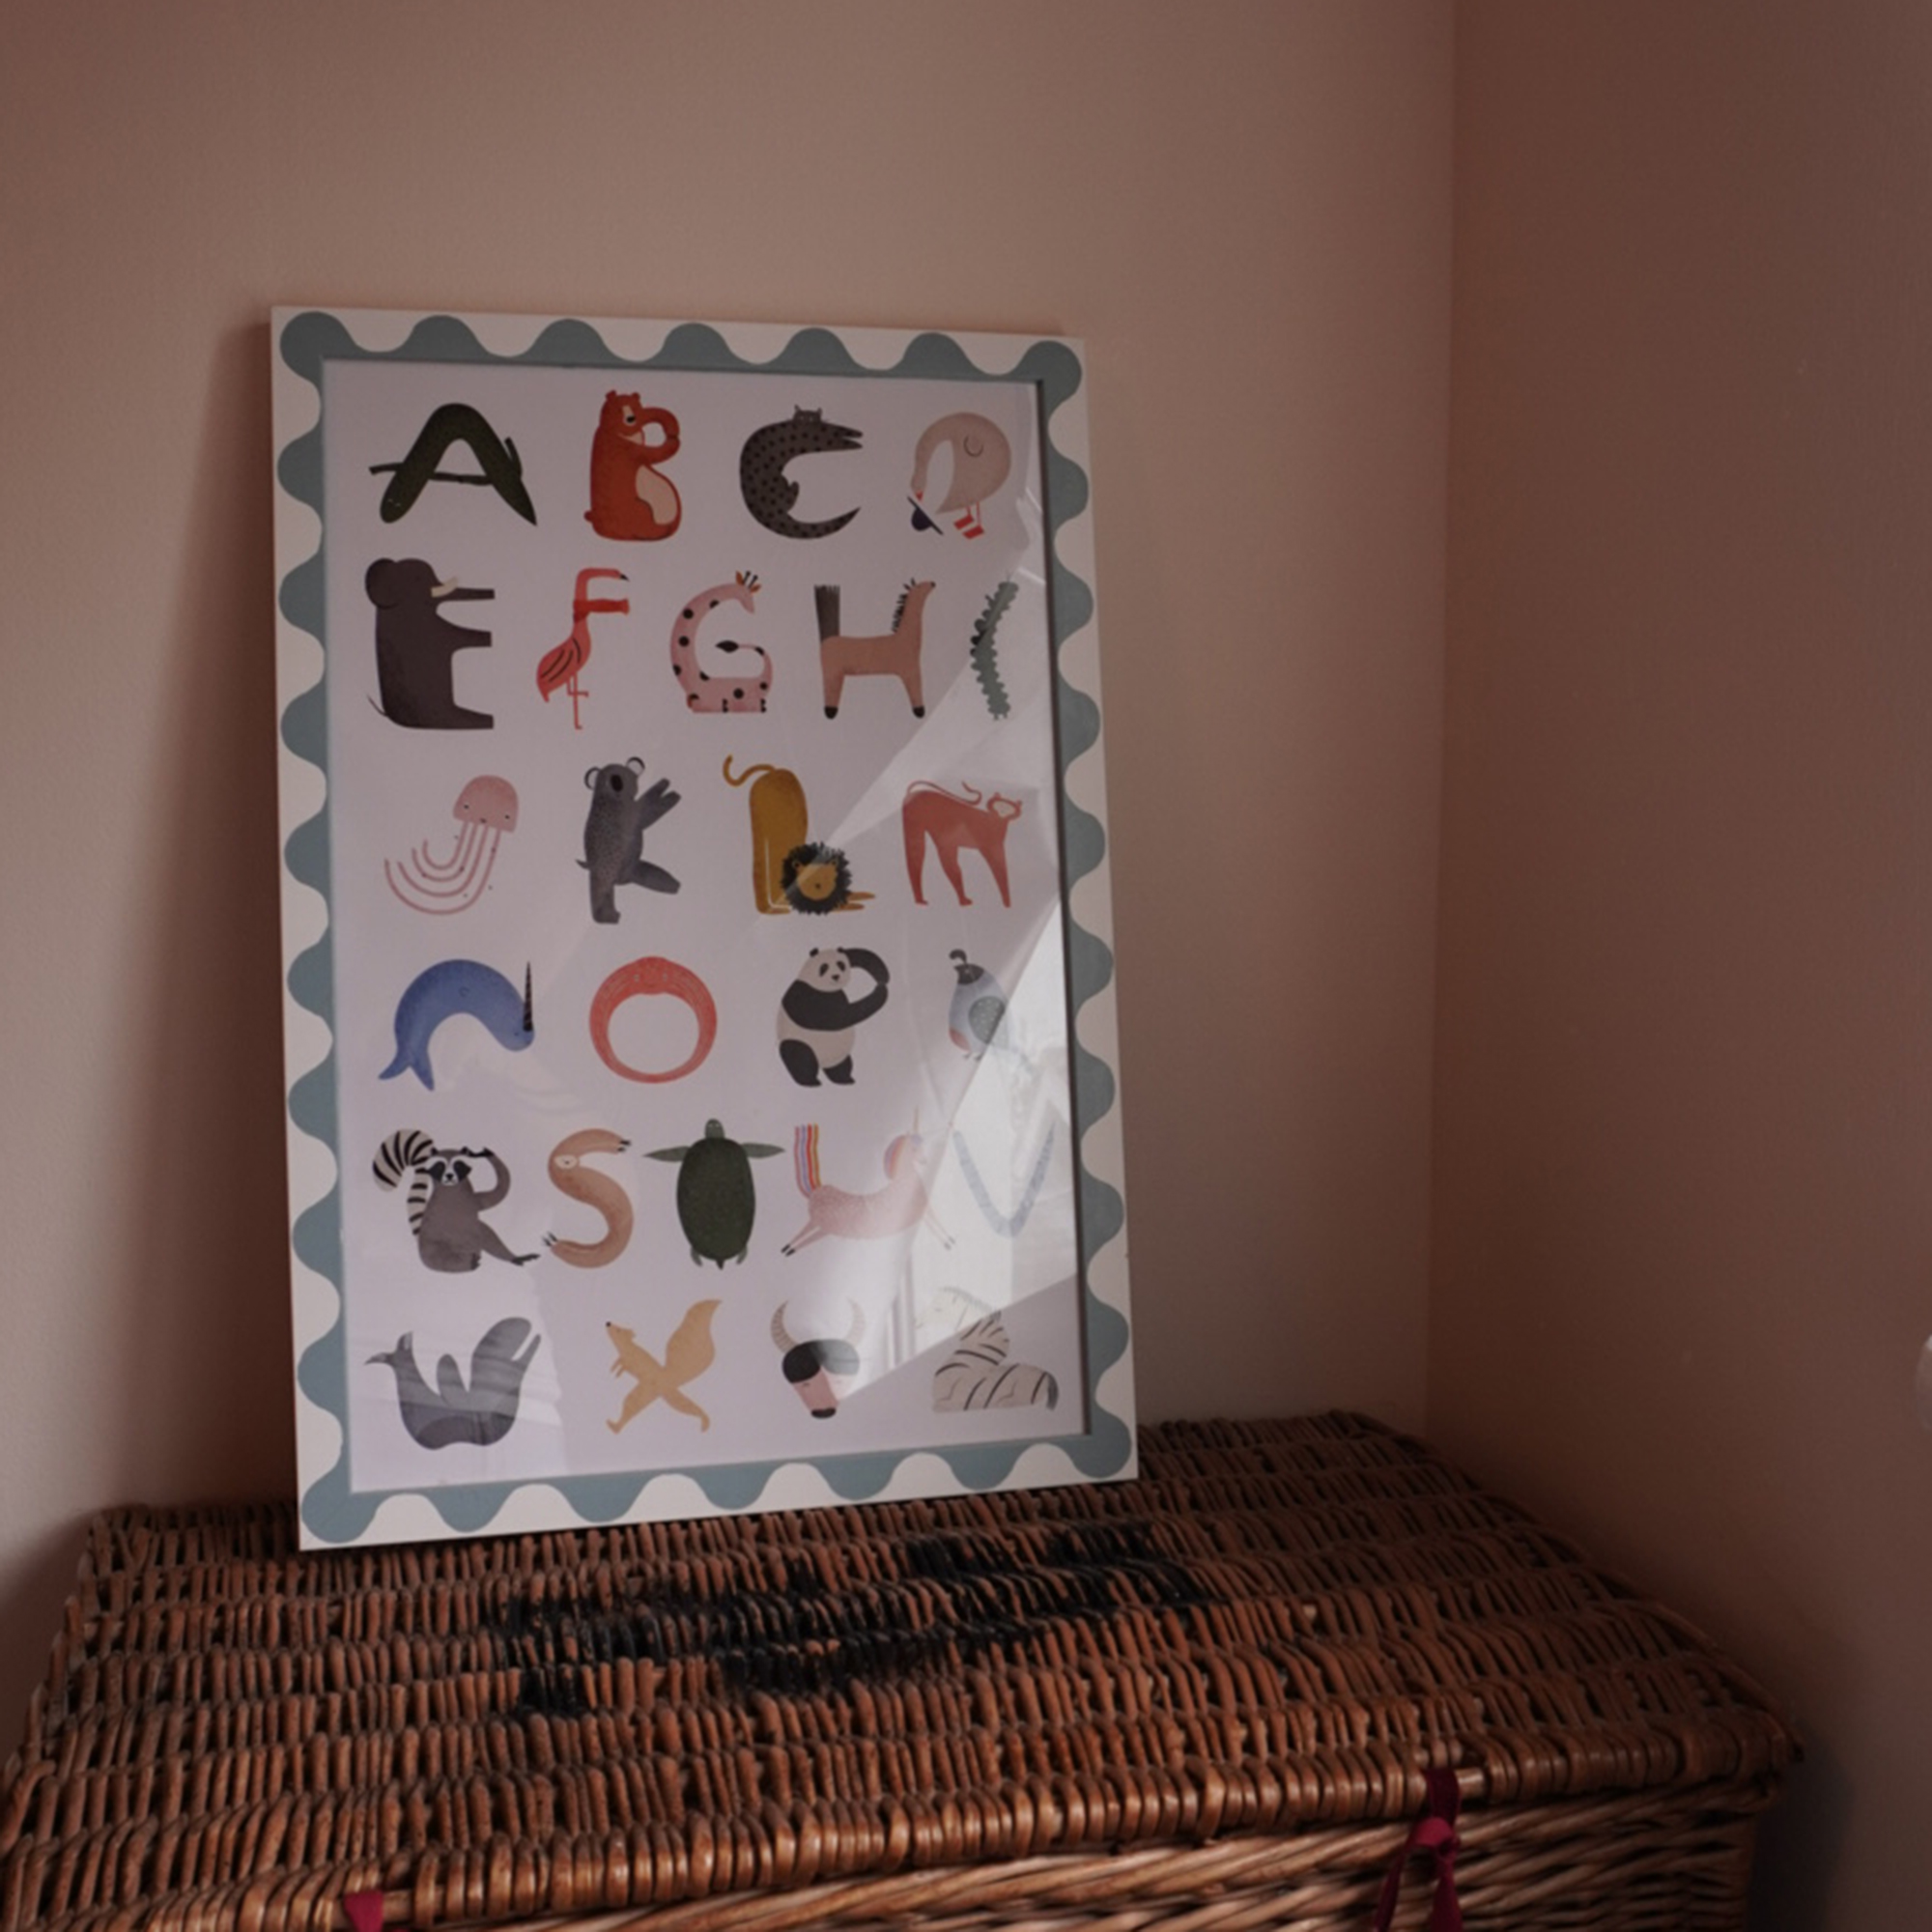
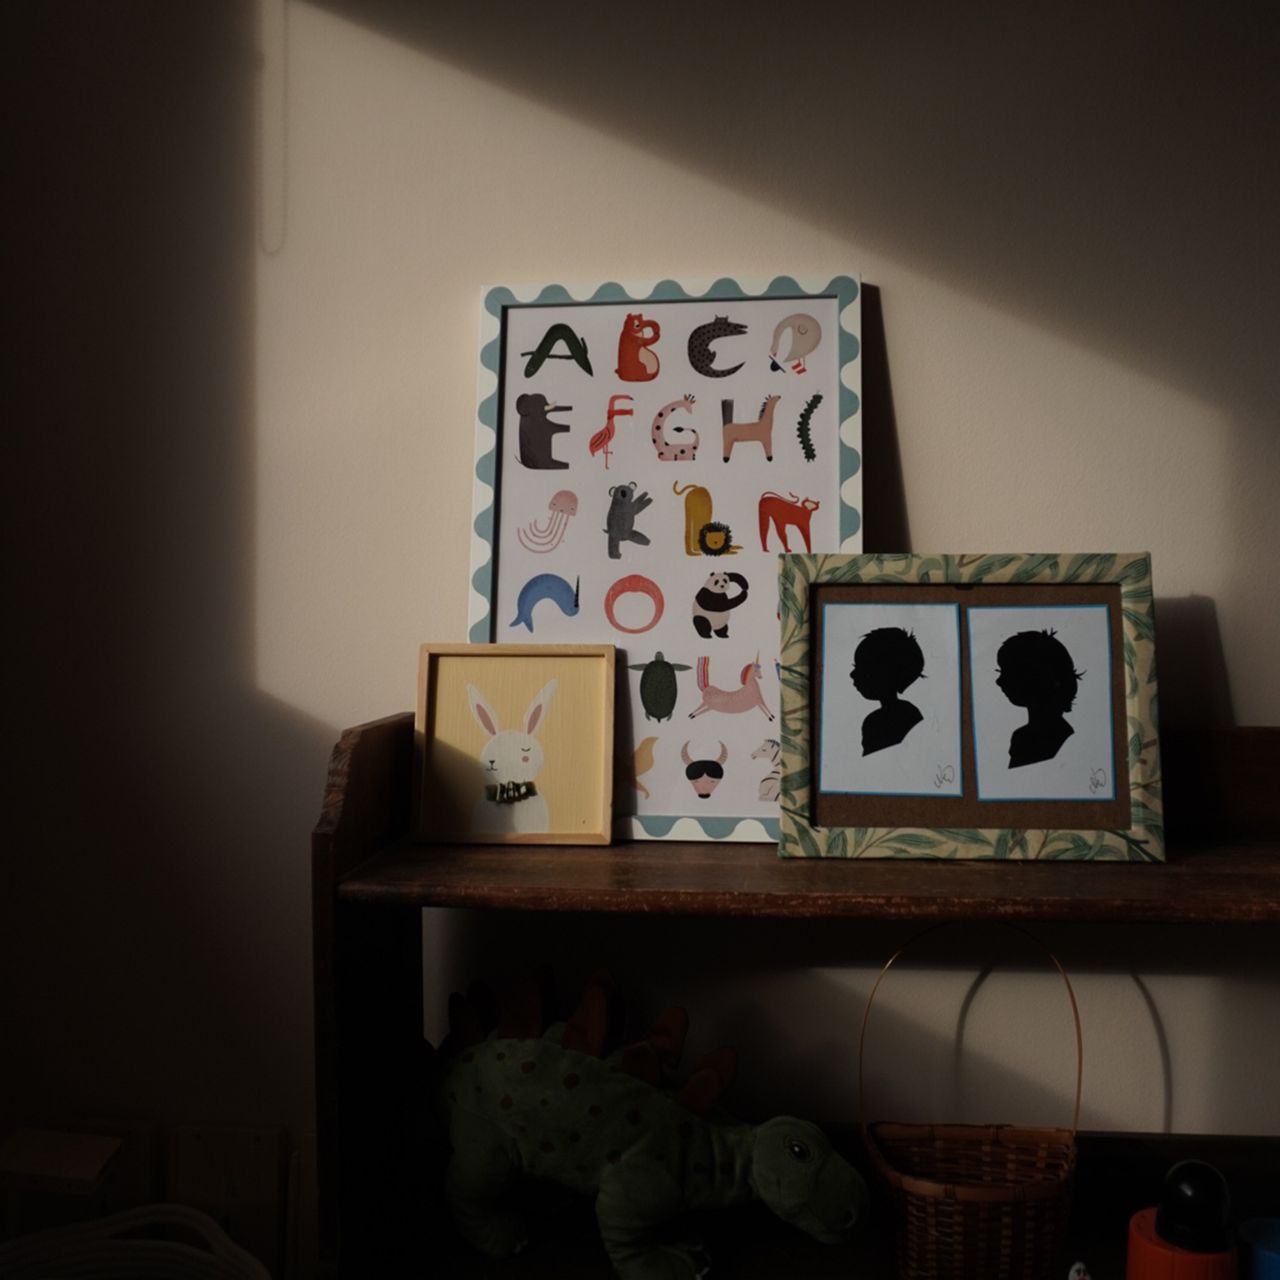
First off, you don’t have to settle for basic frames. It’s no secret I love neutrals, give me white, beige and grey any day! However, when it comes to my children’s shared room, I’m always looking to insert colour and fun, and nothing shouts fun like a DIY frame with squiggles all around! To create the pattern, I simply traced out the curves using a bottle cap - alternating between tracing along the top and bottom to achieve this ‘S’ shape pattern.
Pro-tip: Mark out the corners first before doing the border. Then to the fun part - painting it! I used paint that contains a primer but if you’re planning on using regular paint, don’t forget to prime the laminate frame beforehand. My favourite primer to use has to be Zinsser’s BIN - I use it whenever I want to paint on laminate or gloss surfaces. This painted frame not only makes it a fun addition to any room, it’s very eye-catching and adds interest to the print you have on display.
2. Cut some LACK shelves to size
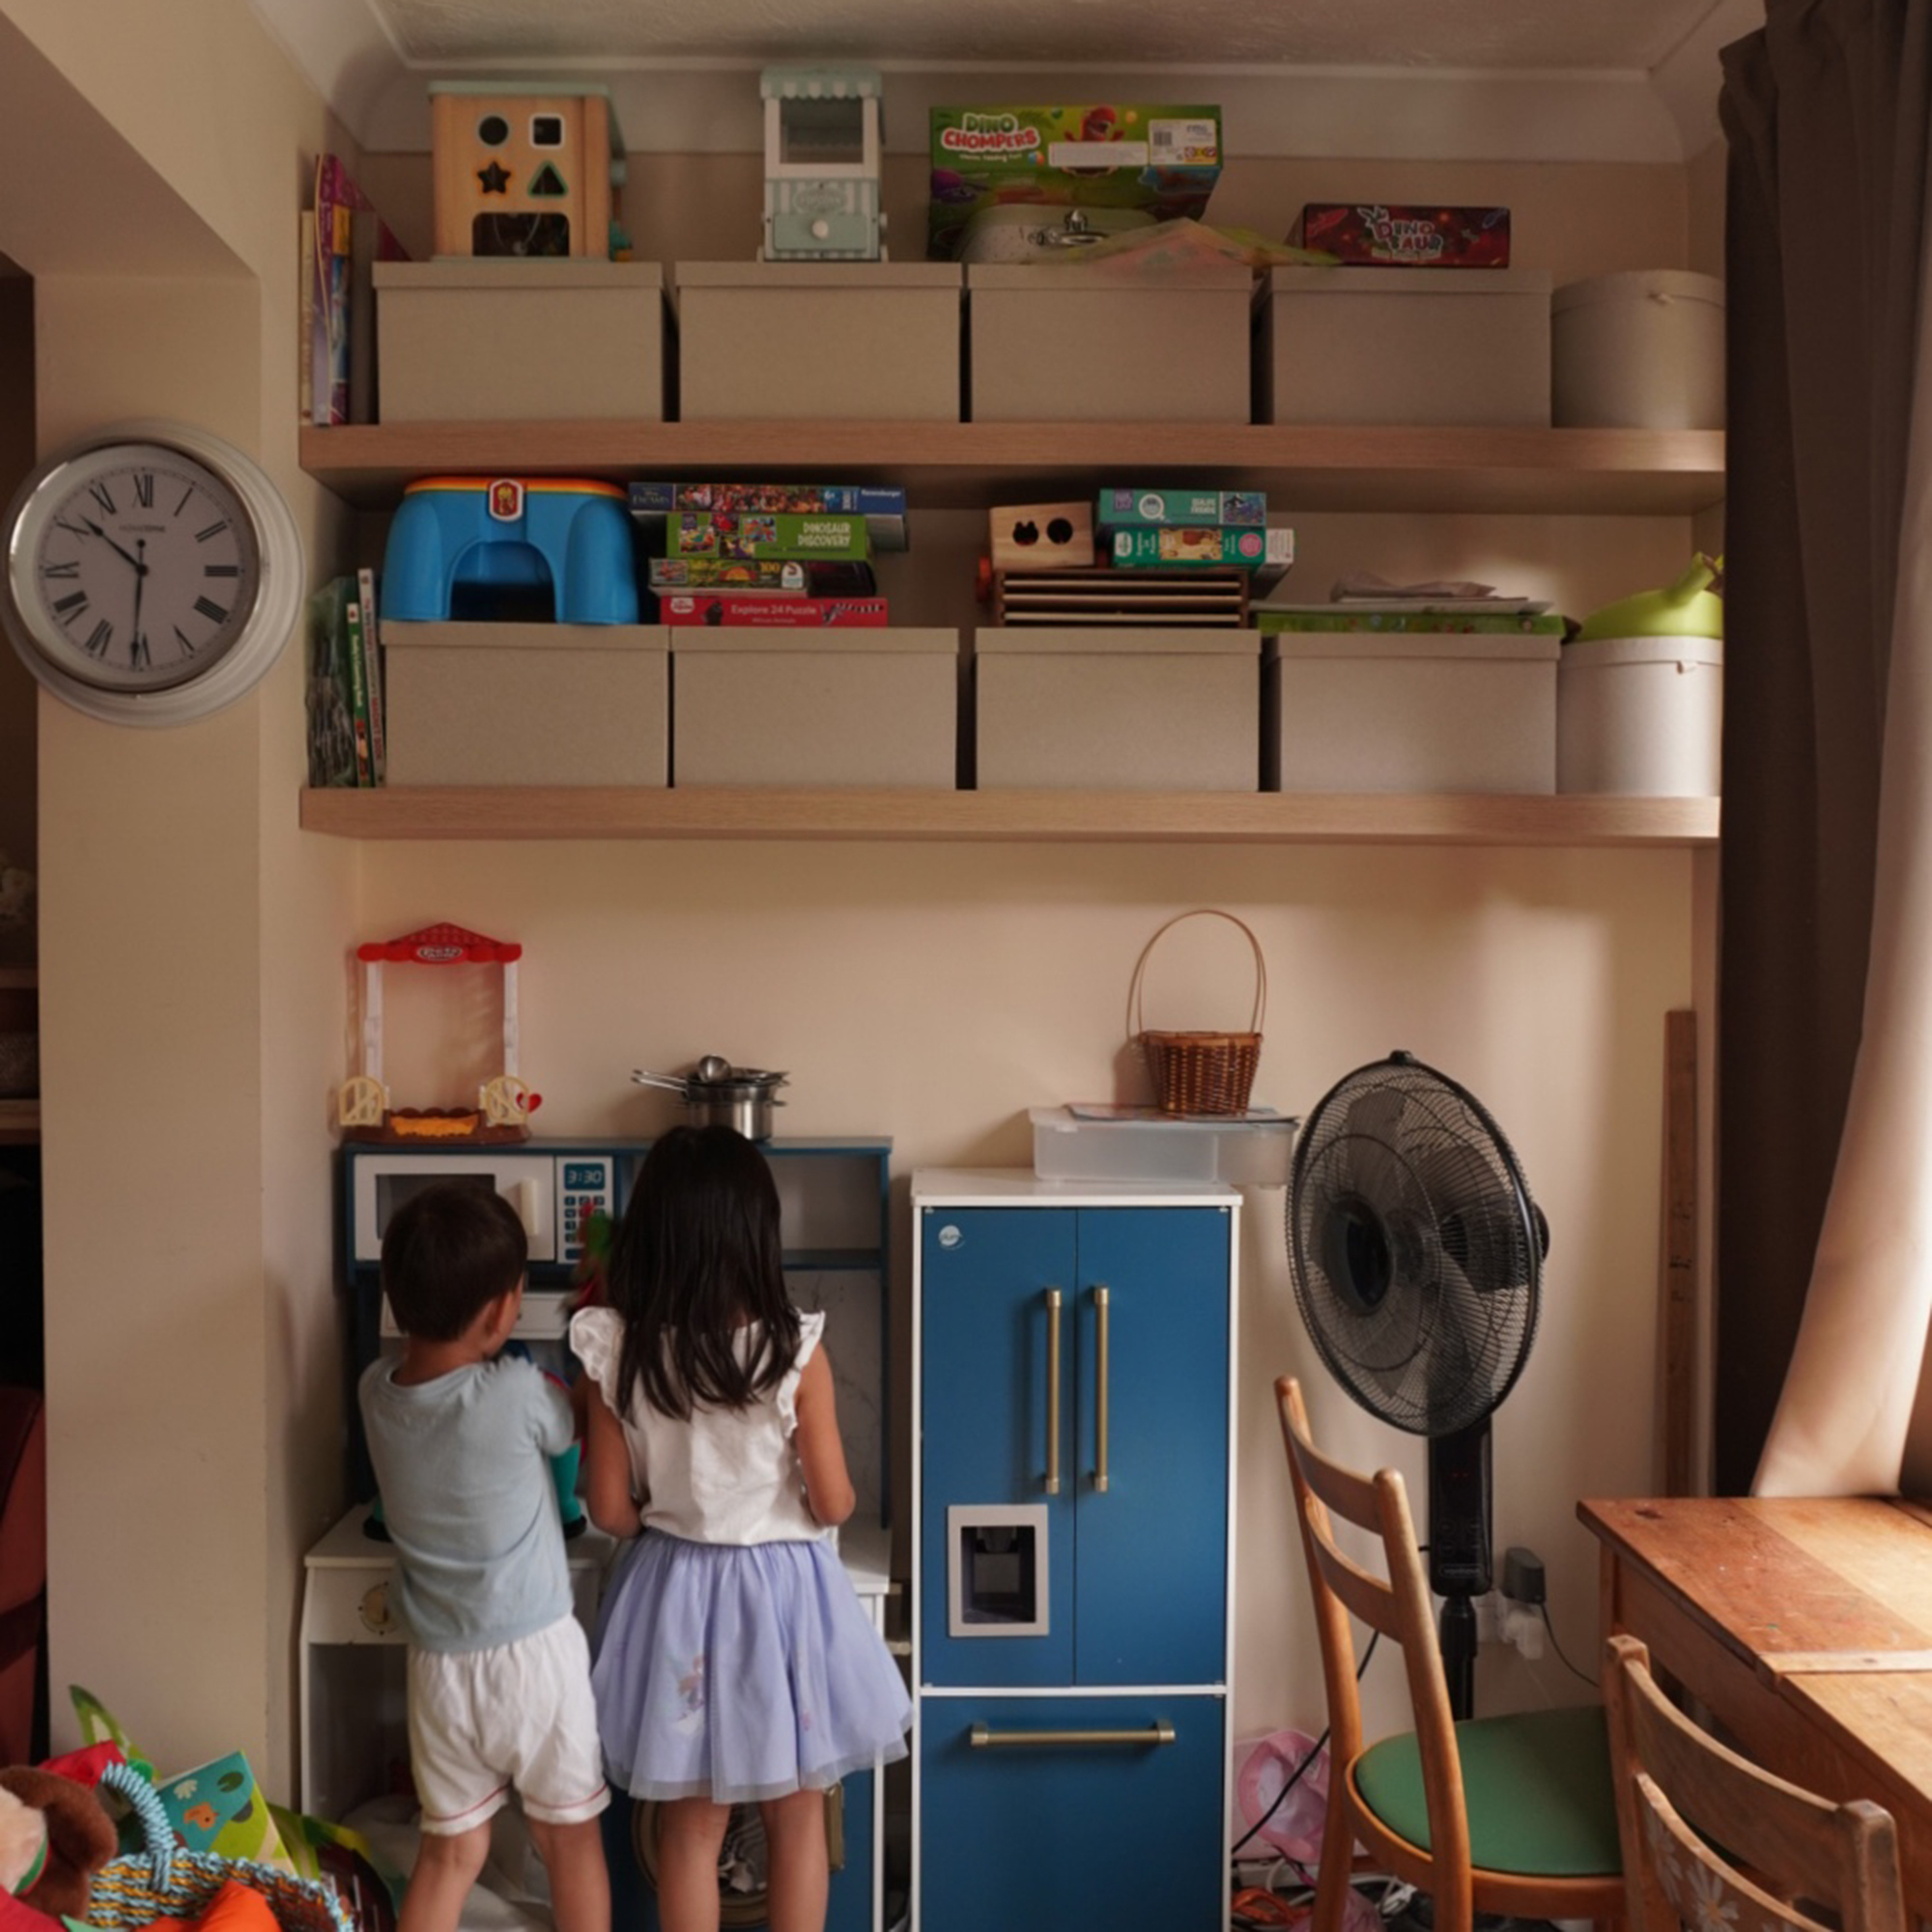
Next up is a lesser shown DIY I have in my home - these LACK shelves from IKEA hold so much. We have this awkward space, almost like a wide alcove, and we needed more storage for our children’s toys and games - preferably one out of their reach. While scrolling through IKEA looking for a solution, I stumbled upon these LACK shelves and I thought it would be simpler to cut them to size than customise my own shelf from scratch. In all honesty, I used a circular saw for this project; after seeing the inside of the shelves, I’m sure a hand saw would have worked well too! I simply taped up the spot I wanted to cut with Frog Tape, which helps make sure it won’t splinter and marks out exactly where the cut needs to be.
Thinking back, using a hand saw would be easier in getting a straight cut, as you can have more control of the blade. Either way, custom-made wooden floating shelves can cost quite a bit - this LACK hack helps create more storage options without breaking the bank or LACKing in style!
3. Add moulding to some PAX cupboards
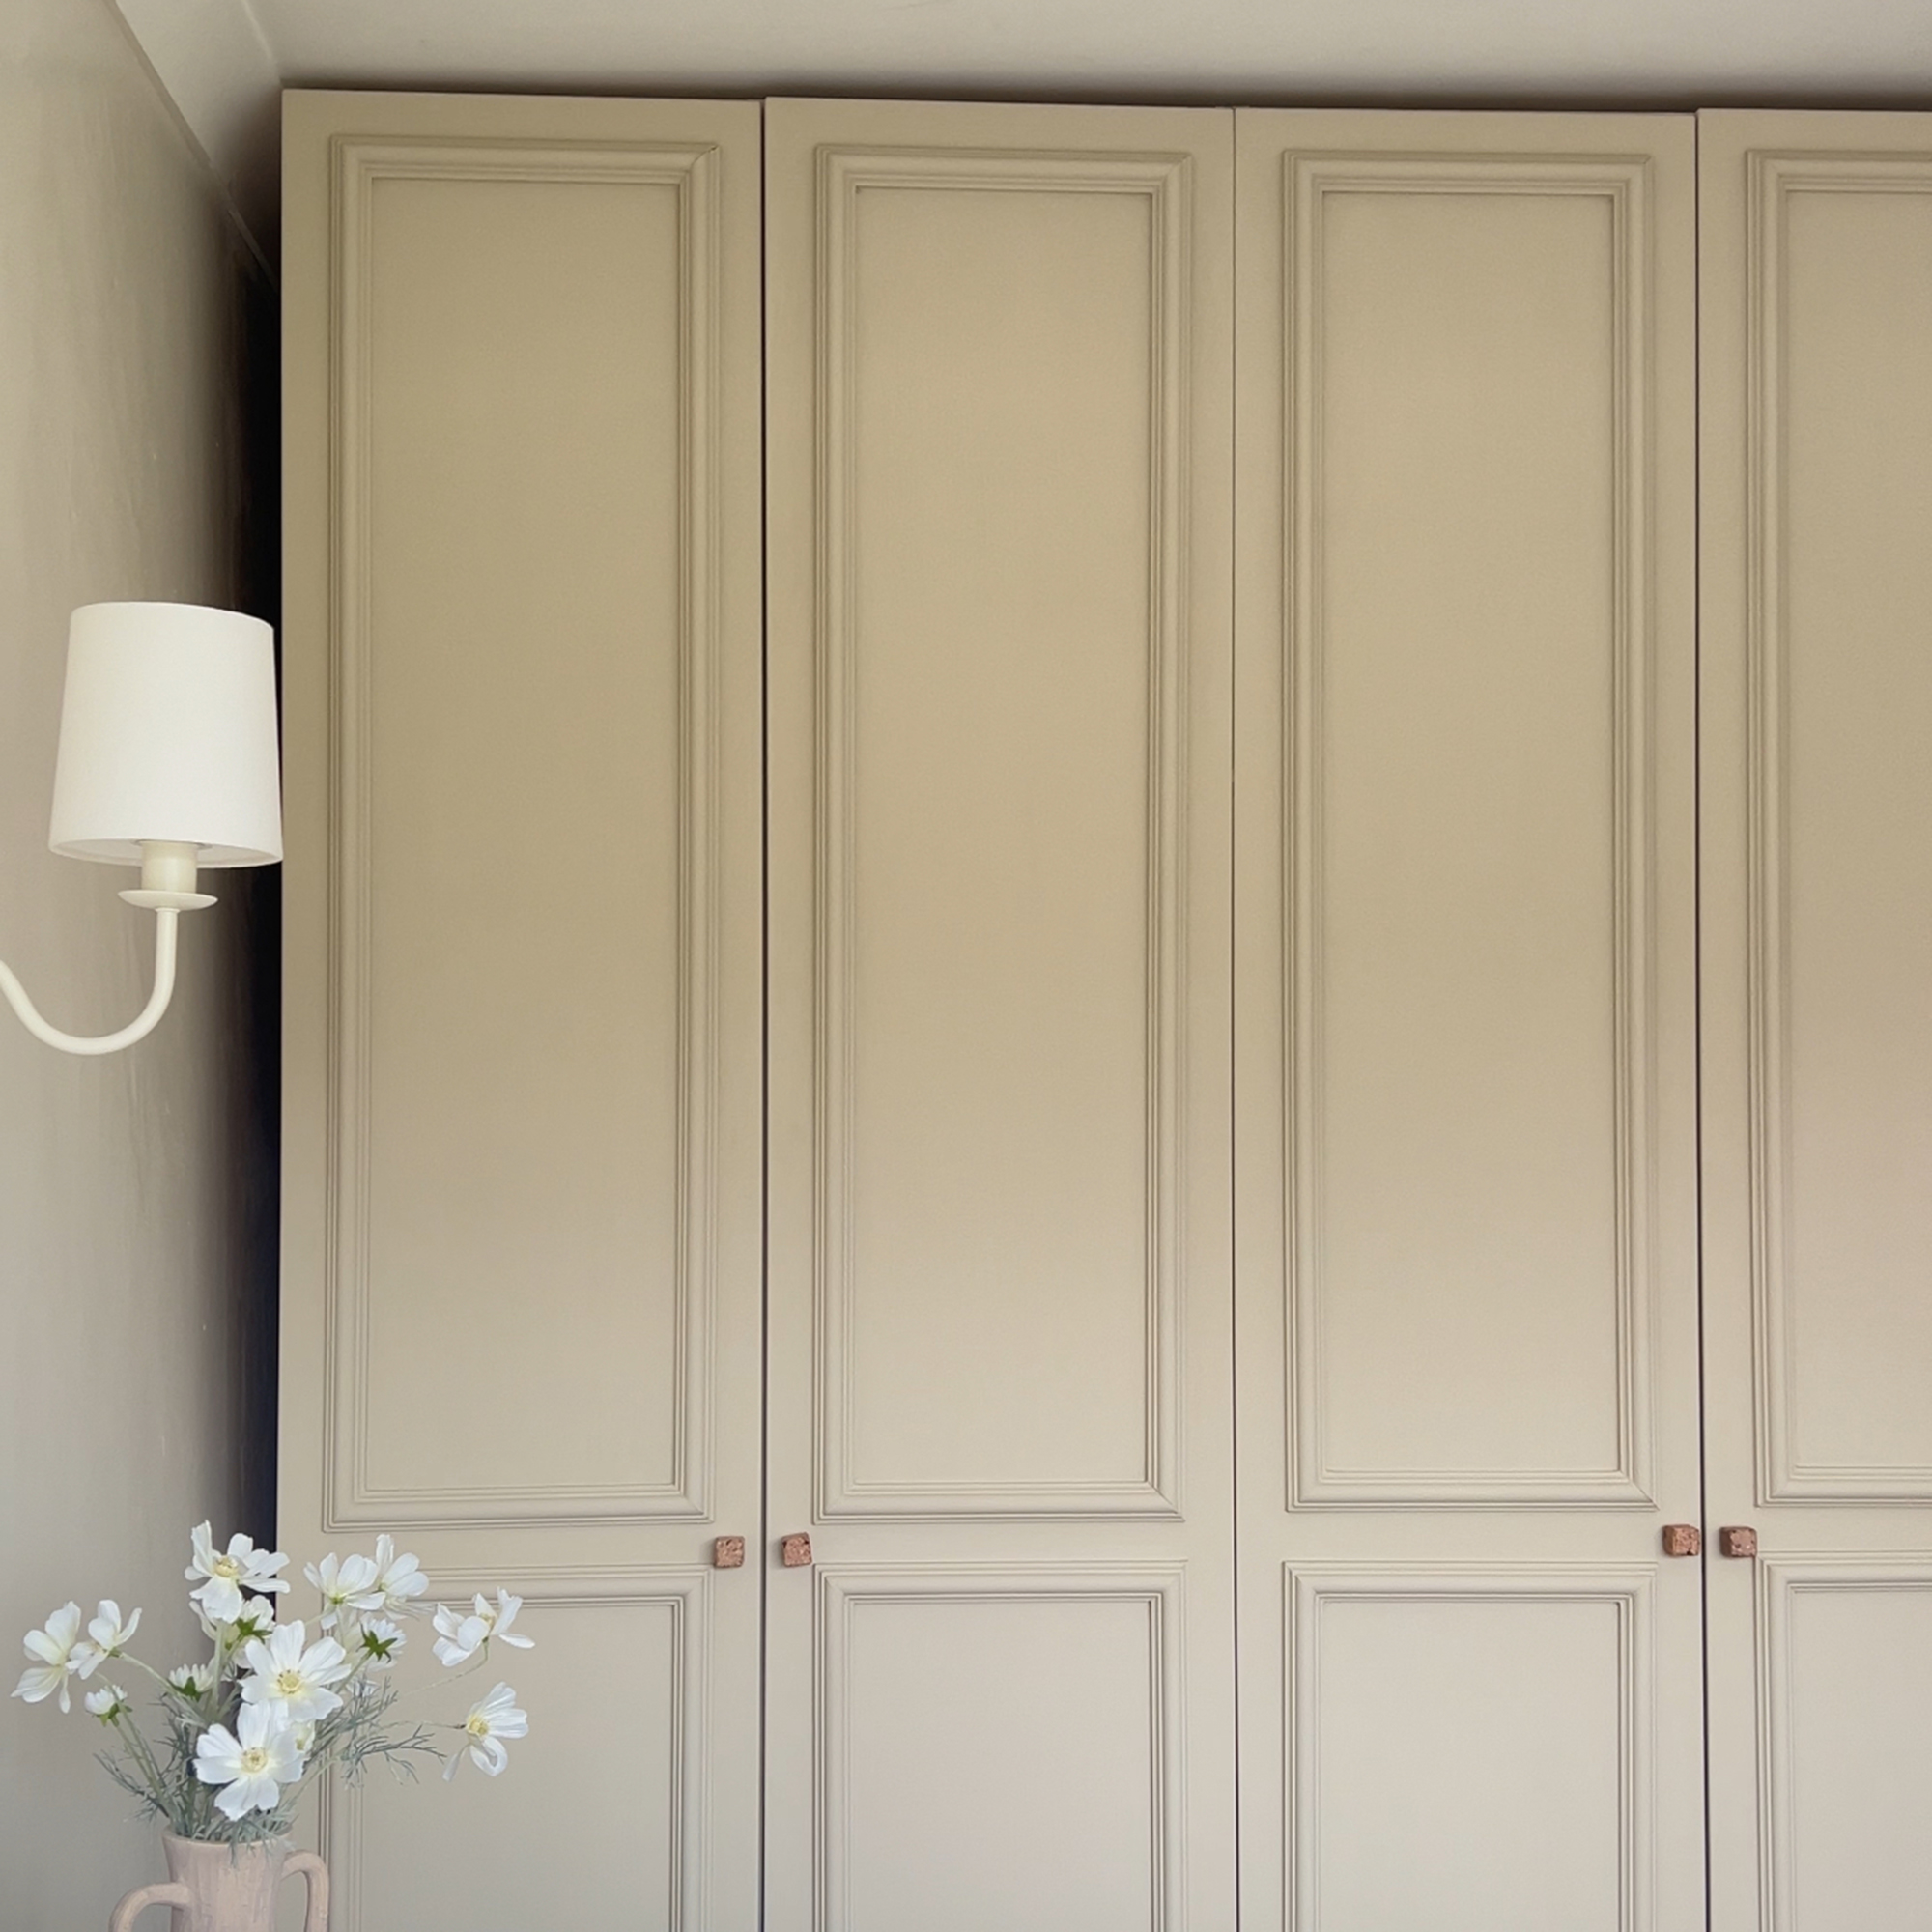
Lastly, this PAX hack I did - don’t worry, it is really simple and can be easily finished in a weekend! We were left with these PAX wardrobes by the previous owners. I started off by priming it, again in Zinsser’s BIN. I ordered some mdf moulding and cut them to size using a hand saw and a mitre box. They were really easy to stick on the unit with No More Nails. Some of the mdf moulding started slipping so I used Frog Tape to keep them in place while they dried. The mdf moulding I ordered arrived primed but if the ones you choose to use are not primed, it would be best to prime it before painting.
Then I finished it with Johnstone Paint in Sandstone. Another tip I have when painting furniture is to mix the paint with a paint conditioner, the one I used was Floetrol, this helps to minimise brush marks. For a customised look I filled in the original handle holes and drilled new ones lower down, and also replaced the knobs with something more modern.
I hope reading this will give you the encouragement you need to give an IKEA hack a go! Whether a simple DIY frame or a PAX hack, it will definitely change the way you live - no more trusty yet basic IKEA, but something that fits your style!