Fortnite Chapter 7 Season 2, called Showdown, refreshes the map and adds a brand new rivalry system that dominates how you'll play. The loot pool is almost entirely new, too—check out our weapon tier list for the best guns. The loot pool is almost entirely new, too—check out our weapon tier list for the best guns.
In this guide I'll explain the map changes including new secret spots, go over the all-important rivalry system and tell you where to find the powerful exotic and mythic weapons, some of them obtained from bosses such as the Ice King.
Fortnite Chapter 7 Season 2 map, storm shape, and driving the Battle Bus
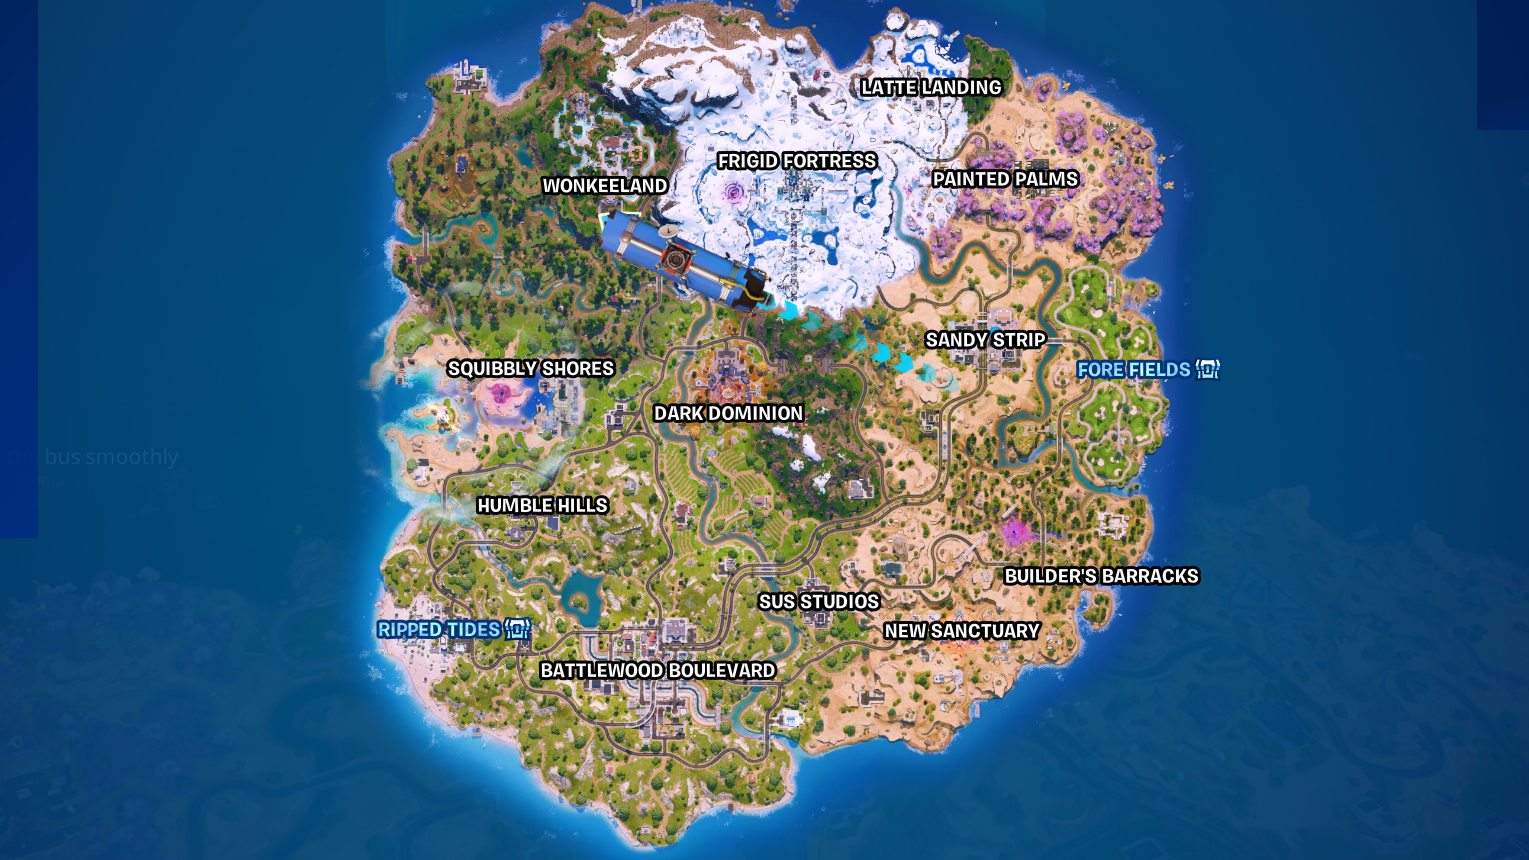
The map looks quite different to Season 1, as you can see.
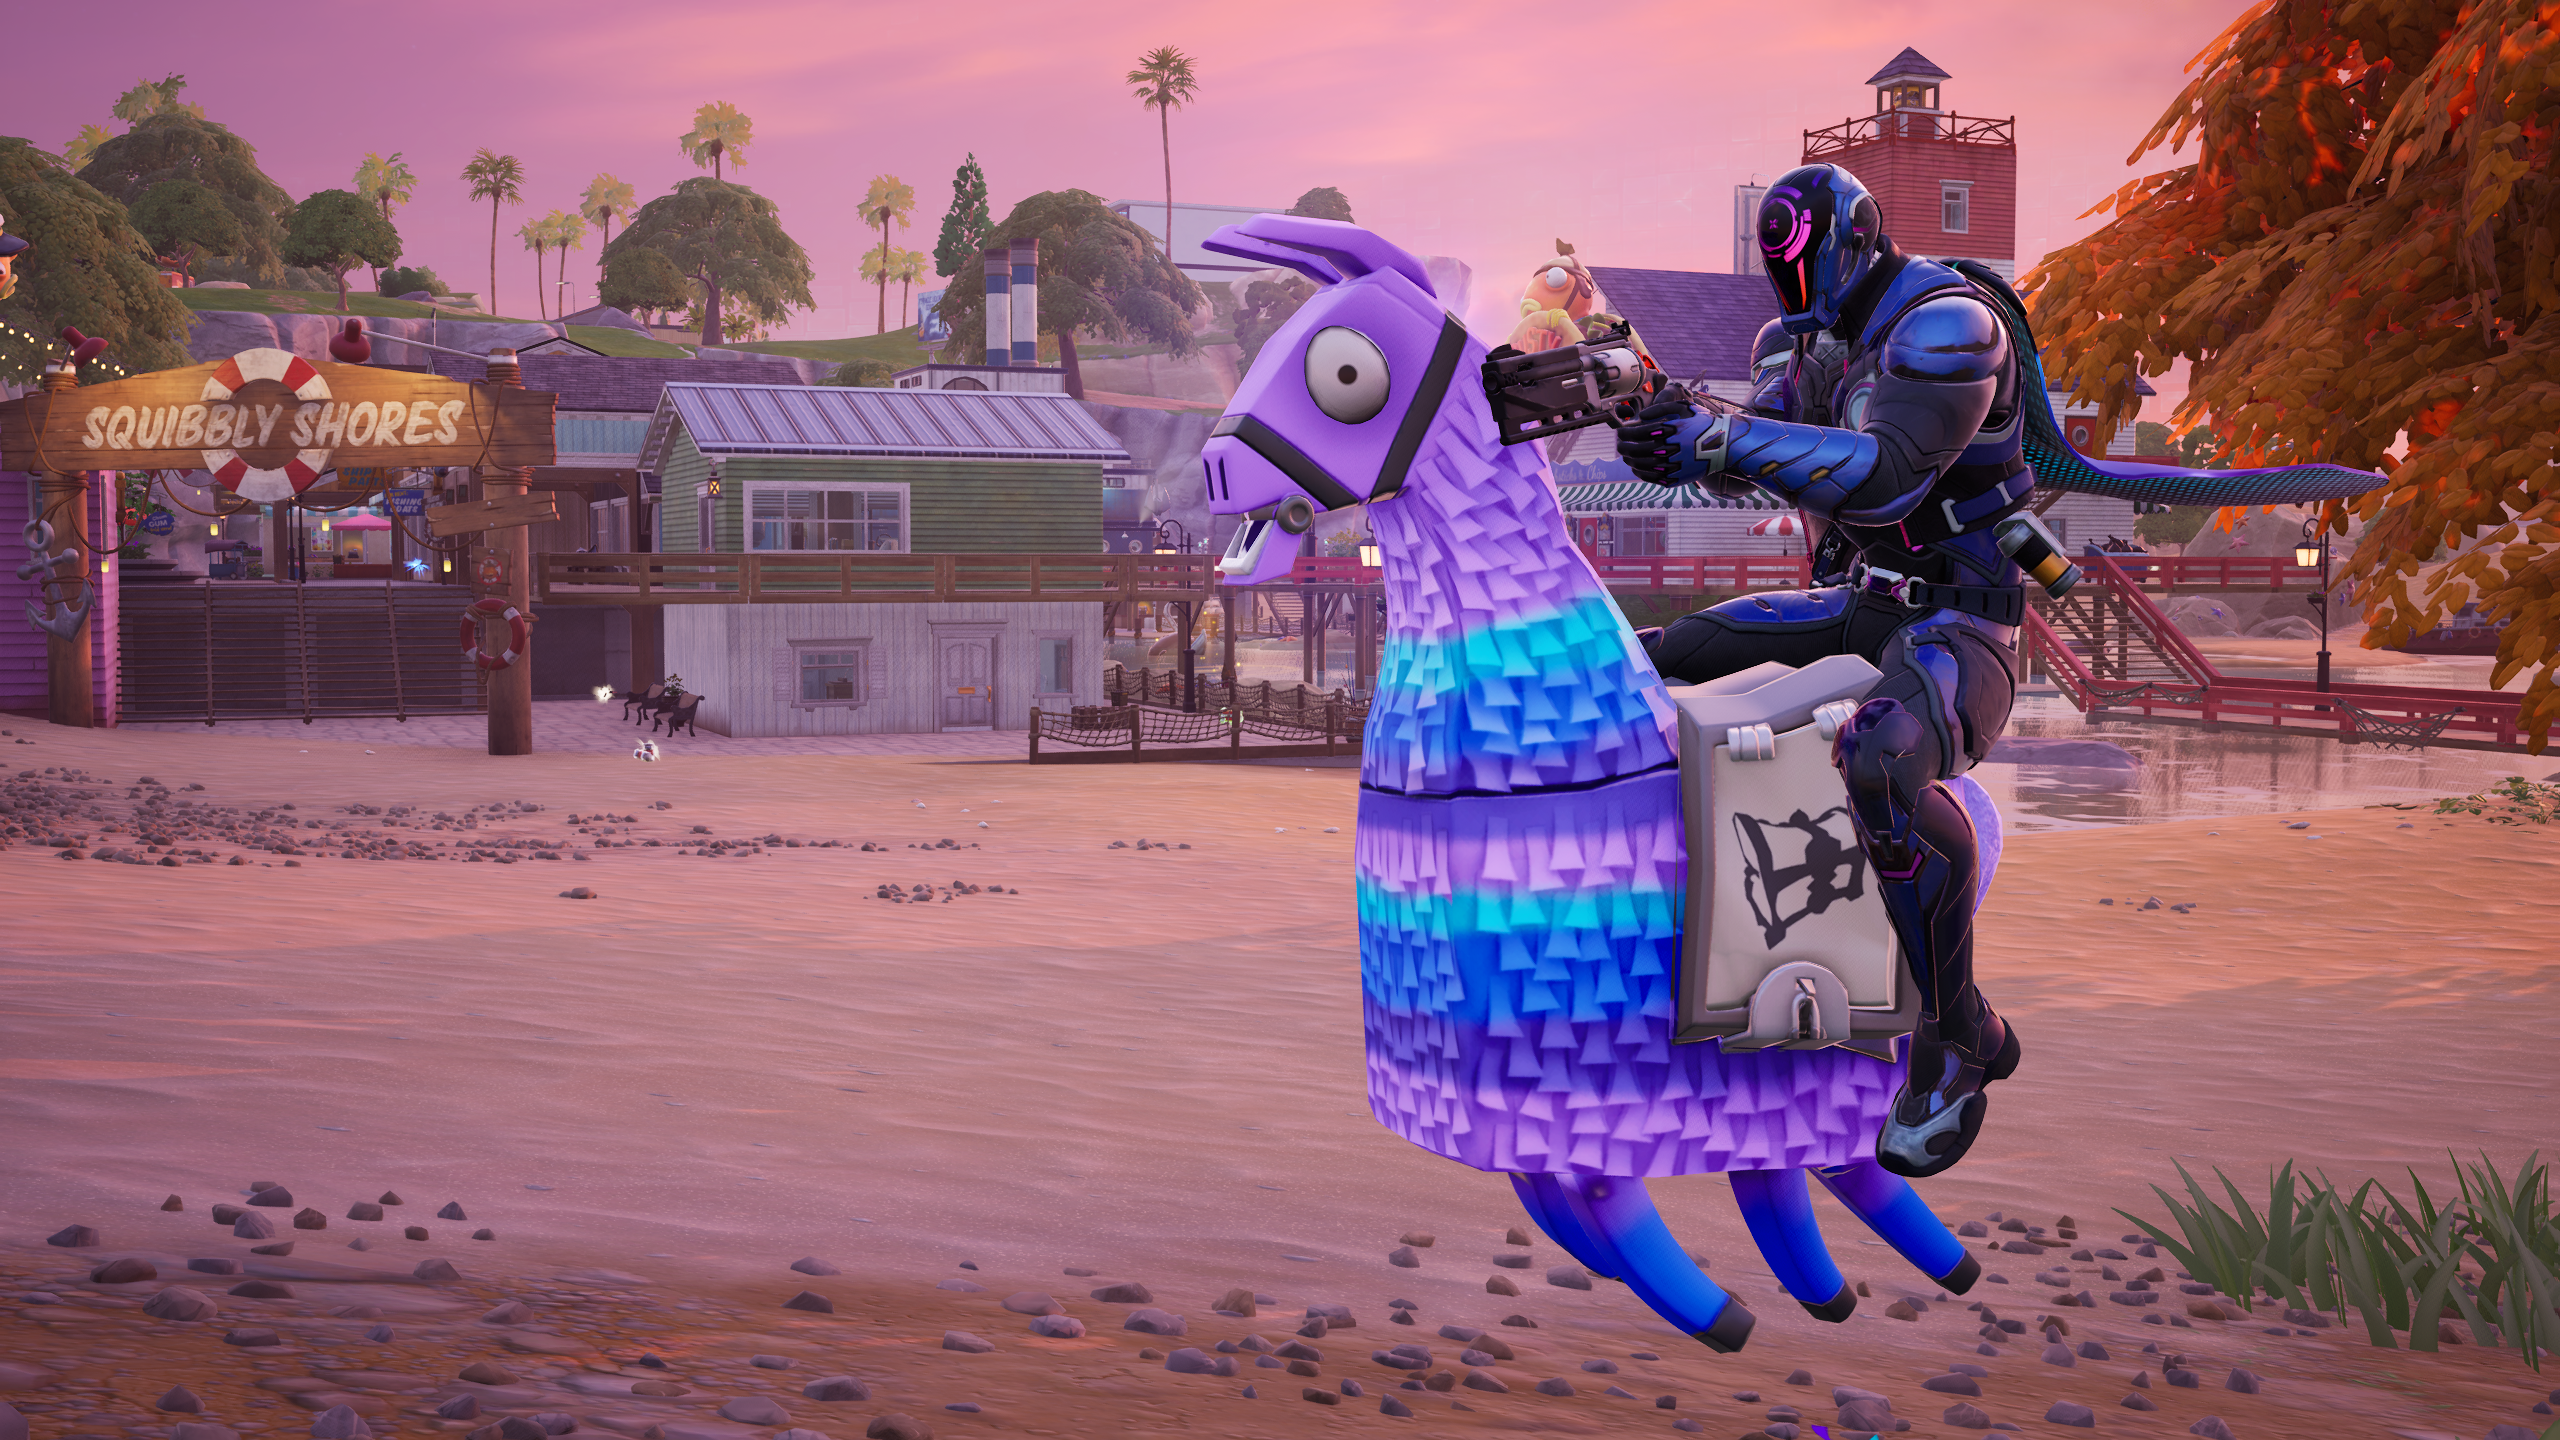
Epic has added four new POIs: Dark Dominion, Frigid Fortress, Squibbly Shores, New Sanctuary, and Builder's Barracks. The hot-air balloon stations, and the balloon themselves, are gone.
Oddly shaped storms remain from Season 1. Alongside the traditional circle you can now find storms of all shapes and sizes: triangles, rectangles, and more irregular patterns like a crown.
The Battle Bus that drops everyone off to start each match is now driven by a random player who can steer it left and right. It's mostly a gimmick, but if you drive into a supply drop icon then one will fall from the sky.
Two POIs will be labelled blue, denoting that you're more likely to find rare chests there with better items.
And just like last season, don't sleep on vending machines: you'll see them marked on your map and after you build up gold—from eliminations or cash registers—you can buy a whole new loadout.
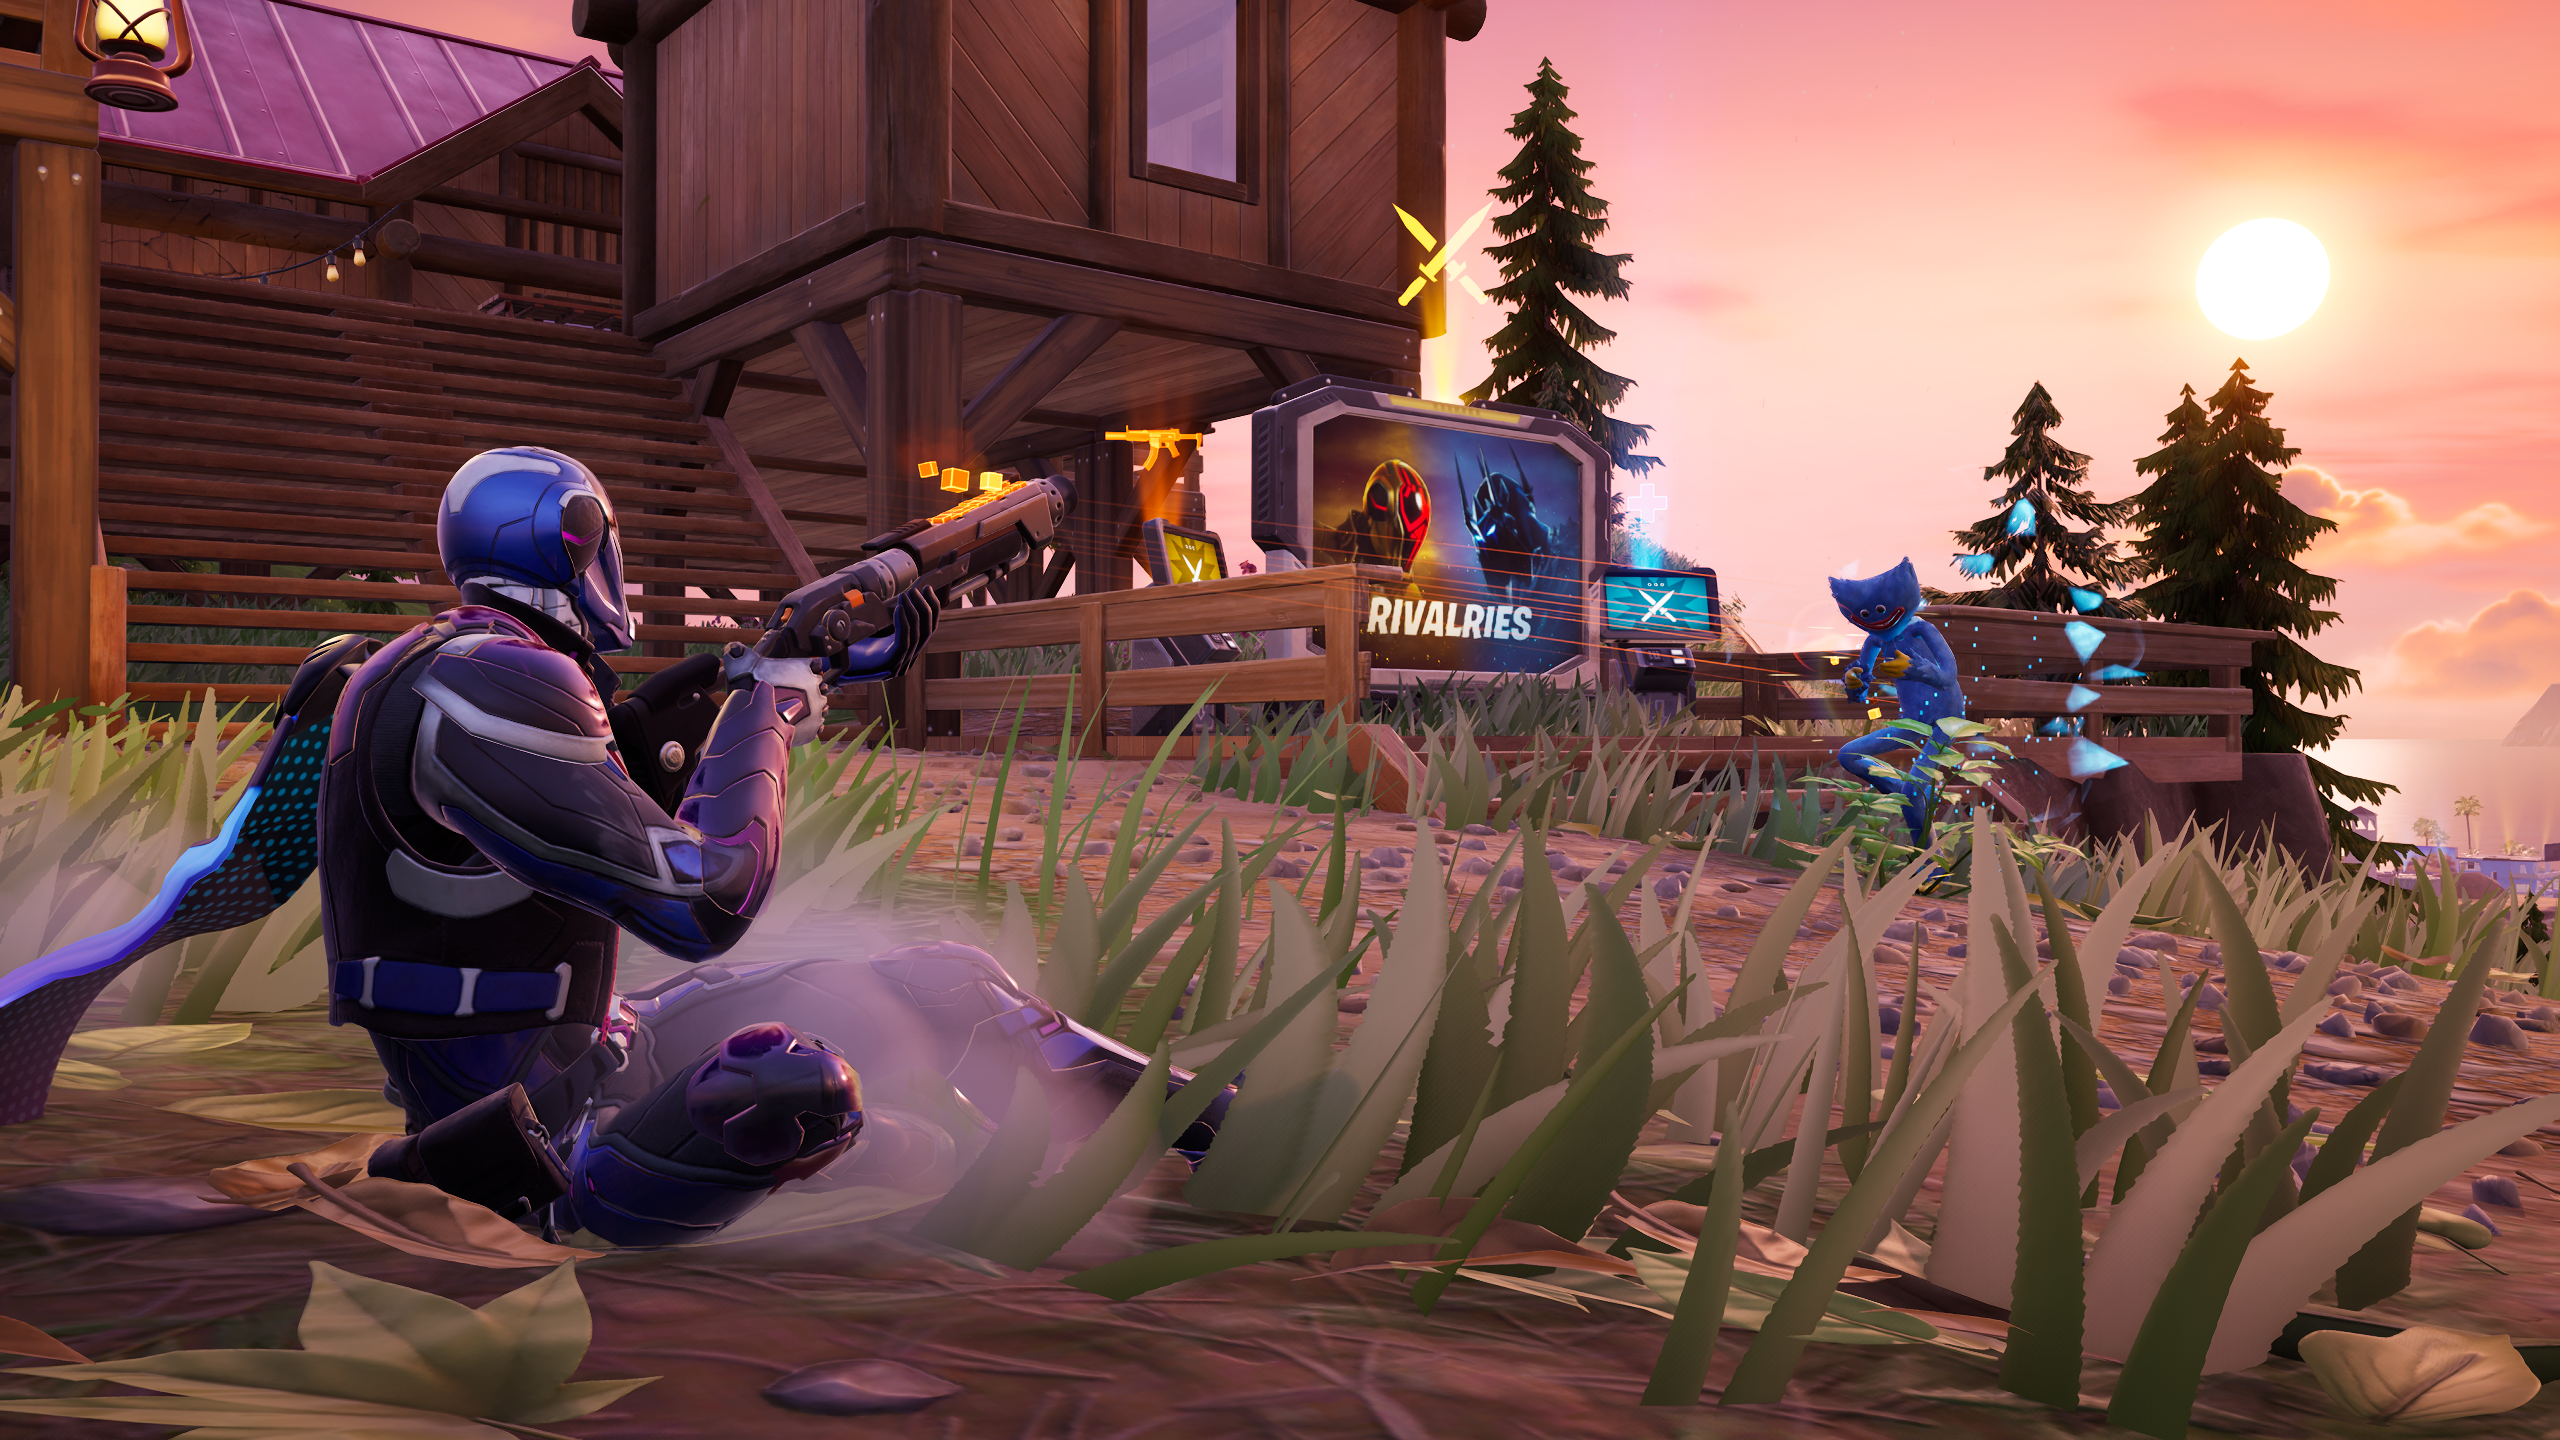
How Showdown's rivalries work and why they're important
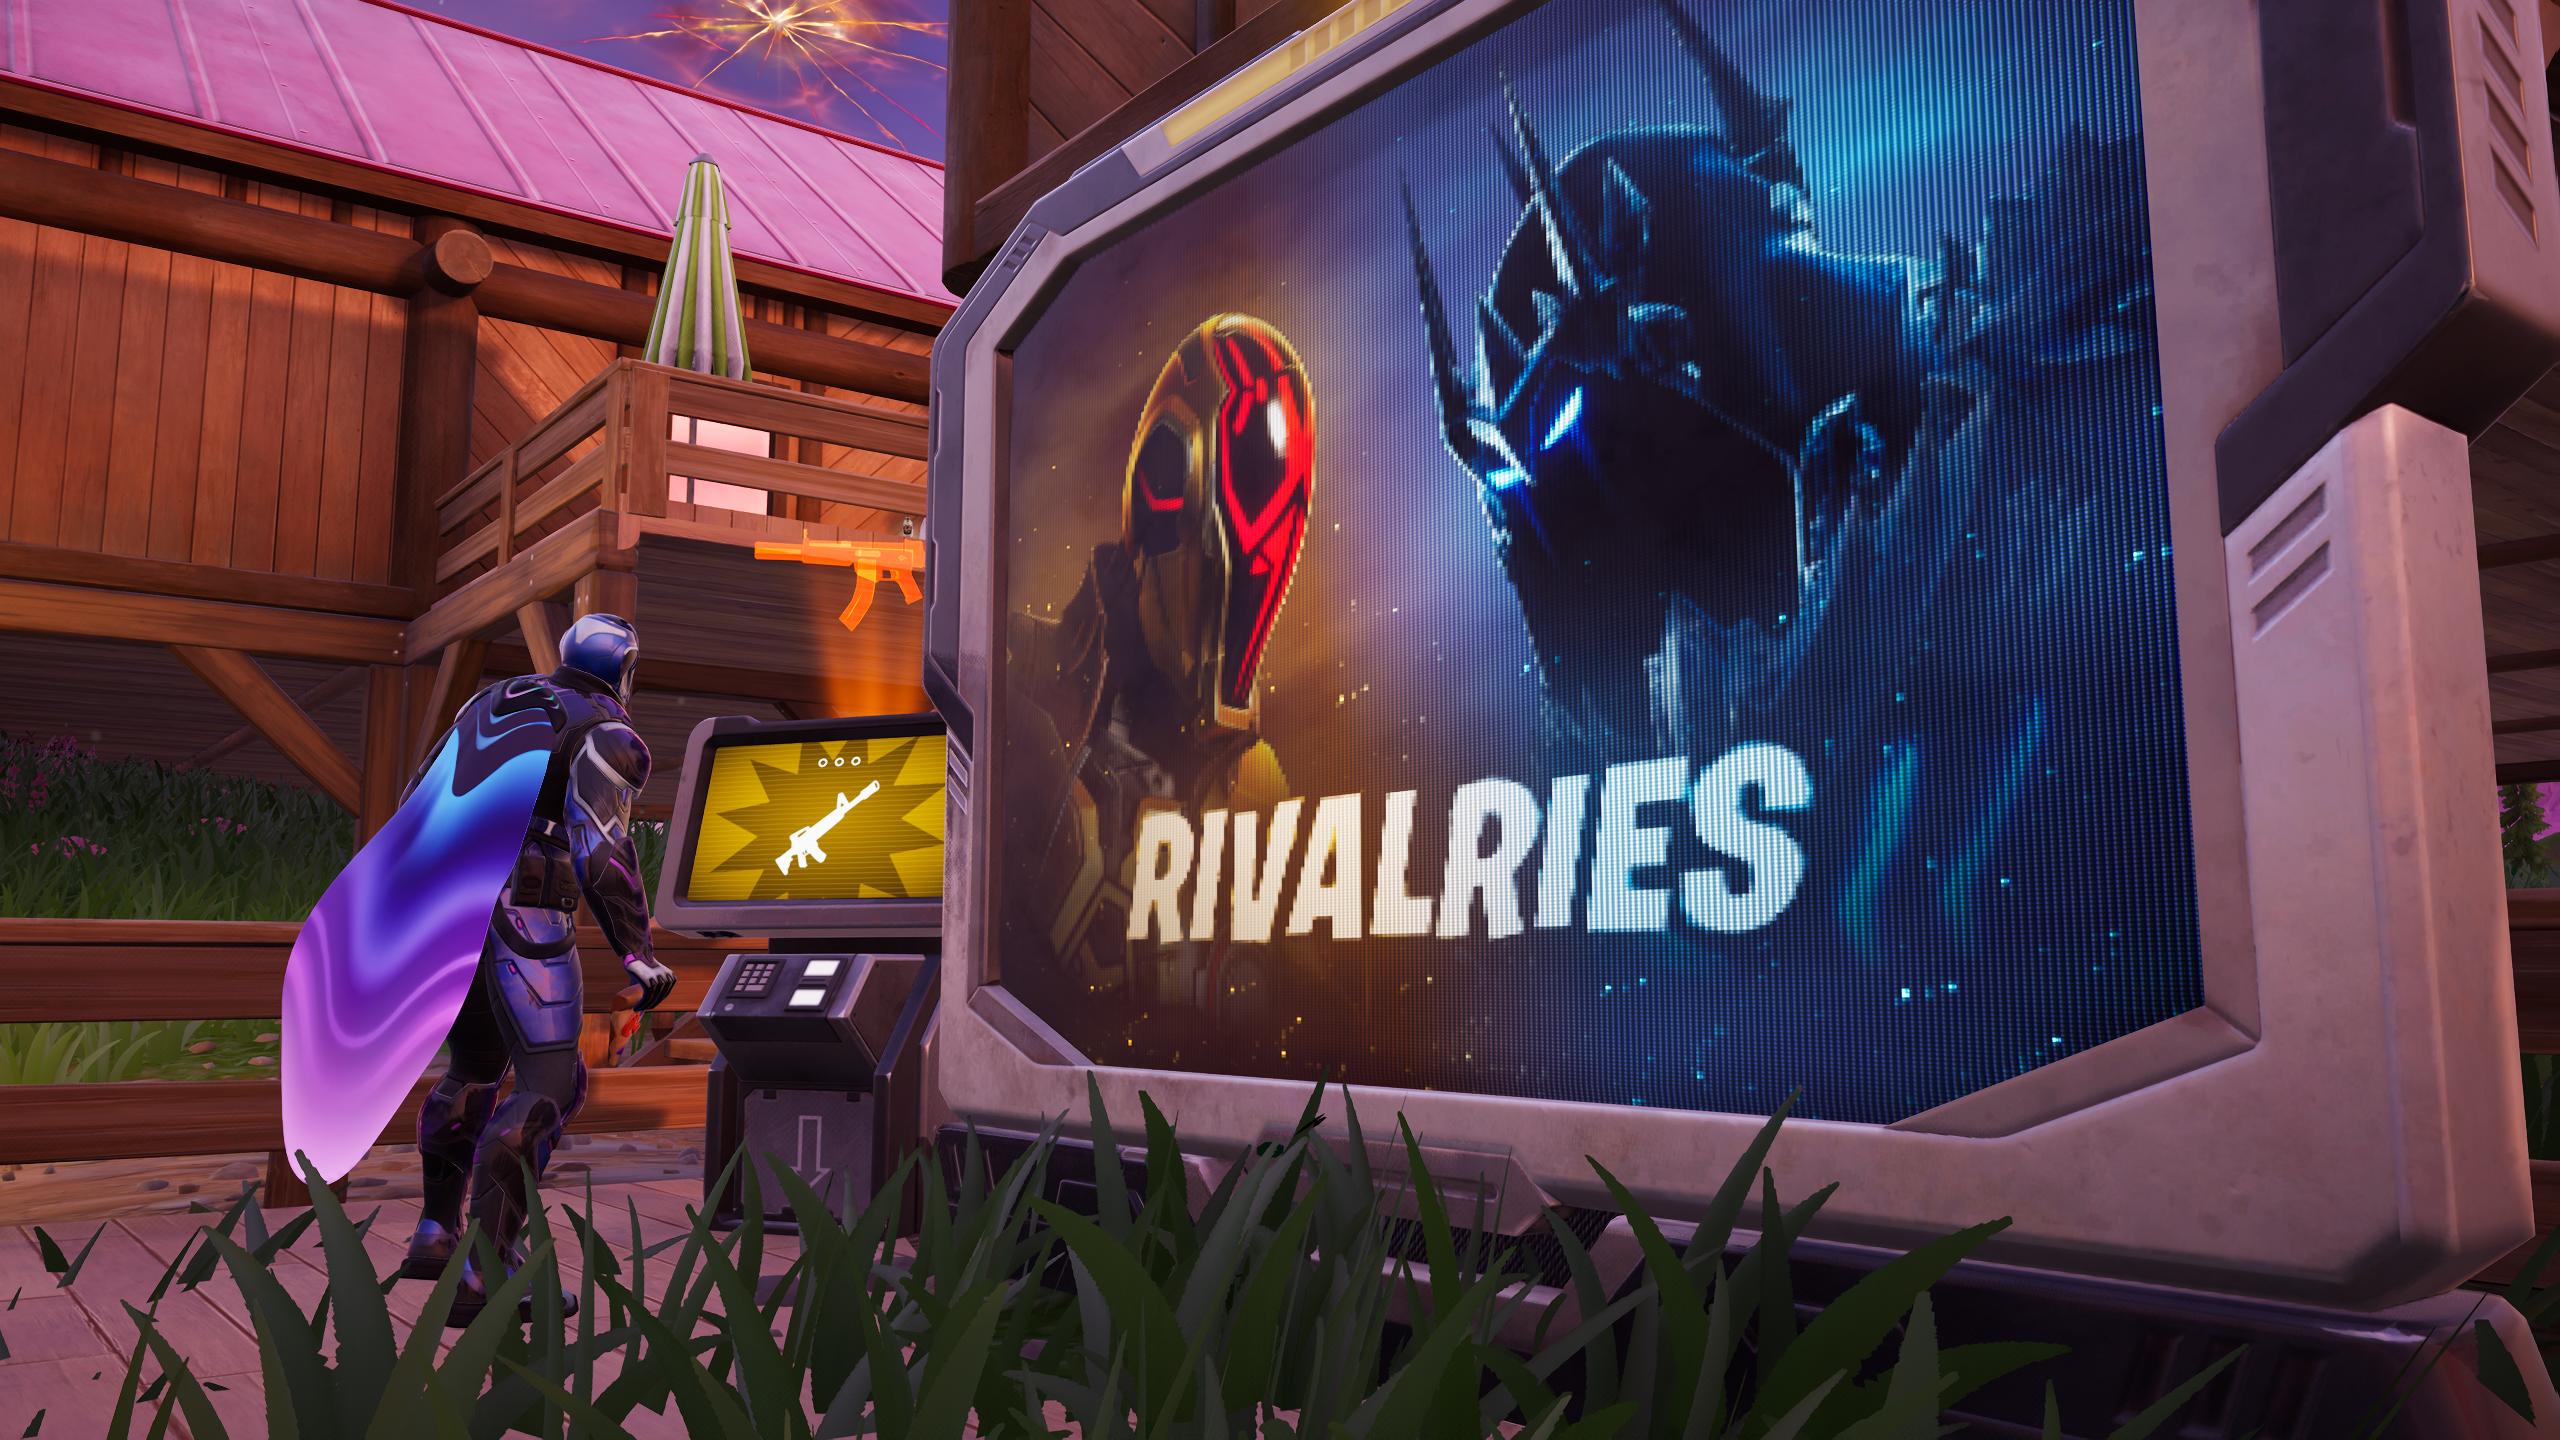
Onto the most important addition to this season: rivalries. These contracts will dictate how you play each round, and completing them rewards you with high-tier weapons and perks.
Starting a rivalry pits two players against each other, and they can both see the rough location of their rival on the map (marked by a red target). Eliminate your rival to earn rivalry points that you can spend on rewards.
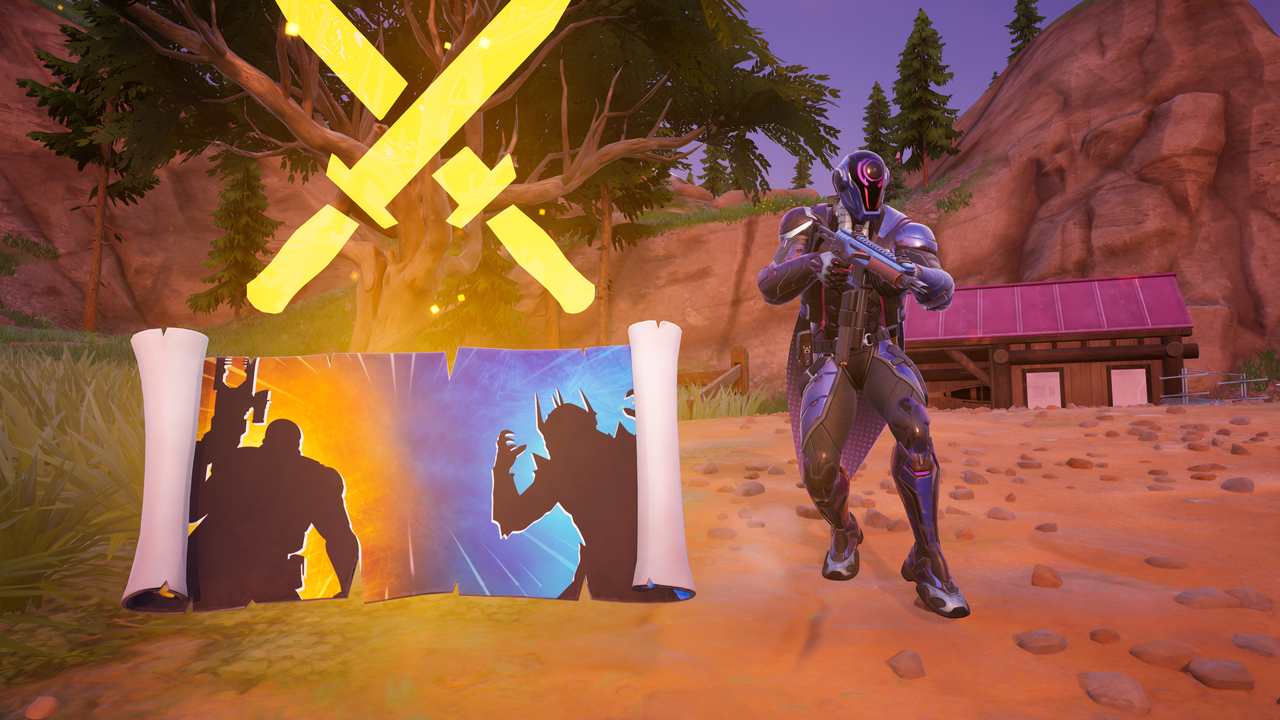
Everything starts at the rivalry boards dotted around the map. Look for the crossed swords icons.
The central screen at this station is for starting rivalries. You can't start a new rivalry while one is active.
The screens on the left and right are for spending your rivalry points. These carry over between rounds.
Spending your rivalry points
You can spend your points on weapons or perks.
You can buy exotic weapons—the O.X.R. Rifle, the Wrecker Revolver and the Boom sniper—from the left-hand screen. You'll need to win a certain number of rivalries first to unlock these uber-powerful weapons, and they're expensive, so make sure you're completing as many rivalries as possible to earn points.
You can also upgrade existing weapons in your inventory: simply interact with the screen on the left while carrying the weapon you want to upgrade.
Finally you can buy perks from the right-hand screen. Once you've won 40 rivalries you can buy a perk that marks enemies in red whenever you damage them; after 80 victories, you can buy an infinite stamina perk.
Keep in mind that your rival may be a bot, giving you an easy win. I've found that my first couple of rivals in any given round are usually bots.
Fortnite Chapter 7 Season 2 Showdown boss locations
Fortnite Chapter 7 Season 2 Showdown boss locations
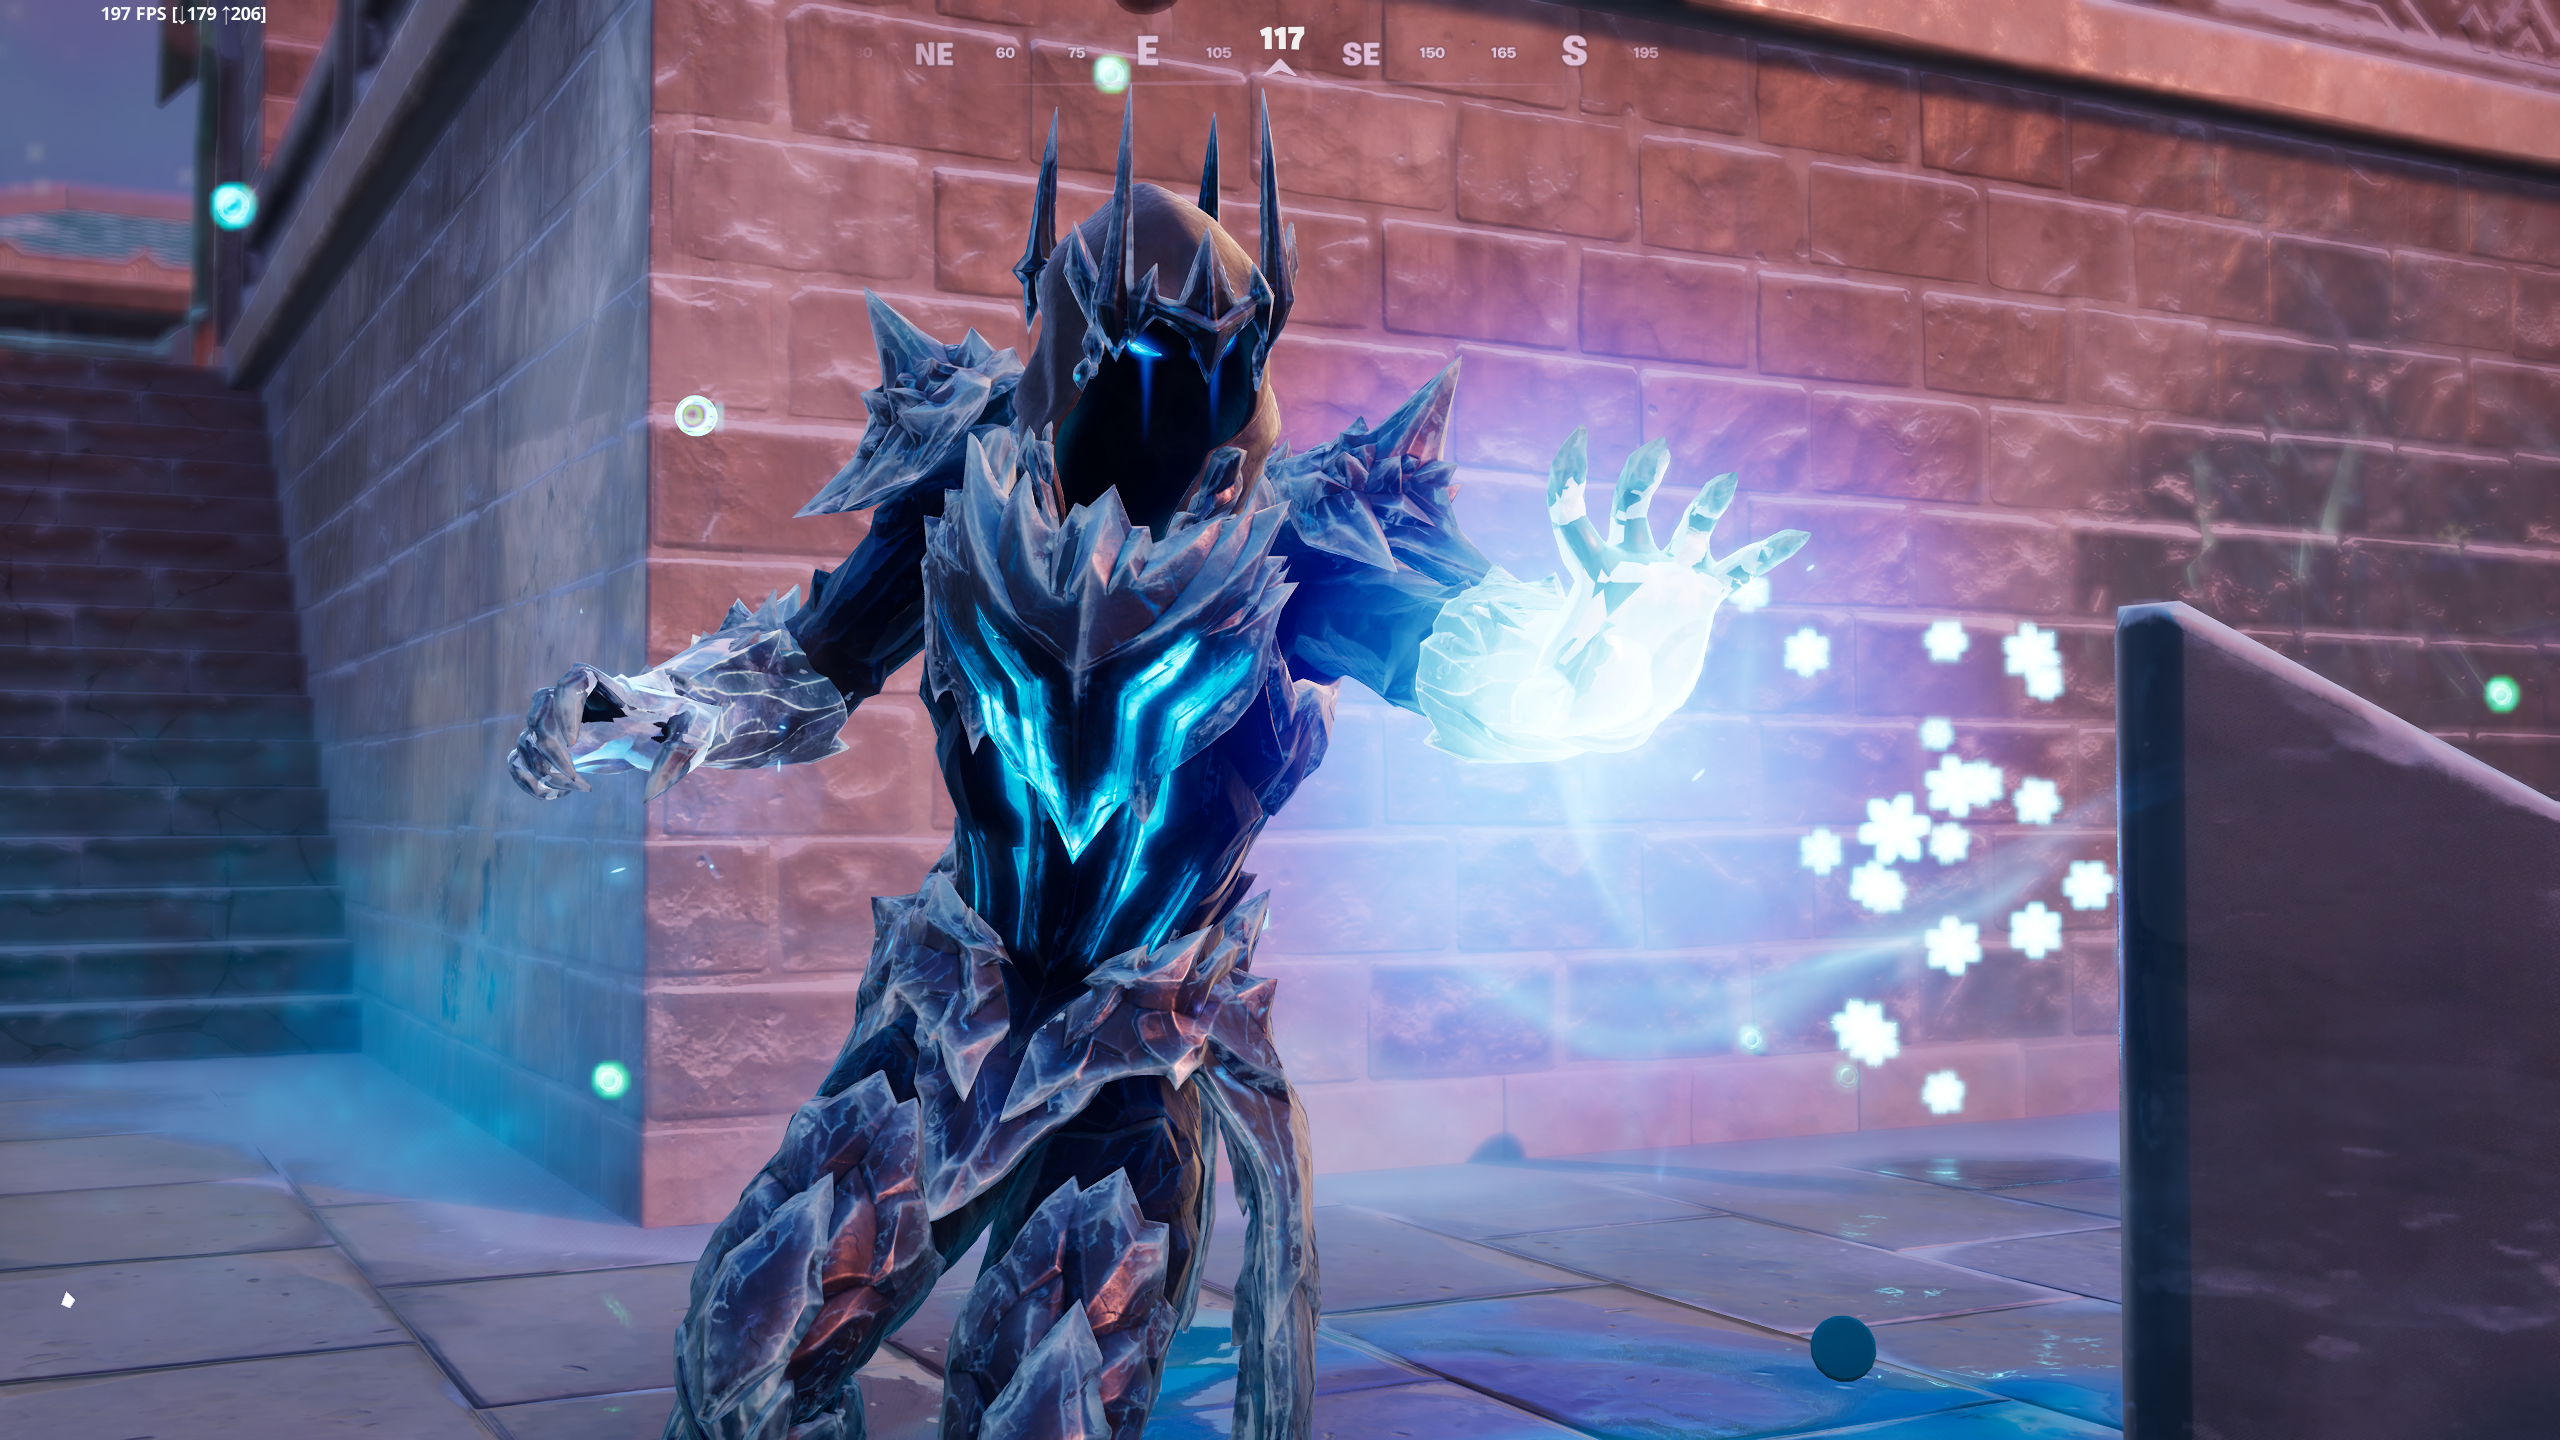
Four bosses stalk Fortnite's map this season, each with a chance of dropping a mythic weapon. Those bosses are Dark Voyager, Squibbly, Ice King, and Zadie.
As is the fashion in Fortnite now, these bosses do not have set spawns and have a chance to appear in various POIs, so you can't guarantee that you'll meet one. Look for a skull and crossbone on the map to find them.
They do, however, seem to spawn in their "home" POI quite often: the Dark Voyager in Dark Dominion; Squibbly in Squibbly Shores; and the Ice King in Frigid Forest. It's always worth checking these POIs out—even if the bosses aren't there you'll find tons of loot.
Zadie's spawn seems to be the most consistent. Drop in the woods just to the north of Squibbly Shores and look for the icon.
Defeating the bosses has a chance to drop the following mythic weapons.
- Dark Voyager's Obliterator: The mythic version of the chaos reloader shotgun, with two shots instead of one.
- Squibbly's Combat assault rifle: A mythic version of the combat assault rifle. Its fire rate increases as you hold the trigger.
- Ice King's Gauntlets: Their primary fire is a 50-damage projectile with some splash damage; right click for a projectile that creates an icy storm that continuously damages anyone within it (good for team-based modes).
- Mythic Hammer Revolver: A souped-up version of this new revolver that deals 138 damage per headshot. Ouch.
Other mythic weapons and exotics
So that's already three exotics from the rivalries board, and three mythics from bosses. But there are still four other mythics and one other exotic to find in Chapter 7 Season 2:
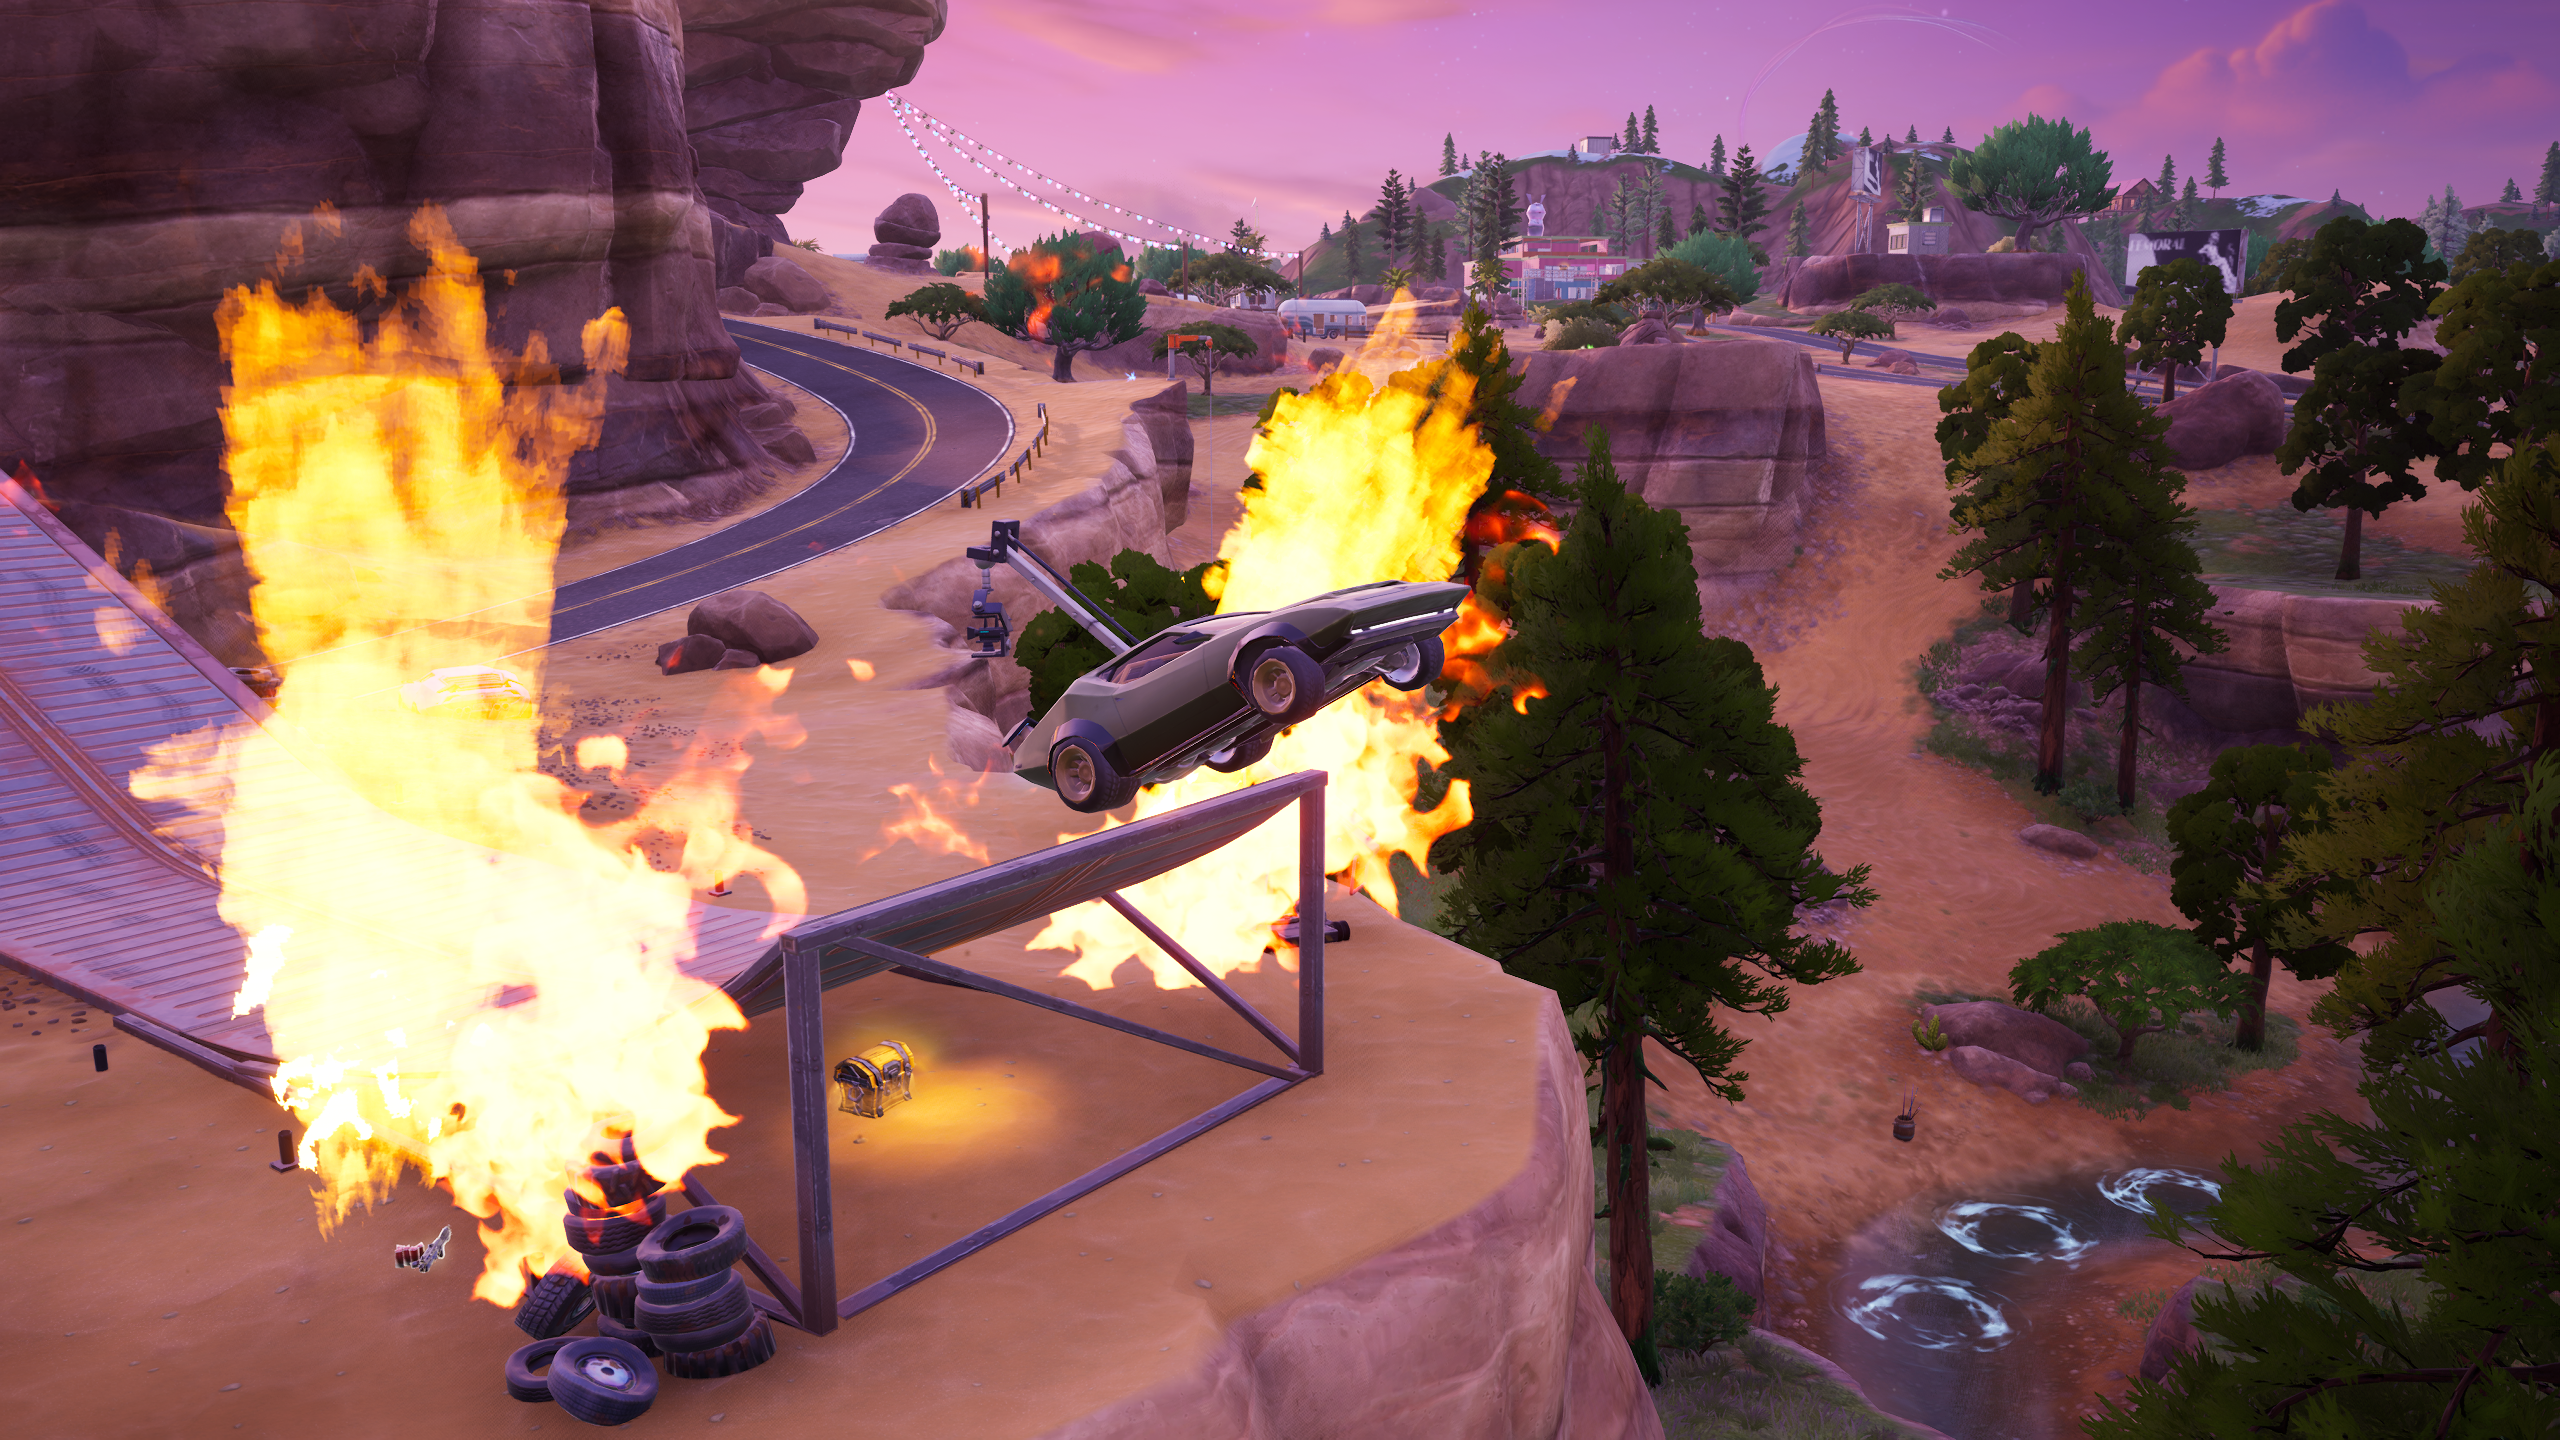
- Brute Nemesis assault rifle: This mythic nemesis assault rifle has a chance to drop when you drive over a car over the jump at Looper's Leap, from west to east, marked below on the map. Boost as you approach the top of the ramp.
- Brutus' Twin Hammer Shotguns: Lift the weight at Ripped Tides and this mythic has a chance to spawn (eat the steaks dotted around the POI to lift the weight faster).
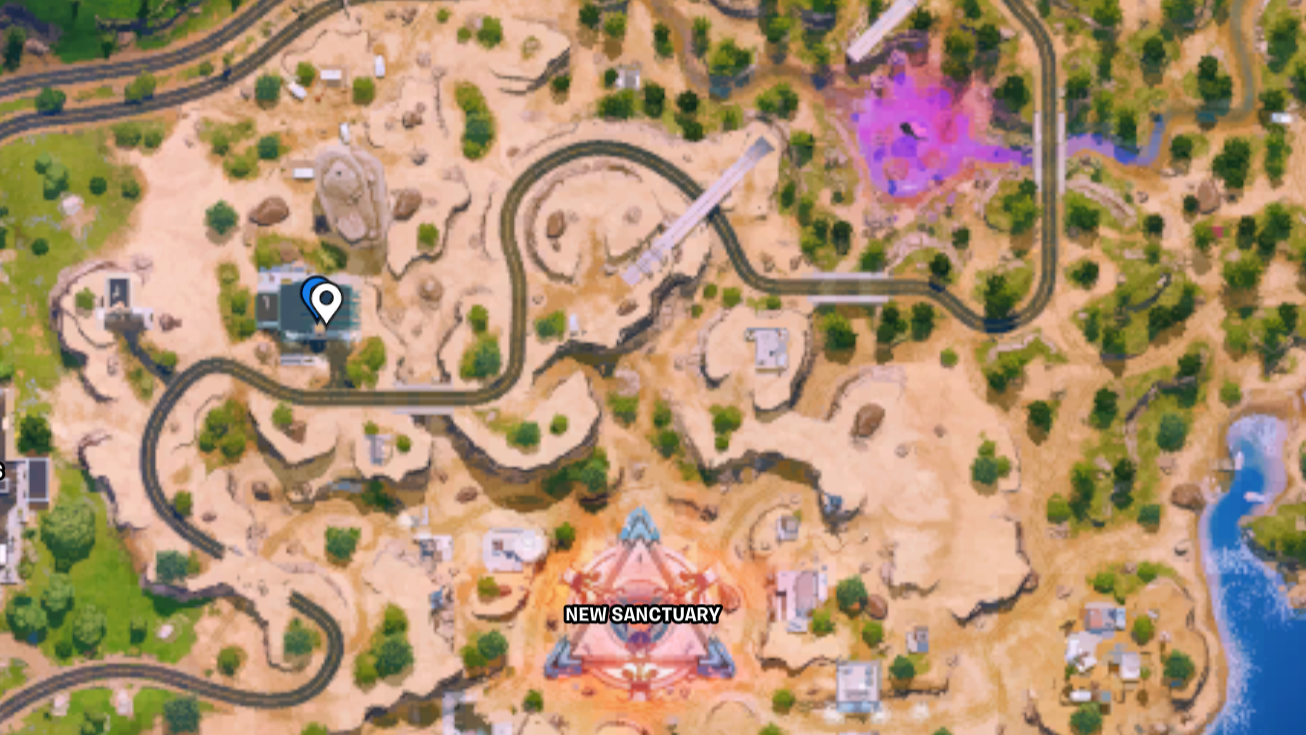
- The Foundation's Rift Rifle: An exotic version of the DMR—if you charge a shot then you'll create a rift where the bullet lands (ideal for moving around the map). To obtain it, first hire The Foundation NPC at New Sanctuary, then get three kills. The NPC will give you this rifle.
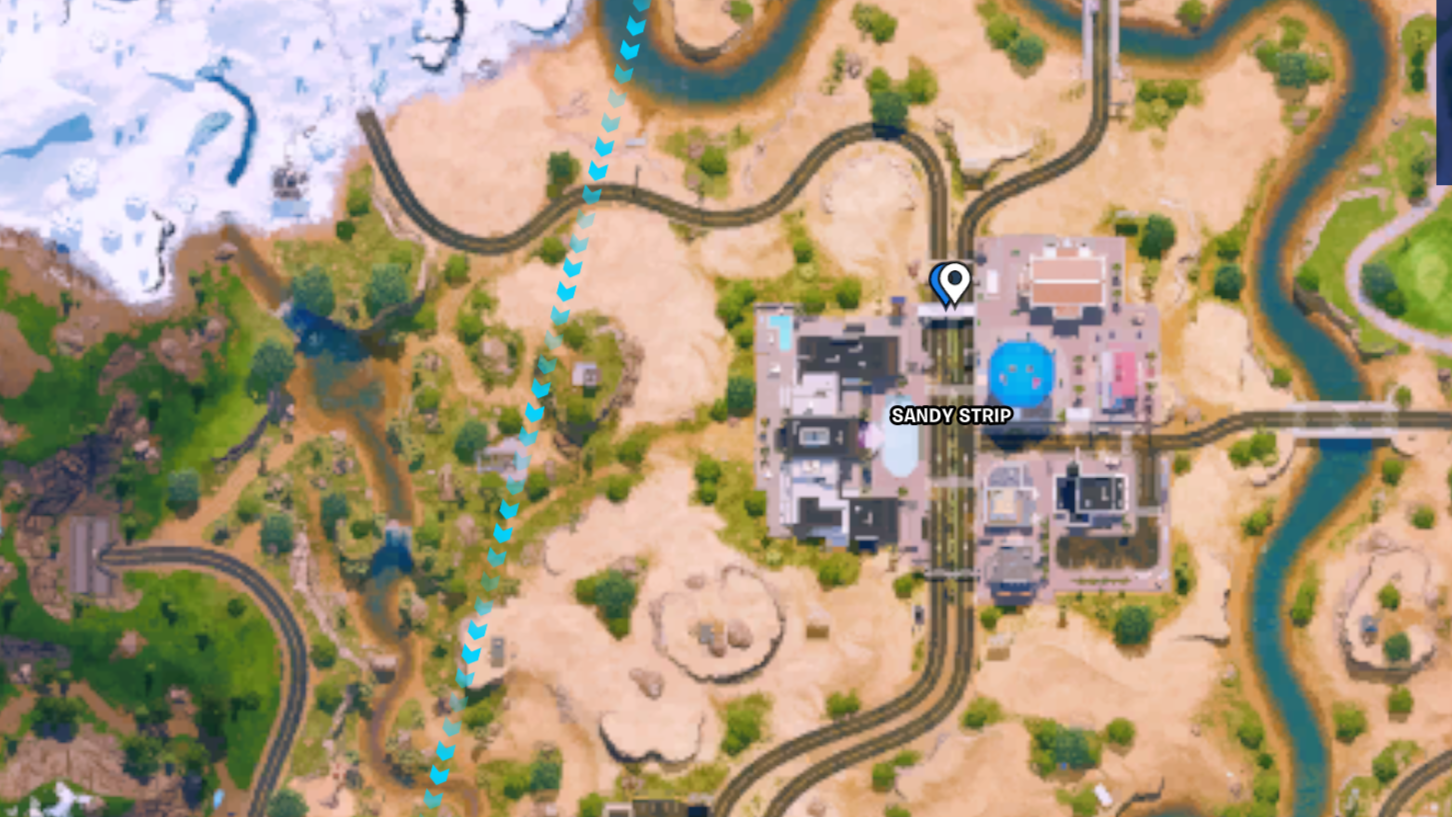
- The drag race at Sandy Strip (marked below) will give you a random mythic weapon.
You'll need two players for this last one, one in each car to start the race. When the race is over a random mythic spawns. In addition to the mythics listed above you can also get the Pinpoint Iron pump shotgun or the Apex Thunder burst SMG.
Fortnite Chapter 7 Season 2: How to open vaults
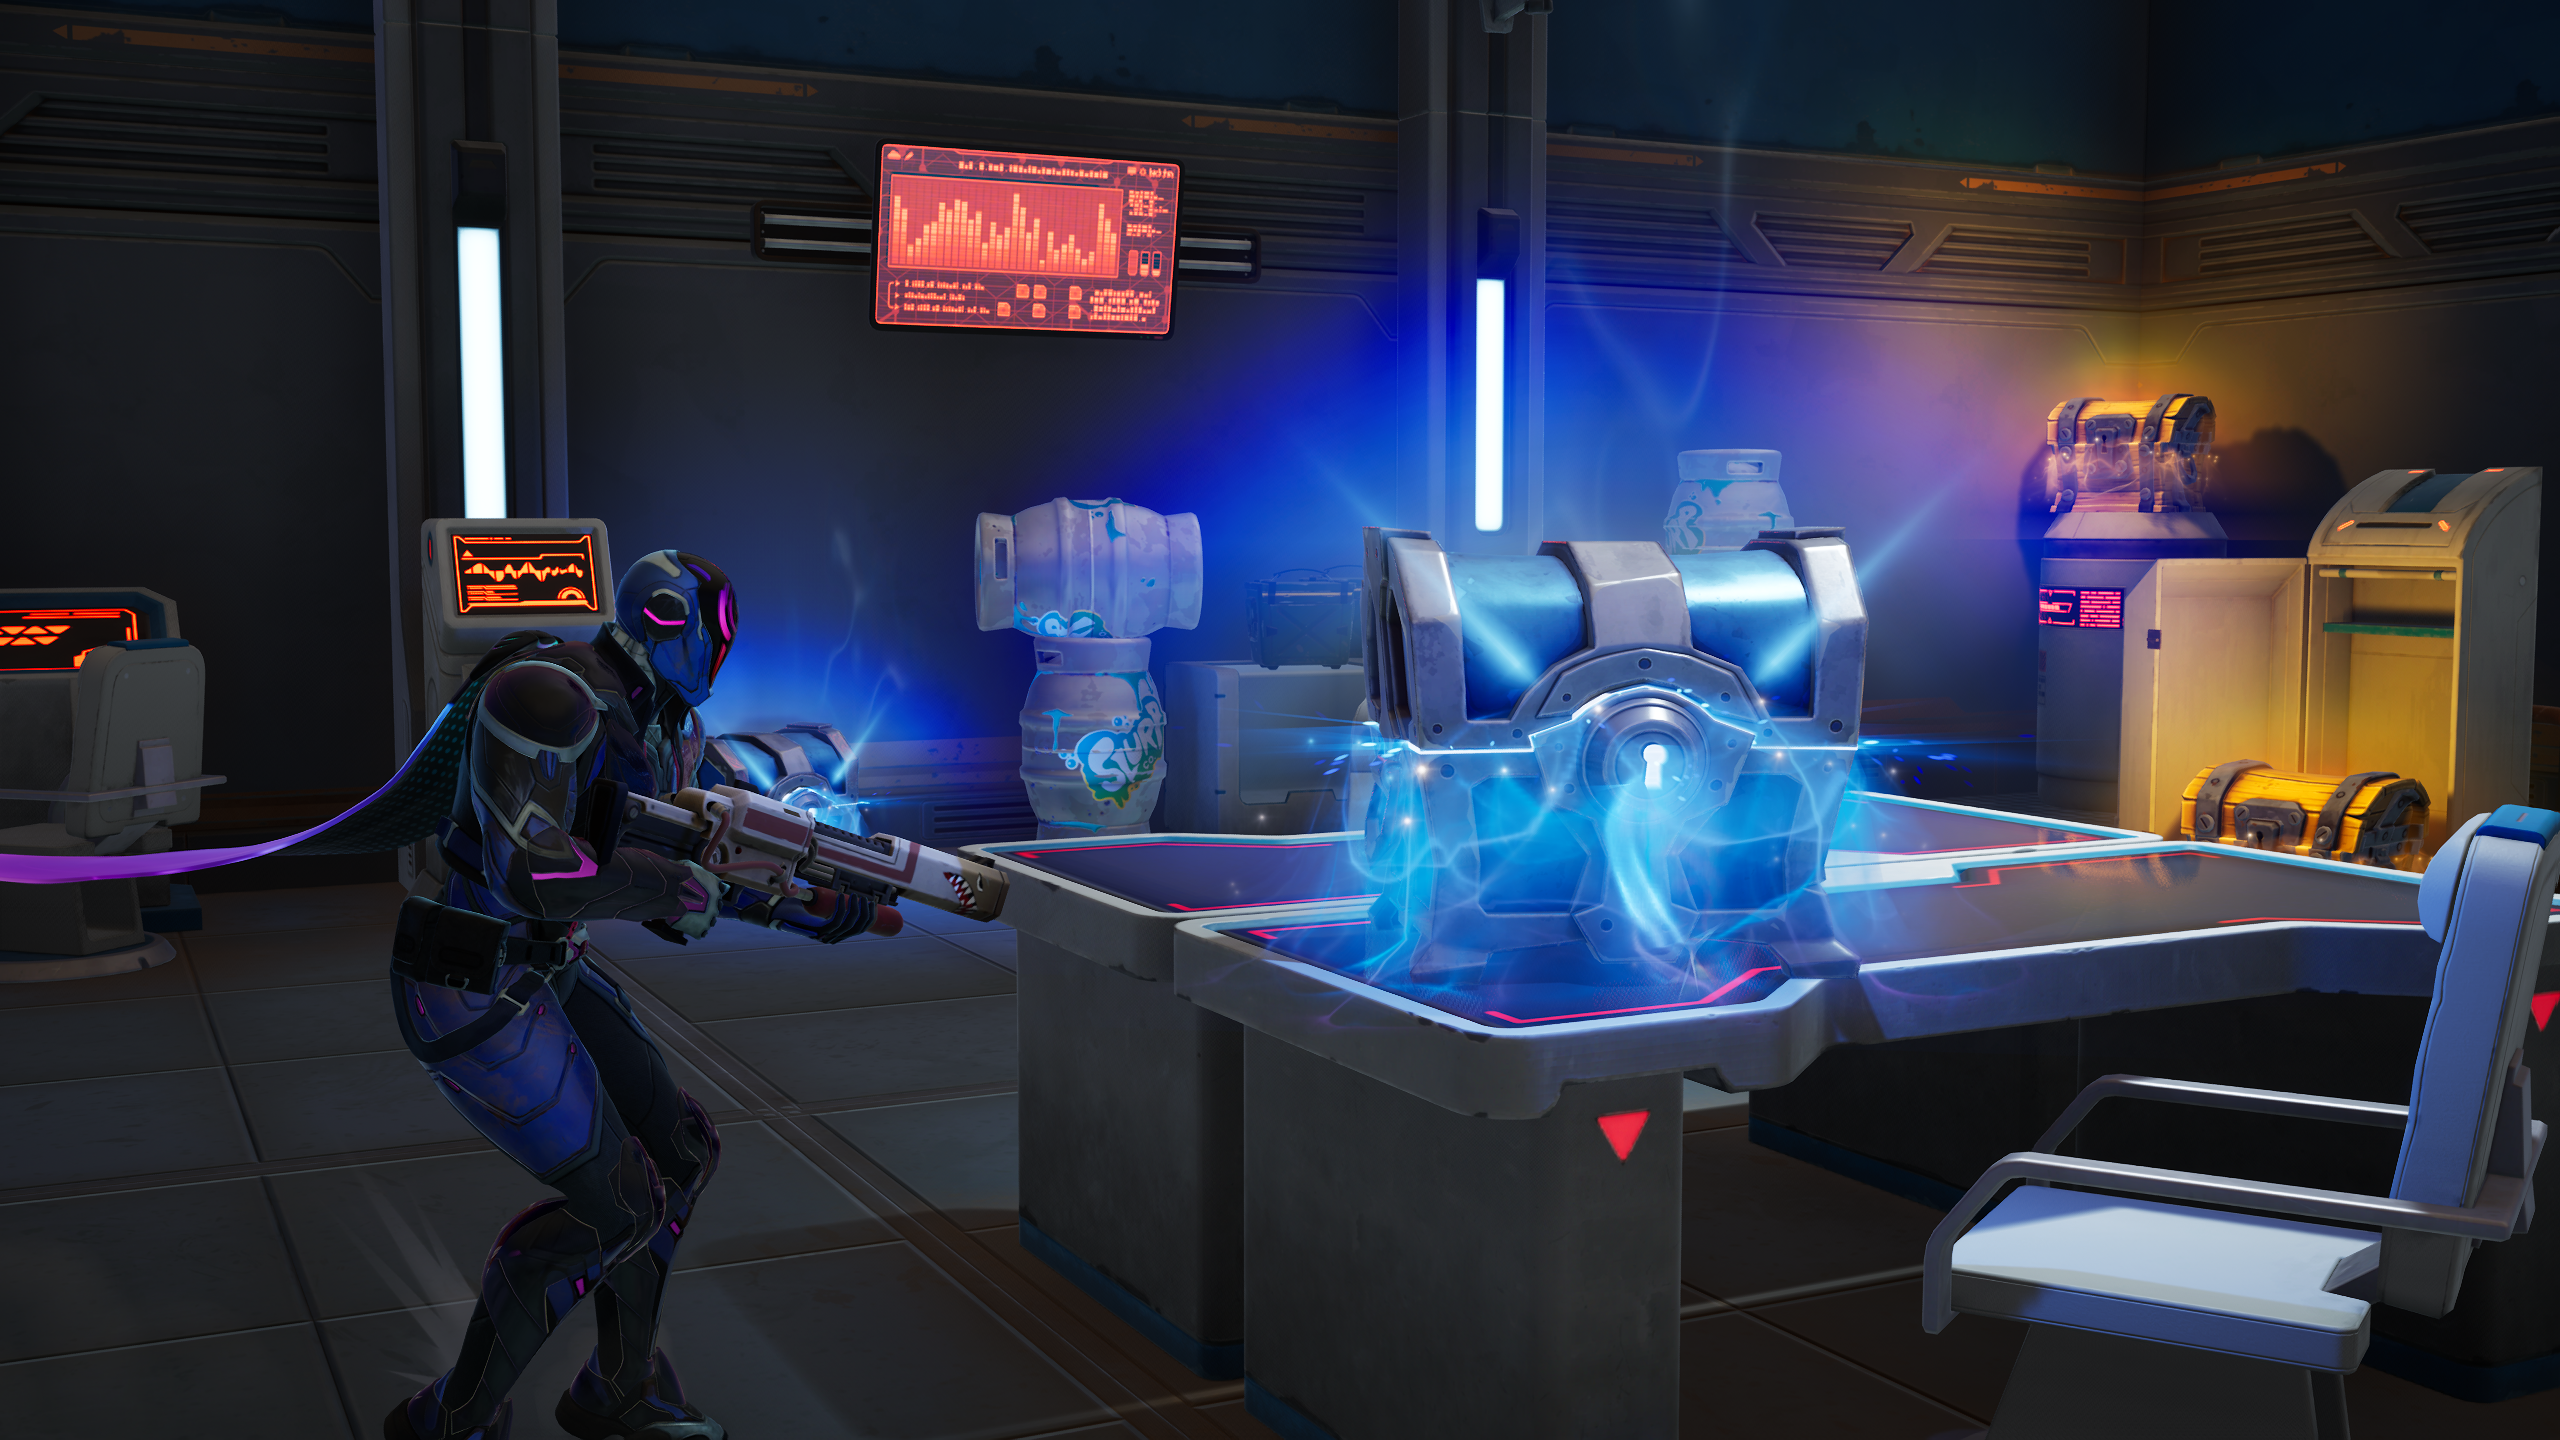
The season's "Act 2" update added two vaults to the map that are stuffed with loot, including rare chests and the chance to spawn a mythic version of the power gloves, with 40 charges instead of 20.
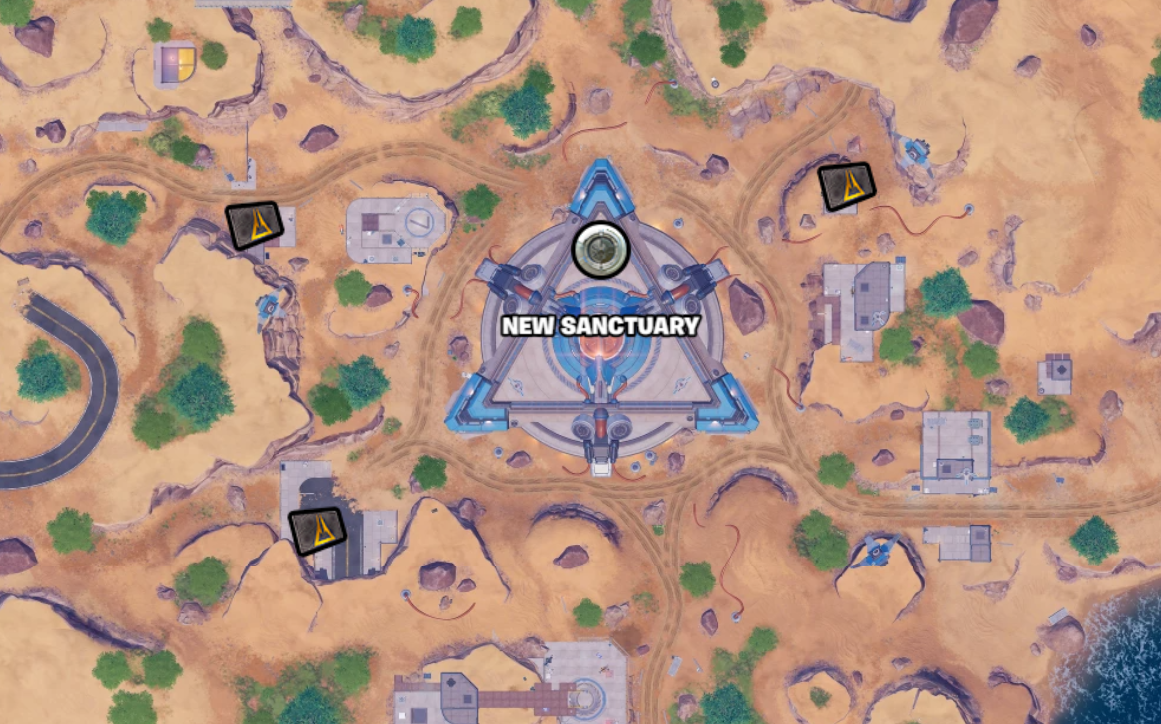
One is at the bottom of the New Sanctuary base, one is to the south of Frigid Fortress, along the bridge.
To open them you'll first need to grab a keycard, then head to the vault.
The vault locations are marked on the maps below alongside the keycard spawns, courtesy of Fortnite data site fortnite.gg. Remember: for New Sanctuary, you need to get to the bottom of the base, so head inside then find the ziplines to take you all the way down.
Fortnite Chapter 7 Season 2 Showdown: Golden fishing spots
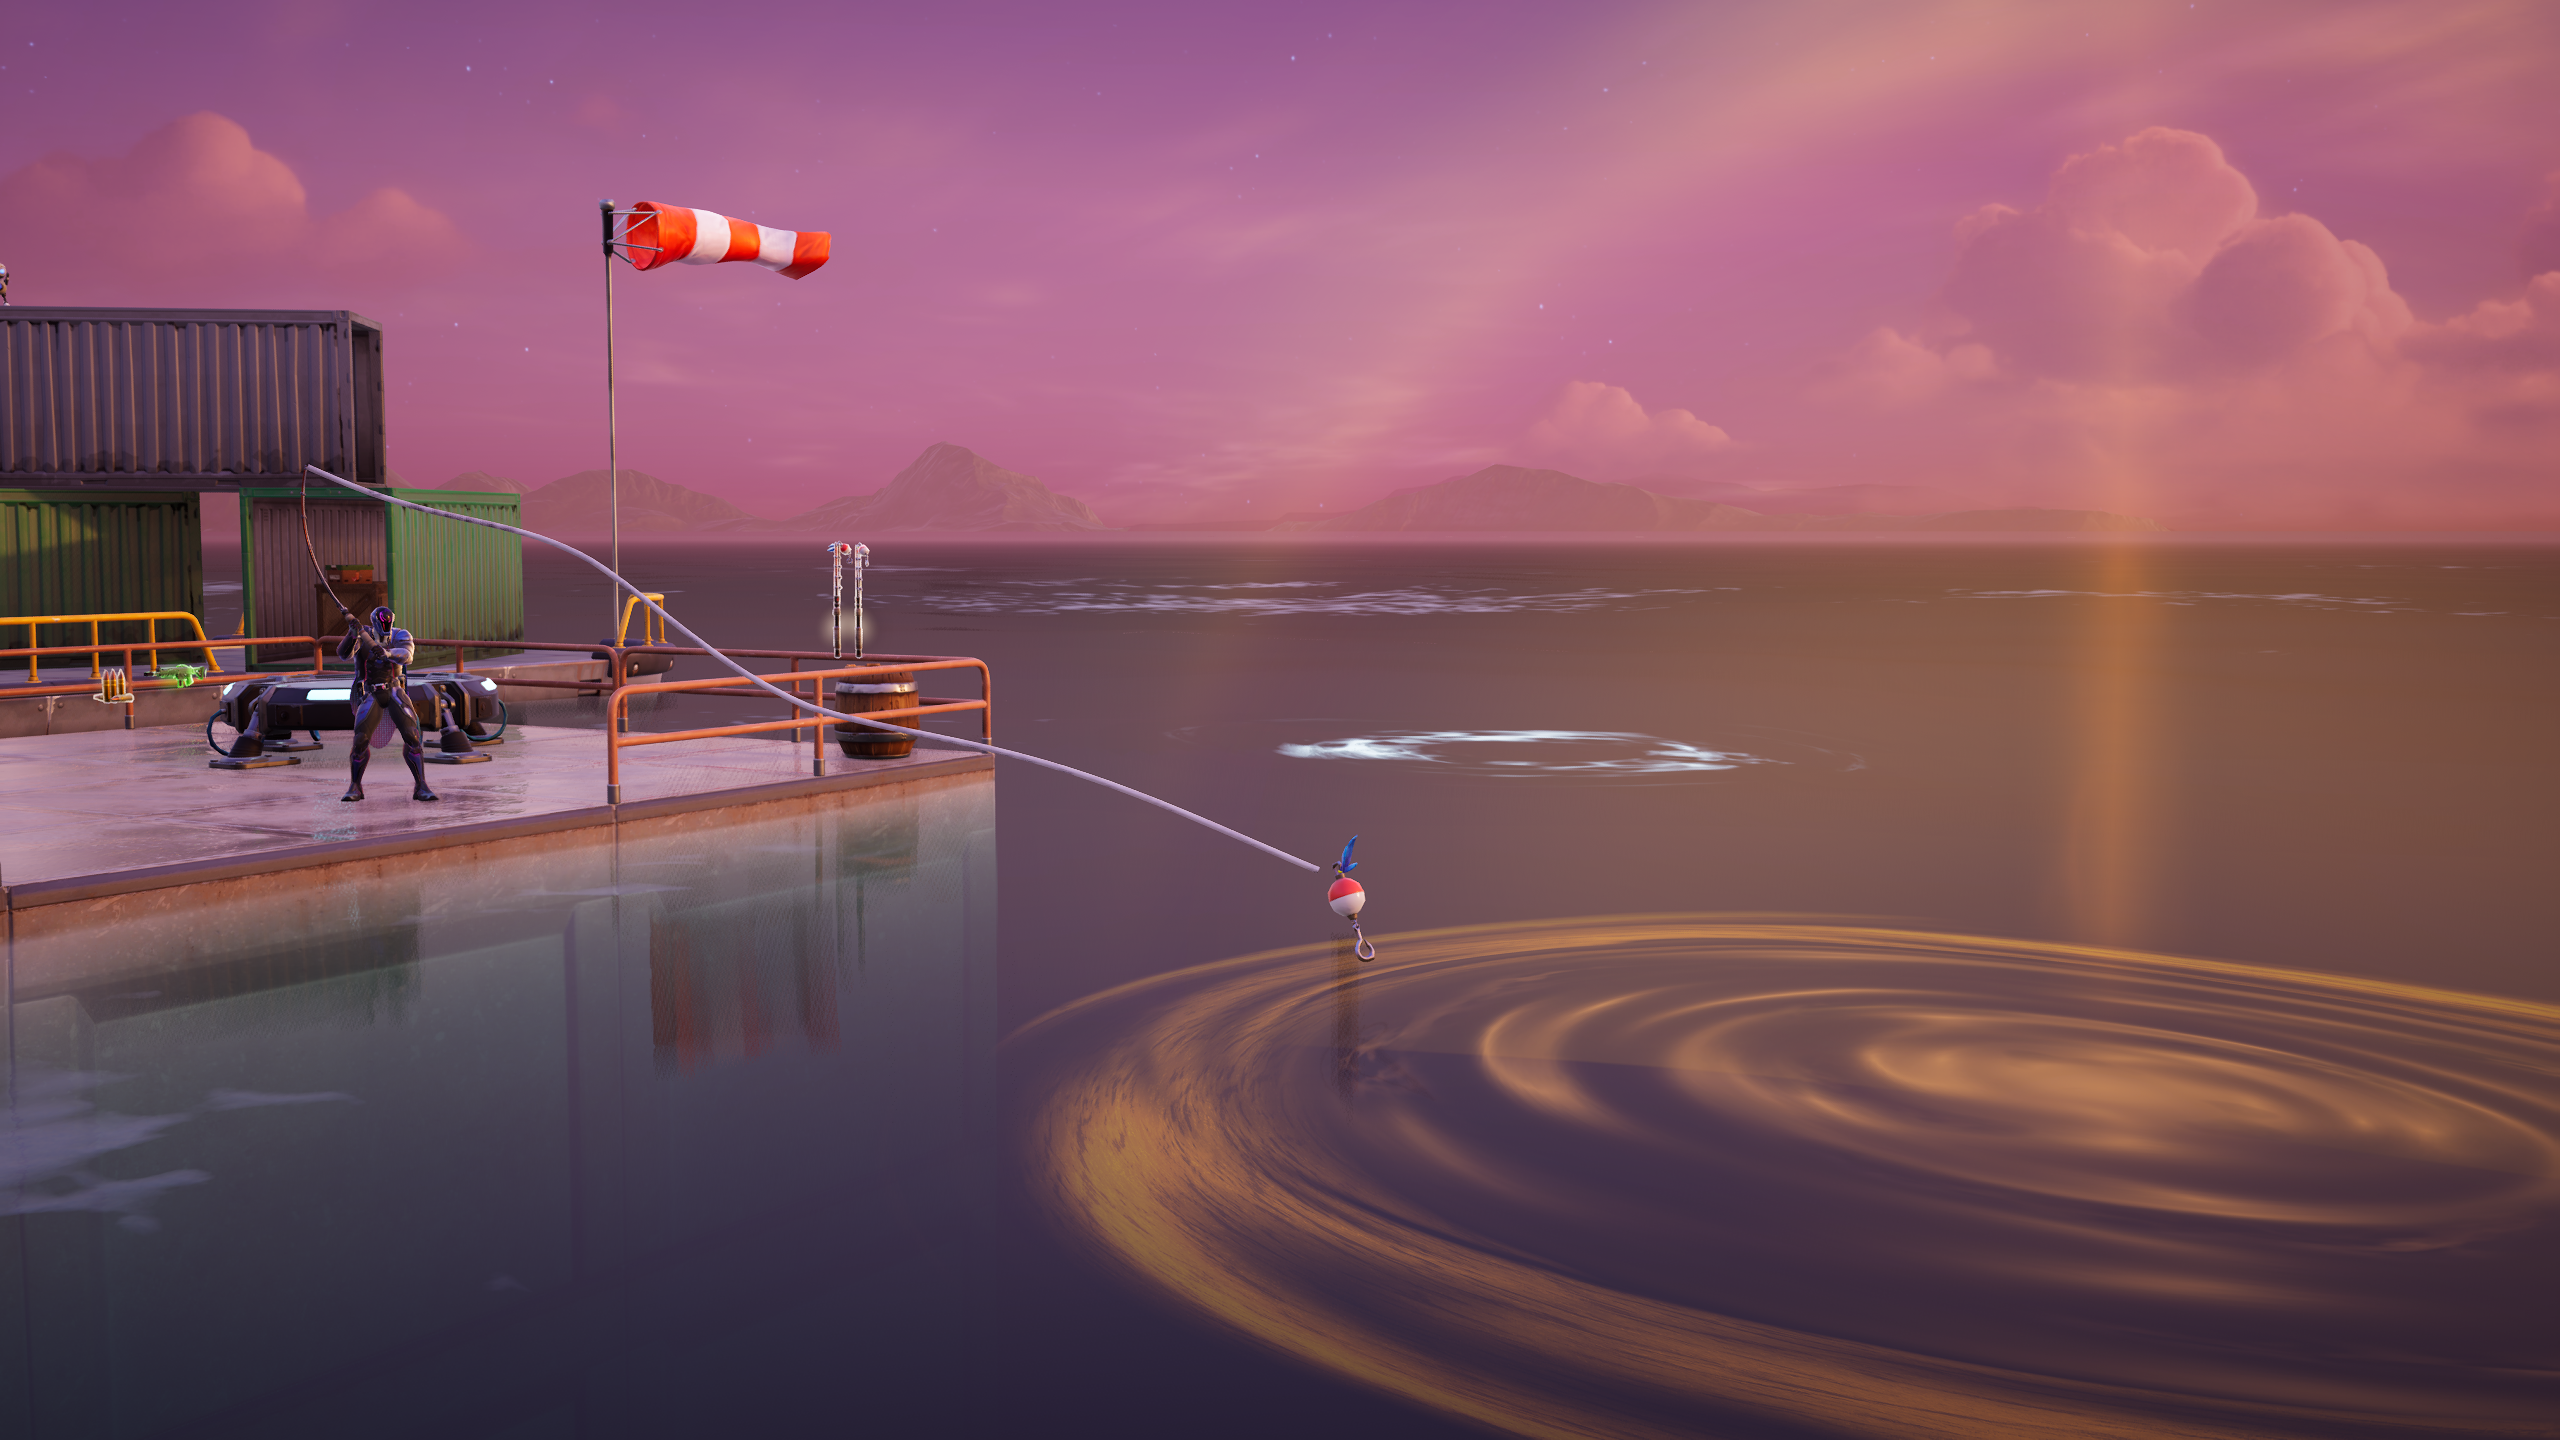
Epic recently added golden fishing spots with rare loot to the Chapter 7 Season 2 map. There's a chance to find one at any of the many fishing holes located around the map – they won't spawn at every location every time, but they're fairly common.
The map below, created using Fortnite tool fortnite.gg, shows all the possible locations
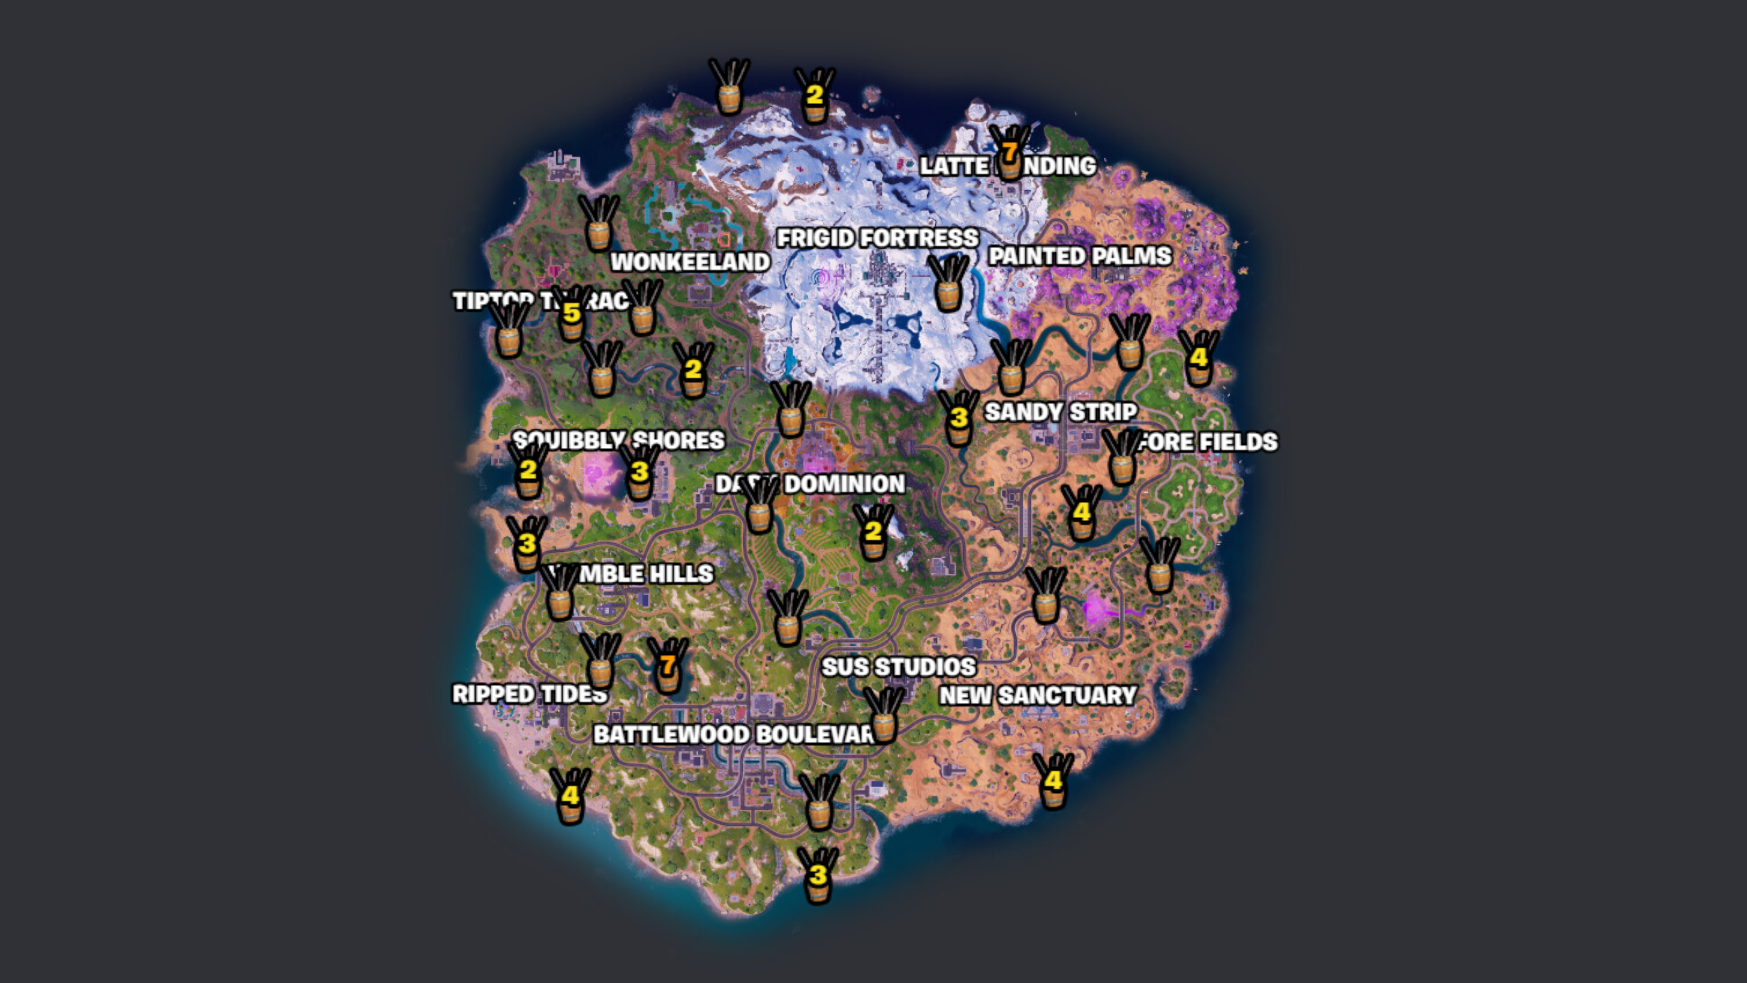
All you need to do is find a fishing rod in a nearby barrel, sling your hook into the golden area, and reel in the gear (a harpoon will also do the trick). You can expect purple-level guns—or even gold guns if you use Pro Fishing Rod.
Fortnite Chapter 7 Season 2 Showdown: Secret places to know on the map
Fortnite marks the big POIs on its map, and there's always good loot there. But you'll want to know about these hidden spots too.
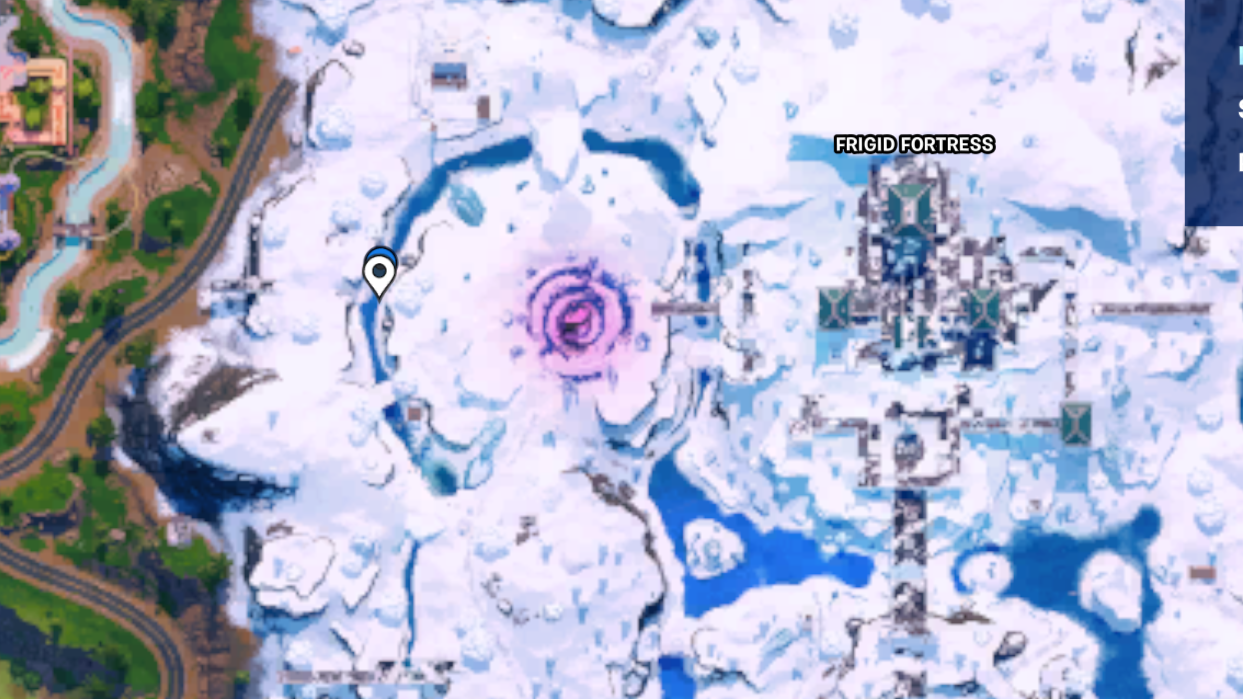
Purple water near new sanctuary
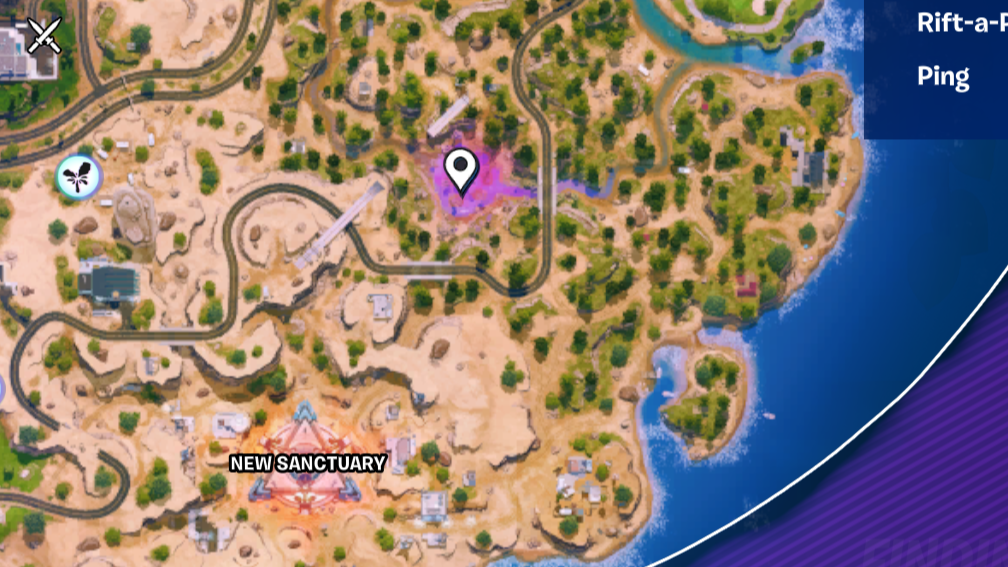
Landing in this purple water grants you three zero-point shards. Each gives you a teleport-like dash: double tap jump to dash in the direction you're traveling. Three doesn't sound like much but they're a huge advantage in any fight. Land in the water, grab some loot from chests, and use the giant purple shard to rift into the sky.
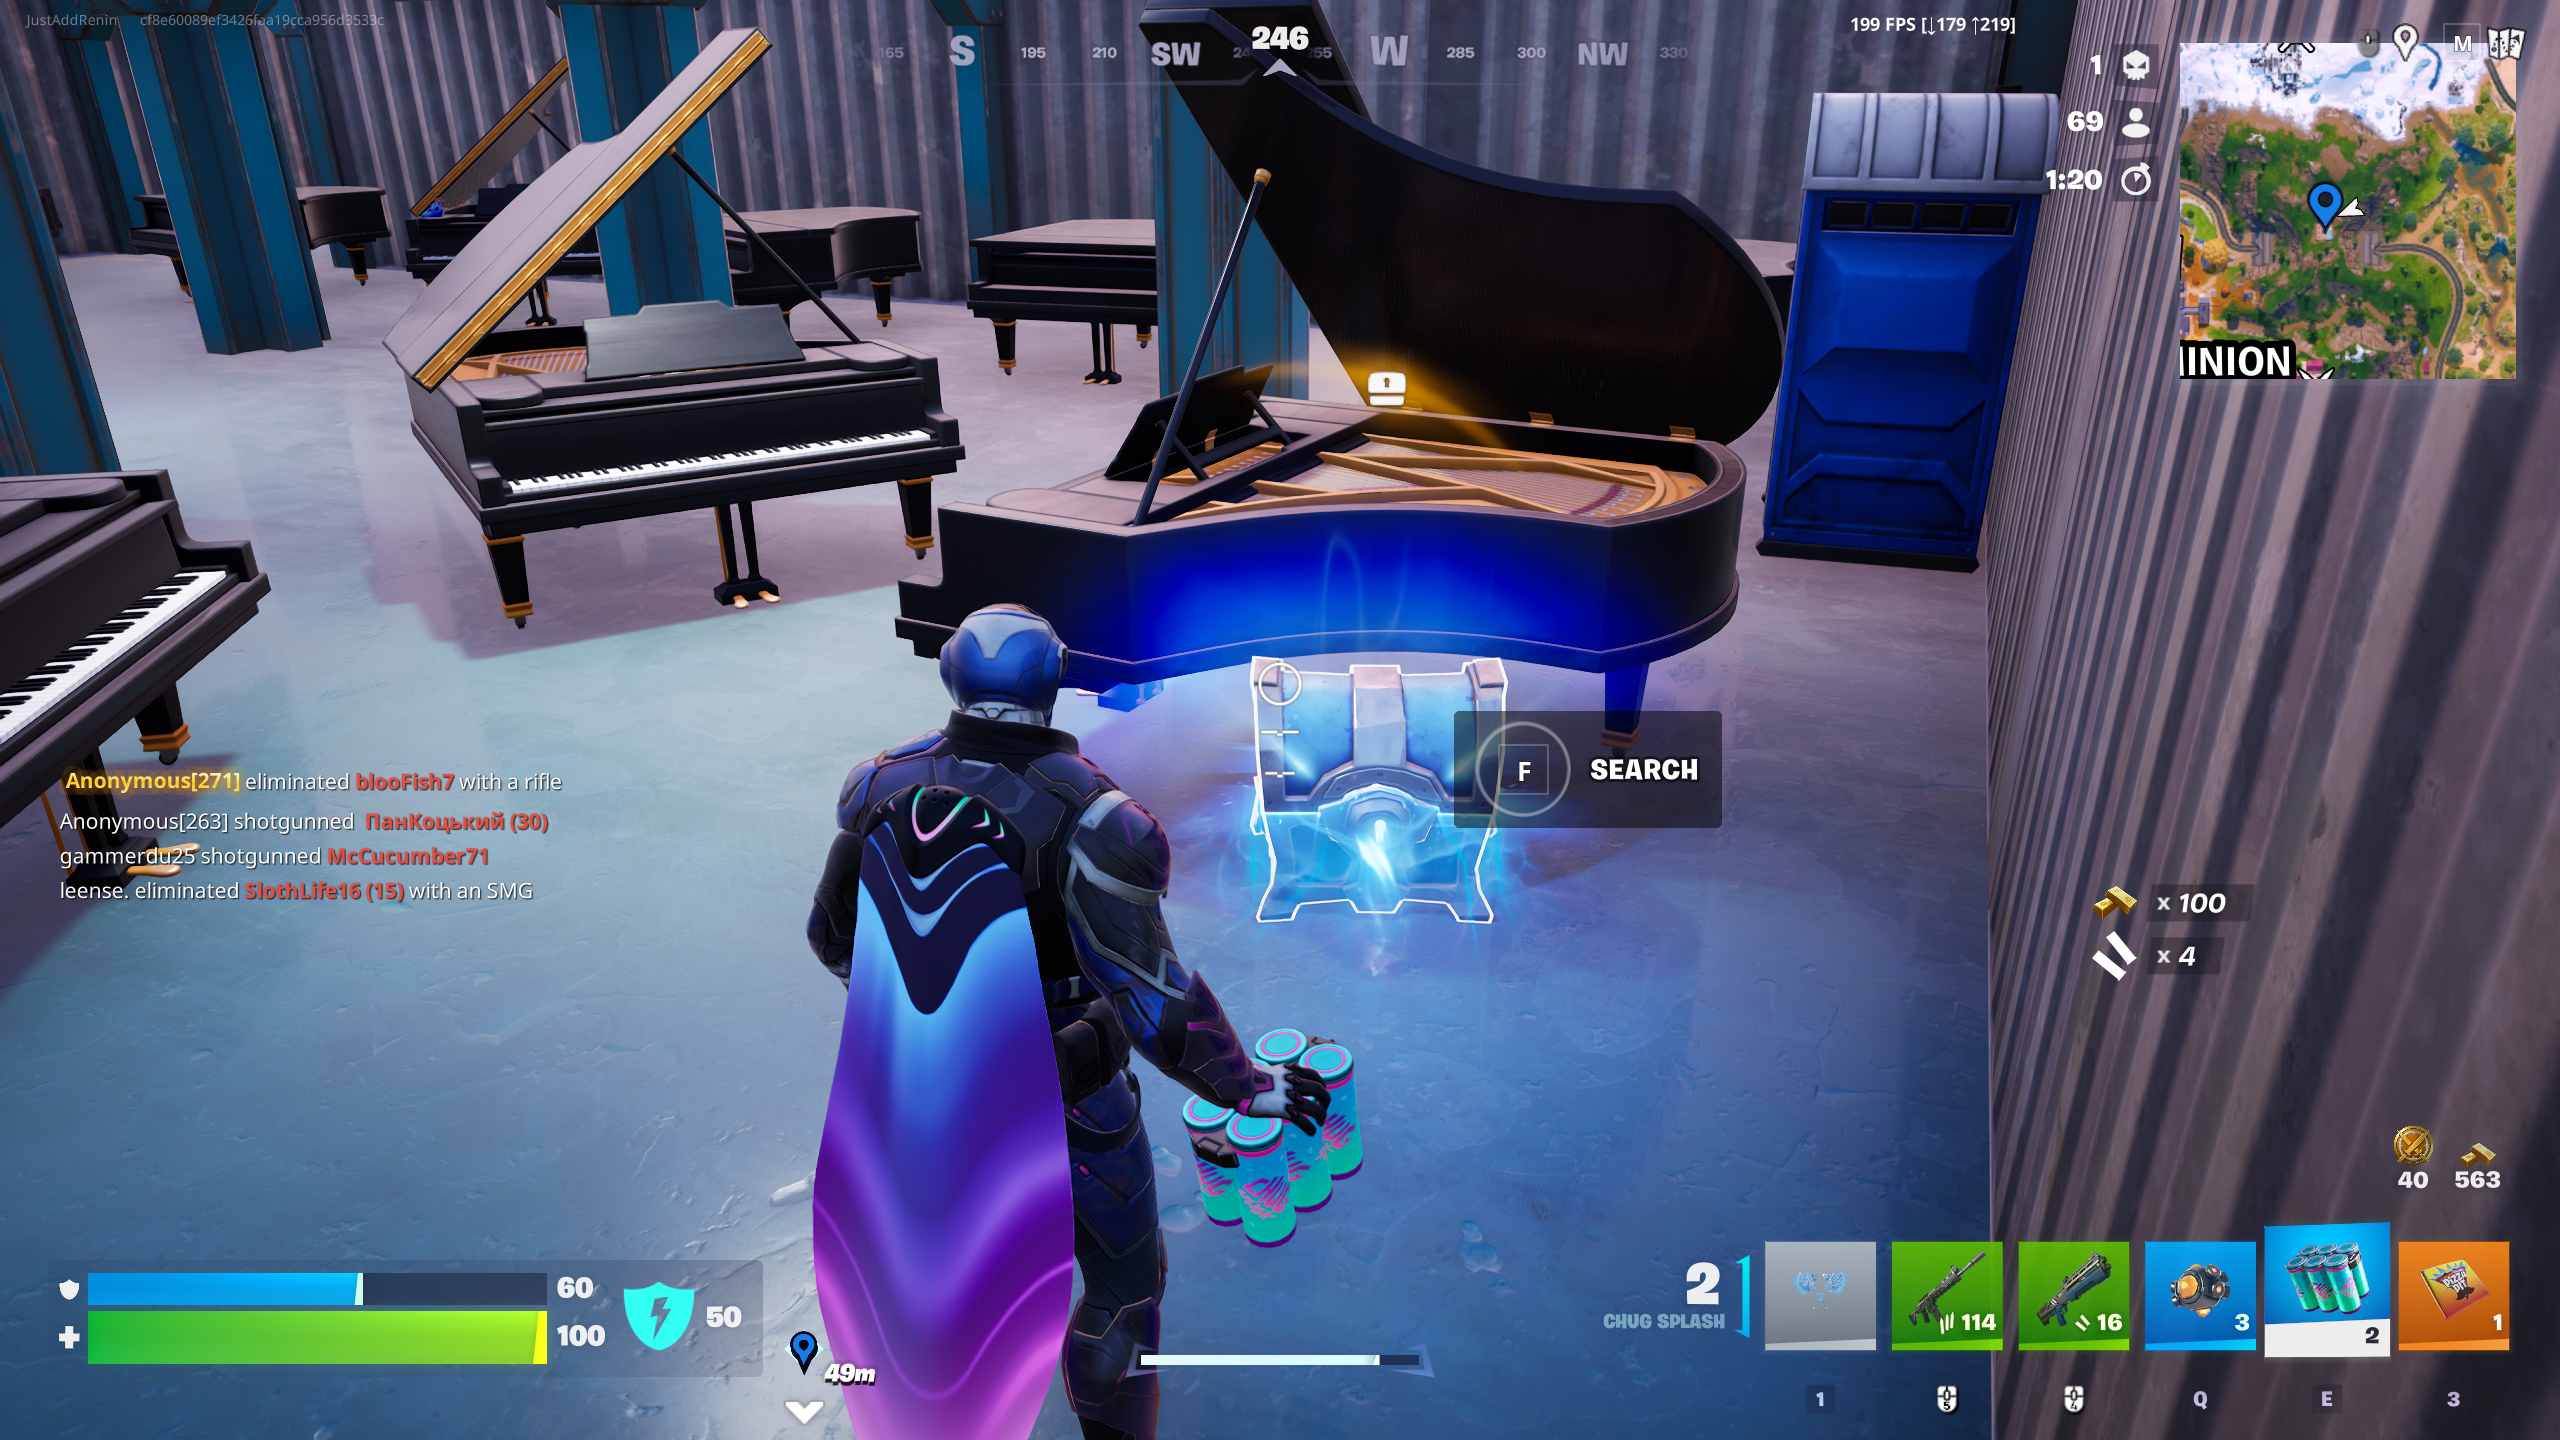
Piano loot room
A secret loot room hidden behind a wall. Land at the marked location and jump down the zipline, then, break the wall shown above. You'll be rewarded with lots of chests, including a rare blue one, and a safe for gold. There's a port-a-potty to take you back to the surface.
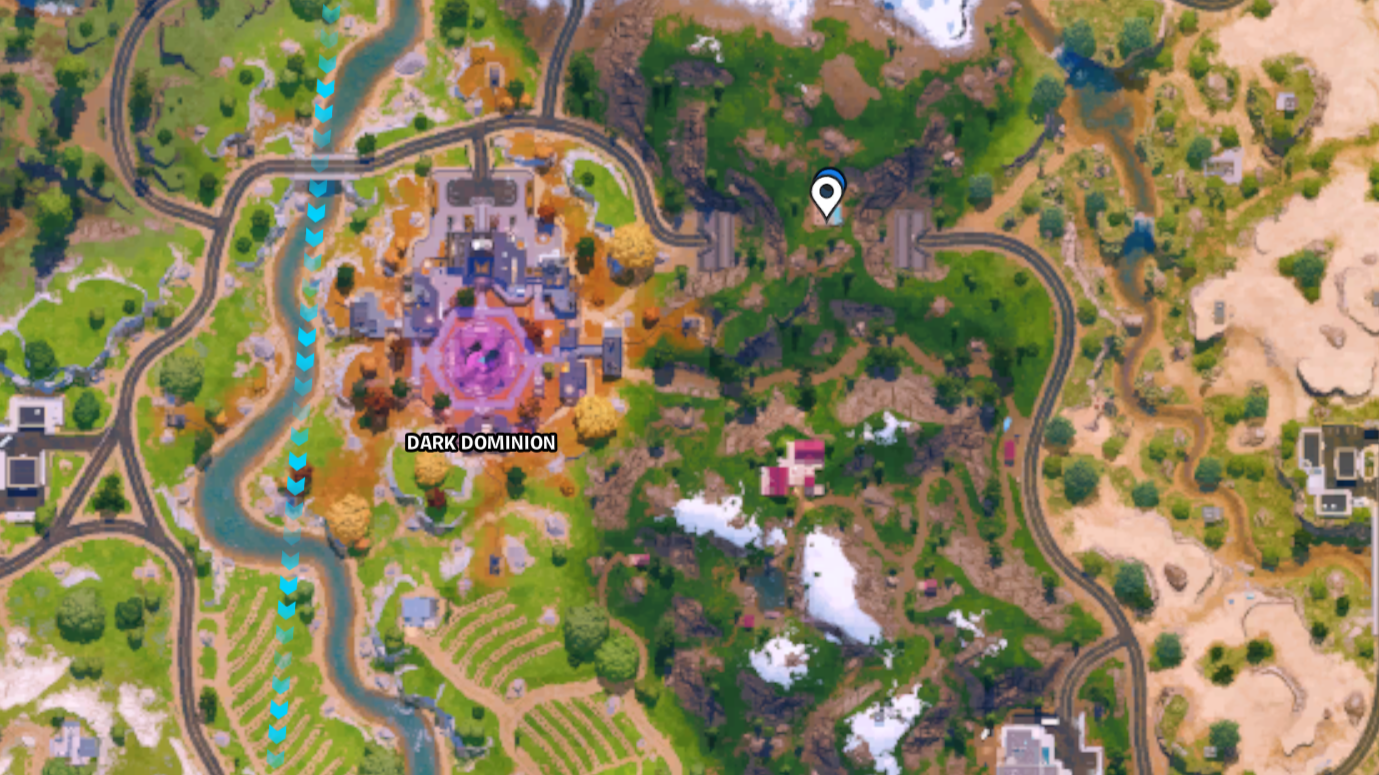
Loot llama
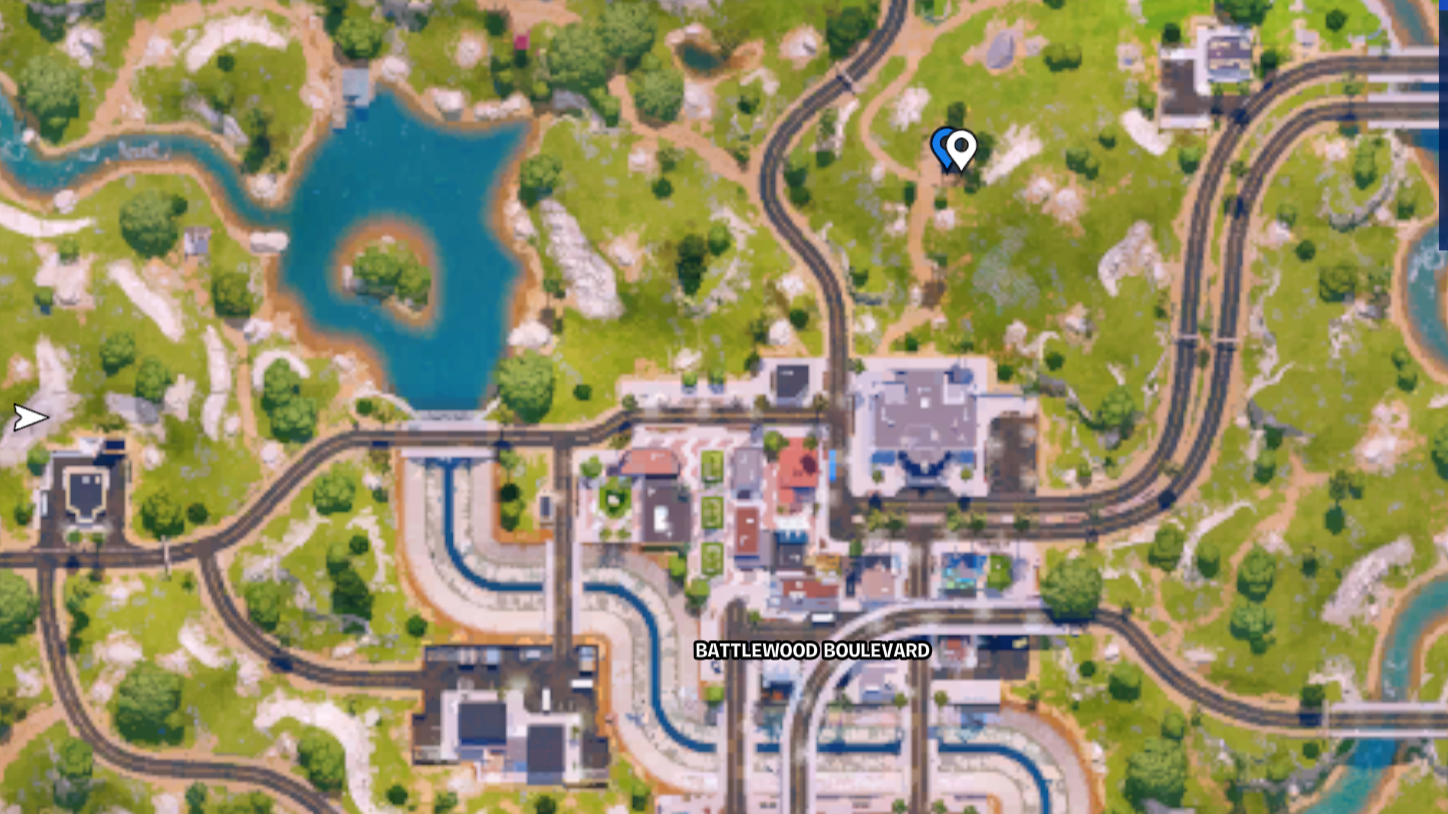
The small farm building hides a loot llama: break it for decent gear at the start of a match.
Wonkeeland shooting gallery
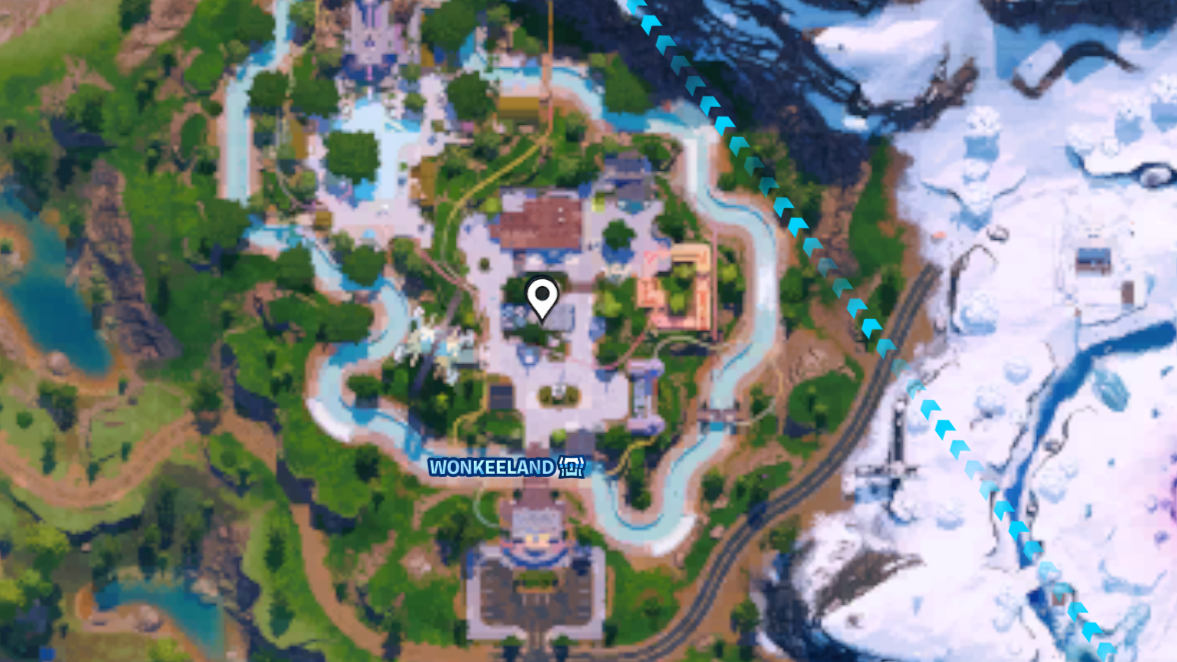
Cone curling
At the marked spot you can interact with cones to push them onto a target. If you land a bullseye, you'll find high-level loot.
Lighthouse key
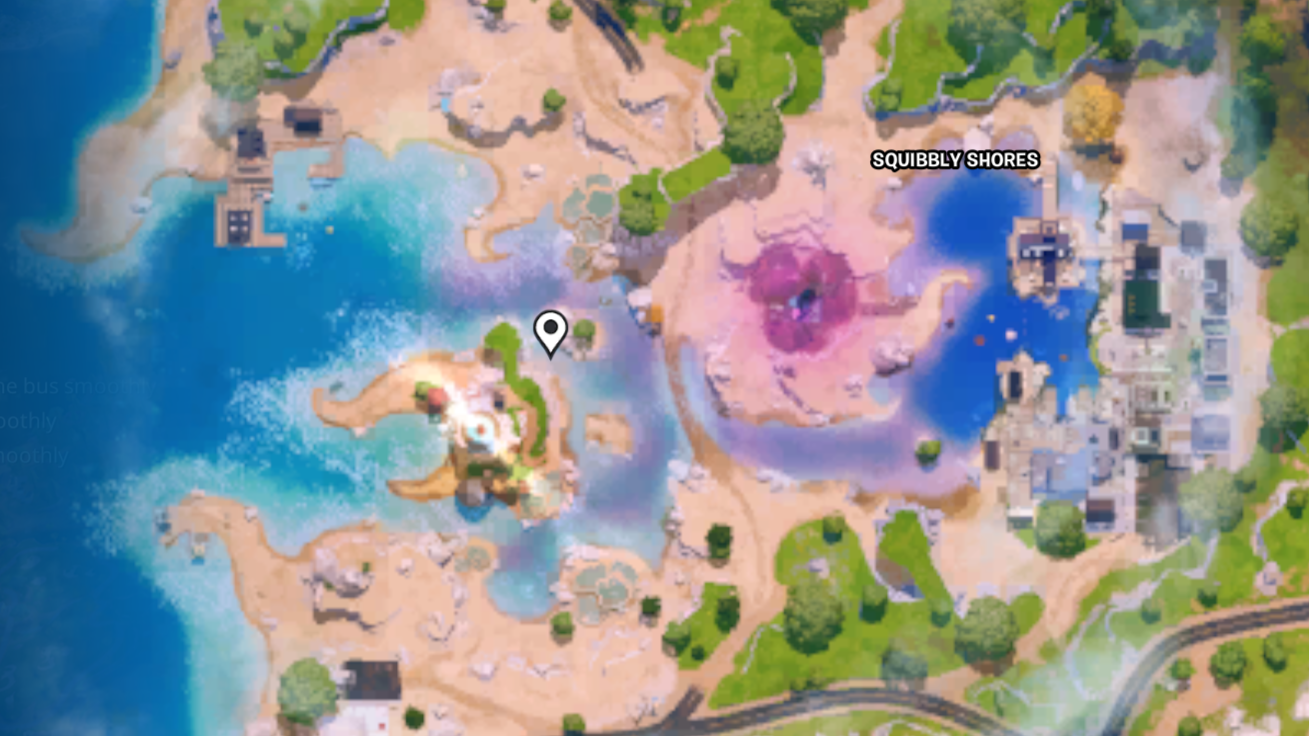
Fishing in the bluey-turquoise waters around Squibbly Shores (marked above), you'll find a keycard. Take that keycard to the lighthouse nearby to unlock a vault filled with goodies.
Fortnite Chapter 7 Season 2: Showdown rift anomalies
Rift anomalies are map-wide conditions for all players that can trigger at the end of a storm circle.
They were introduced last season—in season 2, some of the old ones remain but they're joined by some new ones too.
Here are the main anomalies:
- Llamanomaly: Llamas spawn that drop loot when you ride on their backs.
- Storm focus: A rift spawns that shows where the final circle will be.
- Rivalry rumble: Instantly starts rivalries for everyone.
- Stabilize the Rift: Spawns purple rifts guarded by drones. Shoot the drones to extract a powerful item from Fortnite's past, including the O.X.R. rifle, the Havoc pump shotgun and the Wrecker revolver.
- Care packages: Care packages drop from the sky and contain high-level items.
- Gold rush: Gain gold bars from harvesting materials.
- Rift-a-palooza: Rifts that teleport you to the sky spawn all over the map
Where to drop in Fortnite Chapter 7 Season 2
The variety and density of this season's map means there are dozens and dozens of viable drop spots. I recommend simply picking a spot and learning it inside out, dropping each time until you get bored. You'll definitely want to drop somewhere near a rivalry board so you can instantly start farming those rivalry coins, because they're so important.
Here are three spots I keep returning to this season.
Building west of the Looper's Leap jump
A fantastic spot for a few reasons. There's gold in cash machines, a rivalry board and, crucially, two car spawns out front. Jump in a car and drive east to Looper's Leap, completing the jump to get top-tier loot (including a potential mythic). Head to the nearby purple water next to pick up zero point shards.
Piano room
Mentioned above, this hidden room to the east of Dark Dominion is rarely contested. You'll get a decent full loadout from it: my next step is to head west into Dark Dominion to pick up rivalries and third-party any fights.
Docks in the far north
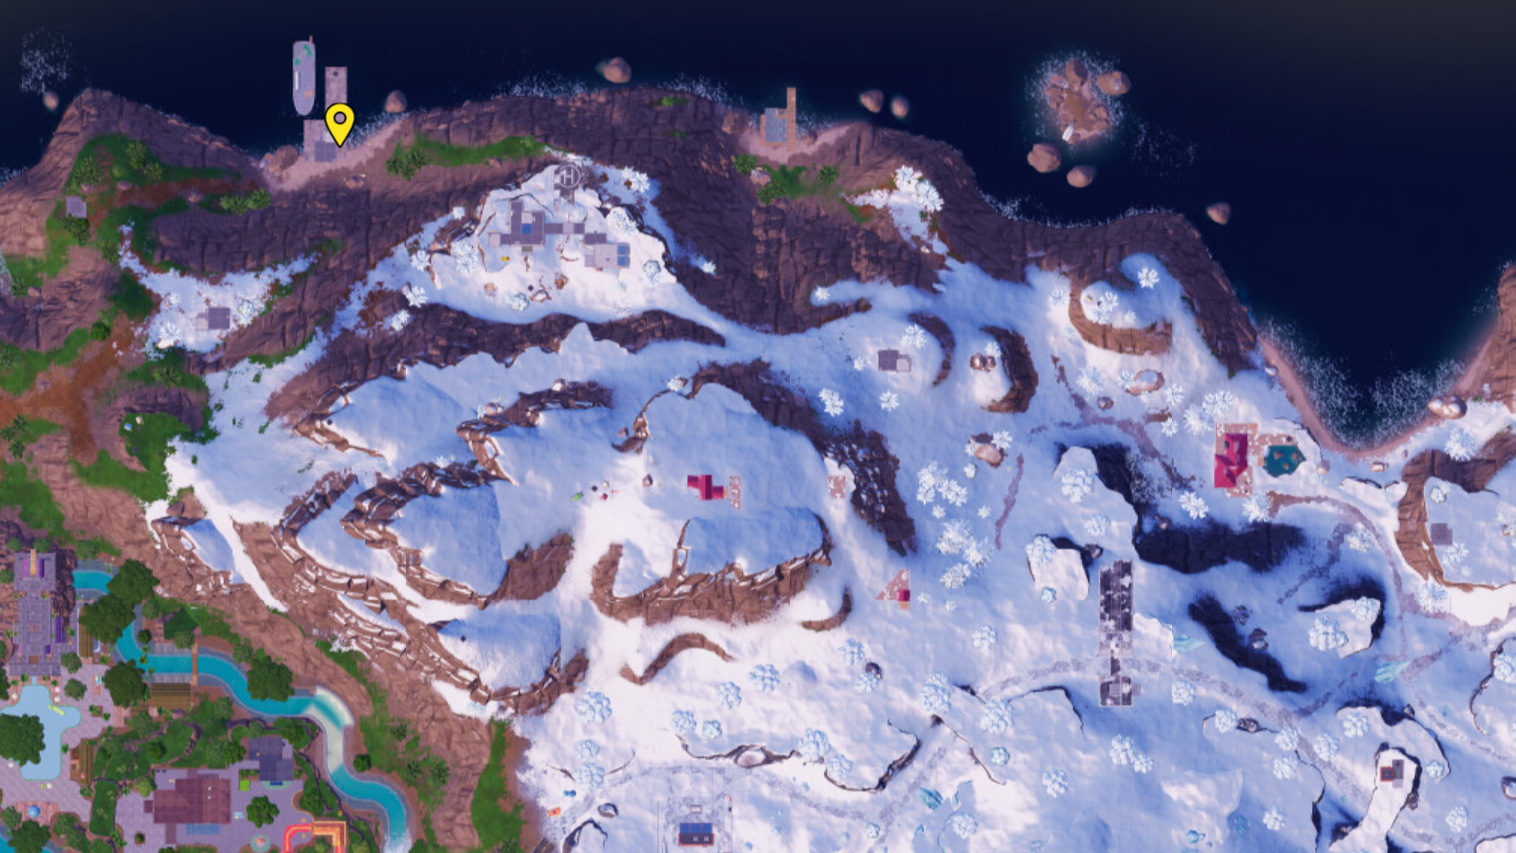
The base to the NW of Frigid Fortress has tons of chest—even further north, you can see some docks. It's a quiet landing spot with a slurp truck to juice your shields, plenty of chests, and a jump pad to take you up to Frigid Fortress when you're geared up.