IKEA Besta hacks are just one option in a world of possibilities when it comes to transforming basic furniture into bespoke home storage.
'Hacking' IKEA furniture means taking the off-the-shelf variety and changing it somehow, with the aim of improving or elevating the piece. This could be a small addition, an adaptation, or a huge and complex DIY project.
As we saw previously with IKEA Billy bookcase hacks, IKEA shoe cabinet hacks, and IKEA Kallax hacks there are ideas for every room in the house – for rooms of all shapes and sizes too.
This curation of projects focuses on the brilliant and inspiring hacks that enterprising hackers have created using the IKEA Besta range, a cost-effective range from our favorite Swedish flatpack furniture maker.
10 inspiring IKEA Besta hacks
Get ready to be inspired as we take a whistlestop tour around the best IKEA Besta hacks for your home. We’ve got hacks for all DIY abilities and a variety of interior styles and budgets.
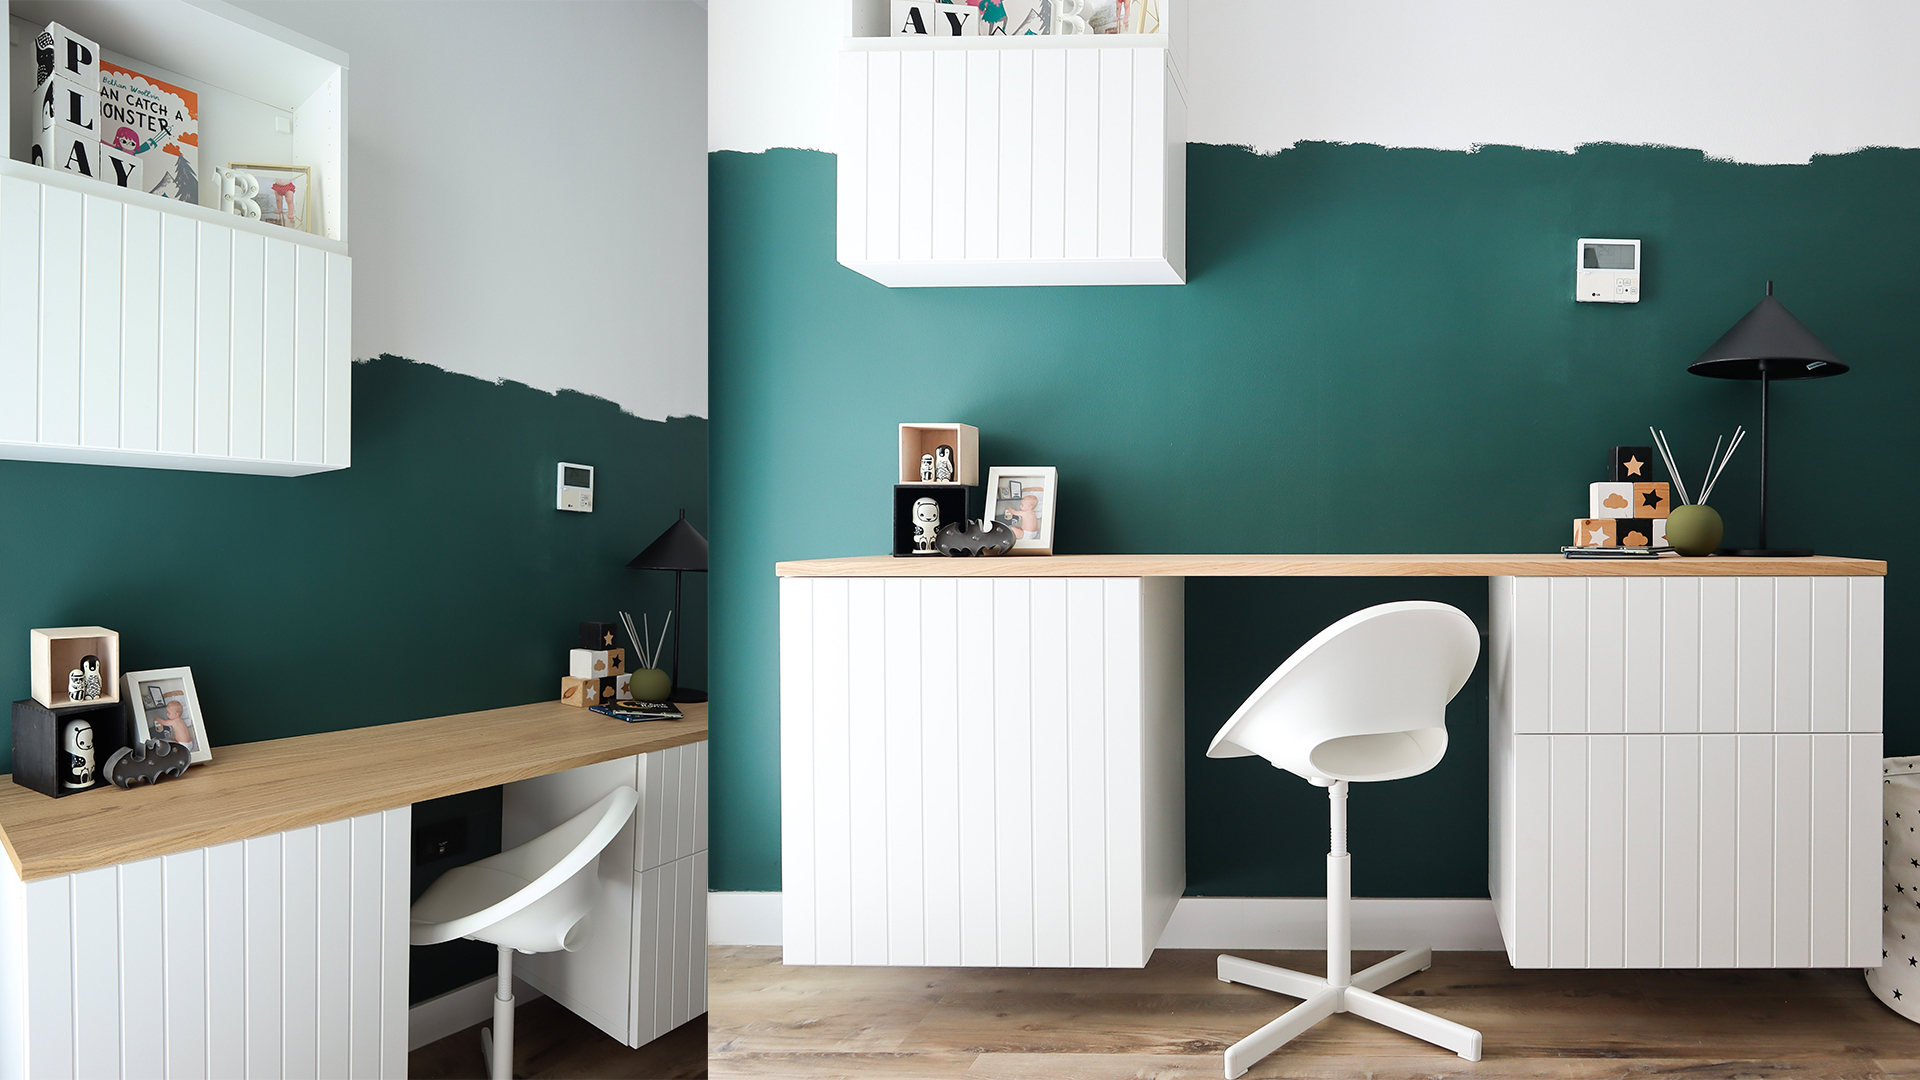
1. Revamp a home office with bespoke cabinetry
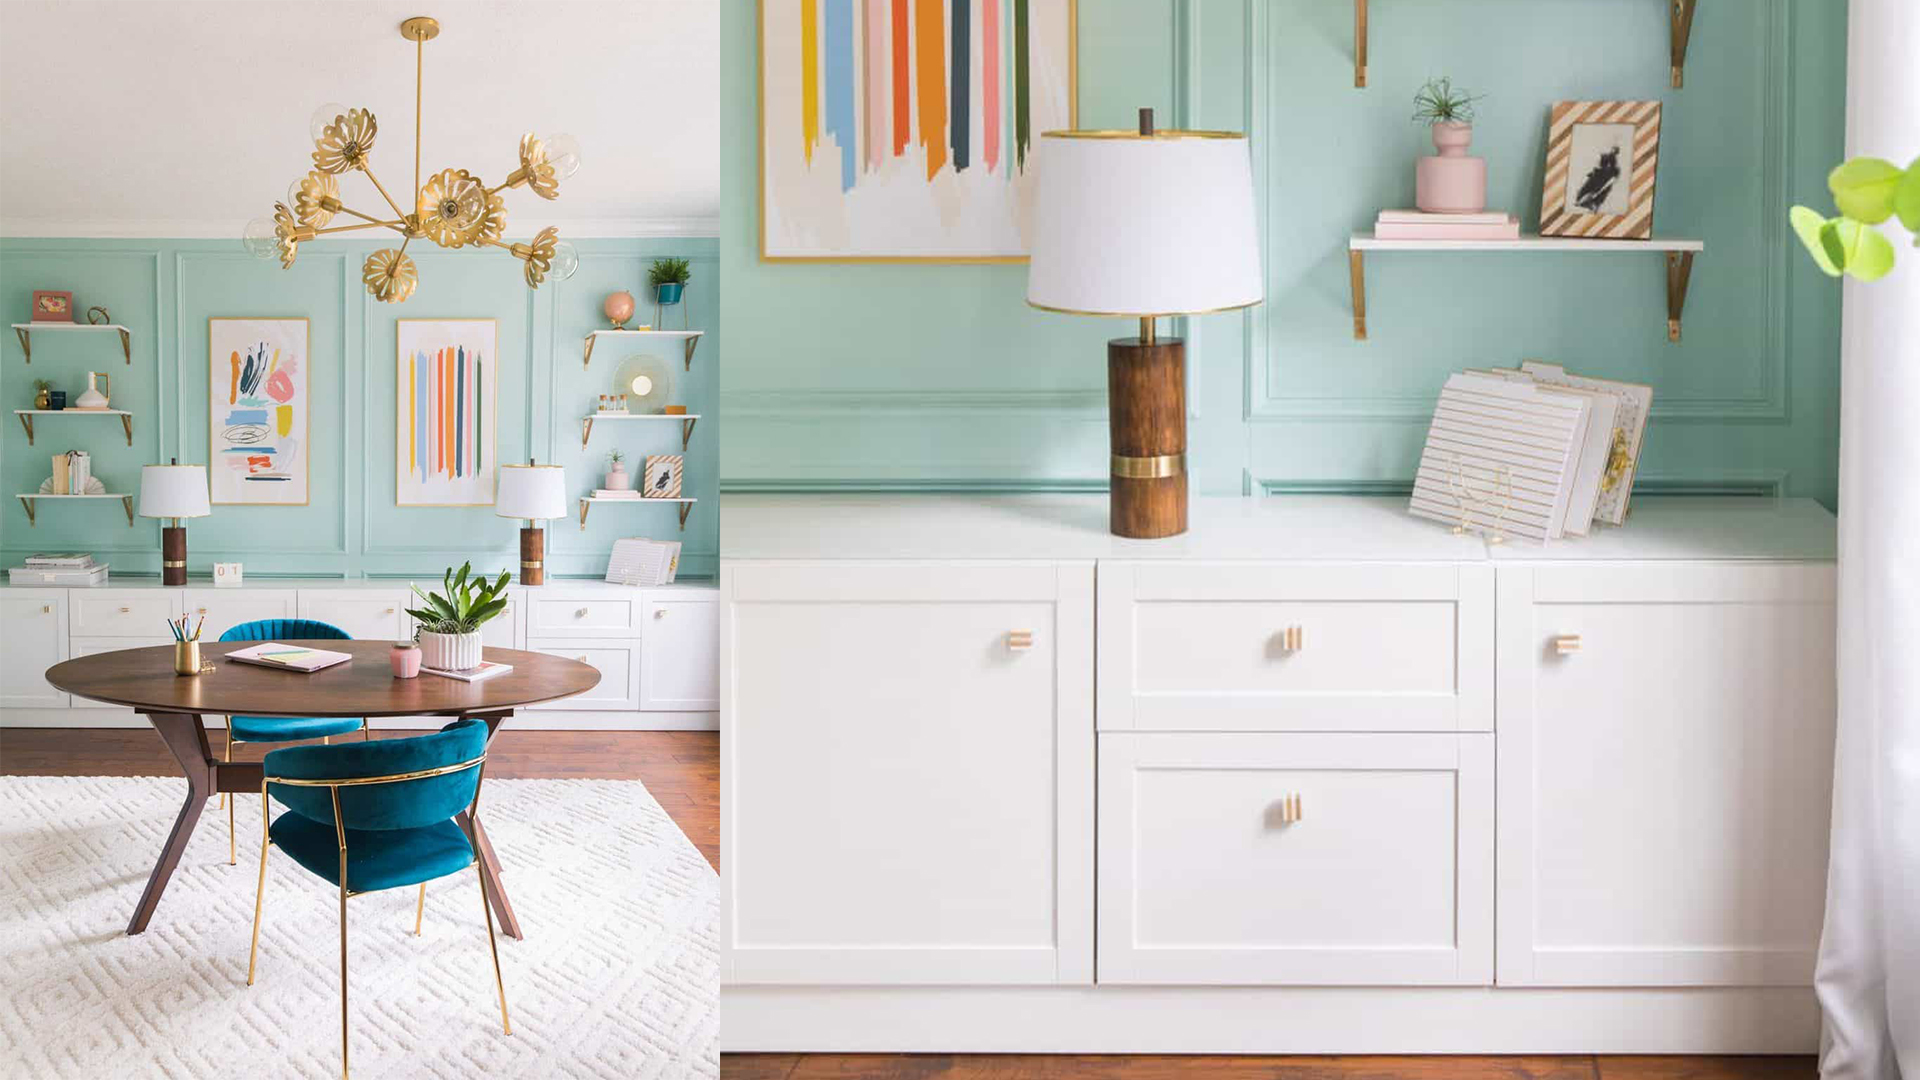
We've seen a lot of IKEA hacks for home offices, but in this home office, it’s the stunning storage cabinets that have caught our attention.
Ashley Rose, founder of the Sugar and Cloth blog, is the expert designer behind this stylish scheme. Ashley found a way to make the cost-effective Besta storage cabinets look built-in by adding IKEA Forbattra toe-kicks to cover the legs.
Built-in furniture is often the cornerstone of an interior scheme with a more expensive look than freestanding storage. Cleverly updating the cabinet hardware is another way to elevate IKEA furniture and make a home look expensive on a budget.
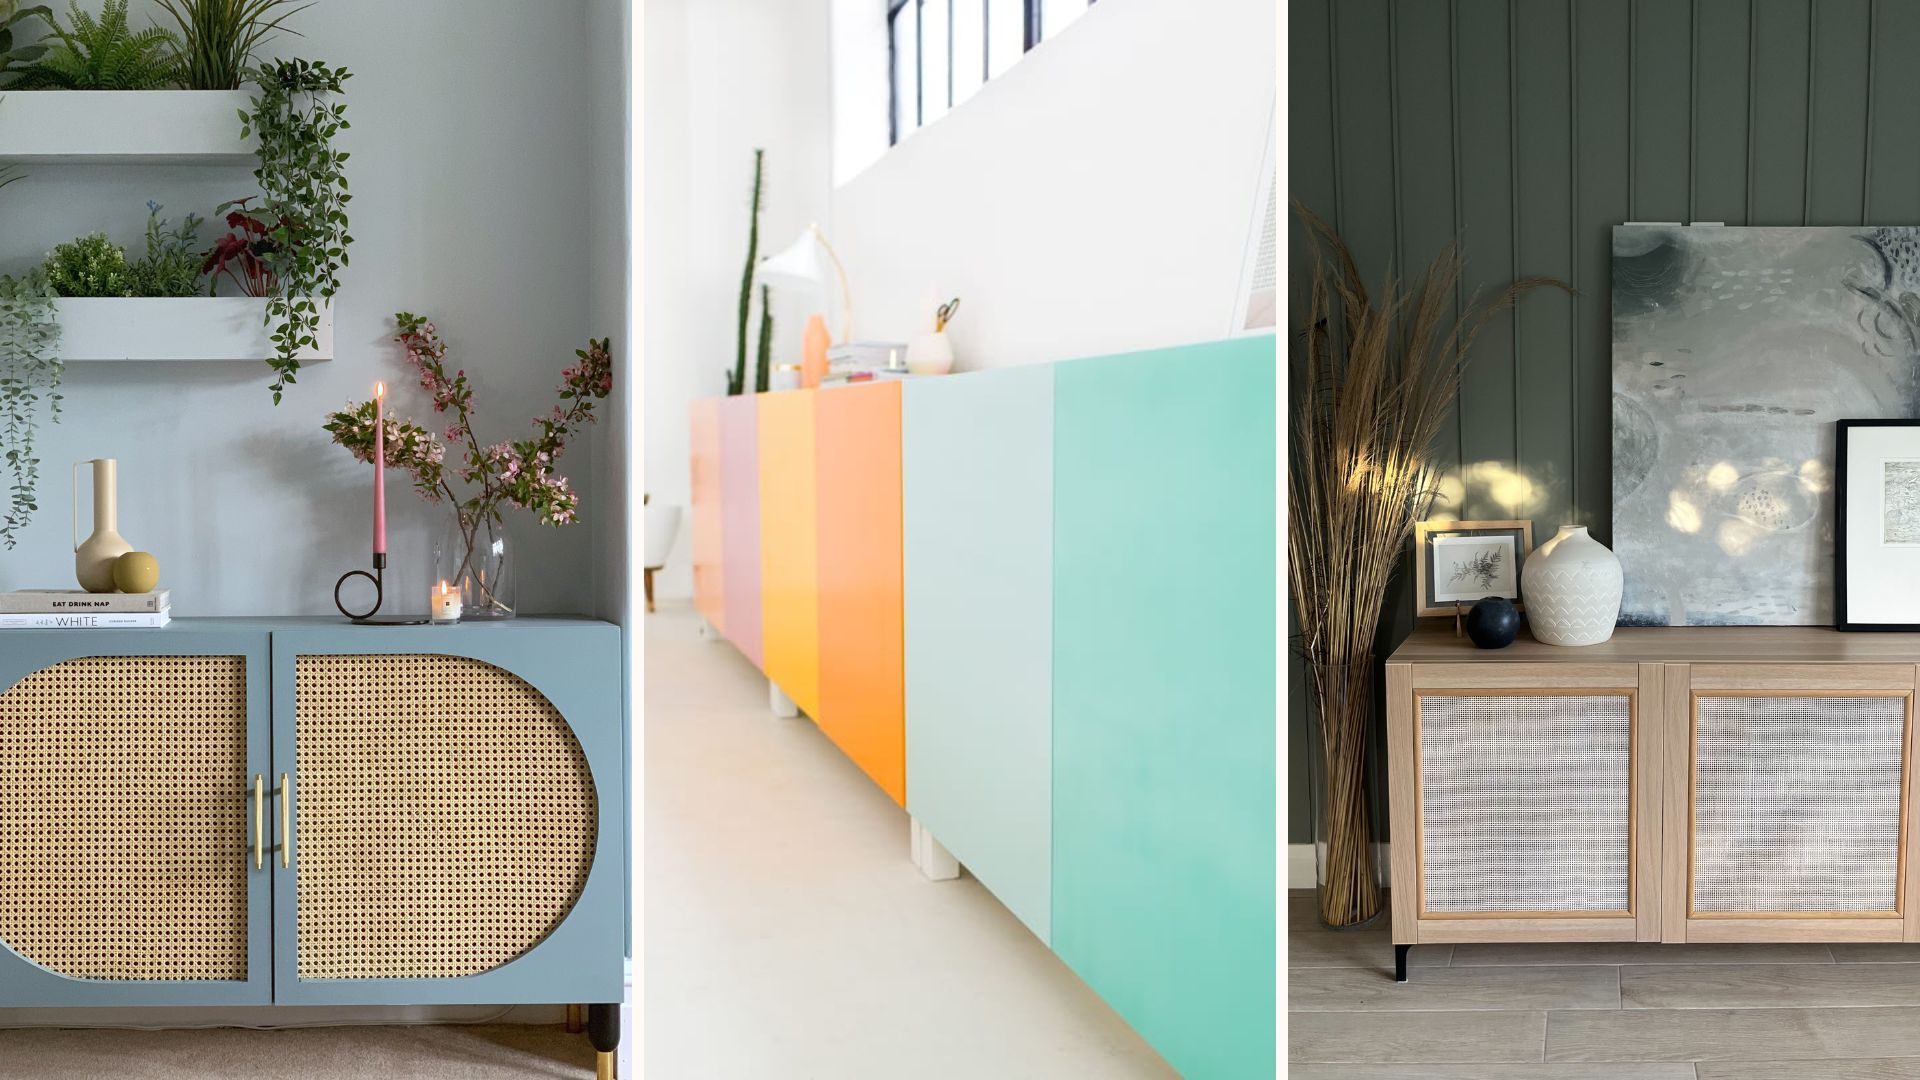
2. Apply French cane to cut-out doors for a luxe look
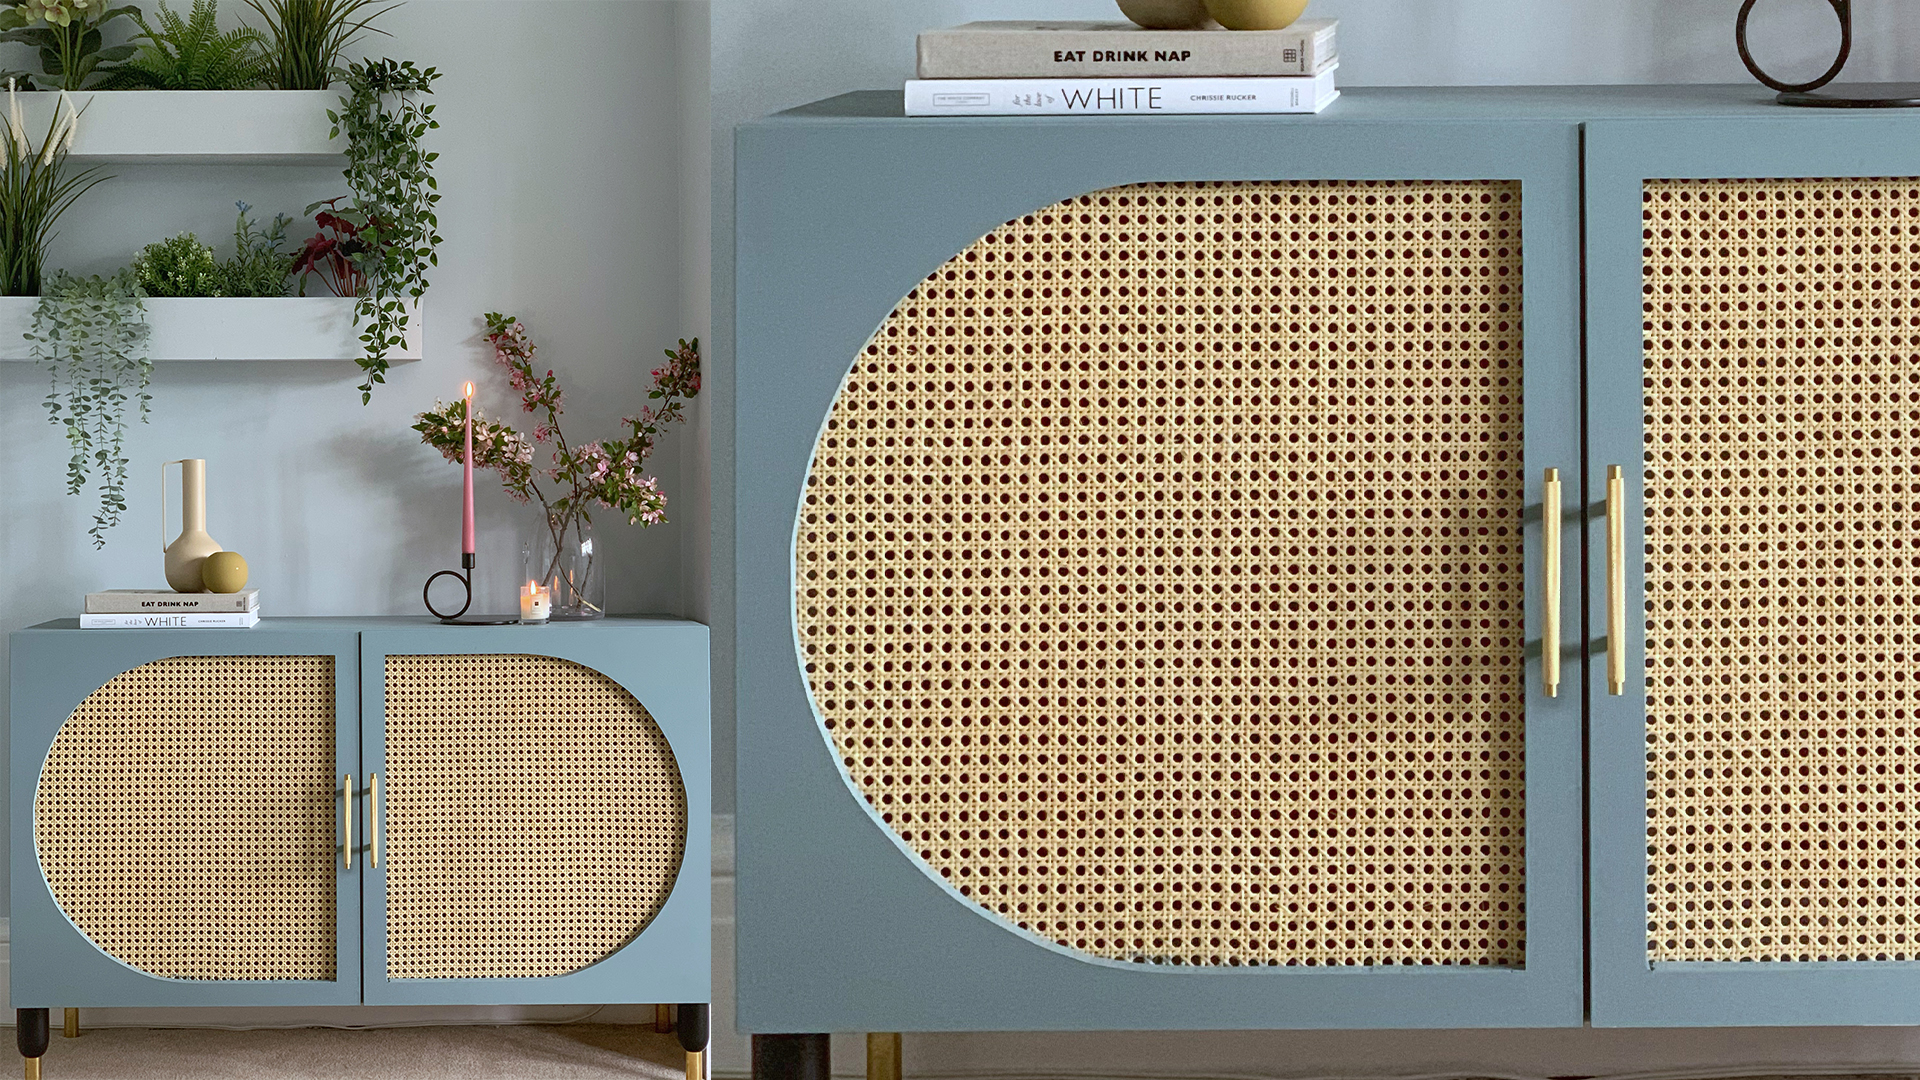
Jen Rothbury is a DIY pro whose popular Instagram account @crack_the_shutters is jam-packed full of genius IKEA hacks and home interior inspiration; in short, it’s a veritable home styling masterclass.
Jen’s IKEA Besta Hack is this stunning creation, complete with curves, cane, and custom hardware (not to mention the dreamy paint job) that would fit perfectly in most rooms in the house.
As with most DIYs, the quality of the finish relies on the effort you put into the prep. Here's how Jen prepped her Besta for this stylish DIY, “Firstly, I lightly sanded and then primed the unit. I drew out the arch shape I wanted on each door and using a jigsaw, cut out each arch (making sure there was still room for handles to be added afterward).”
Once the prep was complete, it was time to paint and add the finishing touches that make this piece really stand out, “I painted the unit and doors and I then added French cane to the inside of the doors and stapled to the inside. The finishing touches were dealing with the decorator's varnish and adding new handles and legs,” all Jen’s hard work paid off as the final results look seriously stylish.
3. Transform a Besta unit with color-block doors
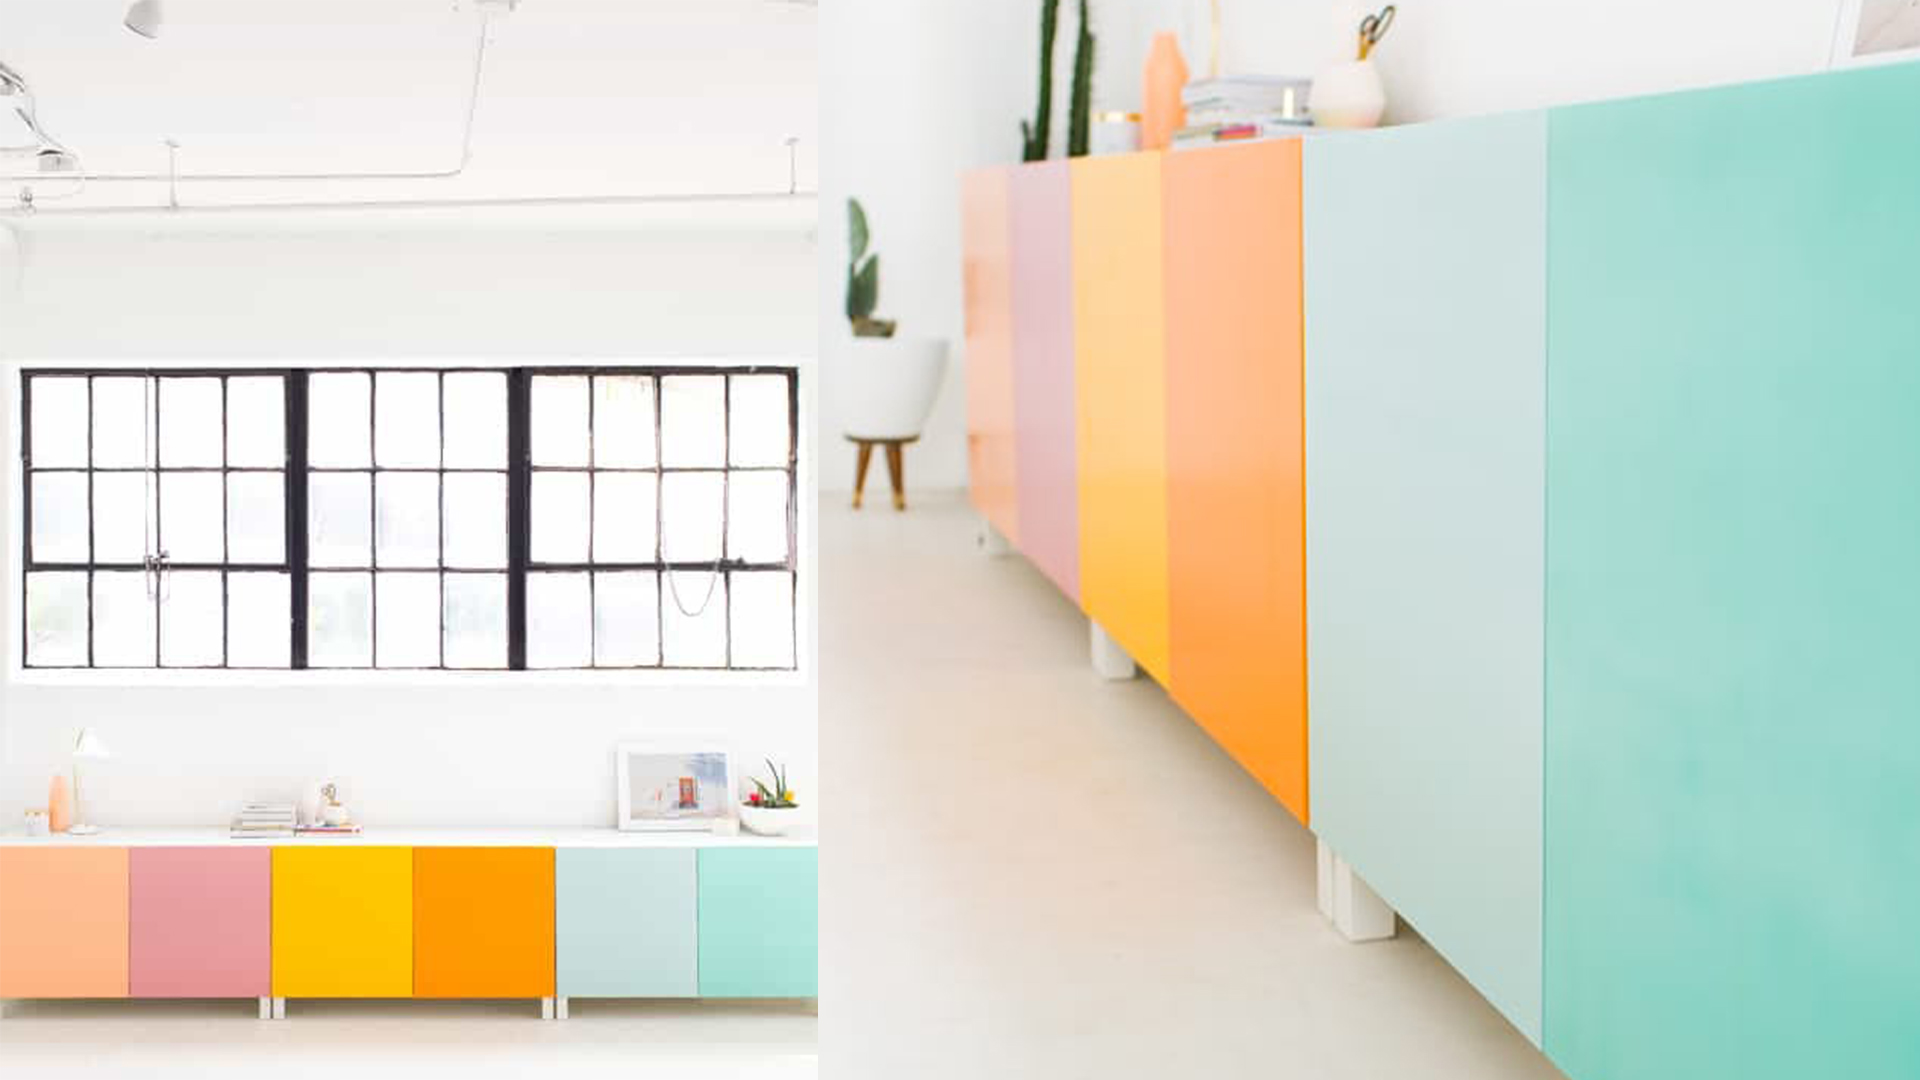
Houston-based blogger, DIY, and decor expert Ashley Rose is a frequent IKEA hacker and when the results are this good, you can see why.
This nifty project, shared on her blog Sugar and Cloth, is simple but effective, which is great news for would-be IKEA hackers. All you need to do is paint the doors to create a color-block effect - a popular interior design trend.
Ashley’s color choices make this piece super fun and playful and the piece would look great in a playroom or to create a feature in a cool white room, perhaps a bathroom.
You could opt for a more pared-back palette of the best interior paint colors or add spots, stripes (or both!) for a maximalist style. Take care to prime the doors before painting, we like Zinsser BIN primer for this job, then let your imagination go wild with paint.
4. Pair black paint and reeded glass to create a designer dupe
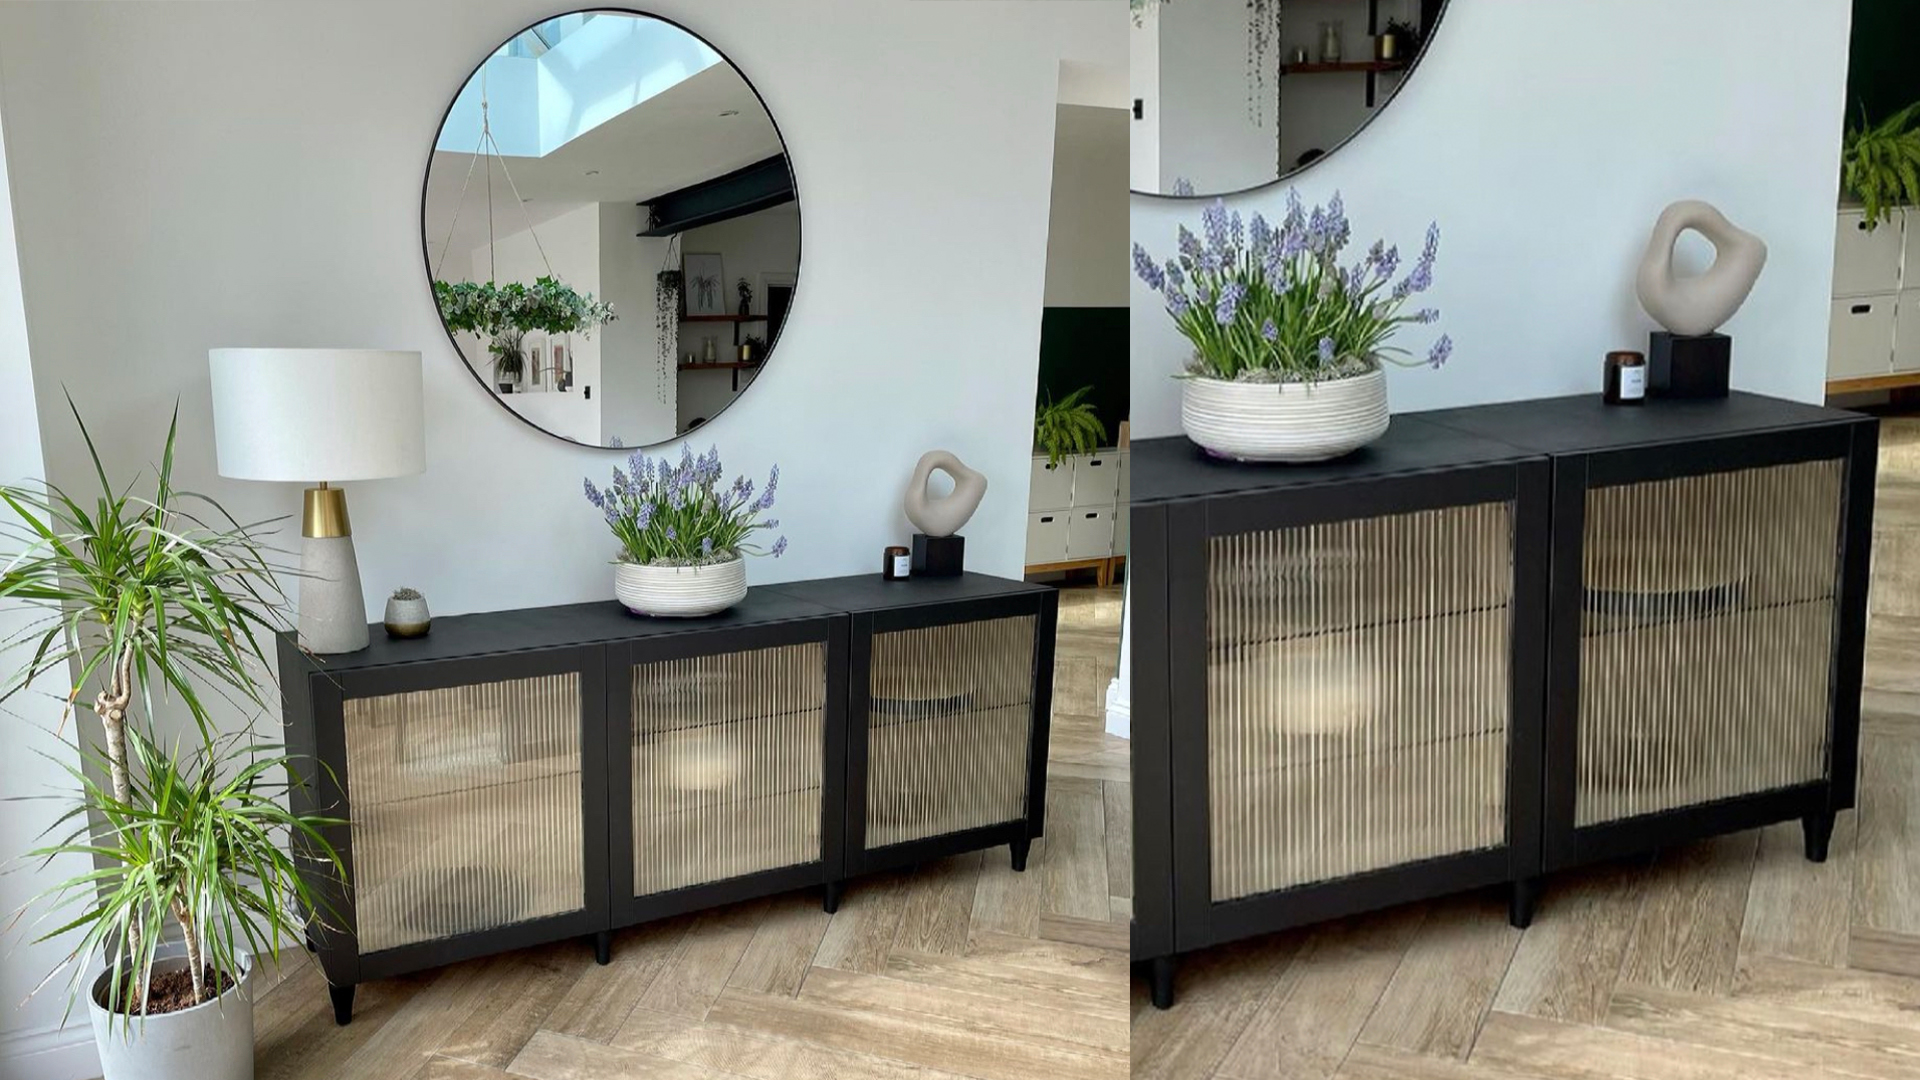
This beautiful IKEA Besta hack was created by Amy aka @firststepontheladder. Amy is a DIY whiz who shares the progress of her home renovation projects and other home and lifestyle content on her Instagram account.
Not happy to pay the huge price tag that came with a designer cabinet, Amy found a way to get the bespoke look cabinet without the eye-watering price tag, “I’d seen a really similar cabinet, but it was over $1k, so we did this for a fraction of the price”. As usual, a bit of DIY was the answer, and with results this professional-looking, no one would ever suspect this started life as a generic IKEA flatpack.
To recreate this look, you’ll need to prime and paint your Besta unit, before adding reeded glass film to the doors. Amy has styled her finished cabinet beautifully and positioned it below a large round mirror as the final touch - a great combo for inviting the 'quiet luxury' trend into a home.
5. Add plywood panels for a calming Scandi vibe
IKEA hacking aficionado Victoria Corrie, the creative behind the Instagram account @Carnesure.house, has created several custom-looking pieces of affordable furniture sourced from our favourite Swedish furniture retailer. The hack under the spotlight here is the brilliant Besta in Victoria’s TV room.
Reflecting on the DIY process, Victoria shared her thoughts with Woman & Home, “We bought a Besta unit and some plywood sheets to wrap around the outside. The plywood was cut to size and the edges mitred by our carpenter, it was then sanded down and oiled with Osmo oil."
"We then used wood glue to attach the plywood to the unit on all four sides.” This DIY is achievable and affordable, two of our favourite IKEA hack qualities and the results are on point. This easy-to-do project is a great way to make a living room look expensive on a budget.
6. Enhance doors with cane detailing for a scandi-boho look

We are back at @Carnesure.house for another impressive makeover. Once again, the stylish neutral results are superb and barely resemble the original IKEA Besta furniture.
Victoria shares the drivers for this clever DIY, “I wanted a large sideboard but also wanted to save on the cost of it so bought two Besta units to create one instead,” if this sounds familiar, here’s what you’ll need to do to replicate this project. “I added some rattan to the doors and an oak trim. Two IKEA Nannarp legs were attached on each end and an IKEA Besta supporting leg to the middle of the units,” Victoria advises.
For extra support, Victoria attached the finished unit to the wall. All in all an achievable DIY for most and a huge cost saving that will appeal to all. Lifting space off the floor is a great way to make a small room feel bigger.
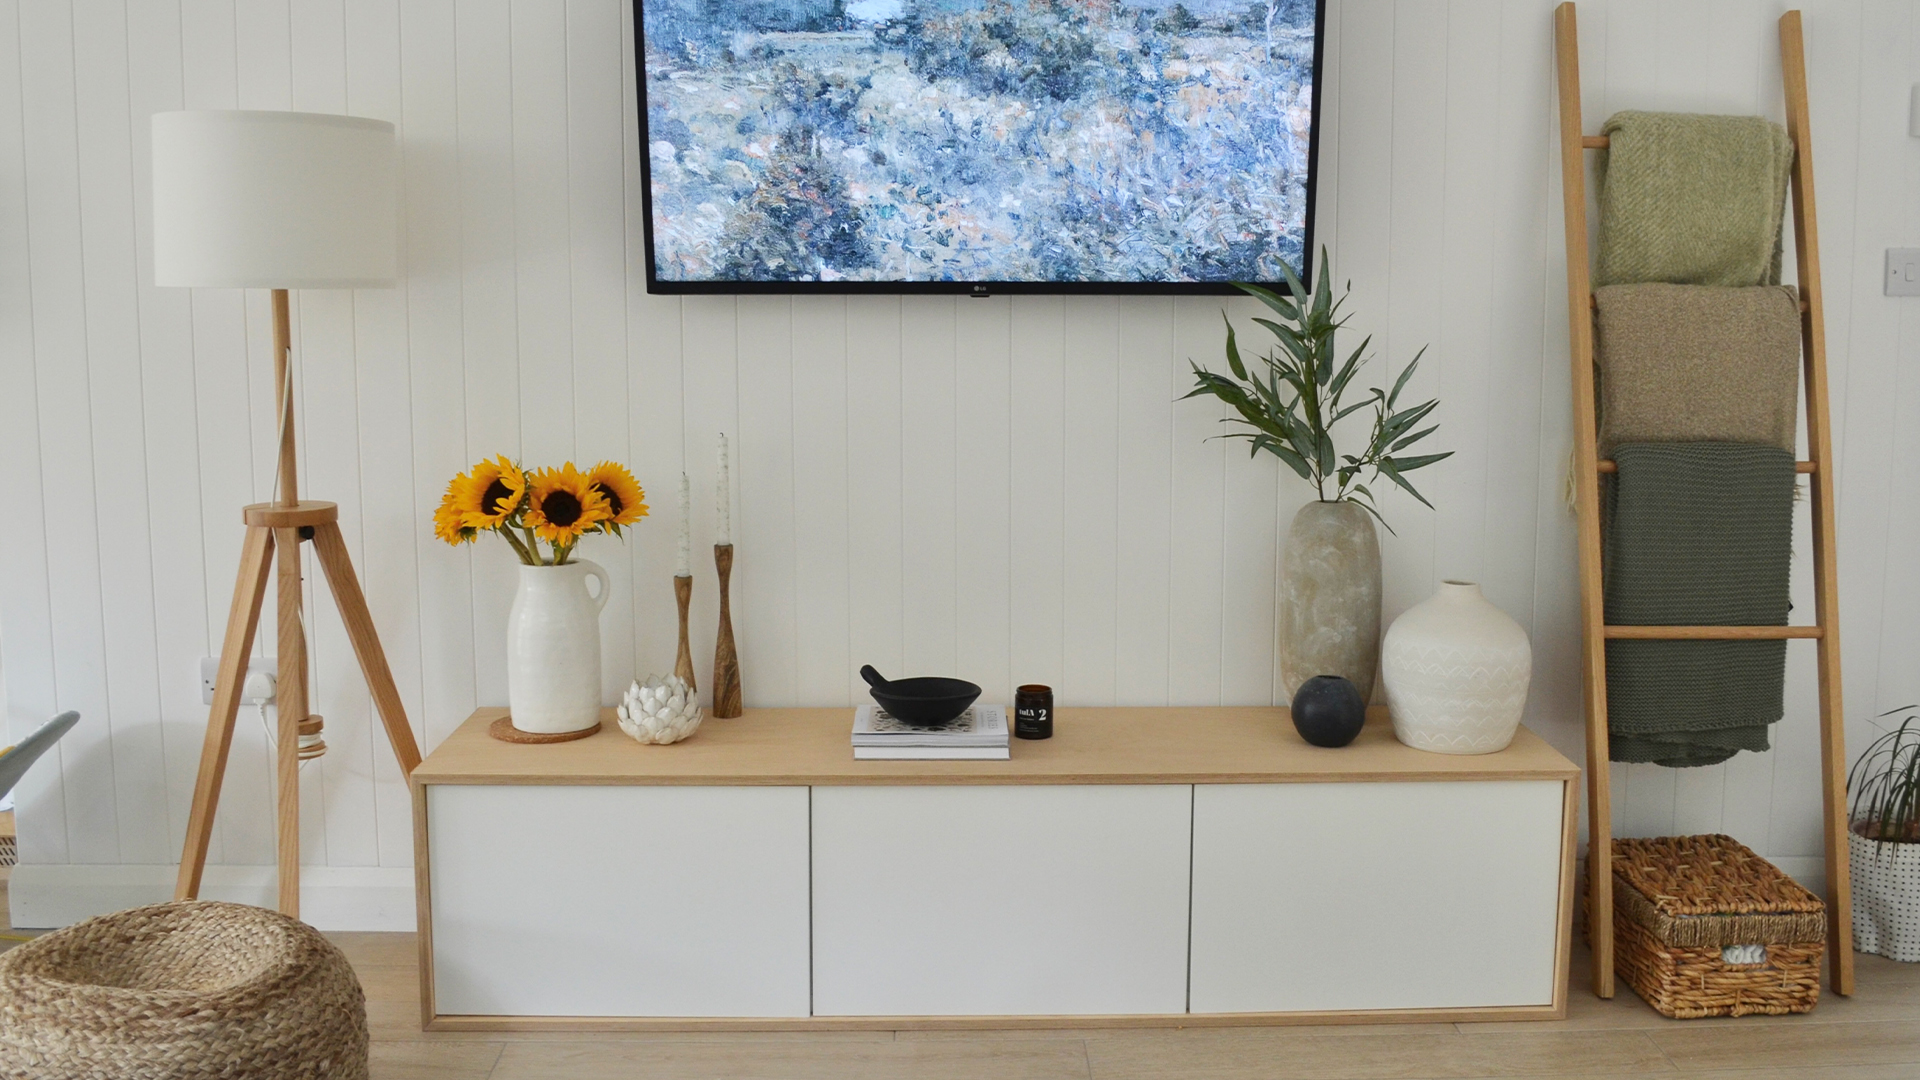
7. Craft a stylish desk for your home office
IKEA Desk hacks are some of the most inspiring as they use basic furniture to transform a home office or workspace, making an impactful change to the daily life of those who work from home and this hack by interior design studio Studio Van Oliver is the perfect example.
Those who are not so keen on DIY will be happy to hear that this project requires very little DIY, so there’s no excuse not to have a go.
Becki Willis, founder, and director of Studio Van Oliver, shares the secrets to this simple but seriously stunning hack, “We used the Besta top panel meant for three cupboards and left out the middle cupboard to make space for a chair and little legs. If you need a more bespoke length, another great tip is to use a piece of IKEA Karlby kitchen worktop and cut it down to size,” she advises.
The creative designer explains why she opted not to add legs to the Besta as is commonplace in our IKEA Besta hacks, “Mounting the Besta frames on the wall brought them up to a standard desk height so the desk will last as our little client grows; you could add legs instead but I love the clean look of the wall mount."
"The shallower Besta cupboards above the desktop add extra storage and we left one frame open for display.” Excellent advice and we agree that the floating effect really adds to the overall look.
8. Introduce door overlays for a textured metallic finish
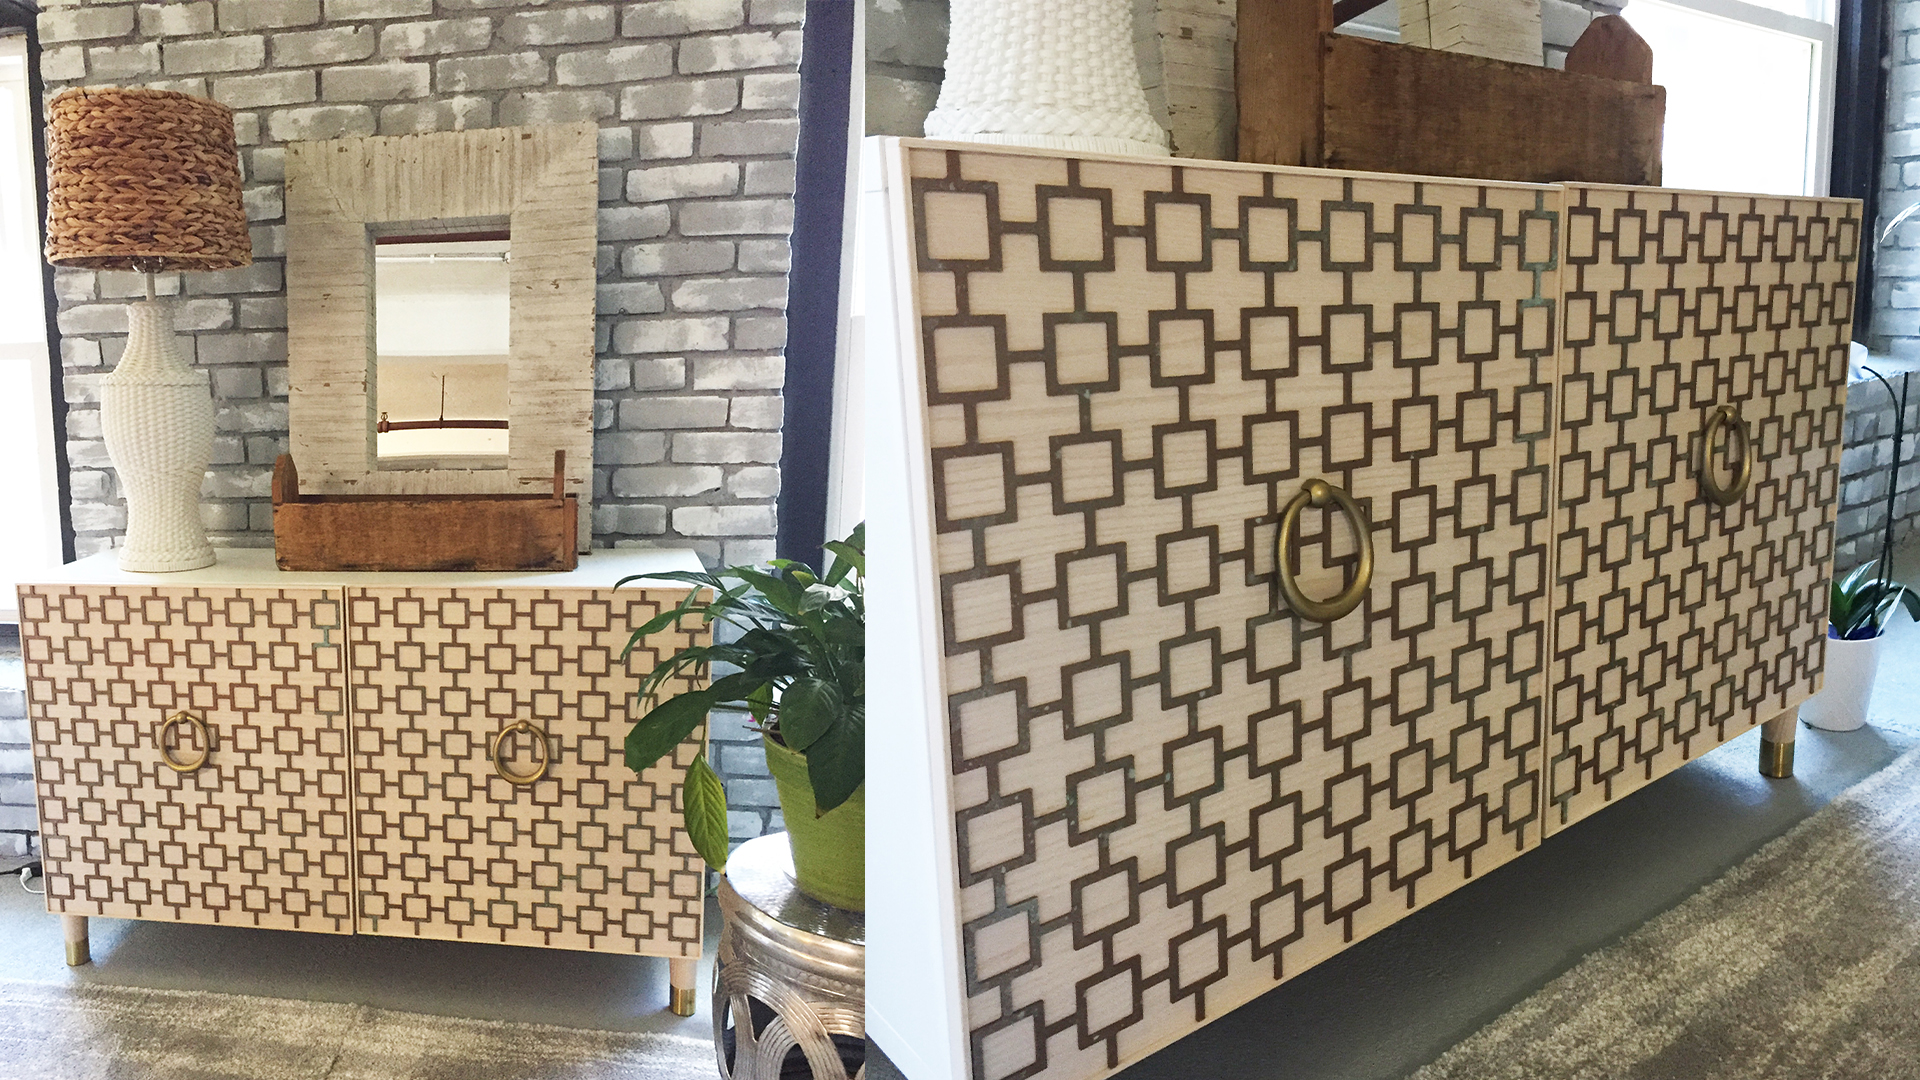
This decadent DIY is the handiwork of Cheryle Rhuda, founder of O’verlays, maker of decorative fretwork panels sized to fit IKEA furniture.
This project was simple to create using clever metallic overlays that were painted and glued onto the front of the IKEA Besta unit and IKEA Inviken doors.
You could paint them any color or keep the overlay the same color as the door front so they provide texture more subtly if an understated vibe is more your bag. Cherly also updated the door handles, a tried and tested method for improving the final results of IKEA Besta hacks.
9. Transform basic units into a floating TV console
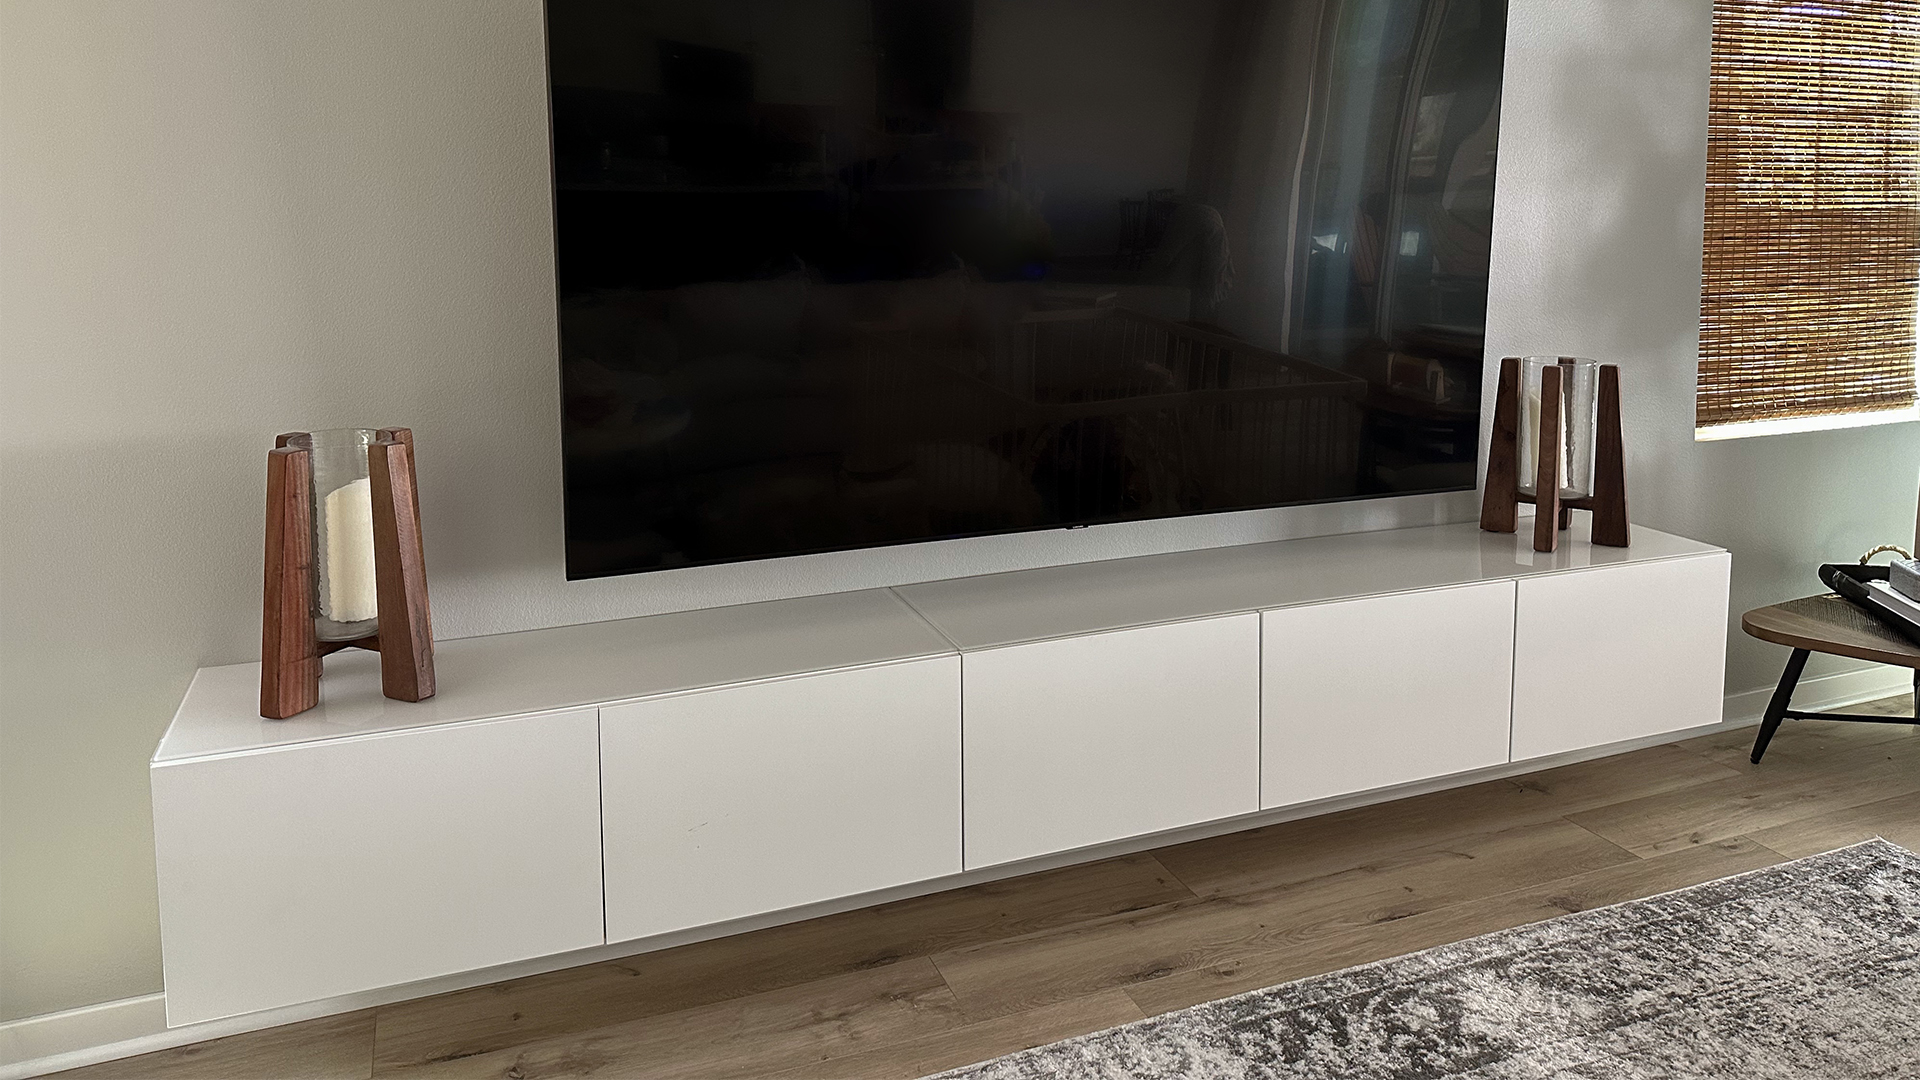
This hack is courtesy of Californian home and motherhood content creator Jo, aka @alongwithjo. Jo created a floating TV shelf by joining Besta units and here’s why she loves it, “We love our IKEA Besta floating tv shelf because we’re able to hide any unwanted items and still maintain our home aesthetic.”
This DIY project will inspire you to declutter your home because who doesn’t love clean lines and an organized home? The elevated storage is also a great way to make a small living room look bigger by exposing more floor space.
To create this streamlined piece, Jo joined a three-cabinet IKEA Besta to a two-cabinet Besta unit and mounted each cabinet on the wall with brackets that she found in Lowe’s. Jo added a glass top and IKEA Lappviken doors. This stylishly functional piece would feel very at home in a Japandi living room.
Top Tip: If you have plug sockets on the wall that you want to hide, either cut out a section of the back of the relevant unit or leave that compartment backless; no one will ever know they are in there!
10. Connect two Besta units for extra wide stylish storage
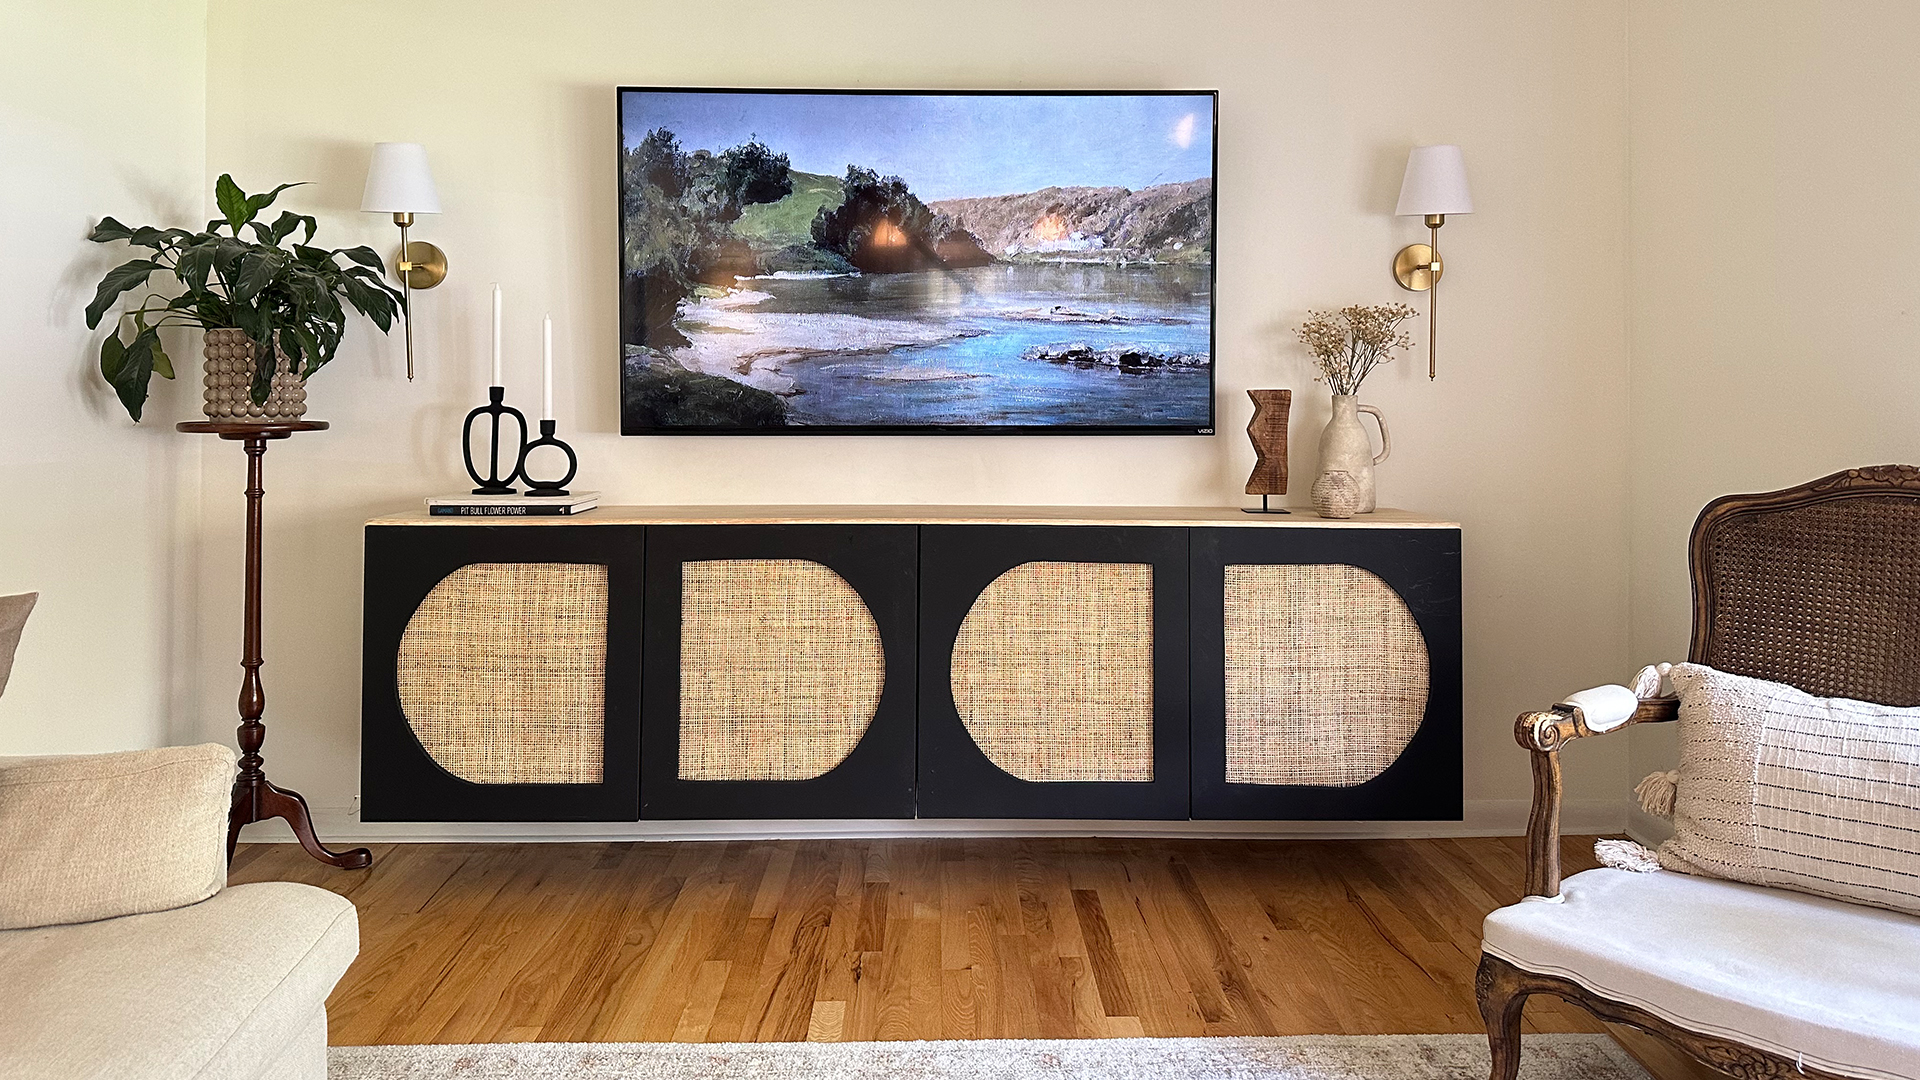
This fabulous entry in our IKEA Besta hacks round-up is one of those great home organization ideas and comprises several elements we’ve seen in other projects. The floating wall-hung cabinet has cut-out door panels, cane webbing, paint, and a plywood-wrapped top and the results prove sometimes more is more!
Kelsey, the creative talent behind the Instagram account @summer.collective, designed this hack for her living room, “We needed a wide media unit to balance out our large TV. Rather than spending a couple of thousand dollars on one, I thought putting together two IKEA Besta units would be the perfect fit!”
Here are Kelsey’s tips on how she created this bespoke-looking beauty for those wishing to have a go, “I used a jigsaw to cut out shapes in the doors and added cane webbing for some fun detail. A couple of tips I’d share would be to add a board on top of two units to make them appear as one and use the IKEA wall mounting kit to suspend the unit rather than attaching legs for an elevated, custom look!” We love this excellent advice and agree that the final results are super custom-looking.
Top Tips for successful IKEA Besta hacks
- Transform with paint: There’s no denying that a lick of paint can completely transform a piece of furniture and this is especially true for IKEA Besta hacks. Choose a colour that complements your interior scheme, this could be a bold accent colour to make the furniture pop or the same colour as the surrounding walls for a colour drench effect.
- Add texture or natural materials: IKEA Besta hacks work well when the base unit is improved by adding some texture; this could be in the form of plywood sheets as we saw above, or rustic wood or pole wrap.
- Add height: Raising IKEA Besta units off the floor is a surefire way to make them look more expensive. You can elevate them with the addition of legs (a trick we saw with the Kallax hacks) or by attaching them to the wall to create a floating effect. Both are easy to achieve with a little DIY effort and are well worth it.