We are all tech nerds here at Cyclingnews, and personally I take great enjoyment in pulling together my guide to the best cycling glasses, so when Engo approached me to see if I wanted to test out its second model of head-up display glasses, the ‘Engo 2’, I parked my initial scepticism, took delivery, and set about testing.
I am rather picky when it comes to cycling glasses, and there is I’m afraid plenty for me to be picky about, but despite that I do think these might have some real benefits in specific situations, though for the generalists I’m going to start by saying they’re not something I’d recommend, so if you only came here for a go/no go decision then there you have it.
For the rest of you who may just be curious, let’s crack on.

Design and aesthetics
From the outside, unless you have the light at the right angle, you’d be hard-pressed to notice that the Engo 2 isn’t a normal pair of cycling glasses (or just sports glasses, as they are equally marketed to runners, and triathletes too). A frameless blue lens, with some vents at the base and a good degree of wrap, hides the tech within.
The arms are relatively slender and tipped with some not-too-tacky grippers. The arm ends though, much like with the POC Aspire that I recently reviewed, are bendable so you can make them fit. The same goes for the nosepiece, again bendable so it can fit.
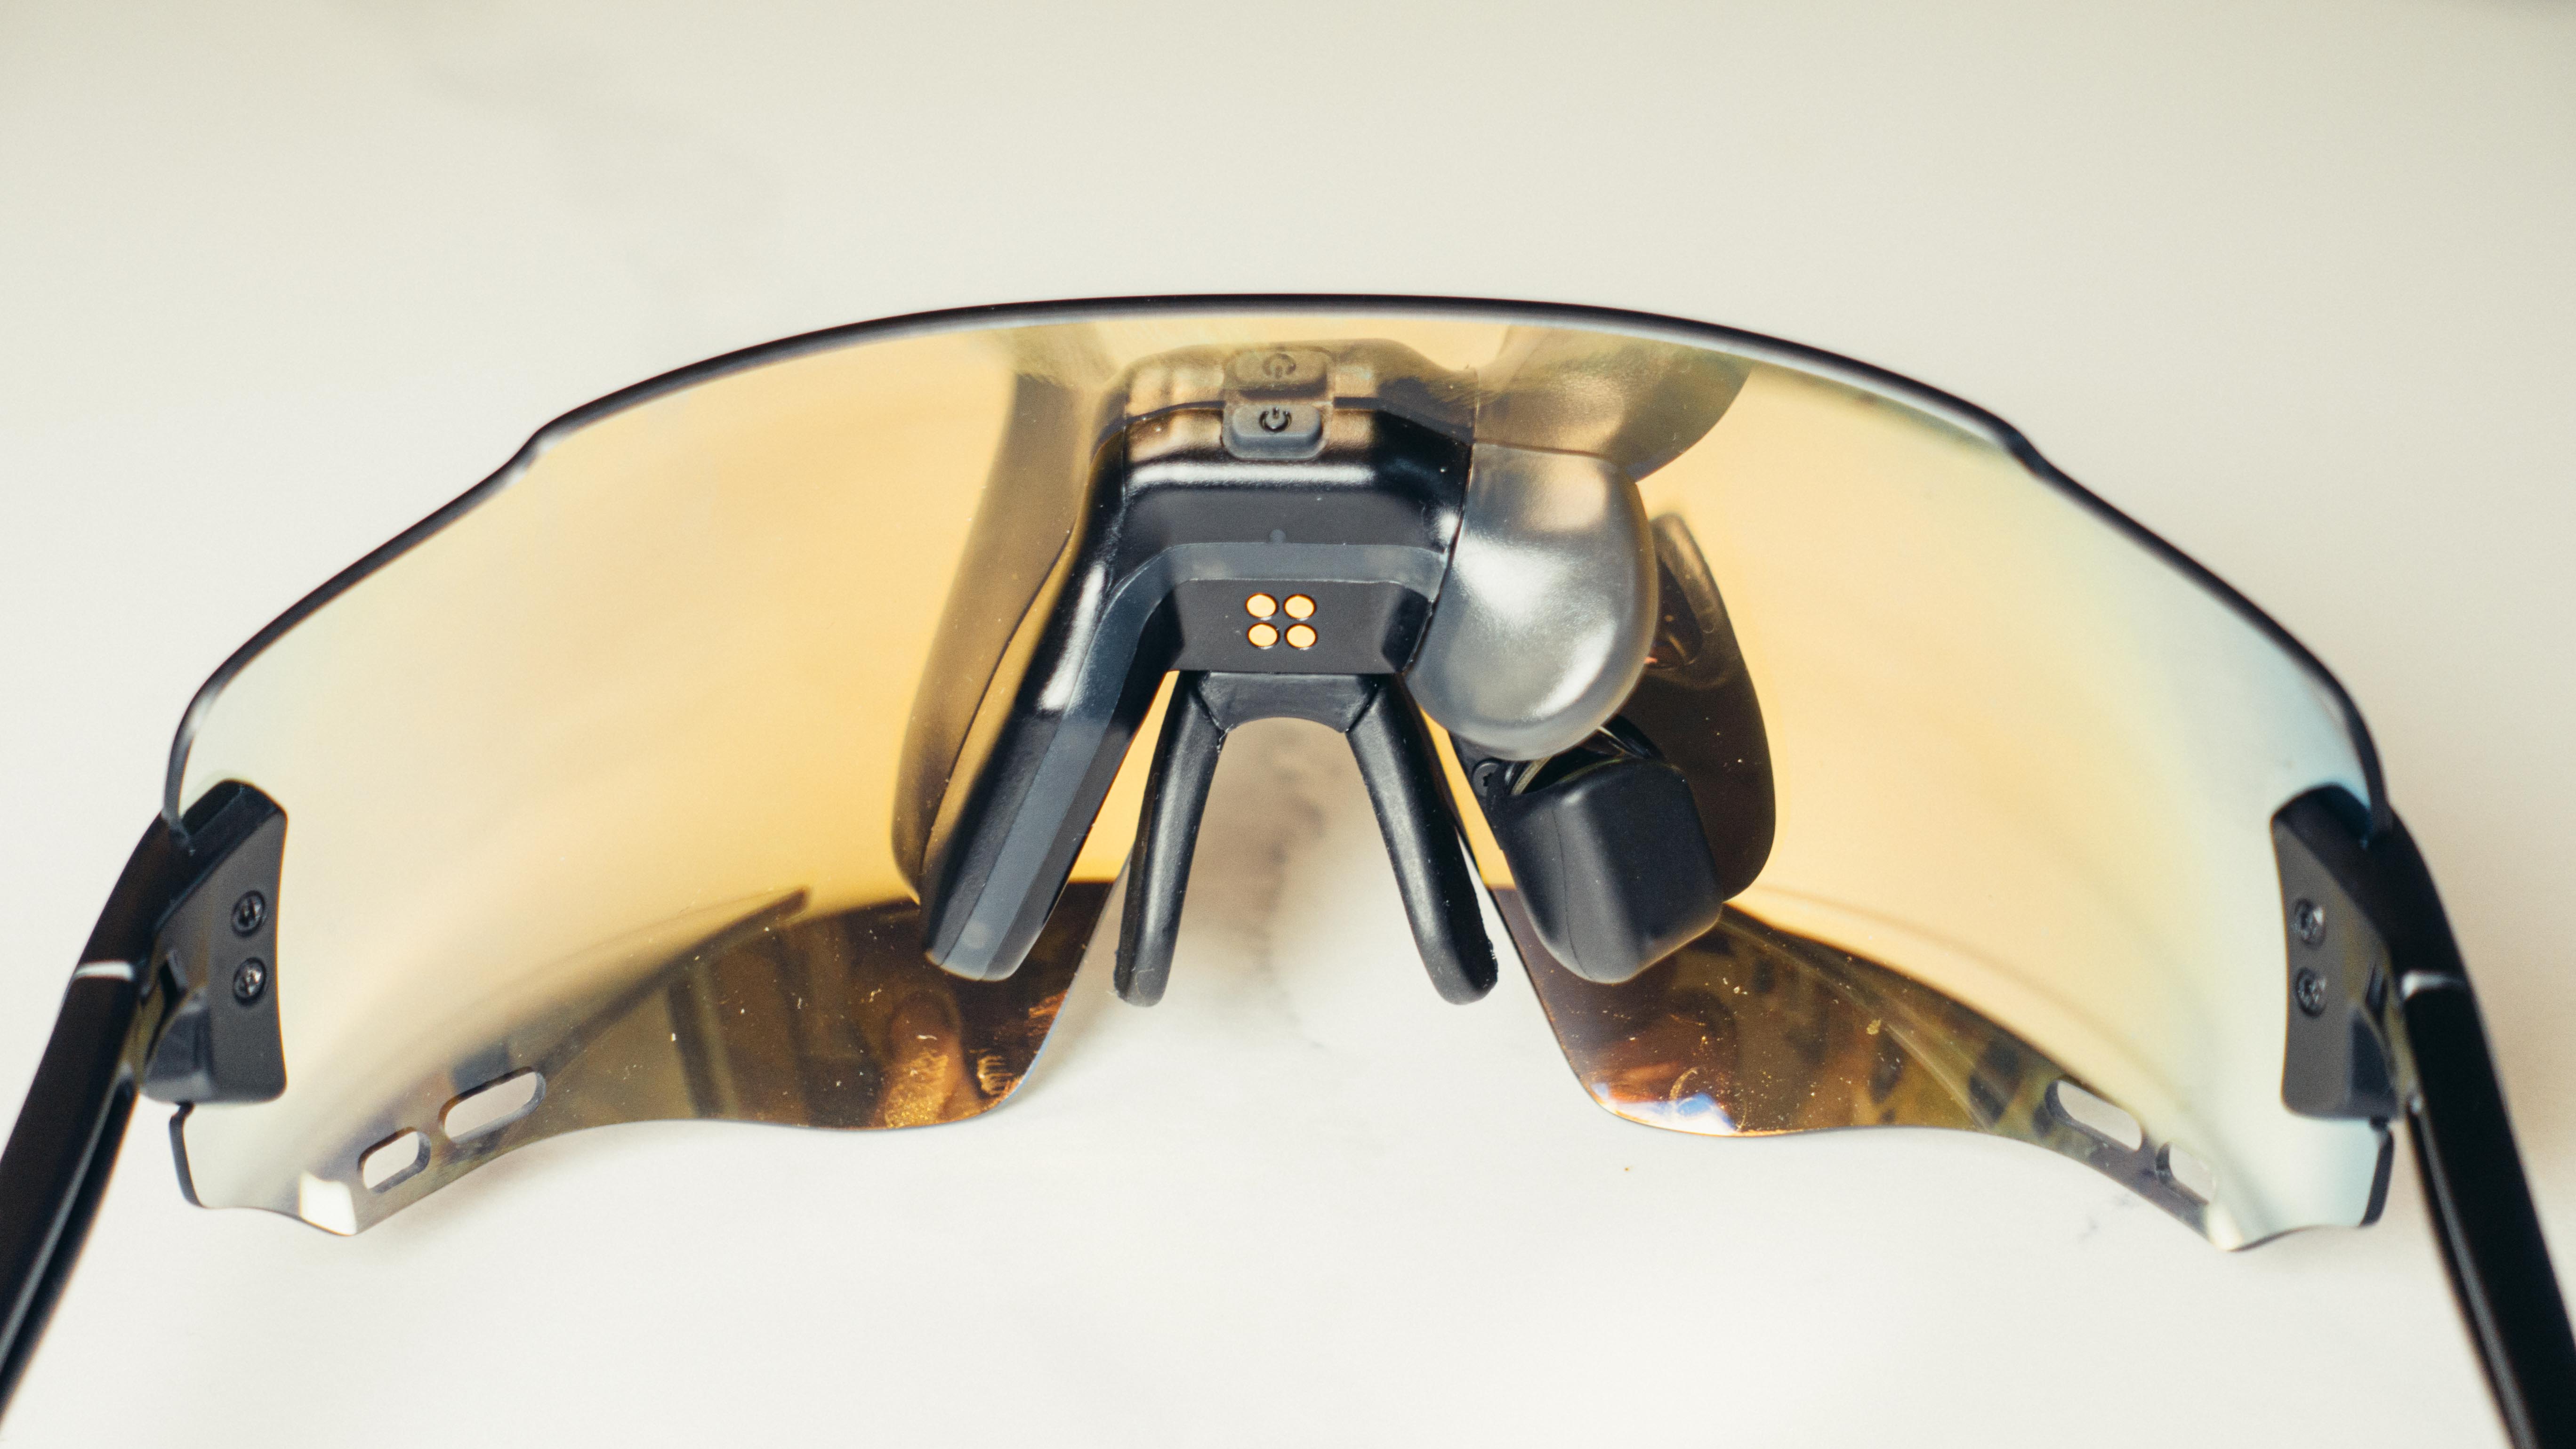
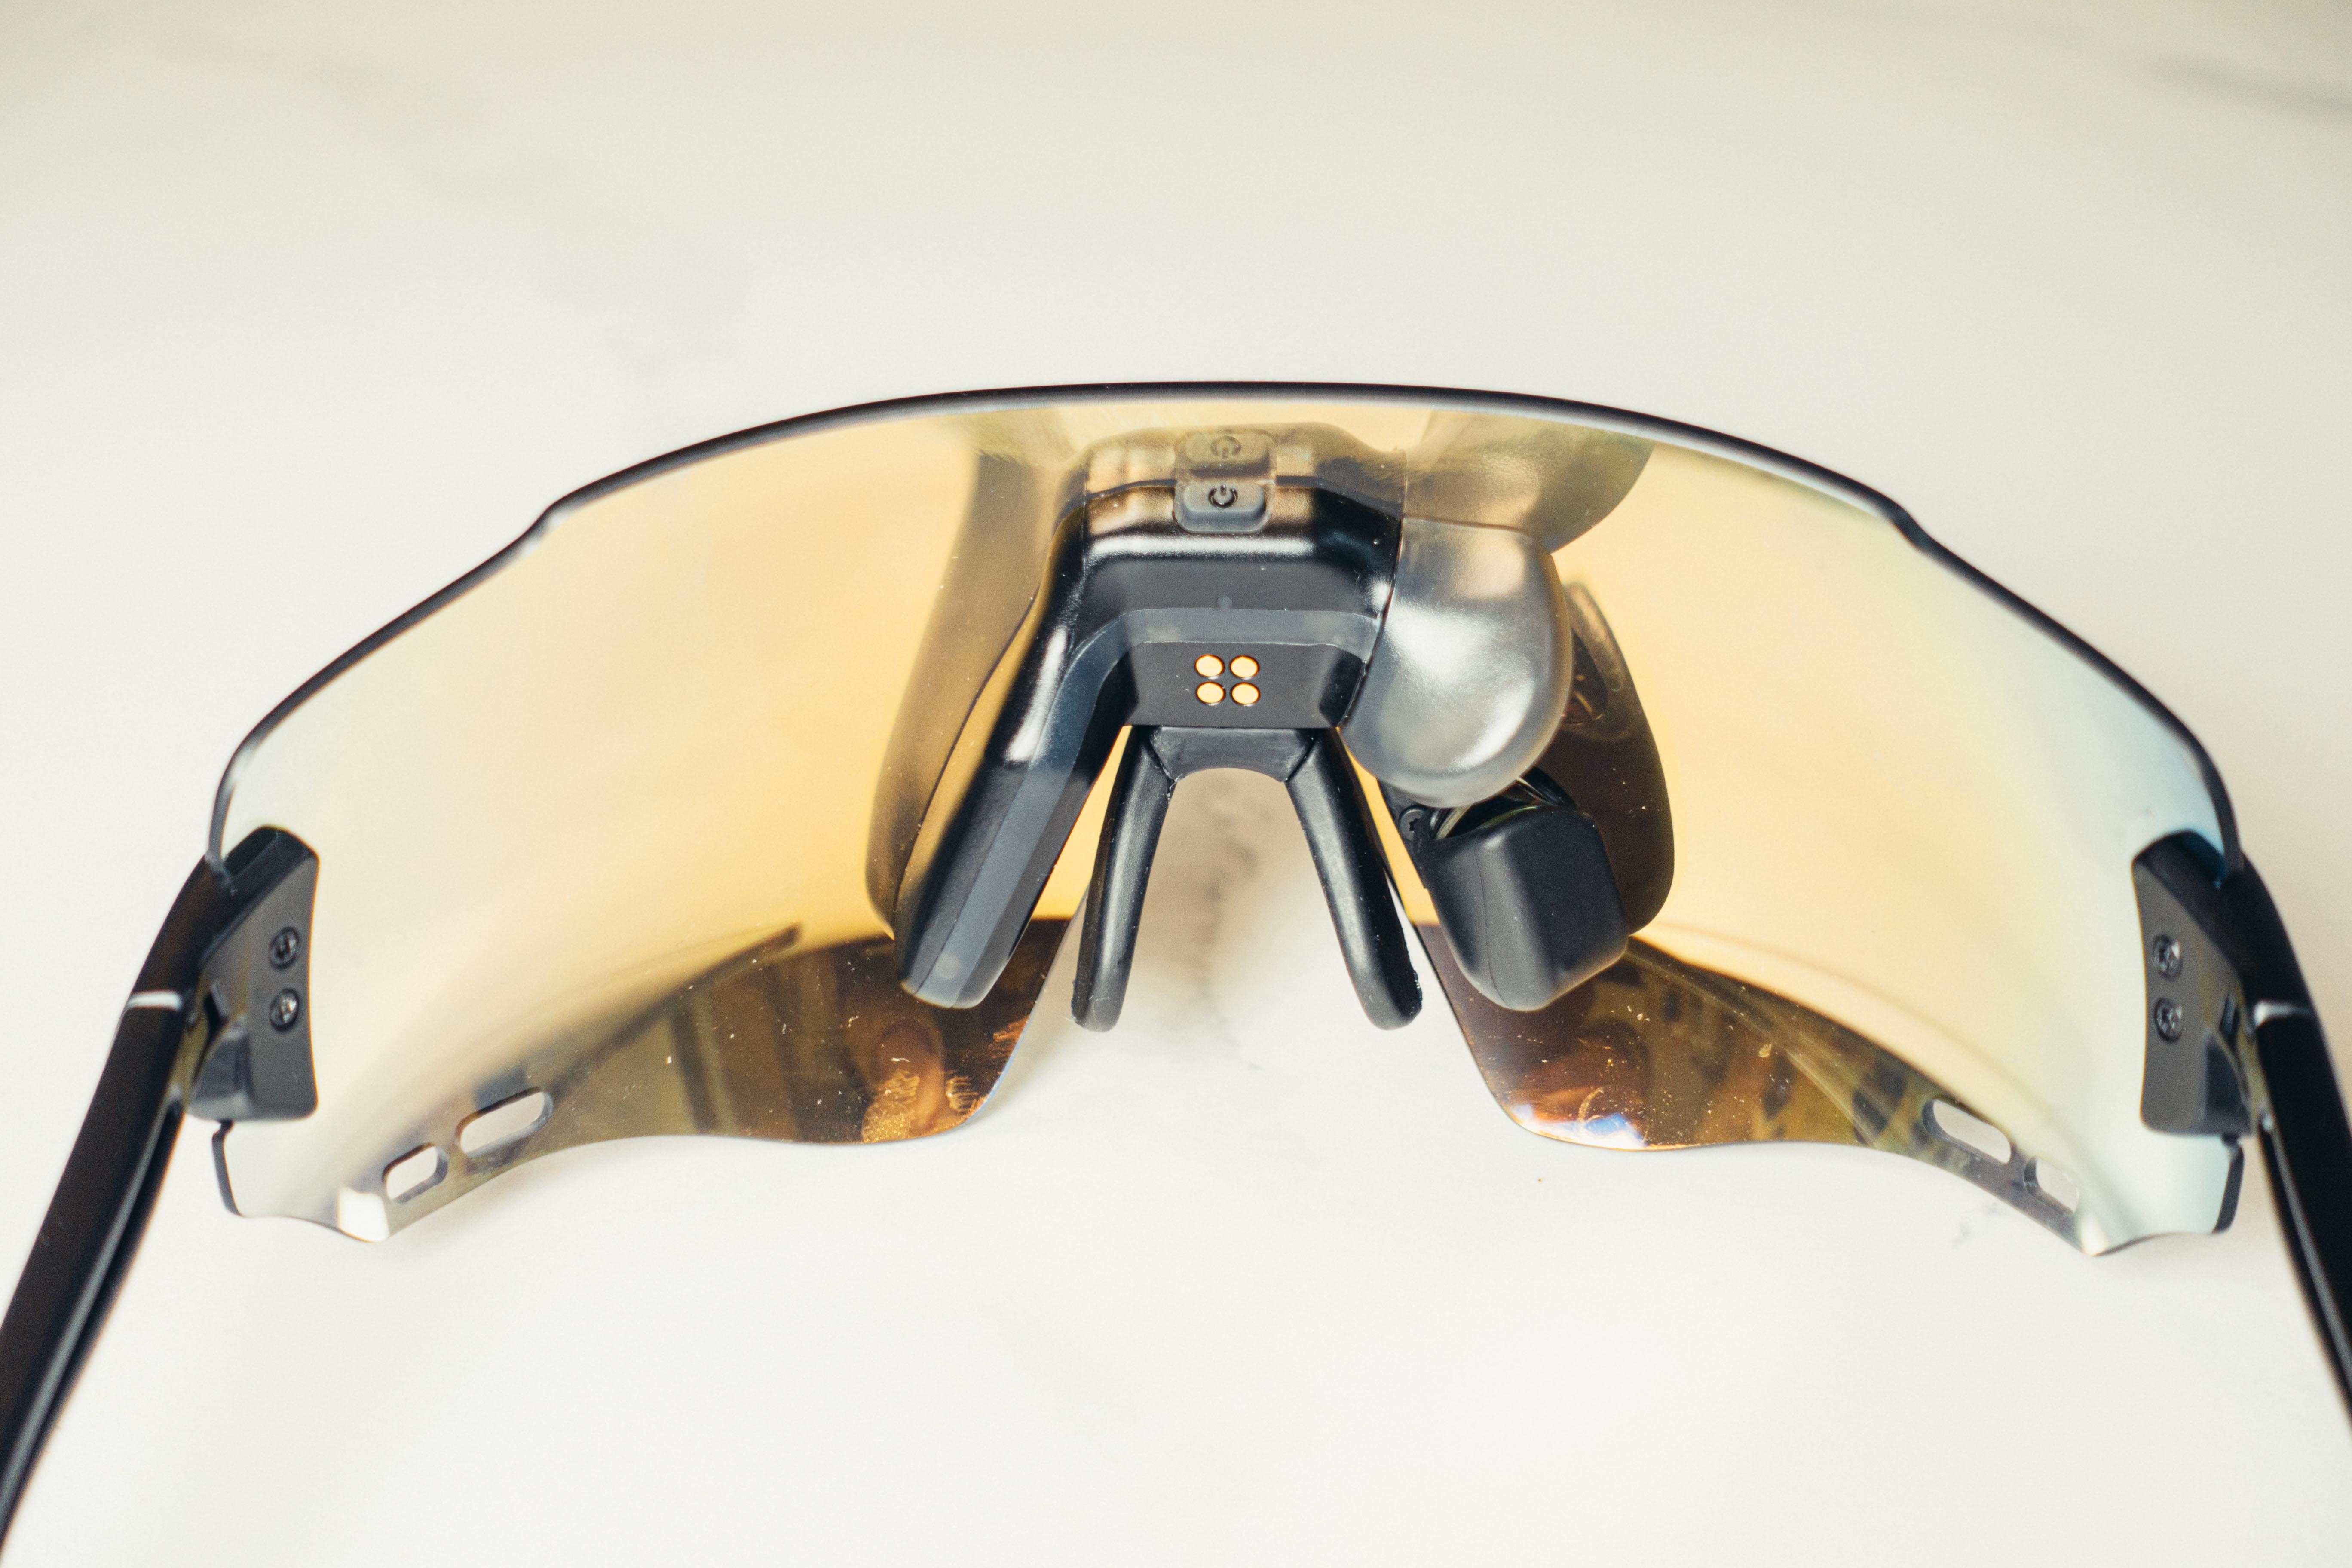
For a frameless pair, they are actually pretty stiff, on a similar level to the Oakley Encoder, but ever so slightly taller. This stiffness is, I suspect, down to the hardware that sits inside the central portion of the lens.
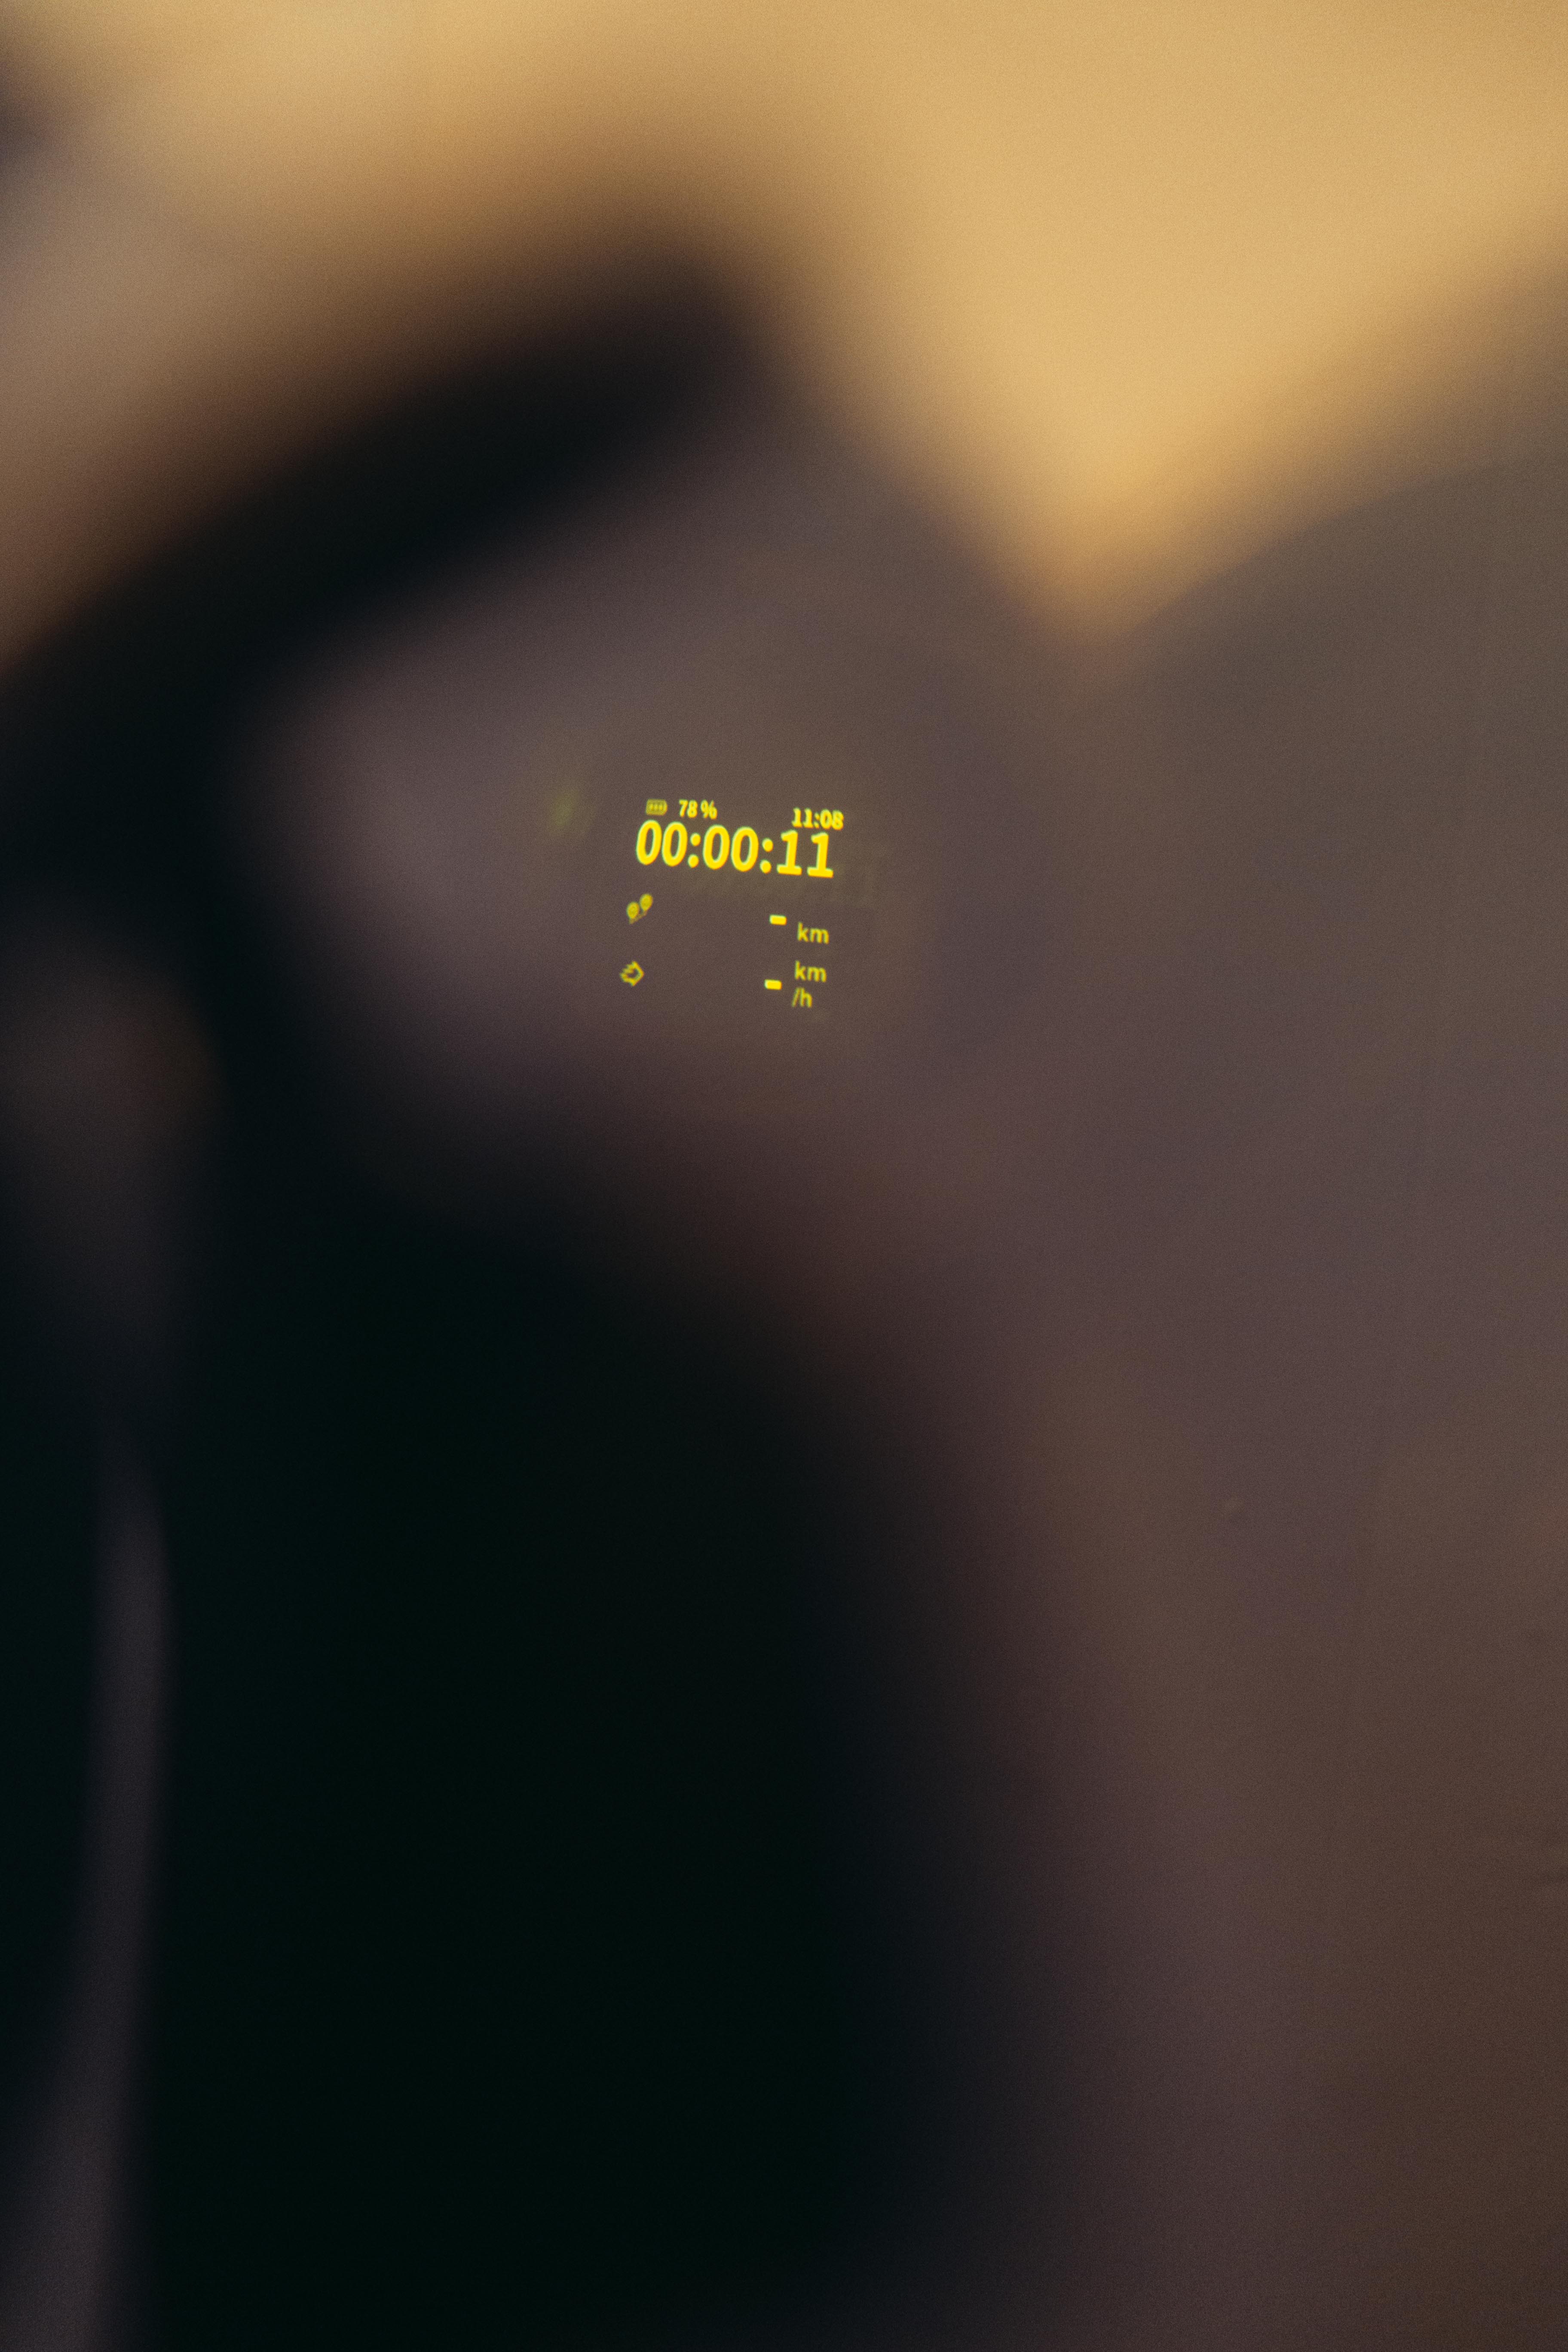
Atop and beside the bridge of your nose is the beating heart of these glasses. Moving from left to right as you look out you have the battery pack, the largest protuberance of the lot, then in the centre, you have the on/off button above the magnetic charging port. To the right is the actual head-up display, which fires the display upwards towards an angled mirror, which then in turn projects the image onto the inside of the lens.
They come in black, stealth (a dark grey), and white, and in two lens sizes. I had a black pair on test, with the larger lens, and they tipped the scales in at 40.3g. This puts them among the heaviest I’ve tested, but still lighter than the POC Devour, which is pretty incredible considering the fact there’s a lot more going on here.

Setup
Never did I ever think I’d have to write a ‘setup’ section for a pair of cycling glasses, but here we are. I am afraid the setup was perhaps the worst part. We are perhaps now pampered by cycling tech with extremely user-friendly interfaces (Wahoo and Hammerhead are both delightful), so it sways things slightly, but even in isolation, it wasn’t a hugely easy process.
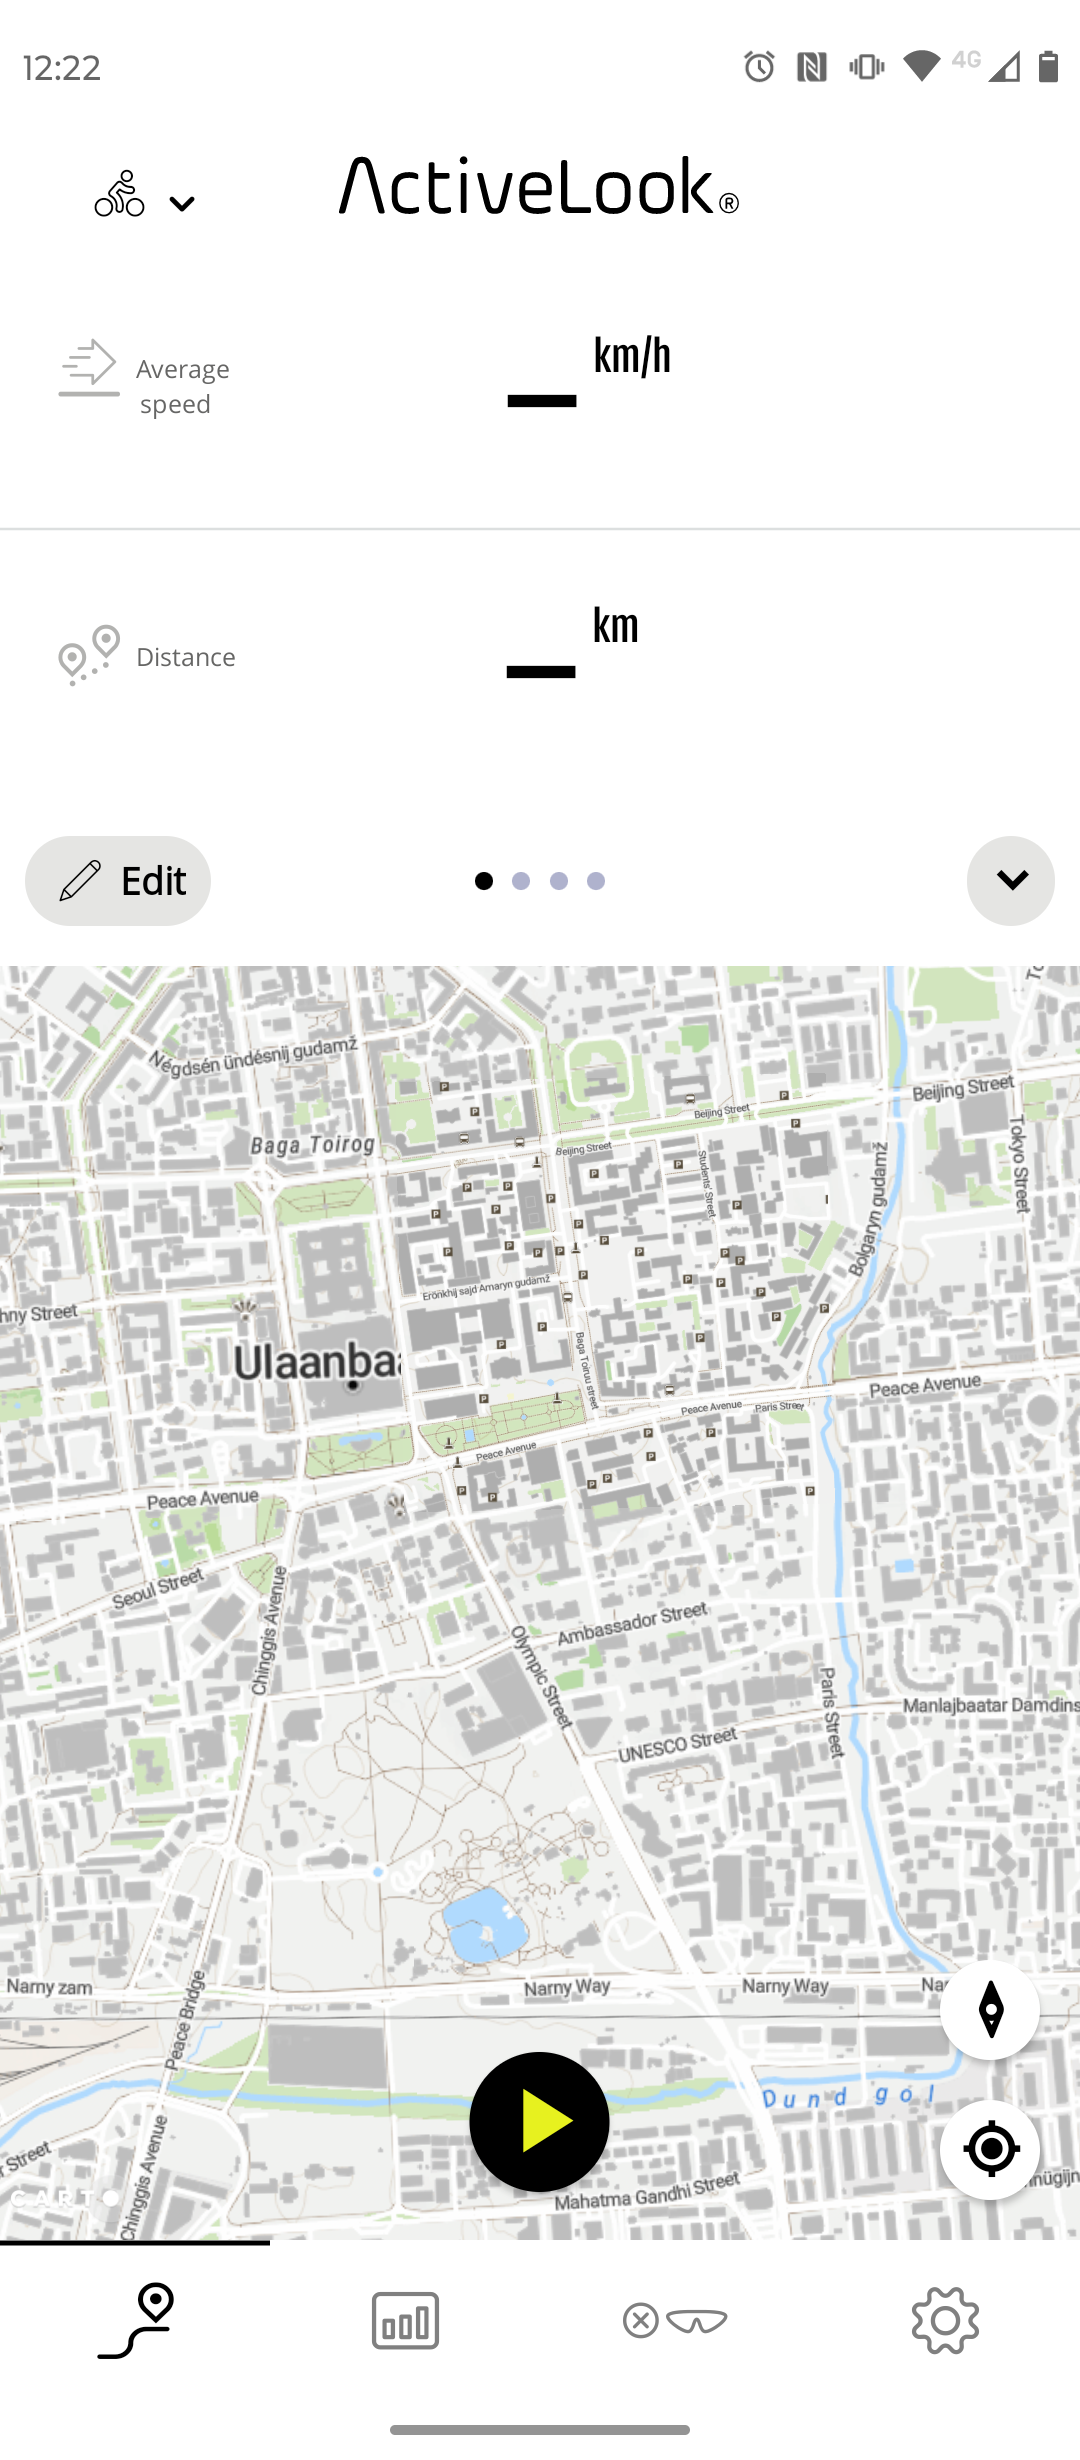
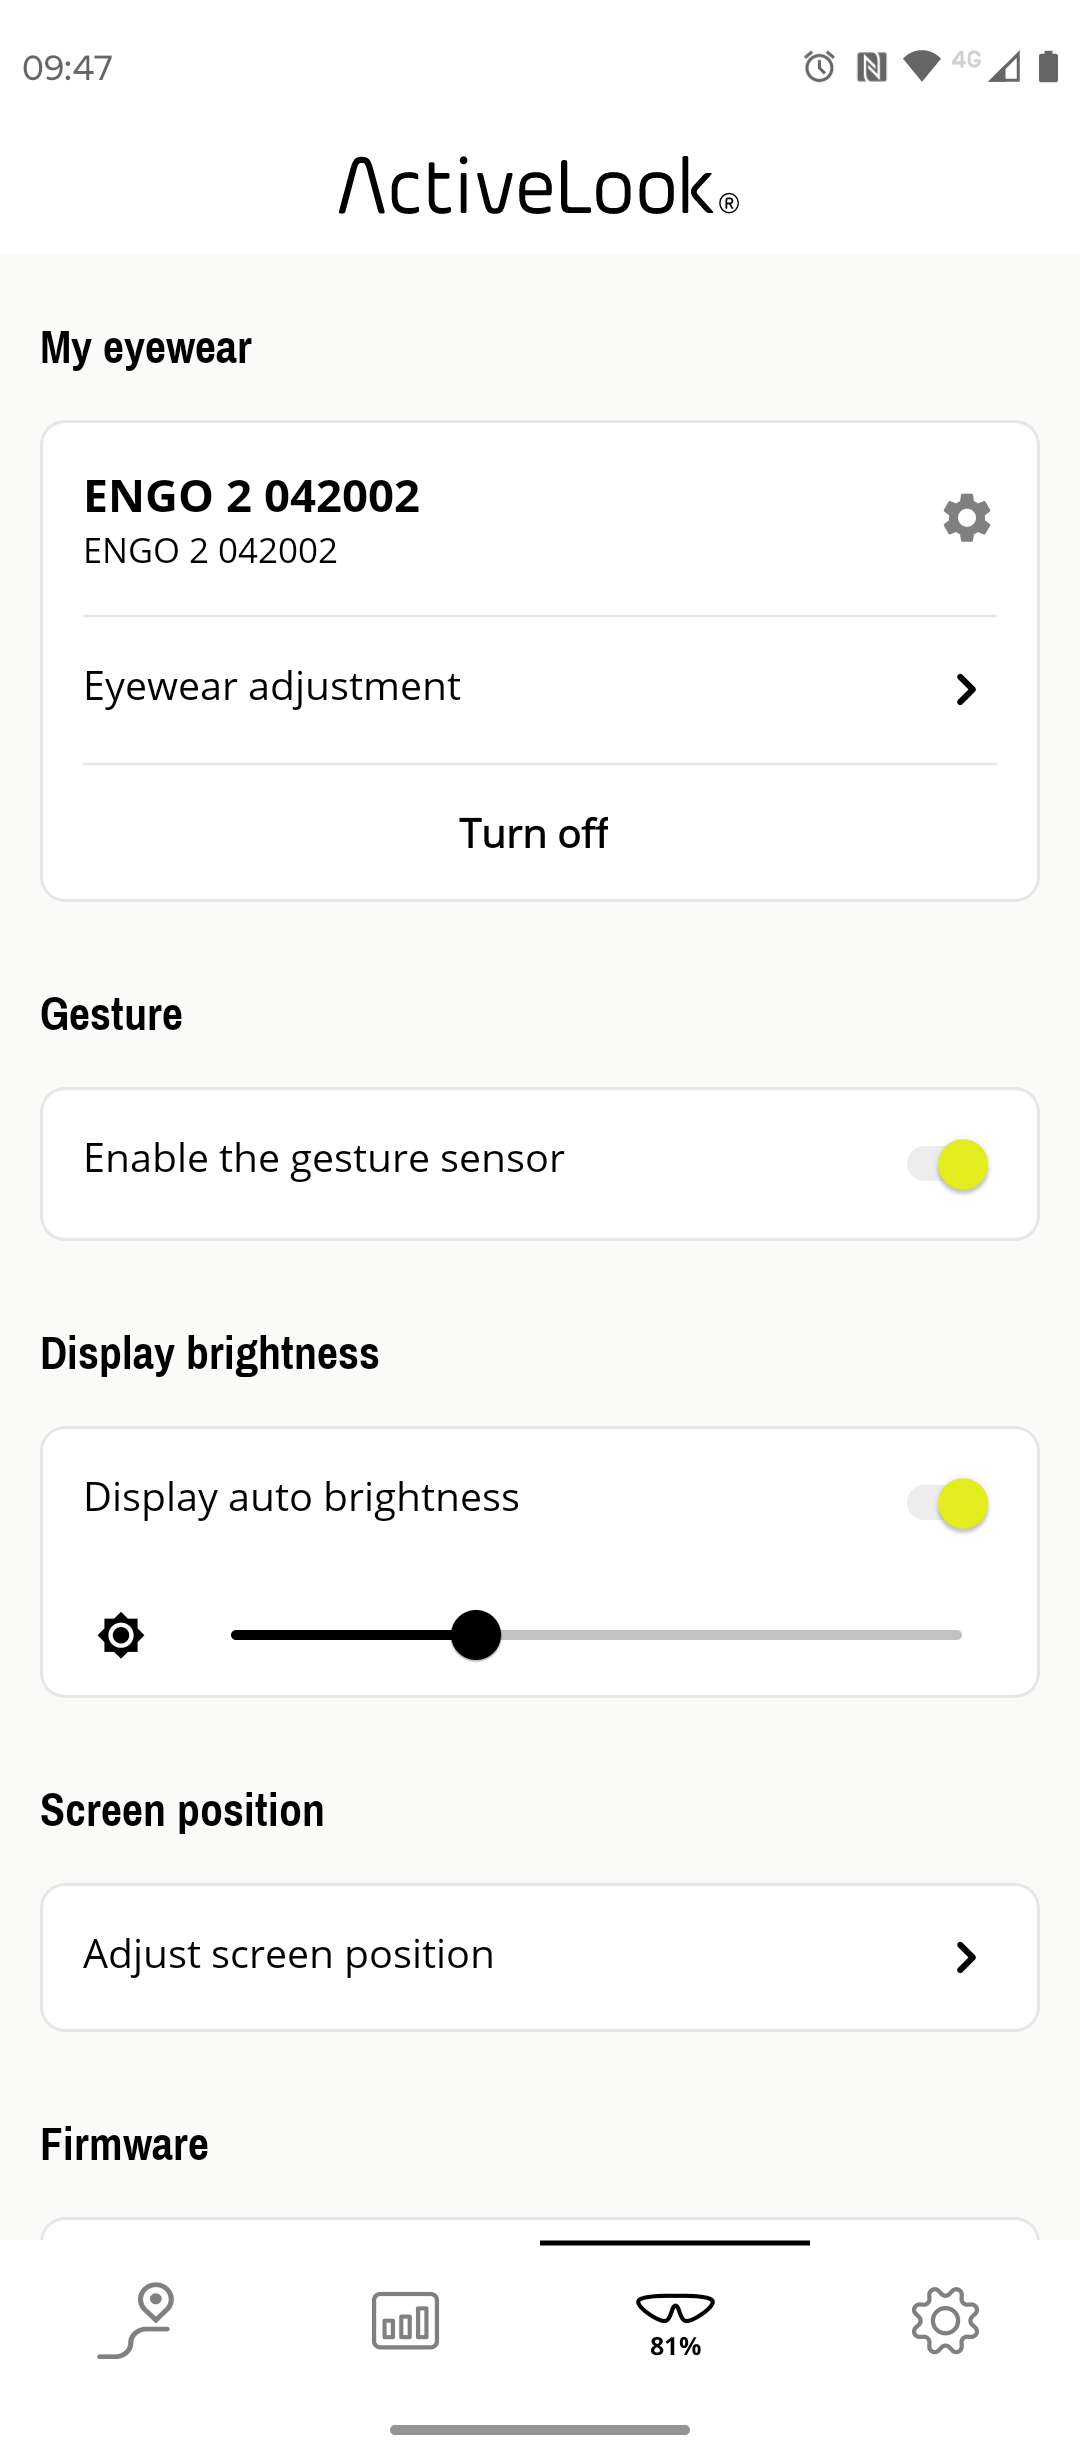
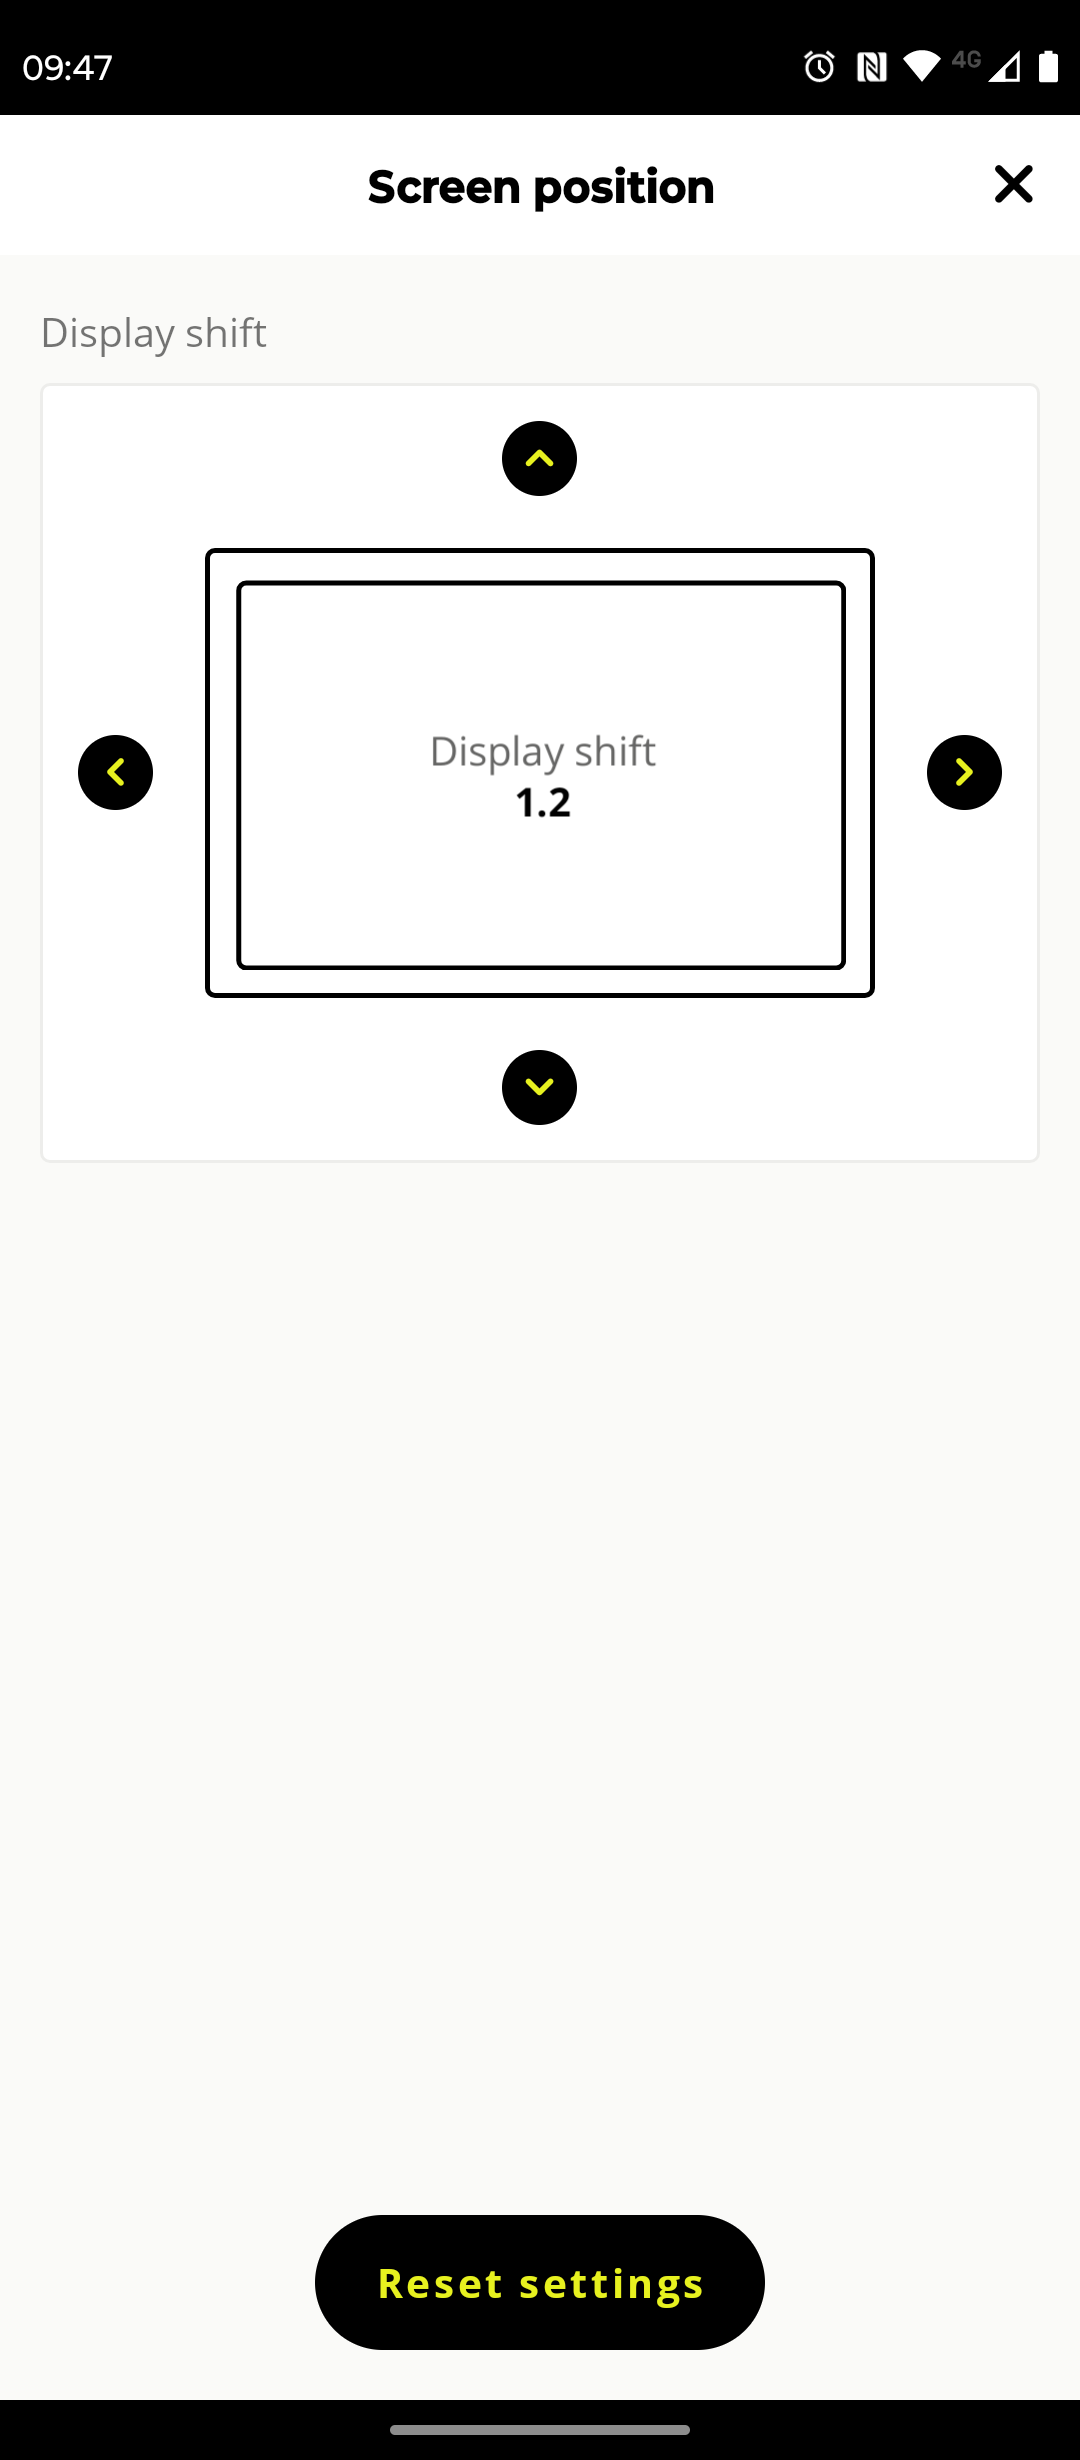
You can run the Engo 2 glasses with the ‘Activelook’ app (this is the head-up display part), and that functions as a basic activity tracker in much the same way as Strava does. Within this App, you can also adjust things like the screen brightness and screen position, and enable or disable the gesture sensor, which allows you to cycle between data screens hands-free by waving your hand in front of the lenses - With it off you cycle by swiping across the lens above the bridge of your nose.
However, athletes with this much of an appetite for data are almost certainly going to have a cycling computer too. Sadly for Wahoo and Hammerhead users the Engo 2 is only compatible with Garmin units, though it will also work with Suunto watches and the Apple Watch family.
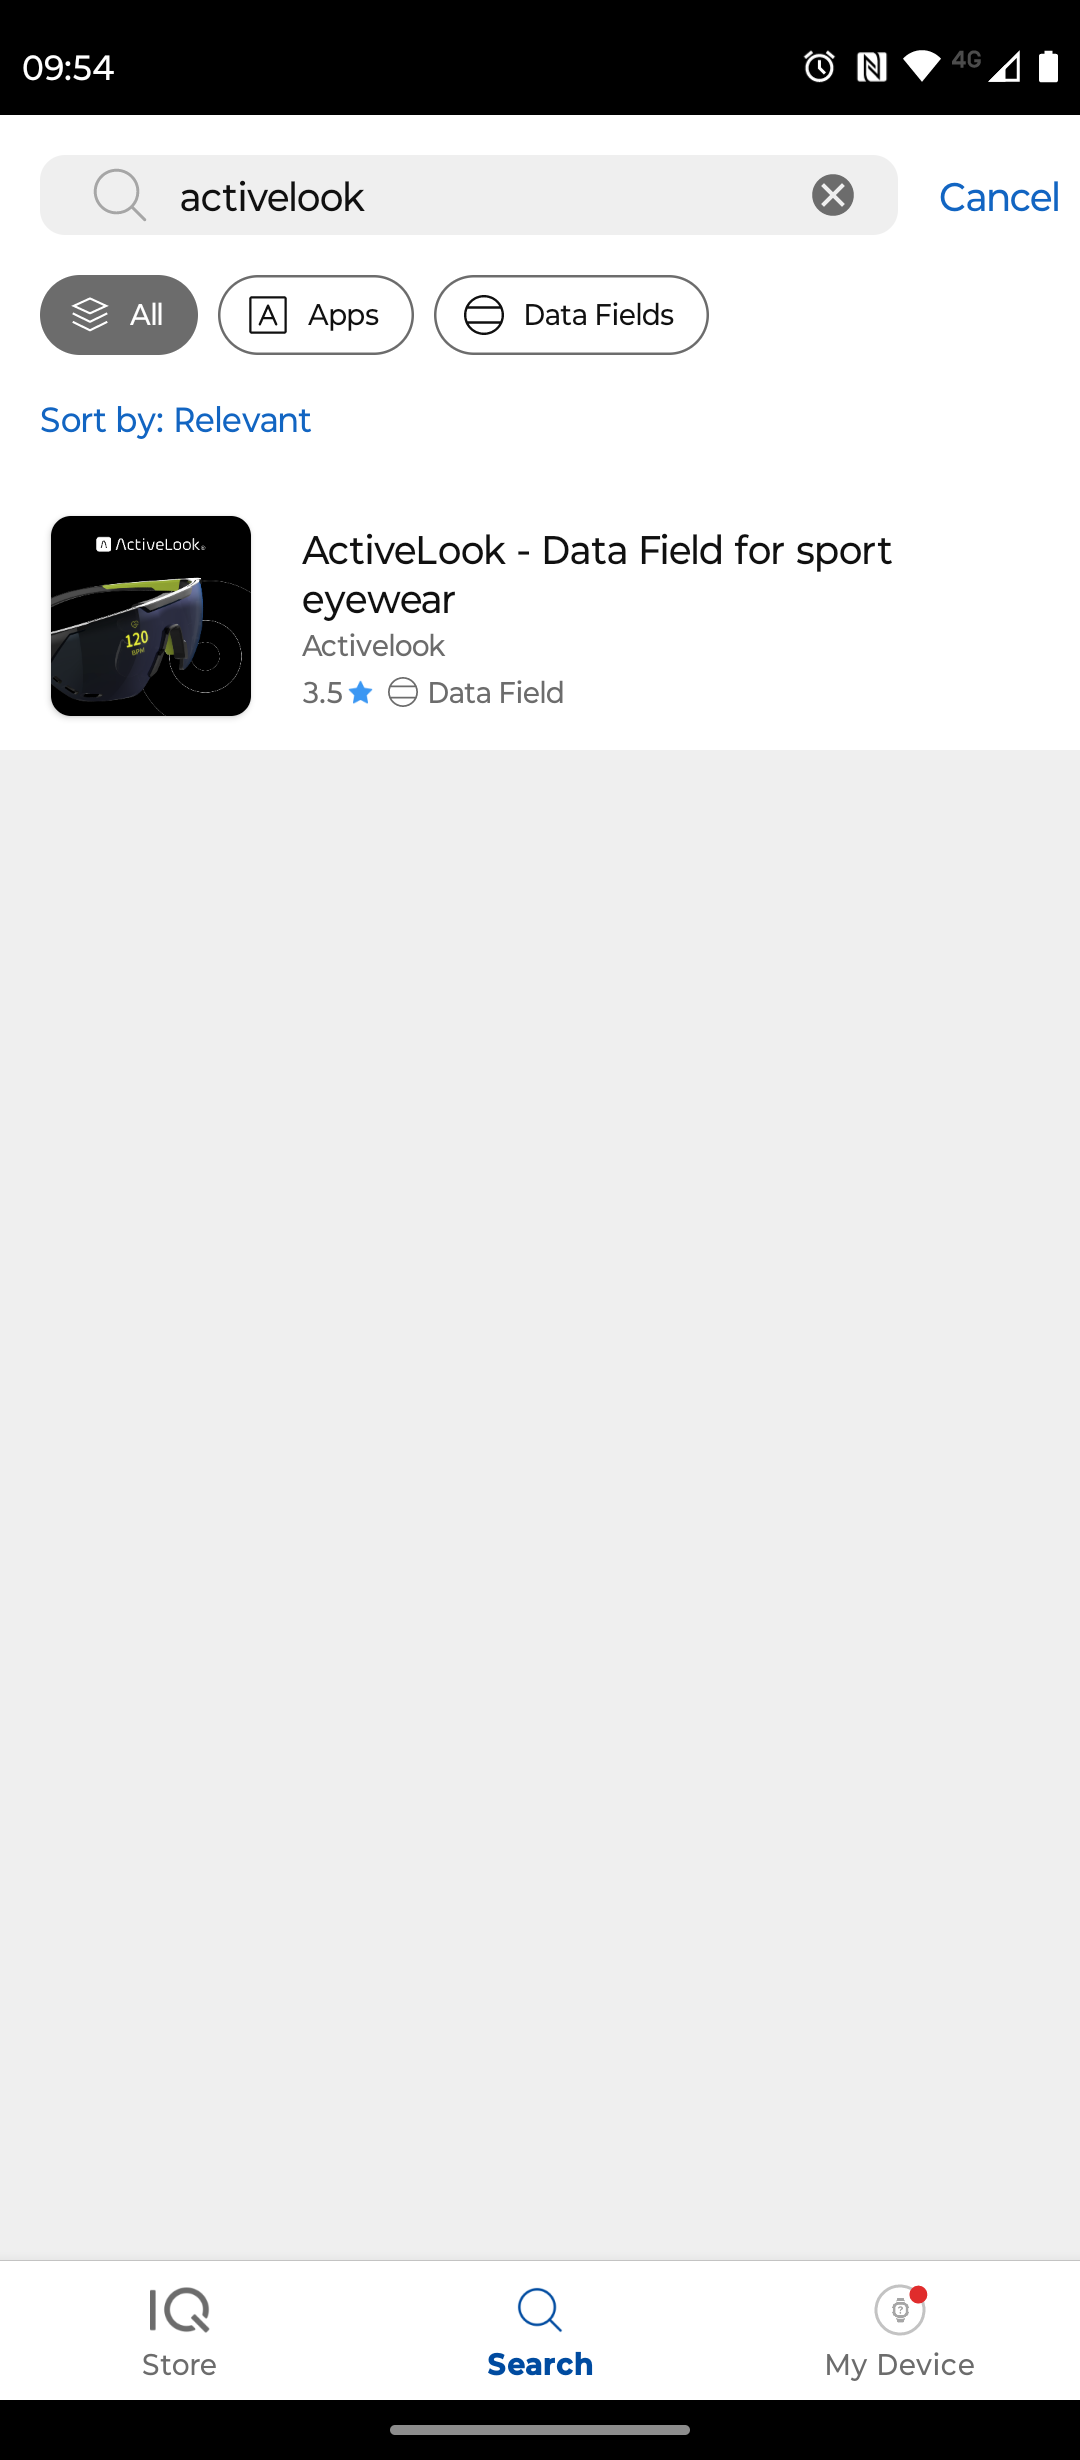
Taking the Garmin route I then had to download the ConnectIQ app (which is different from the usual Garmin Connect app). Within the ConnectIQ app, you then have to find the “ActiveLook” app (yes, apps within apps now) and install this.


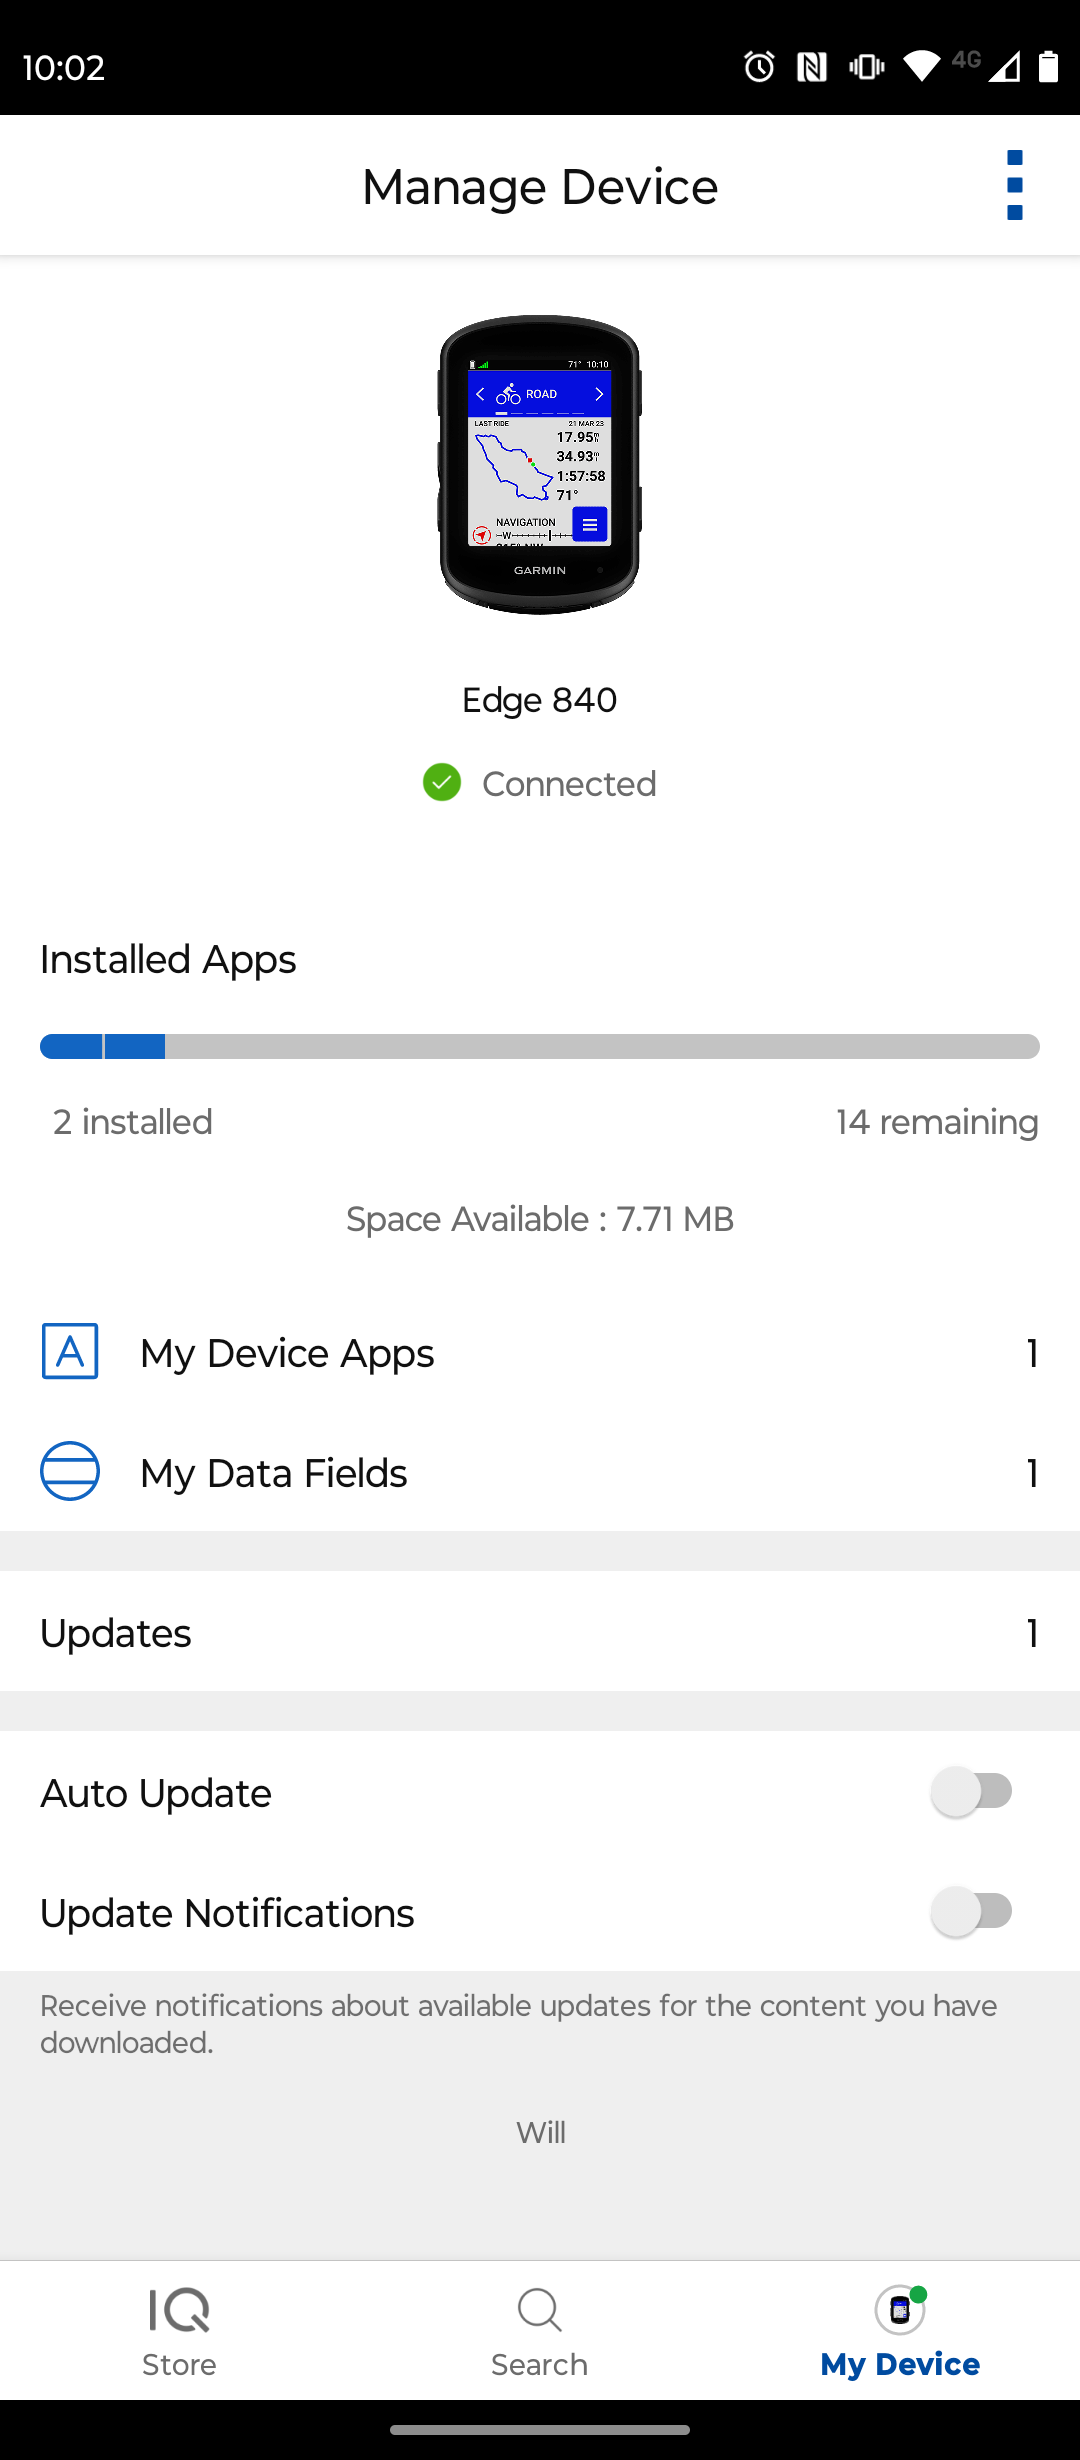

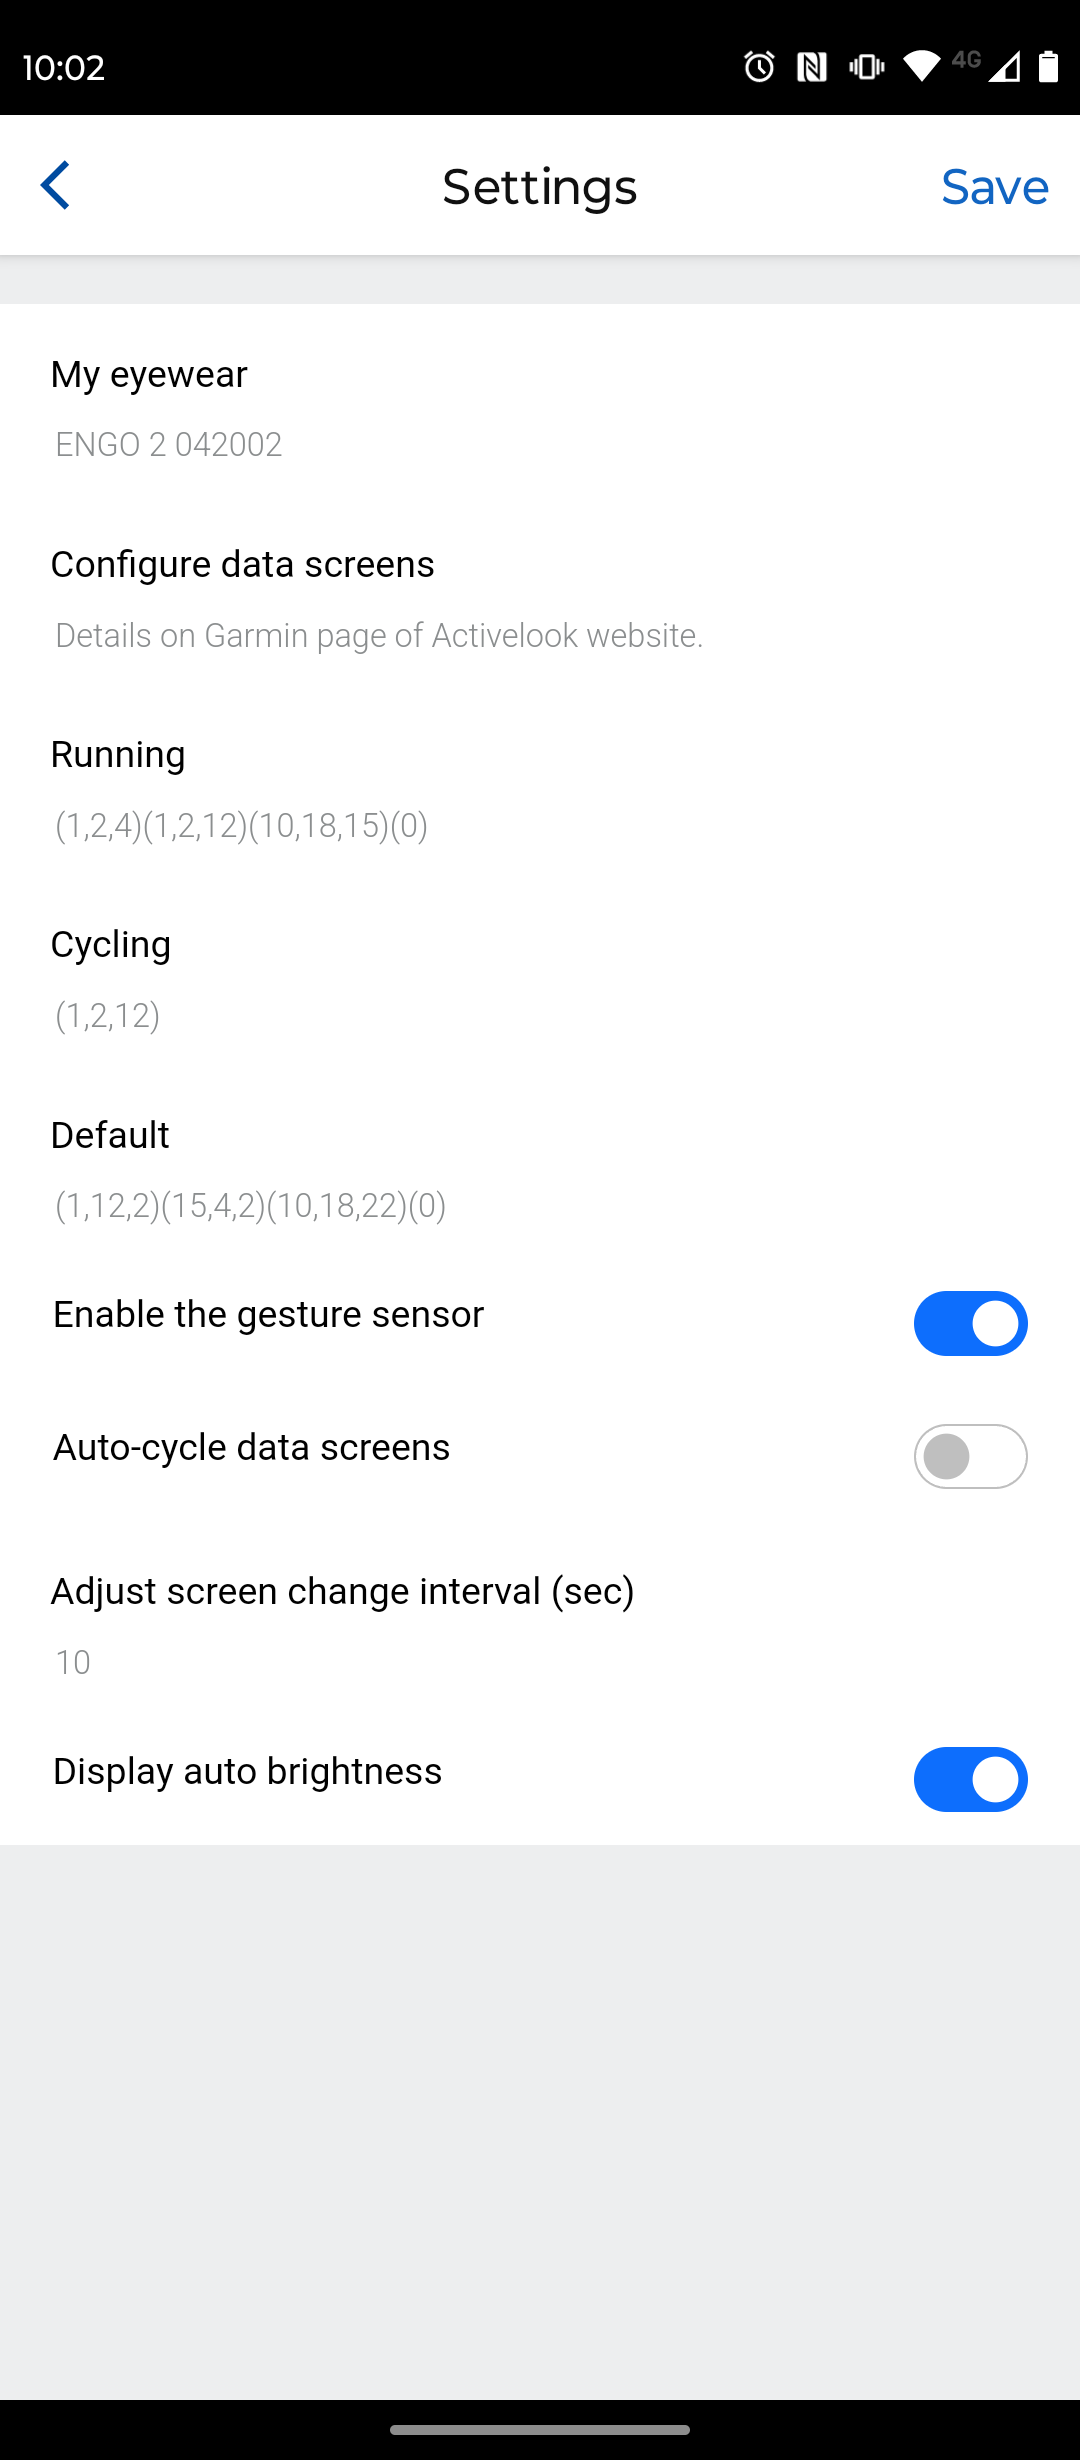
Once you’ve installed the Activelook app within the ConnectIQ app you can connect your Garmin, and within your data fields on the head unit itself (or within the normal Garmin Connect app) you can add the ‘Activelook’ data field from within the ConnectIQ sub-menu. You’ll know you’ve succeeded because you then have an ‘ActiveLook’ data field on your screen, which shows the glasses' battery level, whether they are connected, and which data screen you are on.
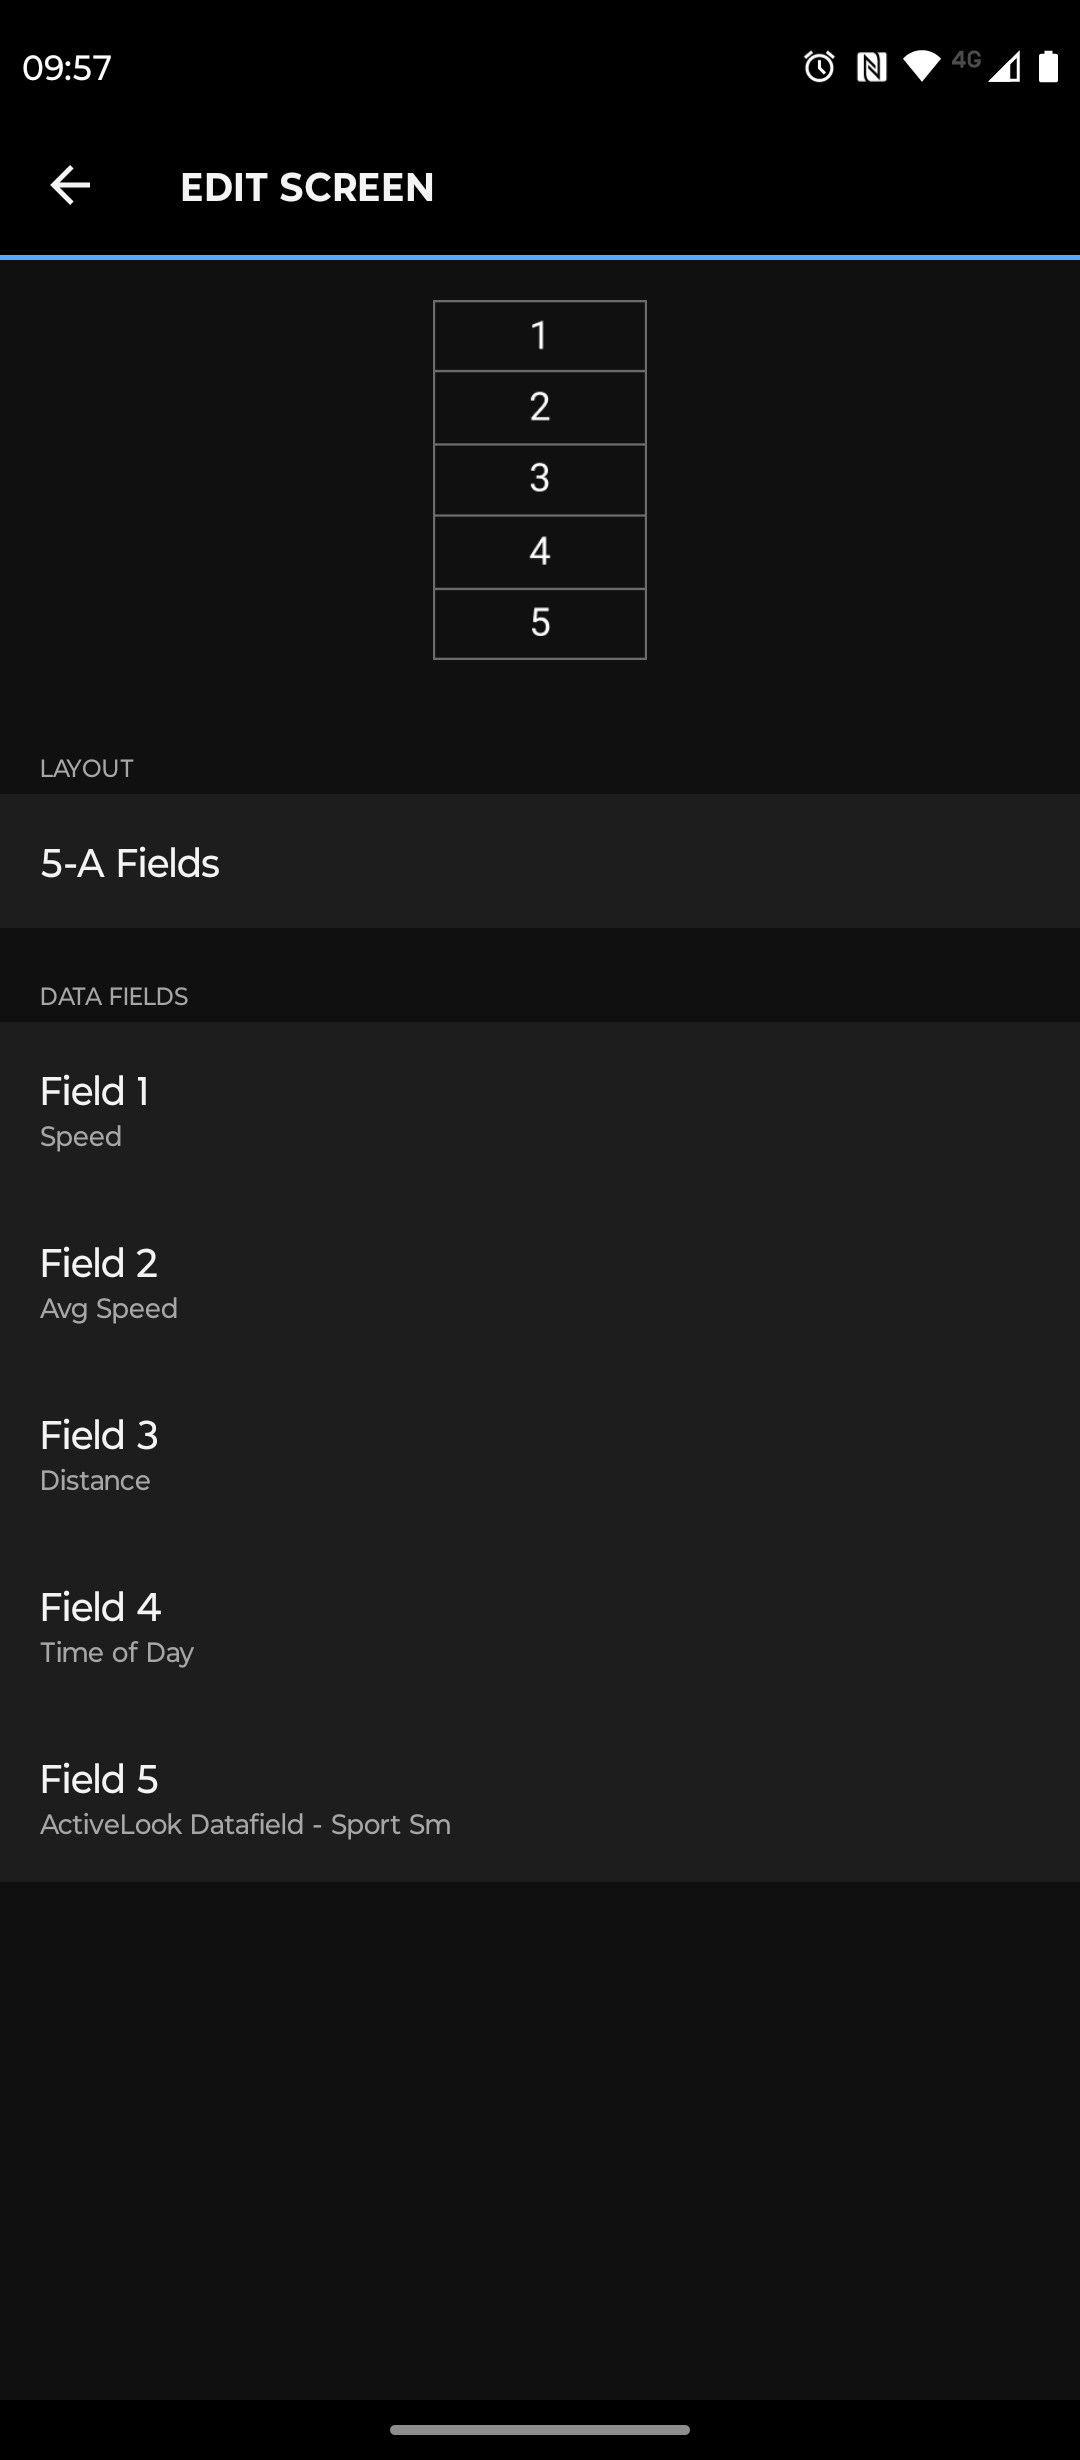
Here’s where it gets complicated (no, I’m not joking). In order to configure the data screens you’ll actually see you need to go back into the ConnectIQ app, find the ActiveLook app, and then head into ‘Settings’. In here you then use a series of bracketed number combinations, separated by commas, to select your data fields. Each number denotes a data field, and each set of brackets is a different screen.

Say, for example, you want to display elapsed time, distance, and heart rate on screen one, and power, cadence, and elapsed time on screen two you would make the ‘Cycling’ subsection of the screen configurer read (1,2,4)(7,18,12). It has to be ‘Cycling’ if you’re cycling, or ‘Running’ if you’re running, as it takes its cue as to which screens to load from the activity type, determined by the head unit.
You can add in up to four different screens, so four sets of brackets. If this sounds too complicated (it is) there’s a handy video that explains it. I think it’s perhaps fitting that the first step in the published how-to guide is ‘Set aside some time”.
Performance
After the setup is complete and you head out to ride things do improve. The good news is that they do what they say on the box; you can see data in real-time in your field of vision at all times. The projector thing does a good job, and the auto-brightness plays its part. It’s a little harder to see against a clear sky, but still not in any way hard to read.
The data fields are easy to read, but my eye is naturally drawn to the central field, so my advice is to separate data fields so that you don’t have two similar metrics next to each other like speed and average speed. Put power, heart rate, and speed on one screen for example.
The data that you see projected sits slightly to the left of your right eye, meaning for those of you who ride on the left the data is away from the oncoming lane not towards it. It’s a really subtle point, but given how much a big floating yellow stream of numbers demands your attention it did drift my gaze away from what is realistically the danger zone.
As sunglasses, they are better than you might expect. They aren’t going to trouble the performance of something like the Oakley Encoder with its amazing Prizm Road lens, but riding in very overcast conditions I didn’t feel the need to take them off. The contrast was rather muted, but I could still see easily enough. They stayed put pretty well too, but only after I worked out that the arms bend - That one’s on me though.
Comfort wise they aren’t the best. The bulk of the weight sits on the bridge of your nose and makes them feel rather unbalanced, and the thin arms do press in a little where the grip behind the ears.
The issue, visually, is that the tech makes the lens sit further from your eyes than usual, or else the projector unit and battery start brushing your eyelashes which is annoying. This gives you the feeling of looking through a window, rather than that ‘I’m not wearing anything’ feeling that I so crave in a set of shades.

I am also afraid that the block of tech in the centre of the lens does impinge on your field of view to a very noticeable degree. There’s no escaping it, and there’s also no escaping your data either. If you want to cruise along for a bit and not worry about your average power, speed, heart rate etc. then you can’t as it’s being fired into your retina whether you like it or not.
Battery life wasn't a massive trouble. I'd go through 25% of it in a two-hour ride, so unless you're embarking on an Ironman they should stand you in good stead.
While there are plenty of drawbacks, I can actually see these being useful in certain situations. I am not an avid time trialist, but I can see how being able to see key data without having to move your head at all would be of real benefit to those riding against the clock, particularly as there are no real risks with being slightly more distracted by the data field. I tended to just stick to one single screen (to the point of deleting the redundant three), leaving the rest of the data to the computer as and when I needed it, which I suspect is what would also be most handy for something like a time trial. Stick your power, heart rate, and maybe a distance field and you’d be golden.
There is also additional navigation functionality now thanks to Navigr8, but sadly this is only available on Apple devices so I was unable to see if this works. My thoughts on that though are that a head unit provides far more contextual information than simply a turn signal, and if used in a race you can just look for the marshals.
Value
With an RRP of £265, these are certainly an expensive pair of cycling glasses, but only a little dearer than what you’d be forking out for a top-end pair of latest-model Oakleys for example.
Considering the tech they pack in they do offer good value on paper, but I’d temper that by saying that they aren’t actually hugely useful unless you have a very specific need for them. Stuff is only good value if you use it, and for specialist applications value is less of a consideration anyway.
Verdict
A good concept, and given it’s the only one available it's worthy of praise for at least doing something different. With a bit of refinement, both in the user interface and ideally in the removal of bulk in the centre of the lens, it could be a far more viable product. For me though it’s not something I recommend you buy unless you can see it being of real benefit for a certain application like a TT.