The last few versions of the Windows 11 and Windows 10 installers will insist that you make a Microsoft Account to fully complete the setup. While it's not too much of a hassle to create or link an account, some people don't want that. So, if you're wondering how to install Windows 11 without a Microsoft account, we've got the answers you're looking for.
Whatever your reasons for skirting the Microsoft account strong-arming, not only is installing Windows 11 without one possible, but it's surprisingly easy (once you know how). It doesn't require an extensive workaround, just two simple command line prompts are all it takes. We'll take you through what they are and when to use them, resulting in you being able to set up a local account on your laptop or PC. So, without further delay, read on for our guide on how to install Windows 11 without a Microsoft account.
How to install Windows 11 without a Microsoft account
As stated, this process is quite simple so don't worry about not knowing the ins and outs of your computer to make it work. While Microsoft does its best to obscure this method from general users, installing Windows 11 using only a local account is still well within your grasp. Let's take it from the top and get things started.
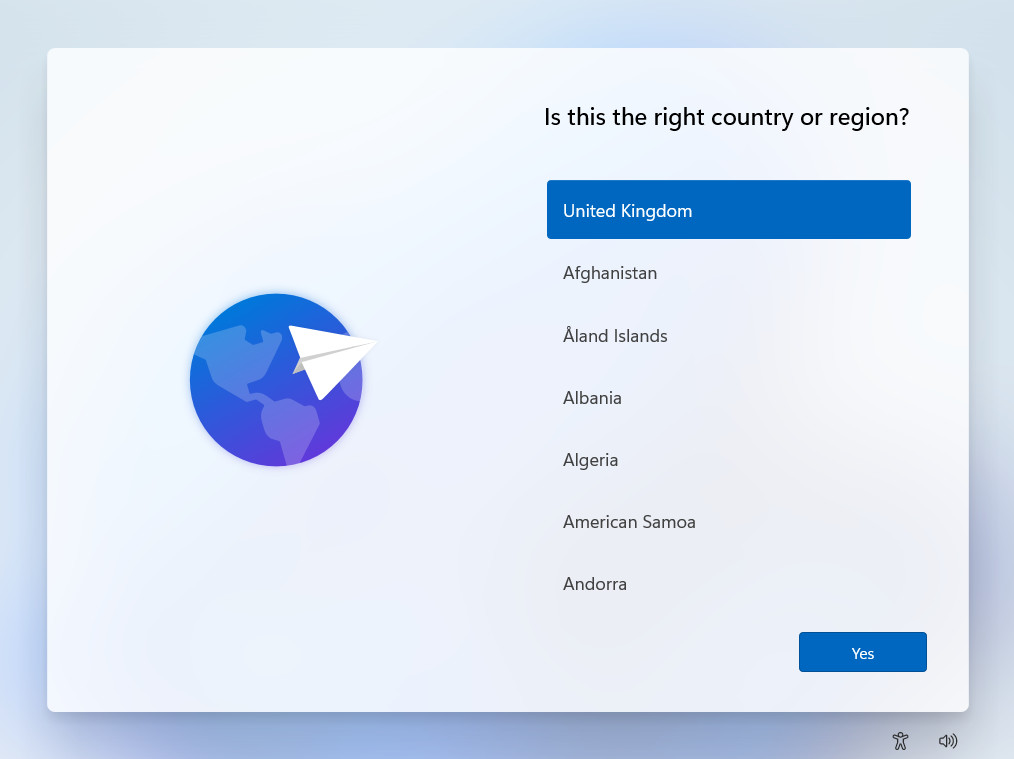
Step 1: To begin, start the Windows 11 installation process as normal. The setup is pretty linear, so you shouldn't have too many issues proceeding through the first few steps of the installation. However, you want to stop once you reach the screen that asks "Is this the right country or region?"
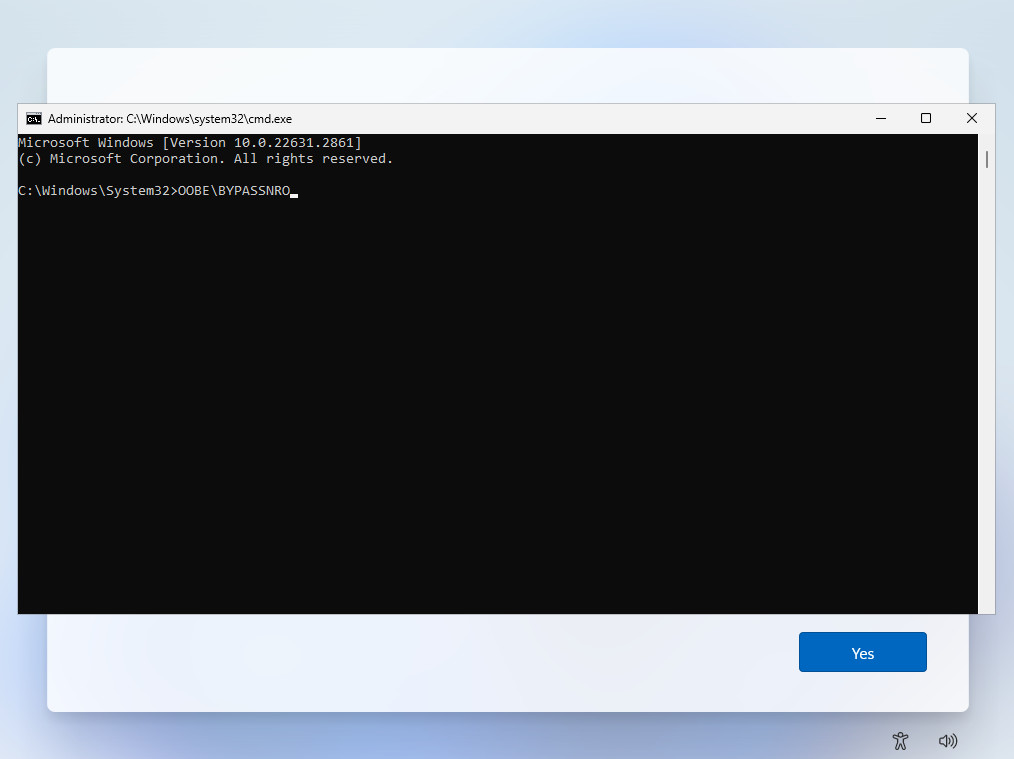
Step 2: Once you're at this screen, you'll need to call up the Command Prompt. To do this, hold down the "Shift" key and press "F10" on your keyboard at the same time. You should then be presented with the Command Prompt, which looks like a black window with white text inside.
If you don't see the Command Prompt, you may need to hold down the "Shift" key, then the "Function" (fn) key, and finally press "F10" on your keyboard.
Step 3: Inside the Command Prompt, type "OOBE\BYPASSNRO" (without quotation marks) and hit "Enter" or "Return." Your system should perform a quick reboot afterward and return you to the "Is this the right country or region?" screen.
If you see an error, you may have mistyped the command you need to use, so double check you've replicated it accurately, using only letters and a back slash.
Step 4: Once your machine is done rebooting and you're back to the "Is this the right country or region?" screen, repeat the key press from step two to again bring up the command prompt. This time, we want to tape the following command: "ipconfig /release" (without quotation marks) before hitting "Enter" or "Return."
Step 5: You should see a message follow that looks like the following image. If so, you've done everything right! Click the "X" in the top right corner of the black Command Prompt window and proceed with the Windows 11 installation as normal from this point on.

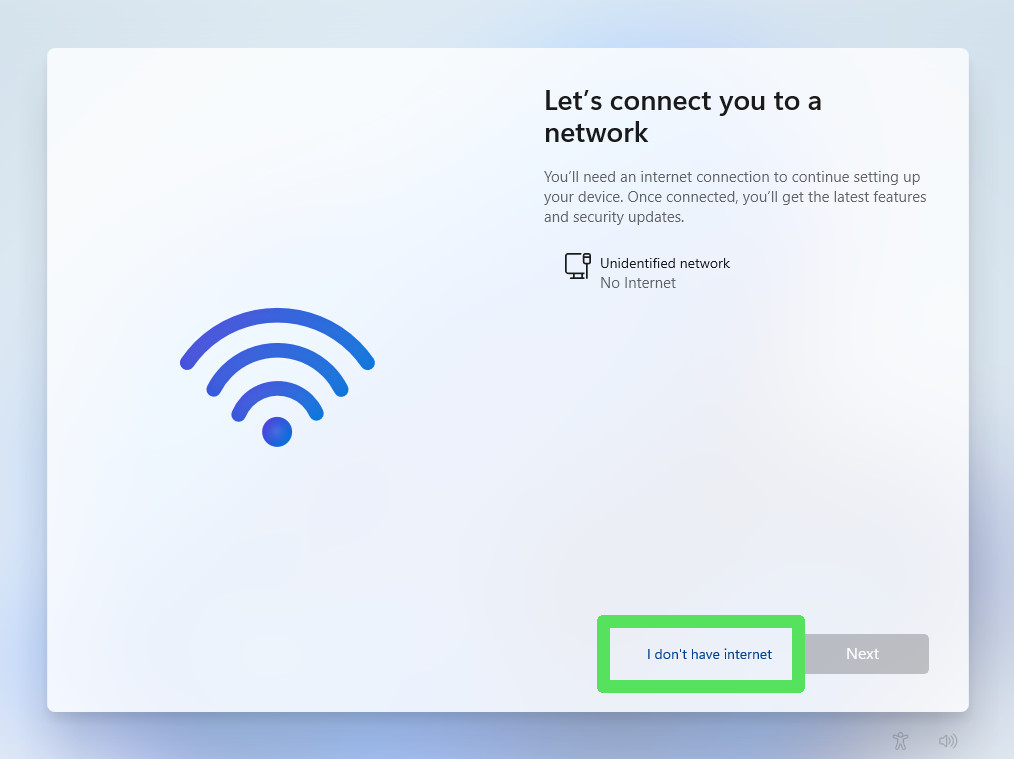
Step 6: Eventually, you'll arrive at a screen that says "Let's connect you to a network." We don't want to connect to a network at this point, so instead of choosing any of the options, click the button below that says "I don't have internet."
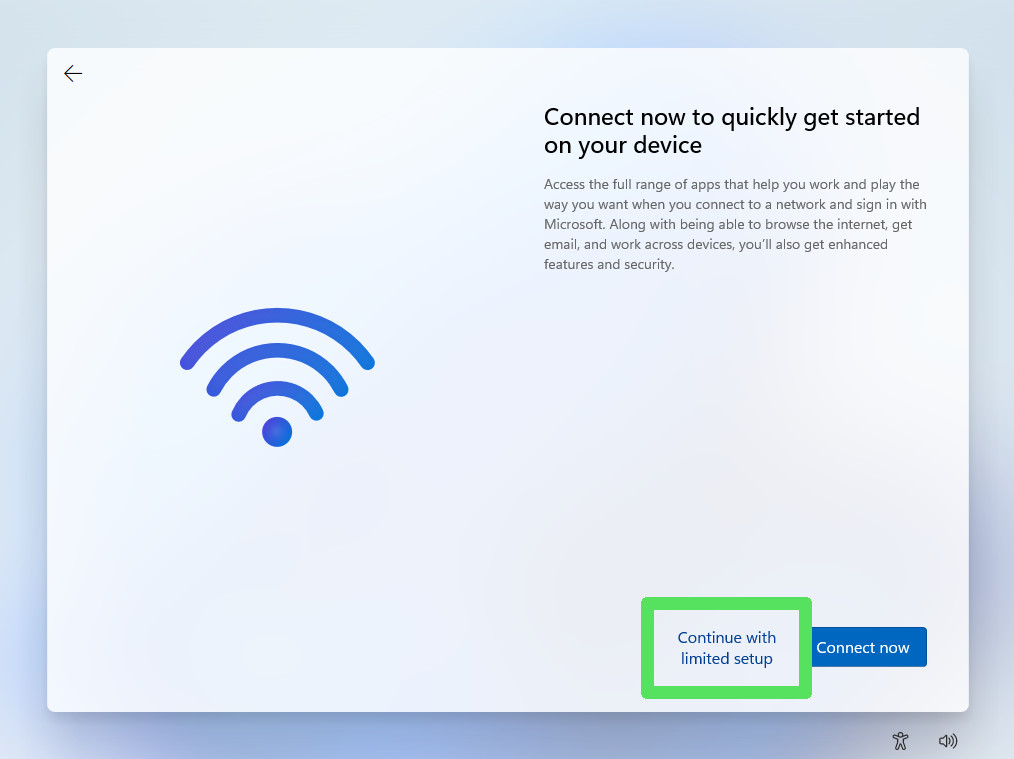
The screen that follows will once again press you into connecting to a network, however, if we do, the installer will once again insist that we make use of a Microsoft account to proceed. So, to avoid this, click "Continue with limited setup."
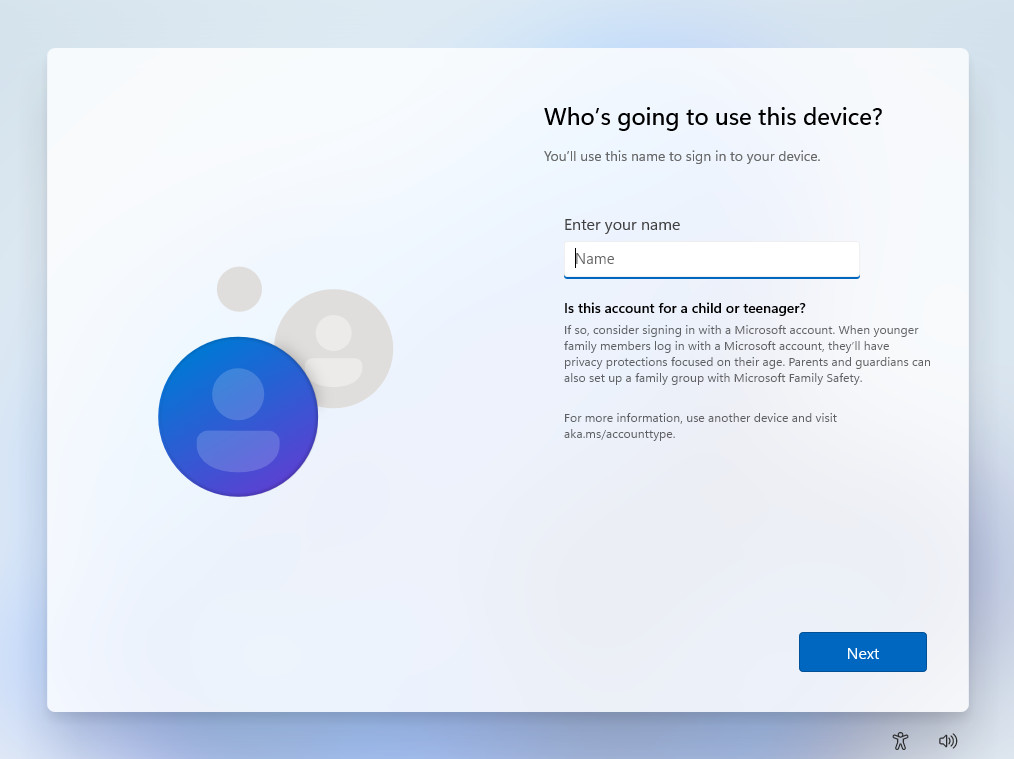
Step 7: Eventually, the Windows 11 installer will give in, and ask you "Who's going to use this device?" This is where you'll be creating your local account. When prompted for a name, this will be your Windows 11 account name, and when prompted for a password, this will be the one used to log in with that account.
From this point on, it's a straight shot right to the Windows 11 desktop after a successful installation. Well done! You've just circumvented Microsoft's strong-arm tactics to force you to link a Microsoft account to your Windows PC or laptop.